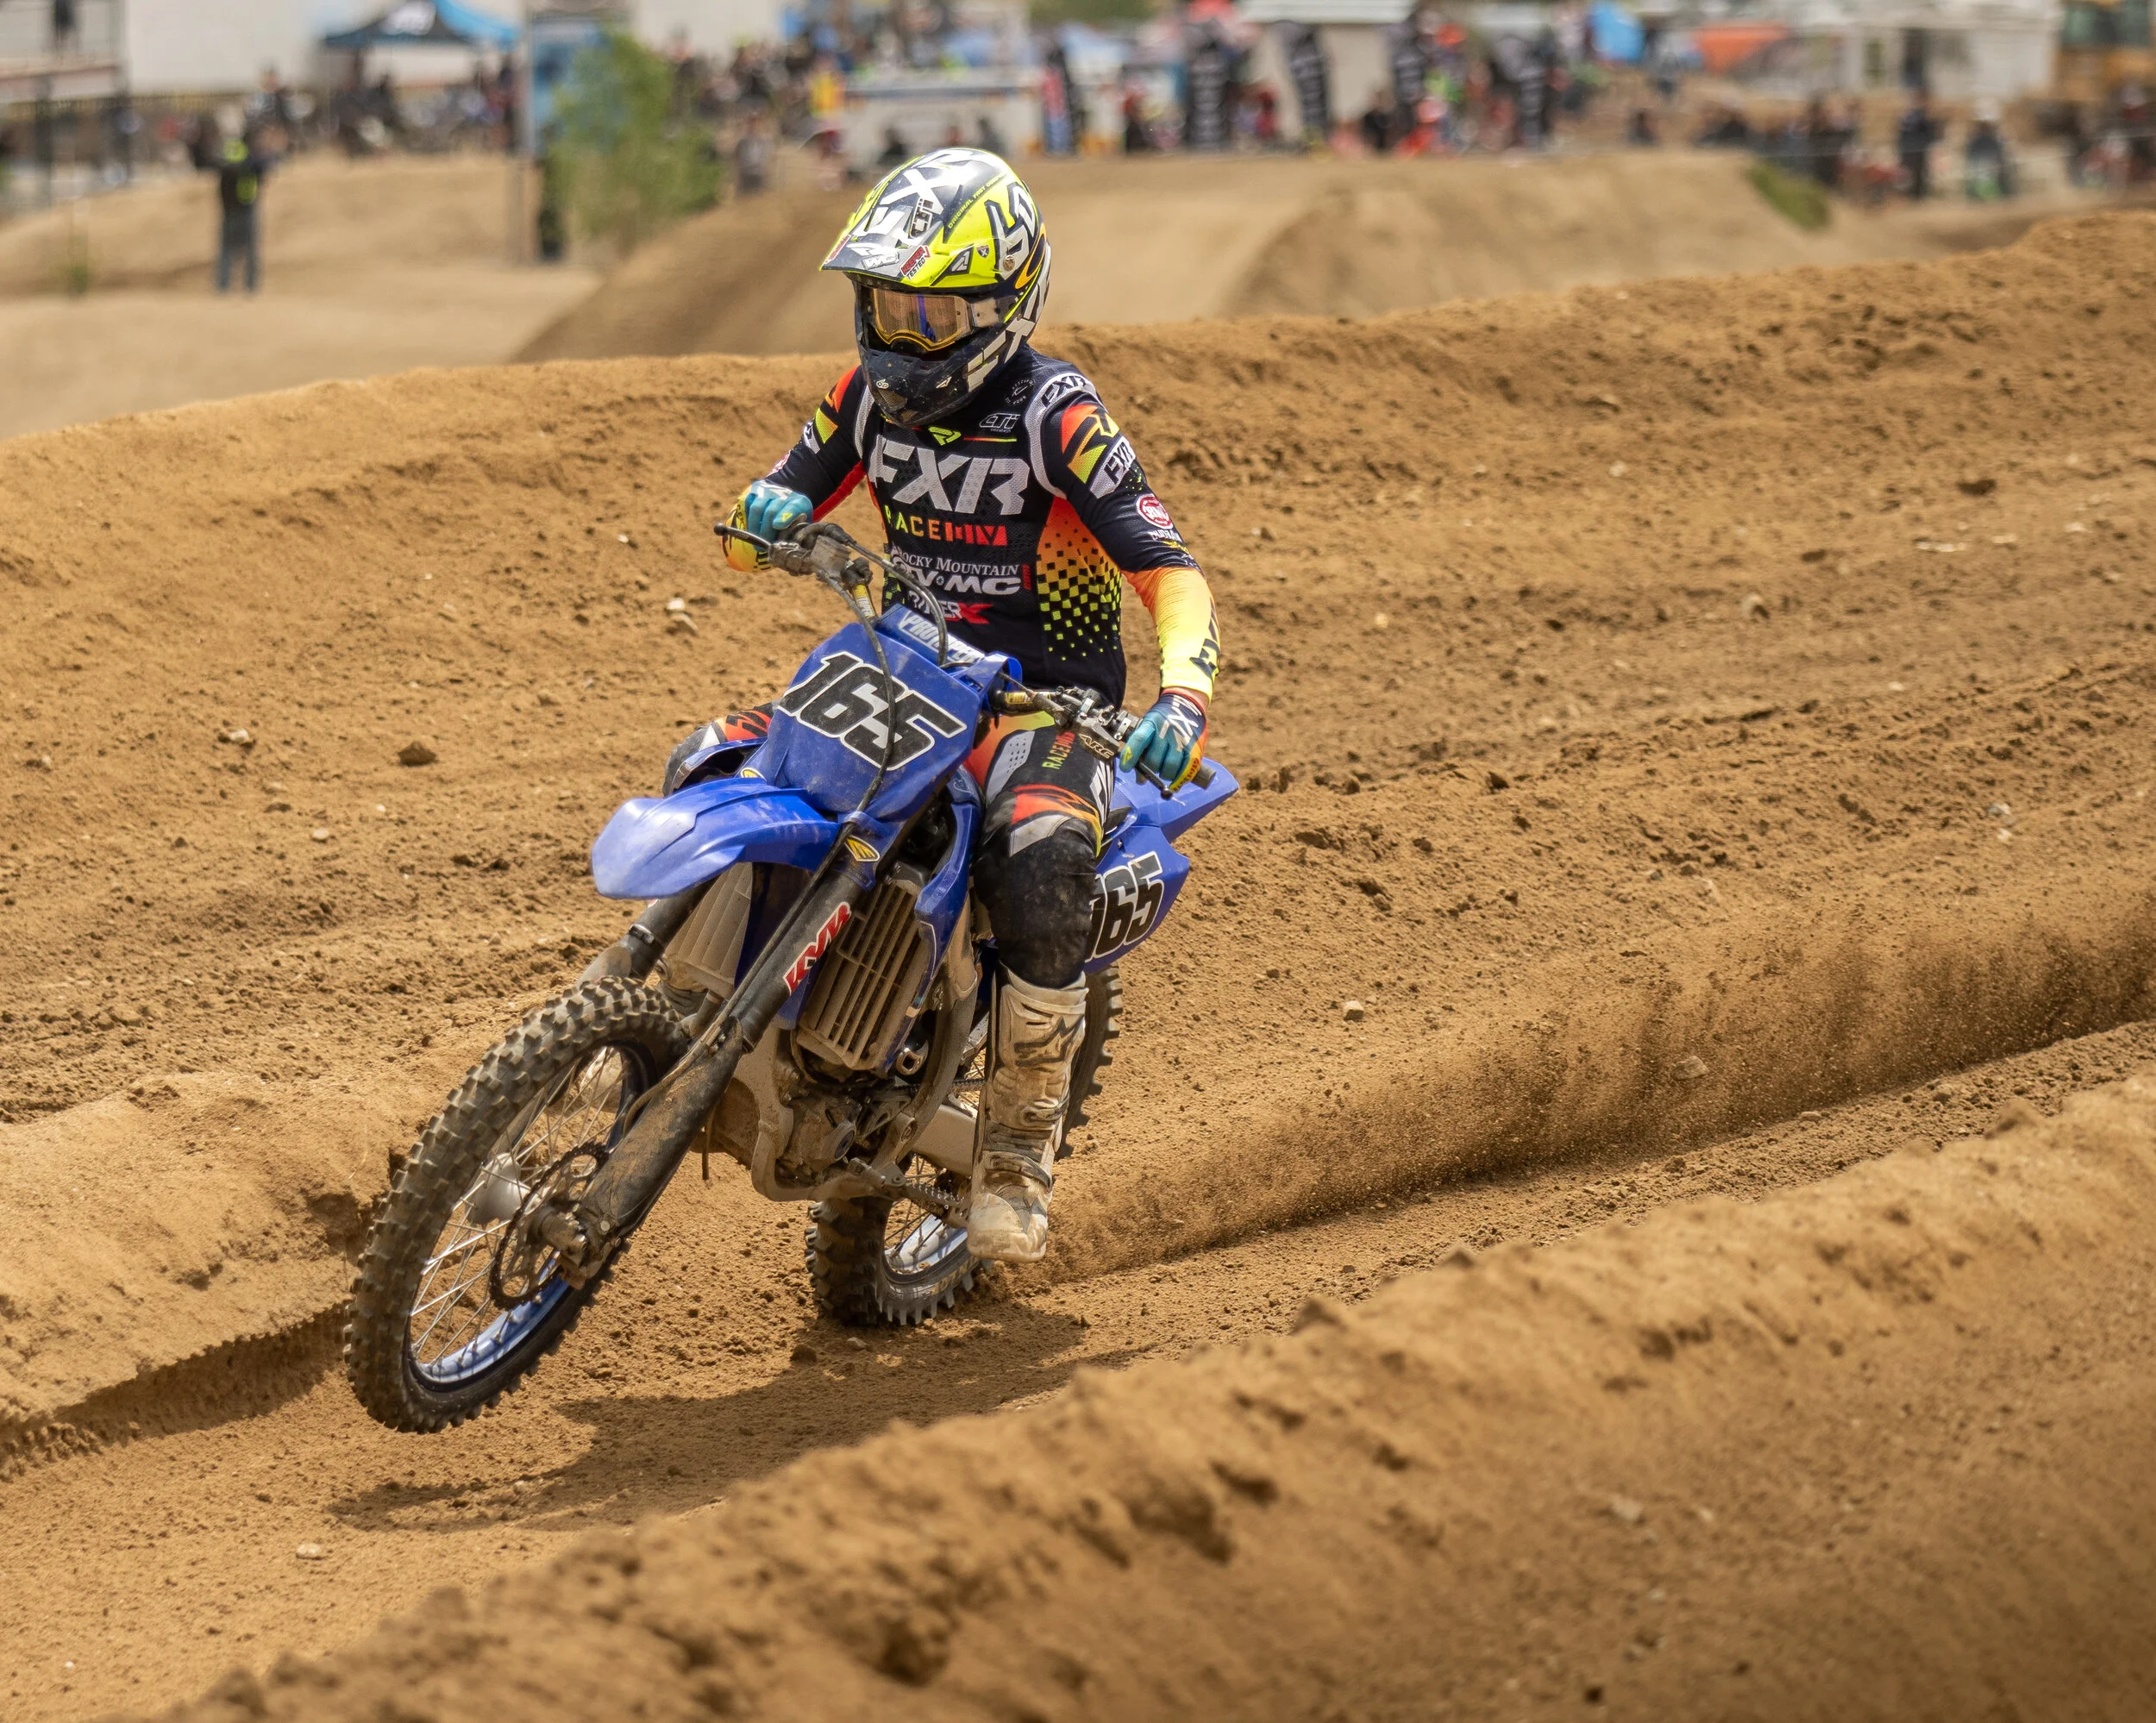
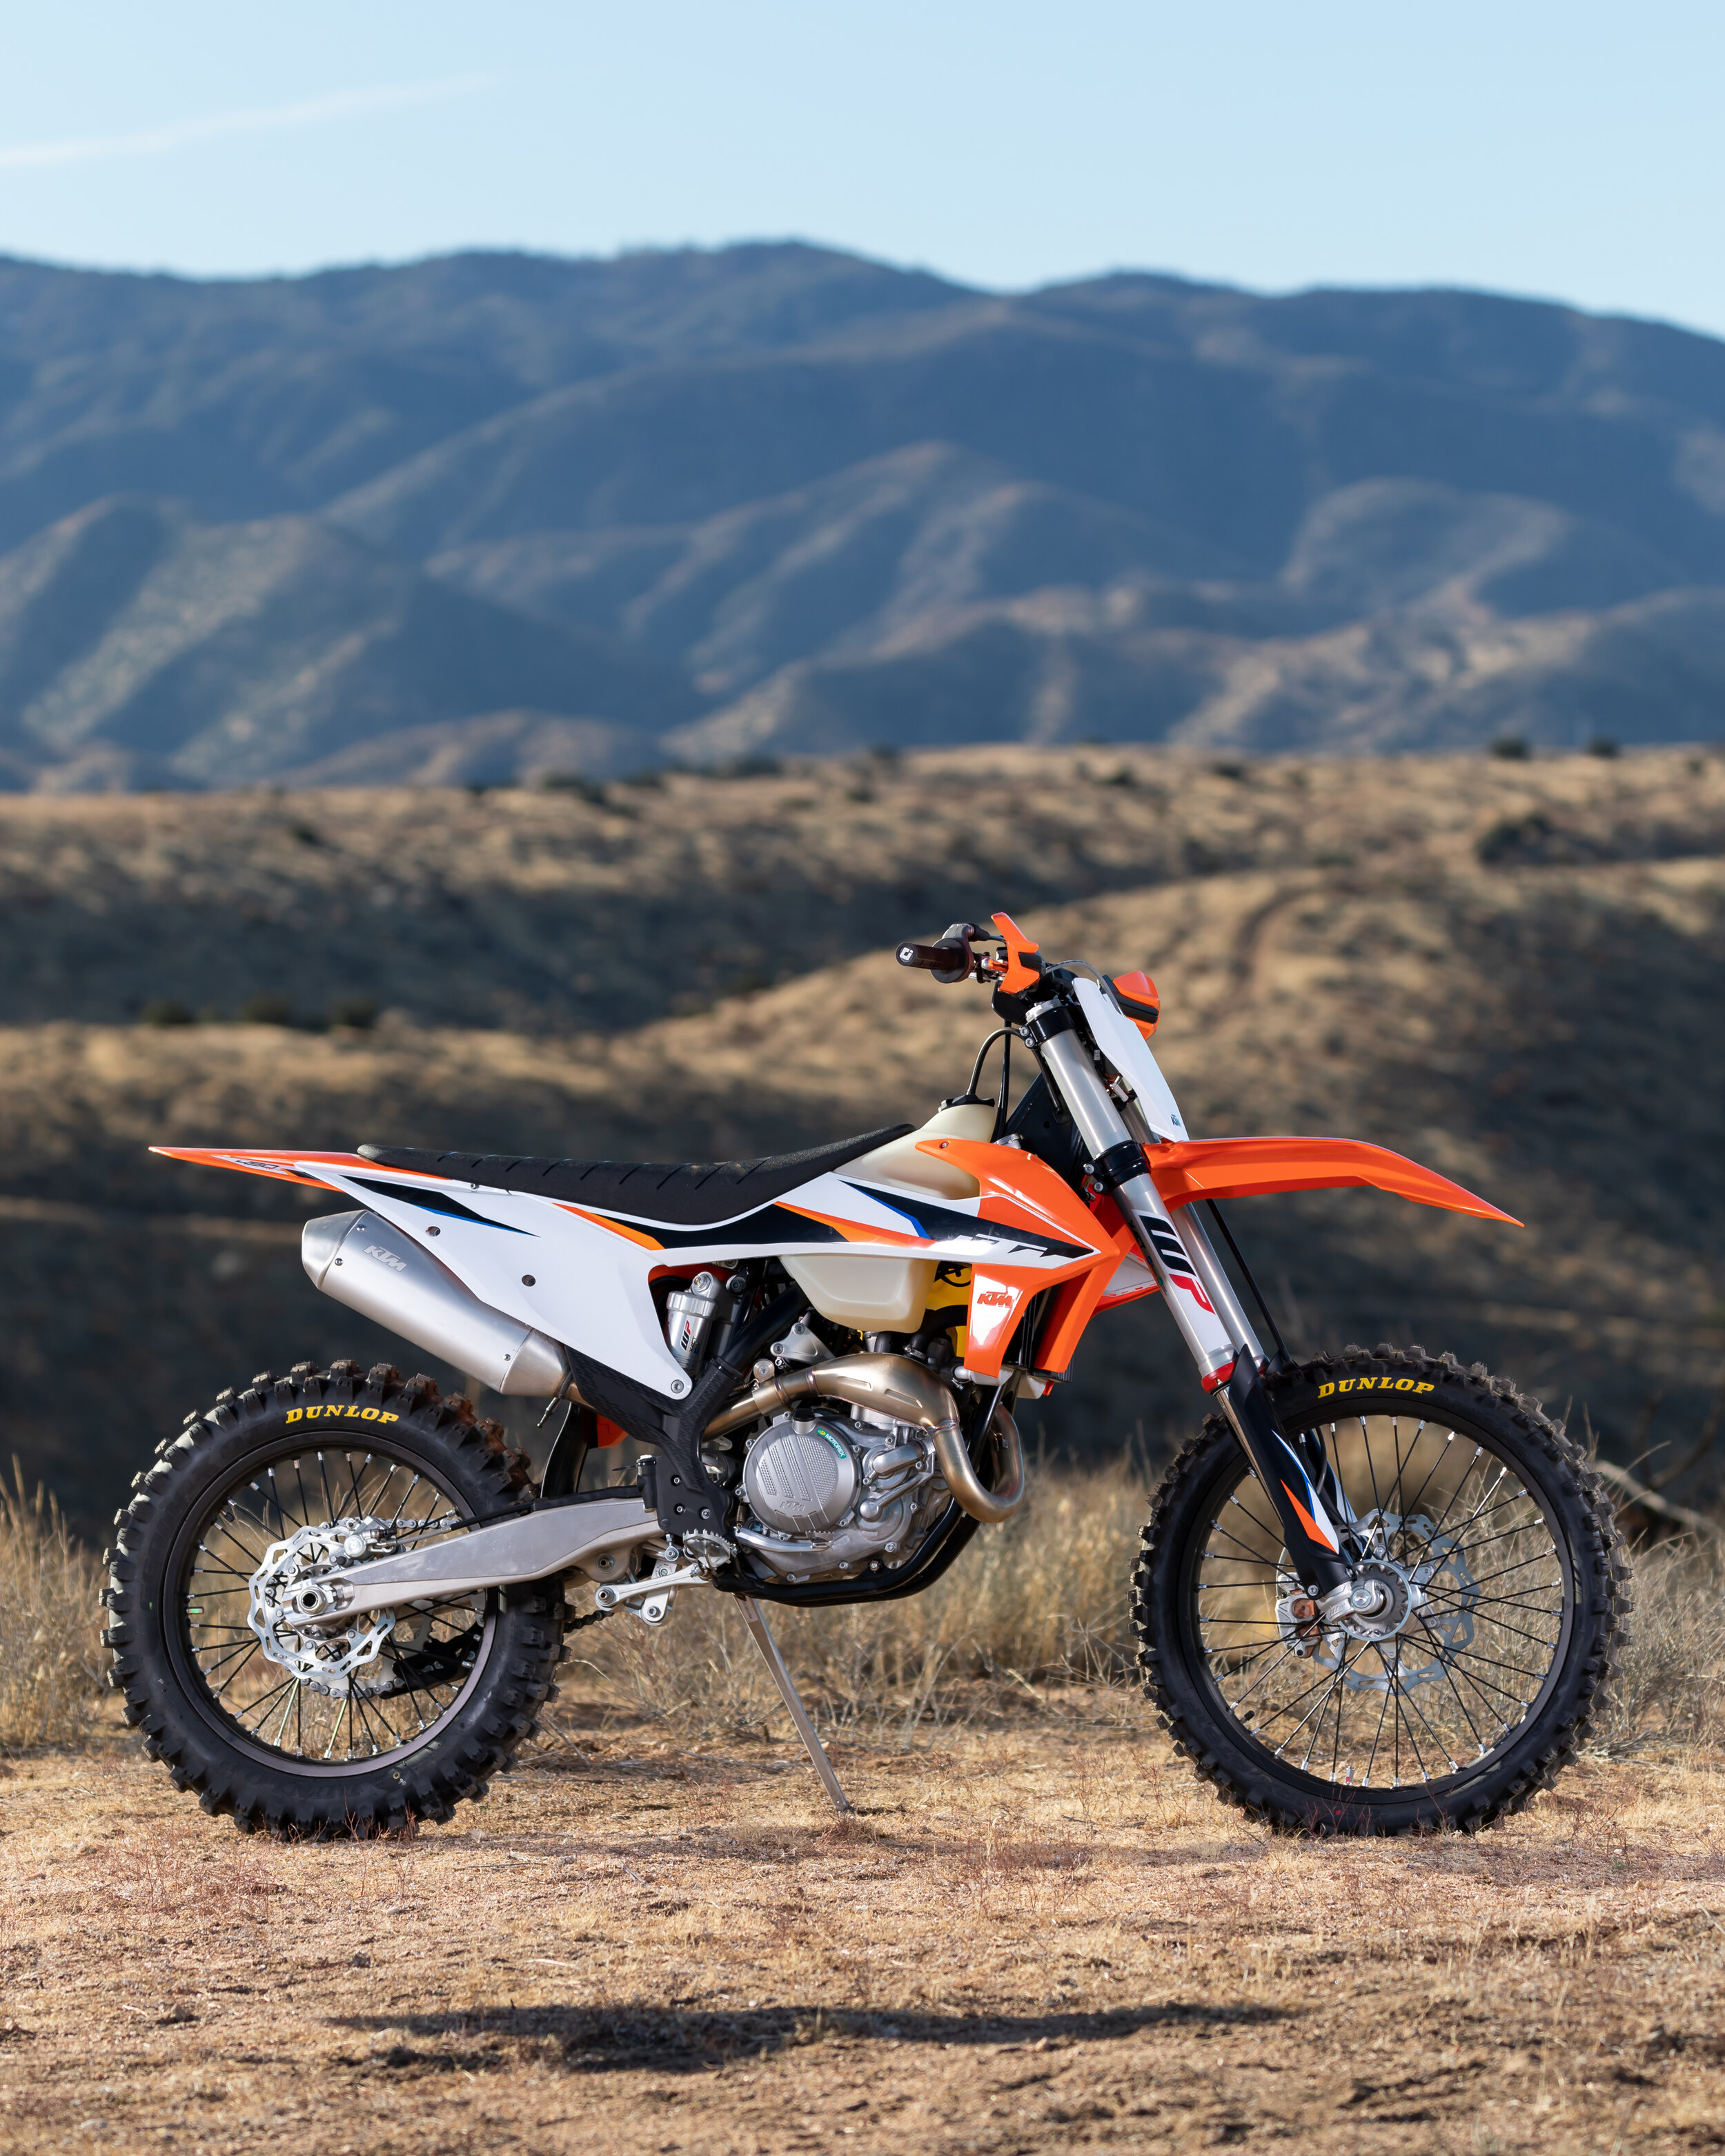
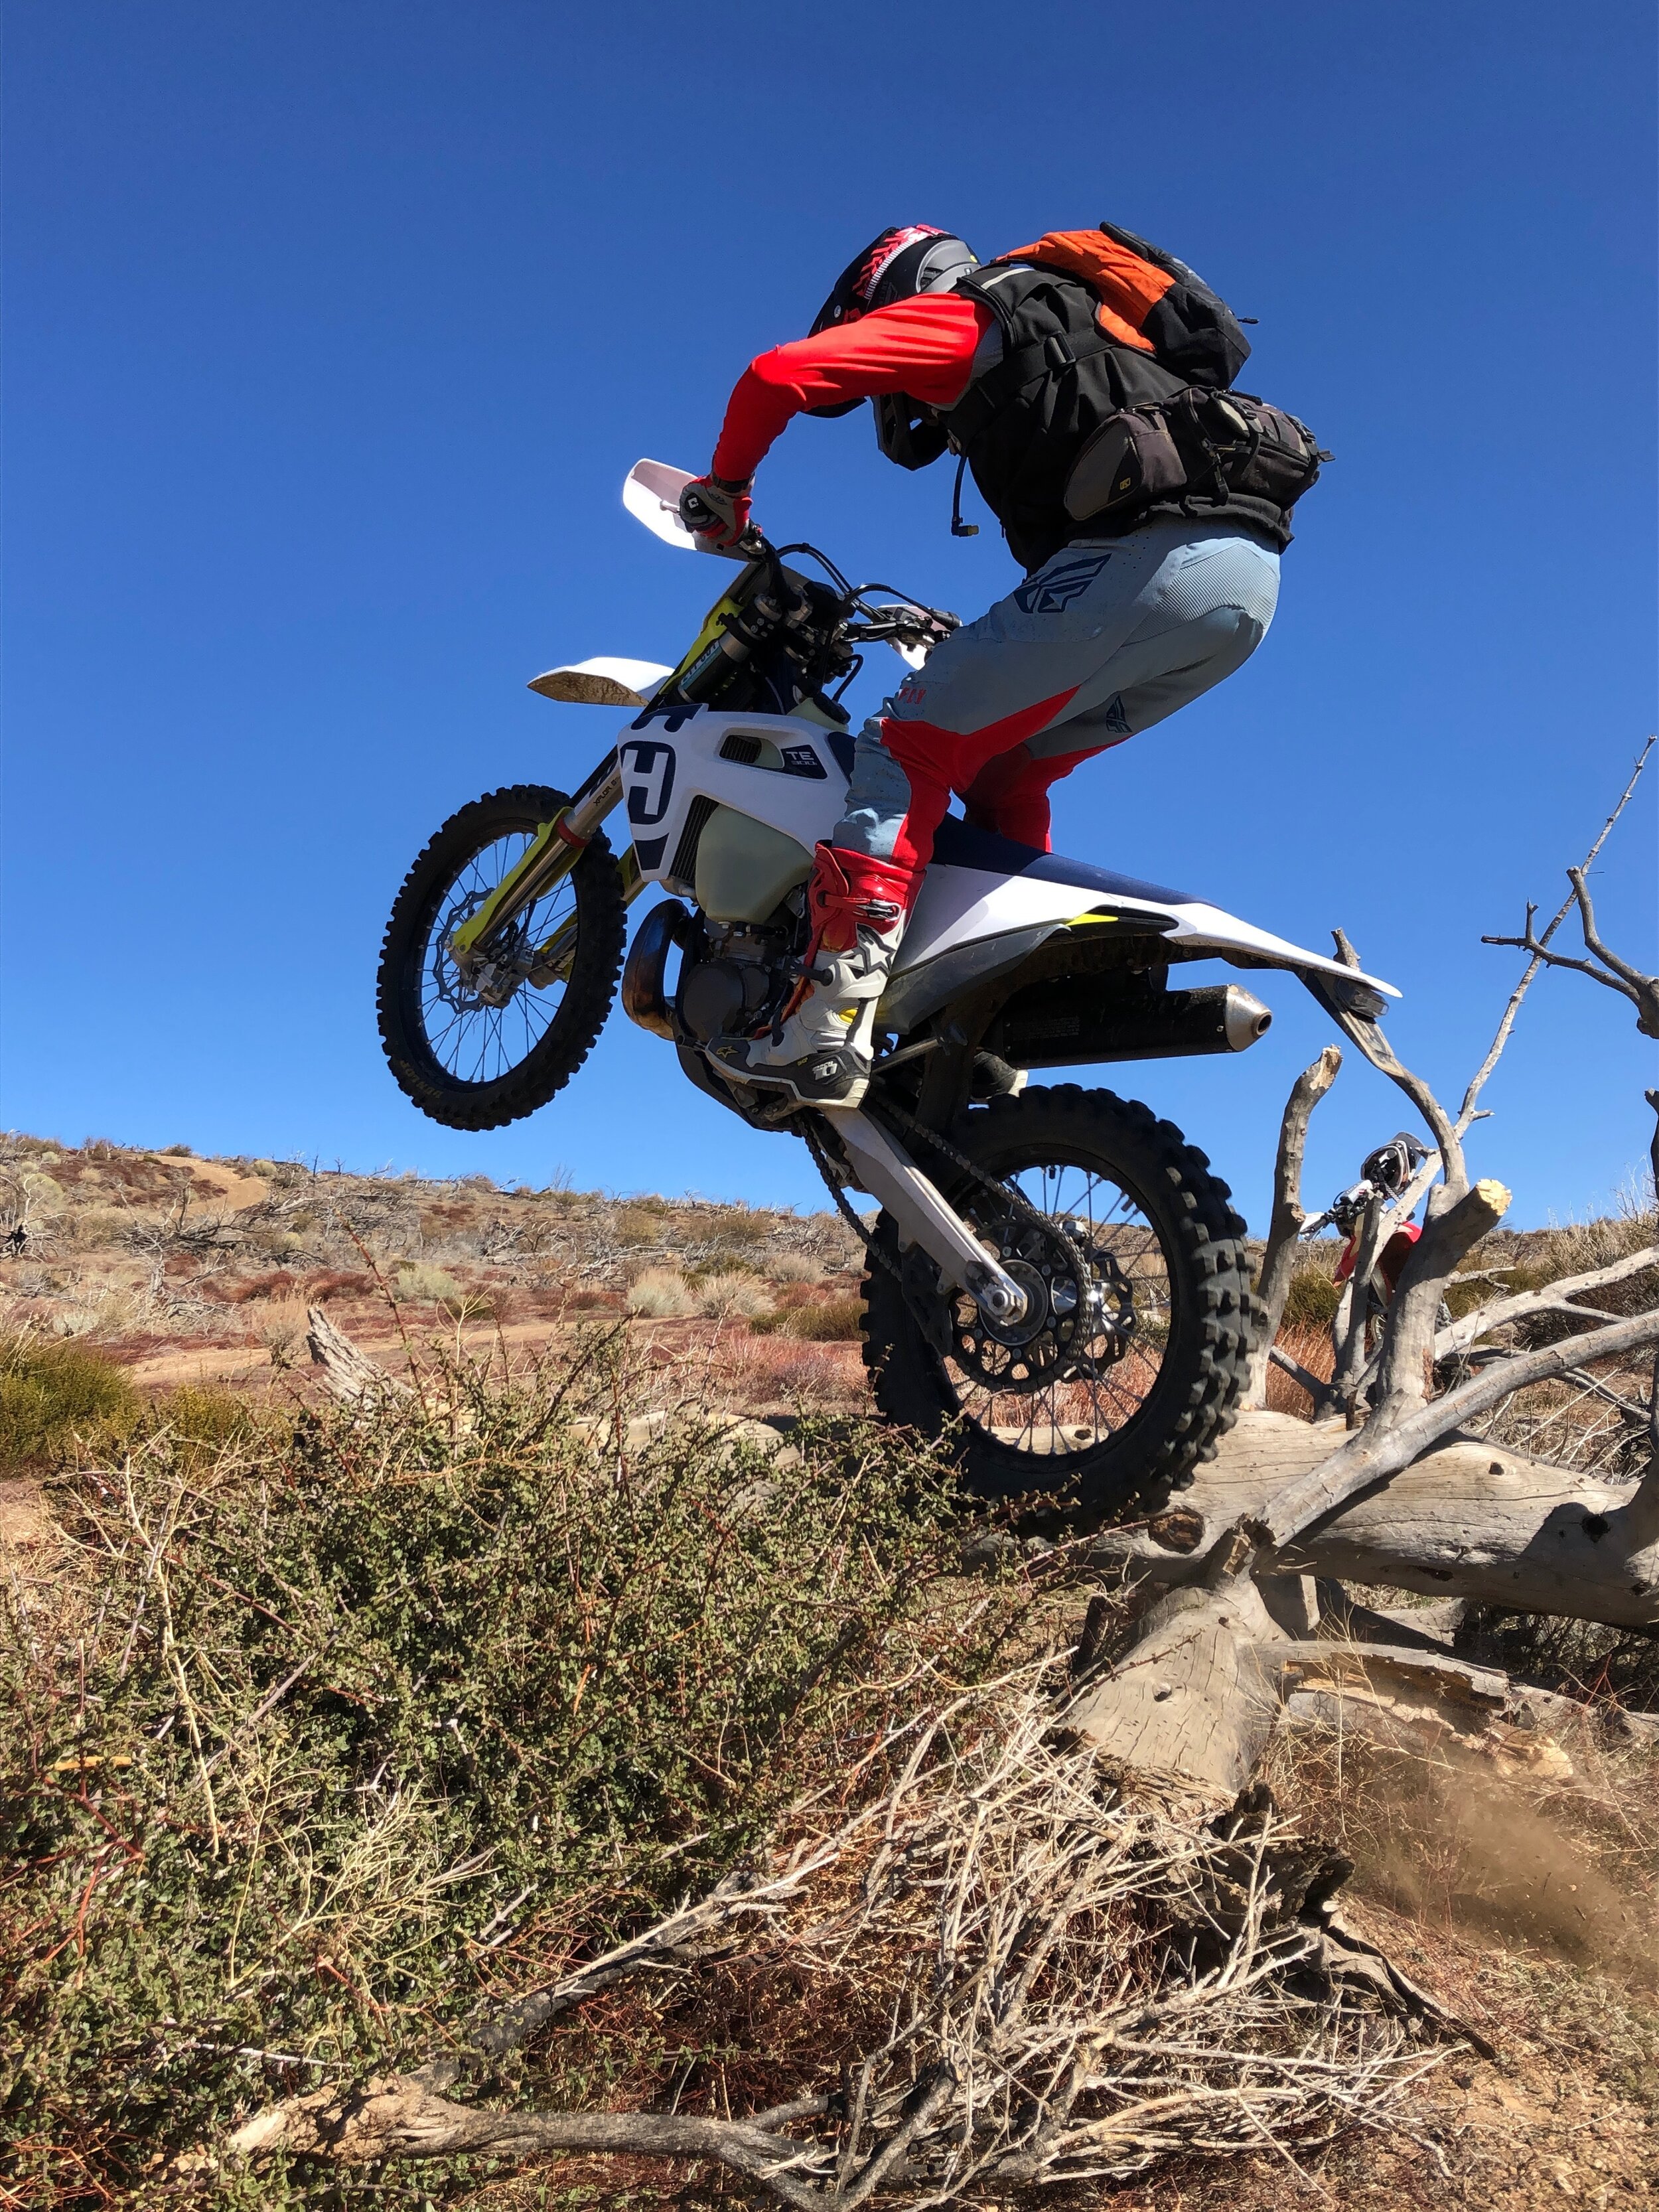
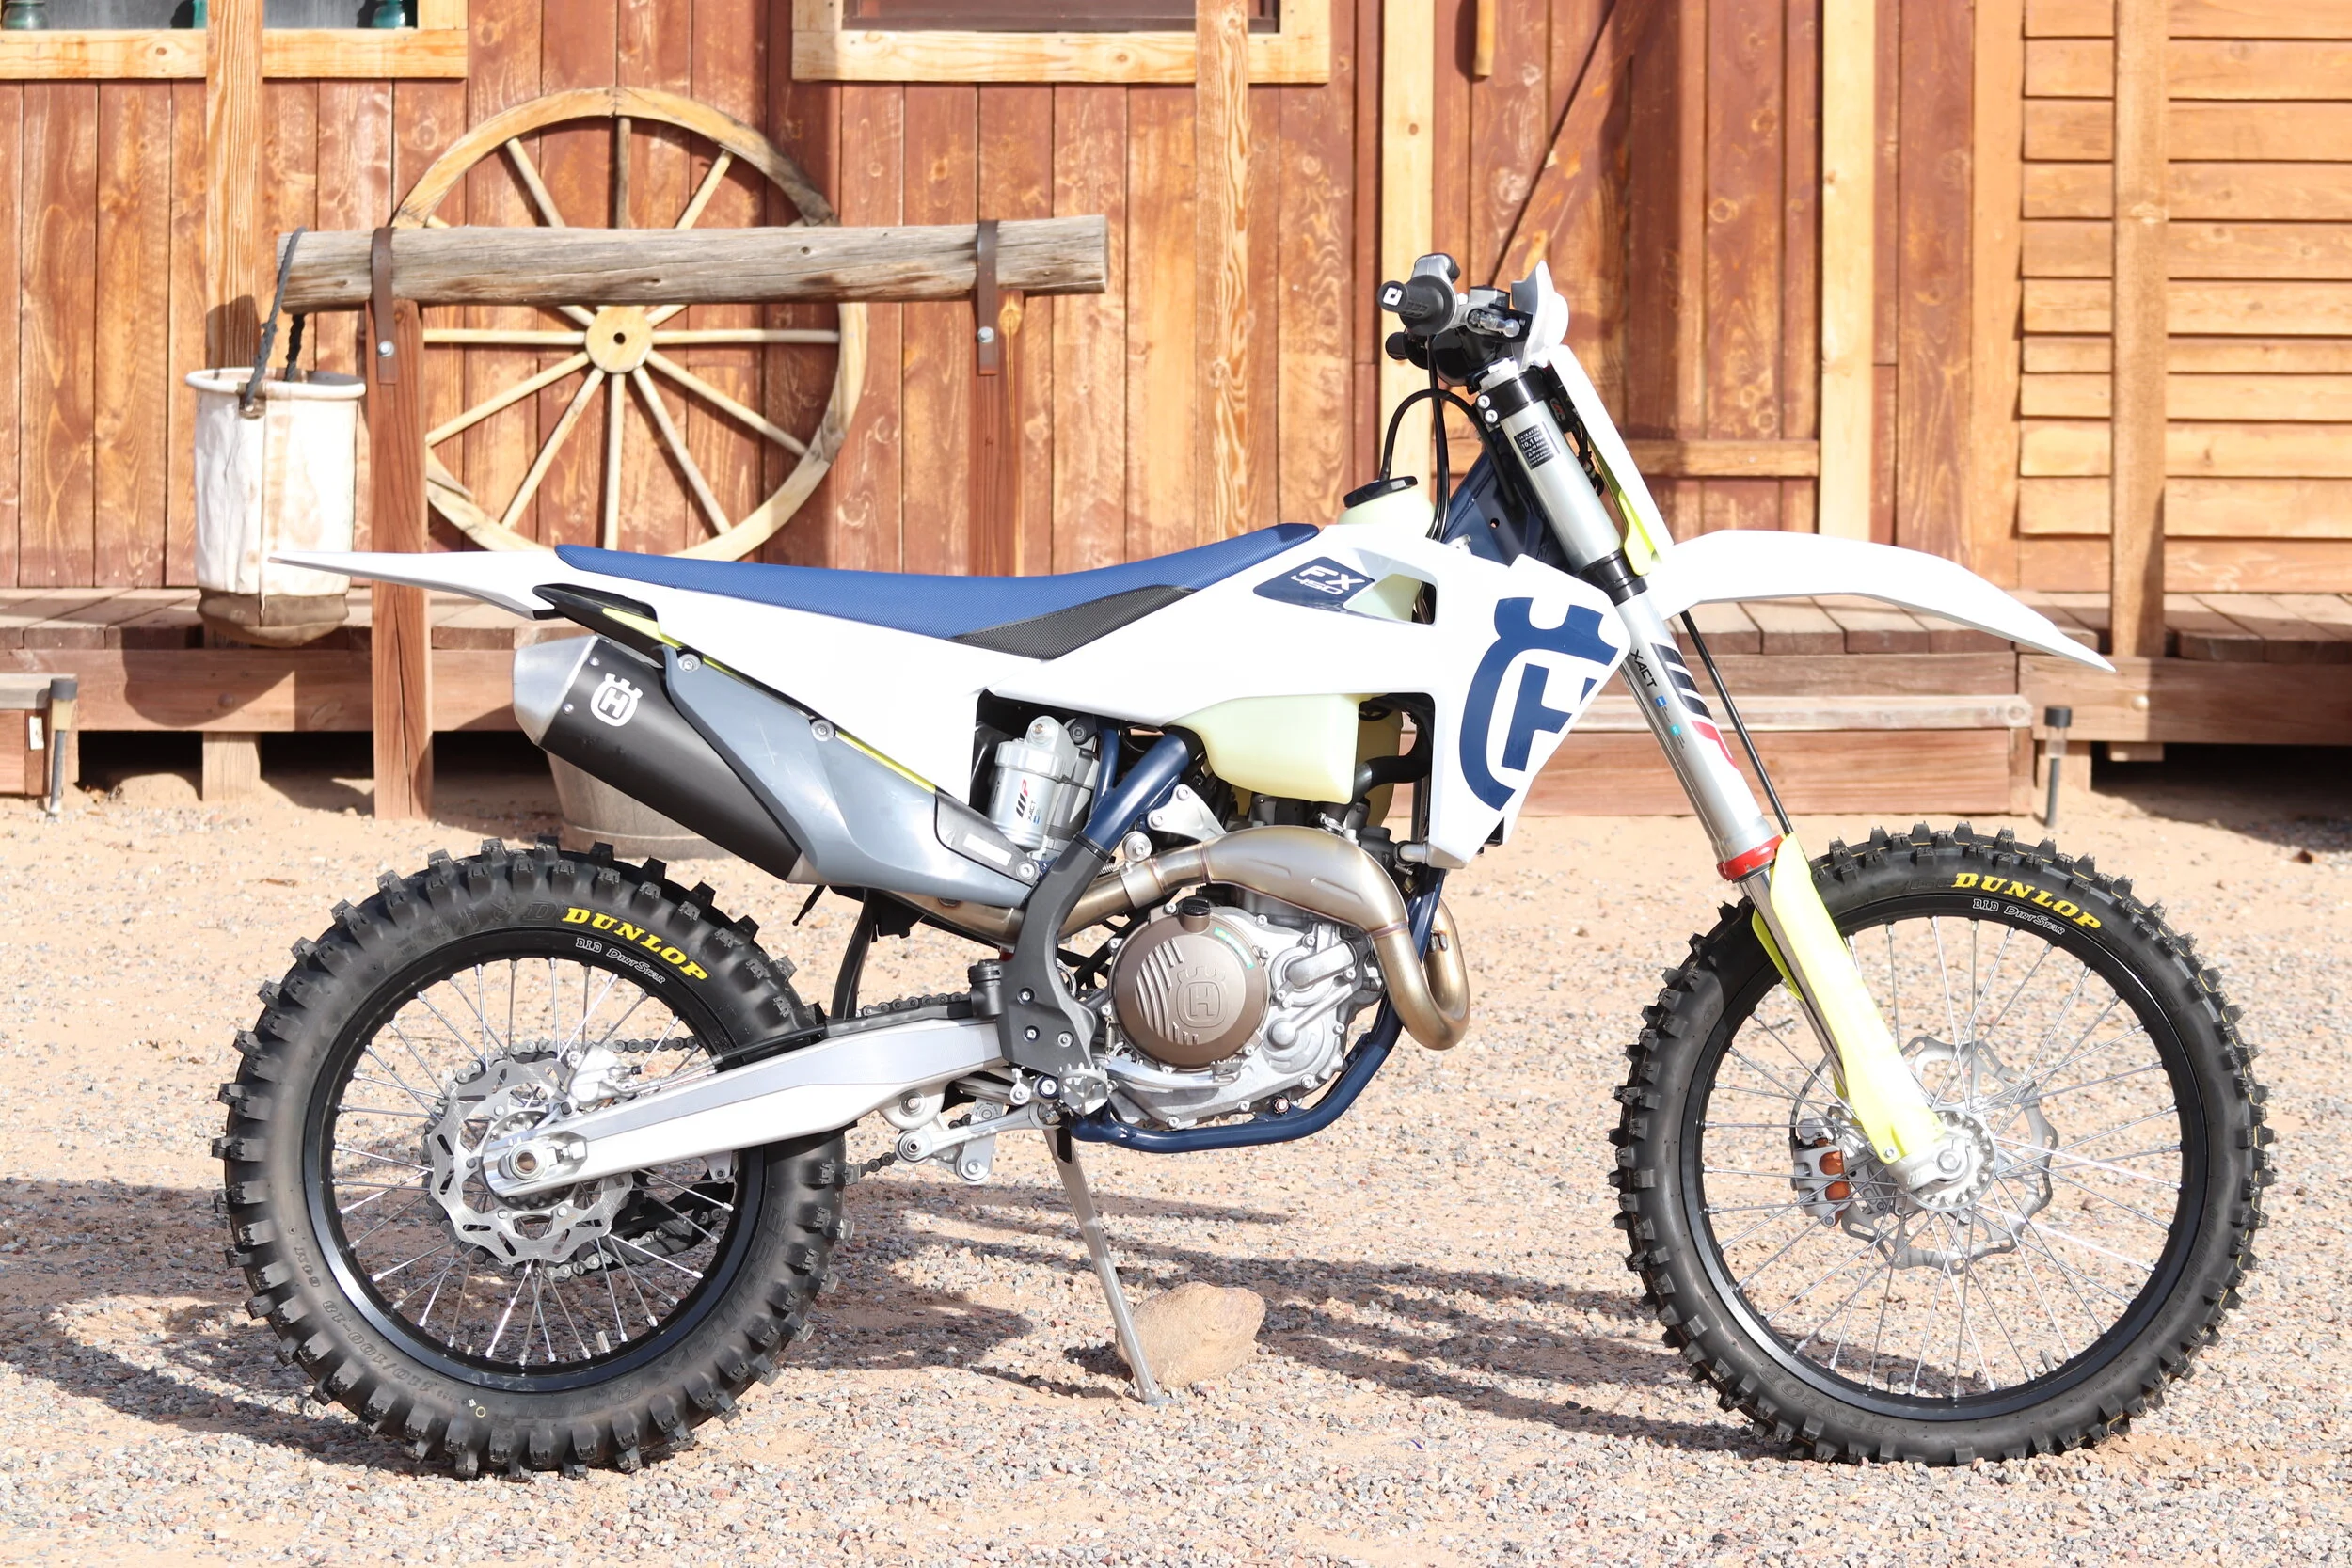
Off-Road

KTM 450/250 SX-F Electrical Problem Tip

IS YOUR KTM 450/250 SX-F HAVING INTERMITTENT STARTING PROBLEMS OR MAYBE CUTTING OUT? LOOK BEHIND THE FRONT NUMBER PLATE FOR THIS CONNECTOR SHOWN. CONDENSATION CAN FIND ITS WAY IN (FROM WASHING) AND CAUSE ISSUES. THE STARTER WIRE CAN ALSO GET YANKED OUT FROM TURNING BARS TO THE RIGHT TOO HARD AS WE HAVE HAD THAT HAPPEN AS WELL. BEFORE YOU FREAK OUT AND START TO BUY A BUNCH OF SHIT YOU MAY NOT NEED, LOOK BEHIND THE FRONT NUMBER PLATE FIRST AND SPEND A LITTLE TIME LOOKING AROUND AT THESE TWO AREAS OF CONCERN.

FIX: YOU CAN HARD WIRE THE CONNECTION TO ENSURE IT NEVER COMES LOOSE AS WELL AS USE A LITTLE DIELECTRIC GREASE.

Helpful Suspension Set Up Tips

twl3z8tY.jpeg

Suspension is hard to understand. Especially if you’re somewhat of a novice when it comes to setting up your bike. It took me a long time to understand what my bike was doing and how I could make it better. If you’re struggling to set up your suspension or maybe you just want to arm yourself with some knowledge, here are some tips to help you when you’re in your garage or out on the track.

Adjustments are there for you to “customize” your set up and feel on the track. The compression and rebound damping adjustments on your machine are known as your “clicker” adjustments. Making the correct changes with your clickers will make your bike handle better and give you a friendlier riding experience. Clickers control the amount of oil flow that is allowed to bypass your fork/shock valving stack. They work like a fuel screw and can fine tune your suspension.

A shock has both low-speed and high-speed compression adjustments. The low-speed adjuster controls the damping at low shock speed velocities like rolling whoops and acceleration bumps. The high-speed adjuster controls damping when the shock is moving at high speeds like g-outs, jump faces and can affect the ride height of the machine. If you’re on an older KYB PSF2 fork (may god be with you by the way) you’re stuck with high and low speed compression and high and low speed rebound. Before you start messing around with clicker adjustments here are some things you should do first:

keefer 2.JPG

Check where your clickers are set at and write them down.

Start out with recommended stock settings first for baseline.

Adjust your tire pressure for the type of riding and terrain. 13-14 psi is usually standard.

Make sure you have the correct spring rate for your weight and set your sag.

Bleed the air out of the forks every time you ride, if you have a spring fork.

If using air forks, makes sure to check air pressure and if you’re on AER forks, there is an air bleed for them as well.

Start off by riding your machine with your clickers set in the stock position. This will give you a good base setting of how your bike handles. Ride only a few laps (2-4) at a time when you try new settings so you will not be second guessing your initial impression of each adjustment. When you stay out too long you will start to second guess your initial thoughts. Ride the same lines/bumps every lap so you get a feel for the changes you make and do not ride around the bumps you are trying to test on. If you change lines this will alter your perception of how well your stuff is working. Cheating doesn’t nothing for you here! This will only hurt you in the long run, so buck up and take the rough line! Make changes to your clickers 1-2 “clicks” at a time and one adjustment at a time (rebound or compression). Changing compression and rebound on the fork and shock at the same time can confuse you as to what setting is actually improving your machine. There is the old 2 for 1, which is for every two clicks of compression you go in or out on rebound. For example, if you’re on a KYB spring fork and you go two clicks in stiffer, you might want to back out one click of rebound to compensate for the stiffer comp setting. For beginners, just chill down and do one adjustment at a time. Soft terrain usually requires more compression damping (stiffer) because the bumps are softer in nature and usually taller. Same goes for when the bumps are soft/big and spaced further apart, so in that situation the machine can require a slower rebound damping to minimize kick. If there is a hard base underneath, the bumps will usually be closer together and square edges will develop. In this case a softer/faster setting can be used, especially when speeds are higher.

IMG_3715.JPG

 You can also run your front end higher (drop your fork height) and the rear end lower (higher sag number) if possible for stability, to combat any twitchiness your bike may have.

On hard pack dirt it is better to adjust the rebound and compression to a softer setting while still maintaining control and bottoming resistance. Try to find a happy medium between bottoming and comfort. It’s ok to bottom out once or even twice a lap, so don’t freak out if you bottom out once in a while. That doesn’t mean you need to stiffen your suspension if you’re bottoming out. All of your suspension is meant to be used, that’s why it’s there, so let it do its job. If you are bottoming out more than that, you would adjust your compression clickers to a stiffer setting. Adjusting your rebound damping to a stiffer setting will help if your bike feels unstable (loose feel) or if you are blowing through the stroke on jump faces. In very rare cases adjusting the rebound clicker one way or the other could work. While it is common to stiffen the shock rebound when your bike kicks over bumps (because you feel like it’s bucking you), many times it is caused by compression that is too stiff. Try going one or two clicks softer/faster to see if it soaks up the bumps and calms the chassis down. If that doesn’t seem to help check your riding position on the bike or yes, it could be that your rebound is too fast/soft. Getting the shock to not “kick” on top of jumps is difficult to diagnose so be ready to try both sides of the spectrum with rebound on this type of tricky obstacle.

Again, be patient. Designate a day where you just play around with your settings and get familiar with your bike. I feel like suspension tuning is kind of like dating. You must learn your partner before you can get married right? Getting a balanced, comfortable suspension setting is no different than dating. Get to know your bike before you decide to dump it and blame it all on her. Maybe it’s you? Maybe you didn’t give it a chance? Play around and see what works for you. If the rear of your bike kicks to the side, the cause can be that it’s too stiff of a setting. Again, try one adjustment at a time. Lack of traction (wheel spin) on acceleration bumps can usually be improved by softening the low-speed compression on the shock or speeding up the rebound, so the rear tire follows the ground better. Keep in mind that faster riders generally prefer stiffer settings to maintain control at speed (performance) while slower riders prefer softer settings for comfort

When it comes to air forks messing with the air pressure can be a pain. Just to let all you know, 2 psi is one full spring rate on any air fork, so that is why I usually adjust using “bar”, not psi. How many times have you changed a spring out at the track? Not very much right? Unless you are very light or on the heavier side, the stock air pressure settings from the factory are usually a great place to start and keep within .2-.4 bar (softer or stiffer). Adjusting your compression and rebound clickers on air forks is much easier and a simpler way to dial in these types of forks. Air pressure will change throughout the day as heat builds up, so if you are checking your air pressure in the middle of the day, make sure the fork is cooled down to ambient air temperature.

Follow some of these easy steps and I can guarantee you that you will get your set up even better and enjoy riding that dirt bike of yours even more. If you have any set up questions you can email me at kris@keeferinctesting.com as we will always try to be here for you!

2021 Kawasaki KX450X Top 5 Mods

Written/Tested By: Gary Sutherlin

The 2021 Kawasaki KX450X has been a bike I’ve been interested in putting some time on ever since Kawasaki decided to jump back into producing an off-road 450. I don’t care who you are, but there’s something nice about rolling up to the track or trails not having to worry about a stand. Unfortunately, Kawasaki missed big with their kickstand placement and as functional as it may be on the showroom it needs to come off ASAP if you’re planning to lean the bike over riding at all. After a few days of riding, I had a pretty good direction of a few things I wanted to try to improve on the KX450X.

AL5_1685.jpeg

AEO/REP Suspension:

The stock valving on the KX450X was too soft for both off-road and MX riding for me. Although it was comfortable it didn’t have the hold up and performance that I wanted for both types of riding. After talking with Mark at AEO we decided to lean more towards an off-road setup and highlight what this bike was designed for. My first impression was exactly what I asked for, the valving had more hold up, a progressive feel throughout the stroke, and the added performance to push in rougher areas. I rode this set up at MX tracks, California desert and rocky single track in Arizona. If I was going to ride both moto and off-road I think I would stiffen the low-speed compression both front and rear to help the performance at the motocross track but not taking too much away from how well it works for trail riding. This setup really shined at everything I threw at it while trail riding, it soaked up all the rocks, small chop and square edges but had enough bottoming resistance that I could still hit bigger whoops and g-outs without completely hammering my back. www.repsuspension.com

AL5_1666.jpeg

Ride Engineering Linkage:

I used to put a different linkage pull rod on my Kawasaki’s back in the day, which was a couple generations of KX models ago, but always saw a big improvement with the ride attitude of the machine. With the stock link I found that the sweet spot for sag and balance, which was around 105-106mm with the link. With Ride Engineering’s link I tried the same sag numbers but realized the balance of the bike was off and too low in the back, so I bumped it up to 102mm to get the bike more balanced for what I prefer. Once the balance felt right, I noticed how well the bike drove through square edge bumps under acceleration, had an increase in rear wheel traction and helped keep the rear wheel planted to the ground. It helped in areas I hadn’t even noticed the KX450 was lacking with the stock link, so this was a surprise mod that I was not expecting too make that big of a change, but was one of the top mods that I did to the green machine. www.ride-engineering.com

Ride Engineering 22mm Offset Clamps:

AL5_1679.jpeg

One of the first things that had me scratching my head with the Kawasaki was the vague feeling I was getting with the front end of the KX450X on lean angle. I felt like I would have traction then, bam, the front wheel was gone and I found myself picking myself up off the dirt. Adrian at Ride Engineering has been testing this clamp set up for awhile and asked me to give it a try and I figured this may be the ticket to stop finding myself lying in the dirt. The 22mm offset helped with front end traction that I was lacking with the stock clamp making it feel more planted and gave me more confidence in the front end anytime I was leaning the KX450X. I found the clamp to work well on single track trails and the flowing desert. My lean in while setting up for a turn was more controlled and seemed to help me change directions on the trail quicker and pick better lines. I did notice on faster high-speed bumps I was getting more feedback in the bars with the 22mm offset clamp than with the 23mm offset. I think going to the 22mm offset might increase rigidity a tad on square edge. When you make one area better sometimes it takes a little away from the other but I think it was a good improvement across the board and made the front end better for what I set the bike up for. www.ride-engineering.com

ARC Levers:

AL5_1883.jpeg

The simplest but most effective change to the KX450X was new ARC clutch and brake levers. In stock form the levers had me wondering if I ever used a clutch and front brake before, they’re oddly skinny and the engagement point was in a weird spot for me. I chose to use ARC Memlon levers over the aluminum for off-road. Bob over at ARC is a clutch and brake warlock giving you the options to make lever engagement and feel for ANYONE!. With his “Flip Chips” allowing you 6 different power ratios you really can make a personalized feel for you. Bob recommended the 16-17 ratio and it helped put the engagement a little closer to my fingers and improved the control while cornering. I know a lot of people think the Memlon front brake levers flex too much, but I really like the feel of the lever and don’t have a problem getting the KX450X to slow down for my thick ass. Plus, if you’re out trail riding and one of those pesky rocks comes out of nowhere, you might find yourself on the ground, the last thing you need is riding the rest of the day without a clutch or brake lever. www.arclevers.com

Brake Tech Brake Piston:

AL5_1658.jpeg

Calling all brake draggers!! I’ve used this product for the past few years on my KTM’s and it’s been a game changer. I have a lead foot and drag the brake a lot to help steer the bike while trail riding (editor’s note: as well as moto!). I noticed in the summer months brake fade on the tighter trails I rode with the added heat. But that was all solved with installing the new brake piston. With Jeff’s brake piston not only is it helping disperse heat through the face of the piston, the back also allows the brake system to hold almost 30cc more brake fluid. Whether you’re riding long trail rides, racing for multiple hours, or just like using that rear brake at the track, this brake piston is a must have on any model bike you have. www.braketech.com


Action And Reaction (Shock)

With every action there is a reaction right? This is no different when it comes to dirt bikes and the mechanics of each change/adjustment. Since suspension is always a hot topic with motocross machines, I thought why not give you guys some insight on what each change point/adjustment available to you is on the shock, as well as what it can do out on the track (good or bad). The action of one change can have reaction on the opposite end of the machine as well, not just the focused area. Here is a breakdown of action and reaction, shock edition. If you’re looking for the “fork” portion of this article, check it out here: https://www.keeferinctesting.com/offroad-testing/2021/6/22/action-and-reaction-fork

GasGas racerX HV-5103.jpg

Shock: 

Low Speed Compression: Low speed compression damping will allow your shock’s stroke to stiffen or soften when compressed at lower load situations. 

Action/Stiffer: Stiffening the LSC can allow your bike’s ride attitude to be flatter with less pitching on/off throttle, can help with wallow feeling through rollers, can help keep rear end down on initial bump impact, bump absorption can improve if shock is riding too low in the stroke, give the rider a firmer feel to allow them to ride more aggressively (more performance).

Reaction/Stiffer: Going too stiff can cause harshness or a too firm feel when hitting bumps, can cause deflection when shock is light in its stroke (off throttle situations), can cause less rear wheel traction (especially on lean angle), can give rider a less plush feel on bump impact, less movement in rear end which can give a rigid feel through seat, can overpower fork and allow bike to be front end heavy down hills.

Action/Softer: Softening the LSC can increase plushness, allow the shock to move further down in the stroke under load or increase comfort on initial bump impact, make the action of the stroke faster, can increase rear wheel traction (especially on lean angle), give a more supple feel through the seat when accelerating out of choppy corners. 

Reaction/Softer: Allow the shock to go through stroke too much (low rear feel), which can create a fast moving rear end feel, less damping feel on bump impact, create a low rear end feel that allows the rear end to kick you on braking bumps (which can make transfer of weight to front end, too abrupt off throttle), oversteering through area 2 of corners because rear end unloads to fast on de-cel which causes front end to knife, make fork feel too high on throttle, which can make fork deflect, causes shock tp bottoming more than 2-3 times per lap.

Keefer JB bike GH -5984.jpg

High Speed Compression: High speed compression damping will allow your shock’s stroke to stiffen or soften when compressed at high-speed load situations, but can also can act like a secondary ride height.  

Action/Stiffer: Depending on if you’re a Showa, KYB, or WP rider will depend on how much you will want adjust the HSC knob to feel a difference. A Showa shock is more sensitive to turns than that of a WP or KYB shock. I would adjust HSC on a Showa shock by 1/6 turns to feel a difference versus a 1/4 turns on a WP/KYB shock. Going to a stiffer HSC setting on your shock will raise your rear end and give you more hold up in g-outs, up faces of jumps, out of corners (on-throttle) as well as create more front end bite when entering into corners (area 1-2). Adjusting the high speed is sometimes scary to weekend riders, but shouldn’t be feared as it is one of the most notable changes you can make to your shock. Adjusting the HSC can give a  rider a plusher feeling if he/she is too low in the stroke. Increasing HSC can get you out of the harsh portion of the shock’s stroke if you’re too low on accel/de-cel. HSC can make the ride attitude of the bike more balanced front to rear.

Reaction/Stiffer: Negative affects of going stiffer on HSC can range from deflection on/off throttle, rigidity feeling up, low front end feel, too firm of a feel when hitting bumps on acceleration, harsh feeling through your feet, oversteer (knifing on lean angle), allow the bike’s ride attitude to be too front end low/rear end high and cause kicking on de-cel as well as nose end heavy off jumps.

Action/Softer: Softening the HSC can increase plushness on braking bumps, give the bike a flatter overall feel when chopping throttle in soft dirt, allow the shock to move further down in the stroke under heavy load, make the action of the stroke faster (less damping feel), can increase rear wheel traction (especially on lean angle/more tire contact patch), give a more supple feel to the hands through the pegs. 

Reaction/Softer: Allow the fork to ride too high in the stroke, can cause front end pushing through corners, fork deflection, create a low rear end feel that can make the rear of the bike wallow through rollers/waves, causes too much pitching on/off throttle (teeter totter movement), harsh feeling (firm) around the track because the shock is riding in the stiffer part of the stroke/damping (mid-stroke), unbalanced feel around track (more comfort in rear end with less comfort on fork). 

Rebound: The rebound damping allows the shock’s shaft to move faster/slower when compressed/released. It can also act as a type of damping force as well. 

Action/Faster: More rear end traction because the shock is moving faster, which in turn is causing the rear tire to get back to the ground quicker over bumps/square edges, can help straight line stability, can increase plushness through the beginning to mid stroke, can help get more lift off jumps.  

Reaction/Faster: Can cause side to side movement on throttle under slight lean angle (edge of tire), could make shock feel too soft/low on acceleration bumps (diving), can cause pushing sensation of rear tire through area 2-3 (middle to end) under throttle, can put too much weight on front end through corners.

Action/Slower: Can allow for more damping feel (firmer), slow the rear end down off throttle which can give you increased front end traction in ares 2 (middle) of corners, more planted feeling coming into deep braking bumps, less movement of the initial stroke/under throttle while hitting acceleration bumps, can allow bike to soak up jump faces more (less air).

Reaction/Slower: Can give rider a harsher feeling on/off throttle when hitting bumps, could make shock feel too firm on acceleration through choppy bumps (too high/harsh), can give less rear wheel traction on hard pack chop, front end high feel off jumps, can cause a ride attitude that is too low off throttle, that low feeling can give the rider less cornering stability through choppy ruts because it will pack and give the front tire less contact patch.

Sag: The sag measurement is important because it gives the correct preload on the shock spring for your weight. Sag is also important because it gives the bike its intended ride attitude when designed. 

Action: Getting the correct ride height (or sag) is crucial because when the bike is designed, it’s designed with the a certain amount of preload. The chassis will not act like it is intended (when developed) if the sag is not set to the correct setting. Having the correct sag will give you the ride attitude/balance around the track. 

Reaction: If you’re sag is too high, the rear of the bike can be harsh/deflect on square edge, cause the front end to be too heavy (or low feeling) off throttle, front end oversteer in corners, as well as give the balance of the motorcycle a stinkbug feel. Having the sag too low can allow your front end to be vague in corners (less front end bite), give the rider less rear wheel traction out of corners (under load) and could even cause more pitching on/off throttle. If you’re looking for a little more front end bite or more front end steering then try going up slightly (less sag) on your preload. If you want more stability on faster tracks or on deep sand tracks try going with more sag (rear end lower) for increase stability and a less front end heavy feel. 

2021 Yamaha YZ450FX Optional Maps

The 2021 Yamaha YZ450FX is pretty all new with most of its upgrades coming from it’s other sibling, the YZ450F. The chassis and engine are a step in the right direction, but that didn’t stop us from trying to get both to work in harmony even more out on the track and trail. These two maps are some of our favorites with the last one developed over the course of a couple weeks out on a couple moto tracks as well as some tighter, technical, rocky terrain. If you want to try these maps make sure to have the “POSITION” set correctly on the side of the grid. Some of those numbers have changed on the “Keefer Connection Map”. Enjoy and let us know what you think!

Try this map if you’re looking for less hit with added rear wheel traction.

Try this map if you’re looking for less hit with added rear wheel traction.

Looking for a broader pulling power but with more rear wheel connection

Looking for a broader pulling power but with more rear wheel connection

Suspension Adjustment Guide

The one question I get sent to my email account the most is about suspension. Suspension is a tricky thing and can be somewhat difficult to figure out for the average rider. These descriptions below may seem redundant to all of you riders out there that are familiar with suspension, but I wanted to cater to the novice type rider, to get him or her familiar with adjusting their suspension to achieve the most comfortable ride possible.

 Adjustments are there for you to “customize” your set up and feel on the track. The compression and rebound damping adjustments on your machine are known as your “clicker” adjustments. Making the correct changes with your clickers will make your bike handle better and give you a friendlier riding experience. Clickers control the amount of oil flow that is allowed to bypass your suspension valving stack. They work like a fuel screw and can fine tune your suspension.

IMG_2576.JPG

A shock has both low-speed and high-speed compression adjustments. The low-speed adjuster controls the damping at low shock speed velocities like rolling whoops and acceleration bumps. The high-speed adjuster controls damping when the shock is moving at high speeds like g-outs, jump faces and effects the ride height of the bike (similar to sag). Before you start messing around with clicker adjustments here are some things you should do first.

  • Check where your clickers are set at and write them down.

  • Start out with recommended stock settings first for baseline.

  • Adjust your tire pressure for the type of riding and terrain. (You can check the tire pressure bible on keeferinctesting.com for your type of tire).

  • Make sure you have the correct spring rate on your bike for your weight/ability and set your sag.

  • Bleed the air out of the forks every time you ride, if you have a spring fork or an AER fork.

  • If using air forks, makes sure to check air pressure.

Start off by riding your machine with your clickers set in the stock position. This will give you a good base setting of how your bike handles. Ride only a few laps (2-4) at a time when you try new settings so you will not be second guessing your initial impression of each adjustment. If you stay out too long you will start to second guess your initial thoughts. Ride the same lines every lap so you get a feel for the changes you make and do not ride around the bumps you are trying to test on. Doing this will alter your perception of how well your stuff is working. Cheating doesn’t nothing for you! This will only hurt you in the long run, so buck up and take the rough line! Make changes to your clickers 1-2 “clicks” at a time and one adjustment at a time (rebound or compression). Changing compression/rebound on the fork and shock at the same time can confuse you as to what setting is actually improving your machine. So just chill down and do one adjustment at a time. Soft terrain usually requires more compression damping (stiffer). The bumps are bigger and spaced further apart so they can require more rebound damping to minimize kick (stiffer). If there is a hard base underneath, the bumps will usually be closer together and square edges will develop. In this case a softer setting or a faster rebound can be used. If you are riding in deep sand your compression and rebound settings should be stiffer (slower) than recommended stock settings that are in your manual. You can also run your front end higher (drop your fork height) and the rear end lower (higher sag number) if possible for stability, to combat any twitchiness your bike may have.

lHFIltXw.jpeg

On hard pack dirt it is better to adjust the rebound faster while still maintaining control and bottoming resistance. Try to find a happy medium between bottoming and comfort. It’s ok to bottom out once or twice a lap, so don’t freak out if you bottom out once in a while. That doesn’t mean you need to stiffen your suspension if you’re bottoming out. All of your suspension is meant to be used, that’s why it’s there, so let it do its job. If you are bottoming out more than that you would adjust your compression clickers to a stiffer setting. Adjusting your rebound damping to a stiffer setting will help, if your bike feels unstable (loose feel) or if you are blowing through the stroke on jump faces. While it’s common to stiffen (slower) the shock rebound when your bike kicks over bumps (because you feel like it’s bucking you), many times it is caused by compression that is too stiff. Try going one or two clicks softer/faster on rebound to see if it soaks up the bumps and calms the chassis down in that area of the track. Always ride within your means when testing and try not to push 110%. Let the pros do that! 

Again, be patient. Designate a day where you just play around with your settings and get familiar with your bike. I feel like suspension tuning is kind of like dating. You must learn your partner before you can get married right? Getting a balanced, comfortable suspension setting is no different than dating. Get to know your bike before you decide to dump it and blame it all on her. Maybe its you? Maybe you didn’t give it a chance? Play around and see what works for you. If the rear of your bike kicks to the side, the cause can be that it’s too stiff of a rebound setting or too stiff of a compression setting. Again, try one adjustment at a time. Lack of traction (wheel spin) on acceleration bumps can usually be improved by softening the low-speed compression on the shock or speeding up the rebound, so the rear tire follows the ground better. Keep in mind that faster riders generally prefer stiffer settings to maintain control at speed (performance) while slower riders prefer softer settings for comfort.

-8ot8wHk.jpeg

When it comes to air forks messing with the air pressure can be tricky. Just to let all of you know that 2 psi is one full spring rate. How many times have you changed a spring out at the track? Not very much right? Unless you are very light or extremely heavy, the stock air pressure settings from the factory are usually a great place to start and keep within 1 psi (softer or stiffer). Adjusting your compression and rebound clickers on air forks is much easier and a simpler way to dial in these types of forks. Air pressure will change throughout the day as heat builds up, so if you are checking your air pressure in the middle of the day, make sure the fork is cooled down to ambient air temperature. If you like what you read here, listen to the Rocky Mountain ATV/MC Keefer Tested Podcast and listen to some more tricks that can help you get more cozy on the track! 

Follow some of these easy steps and I can guarantee you that you will get your set up even better and enjoy riding that dirt bike of yours even more. If you have any questions you can email me at kris@keeferinctesting.com as we are here to help. 

Top 5 Reliability Mods To The 2021 KTM 450 XC-F

Written By: Gary Sutherlin

When you hear the phrase “Top 5 Mods” for a KTM most of the time you think of things like, exhaust, engine, ECU or maybe some cone valve forks. However, in this Top 5 Mods article I went outside the box a little since I’ve spent a few years riding this KTM model and have tried numerous exhaust, engine, ECU, and suspension mods already. KTM has marketed the new 2021 KTM 450 XC-F as a 50/50 motorcycle. Basically, KTM believes for the customer, this bike can be ridden on the motocross track Saturday and then trail riding with your buddies on Sunday. And it can…. almost (check out the air fork section at the end for more on that topic). Now, the mods that I’m going to share with you aren’t going to break the bank and set you back thousands of dollars, I mean geez, you just spent $12k on a new bike so the hell wants to do that?  With these mods, your ride will be massively more enjoyable, and your bike will last over the long haul.

GPR Stablizer.jpg

1. GPR Pro RBM Kit V5 Top Clamp and Stabilizer: It still amazes me today that more people don’t utilize the great qualities of a good stabilizer. I worked with Randy at GPR about a year ago when he was designing the new V5 and asked about adding his elastomer set-up to help with bump absorption and feedback in the handlebars. That set-up is what went into the new Pro RBM Kit which provides the comfort and stability I’ve been looking for in the front end of the KTM. This kit was built for professional riders only and for the first time, is actually available to the public. This has always been one of the keys to my success and I’m happy the public can finally get them too. 

Rekluse Rubbers.JPG

2. Rekluse Inner Clutch Dampeners: Breaking a rubber is never a good situation. But unfortunately, KTM is known for it, hence Husky and Gas Gas. The clutch rubbers in the KTM 450, in my experience, last around 4-8 hours depending on the way you ride. Once they diminish, you’ll need to replace the clutch pack as well, but instead of replacing the rubbers with the stock ones, I recommend using Rekluse. They have designed a clutch rubber that will go the distance.  I’ve put over 60 hours on one set in the past including a few 2-hour plus races. The stock clutch rubbers on the test bike made 8.7 hours before they started to crack, which led to some slipping. You may not feel a physical gain on the bike, but you will in your wallet.

Brake Tech Piston.JPG

3. Brake Tech Rear Caliper Piston: Replacing the piston on your new KTM 450 may be one of the best mods on the list but its not the piston you think. I’m super hard on rear brakes and have even melted the rear caliper itself. Brake Tech has redesigned this brake piston to hold 20cc more brake fluid in your rear system as well as drilled holes in the end to help distribute the heat better. Not only do I NOT experience brake fade on long trail rides or racing, but it stopped that annoying rear brake squeak and locking up of the rear wheel while entering corners. With less heat in the rear brake system, I now have increased pad life as well. Editors Note: Gary roaches brake pads in one race! Serious! If he says this works, I will be trying these for myself!

ZipTy Shark Fin.jpg

4. Zip-Ty Shark Fin: Zip-Ty Racings rear brake rotor shark fin has been a must have on my bikes for over a decade. Whether you are at the track or on the trail there is always that one rock that jumps up and bends your rotor. So before reaching into your toolbox for a crescent wrench to bend your rotor back or ordering one on Rocky Mountain ATV/MC save yourself the hassle and order one up. Zip-Ty also offers a variety of parts that coincide with the shark fin that make rear wheel changes easier and provide the protection needed for both off-road and motocross. 

Ride Shop Brake Tip.jpeg

5. Unbreakable Brake Pedal Tip by The Ride Shop: This product has a lifetime guarantee. If you can break it, he’ll replace it. That’s the motto Jonny from The Ride Shop had when he set out to build this pedal tip. Most brake pedals fold horizontally (or backwards) and don’t actually create more space. With this unbreakable design the pedal folds up vertically which allows you to hit objects at any angle and it will deflect. Putting pieces like this on any race or long-distance riding machine helps create a sense of calm as it’s one less thing you have to worry about having an issue. In my career, this is about the only part on a motorcycle I’ve never broken. 

2021 KTM off road-0602.jpg

What about the Air Fork?

The reason I say the KTM 450 XC-F falls short of a true 50/50 motorcycle is due to the air fork. While I believe for the average consumer the air fork has the features, they need to be successful, I don’t think it’s the case for a higher level rider. At my speed, the faster I go and the rougher the track gets, I cannot get the air fork to perform to match my performance. I spent a lot of time working with the air fork while I had this motorcycle to try to adapt to the different tracks and conditions. Unfortunately, I was never able to get it to be predictable enough for my speed/weight and that’s my only knock on the KTM’s suspension.

Long Term With The 2021 Yamaha YZ 125X


Written By: Dr. Gardner Tarlow

Can the YZ 125X really serve as a multipurpose moto-enduro bike?

If you have read my previous article on the 2021 YZ 125x you know that Kris gave the average Joe rider (me) the opportunity to test the bike. Well luckily for me Kris asked me to continue to ride the bike and give him my extended impression.

I’ve had the opportunity to continue to ride the bike for a few months now. I had been thinking of adding a 125 MX machine to my stable of bikes for mid-week moto for a while, however seeing how I mainly rode enduro, I was hesitant to have a track bike that sat in my garage. When Yamaha first debuted the YZ 125X, I was excited and wanted to see how well the bike could handle the work load as a multipurpose bike. As luck would have it, Kris offered me the opportunity to test the 2021 YZ1 25X and I jumped at the chance. I instantly fell in love with this small-bore bike for both enduro and motocross and I have once again been bitten by the motocross bug. 

IMG_6196+GTM.jpg

I intentionally left the bike completely stock to hopefully get a better sense of the pros and cons as well as the reliability of this bike. This bike currently has 45 hours on it, approximately 20 hours on the trails and 25 hours at the track. I have only performed regular maintenance and played with suspension sag and clicker adjustments. The bike has continued to perform well and has been reliable on both the track and trail.

Not owning a newer 125 for the track to have as a yard stick, I felt this bike more than handled our local tracks and really didn’t give up much in track performance compared to a pure track bike. Recently however, I had the opportunity to ride back-to-back the YZ 125X and a stock 21 Husqvarna TC125. This was a bit of an eye opener for me as it took a bit of shine off the YZ 125X. I continued to prefer the YZs handling and rough track prowess, but the power difference pulling out of corners, down longer straights, and large hills was too much to turn a blind eye to. It would be interesting to ride the 125X back to back with the YZ125 to feel the difference.

In reality, I don’t know how important it is to compare the YZ 125X to a motocross track specific bike as that is not the designed purpose. In the same vein, I think it would be difficult to take a track specific 125 out into the hills, ride a rocky single track, with technical hill climbs/rock gardens for 2-3 hours and not feel completely beat up by the end of the ride. Each bike design serves a different purpose, especially when comparing the extremes of each riding discipline. The YZ 125X is designed to be a GNCC race bike, this means extended cross country, off road courses, and lasting 2-3 hours of racing. These courses will have sections which are tighter and potentially more technical than any motocross track and other sections that will be just as wide open as any motocross track or even short desert sections. Maybe the better question is which 125 can merge to perform all the different disciplines if you’re looking for a single 125 multipurpose bike. 

img-4.jpg

When straight up comparing the YZ 125X wet weight to the other 125 motocross bikes the difference is between 2-10 lbs difference. The YZ 125X is still very light, flickable, easy to muscle around, and place into whatever line you want. Unfortunately, shedding weight on a bike can get expensive and when you consider the HP to weight difference, this may be slightly problematic at the track if you are competitively racing. For me however this isn’t a huge issue as I am looking to have fun on days off.

The power of the YZ 125X engine is smooth, very controllable and builds from off the bottom all the way up to its top end. The bottom end lugability allows the bike to perform very well on slow technical climbs as well as allow me to change lines when trying to maneuver over slow rocky obstacles. The delivery of the bottom end also allows you to roll on the throttle at very low speeds without having to abuse the clutch too much which is nice for an old doc like me. This also translates well for motocross allowing you to be more creative with inside lines and also makes up for some riding technique deficiencies. The mid-range is strong and more than capable with both riding disciplines and it hauls my 185 pound frame around well.. The top end of the YZ 125X seems to rev out sooner than I would like and fall off, leaving you wanting a little more top end. In stock form this is where the YZ 125X suffers the most compared to a track specific 125. 

Modifying a YZ 125X to gain 6hp or more is possible, but at what cost to reliability as well as dollars. I don’t think I would mind pushing my YZ 125X back to the pits from the tracks edge, but it would make for a bad day of riding if you have to tow your bike back 2-3 miles away from your truck. 

IMG_6115+GTM2.jpg

Although not a hydraulic clutch, I was pleasantly surprised at how well the stock clutch performed despite the abuse of both enduro and moto riding. The clutch had a light pull and continued to perform with minimal adjusting even on my most abusing days. Being at 45 hours the clutch held up well and although it will get a new clutch, I believe there are a few more good rides on the existing one. 

The suspension on the 125X is essentially the same KYB setup as the YZ125 but with different valving, because of this, the YZ 125X has the potential to be as good as any YZ125. In its stock form it’s very ridable for the smaller rider, but at 185 pounds once you start getting aggressive or the track gets rougher, you notice the big hits in your wrists and feel the suspension moving thru the stroke too quickly. This unfortunately is going to be the case for all heavier  riders, so re-valving the suspension front and rear with a stiffer spring rate is par for the course with any 125. In stock setting the suspension is just too soft for motocross unless you are the intended audience (<160lb) and even then, it is too soft for a faster rider when considering motocross. Out on the enduro trail and tight single track the suspension valving seems very appropriate soaking up rocky uneven surfaces, but again would need heavier springs for the larger riders.

Being more of an enduro guy and riding primarily a KTM 300XC, I felt the YZ 125X was a blast in the hills, single track and small rock gardens. Although the 125 is much easier to throw around and significantly lighter weight than my 300, you have to ride a 125 with much more aggression to get through certain types of sections. The same way it is a blast to attack at the track you need to do the same out in the hills. I definitely felt like I could manhandle and ride the more difficult sections better on the 125 but by the end of the 3 hour rides, this constant need to attack the trail left me feeling more fatigued compared to my larger bore bike. I will say I think the YZ 125X would be a great tool for any rider to improve and work on extreme enduro style techniques.

img-5.jpg

My wish list for this YZ 125X would be a gradual build up. I typically replace parts as they need servicing or I damage them. At 185 pounds without gear and 45 hours of ride time, the suspension needs servicing. I would service as well as address changing the spring rate and more aggressive valving to better handle weekday moto. I find it easier to soften suspension with clickers for enduro than stiffen suspension for moto. I occasionally drop or dare I say throw my bike out on the trail when in trouble, so bike armor for off-road is a must. At minimum the bike needs an aluminum rear disk guard, plastic front disc guard, skid plate, linkage guard, radiator guards and hand guards. The difference between a good running 125 and the same 125 finely tuned, can be significant. The carburetor performance in stock form seemed adequate, but I feel there is some performance gain to be had with a reed valve system. I wouldn’t mind adding a high compression head, pipe/silencer combo to even the playing field at the track. This would help overall power and hopefully provide a bit more top end without sacrificing too much bottom end performance. The front brake performance is average and although appropriate for both disciplines, an oversize front rotor and steel brake cable would be an improvement. The YZ 125X gas tank is the same as the YZ 125 at 2.1 gallons and although it has a reserve petcock, it doesn’t extend ride time or mileage. I spent most enduro rides carrying gas filled water bottles in my fanny pack so a larger tank would be optimal. Unfortunately, most available larger tanks (3.2 gallons) seem rather large for track purpose. Yamaha should have designed and provided a slightly larger 2.5 gallon tank (similar to the WR450F),which would have been perfect and still small enough for moto. 

Without a doubt the YZ 125X can serve as a multipurpose 125. The more I rode this bike week to week, the more I appreciated what the YZ 125X could do out on the trail and at the track. Outside of competitive motocross, I believe the YZ 125X is a great alternative for someone wanting a 125 that can do it all with the least amount of difficulty going from one discipline to another.  

Getting In The Industry (Test Rider 101)

Keefer, I want to help you test”. Of course you do, but do you know what you have to do once off of the bike? Do you know what the correct way to do things when you’re on the bike testing? I hear this statement all the time, but I end up asking the questions above to the person, every single time I get asked. To me, I don’t think a lot of people understand the ins and outs of testing. From the outside, a gig testing for Keefer Inc./Racer X or any other motocross media outlet appears to be one of the best jobs in the industry and it is! Where else do you get to ride the latest bikes, sometimes on private tracks, while wearing new, free riding gear? Yet, despite all the apparent perks, being a test rider is actually a tough job that requires dedication, being an honest person (well, hopefully), persistence and more than a little luck. The purpose of this article is to fill you in on some of the false notions surrounding the gig of being a test rider and to tell you how to become one if, that is, what you are looking to do.

50780775882_ed124c90d8_o.JPG

Falsehoods That Surround Being A Test Rider:

There are several components of being a test rider that aren’t exactly understood by those trying to get this type of job. Here are some things that I put together that you all may think happens in the testing world, but are simply just falsehoods.

Fiction: Testing is easy work. While you may think that bike tests involves simply cruising out to the track, throwing some big whips for the camera, being back at the house by 2 p.m playing video games, you couldn’t be more delusional. Testing is hard work and those that do it right, do a lot of it! Most of my test days begin early in the morning to take advantage of the quiet time I have at home to type and typically don’t finish a testing day until I run out of light in the evening. Don’t get me wrong, it is fun, but becomes more like a real job the more you do it. The toughest thing about being a test rider would have to be the long days I put in at the track and only to return home to start typing an article or a podcast. I am mentally fried by the time I am ready to hit the sack. Sorry Mrs. Keefer, you’re not getting any tonight! To evaluate a motorcycle in a comparison situation you have to make sure you give equal time for each bike, and that could be up to six motorcycles! So, it is definitely a full day. Your body is tired at the end of the day right up to that last bike you get on, but you have to make sure you’re in the right frame of mind (and in shape) when you are testing at 5:30 in the evening. You have to make sure you are fair and not in a rush to leave the track just because you’re tired.

fxr-4988.jpg

Fiction: Test riders get paid a lot of money. Believe it or not, I don’t pay my test riders (I only have two guys) a whole hell of a lot for their services. While this may seem unfair, consider the flip side: My test guys get to ride the latest bikes, get parts and gear to test and keep. Your hobby is work, but at least you don’t have to pay for your hobby. Not only that, but they end up getting a lot of time on each bike, which makes it a great gig for aspiring pros or those who desire a lot of training. When I started at Dirt Rider, I got paid nothing for years until a check showed up for a couple hundred bucks after a shootout. I had to put in my time and pay my dues in order just to get a couple hundred dollars. When you test for a manufacturer (think durability testing) you will get a set amount per day, but it is usually only a couple hundred bucks per day for a 12-14 hour day

Fiction: You have to be fast or a pro to be a test rider. FALSE! Being a high-level racer type certainly makes someone a good test rider on paper, but this isn’t always the case when it comes to track time. Many pros are very adept at gauging what is going on with their equipment; conversely, some pros can’t even tell if they have a flat rear tire. Trust me, I have seen it! Speed is not directly related to having a good sense of what a bike is doing and as such I try to use riders of every skill level. When I test for manufacturers I have to be conscientious of the fact that these bikes need to perform for a wide variety of riders, not just what I like. When doing stuff for Keefer Inc., I usually try to have multiple opinions in which helps broaden the evaluations I bring to readers, since not everyone out there is a Supercross Pro. This is also why you’ll see mid forty year old, blue collar guys testing in my tests alongside 240 pound weekend warriors, not just 170 pound fast guys; diversity only enhances the value of testing.

Fiction: Test riders get to roach out bikes. While I can’t say the same for other testing sites, there is no denying that I ride a lot and spend almost as much time in my garage as I do on the track. Why? Because I adhere to one simple rule that my dad preached to me when I was young: treat anything you ride as if it was your own. One look around my garage and you will find clean bikes, lubed chains, fresh filters and fresh engine oil in the machines. I take great care to not only keep the test bikes in solid shape, but also to know what makes them tick and this transfers into getting the correct feedback to you all. On the track or on the trails, I encourage my test guys to ride a bike to its full potential, but this in no way includes thrashing it. All of the manufacturers are great dudes and if I trash a bike and give it back to them like that, I would feel like shit.

So now that I brought up some common myths about test riding, how the hell do you become a test rider? 

Keefer -2-5.jpg

Be Persistent And Available:

If you really want to test rider, the first thing you need to do is to make yourself available. Like “I don’t have a life” accessible and on short notice. I usually like to get the information out to the people ASAP, so I often have to plan test sessions without much warning. As a result the guys I have used earned their test riding moments by simply being in the right place at the right time. I have literally talked to riders at the track and I could tell by just the way they treat their bike, how they ride and what type of attitude they have, offered them to try out test bikes. Some of those guys came off articulate when it comes to explaining how a certain bike performs on the track. Sometimes being lucky and in the right place at the right time helps. This isn’t a slam dunk and doesn’t mean that you’re going to be a test rider, but it helps to have a good presence at the track. Say hi to people at the track and look like your enjoying yourself instead of hiding out in your van all day.

Knowledge Of Dirt Bikes:

Please for the love of all that is holy know which way to turn a clicker to speed up the rebound? What does a bike do if the mapping is off? How does the bike react if the sag is set wrong? Do you know what sag is? These questions-and more like them-all need to be answered by a test rider before getting the job. No one is looking for super freaks when it comes to bike knowledge, but a test rider needs more than an elementary idea of how a motorcycle works and how certain changes affect its performance on the track. A test rider needs to be picky enough to know how he or she likes their setup, yet open-minded enough to be able to try something different (I to can struggle with that last part at times). He (or she) cannot be afraid to try new settings, setups and has to be vocal enough when something isn’t working. If you don’t know or can’t feel a difference between bikes or settings, then it is OK to say “I can’t feel a differnce”. Most importantly, a tester needs to distinguish between what effect the track is having, what the bike is doing and what the rider or his technique is causing. This comes with either a natural ability to know a dirt bike, or lots and lots of seat time

9DF86849-3884-4764-90A0-D578728B8188.JPG

Confidentiality:

A lot of my work is confidential and if I screw that up, I wouldn’t have a job. If you can’t keep a secret, don’t even think about trying to become a test rider. If you give up a secret before it comes to production, you risk getting blackballed from any type of testing! The word “embargo” is gold with the manufacturers. I mean Matthes tries to get shit out of me all the time and I simply just tell him, “I know nothing”! Some people think it’s no big deal and I am being too intense, but I take my testing extremely serious and that includes not talking about things until they are in production or the embargo has lifted. The best test riders are not only great at breaking down each machine, but they would have to be water boarded before giving up the goods of a new bike or part.

Be A Good Person And Professional:

As most of you know I like to have fun just as much as the next guy, but when it comes time to start busting ass and working, I am all in. Playtime is over and work mode kicks in. As a test rider I am representing myself and am expected to be professional at those times. This includes not riding like a jackhole at intros, treating people with respect, not looking like I just woke up on the beach the night before, not showing up to the track late or in old, thrashed riding gear and not typing up a second grade opinion of something on an iPhone. Being able to formulate a solid opinion is not only helpful, it’s essential; what good is a rider who can feel what a bike is doing, but can’t put it into words. Or if a rider just starts making up shit to sound like he or she knows what the hell they are talking about. Being punctual is also key when turning in reports on time. I get so many kids that just want to ride the bikes and then go home to throw up an Instabanger to pull chics. Go home, get the report/opinion done and send it in. That is how I got more work. It’s surprising how much of a big deal that is to companies. So many people want to do the fun shit, but not the hard stuff afterwards. Lastly, if you don’t know how to spell at least 90 percent of the words on your report, go take a college course, so you can have the complete package or “The Quan” as Jerry McGuire would say.

Be Consistent:

As with many things, consistency in testing your own stuff is key. Know what you like and stick to it, but again, don’t be afraid to be flexible and try new things. Don’t ever use the word “perfect” in the testing world. There is nothing perfect because everything can get better through testing. An old saying goes “you’re only as good as what you try”. I try to live by that motto when it comes to testing. When I work with manufacturers, consistency is also important because it provides a common goal to work toward. We always have a baseline setting that we are looking to get better than and sometimes we will re-visit that baseline setting along our testing path. Consistency on the track plays a big roll to making bikes better as well. When on the track make sure to hit the same line every lap when you’re testing, so your feeling on the bike never sways one way or the other. If you pick a smoother line one lap and miss the bump you were hitting, you’re not getting an apples to apples comparison.

Help Wanted:

The worst way to approach any one in the industry is to walk right up and demand to be allowed to ride a bike. Instead, it’s better to prove that you have the skills to be a good test rider and that you can follow it up with consistent feedback and valuable opinions. I like that a few riders have given me (at the track, I may add) professional printed out tests of their machines and that goes a long way in my eyes. If you have taken the time to architect an article on your machine and then have the balls to present it to someone, that shows responsibility, gumption, being pro-active as well as not being a lazy ass! All things that I love! If you’re serious about a job in this industry try a few of these things and see where it gets you. You will never know if you don’t try! See you at the track!  As always our door is open to you, the reader, if you have any questions I would love to hear from you! kris@keeferinctesting.com

2021 Yamaha YZ125X Review From A Doctor's Point Of View

Dr. Gardner Tarlow has been my doctor for may years. Dr. T has helped riders like Tim Ferry, Ricky Carmichael, Travis Preston, among others over the years. Dr Tarlow also loves to ride and just like you and I finds his spare time at either the track or trails of Southern California. He has been bugging me to ride the YZ125 X since it came out last year so I thought it would be a good read to hear what an average Joe rider like Dr. Tarlow thought of the YZ125X. Here are his words. -KK

The YZ 125X was designed to be a closed course GNCC style race bike. It’s hard to imagine that a YZ125 with more bottom end, softer suspension, feather light and an 18” rear tire wouldn’t make a good GNCC race bike. Unfortunately, I don’t live on the east coast and my version of cross country is the high desert all the way to the foothills of the California mountain ranges. This means everything from sandy, rutted, rocky, hard soil with technical long hill climbs.

I was lucky when Kris gave me the opportunity to ride the 2021 YZ125X. To be honest, I had been bugging him to ride this bike since it came out in 2020. So naturally, it took me by surprise when he offered to let me ride the 2021 bike and write up a review.. Kris has a lot of options when it comes to having people test bikes and I didn’t imagine I would even make the list. I would consider myself an open novice for both motocross and enduro. I am not the target market for this bike. I already have my AARP old man card and at 5’10” and 190lbs without riding gear. It’s safe to say, I definitely put this 125s ability to perform well in the hills at a disadvantage.

IMG_6115 GTM2.jpg

My first few rides were at Glen Helen Thursday practice, followed by multiple days at Cahuilla Creek. At 190lbs I’m not the ideal rider for any stock 125 motor or suspension. Most important for me was to assess the performance of the motor. I’ve rode a few different 125s and I was curious to see how the motor would differ. Out of the box, the jetting on the bike seemed appropriate and pulled cleanly in almost all riding situations. Under heavy downhill braking, the motor seemed a tad rich and hesitated with a slight bog. Turning the idle up and resetting the air screw cleaned this up somewhat but most likely the bike needed a change of needle height. The motor had a good bottom end with strong mid and top end performance. The top end power and pull seems to flatten out more than a regular YZ125 but then again, each bike is designed for different purposes. Although the top end isn’t the same as most track 125s, it pulls plenty well for track practice days or club racing. When I found myself in the wrong gear, a quick fan of the clutch and the motor lit right up, minimizing my poor riding technique. I gladly would give up the top end performance for the enhanced bottom end grunt, if that term can be used for a 125. I had forgotten how busy you need to be to keep a 125 on the pipe. The suspension in general was not designed for my size, however I was able to dial it in to where I could ride it without major issues. I eventually settled on Fork compression 10, rebound 7, forks 7mm up in clamps. Shock at 103-104mm race sag (free sag 20mm, need stiffer spring) low speed compression 10, high speed compression 2 and rebound 8. Despite the bike being significantly under sprung for me, the bike didn’t have any harsh landings or do anything to spook me or make me feel like I needed to back it down. Once I got the suspension dialed in, I was able to take any line I chose and the bike had that classic 125 feel and sense of just falling over into turns and railing ruts. For a bike that I was hoping could serve dual purposes, this little 125x was a blast at the track. With the exception of having a kickstand stare at me each time I came back to the pits, I would’ve thought I was riding any stock 125 that had a really good, broad powerband.

IMG_6196 GTM.jpg

I initially went to the track because I always think it’s easier to dial in a bike at the track versus out in the hills. I knew from a chassis and suspension perspective this 125x was going to be a blast on tight, undulating, rocky single track. The suspension being a bit under sprung was somewhat of a benefit and less of an issue for the slower speeds and rocky terrain. I actually liked that when I sat on the back of the seat the bike would squat a bit more and allow me to touch the ground, making it easier to pivot the bike more so than my properly sprung KTM 300XC. My bigger concern was that, despite being impressed with how well the 125x pulled up the hills at Glen Helen, could it pull the long hills we ride out in the high desert? Rolling off the throttle or chopping the throttle on a big hill climb is hard enough to recover from on a 300 but on a 125? I figured it would make for a long day of failed climbs. To my surprise, the 125x climbed extremely well. I think because you have to charge up climbs knowing you have to remain in the throttle forces you into more aggressive riding and this got me looking further ahead. That old adage of keeping the throttle on and using the clutch to regulate the power has never been truer than on a 125. I intentionally put the bike in unfavorable situations on numerous long climbs and to my surprise, was able to recover quite easily. There were some technical climbs that had changes of directions and I didn’t seem to dig holes with the 125x the way my bigger bore bikes sometimes do. The more I rode this bike in the hills, the more I actually enjoyed the challenge of climbing on a 125x. In rocky technical sections I felt like I could put the bike wherever I wanted and was able to rock, clutch and pop the bike through difficult sections that I might otherwise struggle in.

One of my last rides I ended up getting lost for an hour on an extremely tight, single tire width, rutted old single-track trail off property in San Diego county. This trail was literally non-stop rutted turning with little to no straights for an hour. The 125x was finally in its true playground and it was without a doubt the weapon of choice. The ability to muscle it around, diving in and out of tight rutted corners, ducking bushes, trees and dry ruts, able to lug 2n​d​ gear and still have the ability to pull out of sections with or without the clutch made me feel like I had a distinct advantage over my buddies on their bigger displacement bikes.

As much as I liked the track days, I enjoyed this 125x out in the hills even more. When it came to undulating, rolling, tight single track, I started thinking, “I need to buy one of these for my bike quiver”. There may be better bikes for both enduro and moto specific riding, but unless you’re planning on racing a 125 or simply can’t fathom having a bike with a kickstand, the YZ125X can absolutely serve as a dual-purpose track and very capable enduro bike. Now the only question is two-stroke versus four-stroke... but we all know the answer to that. -Dr. Tarlow

2020 Yamaha YZ250FX Review/Baseline Suspension Settings

Written By: Michael Allen

Just like a long lost love or relationship there usually is a certain machine that you will have throughout your life that was your “high school sweetheart”, one that was “quirky, but fun” or maybe it was “the one that got away”. For me, ever since I went to the introduction of the Yamaha 250FX in 2015, the FX has been on my mind more than once. I think the reason I have always loved the FX is because it has the capabilities of being competitive in multiple disciplines of off-road riding and racing. Although I love the YZ 250F, I think I’m better suited to ride the FX since my group of riding buddies is quite diverse and I may find myself riding moto on Friday, then rock hopping on Sunday. Since the FX was released in 2015 it has been refined and updated (usually a year or two after the moto bike), but I think the 2020 iteration has taken the largest step towards one of the best bikes I have ever rode. Why? Let me explain… 

IMG_1976.JPG

I didn’t get the chance to go to the 2020 FX launch on the east coast, but I heard all about it from Keefer’s test guys about how much fun it was and how they enjoyed the bike. I was super interested in trying it since I had ridden the previous FX extensively and knew what I did and didn’t like about it. The older bike had a bit of a reputation for feeling wide with those big air scoops that are in the radiator shrouds. The new body work makes the YZ feel closer to other moto bikes and also makes the air filter easier to access than the previous model.  With claims of the new chassis helping the bikes ability to turn and an all new engine having the ability to be tuned with your phone, I couldn’t wait to pick up the new FX from Keefer’s shop to hit the trails and ride some moto. 

The first thing that stuck out to me when I hopped on the 2020 250FX was the new body work and slimmer feel. Gone was the feeling of being slightly bow legged when pinching with my knees in the sitting position. The Yamaha now feels much better between your knees and the shrouds look aesthetically much better than the previous model. I personally like the fact that there isn’t a gas cap on the outside of the plastic because it gives you the ability to scoot further up without crushing what’s between your legs. Although it does come with a quality skid plate, I had to add handguards to protect my dainty digits, which isn’t a big deal, but I seem to be doing this with most hybrid machines lately. Having the map switch on the bar is a huge plus as well as being able to tune the bike from your smart phone. 

IMG_1979.JPG

Although it’s an off-road bike, the first place I rode it was at a Glen Helen Vet motocross race where I was pleasantly surprised with its capabilities. Compared to the motocross model the FX is sprung and valved lighter, but that isn’t necessarily a bad thing. I am by no means a pro moto rider, so at my speed (vet intermediate) and weight (170lbs) as long as I didn’t grossly case or over jump anything the suspension was very compliant. For moto riding I did add 3 clicks (stiffen) of fork compression and take one click out (slower) of rebound which seemed to do the trick. I think one step up on the fork spring would help with the slight front end dive I noticed under hard braking on the moto track. After going back to the stock clicker settings before trail riding I ended up going back to the moto setting because the stock settings are just a touch soft in most off-road situations. The new chassis is a huge improvement when it comes to cornering and overall front end traction. The 2020 takes less effort to lean into rutted corners and once in the corner the front end had more traction which leads to a more overall confident feeling of the front end not washing out. While the 2020 corners far better than the previous model, the new FX only slightly lacked in straight line stability. Only at very high speeds does the front end feel slightly nervous (front end deflection), but I will gladly take that tradeoff to have a better turning motorcycle. When I rode faster trails with square edge speeding the rebound does help calm the front end a little more, so if you’re racing GP’s, do yourself a favor and speed the rebound up one to two clicks on the fork. On tighter trails, I really appreciated the new chassis as it feels lighter (than previous year FX’s) when trying to maneuver the blue machine in switchbacks or tighter rocky areas.     

The 2020 has an all new engine mated with a 6-speed transmission and a large diameter off-road specific clutch. The previous FX had unreal torque for a 250F, but the power seemed short up on top end. Yamaha did their best to retain the great bottom end while adding power on top and the compromise they came to is a good mix. While some of the torque just off idle is gone (low end grunt), the new engine now pulls further into the RPM range, especially second and third gears and gives the engine a more free revving playful characteristic. I have used a few different maps and came to the conclusion that the maps provided by Yamaha as well as the moto maps we have for the YZ 250F are the best (https://www.keeferinctesting.com/motocross-testing/2019/9/3/2020-yamaha-yz250f-baseline-start-upbaseline-settingstips). I keep coming back to the Keefer free feeling map as I think the power works well in a moto or off-road setting. I usually keep this map as well as the torque map in the bike so they can be toggled back and forth during the ride if necessary. When I trail ride I always bring my phone, so having the ability to swap maps on the trail is very convenient. The overall power on the 2020 FX is impressive as a lot of the trails I ride have long soft sand hills and I never felt like I needed 450 power. I even let my KTM loyal 200 pound buddy ride it and he came back with a huge smile on his face. He told me that he has all new respect for a 250F and couldn’t believe how torquey the blue beast actually was. That being said, it is just a touch off of the moto version in terms of making peak horsepower.

IMG_1970.JPG

Not that I was surprised, but the YZ 250FX has yet again advanced and still keeps itself in the #1 spot of my “if I were spending my own hard earned cash I’d buy this bike” list. I can’t tell you how many times I get asked by older riders “what 450 should I buy” and depending on their goals, I often try to steer them in the direction of a 250F in general. For some reason there is so much machismo in our sport that grown men think they need to ride 450cc dirt bikes. If you need to measure your masculinity, go measure it in the confines of your own home, not when you’re trying to purchase a dirt bike. Unfortunately those bigger bikes are ready and willing to hurt their owner when those owners don’t respect all that power. Most people don’t have the skill needed to harness the power of a 450 and they might think that 250F’s are for kids or women. I urge EVERYONE reading this to give 250F’s a chance or a test ride (especially the Yamaha) and I almost guarantee you’ll be impressed and have a blast! After all isn’t it more fun to ride a slower bike at a faster more controlled pace than to ride a faster bike at a slower sketchy one? Feel free to reach out to me with any questions at Michael@keeferinctesting.com. Now excuse me while I head to the garage to check the dipstick on my “soul mate”.

Baseline Suspension MX/Off-Road Setting: 

Fork:

Height: 3mm

Compression: 6 out

Rebound: 12 out

Shock: 

Sag: 105mm

L/S Comp: 9 out

H/S Comp: 1 Turn Out

Rebound: 10 out


2021 Yamaha Tenere 700

By: Michael Allen

I think it’s safe to say that the majority of people who follow and read Keefer Inc.’s content are moto or off-road enthusiasts and I put myself in that category as well. That being said, after riding the 2021 Tenere 700 my eyes have been opened to an all new type of riding that gave me the same exciting feeling as doing motos or riding gnarly trails. When Kris asked me if I wanted to take part in the Tenere 700 intro I said “sure, what is it?” then after looking it up it I started to get curious about what this intro would entail and how “off-road” this bike could really be. I ordered up some Fly off-road/adventure gear and next thing I knew I was on my way to Glen Helen, which is where our all day ride would start from. 

1-13.jpg

The name Tenere is a reference to a desert in northern Africa that has seen many rugged off-road races in the past. This same area is where Yamaha has won large off-road races including the Dakar Rally many times throughout the 1990’s. After Yamaha introduced the Tenere 1200 a few years ago they wanted to focus on a more dirt specific version that could really hold its own against the more hardcore off-road adventure bike market. They started with their CP2 inline twin engine because of its compact design, smooth power delivery, and large amounts of torque. The engine is mated to a six-speed transmission and the power is fed though a chain to the 18” spoked rear wheel. The fact that the wheels are 18” and 21” as well as being spoked and having tubes really shows that Yamaha is going after the off-road marked. The low style front fender can even be slightly adjusted up for a bigger tire or to add more clearance if the muddy terrain is packing up. The frame is made of steel and uses a perimeter design with removable down tubes to help with maintenance. The head tube is double braced and the swing arm is made out of aluminum. Yamaha did their best in trying to keep the feel of the bike slim to help with a nimble character. The Tenere holds 4.1 gallons of fuel and has a claimed range of over 200 miles per tank. The 43mm KYB forks have 210mm of travel, are open bath and are also adjustable for both compression and rebound. The rear suspension uses a KYB piggyback shock, linkage, is adjustable for both compression and rebound and has an easy to use preload adjuster for quick adjustments when going from street to trail. Although seeming out of character, Yamaha uses Brembo brake’s both front and rear; with the rear being a single rotor and the front having dual rotors. Being that this is a street bike as well, Yamaha had to have ABS, but they give you the option to turn the whole system off when you’re in the dirt with the push of a button.

1-9.jpg

The wrap around style handguards come standard but they are fairly minimal. Keeping in line with being off-road, the Tenere comes with an aluminum skid plate standard. There is a small windscreen that provided protection from gusts while protecting the digital readout. The display is fully digital and gives you the ability to scroll through a small menu with the use of a button on the handlebars. The menu is somewhat limited, but it does give you fuel mileage (average and current), engine temperature, ambient temperature, multiple trip settings, and total mileage. Two other features that the Tenere has up front is the 12v outlet and the top bar for mounting accessories. Ready to ride the Tenere come in at 452 pounds and with the stock seat, the height is 34.6” (there are two additional seat options).  

1-11.jpg

With all of that information floating around my head I was really looking forward to what the day would consist of as we left the gates of Glen Helen to start our 100 mile, day long ride. Being that I’m an off-road guy I couldn’t bring myself to go full adventure guy and wear a helmet with a flip down shield and over the boot pants. Wearing a moto helmet on the highway has a downside, which is that the visor acts like a kite when cruising at high rates of speed. Although the Tenere has a windscreen, it wasn’t quite tall enough to keep my visor out of the wind, I needed another 4” (story of my life) and I would have been in a nice quiet wind pocket. (editors note: maybe just take the visor off the moto helmet Mike?) The engine on the 700 is unbelievably smooth all the way through the RPM range. Off the bottom the engine has linear pulling power and so much torque that it can be ridden from a dead stop in third gear without abusing the clutch. The first part of our ride took us on a frontage road that led us up the Cajon Pass just north of Glen Helen Raceway. Being that I’m not a street guy I don’t have a whole lot to compare the Tenere to in terms of performance, but with that being said I thought the suspension was very comfortable on the street without feeling like a marshmallow. On asphalt the Tenere was very stable while still feeling nimble, taking only minimal input to get the bike to lean into the twisty corners on the way to Lake Arrowhead California. Since street riding is rare for me, it was a foreign feeling to trust that my tires would stick to the road. With that in mind, I’m sure my lean angle was about as impressive as a D class rider thinking he perfected the Bubba Scrub. Throughout our 40-ish miles on the street, I never felt like the fact that the Tenere is a “dirt bike” ever held me back in terms of performance or comfortability. 

1-14.jpg

After about an hour of street riding I was itching to hit the dirt. A few windy roads later the leader turned off the highway onto a gravel road with some water breaks (yes, I tried to seat bounce them) and I couldn’t wait to see what this thing was all about. Before fully hitting the dirt we stopped to lower the tire pressure in the Pirelli Scorpion Rally tires as well as making some suspension adjustments that consisted of adding compression, adding rebound as well as adding preload to the rear shock. The forks on the Tenere are open bath style and the way it was explained to me was that in order to keep costs down, they didn’t use the latest and greatest KYB components. The forks are based off of early 2000’s forks that would have come on the YZ’s at the time. This isn’t necessarily a bad thing because the suspension front and rear work really well considering how heavy the bike is as well as the range of rider and terrain that it’s meant to handle. One downside that I did notice is that the linkage seems to hang down fairly far (I know this isn’t an extreme enduro bike) and could hang up on some obstacles. As we set out on the trail I was pretty hesitant and didn’t trust the tires when changing lines or just turning in general. After a few miles I started to get a feel for the street-ish tires and found that the only situation I couldn’t trust them in was in silt/sand. Whenever the ground was loose on top, making quick direction changes was ill advised as I didn’t quite have that confident stick-to-the-ground feel. One thing that seemed to help the front end in loose terrain was leaning back and staying on the throttle while not making sudden direction changes. As soon as the throttle is chopped or the front brake is applied, the front end dives and it’s anyone’s guess as to where the front end is going to go. 

IMG_1523.jpg

Another off-road handling trait of the Tenere 700 (and from what I hear all ADV bikes) is that it must be ridden standing up as soon as you leave the pavement unless you’re traveling down a straight dirt road. To get the Tenere to corner in off-road conditions, you need to stand up and weight the pegs in the direction you want to go. The fact that you can also turn off the ABS makes it nice because with the ABS off you can slide the rear end around to pivot the bike. As with any big bike, when the bike is heavy it’s also stable and hard to get knocked off line. There were many times that I thought the rocks that I am about to hit will knock me off my line, but to my surprise the bike kept driving forward. That being said, if you push it a little too far it can bite you quick. When you really push your luck and the Tenere gets out of line, you can really feel the weight of it when trying to straighten the bike back out. In addition to fire roads, we found ourselves on some skinnier trails with steep inclines and switchbacks, which at first had me a bit concerned. After a few miles of figuring out what gear the Tenere liked to be in (I found that third was the magic number), it seemed that I could do no wrong. If I left the bike lug a little in third and didn’t touch the clutch it was mucho traction. No matter how low the RPM got, the bike kept humming along and never shuttered or stalled.

IMG_1526.jpg

The last section of our ride was on faster two track jeep trails, where I could ride next to another rider and it was confidence inspiring. There were multiple times I looked down and found us doing over 50mph, even when riding through loose rocks. The final downhill before hitting the pavement back to Glen Helen was littered with large loose rocks, which although the Tenere handled nicely, I was still scared that I would get caught off guard and be the second bike of the ride to take a spill (the first bike to crash was from another magazine outlet that will remain nameless). There were only a couple times that the front end got bounced off line and made me really put my weight into the bike to get things straightened out. Although the suspension was made stiffer for off-road riding it still felt a bit springy and empty. What I mean my springy is that once near bottoming out, it had a somewhat fast rebound (I should have messed with the clickers) that would sometimes give me that top out feel. What I mean by empty is once the suspension was past half way into the stroke it didn’t feel as though it had much damping force against the 450 pound Tenere. Although I think the valving could be fine-tuned, I’m sure the slightly limited travel could be a factor as well. I only noticed a few things that were small nuisances when riding; one being that because I have such big feet, when I would ride on my toes I noticed that the heel of my boot would contact the passenger foot peg bracket. Another thing that I noticed was that when standing and hugging the bike with my legs, my right calf would contact the clutch arm actuator cover. This wasn’t really a problem, but something that felt unnatural when riding. In stock form there isn’t any place to store anything, although there is a small open area under the rear of the seat, but it’s not closed off and you’d be lucky to fit a crumpled up windbreaker in there. My final complaint is that in stock trim there is no center stand. If I wanted to work on my bike it looks like I will have to get scissor lift to do some maintenance. No one wants to lift a 450 pound bike on a moto stand. Although the stock seat is just fine, Yamaha brought the short seat (I didn’t try it) and the taller more moto style seat. I really liked the taller seat because it puts your body in a more familiar position if you’re a moto guy.

1-15.jpg

After spending six hours and riding over 100 miles on the 2021 Yamaha Tenere 700 I have to admit that I was impressed with what Yamaha had created. Before I rode the Tenere I would have told you that there was no way this bike would have been capable of going the places we took it. But after the test ride, I now realize how capable this category of bike is and can’t wait to get my hands on one for more testing (hell, maybe I’ll even race one to prove how good it is). Like I said I don’t have much to compare it to, but I can’t imagine a bike in this category handling ten fold better than the Tenere. The Tenere is $9,999 and considering that any other bike in this category will cost you at least $4,000 more than the Yamaha, I think they have hit a home run when balancing on/off-road performance and pricing. From what I hear, dealers are buying these as fast as they can get them and that is good not only for Yamaha, but good for our industry as a whole. The more people we get out riding the better, no matter what they’re riding. If you have any questions about the 2021 Yamaha Tenere feel free to reach out to me at Michael@keeferinctesting.com.  

Kreft Suspension For Husqvarna TE300i (XPlor fork)

Written By: Michael Allen

Let’s be honest, as riders we have all probably uttered these words to a suspension tuner, “I want it plush, but stiff”. I would imagine that every suspension guy has heard that phrase and grits his teeth every time he hears it. That is where Kreft comes in with their revolutionary design of being able to “revalve” the fork with just the turn of a dial instead of taking the fork apart and actually putting different shims in the fork itself. Admittedly when it comes to the internals of how a fork works I am no specialist, but when Matt from Kreft broke it down and explained it to me in dumb dirt bike rider terms, it was very interesting and made a lot of sense. 

IMG_9976.jpg

I have worked with many suspension companies over the years and for the most part they work the same in terms of pick up and drop off. This is the first thing that stood out to me when I started working with Kreft: The first step of the process is an initial phone consultation where you actually build somewhat of a relationship with the representative. You go over the basics, like what bike you’re riding and your measurements, but you also get into what you want to feel out on the trail. Along with that you get a crash course on what makes Kreft different and how their system works. From there they send you an empty box with prefect (I really mean perfect) cutouts for your specific fork and shock. They are so detail oriented they even send you bleeder screws, so just in case you have button bleeders they can be replaced so that your forks don’t leak and ruin the box in transit. The professionalism is second to none while still being personable as well as very helpful and explanatory. 

IMG_0450-2.jpg

Aside from the obvious spring rate change and re-valve, the fork gets Kreft’s “Re-valve Control”. The way it was explained to me was that on a standard fork the shim stack nut is tightened down on the top of the shims and in that case, the valving is whatever the tuner’s spec is. The valving itself cannot be changed without fully dissembling the fork and changing the actual shims. The only adjustability on a standard fork is compression and rebound clickers. What Kreft does is use a spring that can have more or less pressure put on it with the adjustment of the re-valve Control knob on top of the left fork. What that spring pressure does is put more or less pressure on the shim stack itself. This gives the rider the ability to make “valving changes” on the fly to adapt to a wide range of terrain and disciplines of off-road riding. With the Kreft fork you now have the standard compression and rebound clickers as well as the re-valve control. In doing all these changes Kreft has also changed the damping forces in the left and right fork tubes. The XPlor fork has unbalanced forces in stock form, making the left tube do the majority of the work. What this does is give the left fork more of a chance of having oil cavitation, resulting in poor damping performance. The final thing that was done to the forks was the Microfinish which is said to work better than DLC coating (and is far cheaper) to reduce friction creating less drag and seal stiction than the stock finish.

IMG_0454.jpg

To compliment the fork changes, Kreft internally changes the shock components to get the greatest potential and best balance of the low and high speed tuning circuits. If the circuits aren’t balanced and one is doing far more than the other there is a greater chance for cavitation which results in poor performance. Once the circuits are balanced and cavitation is no longer occurring, the changes that are made to the clickers have a much larger adjustment range and are far more effective. Along with the spring change on the shock, Kreft also installed the X-Trig preload adjuster which I had never used, but holy shit that thing is awesome!

IMG_0457.jpg

Now that I have explained all the technical info (to the best of my dumb dirt bike test rider ability) let’s get down to how it all works out in the real world. As I said in my initial test of the TE 300i, any type of riding other than very tech slow trails meant that the TE was going to feel out of place. The fork was extremely divvy when on the brakes or even just when transitioning off throttle. This unbalanced pitching feeling caused the bike to be unpredictable when cornering. In addition to that, anything that resembled a g-out made the bike bottom and rebound too quickly, which doesn’t necessarily give the rider very much confidence, especially in a racing situation. The one race that I did in stock form made it clear that I was having to check up for obstacles that normally wouldn’t phase me, so I knew something had to be done. 

After getting the stuff back from Kreft I bolted it on and read through their extensive welcome packet, which was super informative. I set my sag (which they had very close already) and headed out to my favorite trails, which have a plethora of different types of terrain. The first thing I noticed was that the unbalanced feel was no longer an issue. Now when I enter coroners the bike stays further up in the stroke and is much more predictable. My biggest concern was that after telling Kreft that I mostly ride faster paced desert terrain, I was worried that they would make it too stiff and I would no longer have the compliance in the tight technical terrain. Like I said in the beginning of this story, I basically told them that I want it firm, but soft and to my surprise, Kreft gave me my cake and let me eat it too. After becoming more confident and being able to pick up the pace, I found myself going into g-outs as well as slamming into bigger whoops with more speed. Initially the fork had a slight quick feel that would cause the front tire to lose traction, but after slowing down the rebound three clicks, the bike stayed planted much better following hard landings.

The only other issue I had with the front end was that I felt I still needed more bottoming resistance. I tried going in on the re-valve control, but that wasn’t necessarily the feeling I was looking for. While going in on the re-valve control helped my issue, it took away a little of the initial plushness that I liked. After talking with Kreft, they recommended I simply get a syringe and add 15ml of oil to both forks. After doing this I was able to keep the initial settings on the re-valve control while still getting the bottom resistance I was looking for. When it came to the shock, Kreft was really close on the setting I loved out of the box. I had a slight kick in the rear on de-cel bumps, but it was only off-throttle. To combat this Kreft recommended that I open up the high speed compression all the out. After doing this the kick was eliminated, but I felt the bike was bottoming too frequently, so I followed their recommendation and worked the high speed adjuster in by ¼ turn at a time until I found the balance that I desired. One misconception that I think a lot riders have (I used to as well) is that if your bike is bottoming it’s too soft. It’s perfectly ok for your bike to bottom if the bump or landing warrants it. Bottoming out from time to time means you are using all of your suspension travel. This is what you want! Use all the travel, but still have a comfort/performance blend for your type of riding.  

IMG_0452.jpg

Kreft prides themselves on having great customer service, provide a high end product and also a product that has a very wide range of adjustability. When they told me that I could ride technical single track with the same bike that I rode at the moto track, I was skeptical. My last test before writing this article was doing just that, I went to the moto track. Before riding I looked at their recommended setting for moto, adjusted it and started moto’ing. Now was it just as good as a moto setting would be if the suspension was built for moto? Not entirely, but the adjustments for moto made the bike comfortable enough on the track that I was jumping every obstacle without blowing through the travel as well as cornering with confidence. I didn’t feel like the suspension was holding me back by any means and I wasn’t out of my element on this bike. The mere fact that one bike can be capable of such different disciplines with small adjustments is super impressive. I think that Kreft is really on to something and will only be getting more recognition as time goes on. 

IMG_1417.jpg

The price breakdown is as follows: Xplor Re-valve Control and Re-valved shock is $1,200 (including seals and fluid), the addition of springs (if needed), Microfinish and X-Trig spring adjuster brings the total to $1,800. Like I said before, Kreft prides themselves on being very high end and in my opinion you get what you pay for. Every part of dealing with Kreft was top notch, from their box, customer service, quality of parts, and performance of the suspension was very impressive. If you are in the market to fix your 4CS, AER, or Xplor suspension, I would highly recommend giving Kreft a call. If you have any questions about the performance of the Kreft setup on the TE 300i feel free to reach out to me at Michael@keeferinctesting.com. That being said, if you have any technical questions about the parts itself reach out to them because I’m just a test dummy and won’t be able to answer your questions. Kreft’s contact is 541-797-0700 or email them at Info@Kreftmoto.com

2020 KTM 390 Adventure First Impression 

I am not going to sit here and tell you that I am even close to an “adventure rider”, but I do love getting out and exploring through the deserts and mountains near my home on dual purpose built machines. I also like to grab the wife, stick her on the back at times, so she can enjoy what mother nature has to offer us two wheeled enthusiasts. I am the type of rider that likes to go fast on the track, but when it comes to riding on the road, I don’t need gobs of horsepower or go balls out to make me happy. I just want to be outside with the wind blowing against my body and enjoy the time being on two wheels. When I heard that KTM was going to be coming out with a 390 Adventure bike this immediately got my mind working and thinking of routes that I could venture off to. I have tried 990 ’s as well as 1190’s and they were simply too big for my liking. Again, I am not your hardcore adventure guy so to me I simply don’t need that much motorcycle, but I understand the reasons that others do. I had a chance to go for several “adventure” rides and wanted to give you some feedback on KTM’s 390 Adventure from a beginner’s perspective. 

322630_390 ADVENTURE 2020.jpg

On Road:

 The compact single-cylinder travel-enduro machine has a sporty design attitude, with the comprehensive equipment and performance credentials of the KTM ADVENTURE range. A state-of-the-art, liquid cooled, single-cylinder, four-stroke 373.2 cc engine powers this machine into KTM’s world of ADVENTURE. The engine is equipped with an electric starter and achieves impressive peak power for a small bike with a punchy torque that is surprising. Twin overhead camshafts, four valves and electronic fuel injection are integral to the KTM 390 ADVENTURE’s power and together with a balancer shaft, deliver levels of smoothness that makes it easy to ride on the street or even taking the short way home. 

I took off on a strict road ride regimen for the inaugural ride and found out just how torquey this little engine can be. First gear is surprisingly long yet second gear stop and gos proved to be too tall for the 390. Unless I am rolling a stop sign, second gear is too tall for me not to fan the hell out of the slipper clutch. Once I got used to using first gear more, once stopped, I really had no issues with the transmission spacing. I managed to get up to 92mph without any trouble and the lightweight/free feeling engine makes for a responsive ride around the city streets. With that free feeling comes a lightweight feeling that I didn’t expect from a bike that weighs in at nearly 350 pounds dry, but it does leave you with an impression of a heavier motocross machine when leaning the 390 through corners.

The ergonomics of the 390 is comfortable and leaves me with a moto inspired feel, but I will have to get used to the front fender not moving with the handlebars when I turn. The seat is plush and wide enough for my behind as well as my wife when she tags along. The Bybre brakes provided enough controlled stopping power to please my erratic motocross throttle hand. I really liked the ABS system on the road as it made the KTM 390 feel more planted than say a Super Duke can.

IMG_8068.jpg

Off Road: 

Now to what you guys came here for. How does it tackle some off-road conditions? To my surprise, just like on the street, the 390 Adventure feels easily maneuverable and lightweight when get to a tighter section of any trail. When I say “trail” I mean semi-technical and nothing too crazy as I quickly found out. If you decide to take a hard route the KTM 390 can be a handful to maneuver. On an average trail, the 390 Adventure does feel capable and fast, its WP suspension really working hard to keep you in charge, but aside from the default advantages of having more power, there’s no special trick up its sleeve. You’re not going to be bombing up your local “black diamond” trail and expect to have a good time, but you will be able to take that rough Jeep trail home or maybe the occasional sand wash. Sure, you have Traction Control, but much like it is on the SX models, it’s more of a bar talk feature rather than a genuine rider assist. The TC is quite erratic, re-engaging when it feels like it over loose and rocky surfaces, turning the KTM 390 into a bike that is hard to predict in slippery situations. If you’re a rider that rides off-road on more than a few occasions you will want to turn the TC off and get back to that throttle to rear tire consistent feel, but if you’re new to the off-road side of motorcycles TC could help in some situations.  

When you stand up on the pegs, most of you over 5’11 reading this will find the handlebar set too low to be able to grip the tank with your knees like a moto bike, so even on areas of the trail where the 390 Adventure could shine, you’ll suffer from a loss of some leg grip. I also can’t fathom why the serrated footpegs are set at a forward bank when no other adventure motorcycle really has them placed that way. It also takes a few seconds to turn the TC off and set the ABS to ‘off-road’ mode, which is fine since you aren’t going to go all Ricky Brabec and run off to the Dakar rally, but with KTM, I expected something a little more rider friendly. 

When riding off road conditions third and fourth gears became my weapons of choice because of how well the 390 can hook up (even without knobbies). I do wish the 390 had better ground clearance to clear big-ish rocks, but the suspension soaks up small to medium sized rocks with ease. You find the KTM a little soft if you’re headed into some rollers or whoops, but for only having just over 6 inches of travel, I thought it was consistent and plush enough for how I wanted to ride. 

Extras:

The 3.8 gallon fuel tank allowed me to go almost 230 miles on a tank of fuel and when it says that it’s empty you still can get another 20 miles or so out of it. I purposely checked this and had my wife on speed dial in case I got stranded, which I didn’t. I also like how quiet the KTM 390 Adventure’s muffler note is as it allows me to not have to wear ear plugs on longer rides. The dashboard is super friendly to interact with (except the TC and ABS data fields) and it didn't take long to figure out the lay of the land. The interface gives me enough information and I like that I could hook my phone up to it in order to see which calls I could decline or which ones I had to take.

IMG_8137.JPG

Overall Opinion:

For a guy that doesn't have a lot of Adventure bikes to compare to, I thought the KTM 390 Adventure was more than enough machine for what I wanted. At a price of $6,200 it’s much easier to think about owning an adventure bike now than it was a couple years ago. With the price of adventure riding so expensive it was tough for me to justify thinking about owning a bike like this, but now I have one of these KTM 390 Adventure bikes on my office pin board wish list now. My next adventure with the 390 is to load it up with some bags and head up to the mountains for a camping trip with the fellas this spring/summer. 

2020 KTM 390 ADVENTURE HIGHLIGHTS

  • Extremely powerful single cylinder, 4-stroke, 373.2 cc DOHC engine, electronic fuel injection, 3-way catalytic converter and balancer shaft, PASC slipper clutch and a Ride-by-Wire throttle for a smoother and more refined response. 

  • State-of-the-art engine management system featuring the most modern electronic fuel injection system with a 46 mm throttle body.

  • Lightweight, precision-crafted exhaust system, comprising of a stainless steel header pipe and pre-muffler, which flow perfectly into a slim silencer.

  • Ultralight trellis frame strikes a forgiving balance of flex and stiffness and is designed for straight-line stability and agile and precise steering.

  • Bolt-on trellis subframe is compact and lightweight, but strong enough to carry a passenger and luggage, while negotiating extreme terrain. 

  • Die-cast, open-lattice swingarm is a signature element of the KTM ADVENTURE range. It is precisely manufactured with an optimized stiffness, while still offering excellent flex characteristics. Its long design offers stability and the space needed for offroad tread. 

  • WP APEX 43 mm upside-down fork was originally developed for enduro riding and is the absolute leader when it comes to suspension in this class. It features a spring on both sides, but each fork leg has a separate function: compression damping is fitted on the left side, while rebound is on the right. 

  • Cutting-edge WP APEX shock absorber provides 177 mm of travel and is ideal for traveling long distances in tough conditions. Thanks to an adjustable spring preload and rebound damping, it can be fine-tuned to different situations.

  • Extra robust cast wheels specifically designed for demanding terrain—19” front wheel and 17” rear wheel, both fitted with tubeless CONTINENTAL TKC 70 tires for a blend of street performance and offroad grip. 

  • High-quality BYBRE brakes featuring a large 320 mm front brake disc and a 230 mm rear disc work perfectly with a 4-piston radially mounted front caliper and a 2-piston floating rear caliper to provide the ideal mix of control and stopping power.

  • Ergonomically designed fuel tank with impressive 14.5 liter (3.8 gallons) fuel capacity, together with its exceptional fuel economy, is set for more than 400 km (249 miles) of non-stop exploring on a full tank.

  • High-end, tapered aluminum handlebar that importantly, provides a comfortable riding position and maximum control.

  • Windshield profile that allows the rider to move around the bike freely and offers an unobstructed view directly in front of the bike, even when covered in dirt. It can also be mounted in a lower or higher position to suit the riders sizes or needs.

  • State-of-the-art LED lights are used as the main headlight and taillight and offer great illumination and visibility while being compact and light. 

  • Multifunctional dashboard with full-color 5” TFT display is bright and clear and offers a configurable set up via the menu switch on the handlebar.

  • Offroad ABS function improves braking control in offroad situations. In this mode, ABS is deactivated on the rear wheel, while ABS activation on the front wheel is reduced.

  • Motorcycle Traction Control (MTC) reduces the engine output with an extremely smooth, barely perceptible intervention if the rotational speed of the rear wheel is disproportionate to the speed of the engine, until the system has reduced slippage to manageable proportions for the current angle of lean.

  • Cornering ABS system allows riders to always use the full power of their brakes, while the system adjusts brake pressure to match the lean angle of the motorcycle for more predictable braking across a range of situations. 

  • KTM MY RIDE comes as standard and allows for Bluetooth connection to control incoming calls and audio player through the full color TFT display.

  • The KTM 390 ADVENTURE can optionally be equipped with a race-derived Quickshifter +. Up and down-shifts can be performed without the need to pull the clutch lever. 

SPECIFICATIONS

Engine Type: Single Cylinder, 4-Stroke, DOHC

Displacement: 373.2 cc

Bore/Stroke: 89/60 mm

Starter: Electric; 12V 8Ah

Transmission: 6 Gears

Fuel System: Bosch EFI, 46 mm Throttle Body

Lubrication: Wet Sump

Cooling: Liquid Cooling

Clutch: PASC Slipper Clutch, Mechanically Operated

Ignition: Bosch EMS with Ride-By-Wire

Frame: Steel Trellis

Subframe: Steel Trellis

Handlebar:  Aluminum, Tapered, Ø 26/22 mm

Front Suspension: WP APEX USD Ø 43 mm

Rear Suspension: WP APEX Monoshock 

Suspension Travel Front/Rear: 170 mm/ 6.7 in; 177 mm/ 6.9 in

Front/Rear Brakes: Disc Brake 320 mm/230 mm

Front/Rear Wheels: 2.50 x 19”, 3.50 x 17”  

Front/Rear Tires: 100/90-19”; 130/80-17” 

Steering Head Angle: 26.5º

Wheelbase: 1,430 mm ± 15.5 mm / 56.3 ± 0.6 in

Ground Clearance: 200 mm / 7.8 in

Seat Height: 855 mm / 33.6 in

Tank Capacity: 14.5 L / 3.8 gal

Dry Weight, Approx: 158 kg/ 348.3 lbs. 


Testing Terms Explained (Suspension/Chassis)

Since we are in some weird times right now with this quarantine stuff, I thought it could be cool to learn a little about what each testing term means. What better way to get more in tune with your motorcycle than learning what the definition is to each term. If you listen to the Keefer Tested Podcast or read anything here on keeferinctesting.com you will hear/see these testing terms being used. Some of you have emailed me and asked what the hell some of these terms mean, so below is your template on what each means. Hopefully you can use these to your advantage next time you are talking about your machine or need to get a certain point across to your suspension/chassis tuner.  

IMG_1041.JPG

Pitching: This word is used when the rider lets off the throttle and the weight of the motorcycle forces the front end down. This usually happens when there is a lot of engine braking or the fork is too soft. The 2018 YZ450F was notorious for having a lot of this pitching when coming into a corner. Pitching can upset the chassis balance and can cause some oversteer through area 1 and 2 of corners. Pitching can also mean that a certain bike can squat (shock) too much under throttle out of corners causing the bike to have too much movement fore and aft. Pitching can make the machine seem unstable and cause the rider to not set up properly for corners. 

Hold Up: Hold up is mostly used when the fork or shock is riding too low in the stroke. When a rider is asking for more hold up he is usually wanting a stiffer compression setting so the fork or shock isn't “blowing through”. 

IMG_2776.JPG

Harsh: This term has got to be the worst feeling to a rider. A harsh feeling is when the suspension is either too soft or too stiff. Yes, it can actually be both! If the suspension is too stiff the rider will complain about a harsh or firm feel through the handlebars. This stiff/harsh feel is caused by the suspension not being able to use all of its stroke. If the harsh feel is coming from the stiff side, opening the compression or the rebound can help alleviate some of this feeling. If the harsh feeling is coming from a soft sensation it’s because the suspension is riding too low in the stroke. Riding too low in the stroke can cause a harsh feeling because you are now in the mid stroke where the valving starts to ramp up to get stiffer. By stiffening the suspension a little you are now stiffening the initial part of the stroke which can actually make your bike feel plusher because your machine is riding higher up in the stroke around the track. “Harsh” is a tricky term because the cause of the harsh feeling can be from a too soft or too stiff of a setting.

Plush: I have never been a huge fan of this term, but the word plush means soft or supple feeling. If I hit something at speed most riders want their bike to feel plush and not harsh. However be careful when using this term to suspension techs as they may want to set your suspension up too soft. Plush can also mean the same with frame feel. For example, the KX450 has a plusher feeling to its frame than the of the Honda CRF450R. I like to use the term “bump absorption” more than the word plush. When the Kawasaki KX450 hits a certain square edge at speed, it has a better bump absorption feel than the Honda CRF450R. Off-road riders look for that plush feeling because they have less jumps to deal with and can hit roots/bumps at higher speeds. A softer compression setting or a faster rebound setting usually leads to a plusher feel.

Crust: We can thank air forks for this term. I came up with this term when I was at home during thanksgiving and I was watching my wife make a french apple pie. I always liked the middle of the pie more than the crust, so it immediately made me think of air forks. In order to get to the gooey goodness of the pie, I have to break through the crust right? Well air forks are the same thing! The top of the stroke of almost any air fork is called the crust because it’s usually has a hard/harsh feel initially and then you have some comfort. The crust usually gives you some deflection and a harsh feeling through the handlebars on small chop. We use the word crust because air forks usually feel like you have to break through the stiff portion of the travel in order to get to the softer/more forgiving portion of the stroke. WP has improved the air fork feel over the years so let's hope they continue down the path of a less crusty initial stroke on their air forks.  

IMG_5714.JPG

Empty: This term can be used when talking about engine character or suspension feel. When talking suspension empty usually means there is not a lot of damping feel. If you say “I feel like my end stroke is empty”, it means that it blows through or simply doesn't have any damping feel. 

Rigidity Balance: Rigidity balance is an important term when testing any chassis. If the bike has a firm feel and its rigidity balance is too firm it could mean that it corners excellent, but feels very harsh and has deflection on rough/fast straights. If the rigidity balance is too soft the bike can have a wallow feeling when under throttle as well as give the rider less confidence on braking bumps because of its unpredictable feel. Rigidity balance is something that every manufacturer works a lot on when developing their machine. A bike has to corner with precision, but also have enough comfort in order to have good bump absorption. A machine that has great rigidity balance is a Kawasaki KX450 because it turns well and can hit bumps at speed with a consistent feel.   

Performance: Performance is a word we used in the testing world when a rider is looking to ride at a higher level as well as be able to push the motorcycle without having it be too soft. Getting a chassis or suspension package to have better performance is basically asking the tuner that you understand that you’ll sacrifice some comfort, in order to get a machine that you can slam into obstacles harder without getting blow through. Usually riders that are faster or heavier want a performance based setting so they can hit jumps as well as bumps at a faster rate. 

Comfort: A comfort setting is something most vet riders want so they don’t feel every little bump on the track. A comfort setting usually involves a softer setting that moves more in the stroke, but also can bottom out when hitting bigger jumps or larger bumps at speed. The 2020 YZ450F’s suspension package is a great example of blending both performance and comfort together. 

Blow Through: This usually happens when hitting bumps/jumps hard and the suspension just dives without much damping force feel. If your suspension feels like it’s blowing through then you need to try and get a stiffer setting through clickers or internally with valving.  

IMG_9298.jpg

Vague: Vague is usually a term used by describing front wheel traction. Front wheel lean angle traction can feel vague when the fork setting is too stiff, have the wrong offset triple clamps, or if you have the wrong compound front tire. A vague feel means that you will be washing your front tire out under lean angle and the bike may have less of a contact patch. Running too much air in your tire can also give you a vague feel.

Damping Feel: Damping feel or force is the feeling of the suspension when moving down. Damping feel is used when explaining to tuners that you either have a soft feeling and need more of a stiffer setting. Damping feel can also be helpful/used when asked if the action of the suspension is too fast or too slow. 

Deflection: Deflection happens when either a suspension setting is too stiff or a chassis setting is too rigid. Deflection happens when your front or rear end hits a bump/square edge and your bike simply doesn't absorb it. It’s like a pinball bouncing around from some side to side and can cause you to roll the throttle off in a hurry. Deflection also causes you to have less contact patch and makes the bike feel less planted. Going to a softer setting with the suspension or chassis usually alleviates some of this feeling. 

IMG_5227.jpeg

Contact Patch: Contact patch is a feeling of how much tire is felt underneath you. Contact patch can be increased by running less air pressure in your tires, running a softer suspension setting, chassis setting and/or increasing/decreasing offset. I like using this term a lot with my evaluations because without the feeling of a wide contact patch it will feel like you are running bicycle tires on your dirt bike. Having a wide contact patch feel gives you more confidence to roll the throttle on sooner when exiting corners. 

2020 Husqvarna TE 300i First Impression

By: Michael Allen

In a world where most people think that two strokes are dead and four strokes rule, there is one company (or two depending on how you look at them) that has continued to progress two stroke technology. Husqvarna is one of three (KTM, Husky, and TM) motorcycle manufacturers who have released fuel injected two strokes in the last four years. Husqvarna released theirs in 2017 and after riding it I was pretty impressed. Now that they have been around for a few years I was excited to see how polished the latest model was compared to the first-year bike. The 2020 TE 300i is Husqvarna’s model that is aimed at the trail rider and not necessarily the racer. Although the TX (the race version) and the TE share the same engine and chassis they have two distinct differences from one another. The main things that makes the TE more of a trail bike is the WP XPLOR fork which is an open bath spring fork. The other main difference is that the TE comes with a headlight and a tail light in case you get caught out on the trail after dark. In all honesty, when I went down to Husqvarna to pick the bike up I wasn’t a fan of the bike aesthetically. I thought the grey plastic accents didn’t look right and I didn’t like the shape of the body work. That being said, over the past few weeks the bike has started to grow on me. I can’t explain why, but for some reason I have totally changed my opinion and now I think it looks good.

IMG_9634.jpeg

 The 300i has an MSRP of $10,099 and comes with quality handguards that are very sturdy, as well as a skid plate with decent coverage that is easily removable with two bolts. For 2020 the exhaust system on the 300i has some big changes. The head pipe is narrower and gives the bike slightly more ground clearance than the previous model. In addition to more clearance, the new pipe also has a 3D design with corrugation in the metal, which makes the pipe stronger and less susceptible to damage from trail debris. The silencer has a new aluminum mounting bracket and less dense packing for better noise damping. The engine on the 300i is electric start only and comes standard with a li-ion battery which is 1kg lighter than a conventional battery. With keeping mass centralization in mind, the starter is mounted underneath the engine keeping the weight down low. The wiring harness is all new and looks cleaner as well and concentrates all of the electrical components to a central area for ease of service. The EMS (engine management system) controls the fuel mixture as well as the mapping, which is new for 2020 as well as having a new ambient air pressure sensor to make the bike respond better to differing altitudes.

Unlike traditional carbureted two-strokes of the past, the 300i uses a throttle body that is controlled with two cables that open a butterfly valve that lets more air into the intake and mixes with the oil, which lubricates the crankshaft, cylinder and piston. On the right side of the Pro Taper handlebar, the 300i has a map selector switch which gives the rider the option of a softer or more aggressive power characteristic.  The frame on the TE is new with hydro formed tubes, new geometry, and added longitudinal and torsional rigidity. The TE 300i engine is mounted 1 degree lower at the swing arm improve front wheel traction and feeling. The frame is finished in a dark blue powder coat and comes with frame protectors. The new sub frame although still made of a carbon composite has been made slightly lighter and is 50mm longer to help with the handling of the bike. Like I said before one of the main differences between the TX and the TE is the fork. Being that the TE is meant for slower speed and extreme type terrain, Husqvarna decided to go away from the air fork for this model and use the WP XPLOR fork. The XPLOR fork is 48mm and splits the rebound and compression between the right and left fork tubes. The left fork tube controls the compression (30 clicks) while the rebound control (30 clicks) is handled by the right tube. In addition to the adjustability of the damping, the XPLOR fork also gives the rider the ability to adjust the fork spring preload (3 clicks) with an adjuster on the top of each fork tube. The rear suspension on the 300i has a new piston and updated settings as well as motocross inspired linkage which sets the rear of the bike lower, improving traction in extreme conditions. The radiators on the 300i are also new; mounted 12mm lower (centralizing the mass) and are integrated into the frame which helps with the bikes ability to cool more efficiently. The 300i doesn’t come with a radiator fan (it’s available through the accessories catalog) I feel like it should since it’s designed to be ridden in the most extreme environments. Unlike the KTM which comes with Brembo brakes and clutch system, the Husky comes with Magura components that are mated to the 260mm front and 220mm rear rotor. The Husky also relies on Pro Taper to handle the bars and ODI for their lock on grips.

IMG_4185.JPG

Now that you know all the new and technical data, let’s get into how the TE300i feels out on the trail. Starting with the engine: the E-start 300i always starts quickly and comes to a perfect idle no matter the elevation or temperature. The 300cc engine has a counter balancer which has made vibration a thing of the past. One of the things I used to hate about 300cc two-strokes was the annoying vibration you got after a long ride that would leave you with tingly hands. This engine honestly vibrates less than my YZ 125 which is super impressive. The power on the 300i is all about the bottom end pulling power. This bike LOVES to be short shifted and in fact has made me completely change the way I ride. This two-stroke really benefits from being ridden like a four-stroke so I had to get my mind wrapped around being a lugger again (you guys should know what a lugger is). The power tractors through the bottom into a very meaty mid-range, but then quickly tapers off as the revs increase. Once through the middle of the rpm range there is no point in trying to scream the bike unless you’re hill climbing and need the wheel spin. That being said, if you ride the bike a gear high, you’re rewarded with gobs of torque and an engine that is damn near impossible to stall. The other good thing about the pulling power is it doesn’t have a light switch character that is commonly felt with to two-strokes. The “power character” is so broad on the 300i throughout the rpm range, it never seems to fall off from making power when the engine is under a load.  

IMG_4300.JPG

Being that the TE 300i is designed to be a trail bike and isn’t necessarily directed toward the racer (they sell the TX 300i for cross country racing) the suspension is understandably on the soft side. Unlike the TX, the TE doesn’t come with an air fork and instead comes with the WP XPLOR fork (open bath), which is a spring fork that splits the compression and rebound to each fork tube. Even though the TE is meant to be a trail bike, in my opinion it’s still sprung slightly too soft. The Xplor fork has a 3-way pre-load adjuster, and even with the preload on the stiffest setting, the fork was still too soft for my 6’ 185lb frame. In tight technical terrain the soft/springy feeling was welcomed, but when speeds pick up and I started driving into braking bumps, the fork doesn’t stay up in the stroke nearly enough and dives excessively under braking giving the bike a nervous feeling. The rear suspension isn't as soft as the front, but still is not stiff enough when it comes to riding the bike at race pace. At 232 pounds the soft suspension gives the bike a heavier feeling when trying to ride aggressively on tighter trails. I think the Xplor fork has real potential and I’m excited to see how well the bike will work with stiffer springs. 

IMG_4202.JPG

I think it’s awesome that the TE comes with a headlight and on top of that the computer is a bonus, along with the ability to adjust the mileage for enduro events. I prefer the Magura brakes and clutch to the Brembo components that come on the KTM because I feel like they are slightly less “grabby” feeling. Although when riding the 300i it sounds corked up and quiet, when listening to the bike hill climb or be ridden aggressively with another person on it, there is a crisp barky note from the silencer. The seat cushion is decent, but the cover is a little slippery. If I didn’t do a good job holding myself forward, I found myself sliding back under acceleration or up steep bumpy inclines. Overall I think Husqvarna did a great job making an easy to ride trail bike with the 2020 TE 300i. Although the suspension is soft for my riding style, the stock settings are a good starting point and give the rider some adjustment to play with via clickers/pre-load adjustment. I look forward to racing the TE 300i, and will be keeping everyone up to date with the modifications that are made and how they translate out on the trail. If you have any questions about the TE 300i feel free to send me an email at Michael@keeferinctesting.com and I will try to help.  


2006 YZ125 Craigslist Project

By: Michael Allen

Although I have access to bikes for testing throughout the year, there are times when it’s necessary (and nice) to have your own bike. In this particular case I was invited to Mexico with the Smith family (as in Malcolm Smith) to race the Tecate Enduro which meant I needed a legit bike. What I mean by “legit” is that most of the time test bikes don’t come with any paper work, like registration and even if they did, they would have the manufacturer listed as the owner. Needless to say that doesn’t necessarily fly with the border agents on either side of the wall.. If you listened to our podcast on this bike build you already know the history of my $1,800 craigslist find, but if you didn’t, here it goes… 

IMG_8026-3.jpg

In 2017 I bought this bike with only nine days before leaving for Mexico. It was rough around the edges, but ran well, so I just put some bars and levers on it before going down to race. Fast forward two years and I was still riding the bike and having a blast on it. I had updated the plastics with a Polisport kit, but other than that it was still as it was when it was purchased. In the winter of 2019, we got a lot of rain in Southern California and like everyone else, I was out enjoying the perfect dirt as much as possible. Admittedly I was a bit neglectful in terms of maintenance and wasn’t regularly checking my air filter (I figured there was no dust so how bad could it get). In the middle of a long sandy hill climb my bike went from screaming loudly to dying quietly in an instant. After getting home and taking the seat off, I realized that the air filter cage had fallen off the air boot creating a welcoming environment to all types of debris that was floating around inside the air box. I talked to Kris and he said “we should call Pivot Works so that we could test out one of their engine rebuild kits” and do a story on the process and products. 

IMG_8078.jpg

Wrench Rabbit is a branch of Pivot Works and they sell complete engine rebuild kits for most off-road motorcycles. At first I was a little weary of buying aftermarket parts for my personal bike because I have always been one to buy OEM parts for any bike I had owned in the past. That being said, after opening the box with all the gaskets, seals, crank, piston, and every other part necessary for the rebuild, I was pleasantly surprised at the quality of the parts. Prior to this rebuild I had never split cases and done a bottom end before so I enlisted the help of my older brother Robert to show me the ropes. I drove up to my parent’s house and he showed me step by step how to do the engine and it was surprisingly not too hard. All the parts fit perfectly and there were even parts that I didn’t use because I didn’t replace every seal in the bike (like the water pump). After the engine was rebuilt and back in the frame I decided to go for a trail ride with my buddy to break in the engine before heading down to Mexico. Our ride started out great with my bike running better than it ever had (I also re-jetted it). Everything was great until I washed out the front tire then was pile driven into the dirt by my freshly rebuilt 125. After the crash I was pretty bruised up (everywhere) and the bike was looking a little roached out. I called Keefer on the way home and after telling me that I needed to respect off-road riding more he asked me how bad the bike was. It’s not that it wasn’t rideable, but I figured that since we already had the engine done, why not turn it into a fun project build. We came up with the idea of turning it into a budget conscious bike build. 

IMG_8049.jpg

Since I had already done the engine, the next thing that needed work was the suspension. It had been gone through in the past by god knows who and I could feel when I rode it, that it needed help. We called Race Tech and they were more than willing to help with a rebuild, new springs, and gold valves/re-valve. I dropped off the suspension at Race Tech and a few days later I got an email that brought to light just how roached out this $1,800 craigslist bike really was. On top of the work that they were already doing it needed new inner fork tubes because mine were scratched and dented. The outer fork tubes needed to be re anodized and the compression posts needed to be replaced. Although I did have to spend an extra $750 I’m glad that Race Tech caught the problems, notified me, and fixed it right instead of trying to use old parts in order to cut corners. The company Race Tech uses to anodize the outers makes the fork tubes black instead of the stock gold color which initially I wasn’t sure about, but after seeing the black forks on the completed bike, I think they look really good. 

IMG_8025.jpg

The other main thing the 2006 was in need of was a fresh wheelset. After 13 years of abuse the stock wheels not only looked terrible, but the rims were far from straight anymore. We reached out to Dubya and after talking to John, we decided to use the stock hubs and have them cerakoted in a magnesium color. The look of the coating is awesome and only costs an extra $60. I decided to go with blue rims to give the bike a more current look and those blue rims were mated to the hubs with new stainless-steel spokes. The look of the blue wheels with the coated hubs looks almost as good as a super expensive wheelset, without breaking the wallet. 

IMG_8061.jpg

Once I got all the parts back, I bolted everything up just in time to make it to Mexico. The finishing touch was to put on the Throttle Syndicate graphics with all the companies who helped us out with the project. I’ve installed many sets of graphics over the years, but for some reason the Throttle Syndicate graphics didn’t give me any trouble at all. Thank you baby Jesus! With everything buttoned up we were on our way south with the great Malcolm smith, bench racing the whole way there (man that was cool). 

My first time really riding the bike was the morning of the race, so needless to say I didn’t get much time to get used to all the changes that were made. As I joined the other riders on my minute, all the thoughts started going through my head. I was wondering if I installed everything correctly and trying to remember if I tightened every single bolt. All of those thoughts left my mind the second the green flag fell and we were racing into the first turn. The first noticeable difference was the engine running perfectly crisp with seemingly perfect Pro Circuit jetting and a beautiful note barking out of the Pro Circuit shorty silencer. It didn’t have any hesitation or bog and once in the midrange (it’s a 125 so there is no real bottom to speak of) the engine pulled harder than it ever has. As we entered the rougher terrain, I was pleasantly surprised how much better the suspension worked than before. God knows what settings were in the old suspension, but it was a night and day difference. The small trail chatter was almost nonexistent except for the squarest of edges. Luckily I was able to slam into any square edge or rock since I had installed bib mousse tubes inside the Michelin StarCross 5 medium tires. Tecate doesn’t have a lot of whoops, but the ones that were there gave me a very balanced feeling on the bike. There were multiple times during the race where I would come across a g-out and to my surprise, I never had a hard bottoming sensation. The main place the suspension shined is when the speeds picked up. I don’t like running steering stabilizers, so when I race a bike that can handle high speeds, I’m thrilled! 

IMG_8033.jpg

Some other parts that I chose to run on my bike were Fasst Company Flexx bars. Some people don’t like them, but I love them on off-road bikes because they tend to take some of the harsh sensation out of the square edged bumps. I have a TM Design Works skid plate as well as their chain guide, which have both held up to plenty of abuse. On any bike I have owned with a cable clutch I always put a Works Connection Elite clutch perch and lever on because who doesn’t like an easier/buttery pull? I also have Works Connection radiator braces to help keep the radiators straight in case I goon out. I installed a set of Raptor titanium foot pegs on the bike for a little more grip and let’s get real, they look super cool. The only problem I had with the pegs is that with the small 125 kick starter, it tended to get stuck in the foot peg, when I would start the bike. I ended up making a small kick start extender so the lever would hit the back of the peg instead of getting stuck. Because this is an off-road bike I have an IMS 3.2 Gallon oversized gas tank with the bolt on screw cap, that can be changed to a dry break, if I ever feel like getting sketchy and racing a desert race again. 

IMG_8031-2.jpg

After the bike was back home and cleaned up (unfortunately it only looked amazing for less than a week) I really got the chance to appreciate how well it turned out. Everything that we decided to do helped the bike perform as well as it possibly could have. Unfortunately I was the one who held it back at the Tecate Enduro where I ended up fifth in the vet class and 30th overall. Although I didn’t finish where I would have liked, I was told by many fellow racers that were racing near my minute that the bike sounded unreal and they could hear me coming from a mile away with that sweet 125 tone. If you haven’t ridden a 125 in a long time, I would definitely recommend hopping back on one just to see how fun they are and if you find one for a good deal, maybe you’ll want to make a fun project bike out of one as well. If you can’t ride fast, you might as well sound fast.  


2020 Yamaha YZ125X/250FX Introduction

Editors Note: It’s hard to be in two places at once. Yamaha scheduled their 2020 YZ125X/250FX introduction in South Carolina after I booked a testing trip to New Mexico. With that being said, it’s not as easy as you think to find good people to help you give some quality feedback in this industry. I get countless emails/calls about wanting to help me with testing, but after I tell them to write me something on their own bike (as a test), send it in to me, so I can see if they can write, it usually ends in crickets. Most people just want to do the fun shit and go home, but there is more to testing than just riding the bikes. Colton Aeck and Dallas Dunn are two of only a few that I have within Keefer Inc. that I trust to go to an event like this. Colton is a quiet kid, but respectful and does what he says. He’s a privateer Supercross racer that doesn’t get to ride much off-road, so I thought the YZ125X/250FX machines would be the perfect fit (for him) to give you the reader, a perspective from an off-road newbie. Dallas is a single father that works as a heavy equipment operator that loves everything two wheels. He is your average blue collar dude that just loves to ride dirt bikes and is a bad ass at shooting photography as well as riding a BMX bike. I knew he would be a great photographer to bring this trip to life. Below is Colton’s story of how the event was, as well as his first impressions of how the bikes performed out in a true off-road setting. -KK

yamaha-2371-2.jpg

Written By: Colton Aeck

Photos By: Dallas Dunn

For 2020 Yamaha completed their line of "X" off-road bikes by introducing the new YZ125X. They also made major changes to their YZ250FX model by updating it with all the changes we saw from the 2019 YZ250F motocrosser. This past week, Dallas Dunn and I were invited to the home and training compound of off-road legend and 7 time AMA National Enduro Champion, Randy Hawkins to test out the new bikes. 

When I first got the call from Keefer a few weeks back, I was pretty excited, but also a bit nervous. In the past few years I've spent the majority of my time riding and racing Supercross. Besides a few WORCS races back in 2012 as a B rider, I've had zero off-road experience. By saying that most of you probably know, off-road in the wet coast desert is almost the complete opposite of what you'd find in the tight woods at a GNCC or enduro on the east coast. As we pulled up to Randy's on Tuesday we arrived at a big open pasture that was surrounded on all sides by hills and woods. It was a brisk 28 degrees and I thought to myself this west coast boy is going to be coming out of his shell this week!

Randy and the crew from Yamaha set up 3 separate courses through the woods, each with a variety of what you might expect to see at a GNCC or National Enduro. We had a variety of open fire roads, ultra tight woods, single and double track jeep trails, steep uphills/downhills, creek crossings, and there was even a grass track as well as a motocross section. Other than some frozen fingers in the morning and having a run in with more than a few trees along the way, I can honestly say that it was some of the most fun I've ever had on a motorcycle. Throughout my life I've never understood why people would choose to ride or race off-road. Moto and Supercross just always seemed a lot better for me. Not to mention ripping across the desert wide open and eating a bunch of dust, just doesn't sound like much fun. Well, riding in the woods is a completely different animal, but riding these Yamahas in the woods of South Carolina has really changed my mind about off-road riding in general. In fact, it has my gears turning and thinking more about what I'd like to do after my moto career is over. 

yamaha-2631.jpg

I strongly encourage all you moto guys out there, if you've never been trail riding out in the woods, find a place, find a bike, and go try it! Racing is my passion, but just like anything, if you do it enough it can turn into a job as well as burn you out on something that you love. This week I had the chance to get back to my roots and really remember why I love dirt bikes so much. Being out in the wilderness, with just yourself, your bike and a couple buddies really reminds you why you got started riding in the first place. It's been a long time since I've gone riding all day long and still wanted to keep going. The Yamaha crew just about had to pry me off their bikes each day just so they could prepare for the next day of riding. 

Enough about me and how much fun I had, you guys are here for the testing, so let’s get to it. Yamaha's goal with their "X" line is to have a purpose built bike that's ready to ride and race in off-road situations. They took their motocross bikes and made a handful of changes to each to better suit off-road riding. 

yamaha-2316.jpg

The YZ125X shares most of its parts with the YZ125, with a few key changes, the biggest being engine and suspension. The X model has a different cylinder head shape, different powervalve shape/settings and a new ECU setting to match the engine changes. The suspension components, as well as spring rates remain the same, the only suspension change is in the valving. The YZ125X also comes with a kickstand, o-ring chain, reserve fuel petcock, 18 inch rear wheel and Dunlop AT81 tires. 

The goal was to make the YZ125X more capable for off-road and after the crap out of it, I think they did just that. The engine changes lead to a broader, easier to ride engine character for the tight, slippery terrain I was testing in. The engine hits sooner in the RPM range (although not quite as hard as a YZ125) and pulls longer on top. The engine is really what you'd expect from a 125. It's not a rocket ship, but it is a lot of fun to ride when riding in that sweet spot. I was really impressed at how well it climbed some of the steep hills on Randy's trails. In situations where a 250F or 450 would break traction and start digging a hole, the 125 would stay light and on top of the dirt, driving with forward bite.

yamaha-2937-2.jpg

To my surprise the suspension worked really well for me on initial plushness and small impacts, but left me wanting more hold up as well as bottoming resistance on hard impacts (like creek crossings, or big G outs). Anything more than a medium size impact left me with an empty/soft feeling front and rear. I was able to get the fork and shock to bottom fairly easily when I started to feel comfortable and push it. Honestly though, soft suspension was what I expected from an off-road type of machine, but I am so used to such stiff settings on my SX bike that anything feels soft to me. I don't think a 180 pound Supercross pro is the target market for the YZ125X, but I enjoyed it a lot. Your typical younger generation off-road kid or even the older more mellow weekend warrior will have a blast on it while feeling like a hero through the trees, but may want a little stiffer suspension set up once broken in. I think this bike is the perfect tool for the younger generation moving up off minis or a newer, less experienced rider just starting out in off-road. The YZ125X is not intimidating to ride and is light enough that almost anyone is able to pick it up after a spill.

yamaha-2226.jpg

The bike I enjoyed the most was the YZ250FX. The 2020 YZ250FX received all the changes we saw to its moto brother, the YZ250F in 2019. This means a completely new chassis and engine, plus all the off-road goodies you'd expect the X to have. The X differs from the standard YZ250F, with stiffer front engine mounts, (designed for off-road), GNCC specific suspension settings, a kickstand, 18 inch rear wheel, O-ring chain, skid plate, a check engine/low fuel light/sensors, oversized gas tank, and the big one, a wide ratio six-speed transmission. Also new for 2020 the X now utilizes the Yamaha Power Tuner app so now you can wirelessly adjust your fuel and ignition mapping all from your phone. Whether you're a beginner or a pro, chances are you can find a map that makes you happy out on the trail.

yamaha-2496-3.jpg

On the trails, the YZ250FX was insanely fun to ride, I really had a hard time finding anything to critique honestly. I've never ridden suspension that was setup specifically for off-road and I was really surprised how well it would soak up small rocks and roots. I have experienced trail rides before on stiffer suspension and would find myself deflecting off everything on the trail. With the YZ250FX I’d approach rocks and roots expecting my front wheel to grab and deflect, but the bike would roll right over them with ease. It also had good hold up as well as bottoming resistance when riding over big logs or on hard impacts/landings. If I had to nitpick I would want a little more damping feeling through the mid-stroke just so I could start to push more when feeling comfortable. I know I would want to go faster, so I need to forecast my suspension settings accordingly.

 The YZ250F has been a class leader in the engine department for a few years now. I am not a 250F guy, but when I have tried the YZ250F in the past it blew my mind with how much torque it had. The X uses the same engine, so the torque feeling is just like how I remember it. It has a strong bottom end that pulls hard all the way through the RPM range. I enjoyed the wide ratio transmission and I found myself riding almost everything in 3rd gear, only using 2nd for really tight sections and occasionally on a steep hill climb. I can't really imagine a place where 1st gear would be very useful because after getting about 10 feet from the truck, I was out of first and never touched it again. The YZ250FX loves to lug and I have come to find out that lugability is important in the woods. The only major compliant I could come up with is that the YZ250FX is fairly difficult to start in gear. Unless you're in neutral, plan on it taking a few seconds to get the bike fired up or use the throttle a little bit in unison with the start button. Keefer is going to experiment with maps for you all and will post them up here on Keeferinctesting.com very soon. I will let him handle all of that stuff!  

yamaha-2697-2.jpg

Just for fun, I also had the chance to ride the YZ450FX on our last day at Randy’s. Being a 450 guy, I thought I would love it, but honestly the extra weight and power was just too much for me in the tight woods. This made me appreciate the YZ250FX even more because of its fun and easy to ride nature. The YZ250FX is really easy to just jump on and ride and when you start to push it, you don't get the feeling that you're one whiskey throttle away from a head on with a tree. I really think the YZ250FX is the better all around bike for this type of riding and anyone from beginner to pro could have a blast on it. 

yamaha-2644-2.jpg

Overall I was super impressed with Yamaha's additions to their "X" lineup. They are designed to be race ready for GNCC type riding and I think Yamaha did a great job. I know most of you Keefer Inc. readers are moto guys like me, but trust me when I say, “don't knock off-road until you try it”. Support your local riding spots and get out on the trails and ride. You'll probably be like me, re-kindling your love for dirt bikes and wondering why you didn't try it sooner! See you soon off-road! See you soon! -Colton Aeck


2020 Husqvarna FX450 First Impression (with specs)

Are you a hybrid type of rider that likes to ride off-road as well as some motocross? Maybe you’re not just a one dimensional rider and would love to go race a GP on the same weekend as a local motocross race. Well Husqvarna has a bike that is directed towards that type of rider! The FX450 is very similar to the FC450, but the FX450 comes with different ignition mapping, softer suspension valving, a softer rear shock spring, an 18-inch rear wheel, a kickstand, and a 2.25-gallon tank. It’s not green sticker legal and doesn't come with a spark arrestor so be forewarned that you may want to add a slip on spark arrestor to this steed in order to make “Johnny Law” happy. To test this Husqvarna out, I decided to get the hell out of California, in order to get a different perspective/first impression of the FX450 in the vast terrain of Rio Rancho, New Mexico. The area I tested at had a wide variety of tight single track, long sandy uphills, technical rocky terrain, fast whoop sections, as well as the occasional natural terrain motocross/turn track. Perfect for this kind of test! The downside? I didn’t have a professional photographer with me to get the bike in action. This was a true to life off-road trail ride with your buddies, talking trash, bench racing, but without the cool guy photographer. We will eventually get some action shots, but to me, the most important aspect to any test is getting the information across to you all. Hopefully we can do that in this article.

Nothing says variety like a barber shop, a bar, a bath house, and a 2020 Husqvarna FX450 in a photo.

Nothing says variety like a barber shop, a bar, a bath house, and a 2020 Husqvarna FX450 in a photo.

If you’re looking to take this Husqvarna straight from the dealer show room to your local BLM trails, you might want to get a spark arrestor. The FX450 has a closed course designation, so in order to be “legal” make sure to be prepared before you venture out into public lands. After spending almost five engine hours on the 2020 Husqvarna FX450 I came away with this impression as well as the suspension setting below.

IMG_4150.JPG

Engine: Just like the FC450, the FX450 is deceivingly fast. I received the bike with 0.2 hours on it and it took 1.8 hours for me to actually feel the engine free up. There was a lot of engine braking in the initial hour or so, but after that you can feel less de-cel pitching and more overall torque/pulling power. The FX450 should feel like the FC450 because it’s the same motor, same gearing as a 2019 FC450 (13/48), but the FX450’s ECU settings are smoother throughout the power curve. You may want more excitement on low RPM’s if you're in sandy conditions, but on tight single track the engine is buttery smooth and easy to ride in second gear. This engine isn't a huge third gear torque monster like the YZ450FX, but if you learn to ride in second gear instead of third, the FX450 can chug/lug up anything with ease. Second gear is longer than the YZ450FX, so if you're coming off of another brand just know that a lower gear is more usable than you might think. Another feature that makes me smile is how much top end  pulling power the FX450 has. Got a long sandy hill you need to get up? Not a problem. Click the Husqvarna FX450 into either third or fourth gear and let it do the work for you. It literally feels like it never hits the rev limiter and keeps pulling where other bikes require more finesse shifting. The FX450 comes with a handlebar mounted map switch just like the FC450, but going back and forth between map 1 and map 2 didn't prove to be life changing in either direction. Both maps feel similar and putting the FX450 into “TC” mode helps with slow speed slippery conditions, which didn't happen very much where we were riding. The overall engine character is an easy to ride, yet super powerful pull that fits a wide range of riding abilities. It’s not going to rip your socks off, but it’s one of those engines that you appreciate the more you ride. 

Chassis: On this test, I ended up going back/forth between a 2019 Yamaha YZ450FX and the Husqvarna FX450. While doing this I noticed that the Husqvarna may not feel as planted on high speed trails as the Yamaha, but when in tight single track the Husqvarna feels more playful and easier to manage. The Husqvarna has a good amount of traction on lean angle and although it’s not as stable as the Yamaha at high speed, it can be dialed in with some suspension tuning to make it better when twisting the throttle hard down a rough, long trail (see suspension setting). The FX450 loves flowy type single track where the trail goes back and forth. We had a five mile section of trail that was similar to a long turn track and the Husqvarna absolutely feels at home in these types of conditions. The faster, more rolling whoops there were, the more I felt like the Yamaha was better suited for me in those areas of the trail.

IMG_4154.JPG

Suspension: The trails that I tested on had more than enough variety in terrain and I felt anything other than very slow/rocky terrain, the Husqvarna needed more hold up, especially in the front end. Below is the setting that I came up with that gave the Husqvarna FX450 the most balance, as well as the most comfort for a rider between 170-195 pounds (without gear). With this setting the FX450 becomes more stable at higher speeds as it just slows the action of the suspension down, which allows you to hit obstacles at speed faster/harder with more confidence.

Fork: 

Fork Height: 3mm (5mm on tighter single track)

Air Pressure: 10.3-10.4 bar (10.1 stock)

Compression: 10

Rebound:  11


Shock:

Sag: 105mm

L/S Compression: 12

H/S Compression: 1-3/4 out

Rebound: 11


Ergonomics/Extras: The rider triangle of the Husqvarna FX450 is comfortable for the long haul. I rode almost a 100 miles on its maiden voyage and felt comfortable on it right away. For motocross I usually like to trim the stock handlebar down, but for west coast off-road conditions, the FX450’s bar length (811mm) was nice because it put me in a better rider attack position when standing up all day. Husqvarna needs to rethink their seat cover material for the FX line up however as I feel as if it’s a much too aggressive seat cover for a rider that is in the cockpit for more than 4-6 hours a day. The fuel range of the Husqvarna FX450 is superb as I managed to squeeze in over 50 miles on a tank of fuel (with a little to spare), with miles that were mixed with plenty of gas guzzling sand.  

Some of the backdrop in New Mexico where we tested the 2020 Husqvarna FX450.

Some of the backdrop in New Mexico where we tested the 2020 Husqvarna FX450.

FAQ:Keefer, should I get a Husqvarna FC450 or FX450”? If it was me and I was doing a 70/30 off-road to moto ratio, I would be on a FX450 simply because of the comfort that I get on longer trail rides. The FC450 is made to carve inside lines and go fast and I feel like the FX450 is more of a friendlier machine for longer distances. Yes, it’s still fast, but it has more comfort with its suspension and ECU settings, where the FC450 has a firmer, slightly snappier throttle response. The occasional moto session with your buddies is fine on the FX, as long as you go to a suspension setting that doesn't bottom up faces of jumps. The stock FX450 suspension setting is much too soft for a motocross track. 

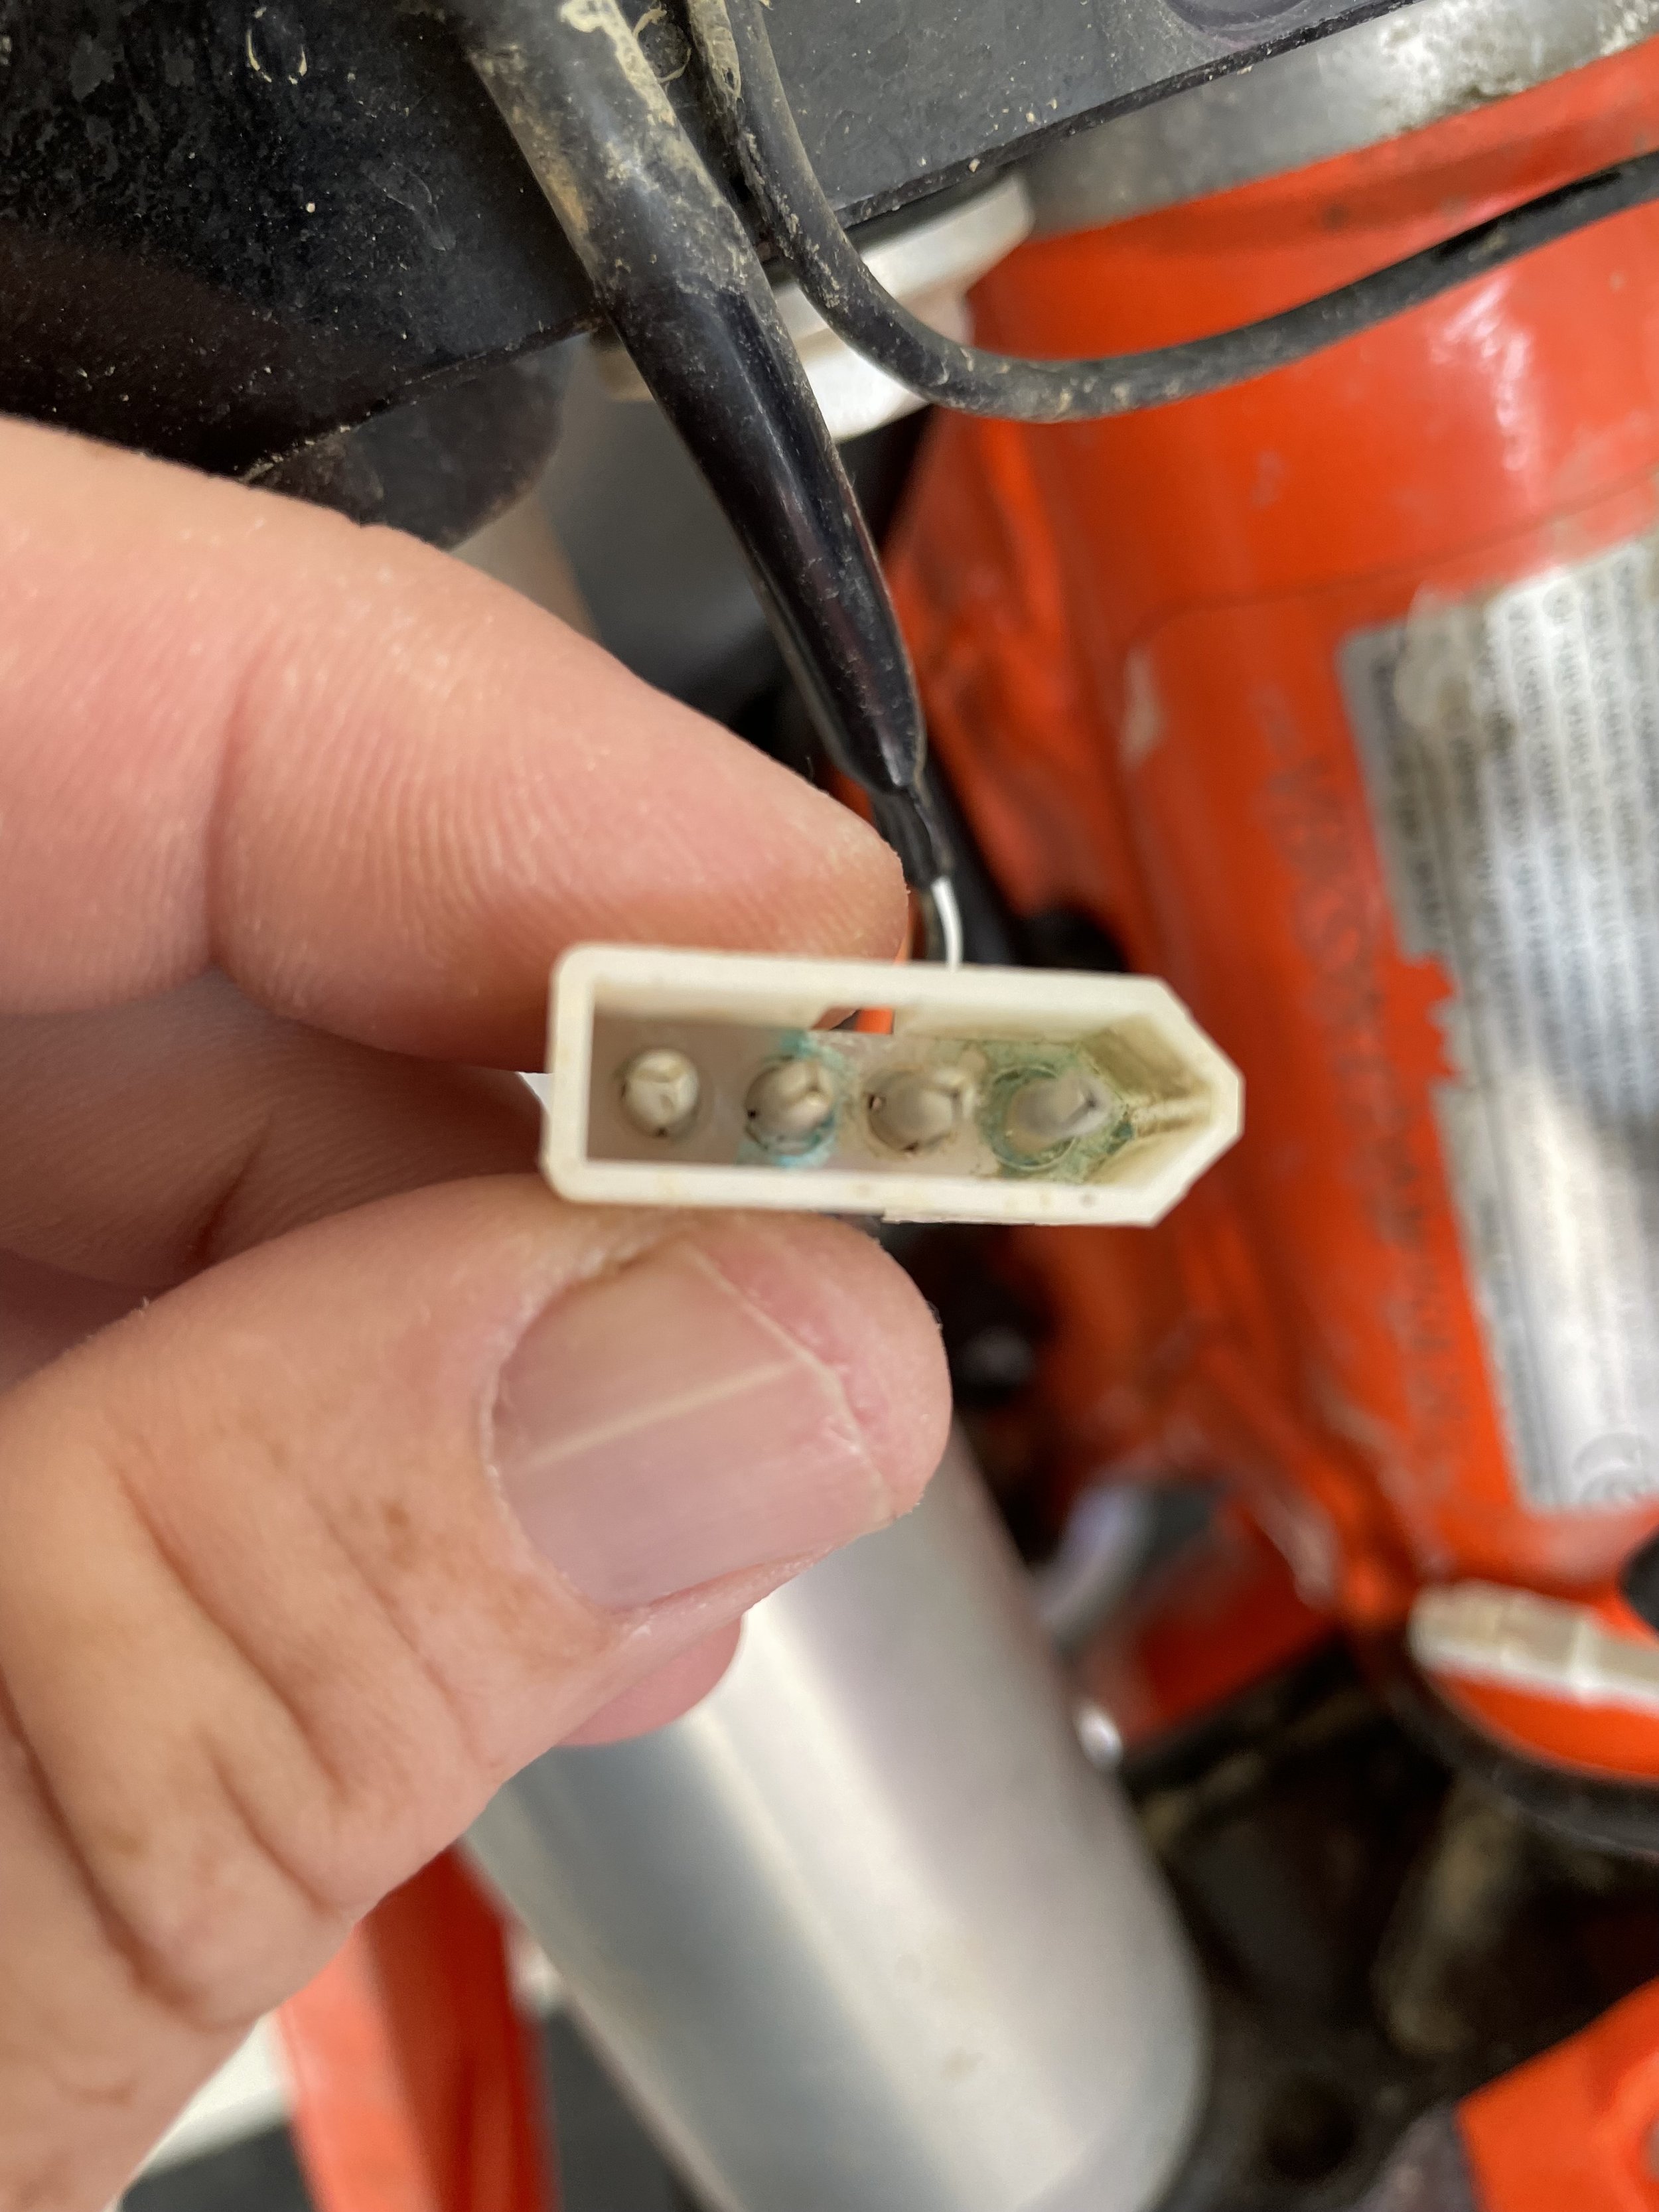
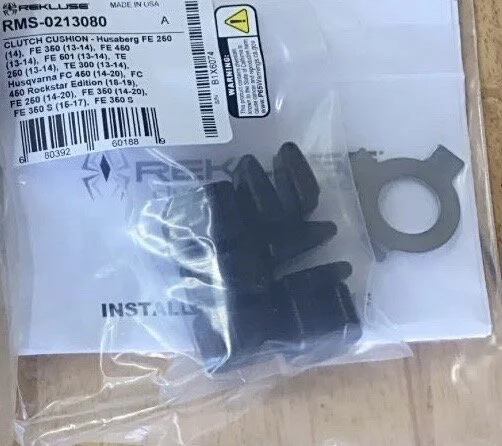
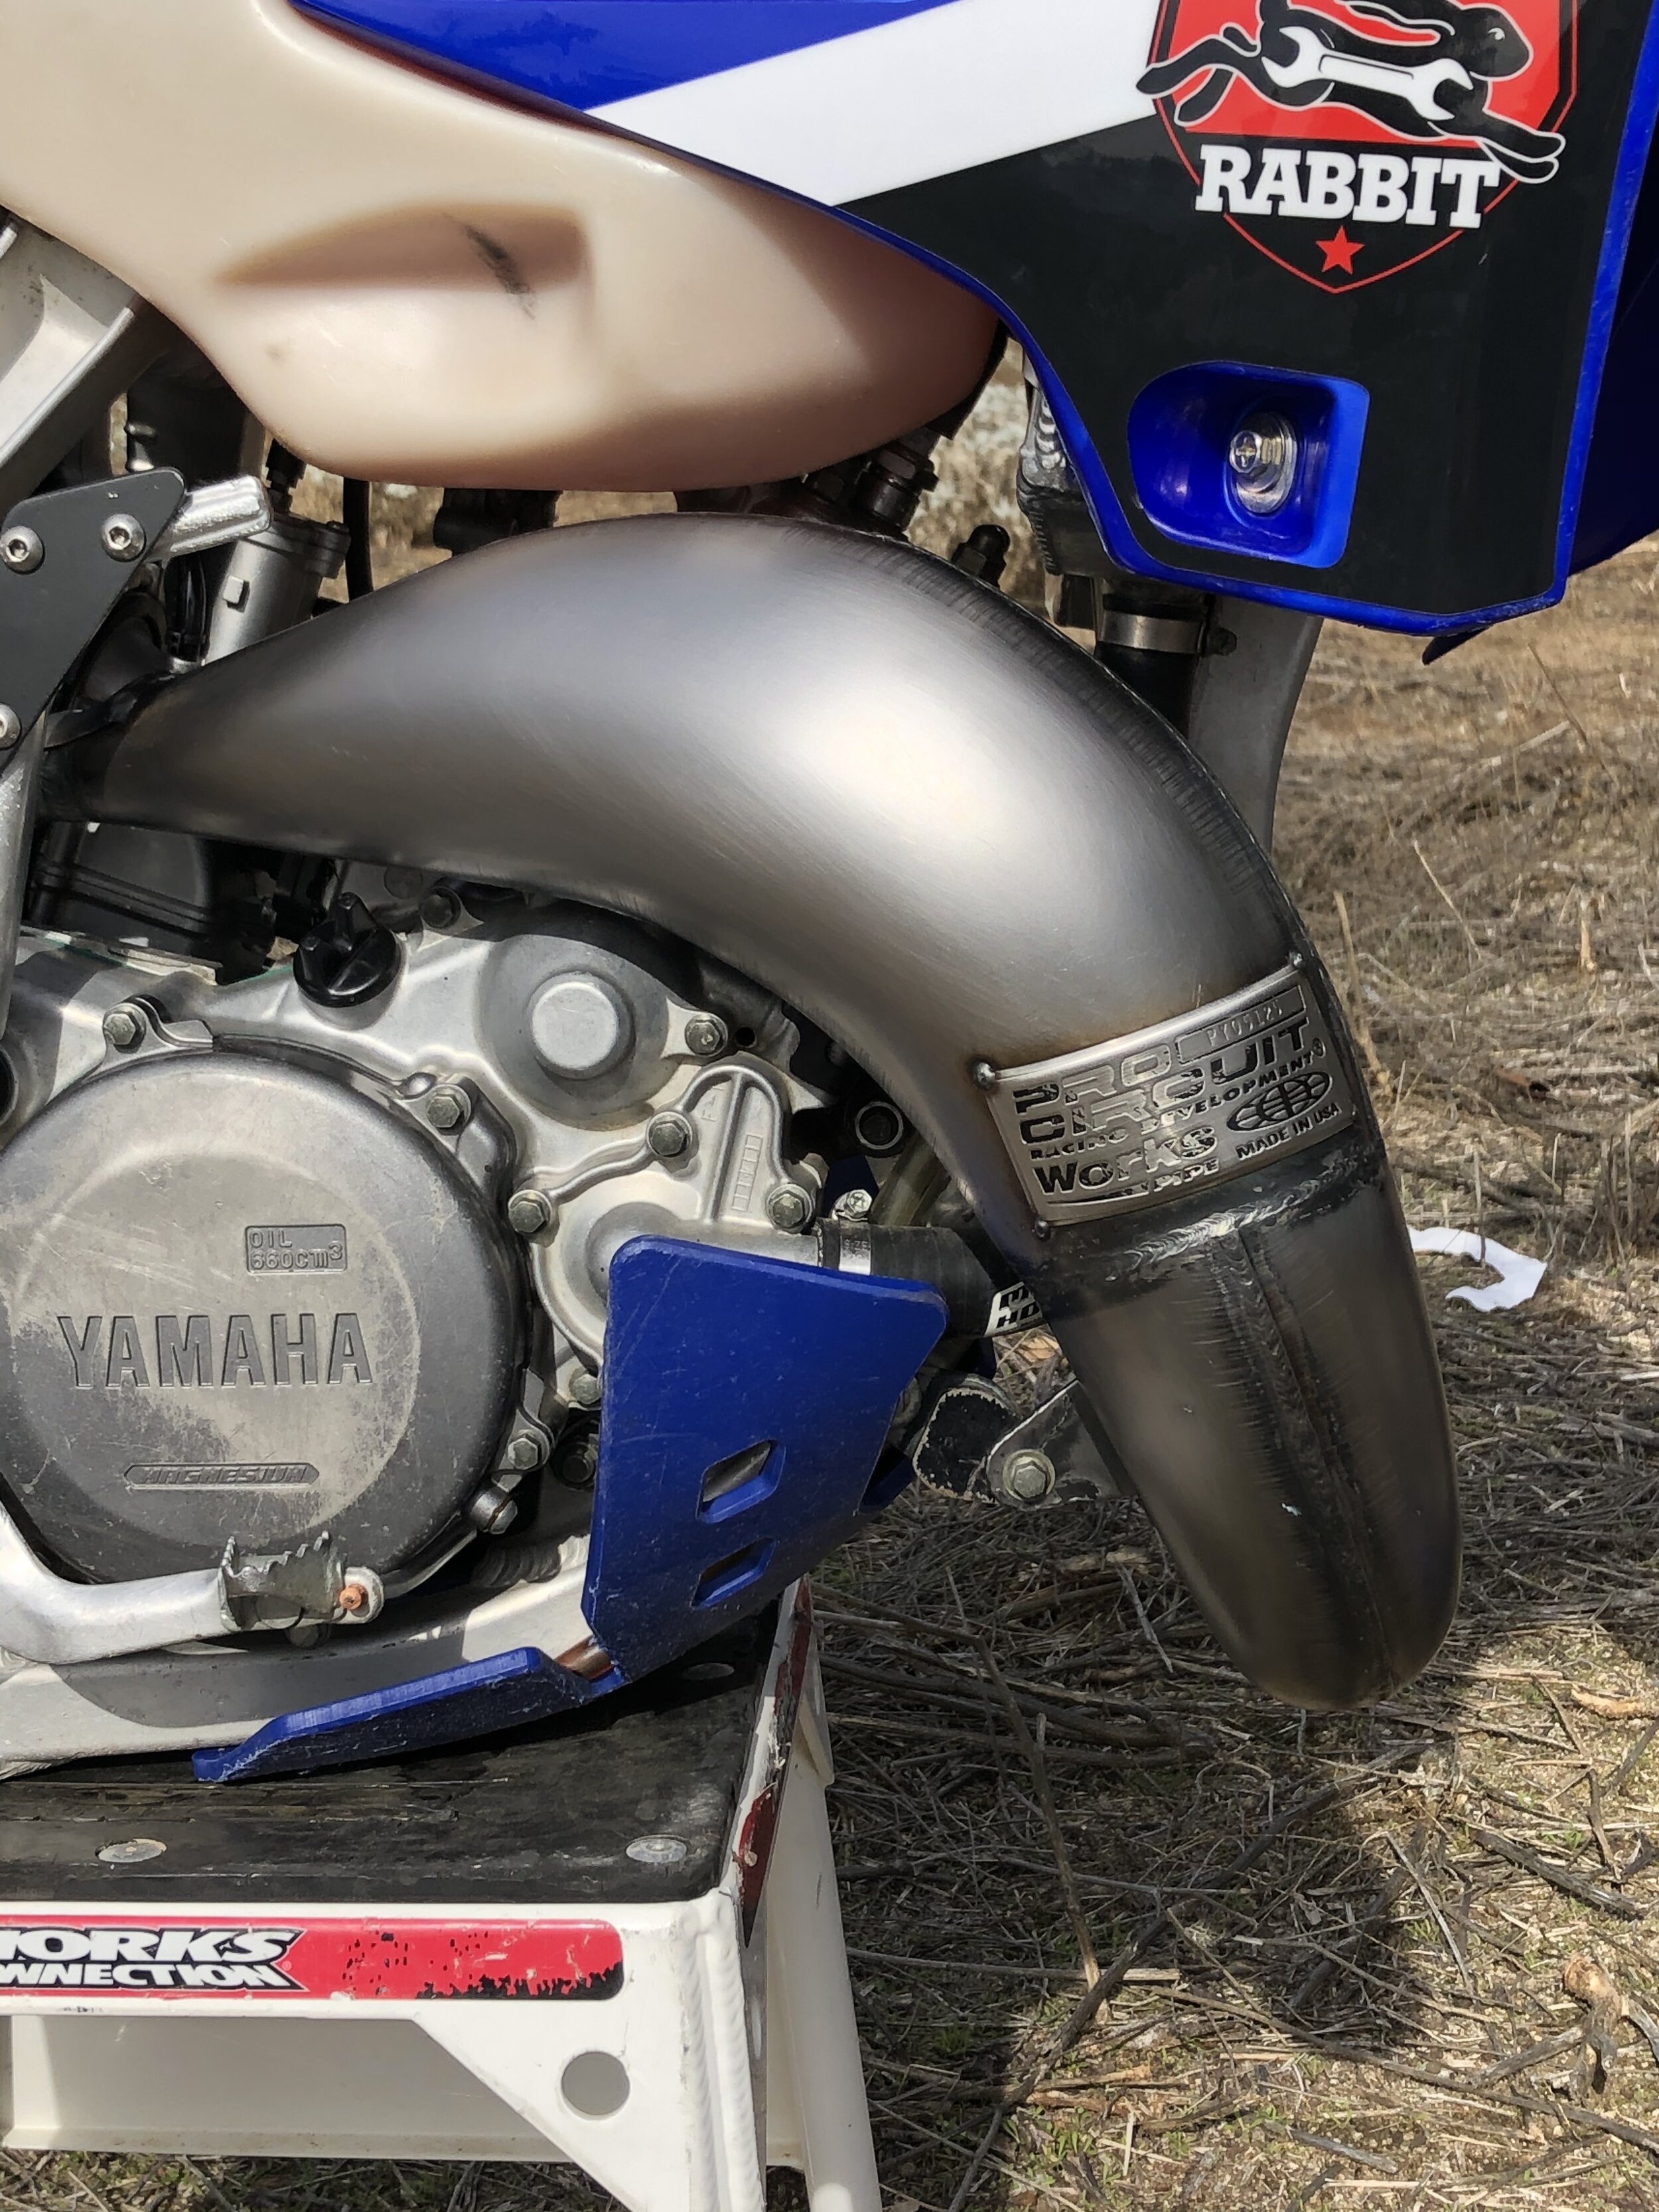
FAQ: “Keefer, will my FX450 parts interchange with my FC450 and vice versa”? Yes, the FX450 parts (wheels, tank, etc.) will bolt right onto the FC450”. 


This is just a first impression… I will be logging more off-road miles on this machine and may even take it to a Grand Prix event just to see how versatile this Husqvarna FX450 really is. If you want to “hear” what I have to say about the Husqvarna FX450 and get some extra tidbits you may have not received in this article, listen to the RMATVMC Keefer Tested Podcast. If you have any questions about this test or the 2020 Husqvarna FX450, please feel free to email me at kris@keeferinctesting.com.


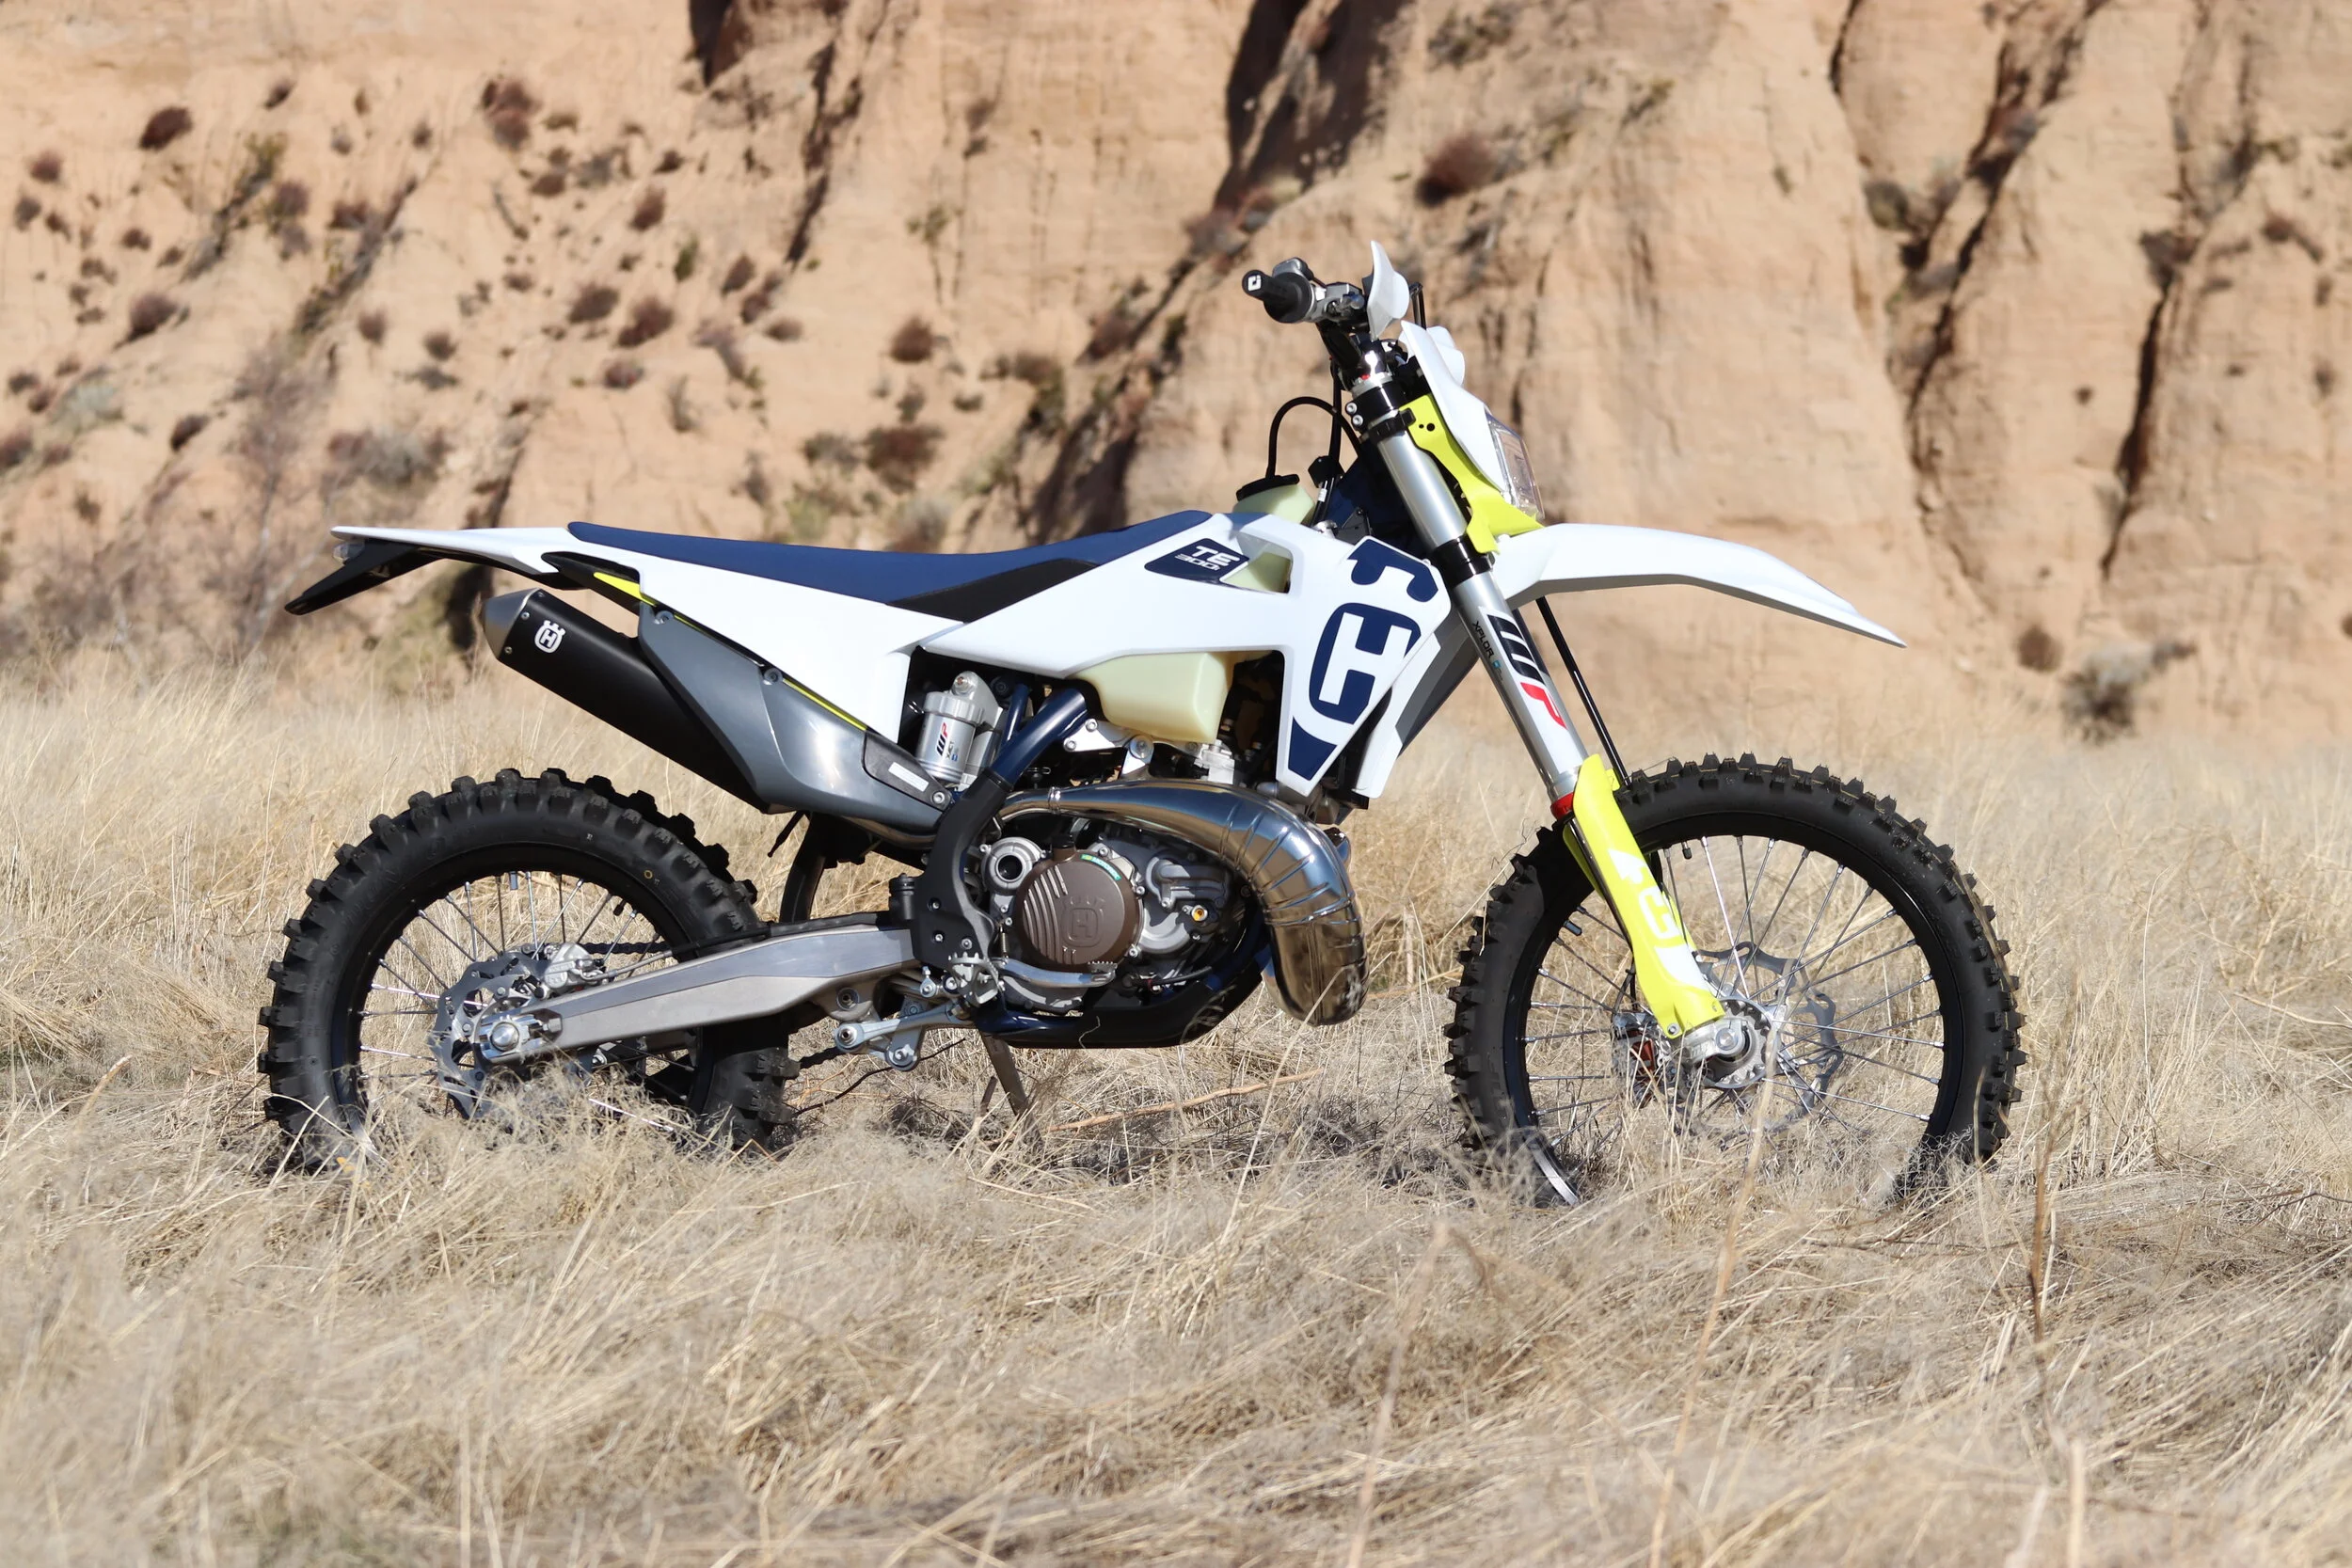
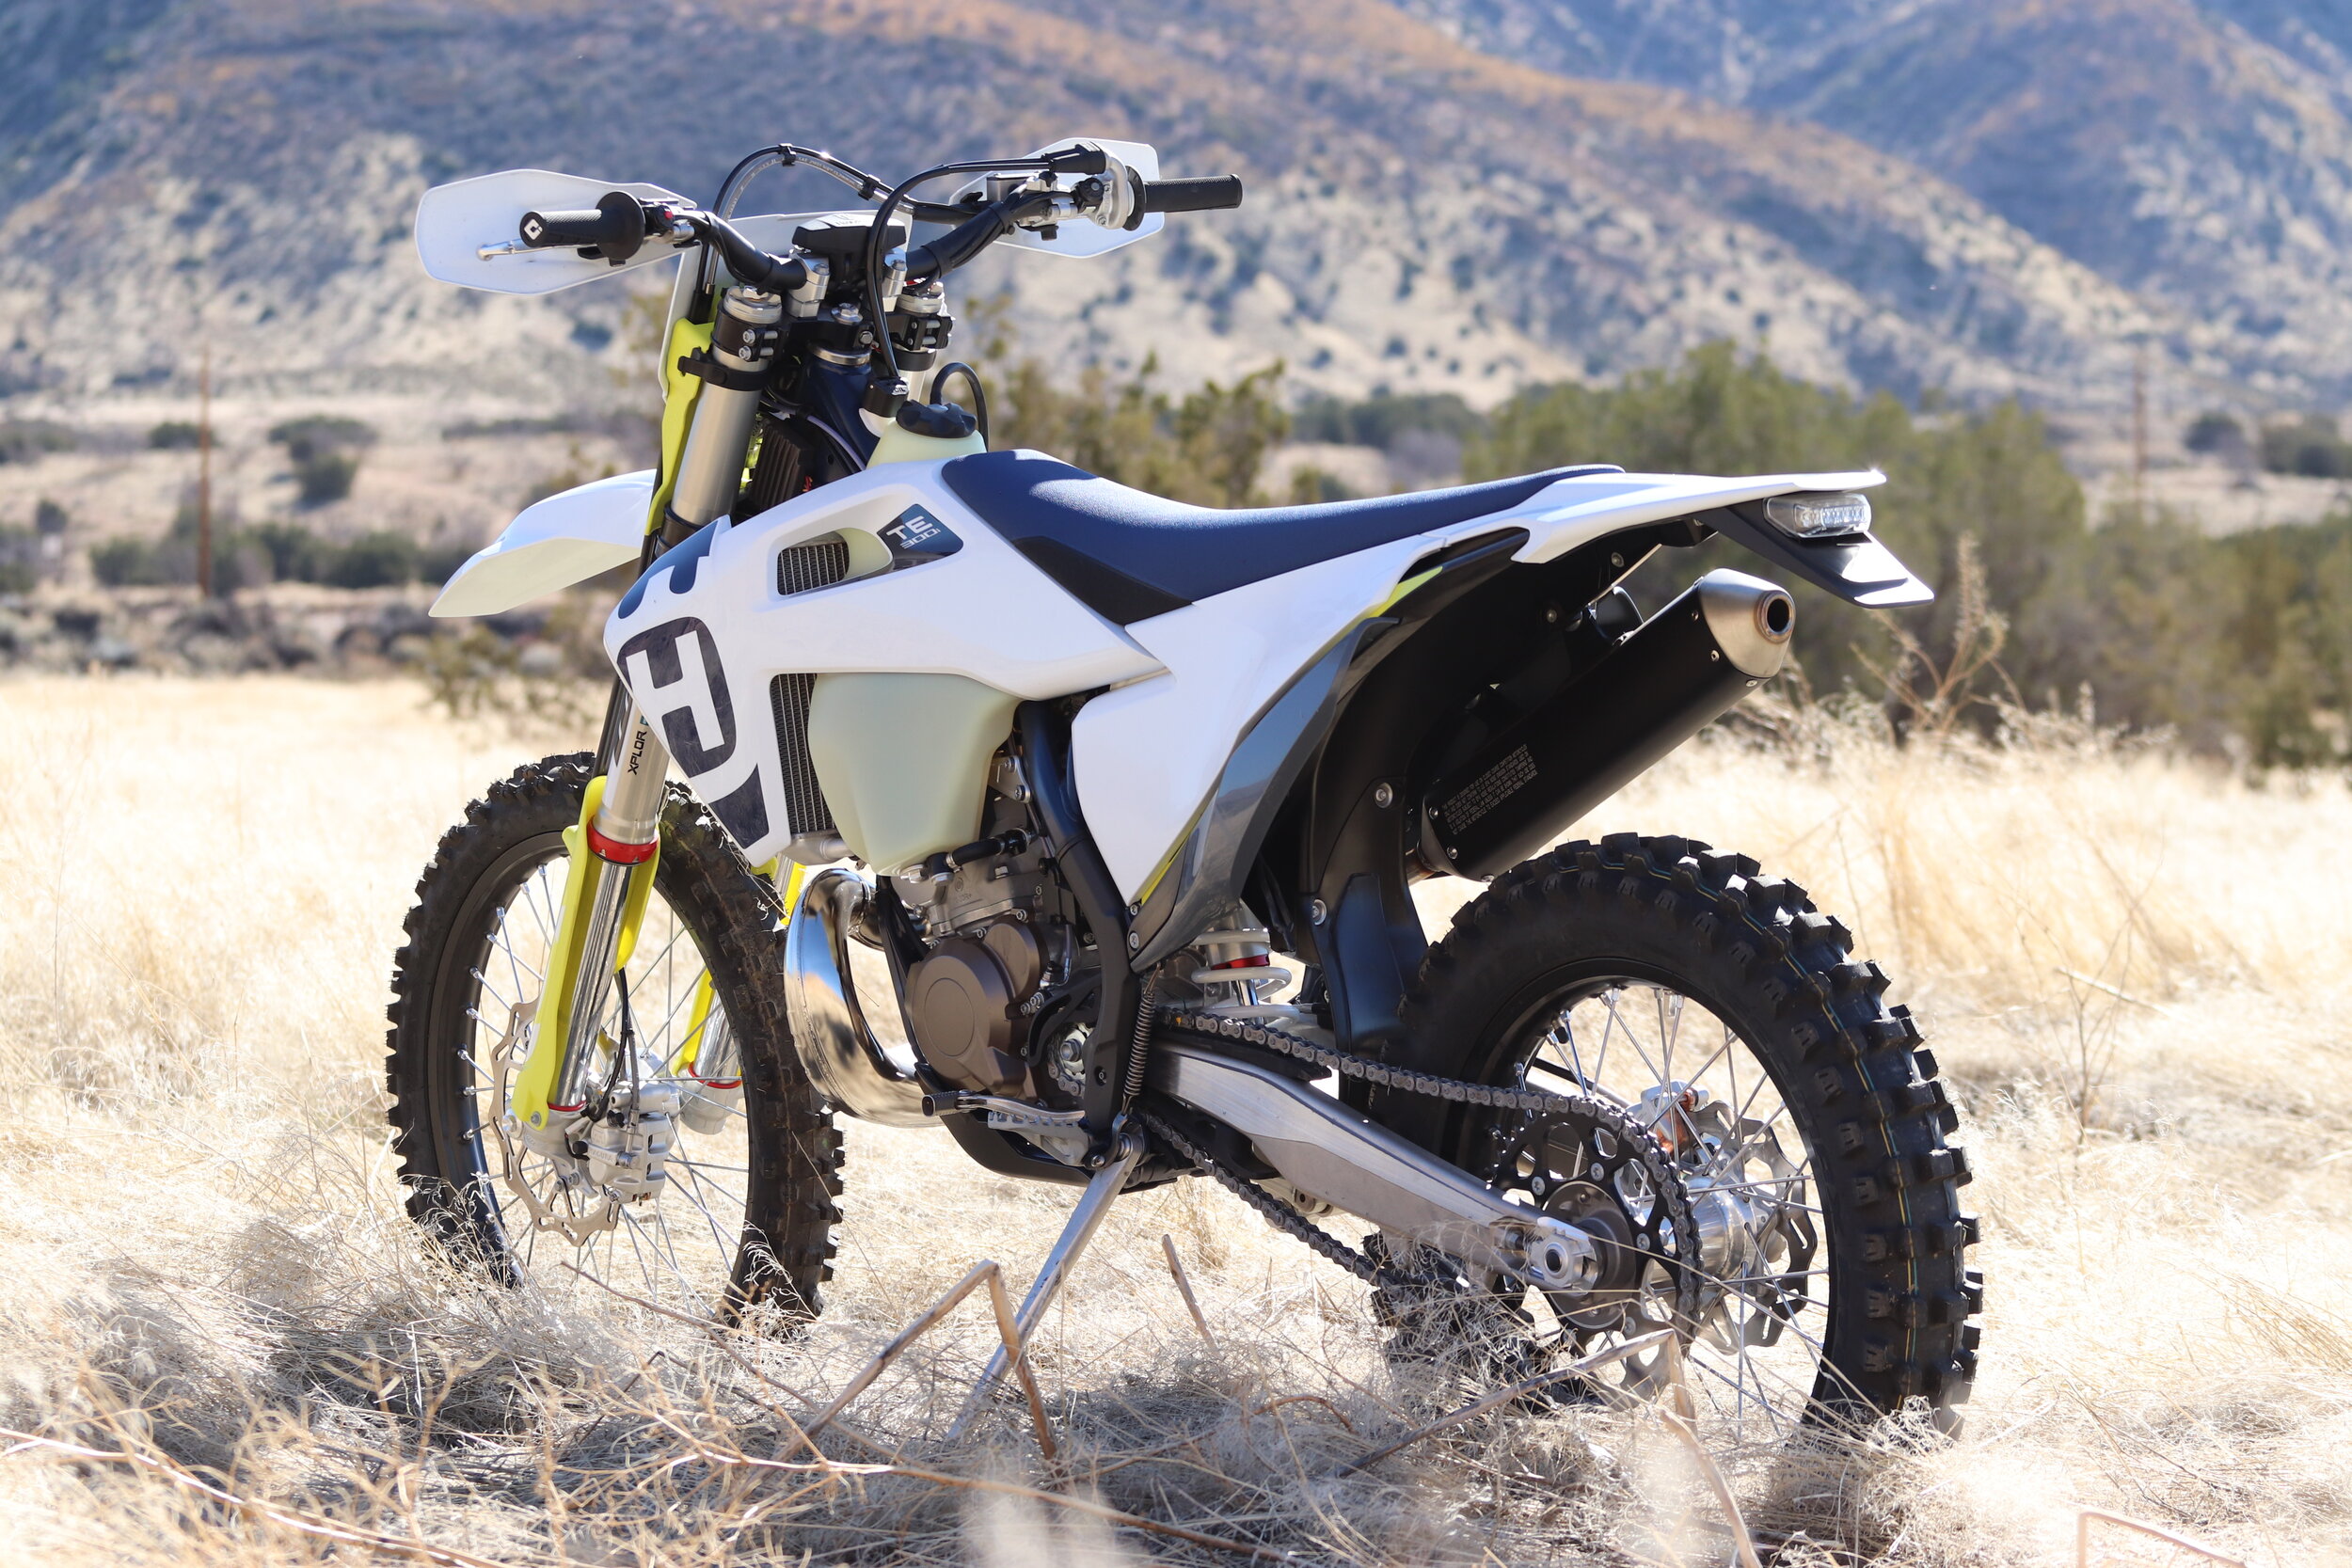
HUSQVARNA FX450 SPECS:


Engine type: SOHC, electric-start, 4-valve

4-stroke

Displacement: 450cc

Bore & stroke: 95.0mm x 63.4m

Fuel delivery: Keihin EFI, 44mm

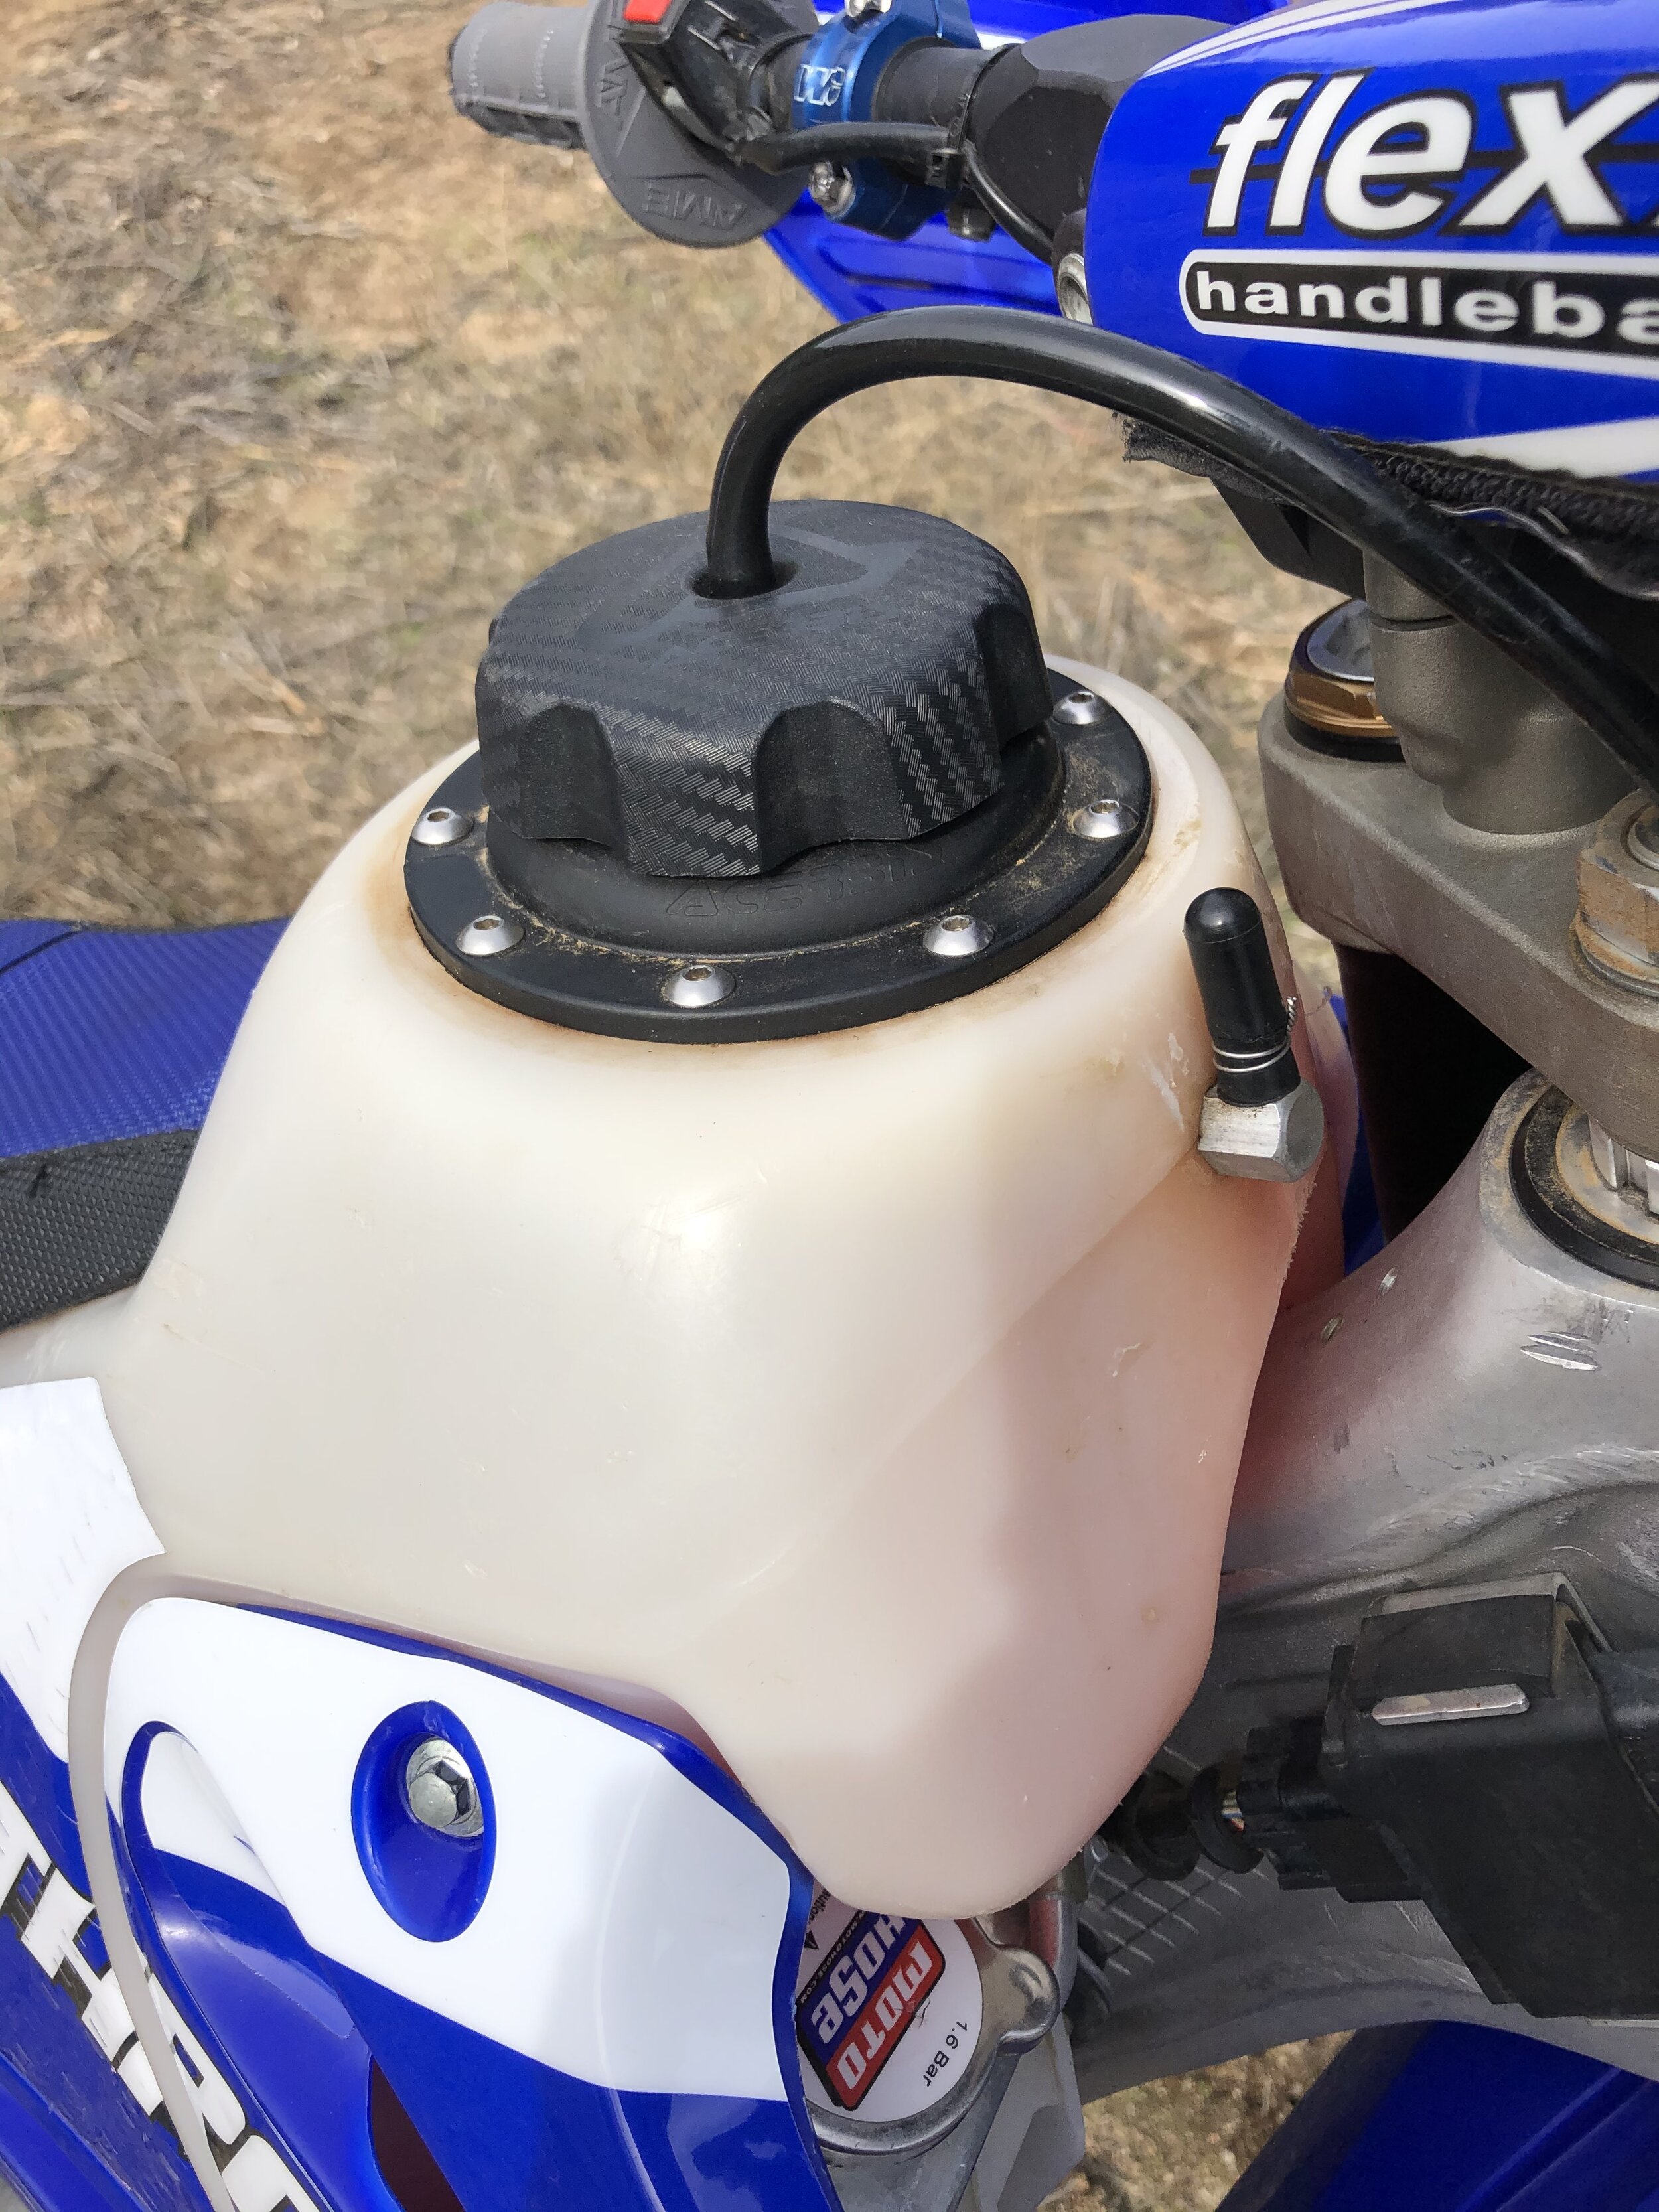
Fuel tank capacity: 2.3 gal. (8.5 l)

Lighting: No

Spark arrester: No

EPA legal: No

Running weight, no fuel: 224 lb.

Wheelbase: 58.5″ (1485mm)

Ground clearance: 14.6″ (370mm)

Seat height: 37.8″ (960mm)

Tire size & type:

Front: 90/90-21 Dunlop Geomax AT81F

Rear: 120/90-18 Dunlop Geomax AT81
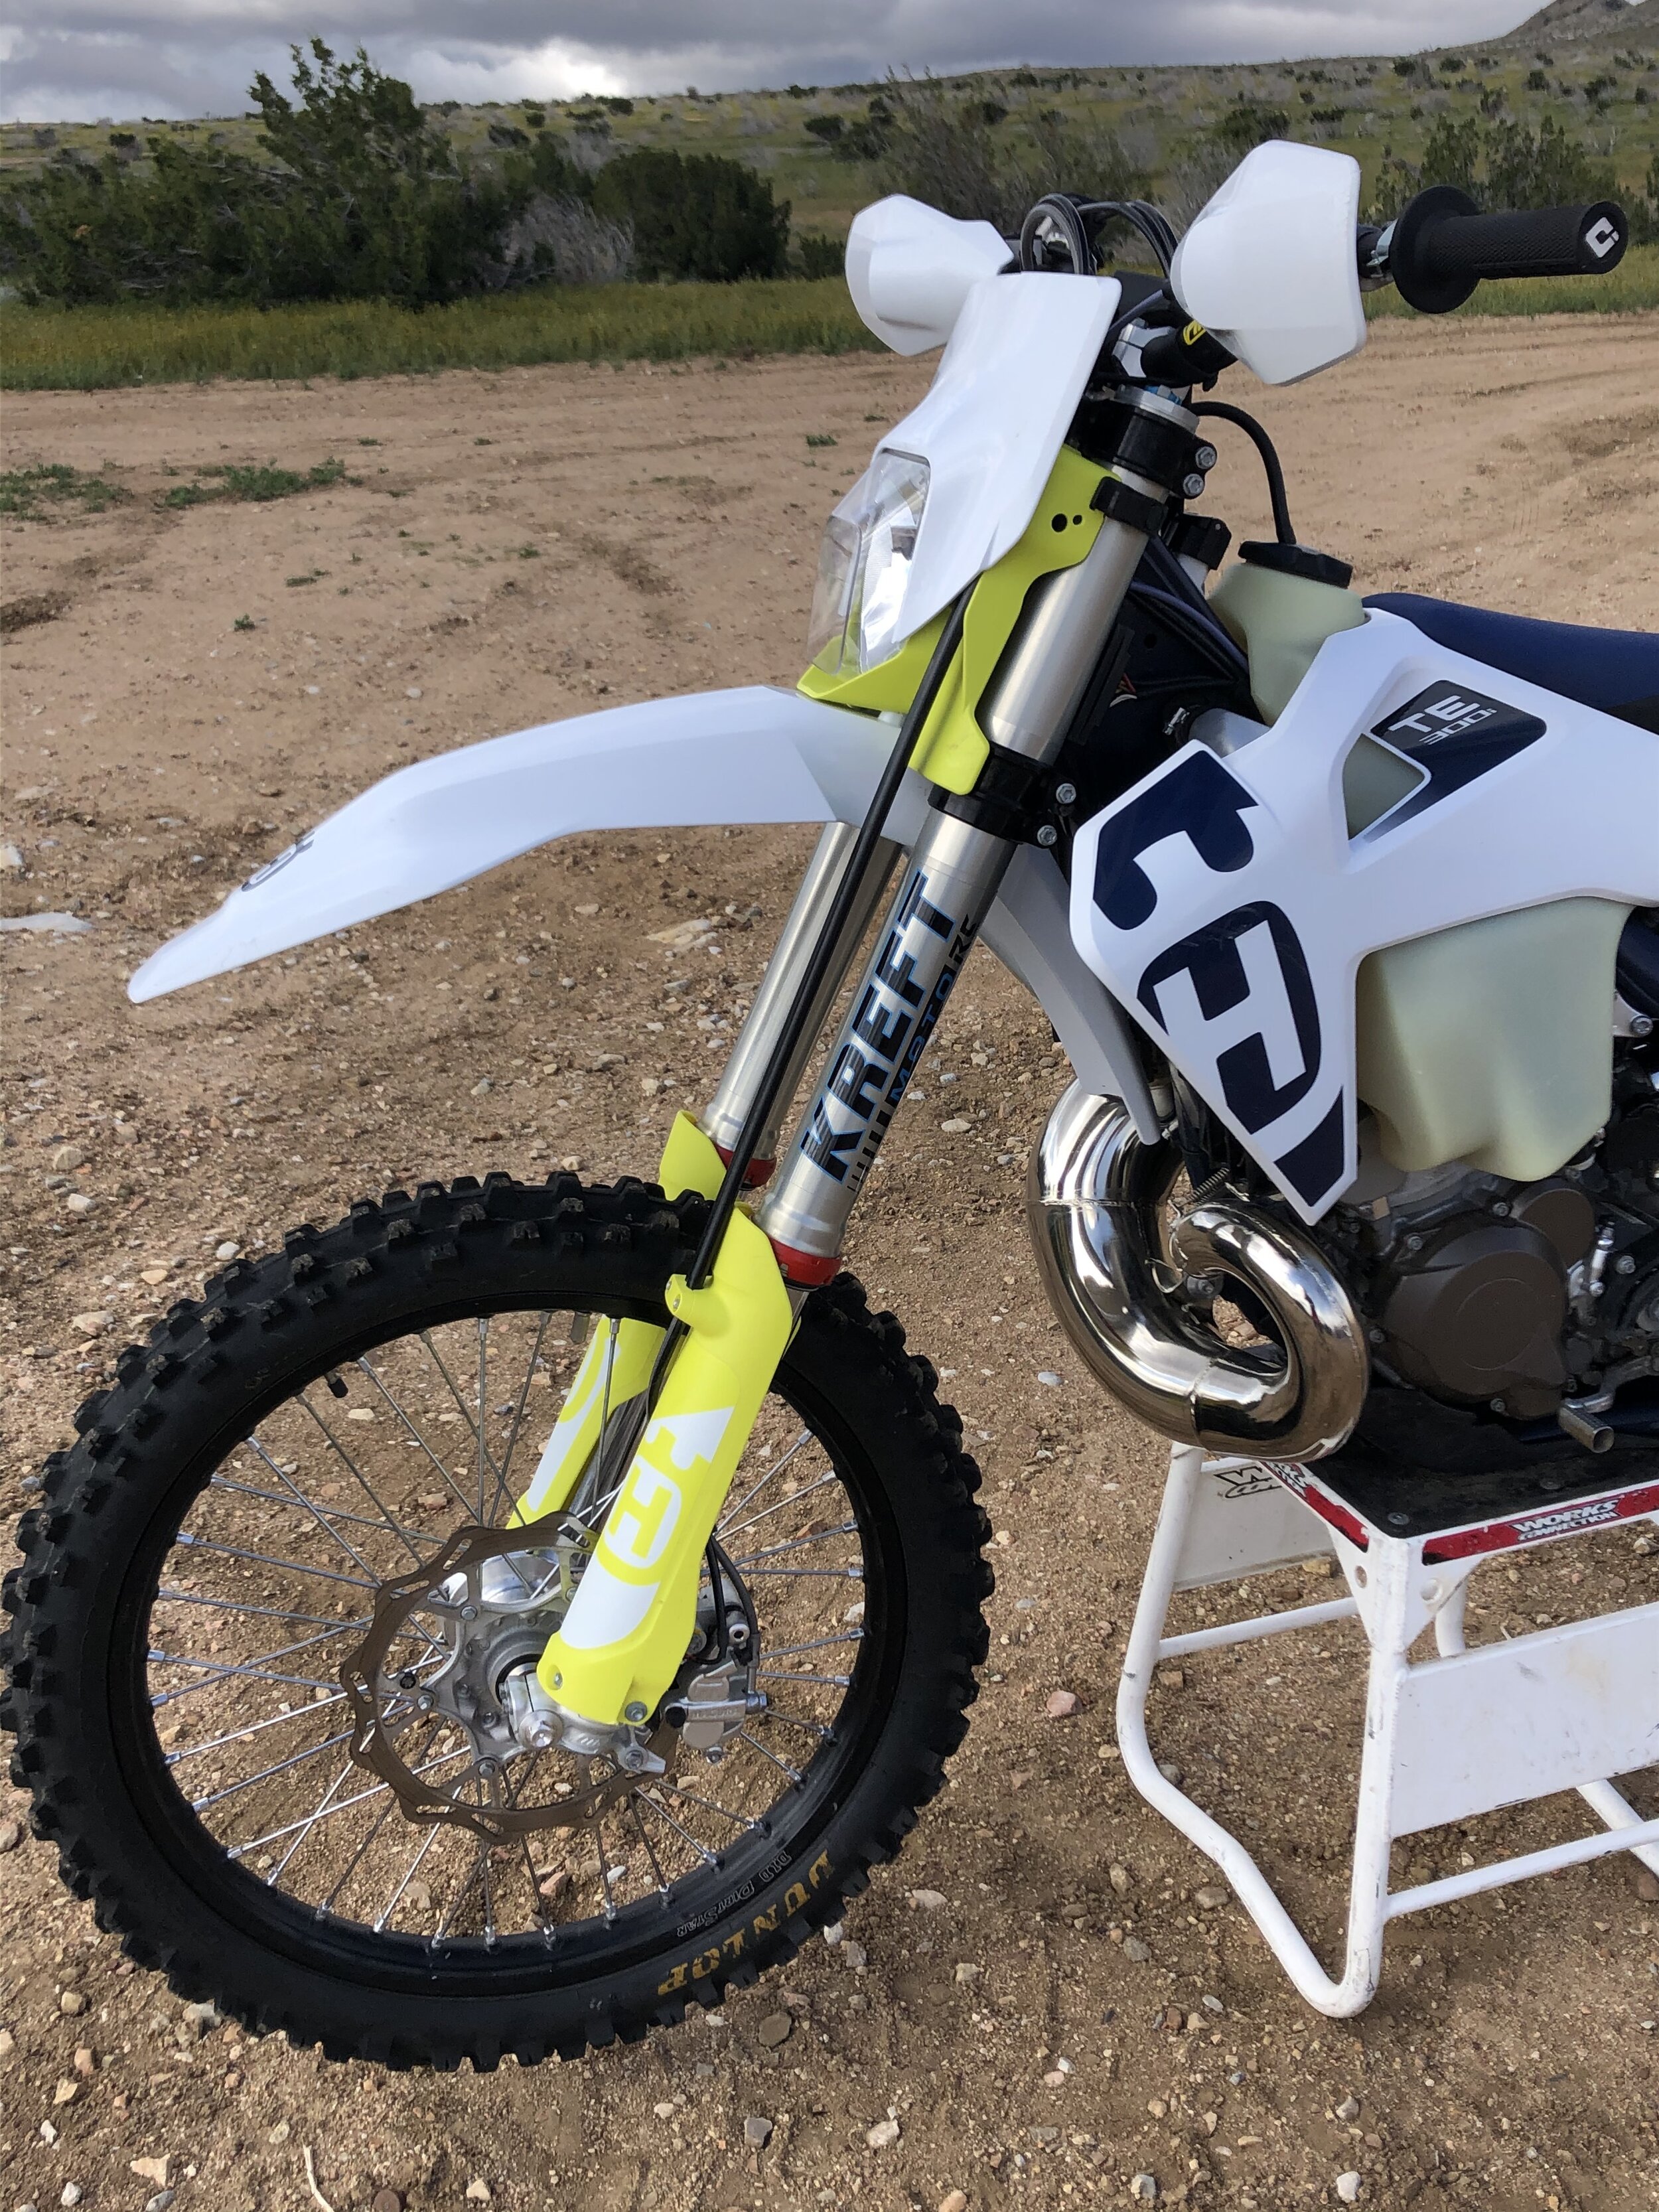
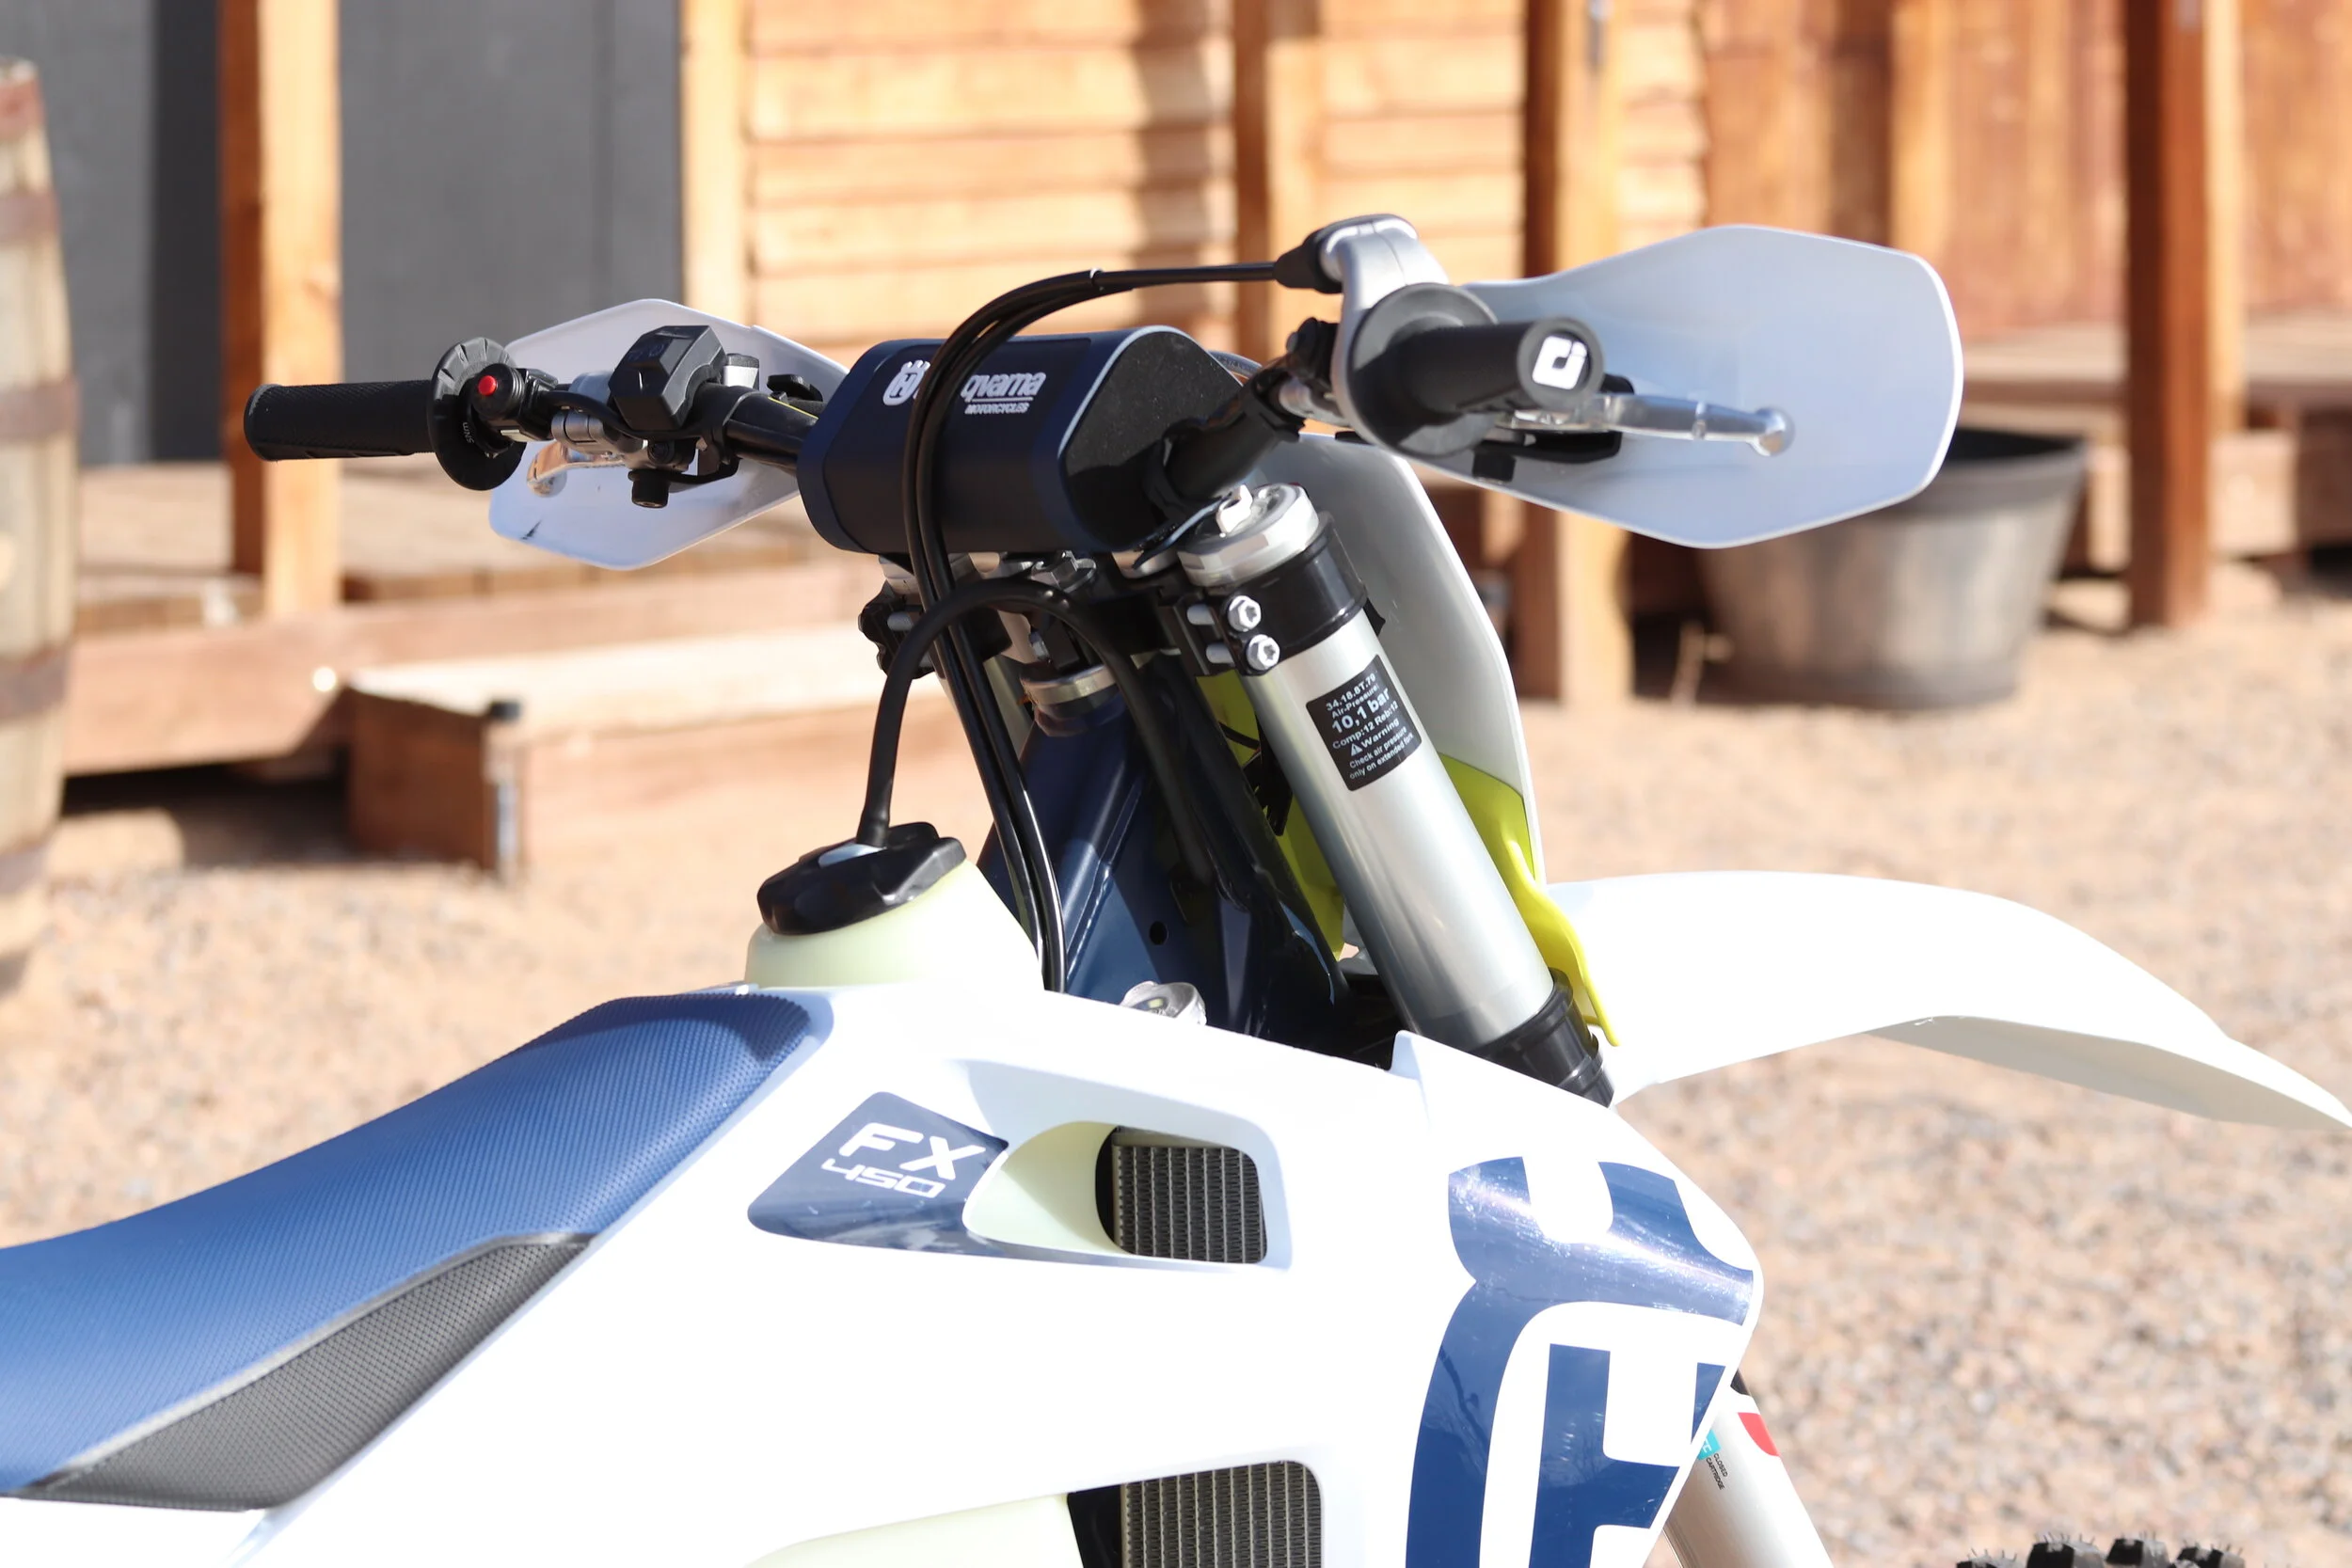
Suspension:

Front: WP AER 48, adj. reb./comp.,

12.2″ (310mm) travel

Rear: WP aluminum piggyback, adj. prld.,

hi & lo comp., reb., 11.8″ (300mm) travel

Country of origin: Austria

Suggested retail price: $10,099

Manufacturer: www.husqvarna-motorcycles.com


The AMA National Hare N Hound Experience

I wasn't always a moto guy. I know a lot of my high desert buddies bust my balls about just being one dimensional, but I came from a desert racing background. My dad would worked his ass off all week just so our family could go camp out in the desert on the weekends, in order to enjoy some family time as well as off-road riding. I was raised on the annual Barstow To Vegas race as my dad would send his entry in as early as he could, just so he could be one of the 1200 riders to tackle the infamous desert racing event that took place annually in the Mojave Desert. 

I remember when my dad came home with his first brand new bike and how excited he was. He took some extra side work and managed to save enough to get a 1985 ATK 560. His hero was Chris Crandall because he rode an American made bike and he won the 1984 Barstow To Vegas race on one a year prior. Obviously I didn't know if my dad knew at the time, but I wanted to be just like him, not Chris Crandall. I was nine years old watching my dad go on trail rides and race desert races on his ATK and that is what I wanted to do.  

Instead of watching guys like Bob Hannah and Broc Glover, I emulated riding styles of Larry Roeseler, Danny Hamel, and even Malcolm Smith. I would make my parents purchase pink ribbon (desert racing course markers) at Home Depot and even stole Day Glow markers from these races my dad would enter, just so I could mark my own course around our property. There I was after school with my pink ribbon hanging from my 501 Levi’s and my trusty hammer that I may or may not have got from my dad’s toolbox, while he was at work (that’s a whole other story in itself), hammering away at my new desert layout. I would go into my bedroom, grab a pencil, and begin to write down ten top desert racers on a notepad, just so I could ride my bicycle around my makeshift “loop” around the house and imitate each one of those ten riders. My dad would come home to a damn racecourse and would immediately make me clean it up the next day. That didn't stop me from doing another course the next day though!  

Once my dad started to put his racing/riding aside and started putting more effort into my racing we began to chase some of the District 37 desert events around Southern California. I worked my way up from a 125 novice to 125 expert in a little over two years and even won some bigger events like the Adelanto GP and the now defunct Barstow GP. I thought I was going to be the next off-road star, but at some point in my early teens my dad discovered that he could stick me into motocross and spend less money on parts for my bike. I seemed to thrash my bike at every desert race I did, so pops wanted to go the less expensive route, which back then was less expensive. The year I had hoped to race with my dad in the Barstow To Vegas race, the BLM pulled the plug on my dream. From there on out, I was a moto kid. 

My career went on a different path, but the love for off-road riding/racing never really wavered. I didn't go race out in the desert, but I always kept an eye on the AMA National Hare N Hound Series and its riders. Through my time at Dirt Rider Magazine I would interview factory riders and series champions and admired the off-road side of the industry. Fast forward to January 2019, I was asked by Meg Argubright (wife of 2019 NHHA Champion Jake Argubright) if I could help promote the series a little. I was on my own at Keefer Inc. and had the freedom to do what I want so I agreed. The NHHA jumped on board with my Keefer Tested podcast and one of the promises I made to Meg was that I would come out and race one event and re-live my youth a little. Well… My procrastinating ass managed to pick the hardest AMA National Hare N Hound of the year to re-pop my cherry (so to speak). I did a podcast on the event as well as the JCR Honda that I raced, but I thought some of you moto heads as well as old non podcast types could appreciate an old fashion article. I really wanted to share what it’s like for an old moto guy to be re-introduced to his 15 year old self. 

19HH9-548.JPG

The Bike/The Race:

I was lucky enough to get Ricky Brabec’s factory JCR/Honda CRF450X for the event and had help from multi time Baja champion Johnny Campbell. Johnny graciously let me race Ricky’s CRF450X and gave me the factory treatment for the weekend. Shaking the bike down on Saturday proved to be an eye opener for me (literally) because of how fast the bike and the conditions were out in Lucerne Valley. I knew I had to ride the day before the event just to get my eyes used to the speeds that I was about to encounter. After being clocked at 88mph down a dry lake bed and having my eyes watering from the dry desert air that was getting through my goggles, I knew it was going to be a fun weekend! I took my kid out for a trail ride just so I could school him on the fundamentals of off-road riding. There are certain aspects to riding out in the desert, that unless gets taught, you may never learn, and that means you could get hurt because of your own stupidity. Aden got to learn the ins and outs of reading terrain, what the course markings mean, how to follow ribbon, and of course know how to scan for other vehicles out sharing the same desert you are. Fun Fact: I have never raced a desert race on anything over 125cc’s!

Sunday came and I kissed my wife and kid goodbye as the start to the 69th Annual Checkers MC National Hare N Hound was some 40 miles away from where they would be helping Johnny Campbell pit me. The first loop was 45 miles and the second loop would be 42 miles. Unlike in motocross where you can learn your line by riding the track several times, desert racing is all about tackling the unknown. Except for “The Bomb”. The Bomb Run is anywhere between a 1-4 mile section of the start, which you’re allowed to pre-run as much as you want in an allotment of time given by the club that puts on the race. I managed to get my line sorted out in about 5 passes, but I should have done more. Did I mention that hundreds of other racers are practicing the bomb as well? It’s the desert. It’s dusty. It’s tough to see. It's gnarly. There are things that come up really fast on a JCR Honda CRF450X. 

Before the race started there is a riders meeting where all of the riders gather in the middle of the desert to listen to the race director on the back of an old truck. I wish everyone reading this could get a look at what I witnessed that morning. Not to get all Ryan Hughes on you, but the desert landscape as hundreds of riders gather around a truck, in the early morning sunlight, in the middle of BFE, singing the national anthem was very, very cool to me. It’s bad ass and something I have never experienced in my years racing a motocross event. 

The race is a mass five row start (Expert, Amateur, Novice, Beginner, Quads) with a dead engine banner drop. Of course I choked at the start and my Honda CRF450X didn't fire! I did several makeshift practice starts perfect except for the one the counted! Figures! I managed to get pass the bomb without any huge issue and pick up the marked trail so far back in the dust it felt like I was literally going 10mph. Upon clean air I managed to bob and weave my way around riders and at around mile marker 20, I was in some good clean air. This is where I noticed how many damn rocks are out in the middle of the Mojave Desert! There are so many god damn rocks! The Checkers Motorcycle Club are known for tough courses, but holy shit, I didn’t think the first loop (which is notoriously easier for beginners, because they only do one loop) would be this technical in spots. 

I see the fuel stop out in the distance and start to haul ass like someone is watching me. No one actually was, but I like to think that there was. I got some gas, a water, a gel, and told my family there are a lot of rocks out there at least seven or eight times. They looked at me like I crashed because as I was drinking, I could see my wife studying my helmet as she walked around me a couple times. “No Heather, I didn't crash, but did I mention there are a lot of rocks out there!” I waved goodbye and set out for loop two knowing that it would be tougher than the second! Awwwwwww, shiiiiiiiiiit! 

Heather making sure I didn't have a concussion because I said the word “rocks” like 48 times.

Heather making sure I didn't have a concussion because I said the word “rocks” like 48 times.

Not even 5 miles in, the club stuck me in more rocks. Shocker! But you know what was cool? There was a woman on the side of the course, as I was making my way up this nasty climb and she was literally BA’ing me! There I was climbing this mountain in the middle of nowhere and this lady was showing me her ass! Hell yeah! It took me by such surprise that I almost went off the damn mountain and laughed about that for at least a solid four miles! Thanks for the ass shot lady! There were sections of the second loop that were so tough at times that it tested my mental/physical strength more than any motocross track has ever done as of late. At each passing checkpoint the course workers were there to root you on with positive gestures and give you that little bit of extra strength that you didn't know was inside of you. As I was coming off one of the mountains down into a valley, you could see the vehicles off in the distance. I just knew I was almost to the finish, but then the course would go another way and would really screw with my mind. I was literally MF’ing the club as I was racing at times, but also laughing and having fun at other points in the race. It’s like I was going crazy all alone out in the middle of some god forsaken desert. Shit, maybe I am going full Ryno. Who knows! 

I got to the finish, met my family and told them all about my trials and tribulations during my almost three hour race. I mentioned the rocks, the lady with her ass hanging out, I saw donkey, and told them about a guy named Kato that was out in the hills taking photos. They looked at me in disbelief! I think Heather was still walking around me to see if there were any crash marks on my helmet, but I know that none of them could relate to what I just experienced or went through. That’s what’s crazy about desert racing. No one is out there witnessing all of these moments you’re having, in your life. In a motocross race I would have at least two Instagram bangers sent to my phone before I get into the van to go home! In desert racing, the only people that can relate are the ones out on the trail with you doing the same shit you are! Those are your brothers and sisters for one day. That is your family! That is desert racing! It’s a lot like doing a triathlon to me a times. No one can relate to what you just did, except for your competitors. As tough as it was, it was one of the best times I had on a dirt bike in a long time. Why? Because it tested me at times. I like being tested. I know it’s fun when I can look back on something a week later and be proud of what was just accomplished. If the feeling hasn't worn off in a week, I know that what I just did was something I need to do again. That is desert racing to me!  See you next year brothers and sisters! Thanks for having me back. 

2019 NHHA Pro Champion Jacob Argubright

2019 NHHA Pro Champion Jacob Argubright

Random Thoughts I Had While Racing: 

-All moto guys should give one Hare N Hound or even an off-road race a shot. It’s an experience that you will never forget and it could even help your moto skills as well.

-Why in the hell are all these people racing in the middle of the desert on a Sunday morning?  

-The Off-Road community is some of the best people I have ever come across. Title contenders talk to each other before the race. Riders singing the national anthem. Riders stopping to help other riders finish the race. The people that you pit next to you actually smile at you and would give the shirt off their backs for you. 

-These top dudes of Hare N Hound are fucking crazy! How do they go so damn fast over this stuff?! 

-They want us to go down this?

-They want us to go up that? 

-How do Rally guys navigate and haul ass with no markings on the trail? 

-I wish Shorty was here…

-I am so hungry. I wonder what Heather is making for dinner? 

-Was that a woman’s ass I just saw? No way! I must be really tired and dehydrated. 

-Thank god for bib mousse tubes and this Scott’s Steering Stabilizer. 

-I have never seen a desert tortoise out here.

-I wonder where Kato is hiding on the second loop?

-Oh look! There’s Kato! As I almost crash

-This is the worst thing I have ever done. 

-This is the most fun thing I have ever done.