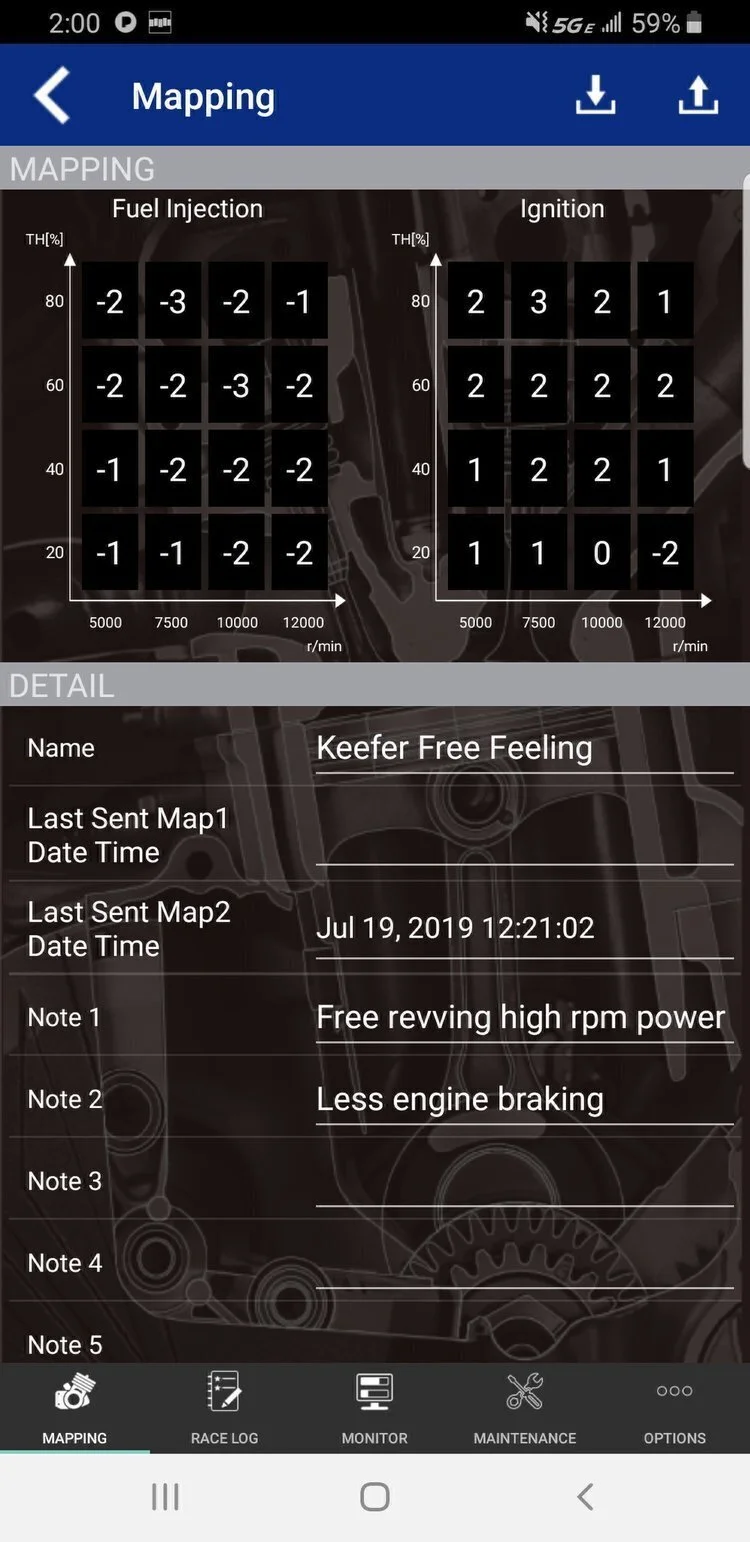
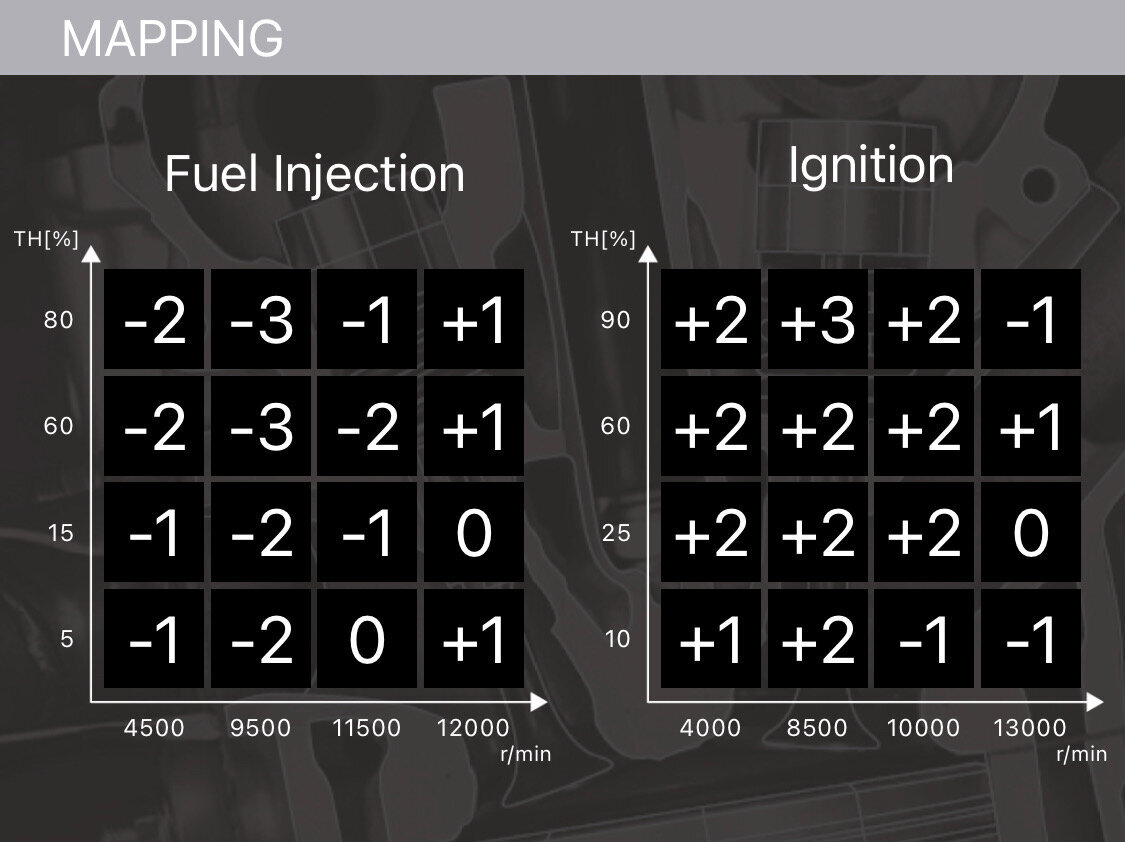
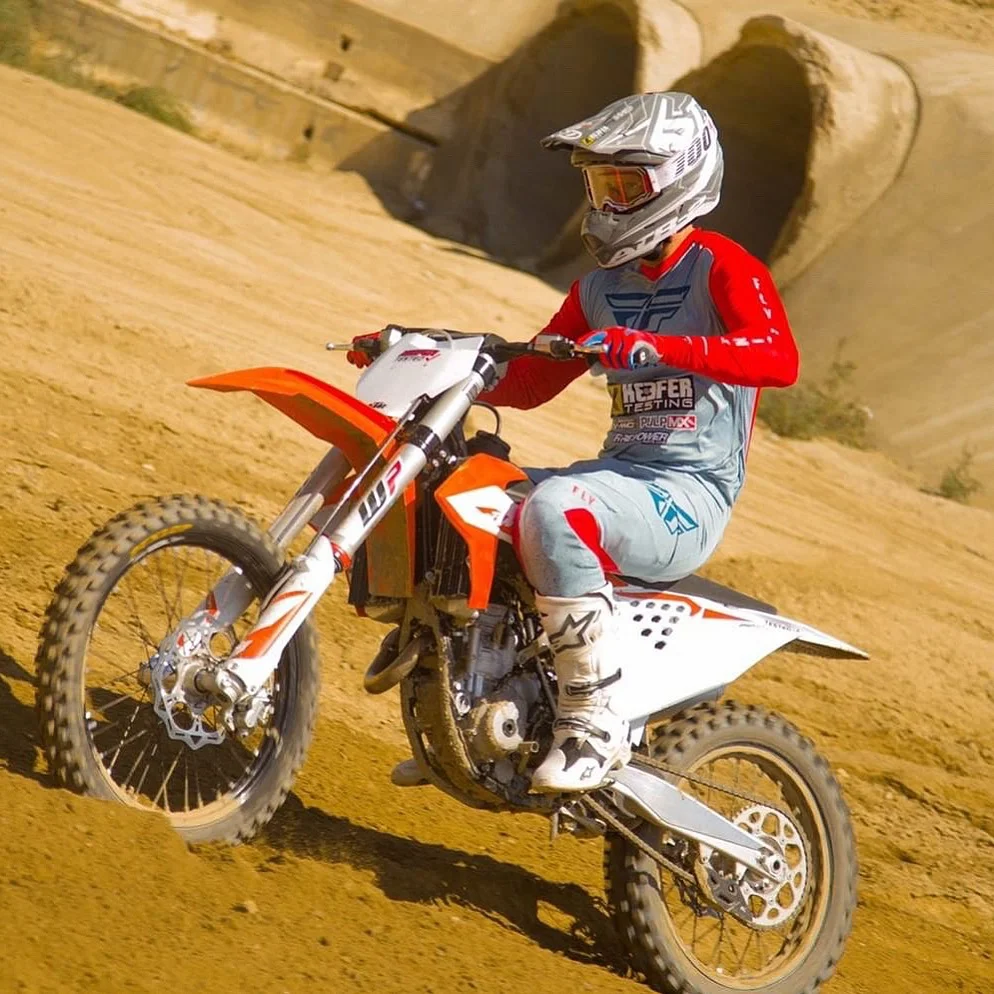
The 2022 Husqvarna FC250 has been in heavy circulation the past couple months and we have come across some settings to get you comfy as well as some mods that can help you get some more power out of the white stallion.
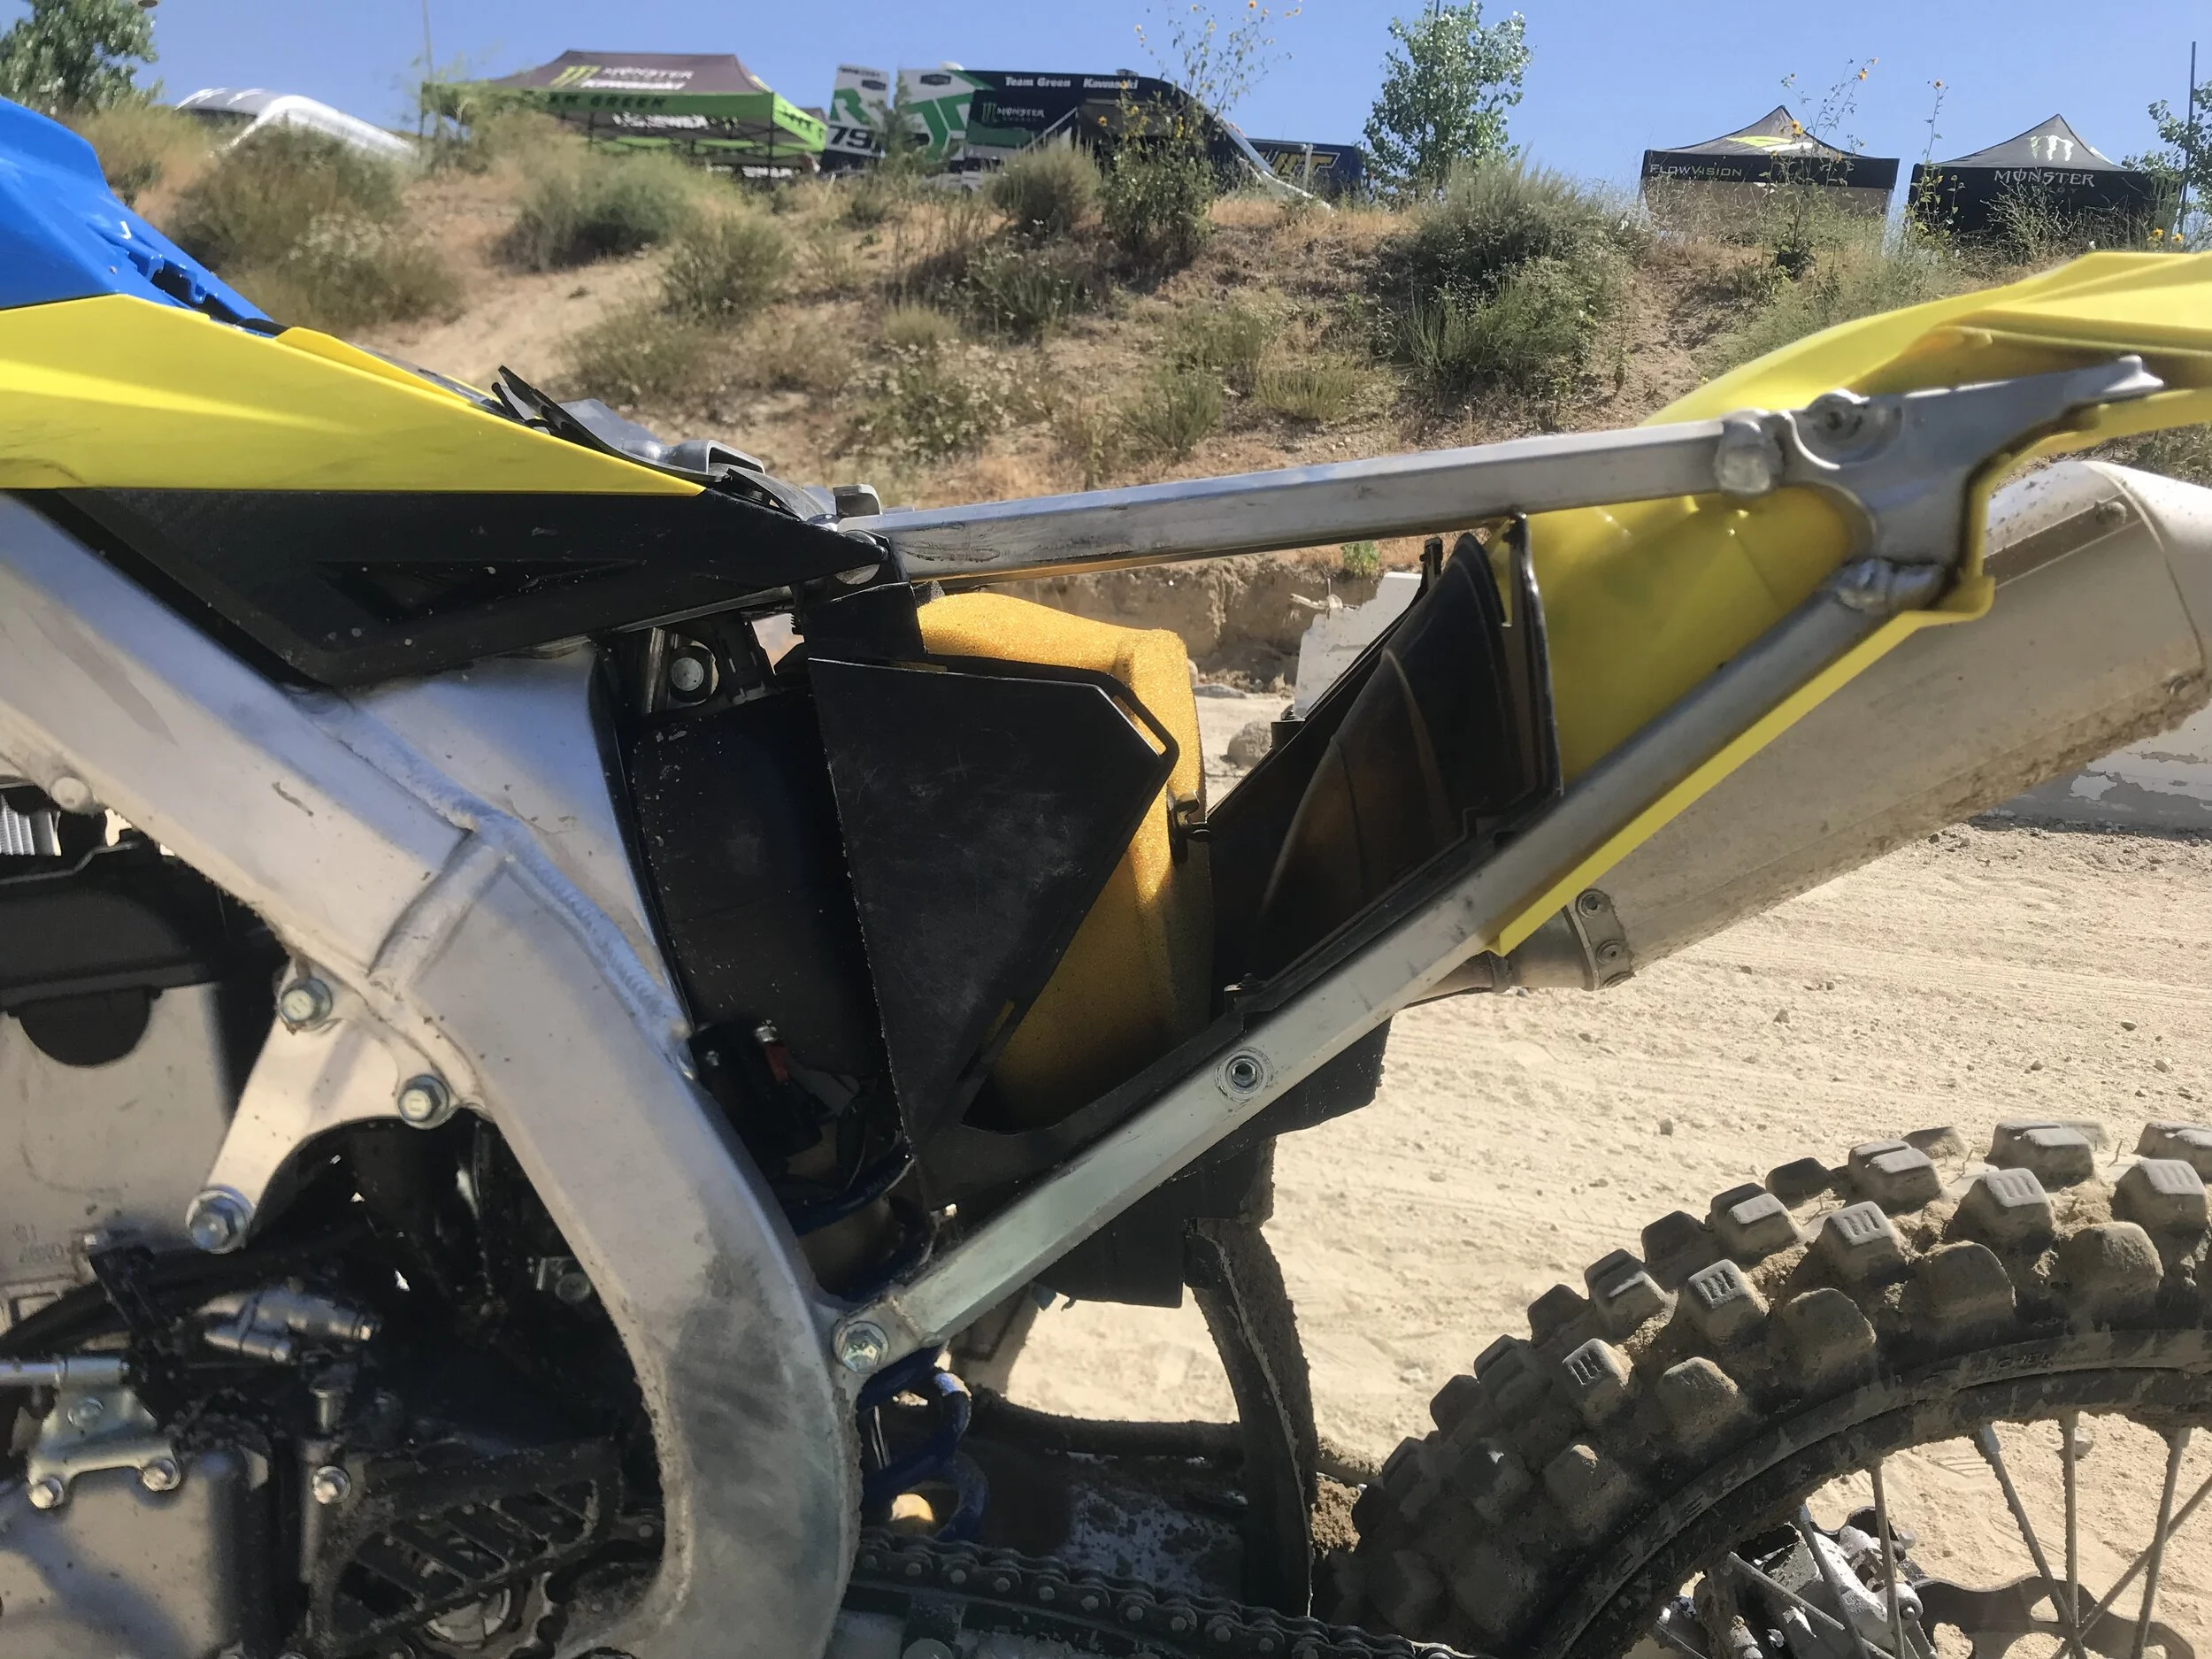
TC Two-Stroke Air Filter Cage: This is the cheapest and easiest way to get more throttle response out of your FC 250. You will notice better throttle response through the low to mid RPM range by simply going to a TC two stroke cage with no backfire screen. Here is the part number you will need. P/N 5040601600
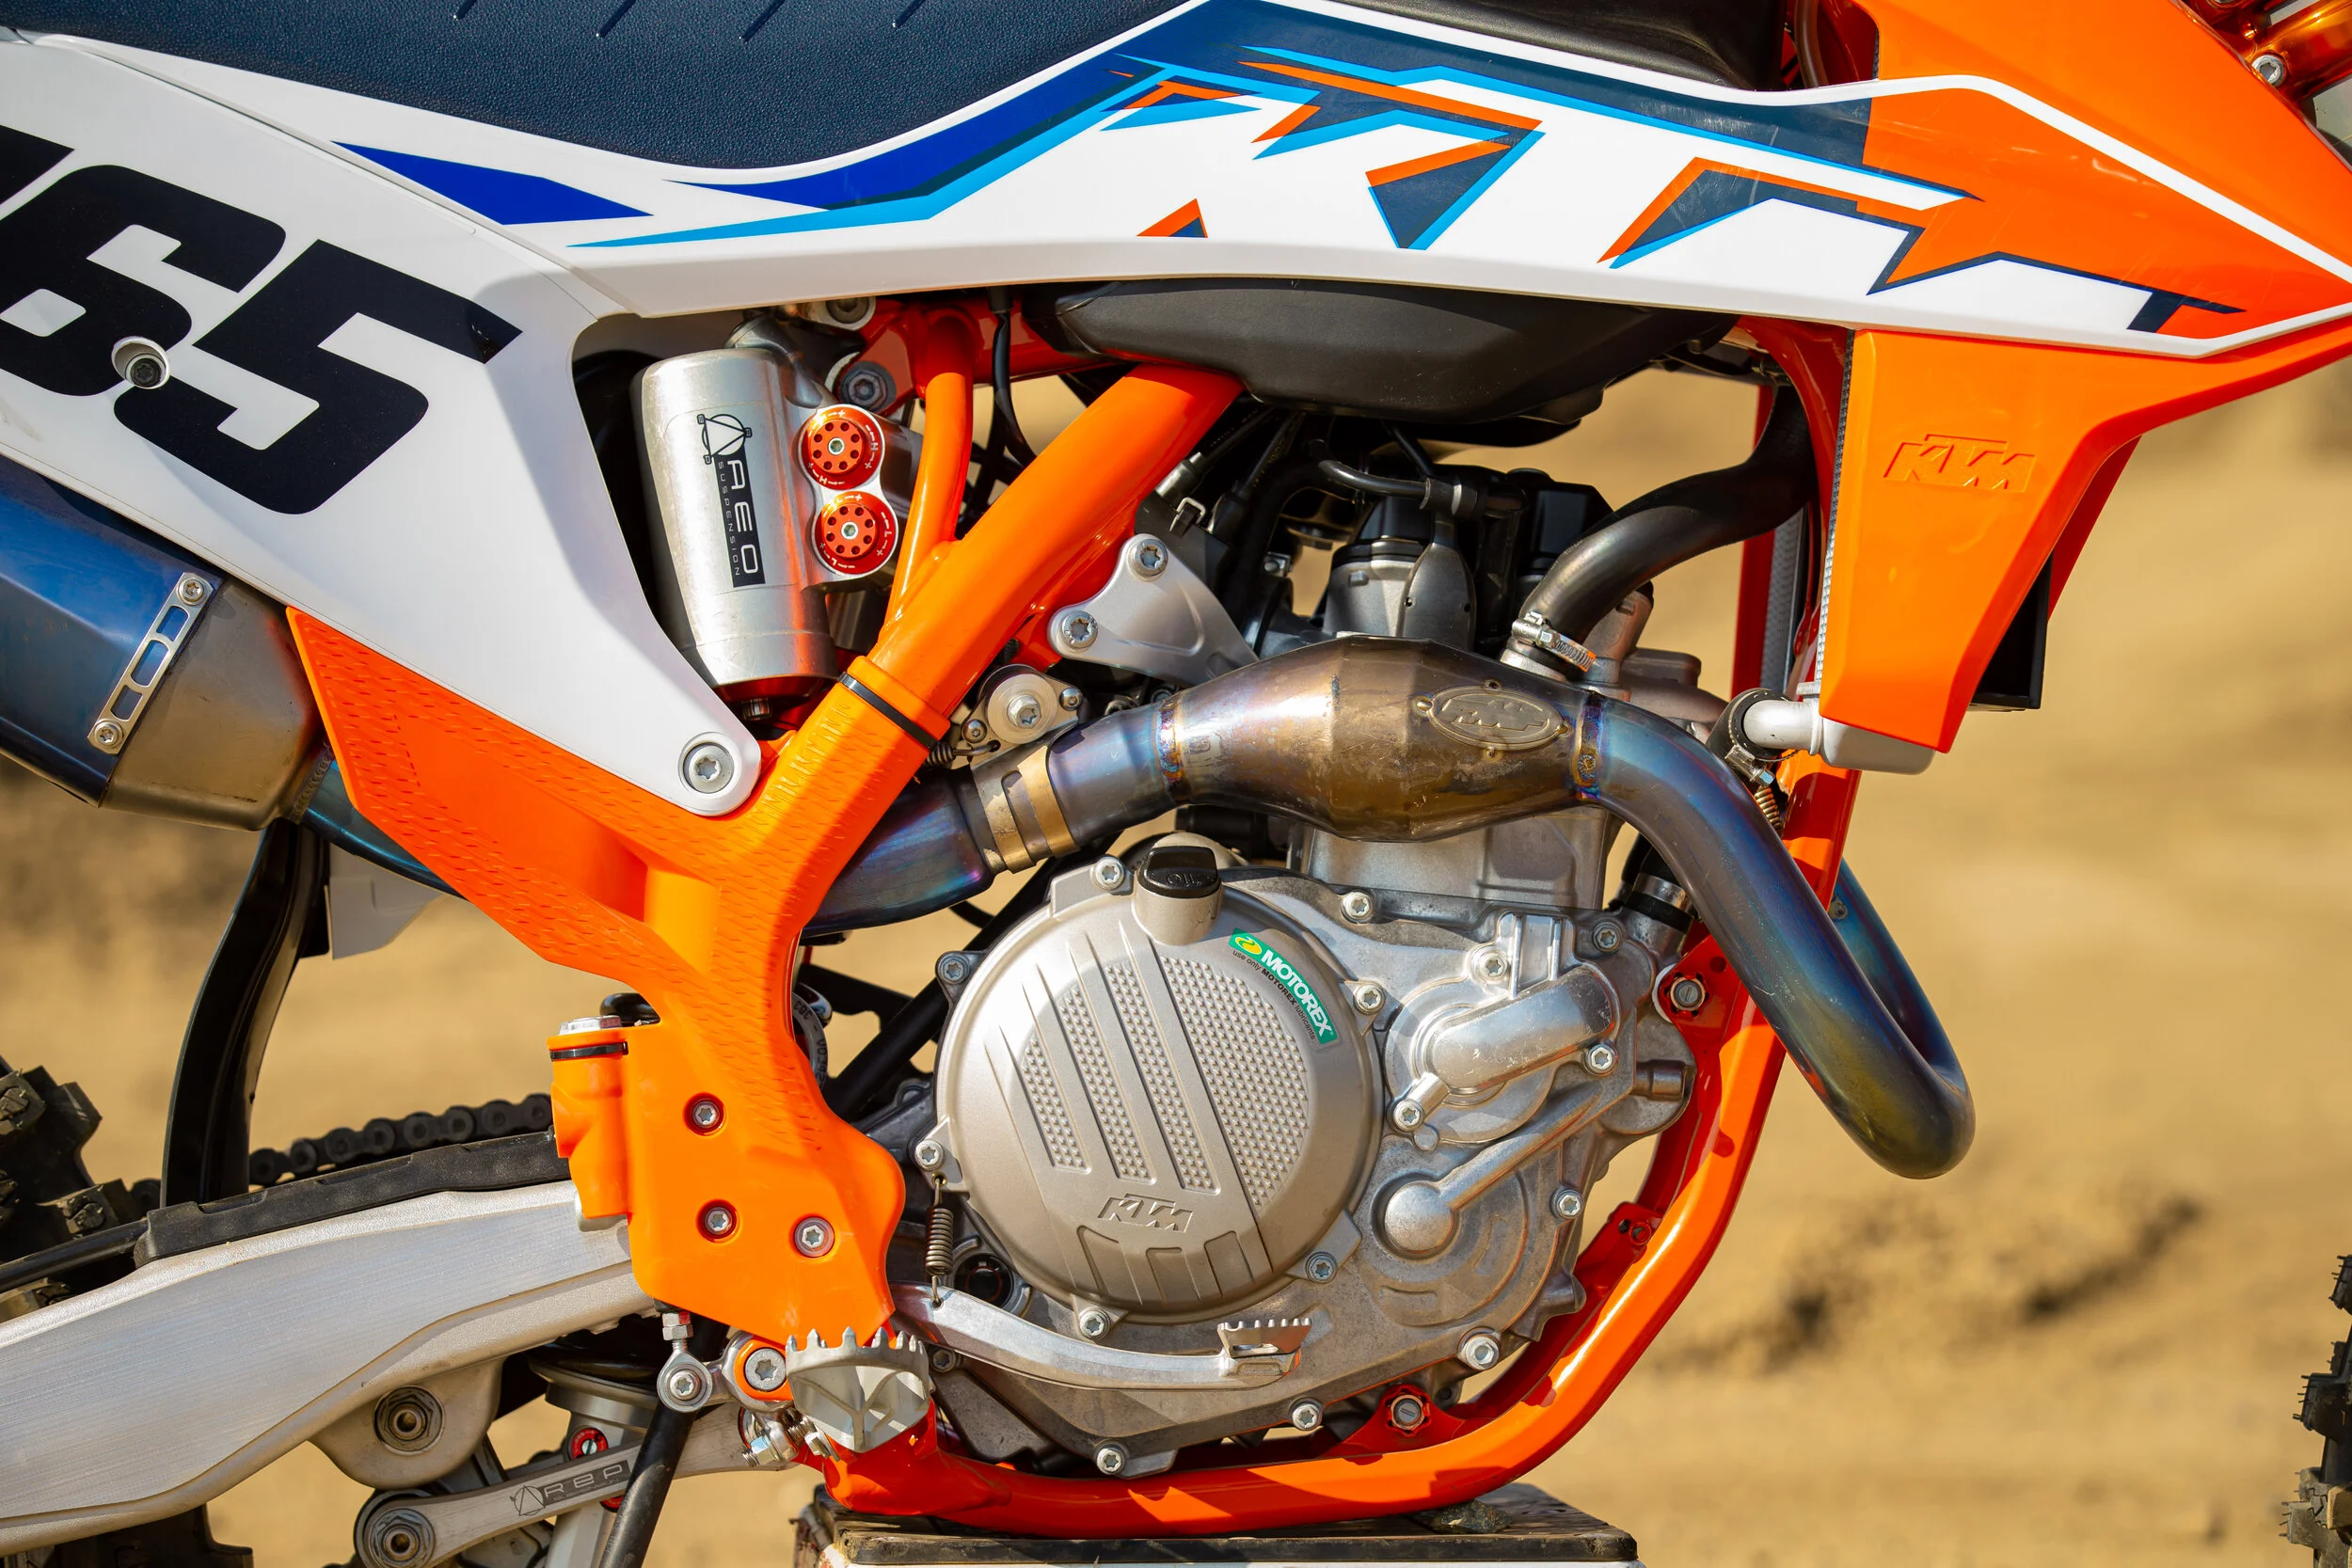
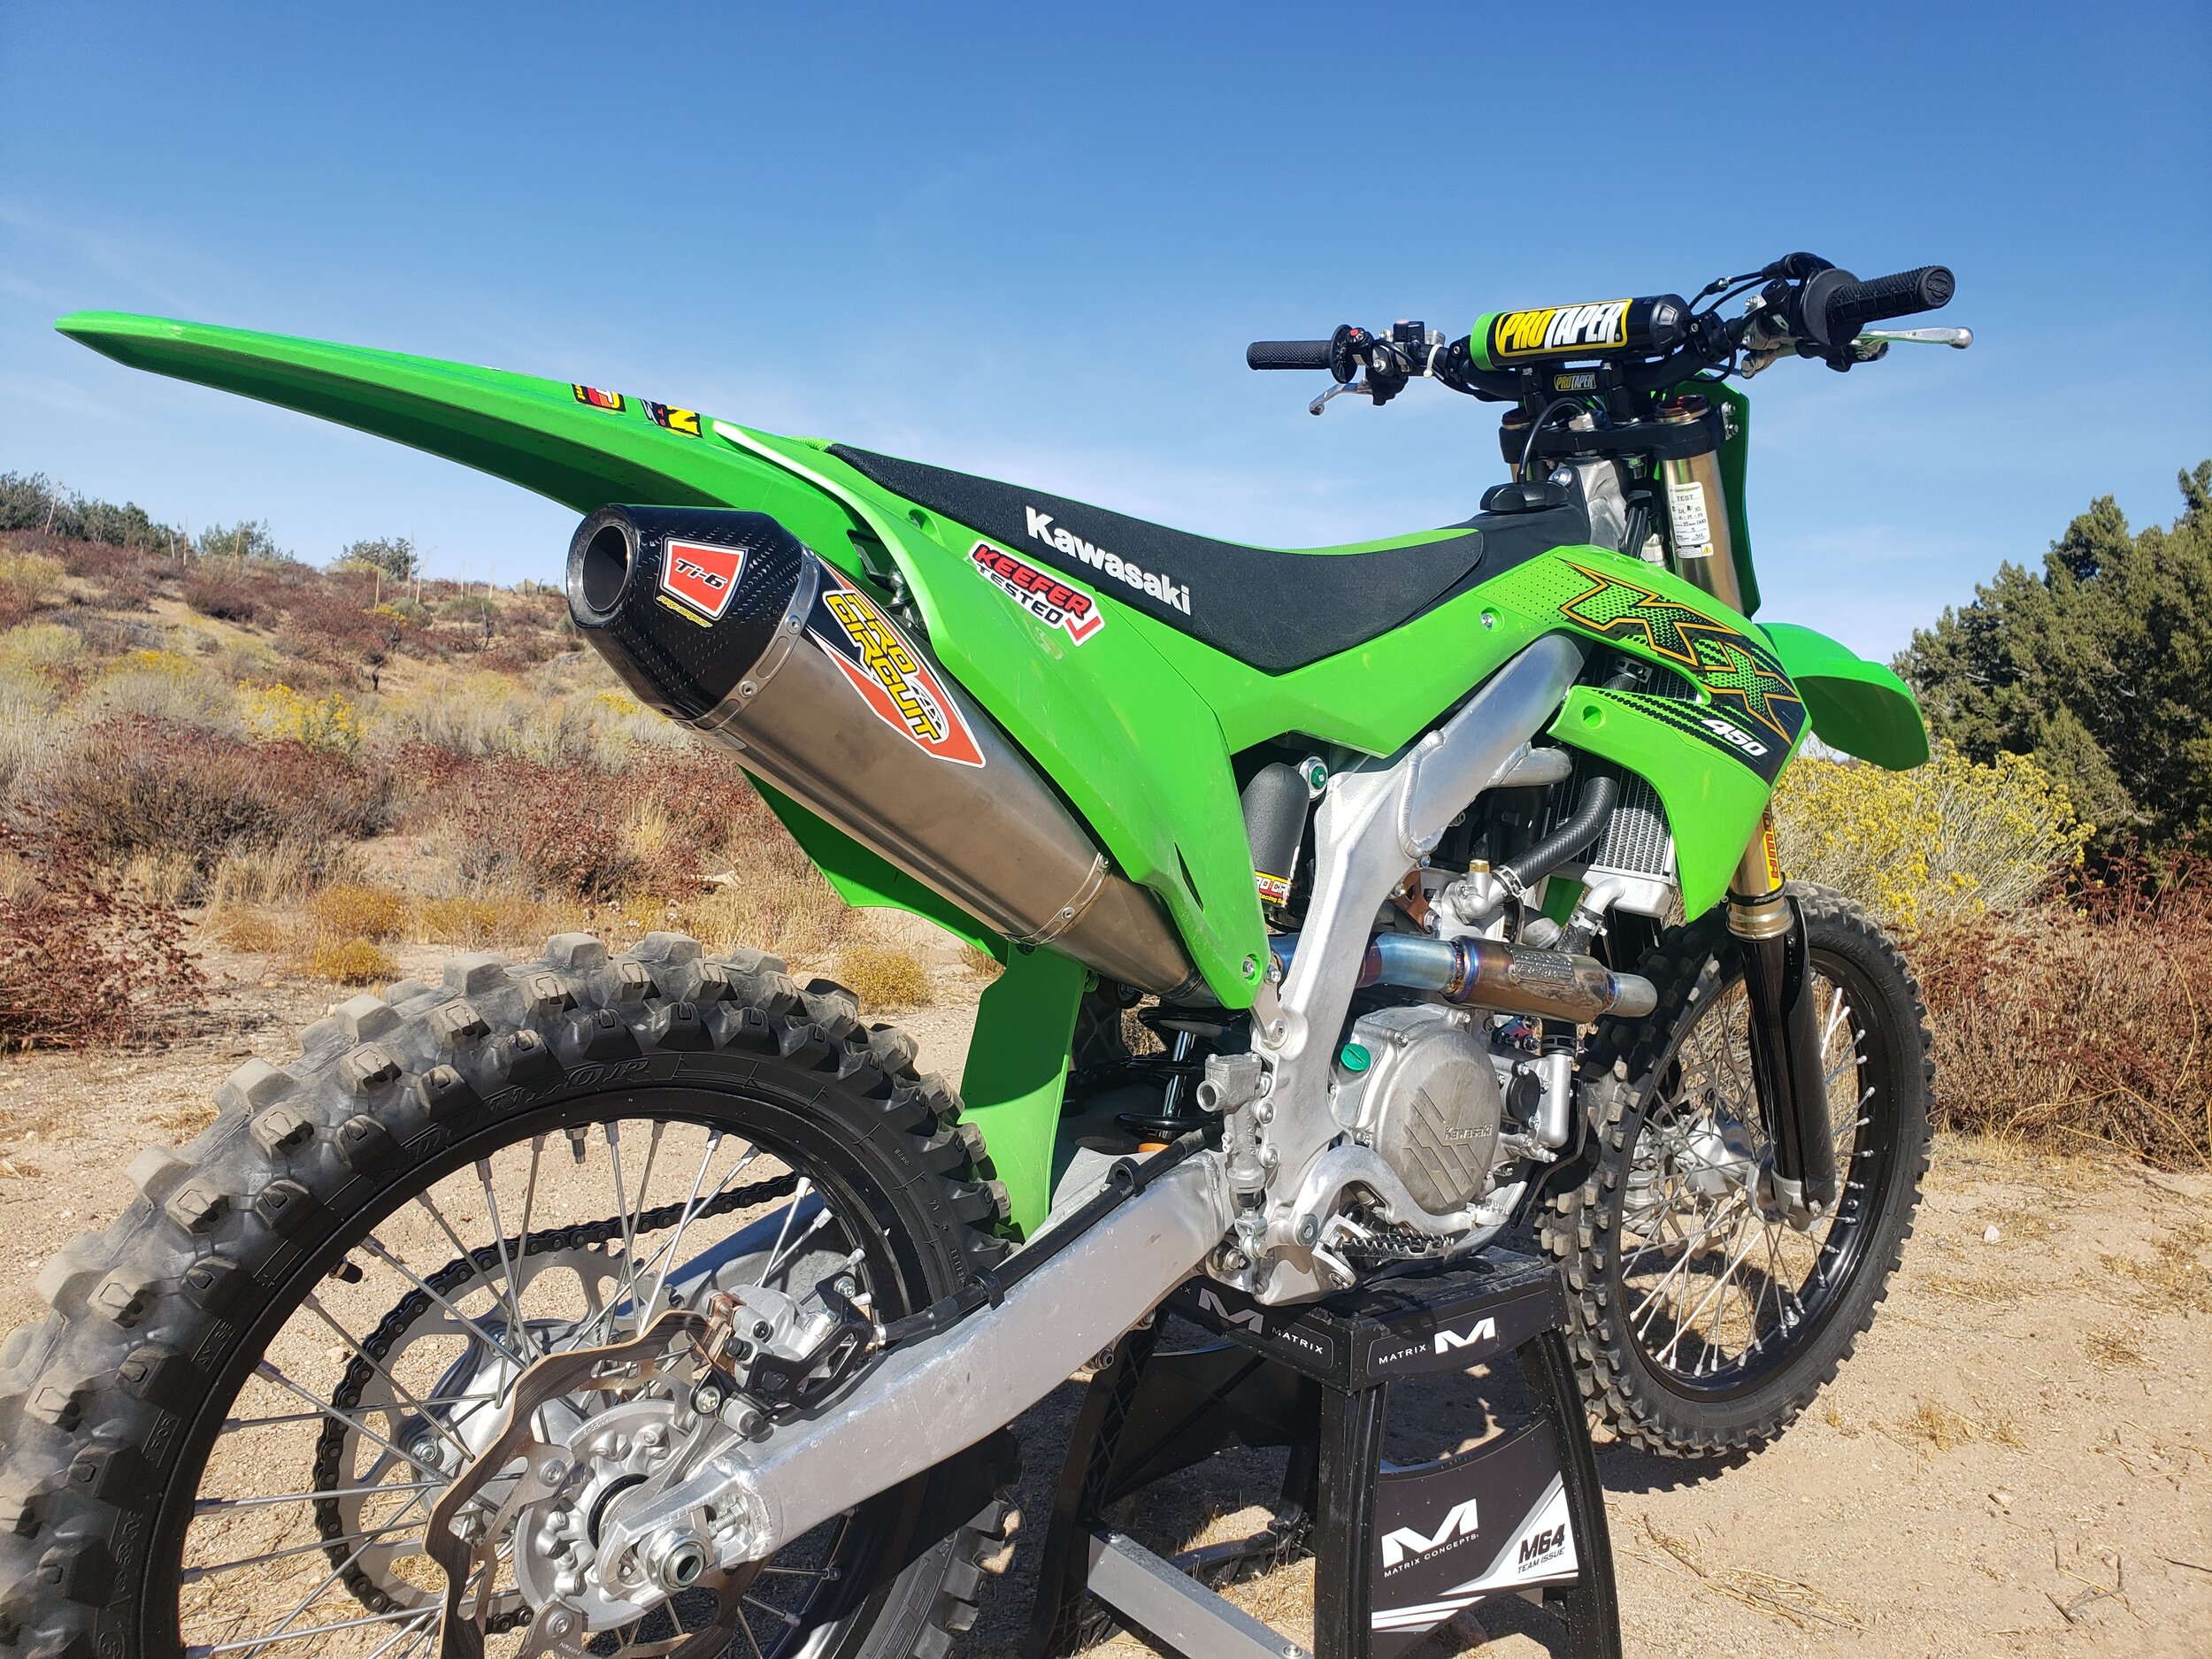
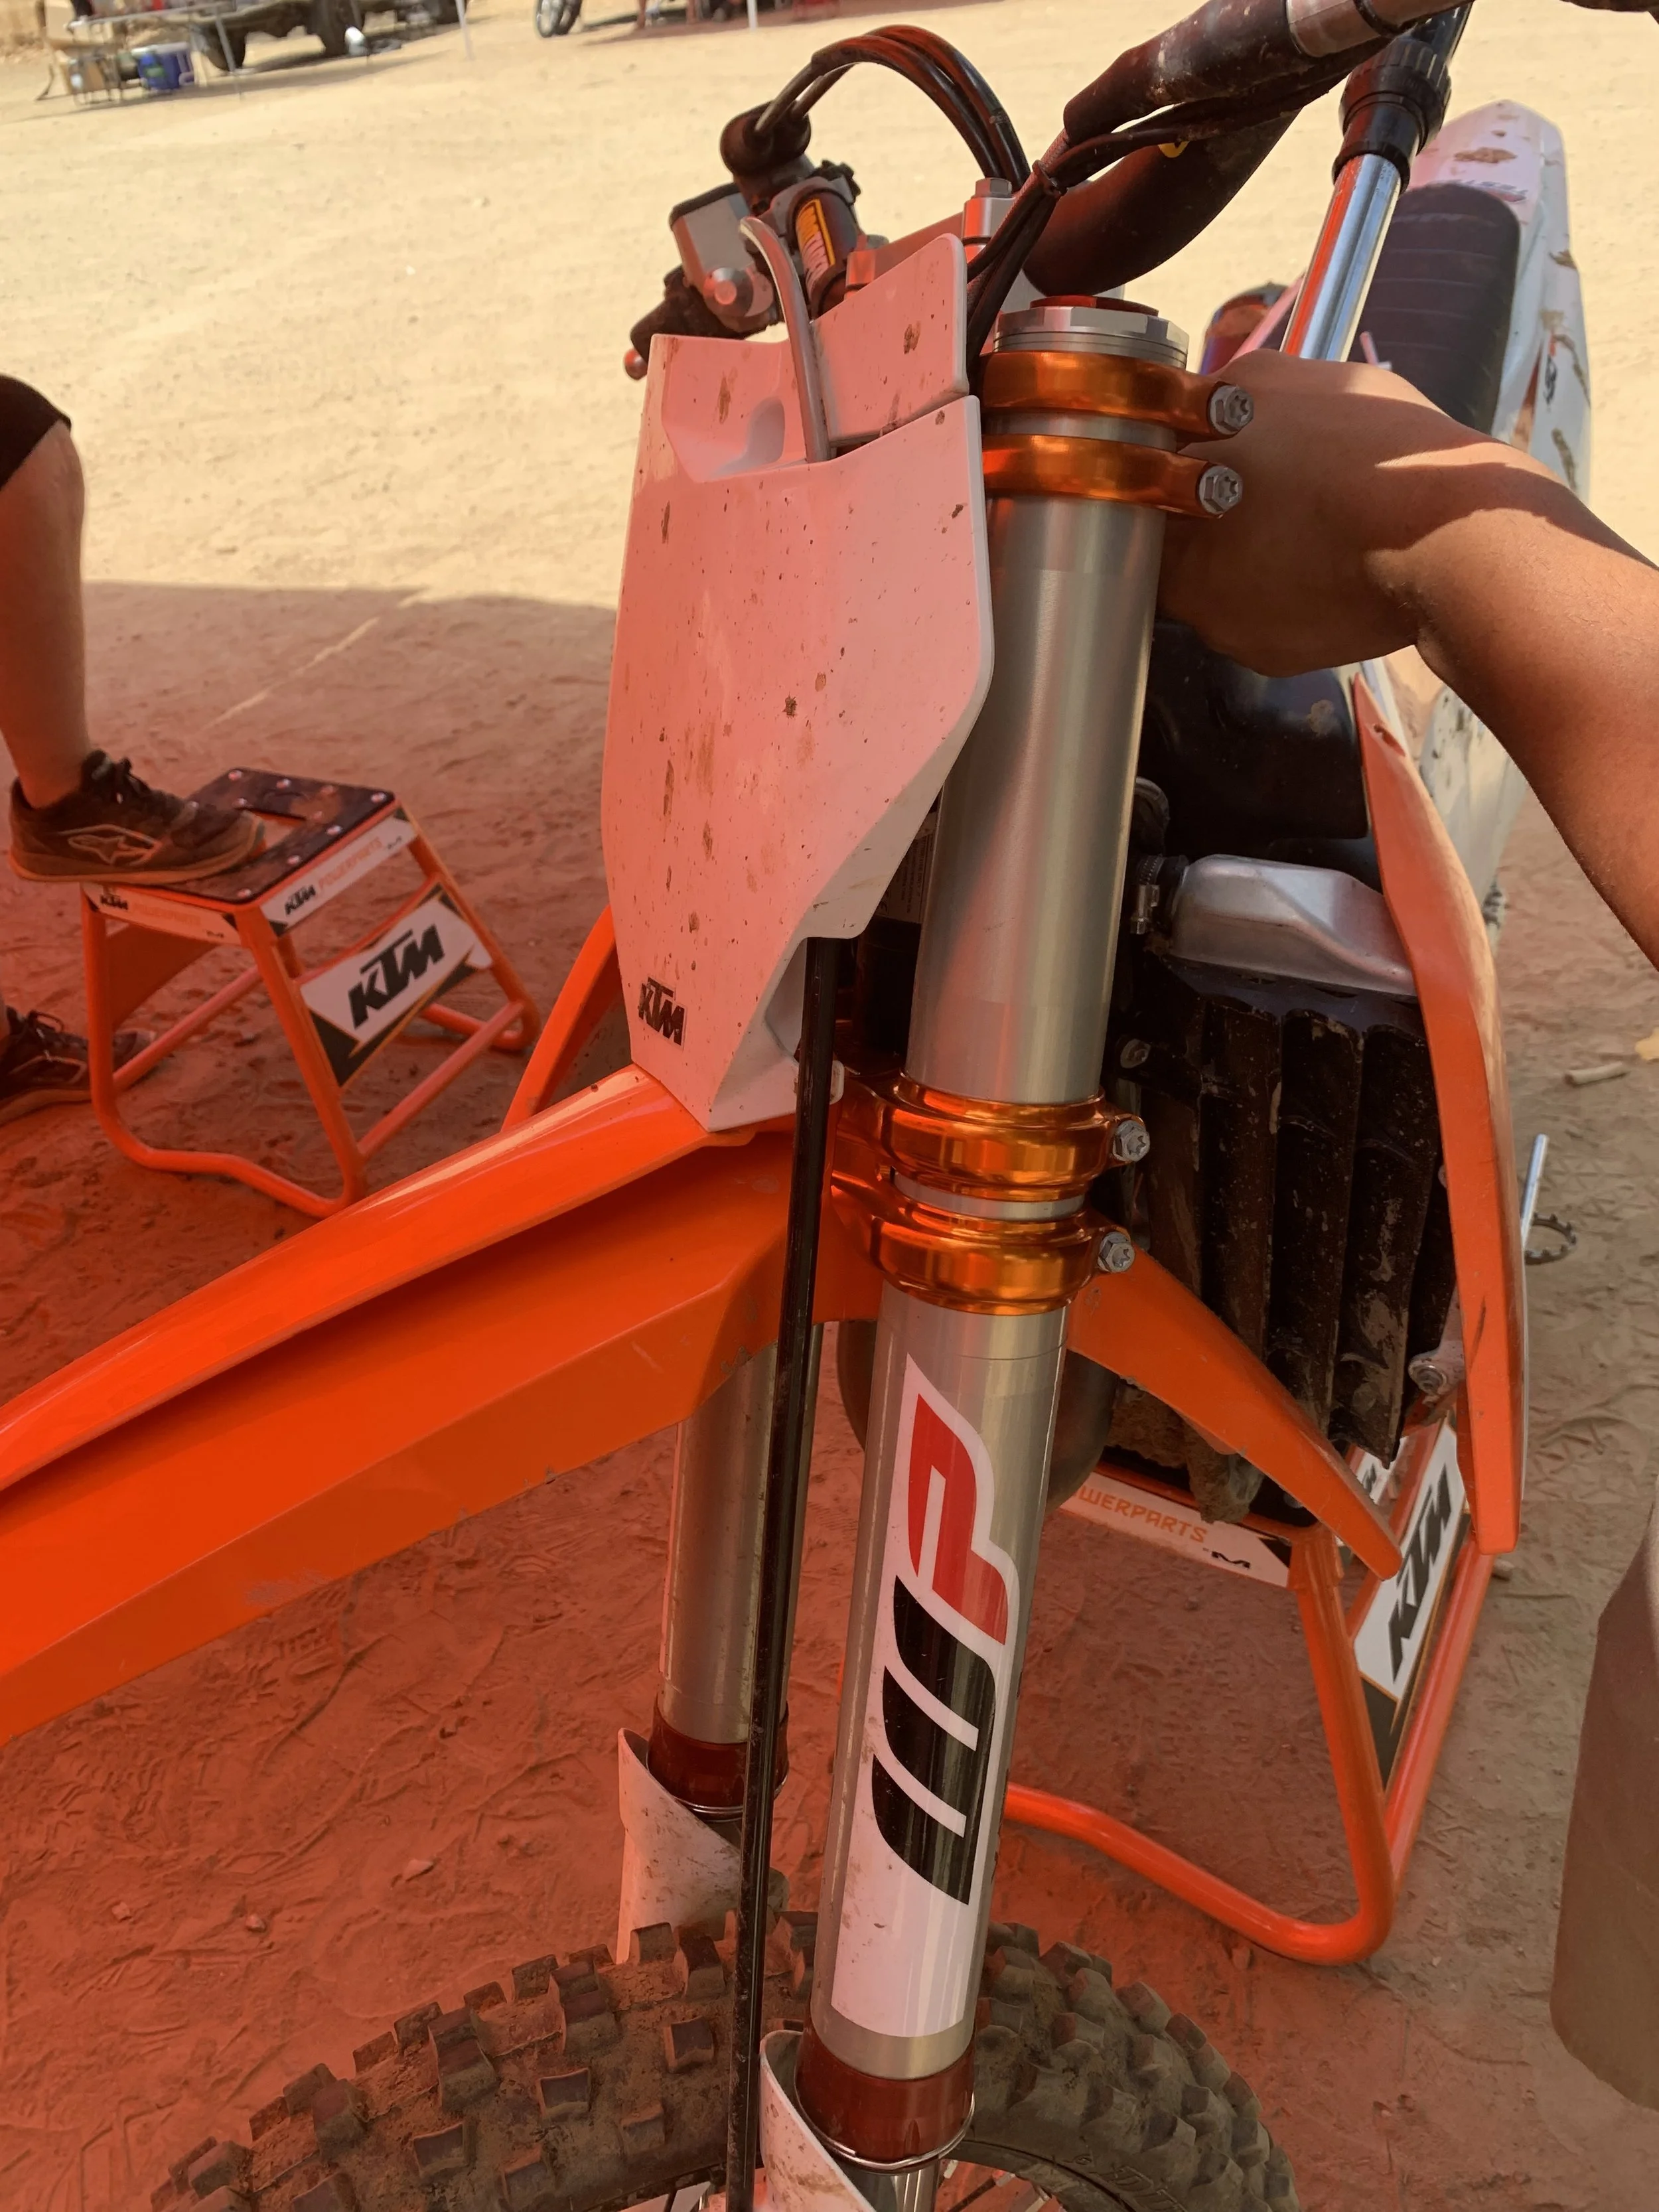
FMF 4.1 Full Muffler System: To me, FMF makes the best muffler system for the Husqvarna FC250. There are some other companies that have other bikes dialed in more, but on the Husqvarna, FMF has got it down. You will get more low to mid RPM response as well as more mid range pulling power. Top end is increased plus the over-rev is as good as stock. It is one of the few times that I was impressed because it was actually better than stock in almost all areas. The downside is that you must keep up on muffler packing (every 10-12 engine hours) because the FMF will blow out and that could damage your expensive titanium can. Did I mention that you will lose almost two pounds with the titanium 4.1 system? If you slap spring forks on your Husqvarna, you will be gaining almost three pounds. You can get most of that weight gain back down with a 4.1 Titanium FMF Muffler system.
Pro Taper Handlebars: But Keefer they come with Pro Taper’s! Yes, I know but now that PT offers the “Race Team bend” (810mm width, 91mm height, 49mm rise, and 52mm sweep), which is a little higher of a bend than the stock Husqvarna PT bar and is still a pretty straight. I do cut the Race Team bend down to 805mm as that is the happy medium for me and my 5’11 frame. The Pro Taper SX Race bar worked well for riders from 5’8 to 6’1 as well. Both bends come in a crossbar or crossbar-less style and the SX Race bend has a 800mm width, 87mm height, 54.5 rise, and 54mm sweep. If you’re looking for a better “stand up feel” from your FC250 look for handlebar close to these measurements.
Throttle Tube: There are a couple you can choose from here… If you’re looking for an aluminum throttle tube that is expensive, but helps the feel of your throttle, I recommend the ZRT throttle. This throttle tube makes the pull have almost zero drag and is a tough SOB. There is some set up/prep time to this throttle (cutting the right side of the handlebars), but it can help the pull over the long haul. If you’re more the plastic style tube type of rider, look at the Motion Pro Titan tube as it’s tough for a plastic tube and doesn’t have as much drag as the stock lock on style ODI grip/tube that comes on the stock FC’s. The stock plastic throttle has a lot of friction and gets tough to turn too quickly.

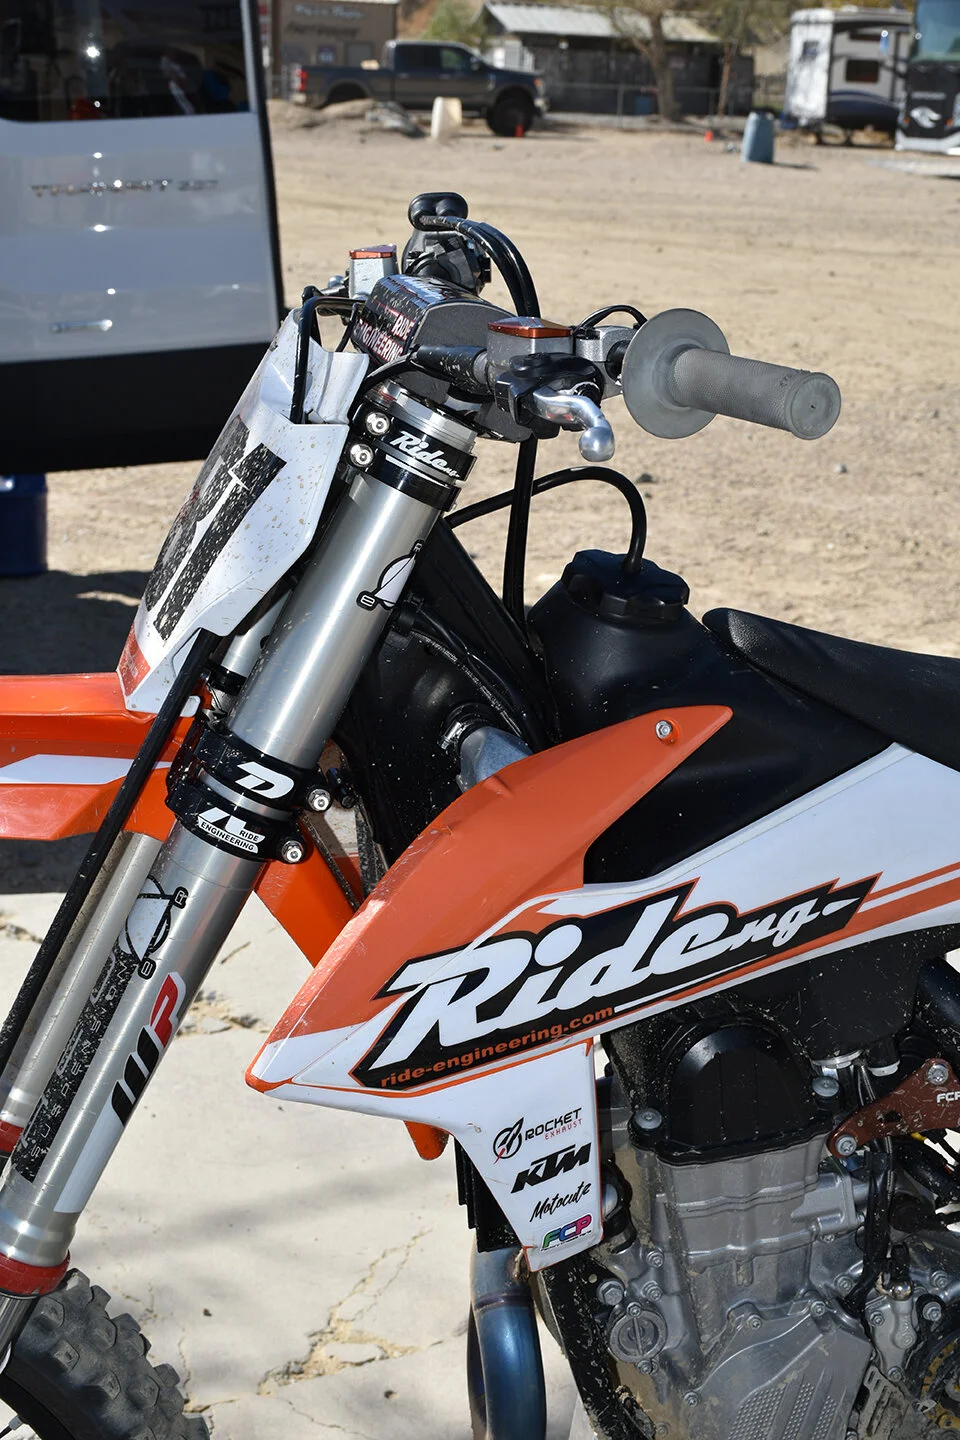
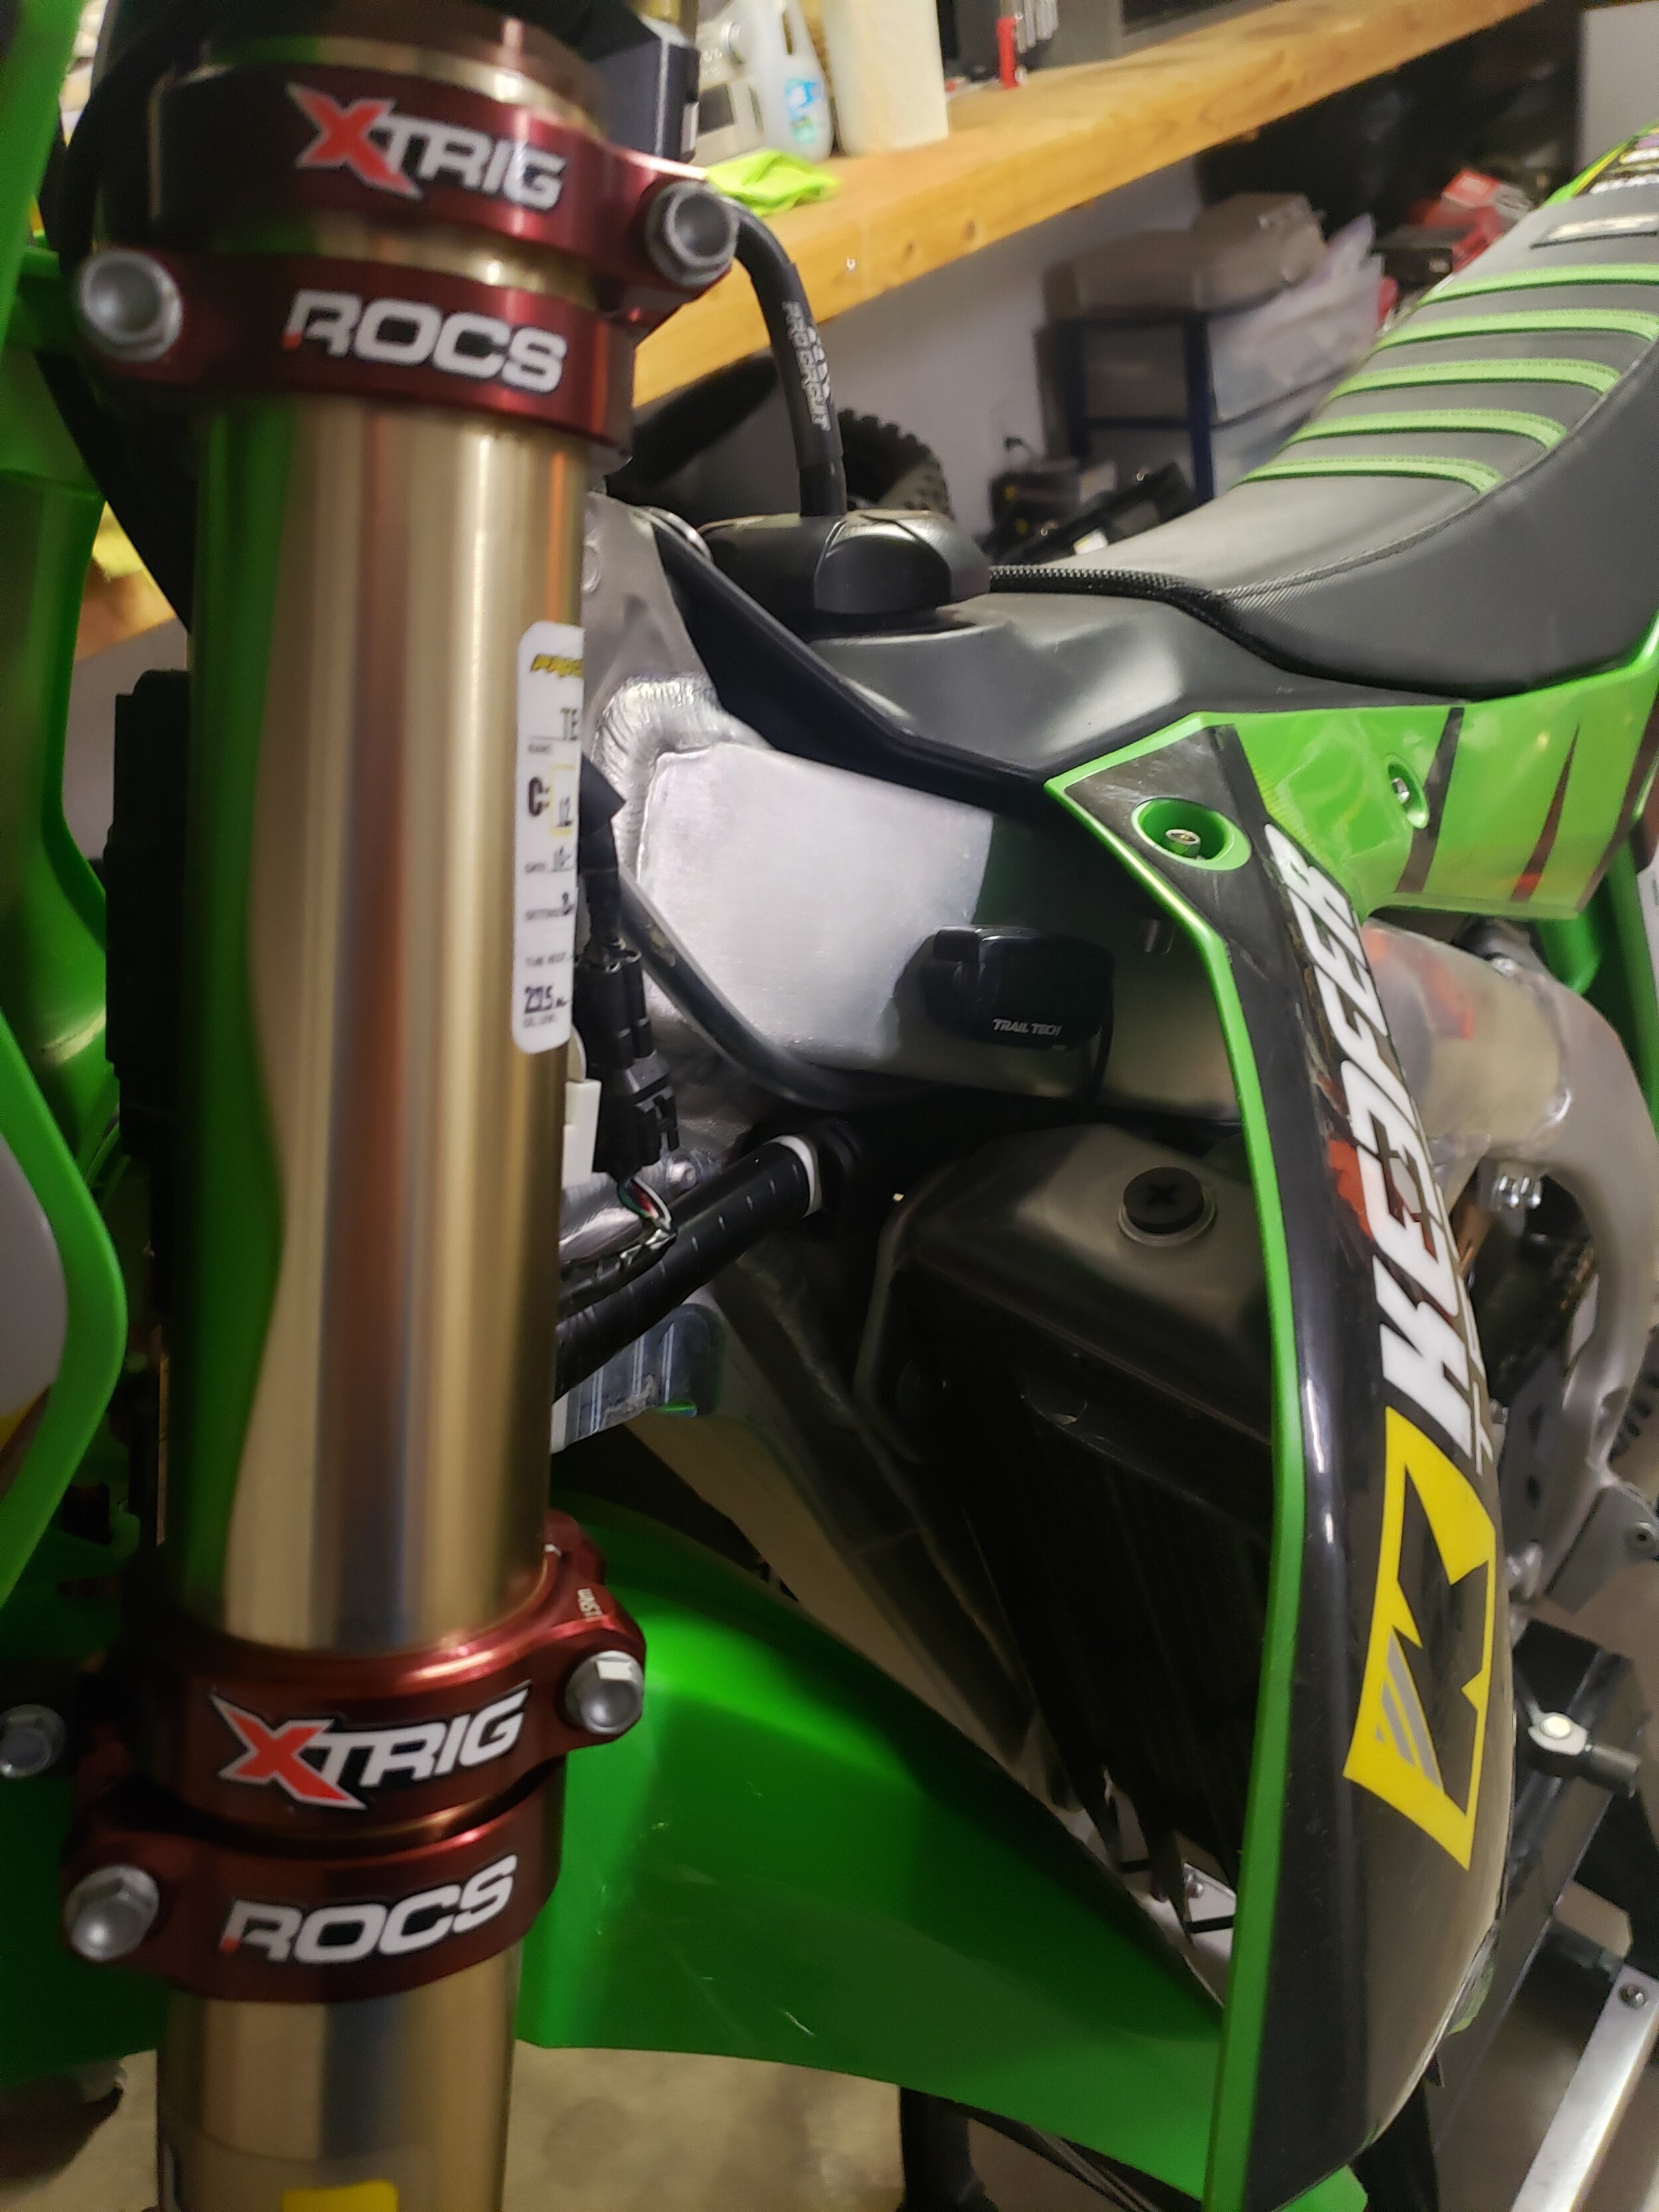
Ride Engineering One Piece Bar Mount: The Ride Engineering One Piece Oversize Bar Mount has a one-piece top that is designed to resist bending much better than the stock bar mount. Precision machined from aircraft quality aluminum, there is also a 6mm difference between the forward and back mounting positions. Ride Engineering also machines their own stainless steel posts that prevent over tightening, unlike some other competing brands that DO NOT use quality posts. This bar mount has saved my son and I a couple times when we are out doing motor. He seems to crash a lot in corners and the stock mount on the FC250 just twists and bends easily.
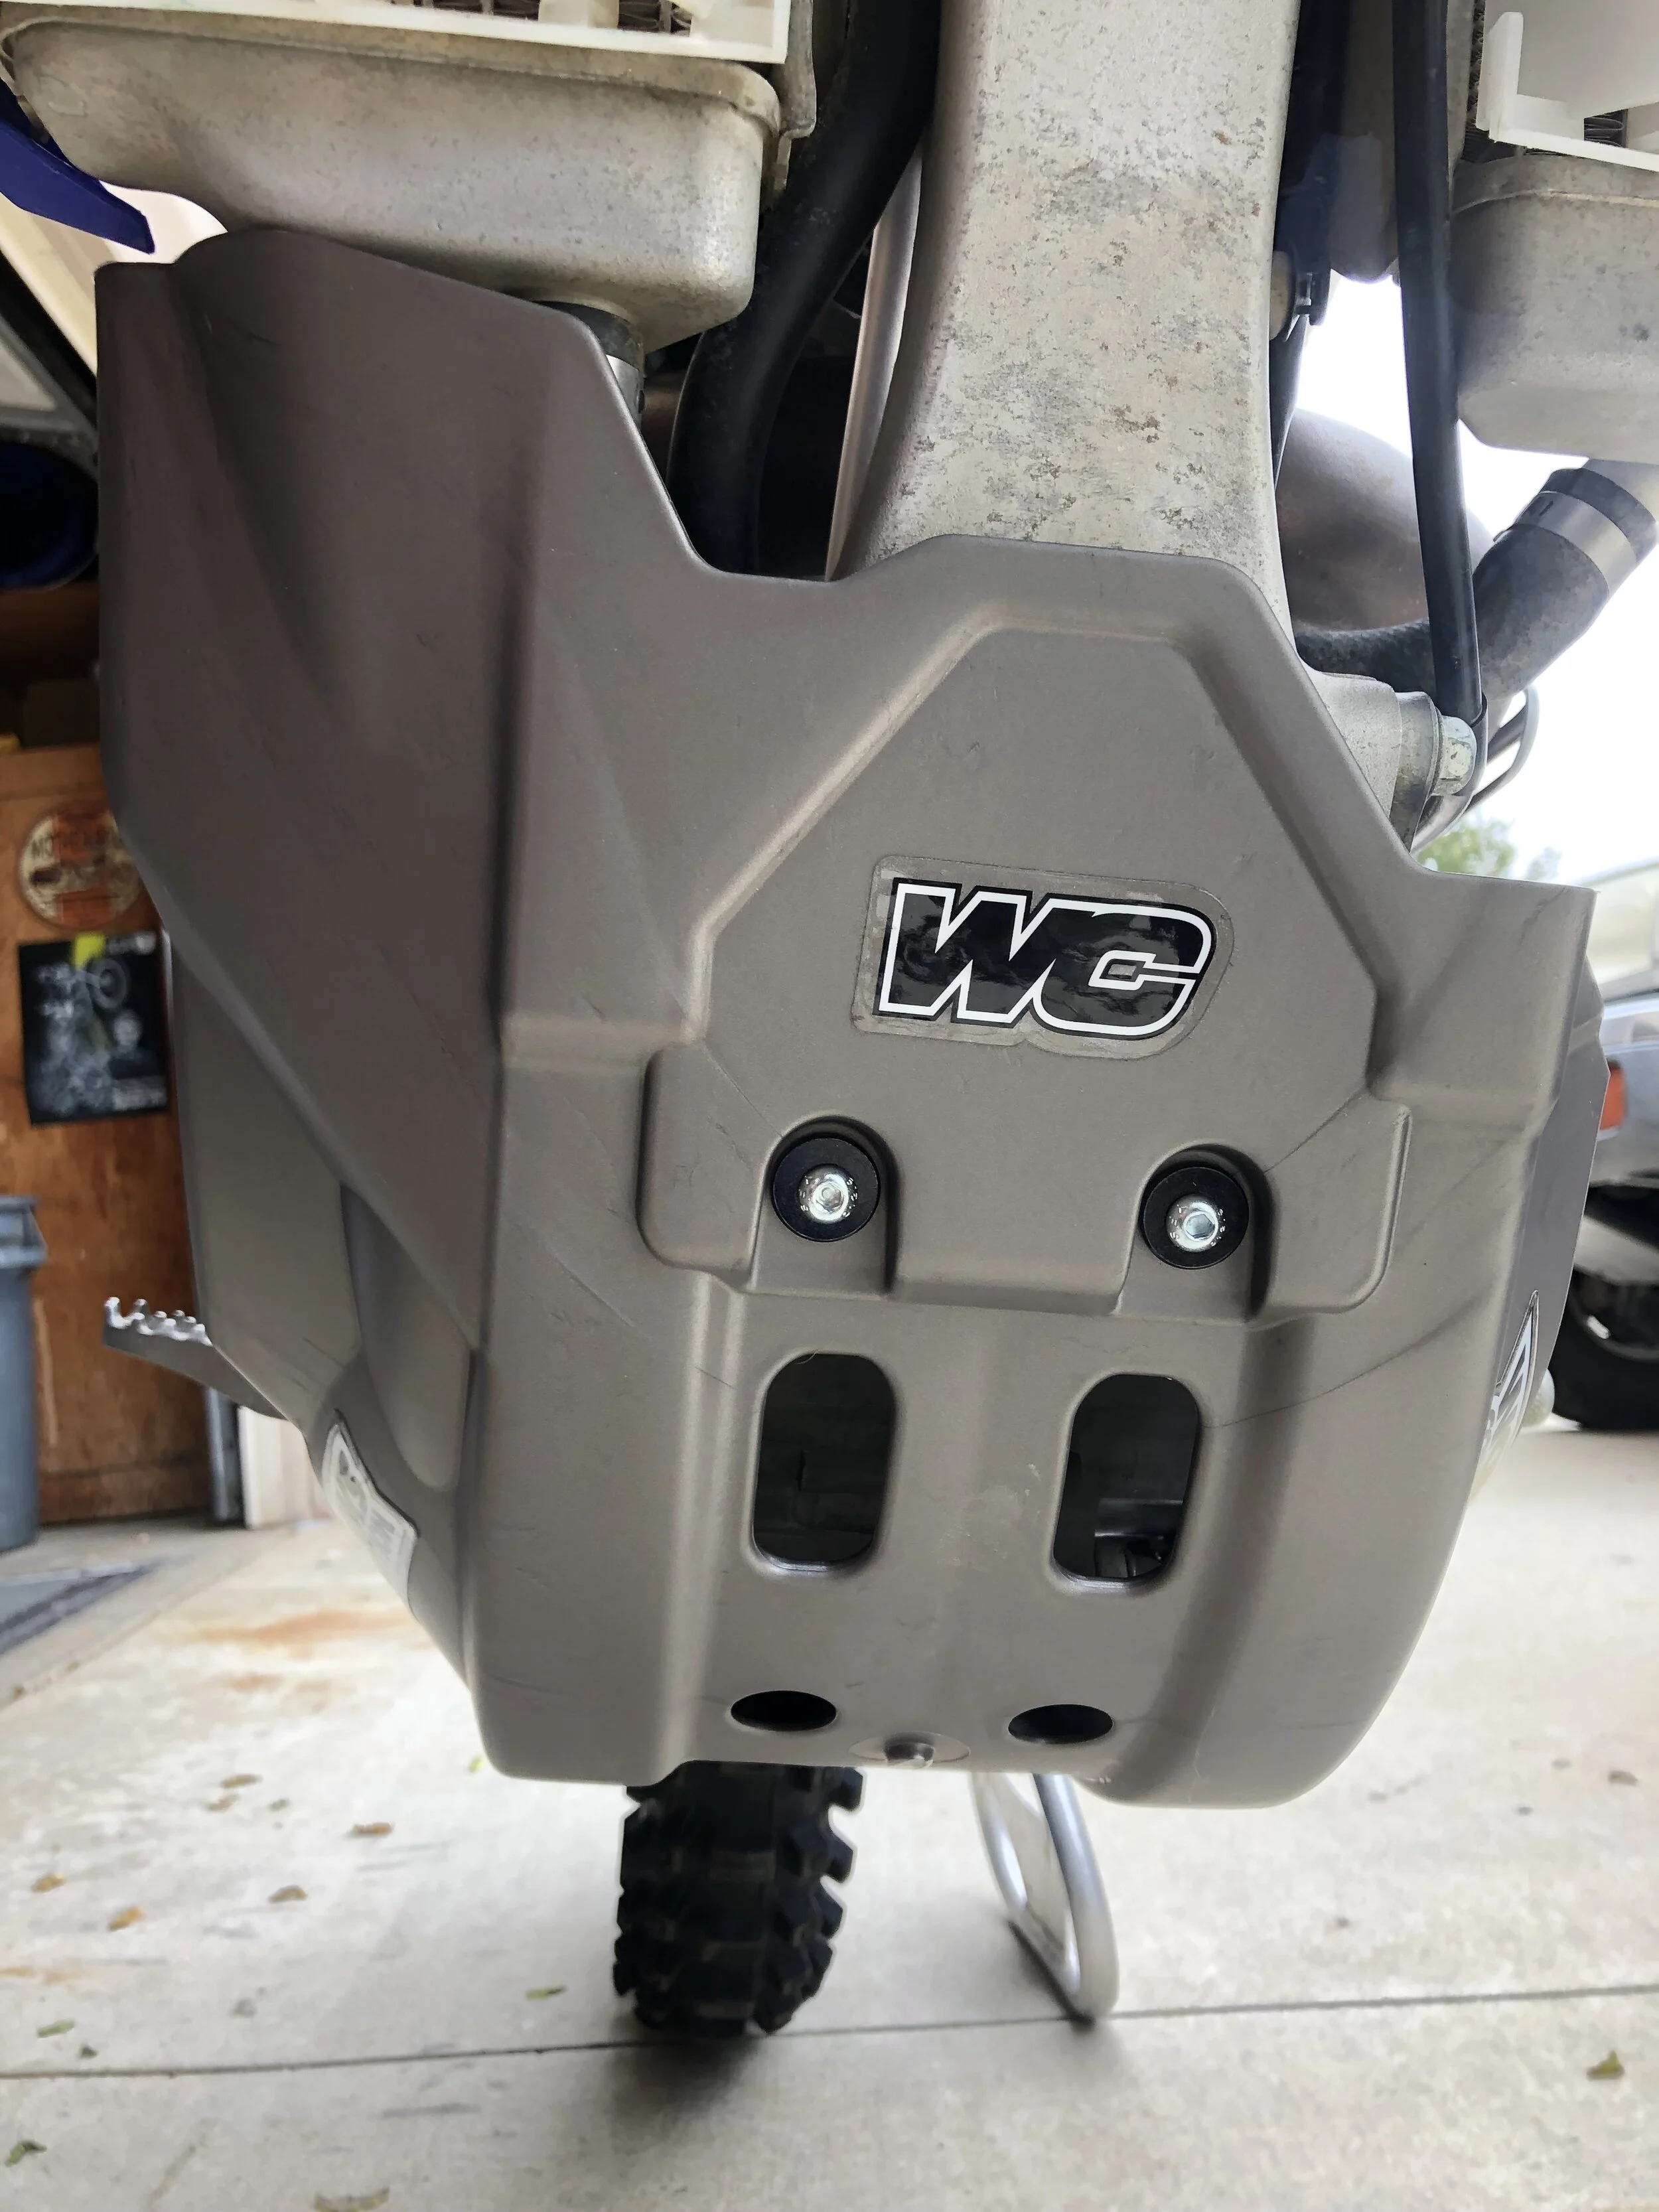
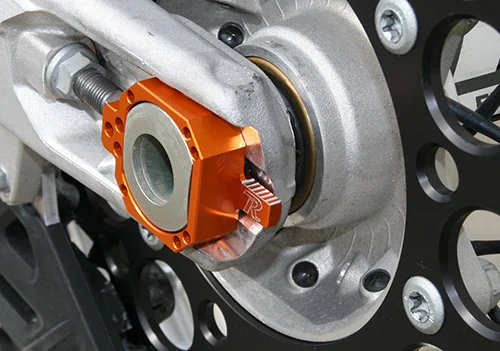
Rear Axle/Axle Blocks: Going to a Works Connection Elite axle block kit or Ride Engineering axle block kit will get rid of the fixed left axle block on the stock KTM’s axle. This will help the rear end to move more freely under throttle and improve the shock’s comfort on acceleration chop. Both are great, but you will have to decide if you want a complete axle/axle block kit like Ride Engineering’s or just the blocks themselves like WC’s.
Rear Brake Pedal Spring: Purchase a Honda CRF450R rear brake pedal spring with the rubber around the spring. The FC rear brake pedal spring vibrates and will break every 4-5 engine hours. Orrrrrrrrr. Get a Fasst Co rear brake return spring and be done with it! Fasst Co’s rear brake return spring offers tunable pedal resistance and a more controllable feel by placing the spring in compression instead of tension, minimizing the "on-off" feel of most rear brakes.
Fuel Filters: If you’re a FC owner, do yourself a favor and put a couple of these in your toolbox just in case. Fuel filters can get clogged on all FC’s and this can cause damage to your fuel pump or possibly not allow your bike to start properly.
Throttle Cables: If there is one thing that DOES NOT last on KTM’s/FC’s it’s the throttle cables. Every 20 hours or so I will have to replace the throttle cables to ensure that my throttle doesn’t feel hard or sticky when twisting. Originally I thought my throttle tube was dirty or maybe the right side of the handlebar had dirt on it, but I found out through a couple KTM mechanics, that the throttle cables simply wear out. You can’t lube them or clean them out as it will only make the throttle feel better for a short amount of time.
Check All Spokes: KTM/FC spokes always come loose near the rim lock so make sure you pay attention to all the spokes after every ride. If you don’t check them constantly you will lose or break a couple.
Check Engine Mounts/Swingarm Pivot Bolt: Always check the torx bolts that hold the top engine hangers on the bike. After break in, these will loosen up a bunch, so you might need some blue Loctite on the threads. After you do this, please continue to check these as they still back out from time to time. The torque spec on these bolts are important to the ride attitude of these FC’s. Also the FC come with frame guards and that means you will not know (until it’s too late) when your swingarm pivot bolt backs out. Take off your frame guard and check pivot bolt regularly. While you’re at it, get the Acerbis frame guards as they last longer and have better grip than the stock ones.
FI Indicator Light: The little FI indicator light bulb will fall out of the rubber casing as soon as you get past 10 hours. The best thing to do is put a little silicone inside the rubber casing, so the light bulb as well as the wire doesn’t flop around.
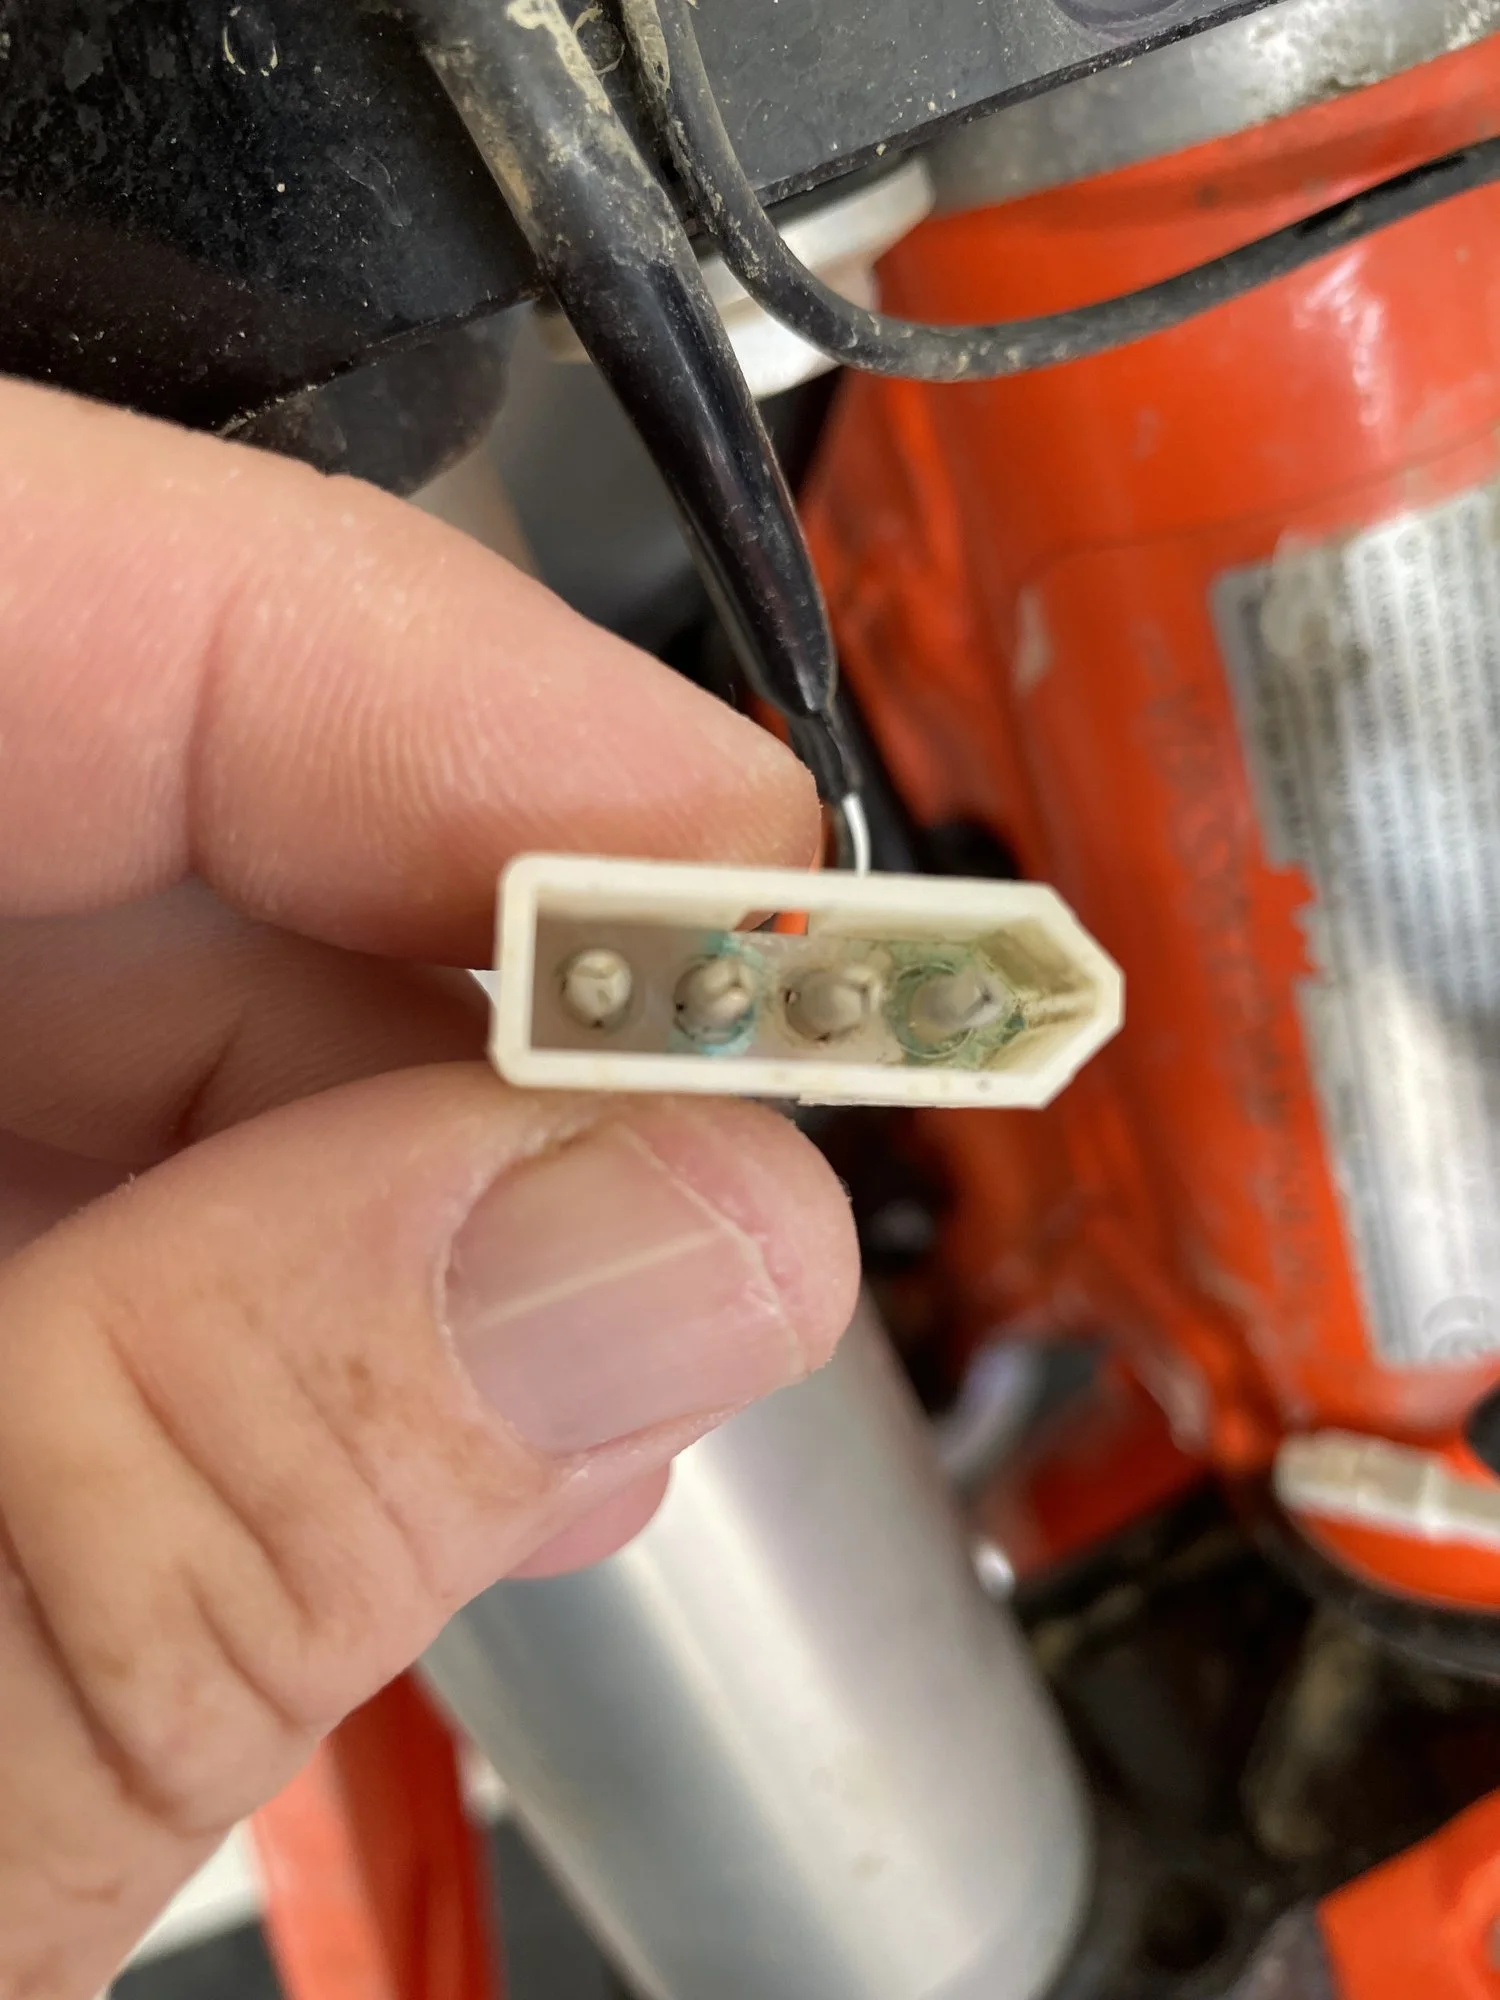
Connector Behind Front Number Plate: If your FC or KTM is cutting out or maybe not starting, check behind the number plate for this connector. It could be unplugged or corroded from condensation. Hardwiring the wires/connecter is the best way to ensure that it doesn’t come unplugged. You can even using a two post connector instead of a four post as that can work as well. If you’re turning your handlebar to the right and your FC will not start, chances are it’s the starter wire being kinked or pulled too tight. Pull the sheathing away from the cables and inspect to see if it has come apart.
Suspension Settings:
RIDER WEIGHT: 150-185 POUNDS
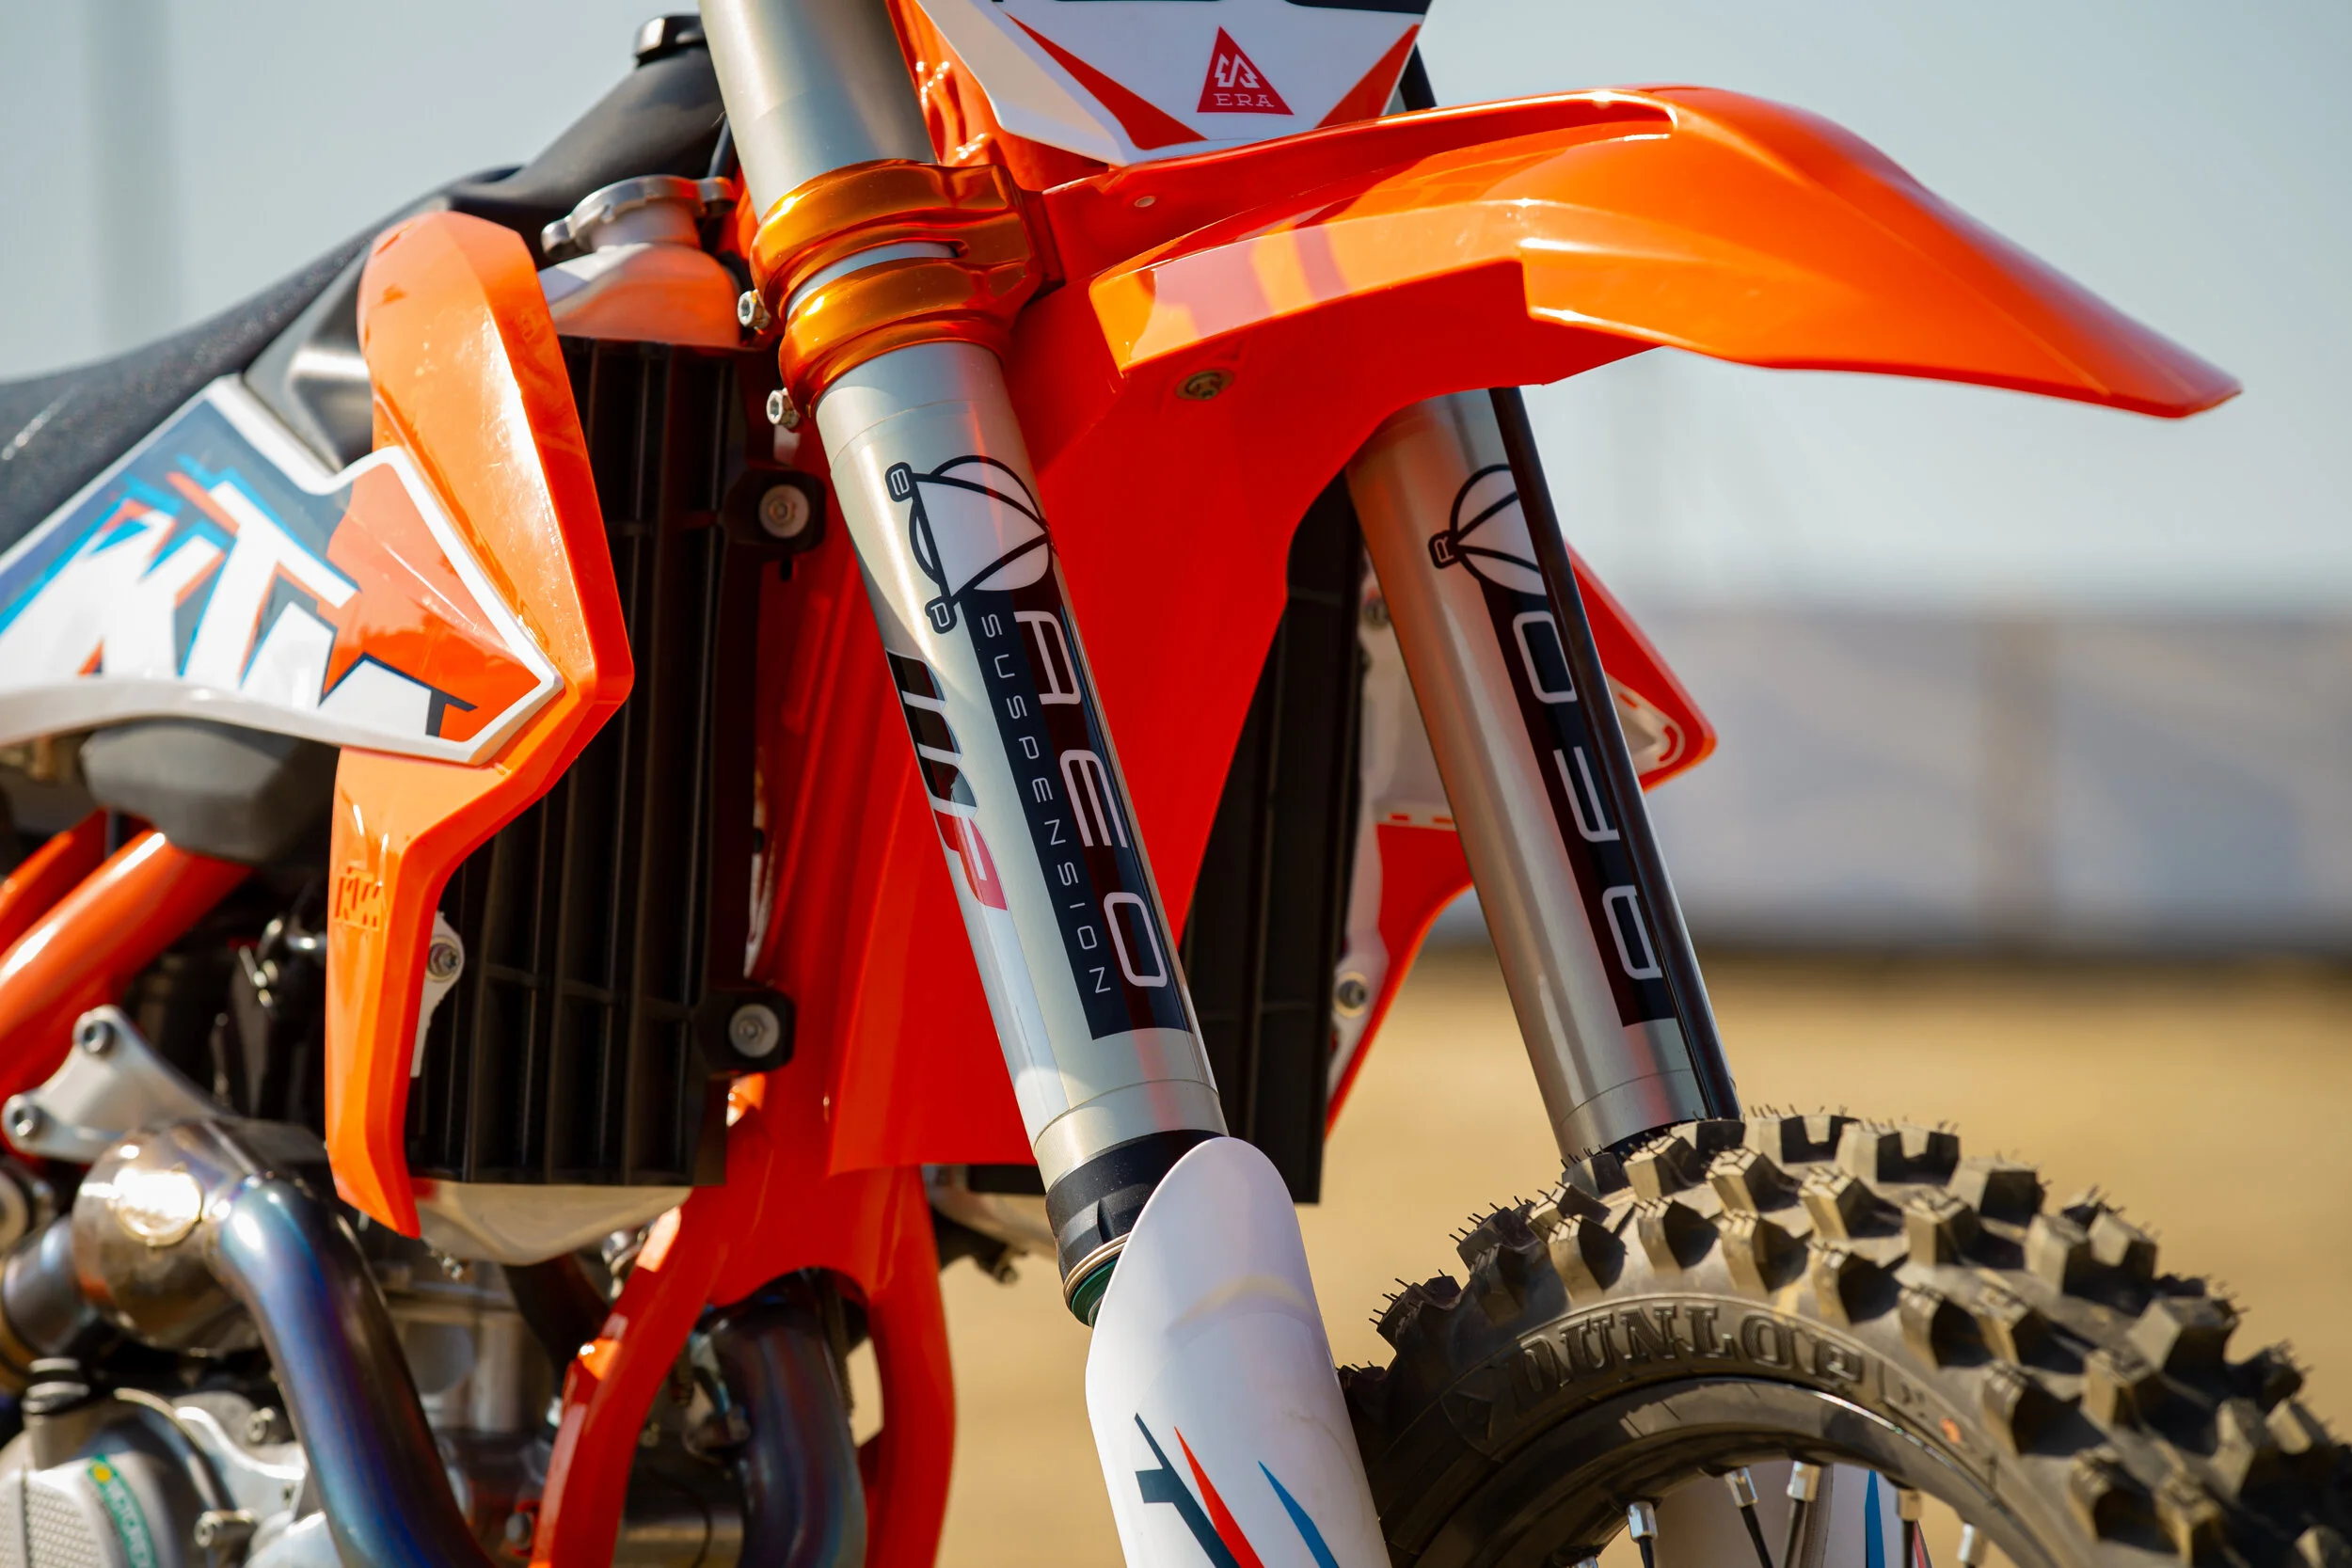
Fork:
Spring Rate: 10.7-10.8 bar
Height: 5mm
Compression: 12 clicks out
Rebound: 9-10 clicks out
Shock:
Spring Rate: 42 N/mm
Spring Rate For 175 Pounds And Up: 45 N/mm
Sag: 102mm
High Speed Compression: 1.5
Low Speed Compression: 9 clicks out
Rebound: 10 clicks out