My 14 year old son has been riding the 2020 KTM 125SX off and on for over six months now and although he likes the bike, he has struggled with set up from time to time at different tracks. He and I have worked on some different settings as well as added a few mods that has kept us happy at several tracks in Southern California. Yes, that’s right we do share the bike and some track days. Most of these mods are inexpensive and can make your orange screaming pumpkin a little more comfortable as well as make some extra ponies. Here are five mods in no particular order that we thought were worth mentioning.

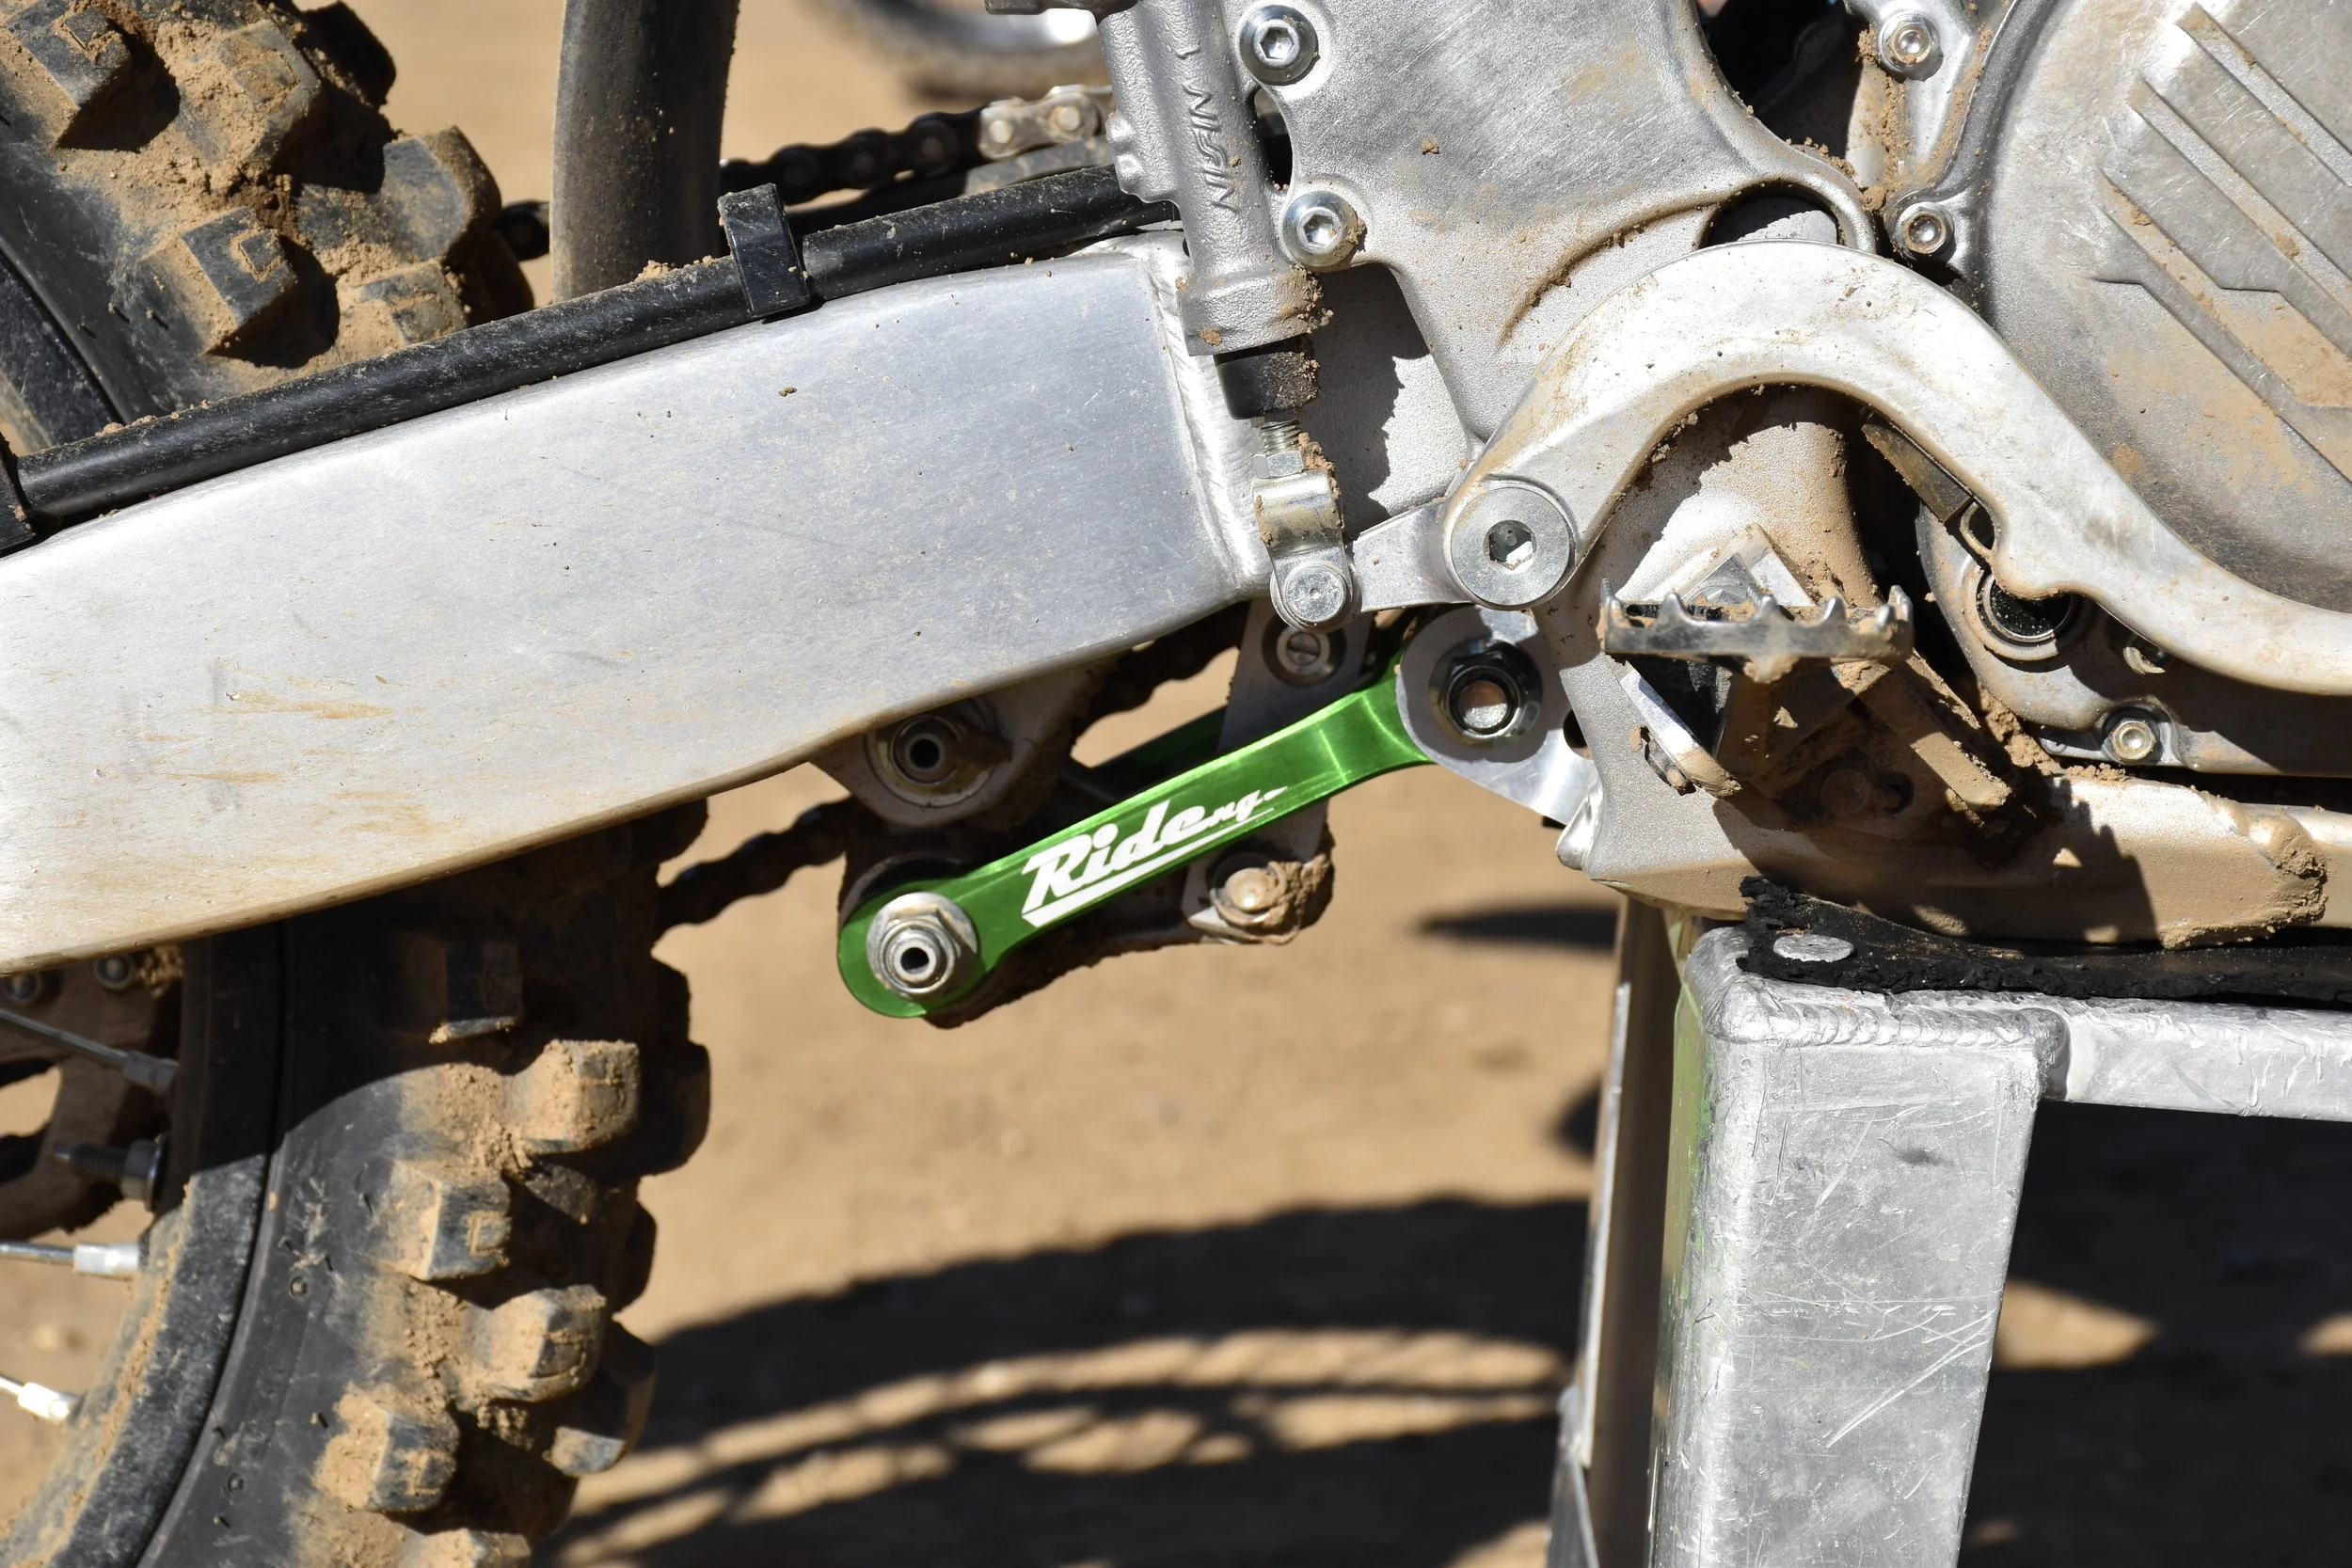
Ride Engineering Link:
For this test I had two KTM 125SX machines. One was set up for my son, with his softer shock spring and one was just a bone stock KTM 125SX with the sag set for me at 105mm. We started later in the day at a couple tracks on separate days to make sure the track was nice and broke in before we started to make our changes. Doing this ensures that the track doesn't change too much from each change we made to the orange machines. With the Ride Engineering link I noticed better tracking/acceleration coming out of choppy corners and slightly more stability off-throttle. I really liked that the link helped the ride attitude of the KTM when leaning, under throttle, on choppy terrain. I had more trust in the KTM when loading the chassis hard on throttle. I didn't get near as much kicking coming down rough hills and the overall cornering character didn’t suffer. I was worried that this Ride Engineering link would hurt turn in, but to my surprise it didn't affect the KTM’s easy natured turn in character.
Aden’s comments didn't exactly mimic mine, but one comment that actually made sense was he did like that he felt lower to the ground, when sitting, and that helped him with his starts. When watching him ride the bike was visibly less busy in the rear and didn't give him as much kicking on de-cel. The length of the Ride Engineering pull rods are 1.3mm’s longer than stock and come in at a 149.5mm overall length. Aden doesn't know enough about chassis testing to give me some great feedback, but some of his comments overlapped mine. I more or less watch the bike when he rides and then decide if it’s a good direction or not. We decided to leave the Ride Engineering link on his bike after we both came to an agreement that he looked/felt better on a rough track with it on.
If you do decide to get the Ride Engineering Performance Link just know that you may have to adjust your AER fork pressure, if you’re still on air forks. Now with the Ride Engineering pull rods installed the rear end will ride a little lower, so the front end might seem a little high. Dropping the air pressure anywhere between .2-.5 bar might be needed to get some added front end traction. We dropped Aden’s air pressure from 8.3 bar to 8.1 bar at some tracks and even down to 8 bar at others. Try running your normal AER pressure when you first put on the Ride pull rods and see how your front end feels though corners. If you feel like your front end is tall, your front end is pushing, or have a vague front end feel, just try to drop your air pressure slightly. This will help let the fork use more of its stroke and get that front tire to bite into the ground more.
Jetting:
Jetting was pretty close in stock form, but we noticed if we ran VP C12 or T2 it does become a little finicky (rich) off the bottom. Here are the jetting specs for pump fuel and VP T2 racing fuel.
Pump Fuel:
Main Jet: 500
Pilot Jet: 35
Needle: 6BFY43-71
Clip: 2nd position
Air Screw: 1 out
VP T2 Setting:
Main Jet: 520
Pilot Jet: 32
Needle: 6BFY43-71
Clip: 2nd position
Air Screw: 1.5 out
Suspension Settings:
120-140 pounds:
FORK:
Air: 8.1 bar
Compression: 10 clicks out
Rebound: 10 clicks out
Fork-leg height: Stock
SHOCK:
Spring rate with or without link arm: 36 N/m (39 N/m is stock)
Race sag: 104mm
Hi-compression: 2 turns out
Lo-compression: 16 turns out
Rebound: 13 turns out
150-170 pounds:
FORK:
Air: 8.4 bar
Compression: 14 clicks out
Rebound: 11 clicks out
Fork-leg height: Stock
SHOCK:
Spring rate with or without link arm: 39 N/m
Race sag: 105 mm
Hi-compression: 1.5 turns out
Lo-compression: 13 turns out
Rebound: 11 turns out

FMF Factory Fatty Pipe/Shorty Silencer:
I went back and forth with the stock set up as well as the FMF a couple times at a few different tracks and I will say that the FMF Factory Fatty pipe/Shorty silencer combo did help throttle response as well as low end grunt. Coming out of corners (with the FMF Fatty/Shorty) the KTM 125 SX has a little more acceleration pull on corner exits and could be shifted a little earlier without falling off. The mid range pull was also longer and overall crispness of the mid range seemed improved. The FMF Fatty/Shorty seemed to slightly lean out the bottom to mid range (in a good way) and made the KTM feel more playful around the track. RPM response was improved throughout the power and the throttle felt more connected to the rear wheel. The top end pulling power/over-rev was slightly shorter than the stock set up so going to the jetting above helped get some of this back.
VP T2 Racing Fuel:
T2 is a 40:1 pre-mixed racing fuel that increases bottom to mid range response over pump fuel. I performed a couple blind tests with Aden on a couple occasions and each time I poured in T2 without him knowing, he always mentioned to me that his KTM 125SX had more pulling power. After I tested T2 and pump fuel back to back you can feel that T2 definitely brings more bottom end punch to the KTM’s engine character. Unlike the YZ125 where T2 doesn't need to be re-jetted, the KTM 125SX needs the jetting specs above to run efficiently and clean. This simple pour in mod runs you around $75.00 for 5 gallons, but to me this is a good alternative if you want some extra power on race day.
If you have any questions please feel free to email me at kris@keeferinctesting.com