Tricks

Top 5 Mostly Inexpensive Mods To The 2021 Husqvarna FC450

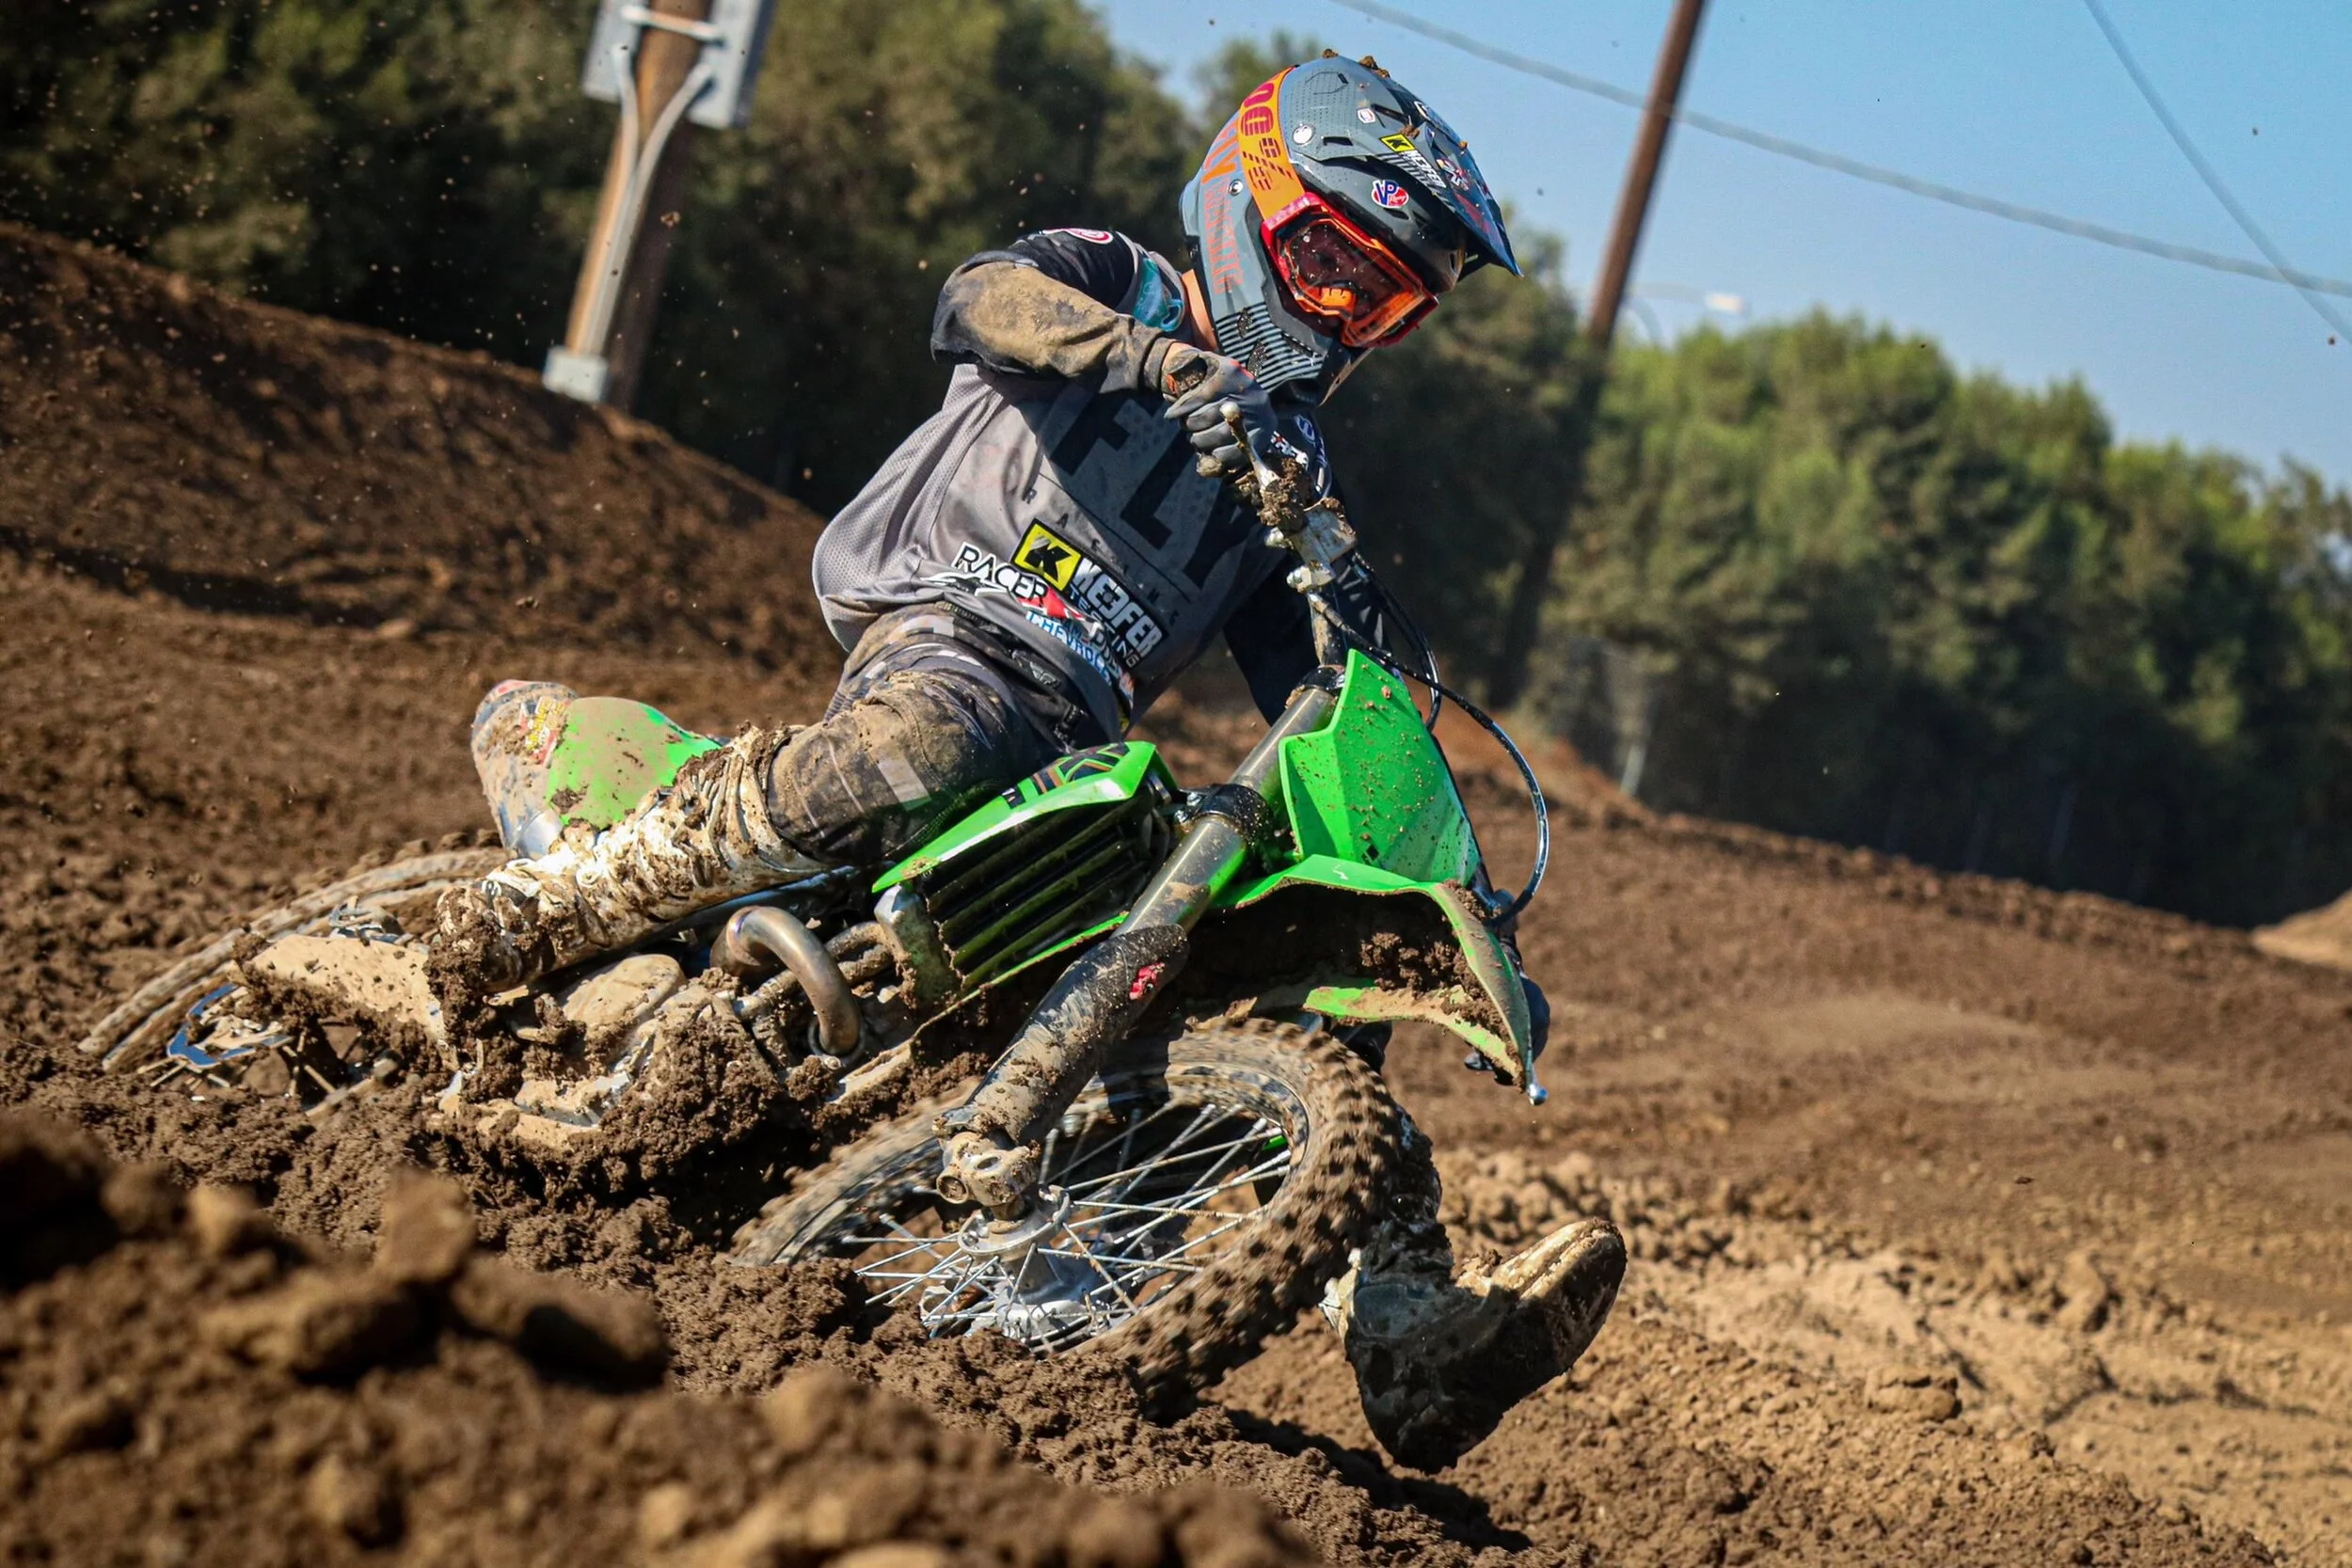
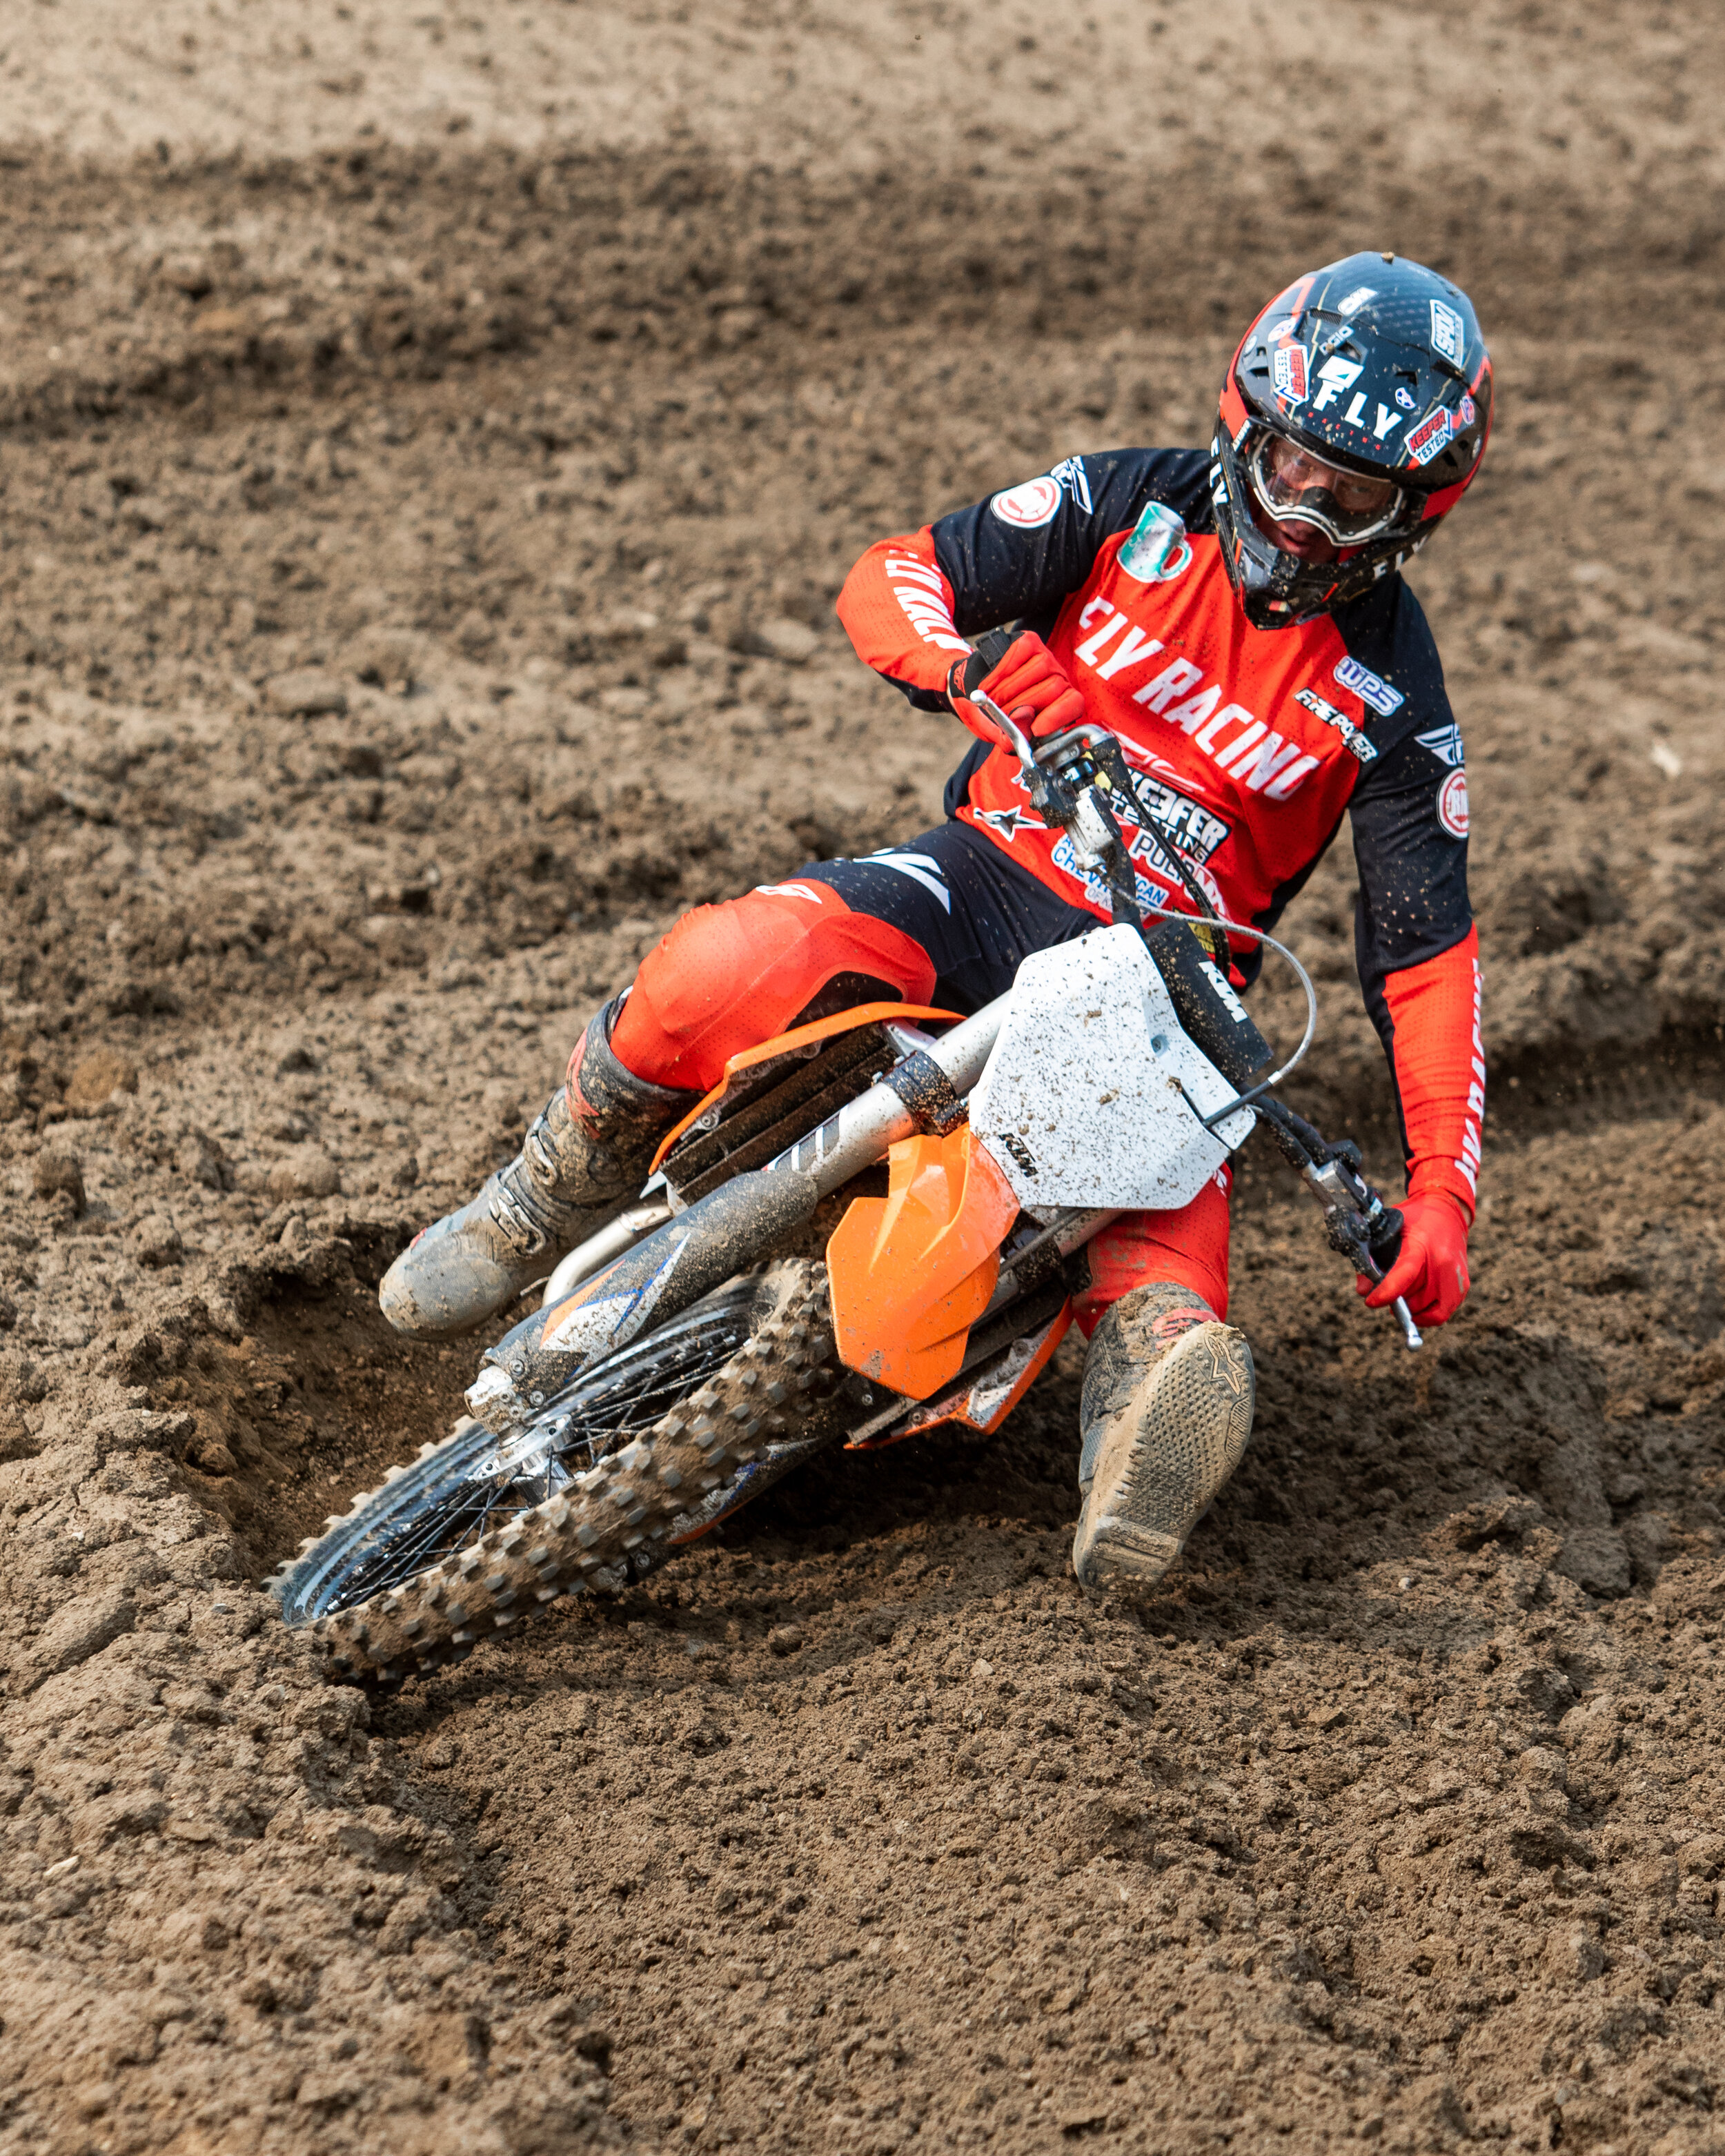
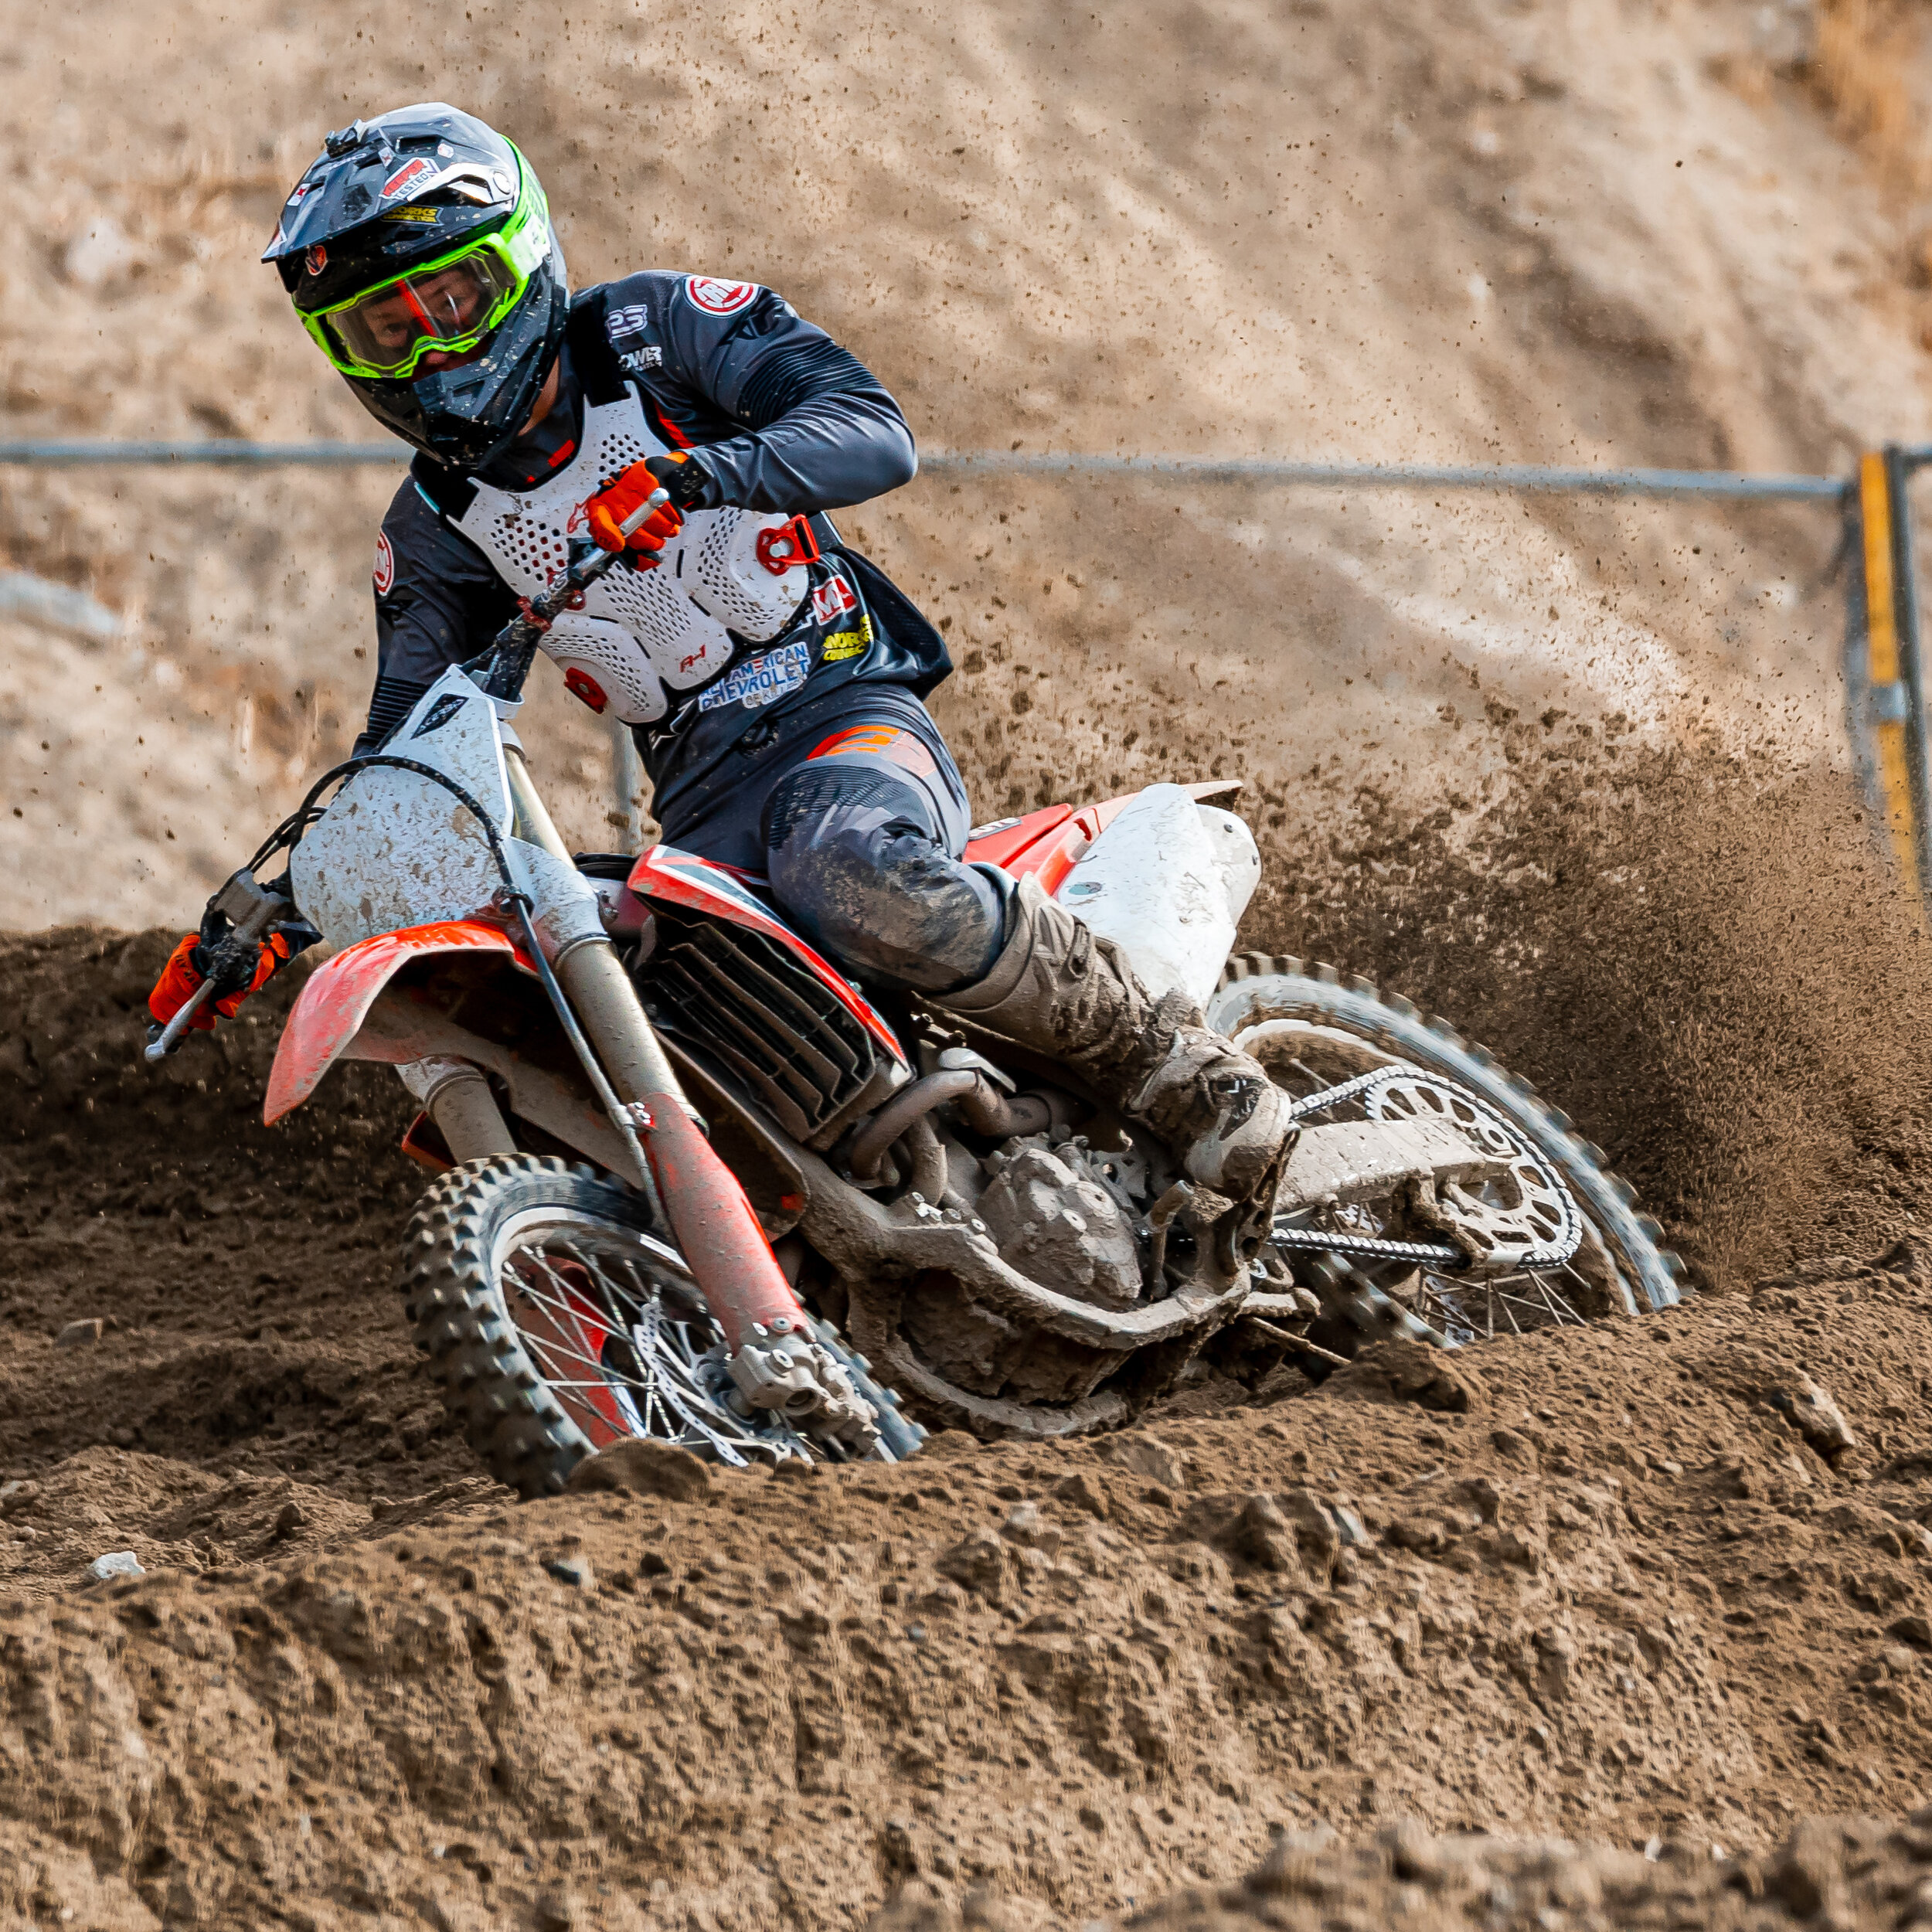
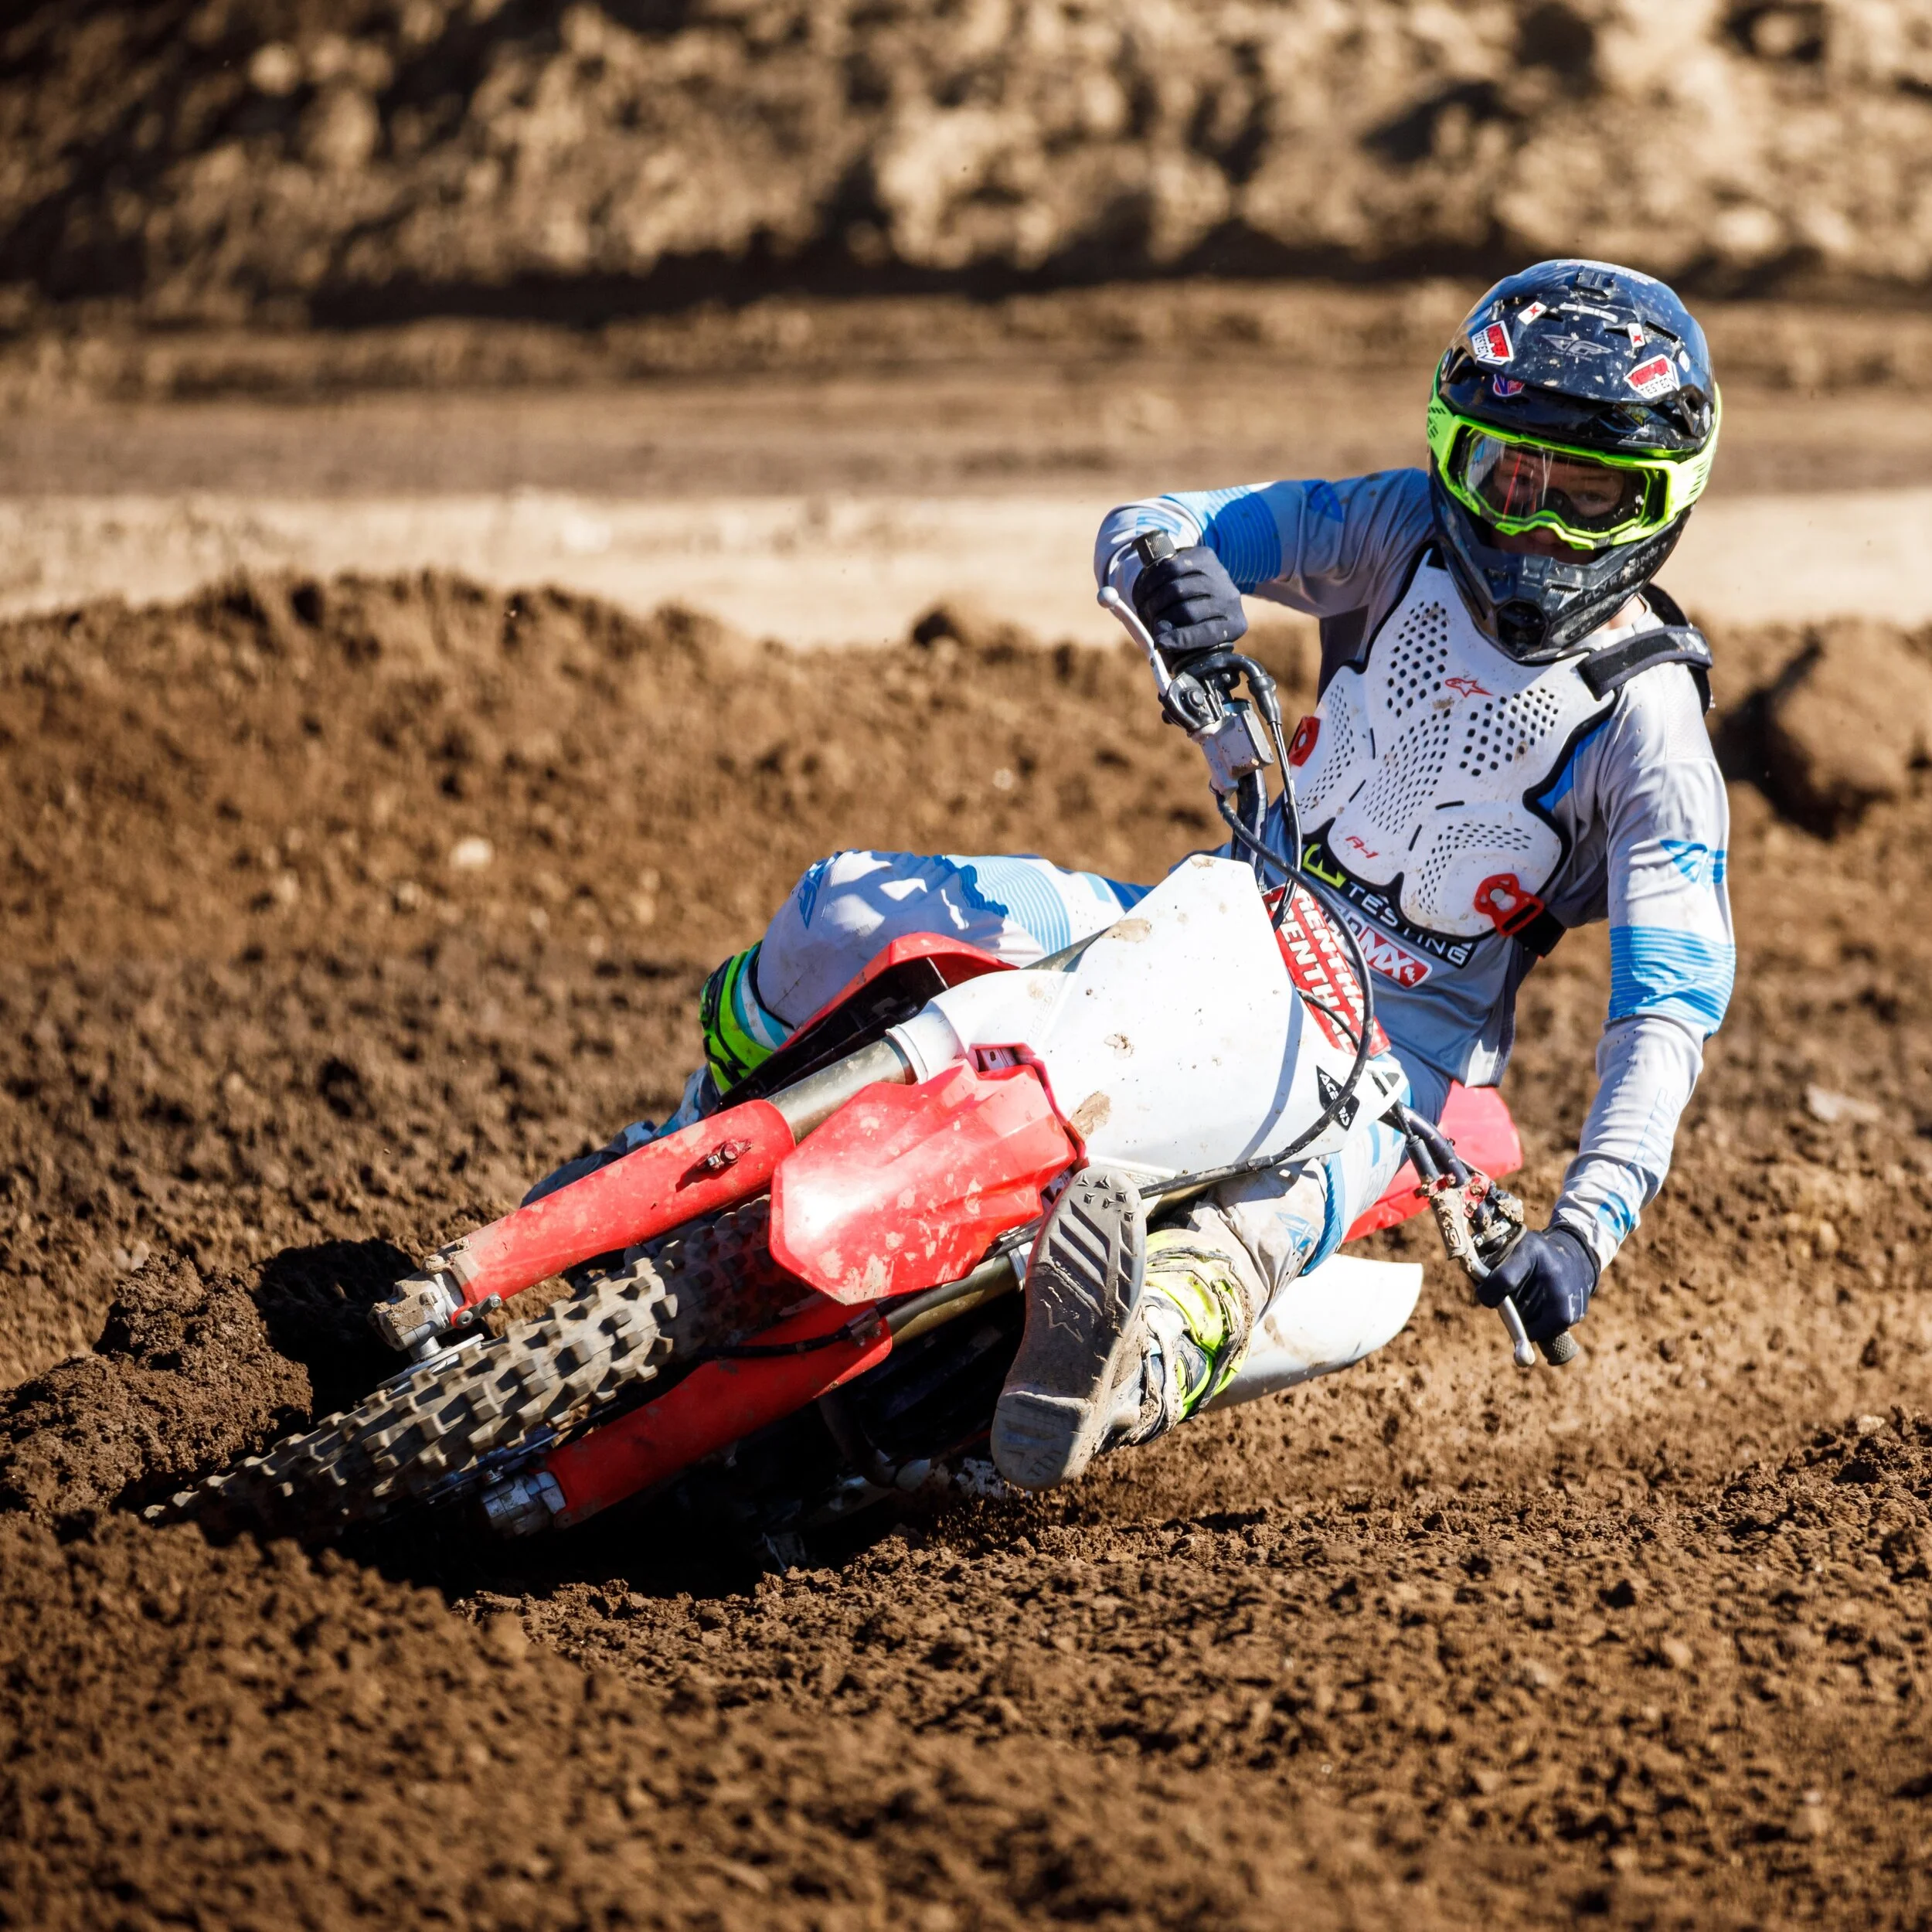
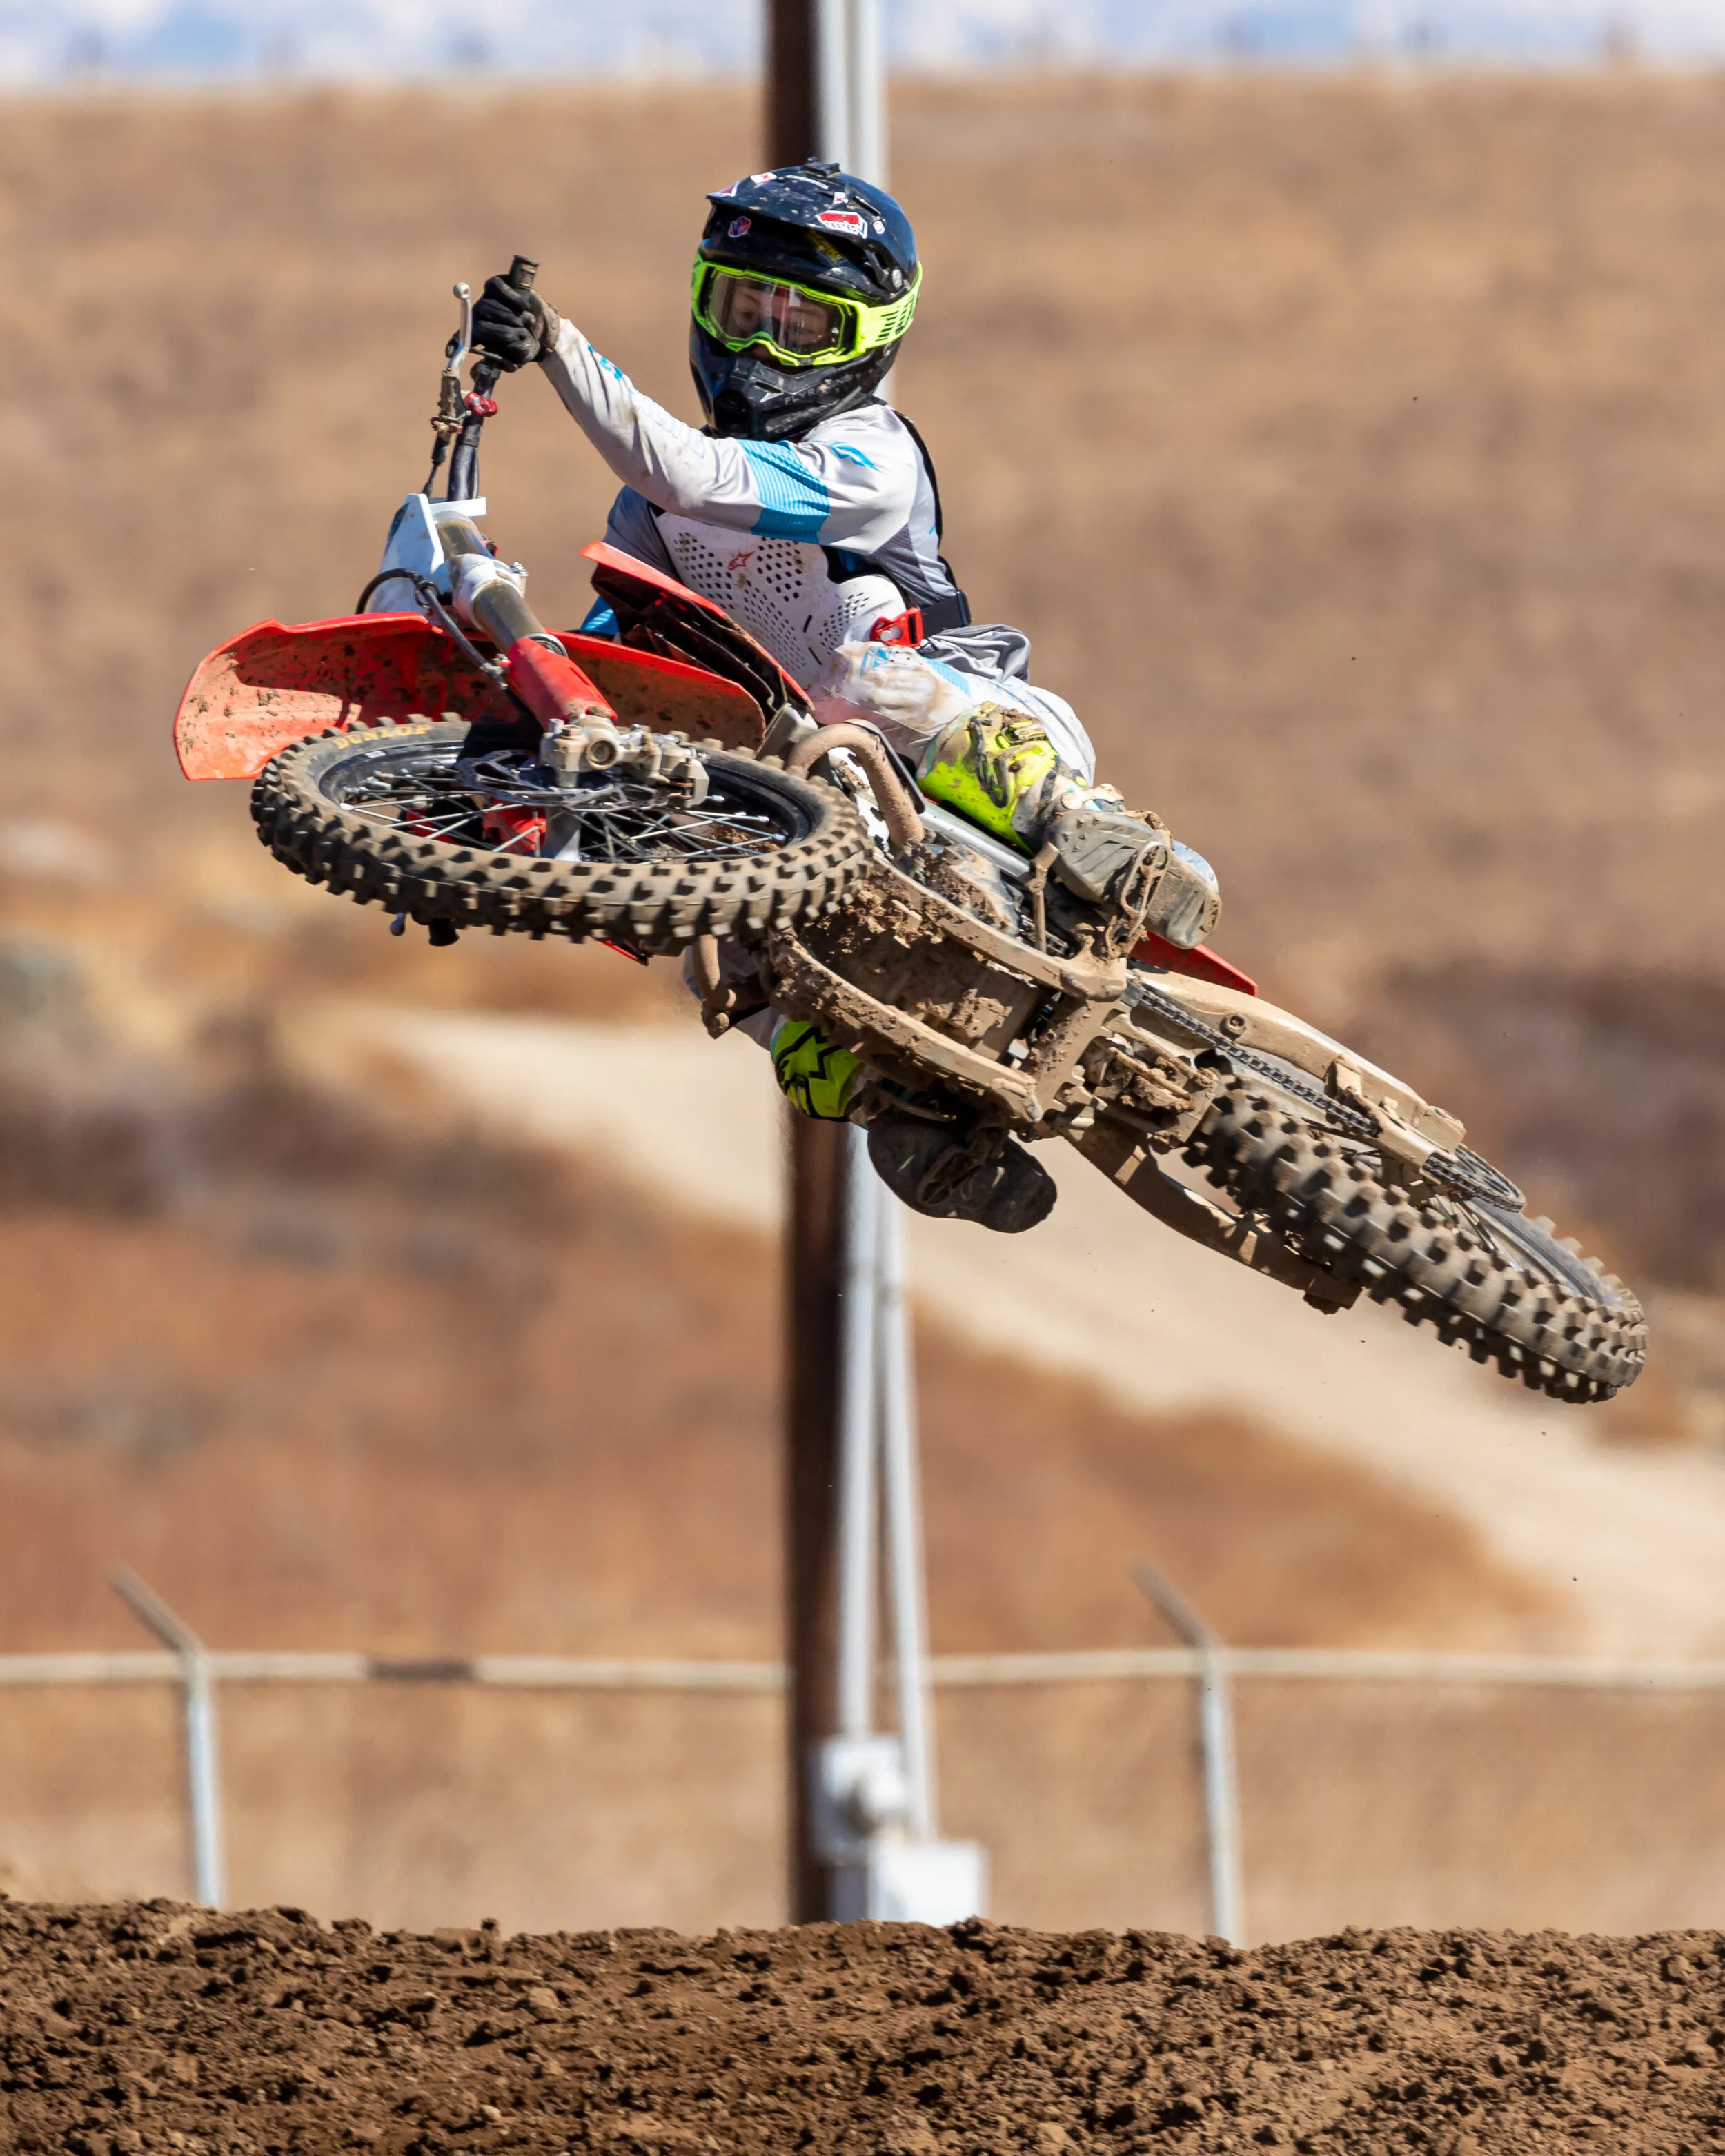
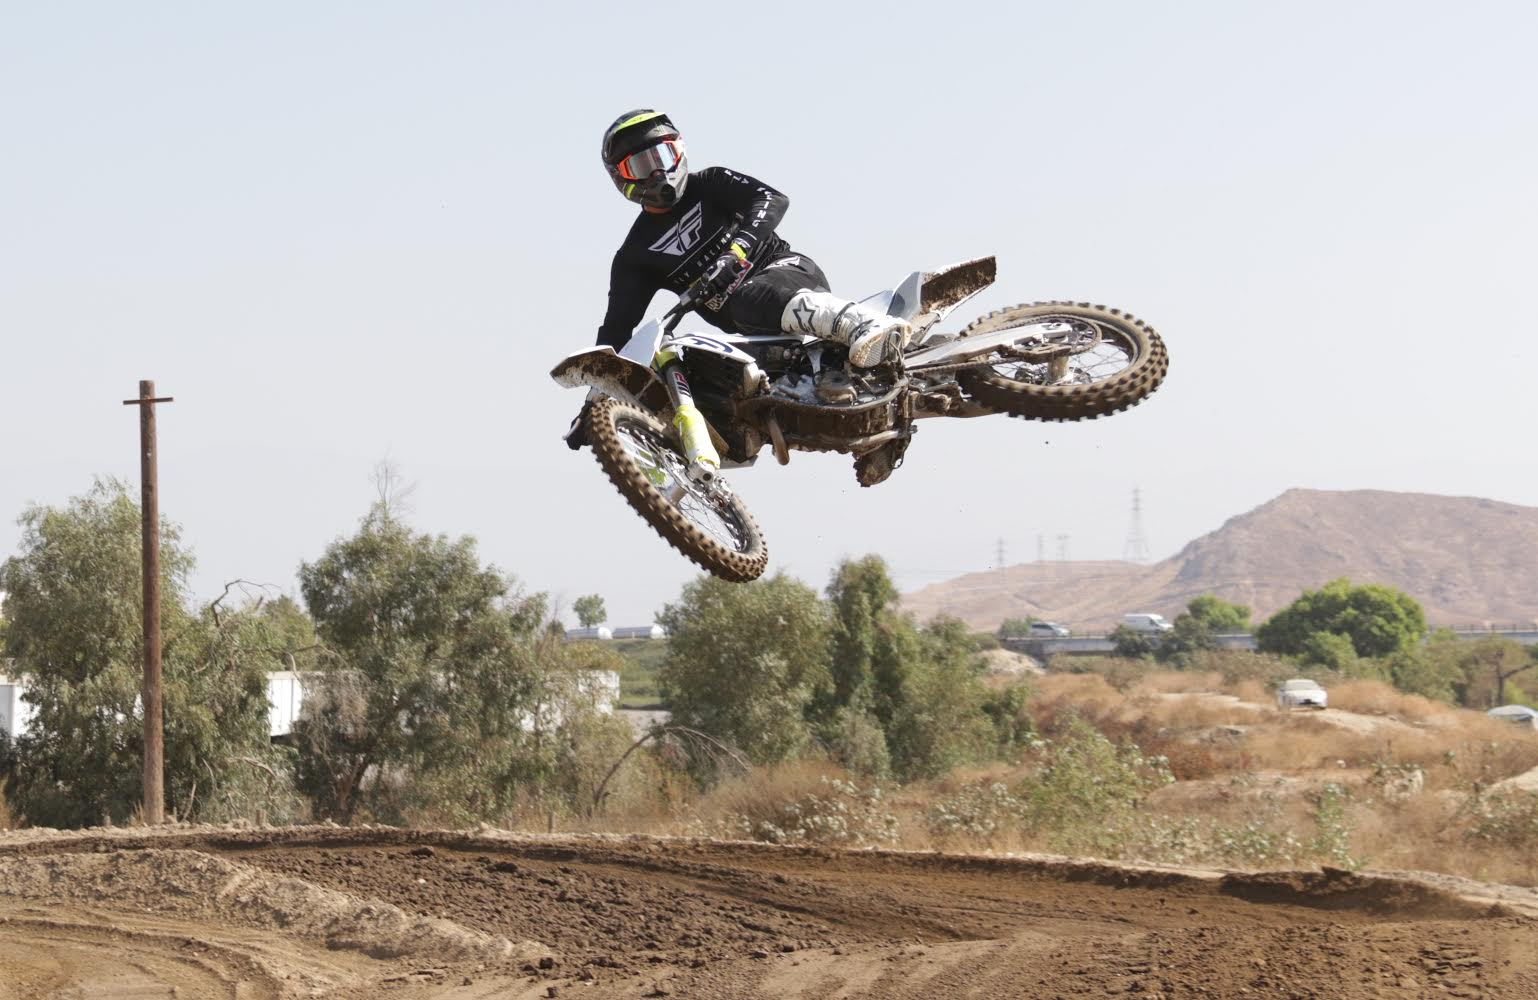
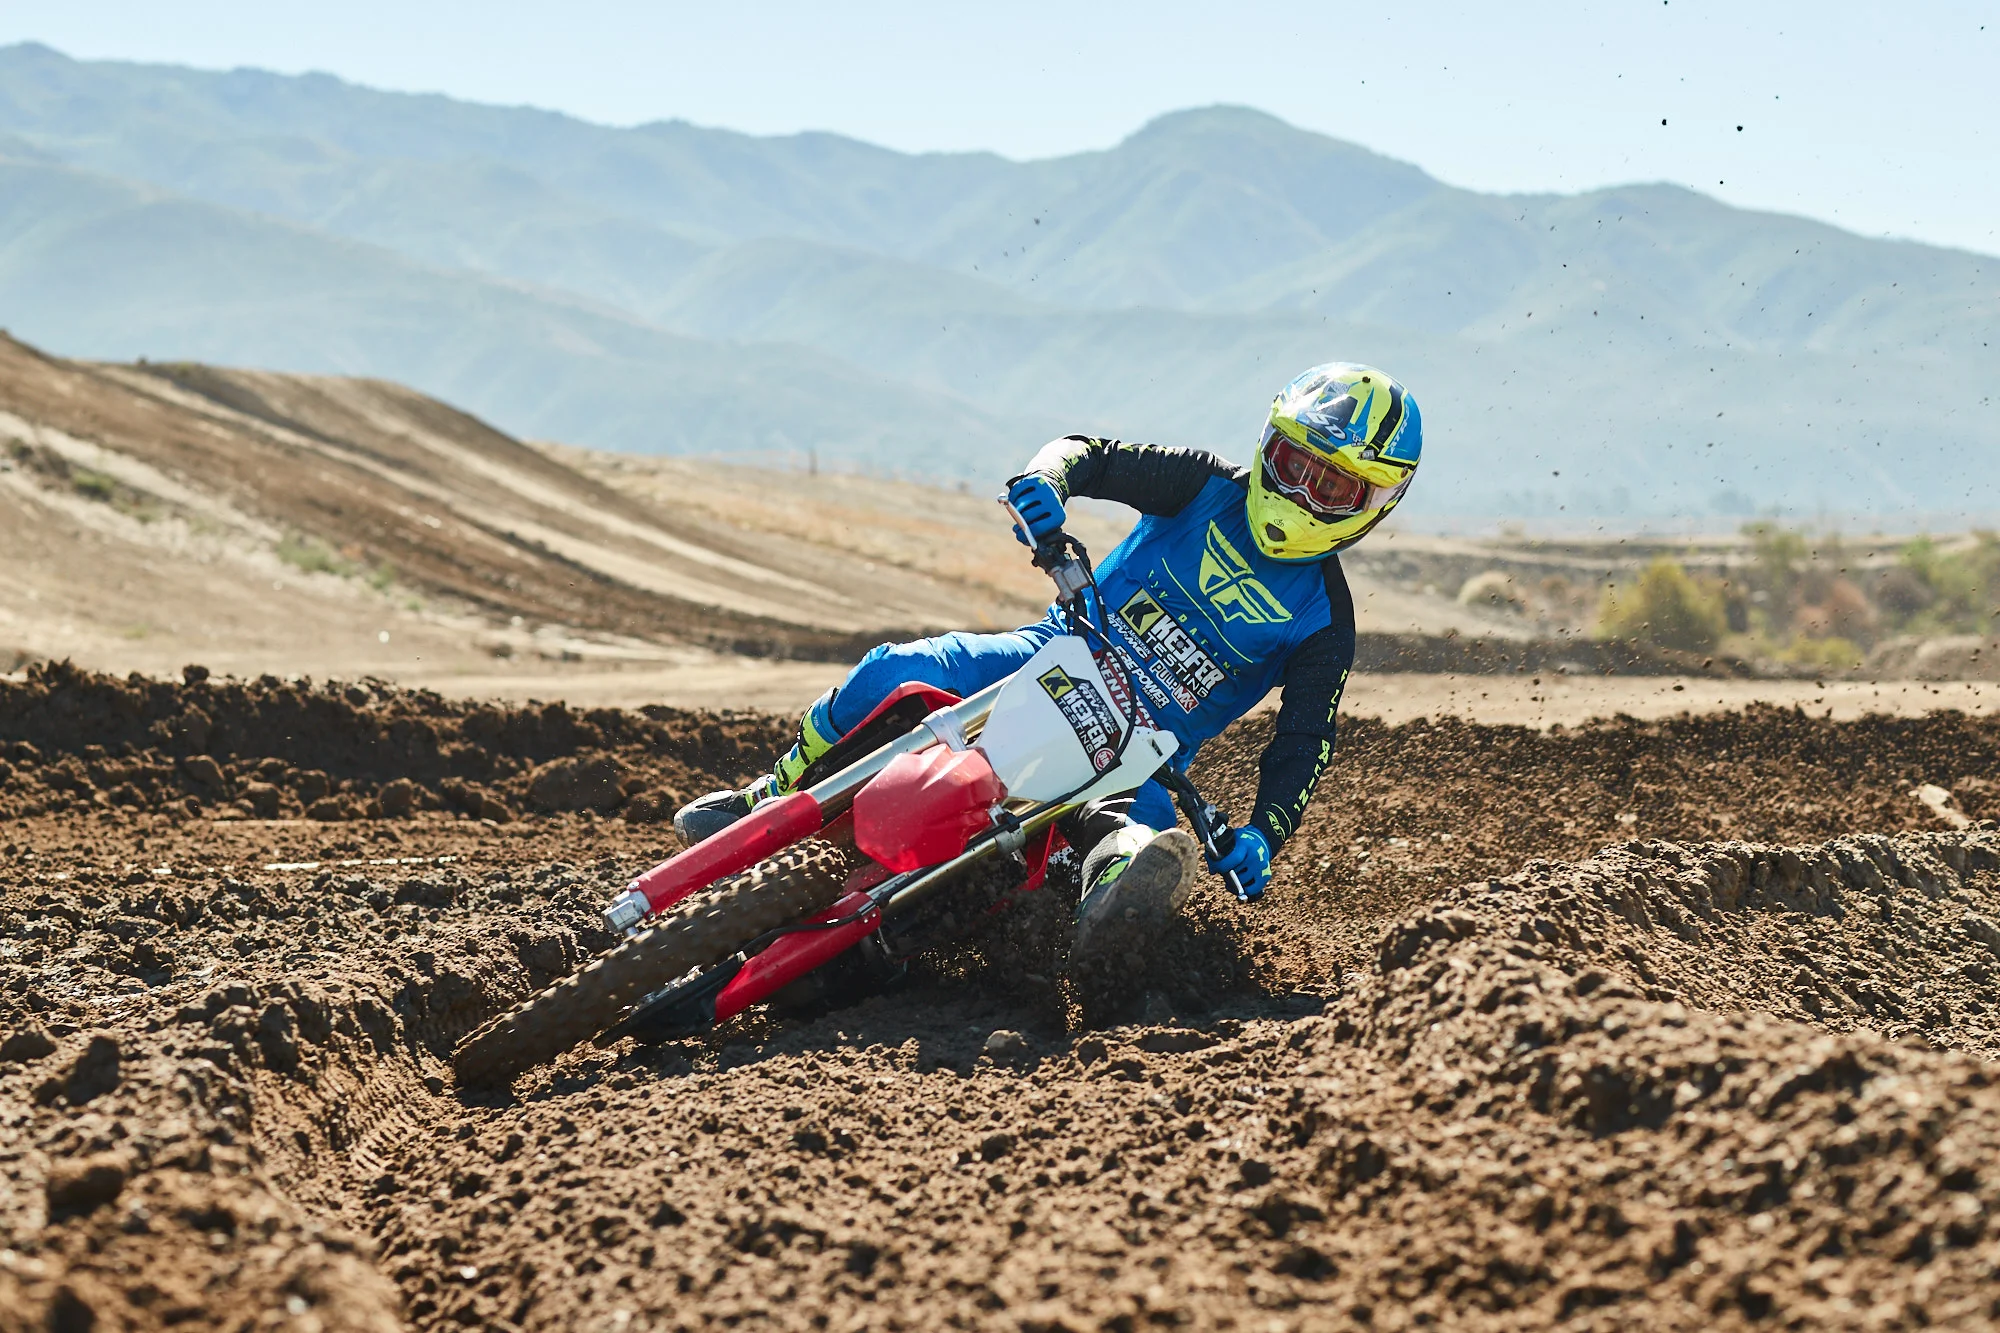
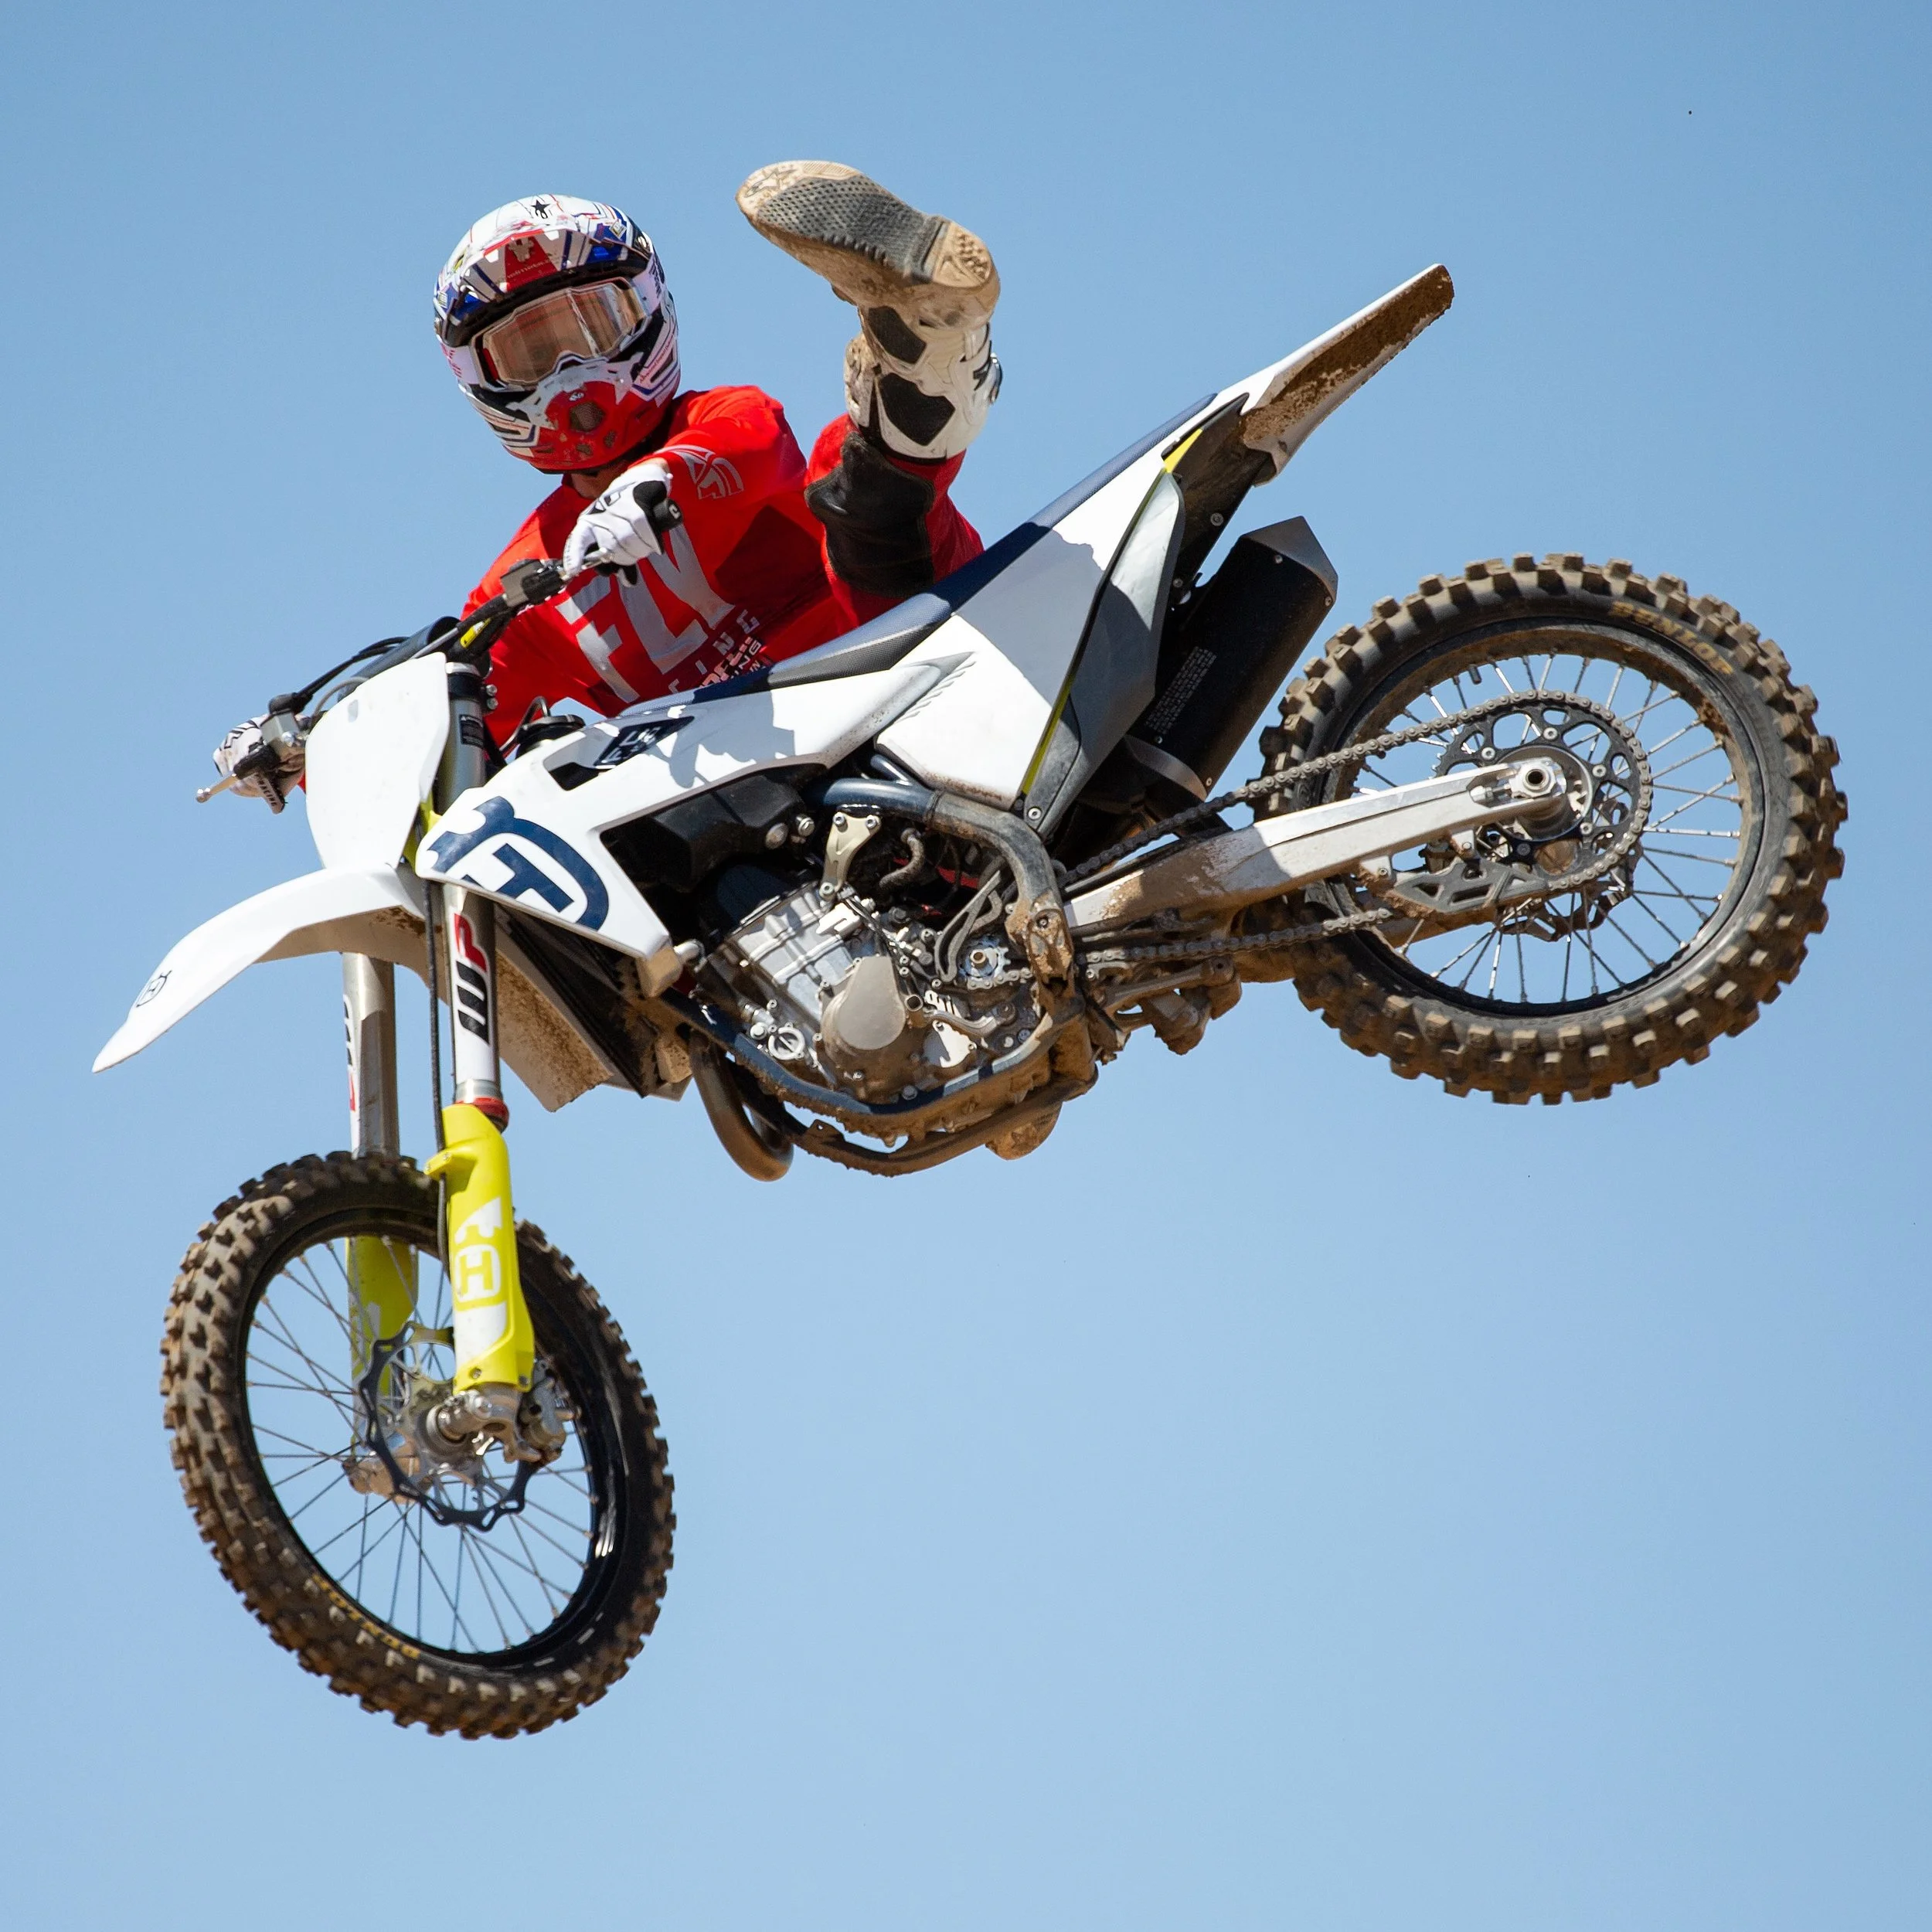
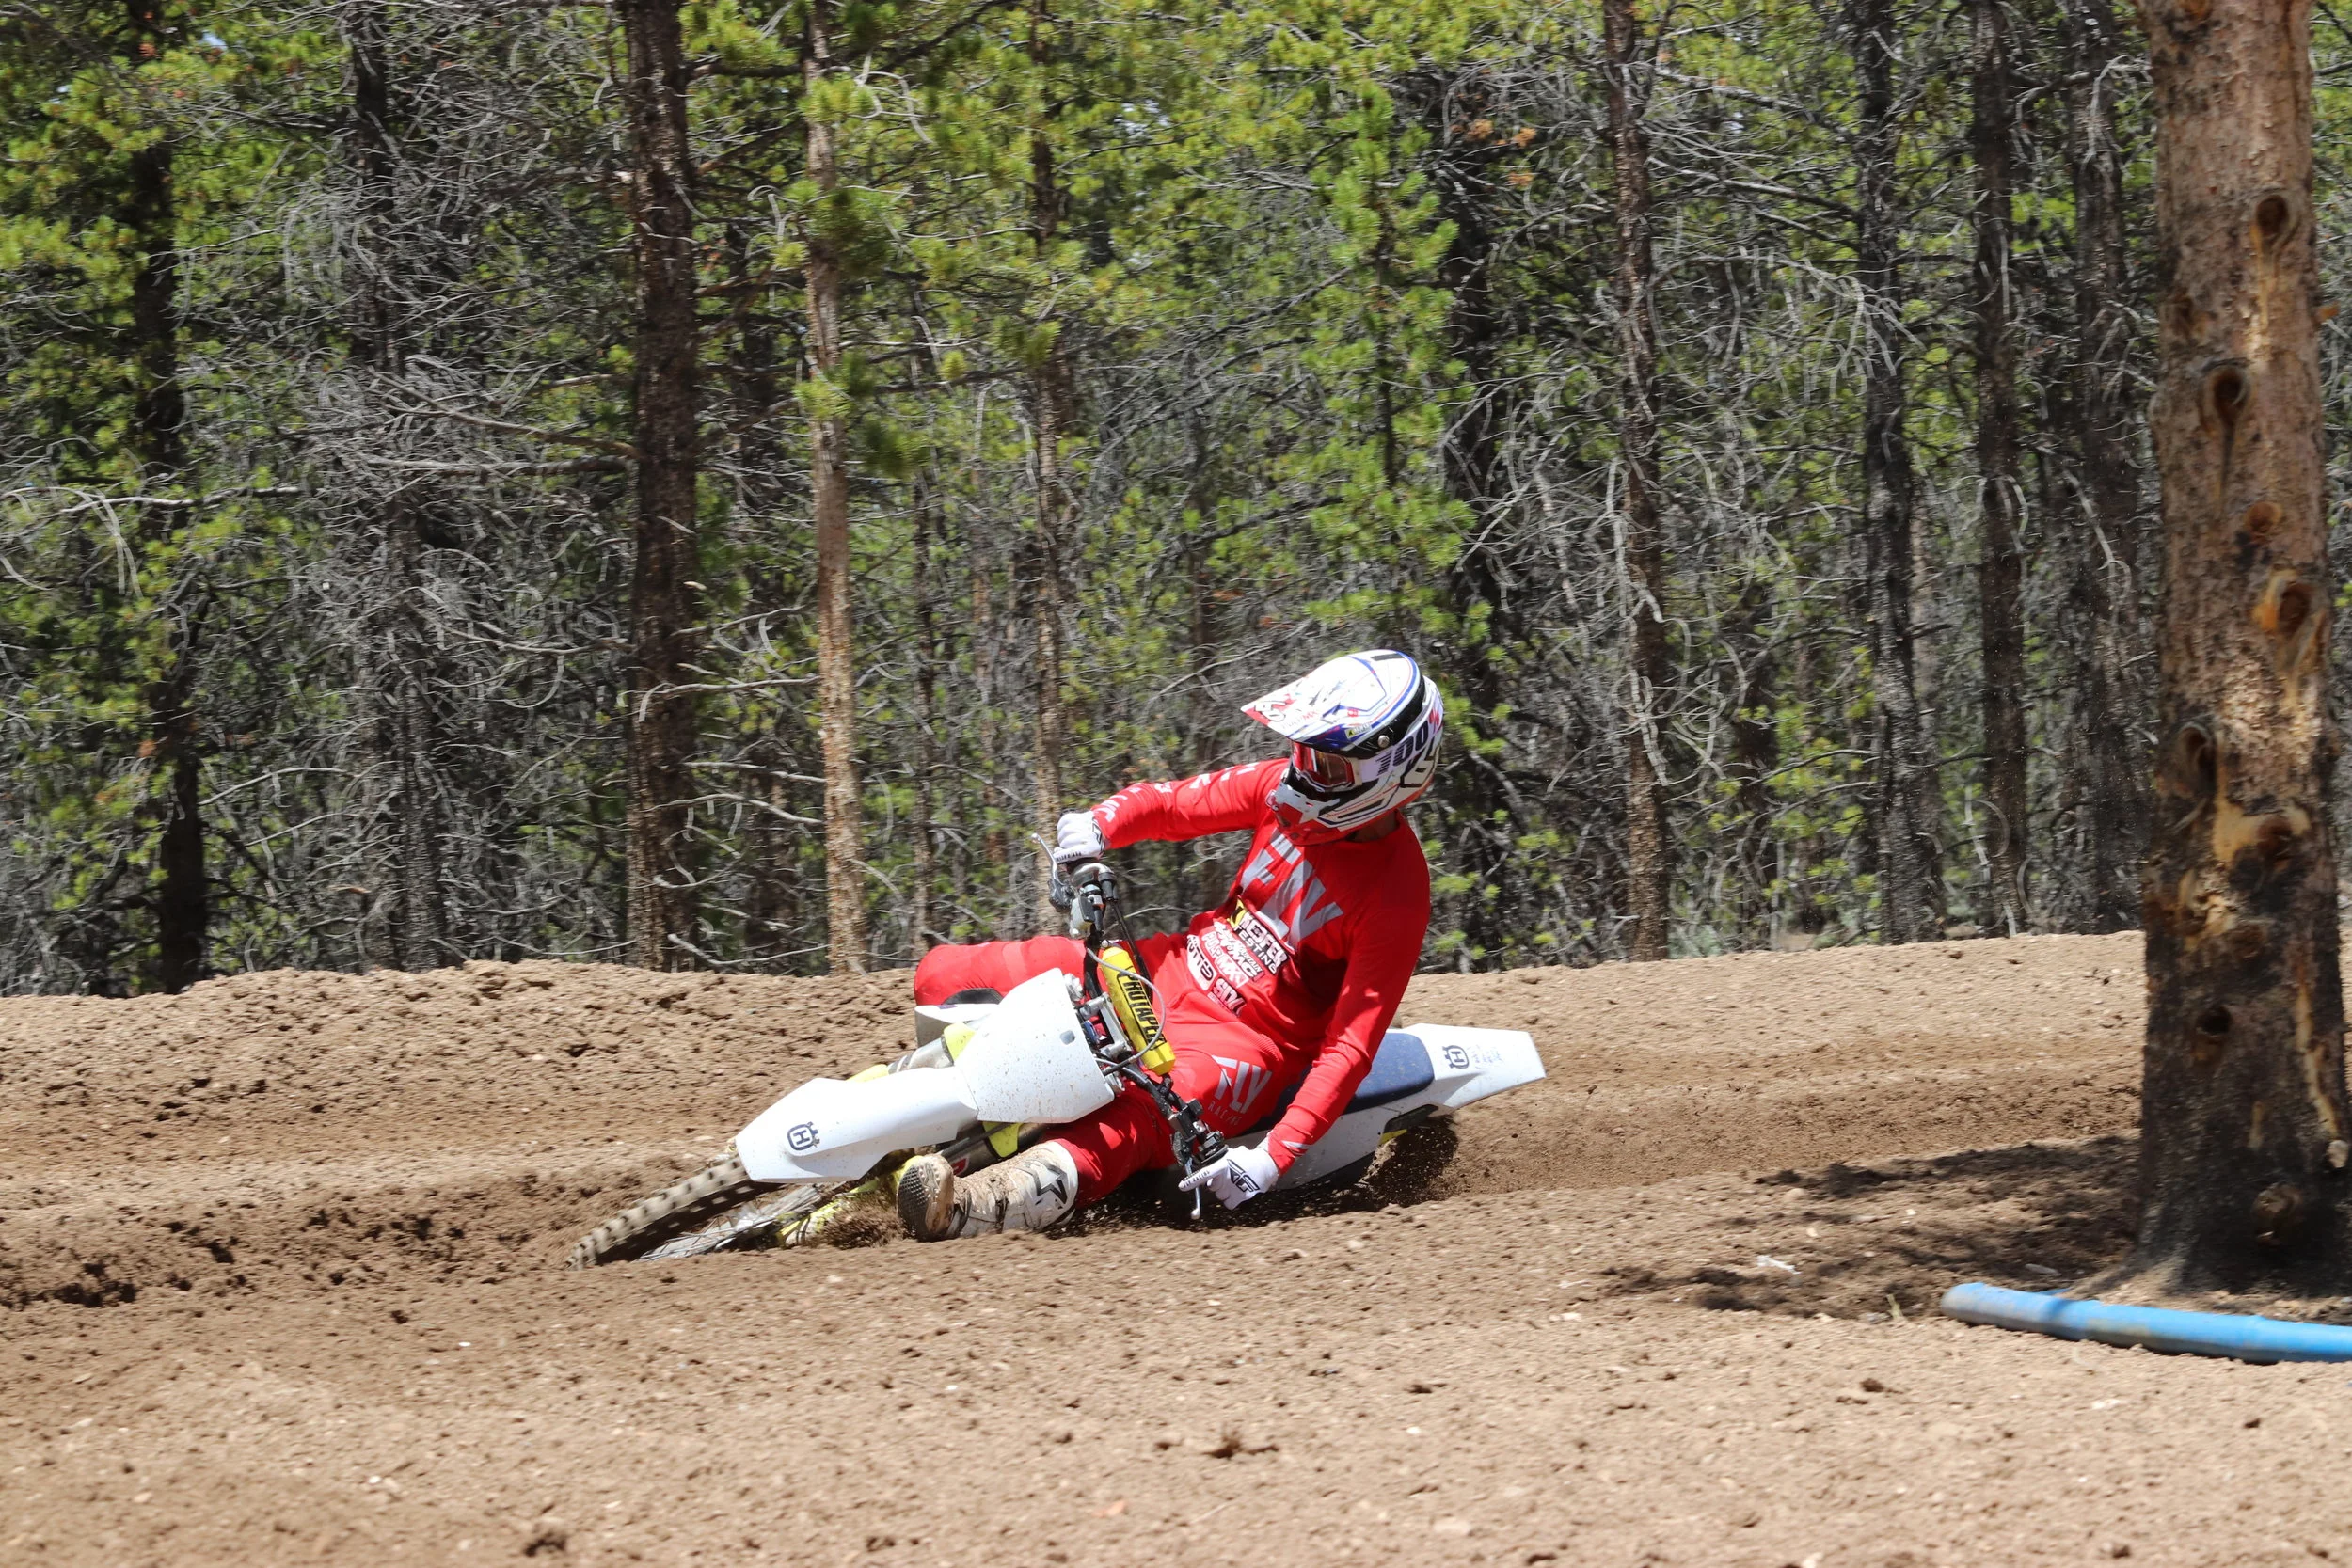
The 2021 Husqvarna FC450 is a great machine that turns better than the KTM 450SX-F thanks in part to lower suspension, but also is also not as snappy as the KTM down low. The Husqvarna has a slightly more compliant feel with a more lethargic engine character. I wanted to see if I could make the handing traits better on the FC450 and give it a little more power! Here are 5 mods in no particular order that have helped me love the Husqvarna FC450 even more.

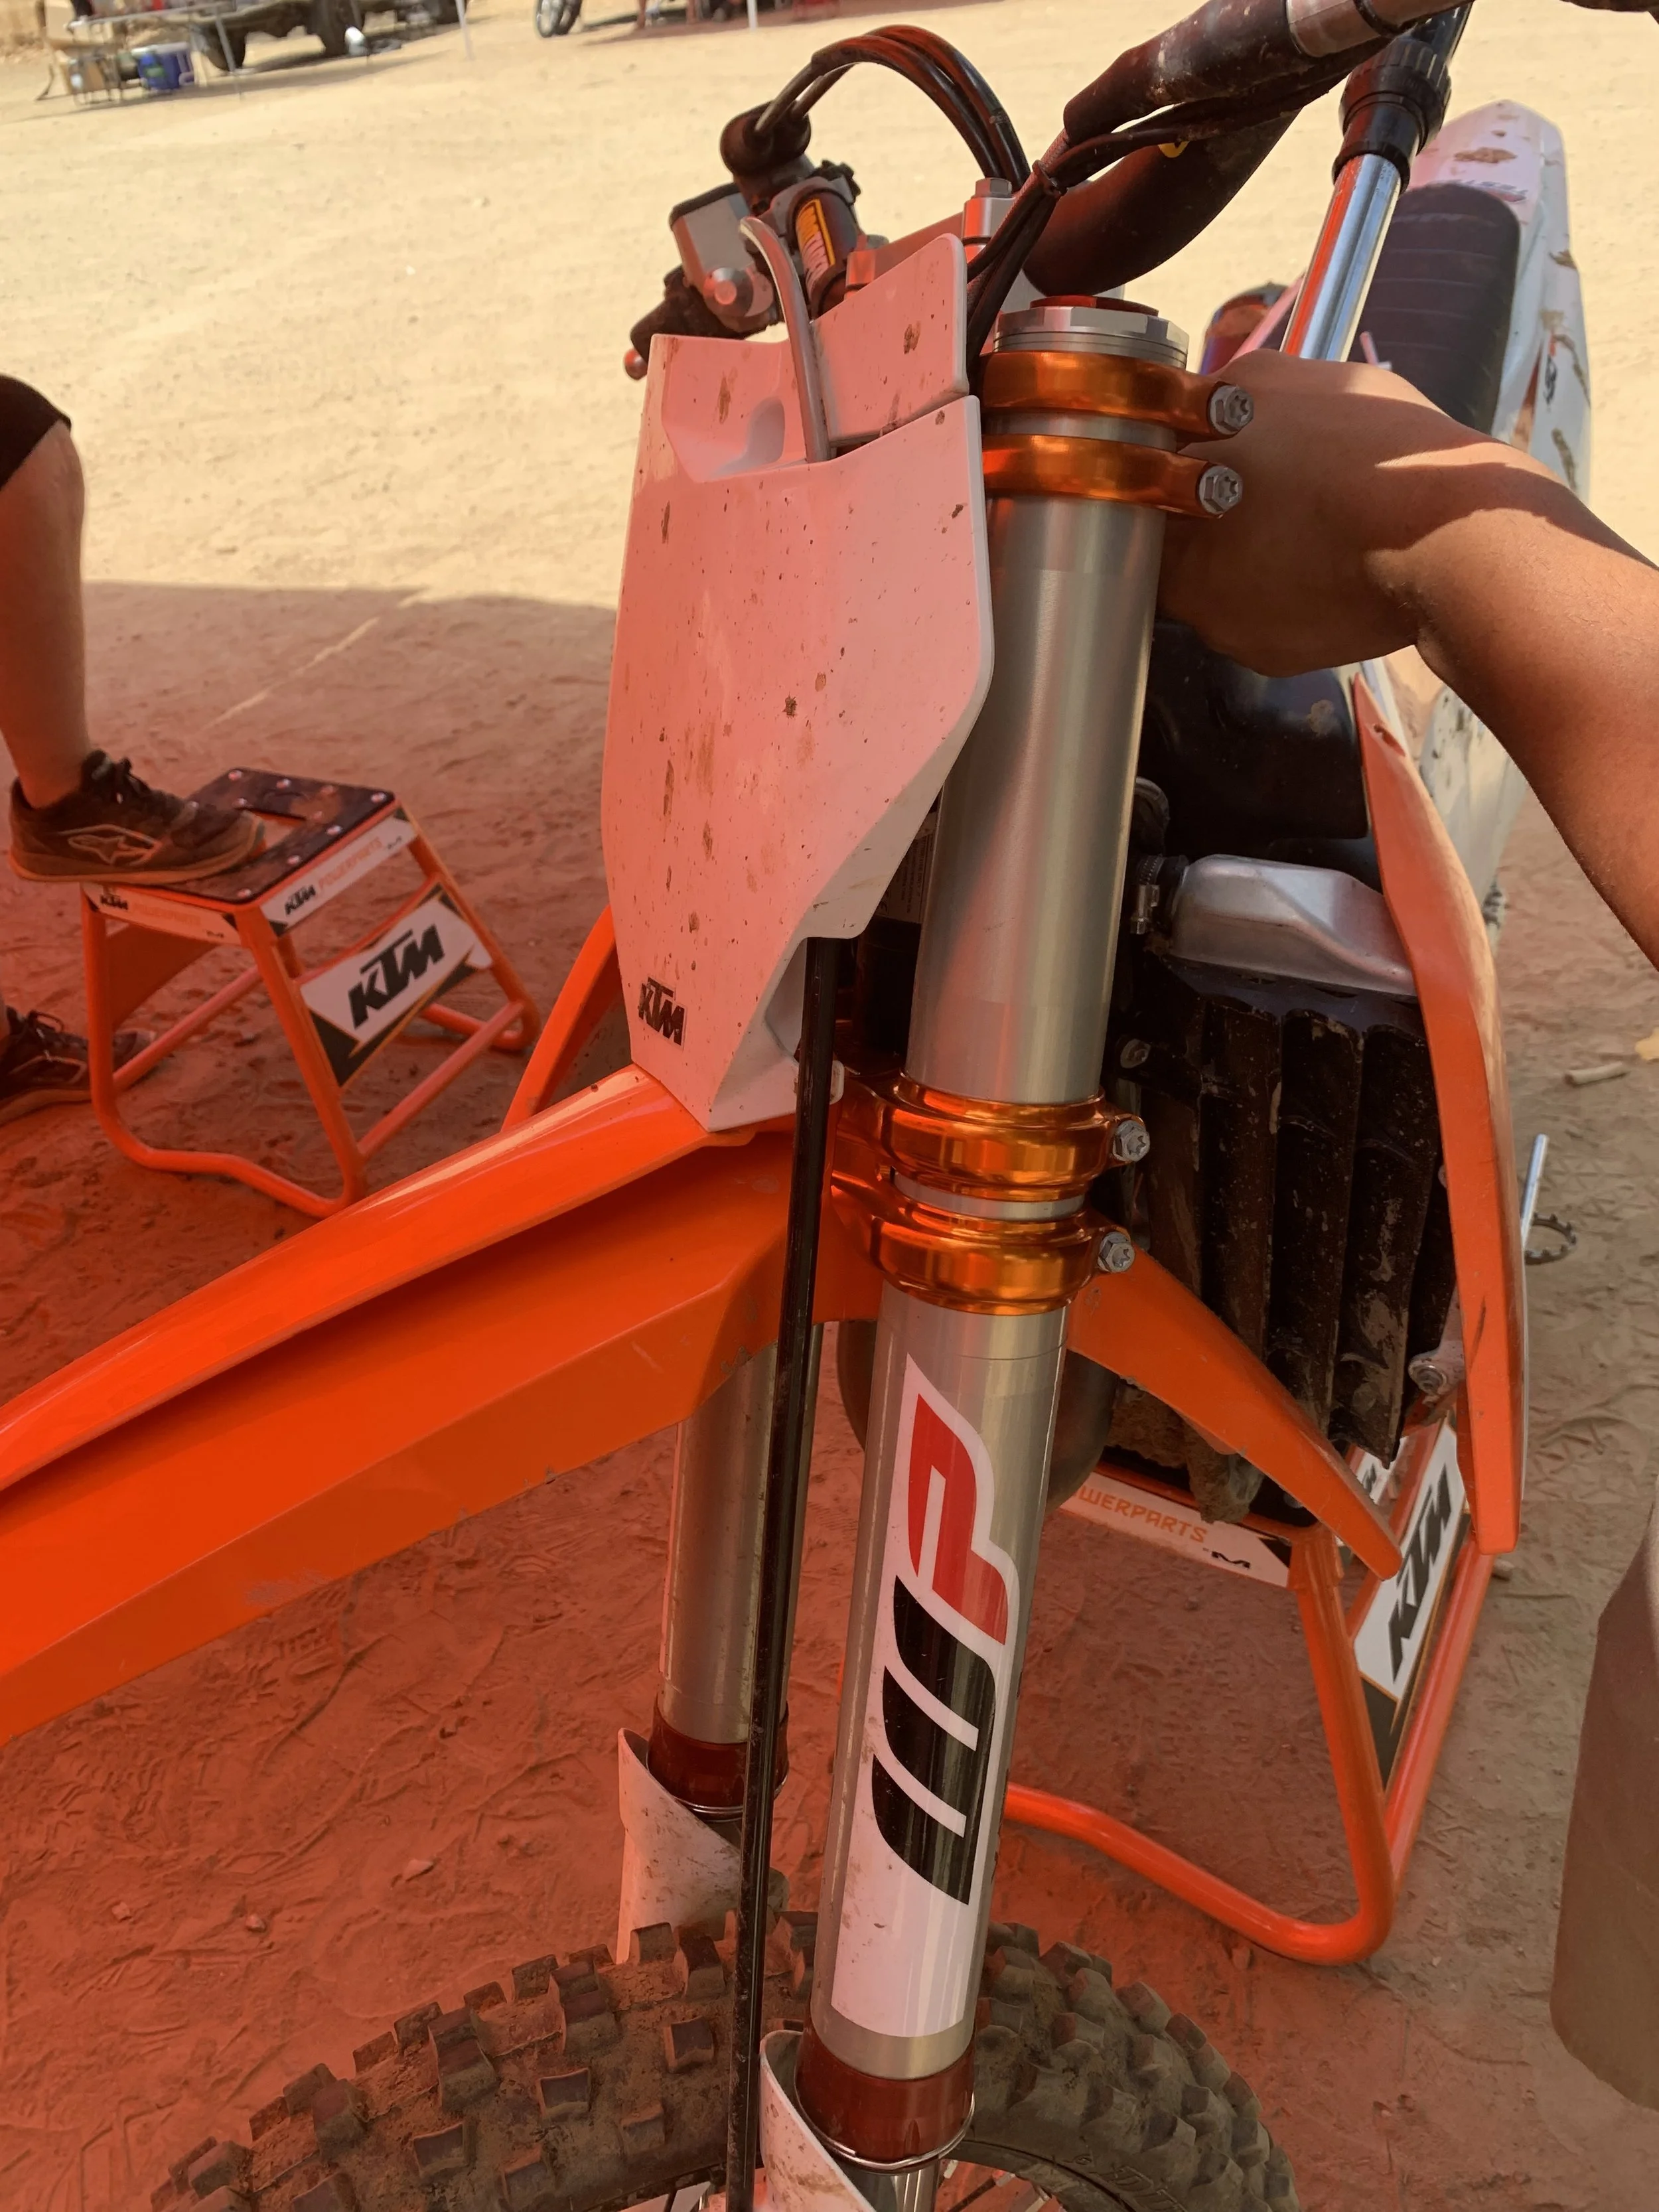
ZRT Throttle: How does it work? Simply put, there are two radial ball bearings on each end of the tube. One located inside the throttle housing and one on the end of the handlebars. This gives the throttle assembly an ultra smooth action and a claimed longer lifespan. Unlike the traditional FC plastic throttle tubes, the weight of the rider either pushing or pulling on the throttle will create some type of “friction”. The longer this goes on, the more the throttle and handle bars deteriorate and I have seen the right side of my bars look like slot car tracks in the past. Inserting two bearings within the throttle tube helps eliminate wear and friction, making your throttle assembly ultra smooth. So does it work? Yes, it does and sometimes too well! Sometimes! What I mean by “too well” is that it works so good that sometimes I get whiskey throttle when I get tired or have massive arm pump. This throttle is so smooth that it can be easy to grab a handful when sometimes you weren’t expecting to. However, once I got used to the buttery twist, my whiskey became less and less. This is by far the biggest difference I have felt from an aftermarket throttle tube.  The fears I had of cutting my bars and getting a different feel quickly went away when I rode out on the track. The 1/2 inch of bar loss was made up by the ZRT and my 802mm of bar width remained the same. Oh and trust me, if it didn’t feel the same, I would have felt it. Now when I go back to other test bikes that don’t have the ZRT tube on, it feels stiffer and harder to pull. We have been running the ZRT tube on our Husqvarna FC450 machine for almost 30 hours and have done nothing to it. I like that it feels as good as when we put it on and we have done zero maintenance to it.  The throttle cables on the KTM/Husqvarna kind of go to crap after 20 hours, so having the ZRT on there allows for an easier throttle pull even when your cables get worn. It is a good rule of thumb to change out your throttle cables on this bike around 25 hours or so.

      Of course there is a downside and the downside is that it costs $179.95! Now to most this is outrageous right? But to some, this costly part is worth it. For example, I would want a ZRT if I owned a KTM/Husqvarna/Gas Gas. Why? I am not a lock on grip guy, so I would normally go straight to an aftermarket throttle tube and instead of purchasing a cheaper plastic tube or an aluminum throttle, I would spend the money to get the ZRT. Yes, we know this is mostly an inexpensive mod article, but to us this think pays for itself. If you plan on keeping your bike for a few years or even if you get a new bike every year (albeit the same brand) this throttle tube is worth the cost. You can order your Zero Resistance Throttle at zrtthrottle.com. Any questions email me at kris@keeferinctesting.com

I have tested several exhaust flanges over the past several months and Twisted Development’s flange is not a gimmick! It actually helps low end pull, even if you have a stock muffler system!

I have tested several exhaust flanges over the past several months and Twisted Development’s flange is not a gimmick! It actually helps low end pull, even if you have a stock muffler system!

Twisted Development Exhaust Flange: The Twisted Development exhaust flanges are shaped differently than the stock OEM flange, which can change the engine character of the FC450. I went through several during testing and found out a size/shape that can actually enhance the low to mid range power character. Compared to the stock piece the TD Performance flange will give you better throttle response through area 2-3 (mid to exit) of corners. Another advantage to me is that the TD flange helps pulling power out of corners as well and helps third gear lugability. The TD flange just helps the RPM’s pick up quicker, which in turn makes the KTM feel lighter when the track gets bumpy. There is no need to remap your ECU and it takes minutes to install.  

 The TD flange works with the stock headpipe/muffler system or any aftermarket system. I tried it on a stock muffler system as well as a full FMF system and with both, the TD flange helped in aforementioned areas. For $200.00 bucks, to me, it’s a great way to get a little more snap out of your FC450.

2021 rockstar fc450-3384-2.jpg

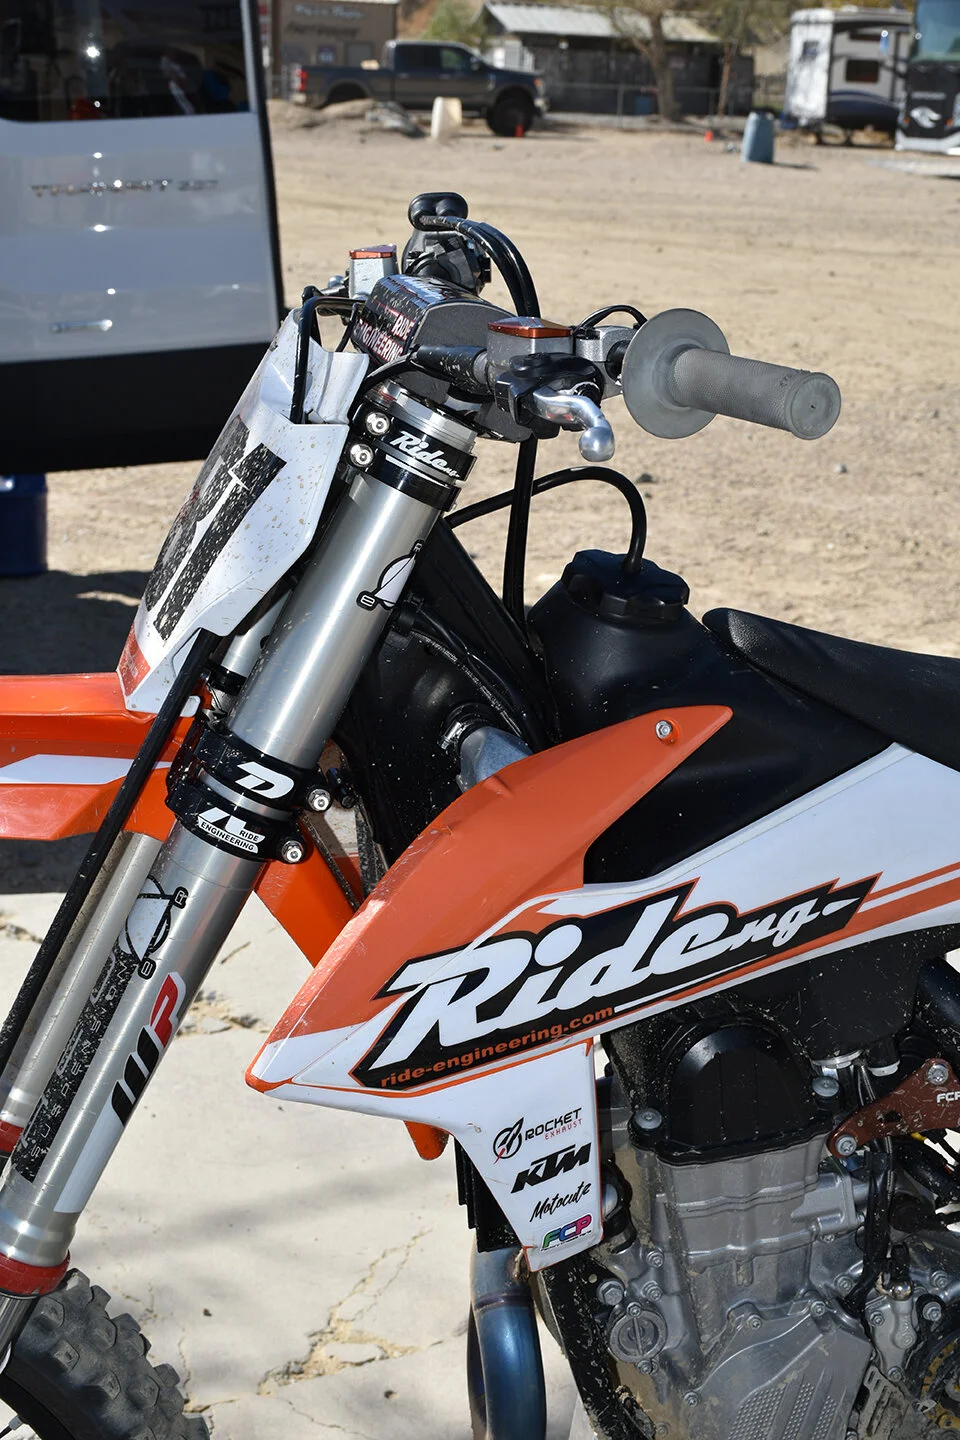
Ride Engineering One Piece Bar Mounts: Just looking at the stock FC450 bar mounts wrong can allow them to shift/bend. I have literally have come into the pits after a moto with my bars twisted and didn’t even crash. Yes, going to an aftermarket clamp like the Rockstar Edition clamp or a Ride Engineering Split Clamp helps with comfort so that should be one of the mods you should do if you’re looking for comfort, but that is also 700 bucks. The Ride Engineering One Piece bar Mount has a one-piece top that is designed to resist bending much better than the stock bar mount. Precision machined from aircraft quality aluminum, there is also a 6mm difference between the forward and back mounting positions. Ride Engineering also machines their own stainless steel posts that prevent over tightening, unlike some other competing brands that DO NOT use quality posts. This $104.95 all aluminum bar mount is sturdy enough to take some crashes, but doesn't cause any added rigidity problems. I would know because I am super sensitive to any added rigidity in my front end. The flex I got on the track (from the Ride mount) is as good as the stock flex and Ride Engineering’s rubber cones are also as flexible as stock. Ride does offer a variation of different elastomers/rubber cone compounds for a custom desired flex, just in case you need a stiffer or softer feel. The Ride Engineering Fourth Generation One Piece Mount has been refined over the years to weigh as little as possible, yet stay strong. The final product is a little heavier than stock, but for the added strength that I am getting, it’s worth its “weight” in gold. 

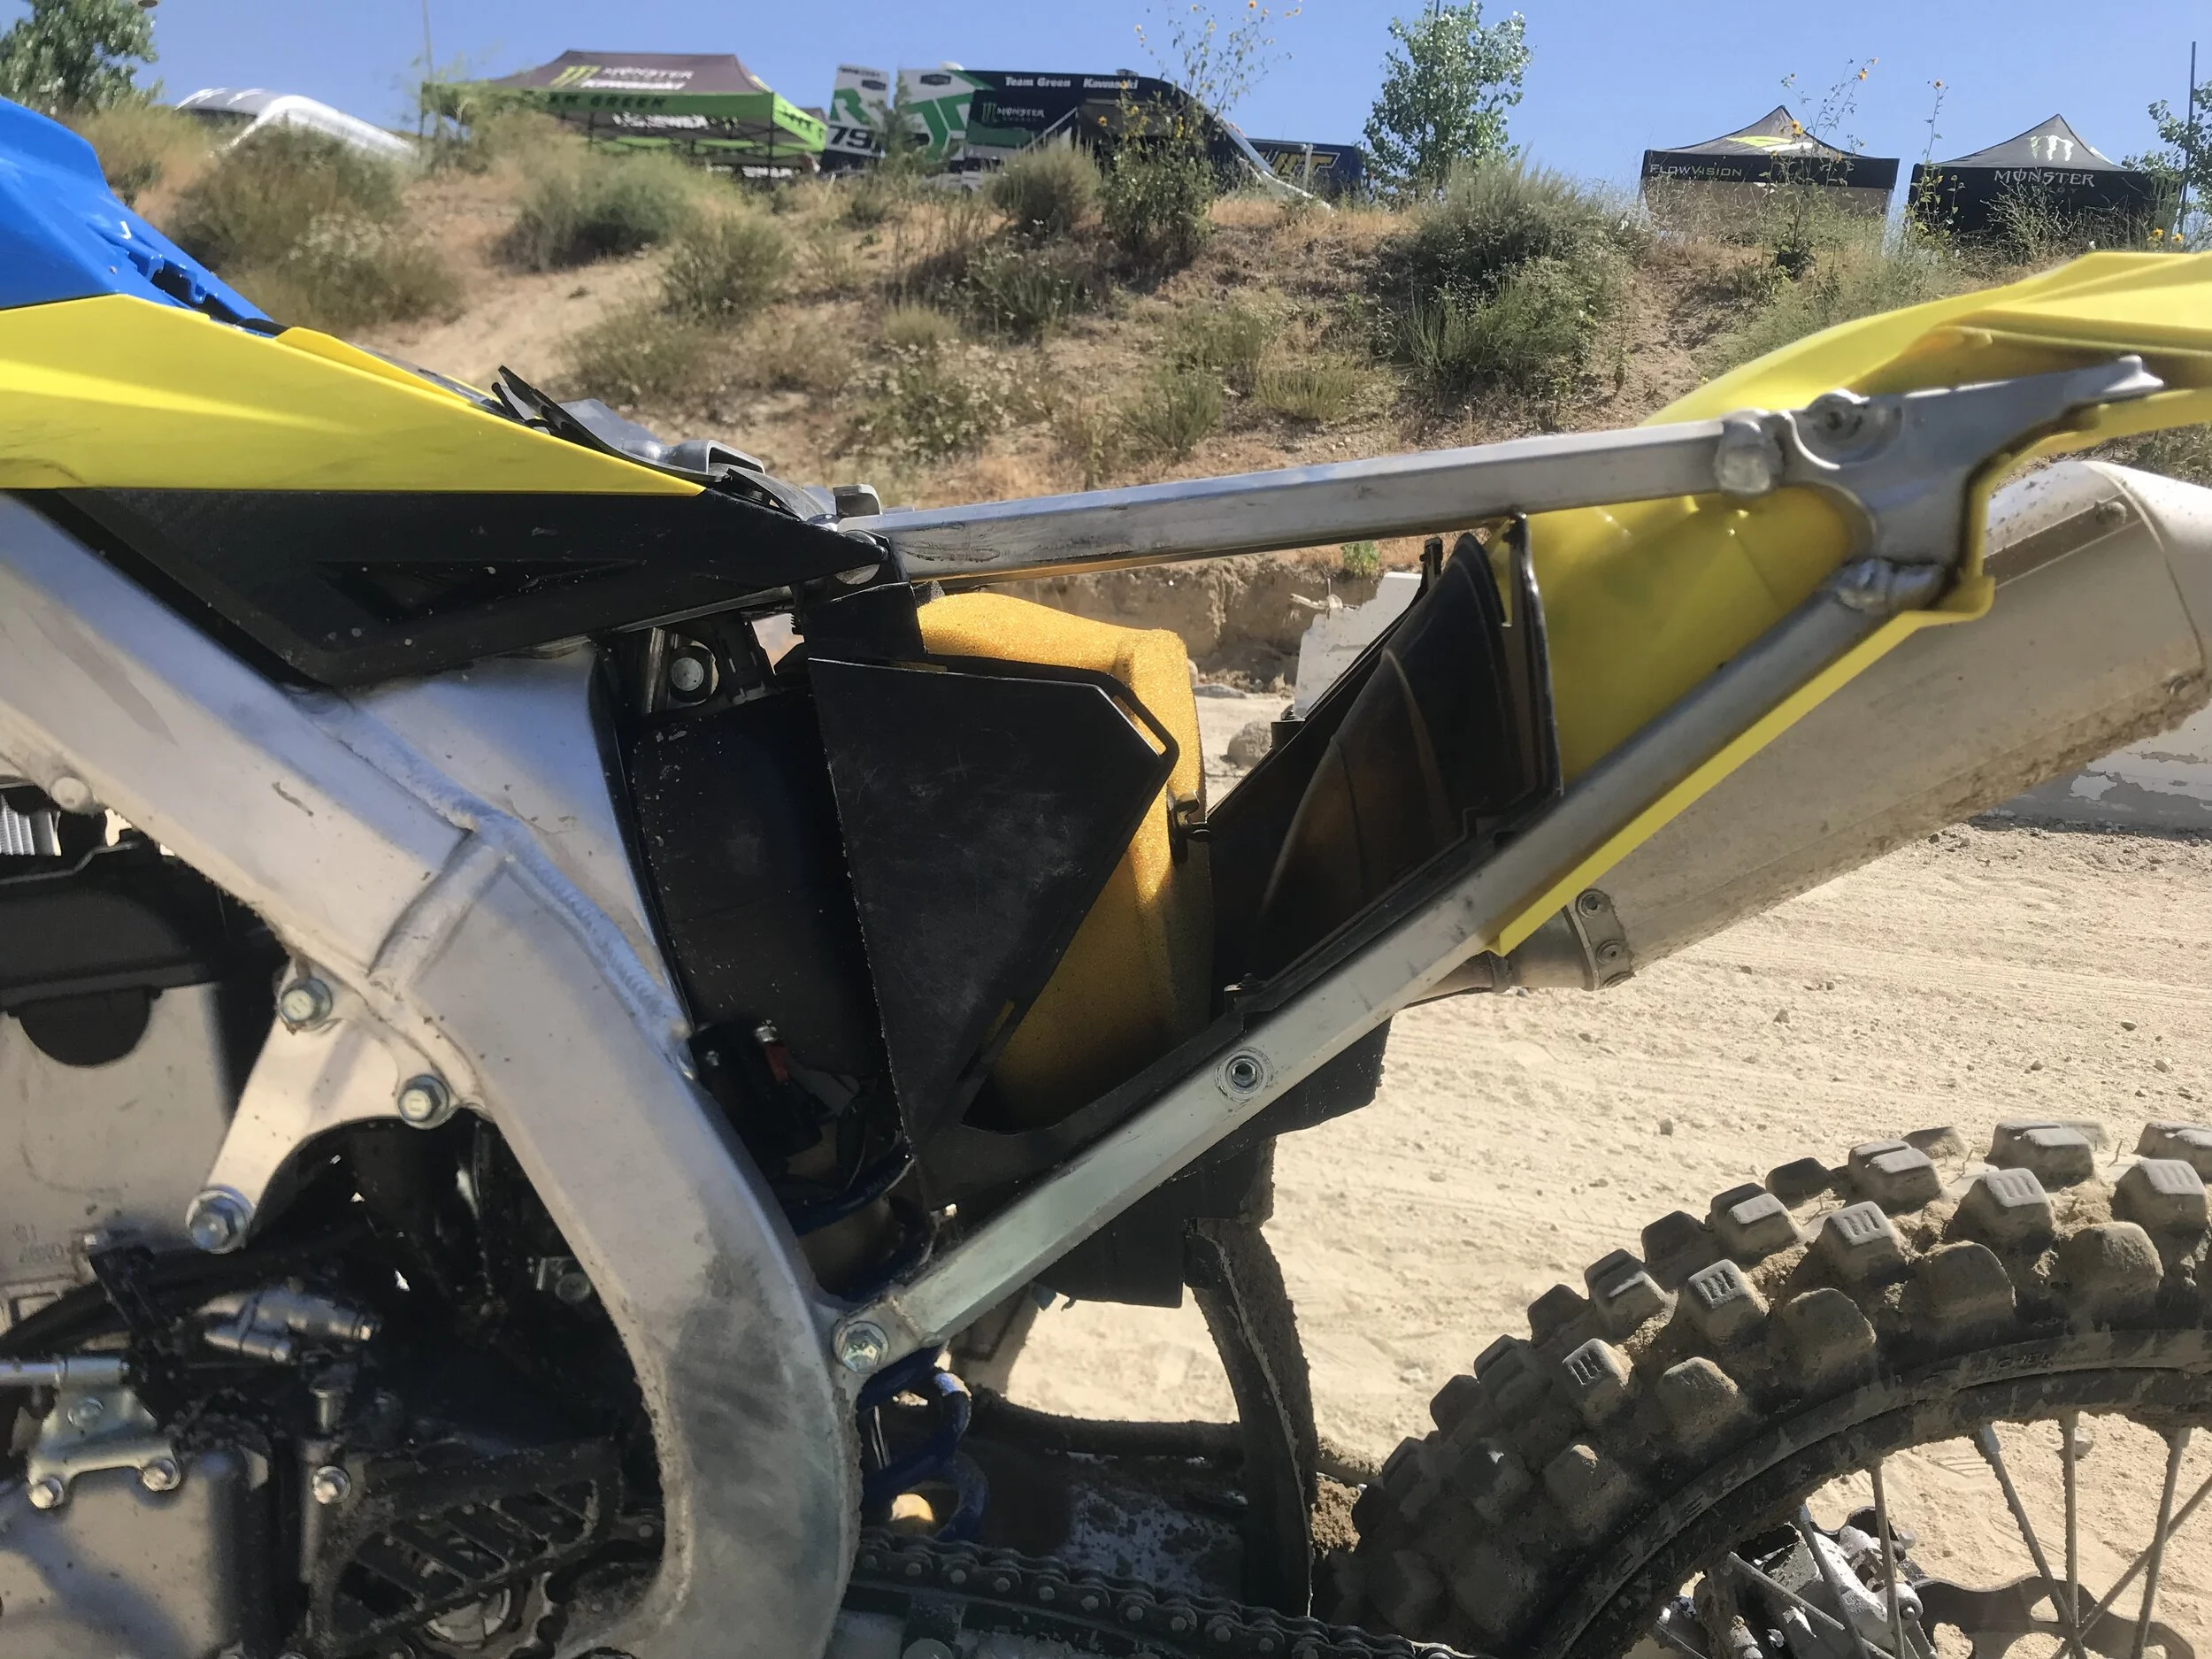
Air Filter Cage: OEM Part Number 50406016000. Using a two stroke filter cage without the screen will help low end RPM response and low end power delivery. For less than 20 bucks this is a great mod that actually does work! 

IMG_3013.jpg

FASST Company Rear Brake Return Spring: I seem to break return springs on KTM’s/Husqvarna's all the time. You can use a stock Honda rear brake spring or just get the FASST Co. piece that completely removes it. The pedal resistance can be adjusted by how much preload is placed on the spring. The Return Spring Kit also minimizes debris from jamming the master cylinder as well as eliminating the stock tension return spring that attaches to the pedal. The Rear Brake Pedal Return Spring Kit consists of spring, spring bucket and nut. The spring bucket contains the spring as well as seals the master cylinder with the stock rubber dust boot. Installation takes 10 minutes and the return spring kit gives you more of a positive feel, without a lot of slop, not to mention it’s way more durable than the OEM Husqvarna or KTM rear brake pedal springs. For 20 bucks it’s an easy one time investment on something you may have to purchase every few months with the stocker. You can purchase or check out what they offer over at www.fasstco.com.

Other More Notable But More Expensive Mods That Are Effective:

FMF 4.1 Full Exhaust System (Increase Mid Range and Top End)

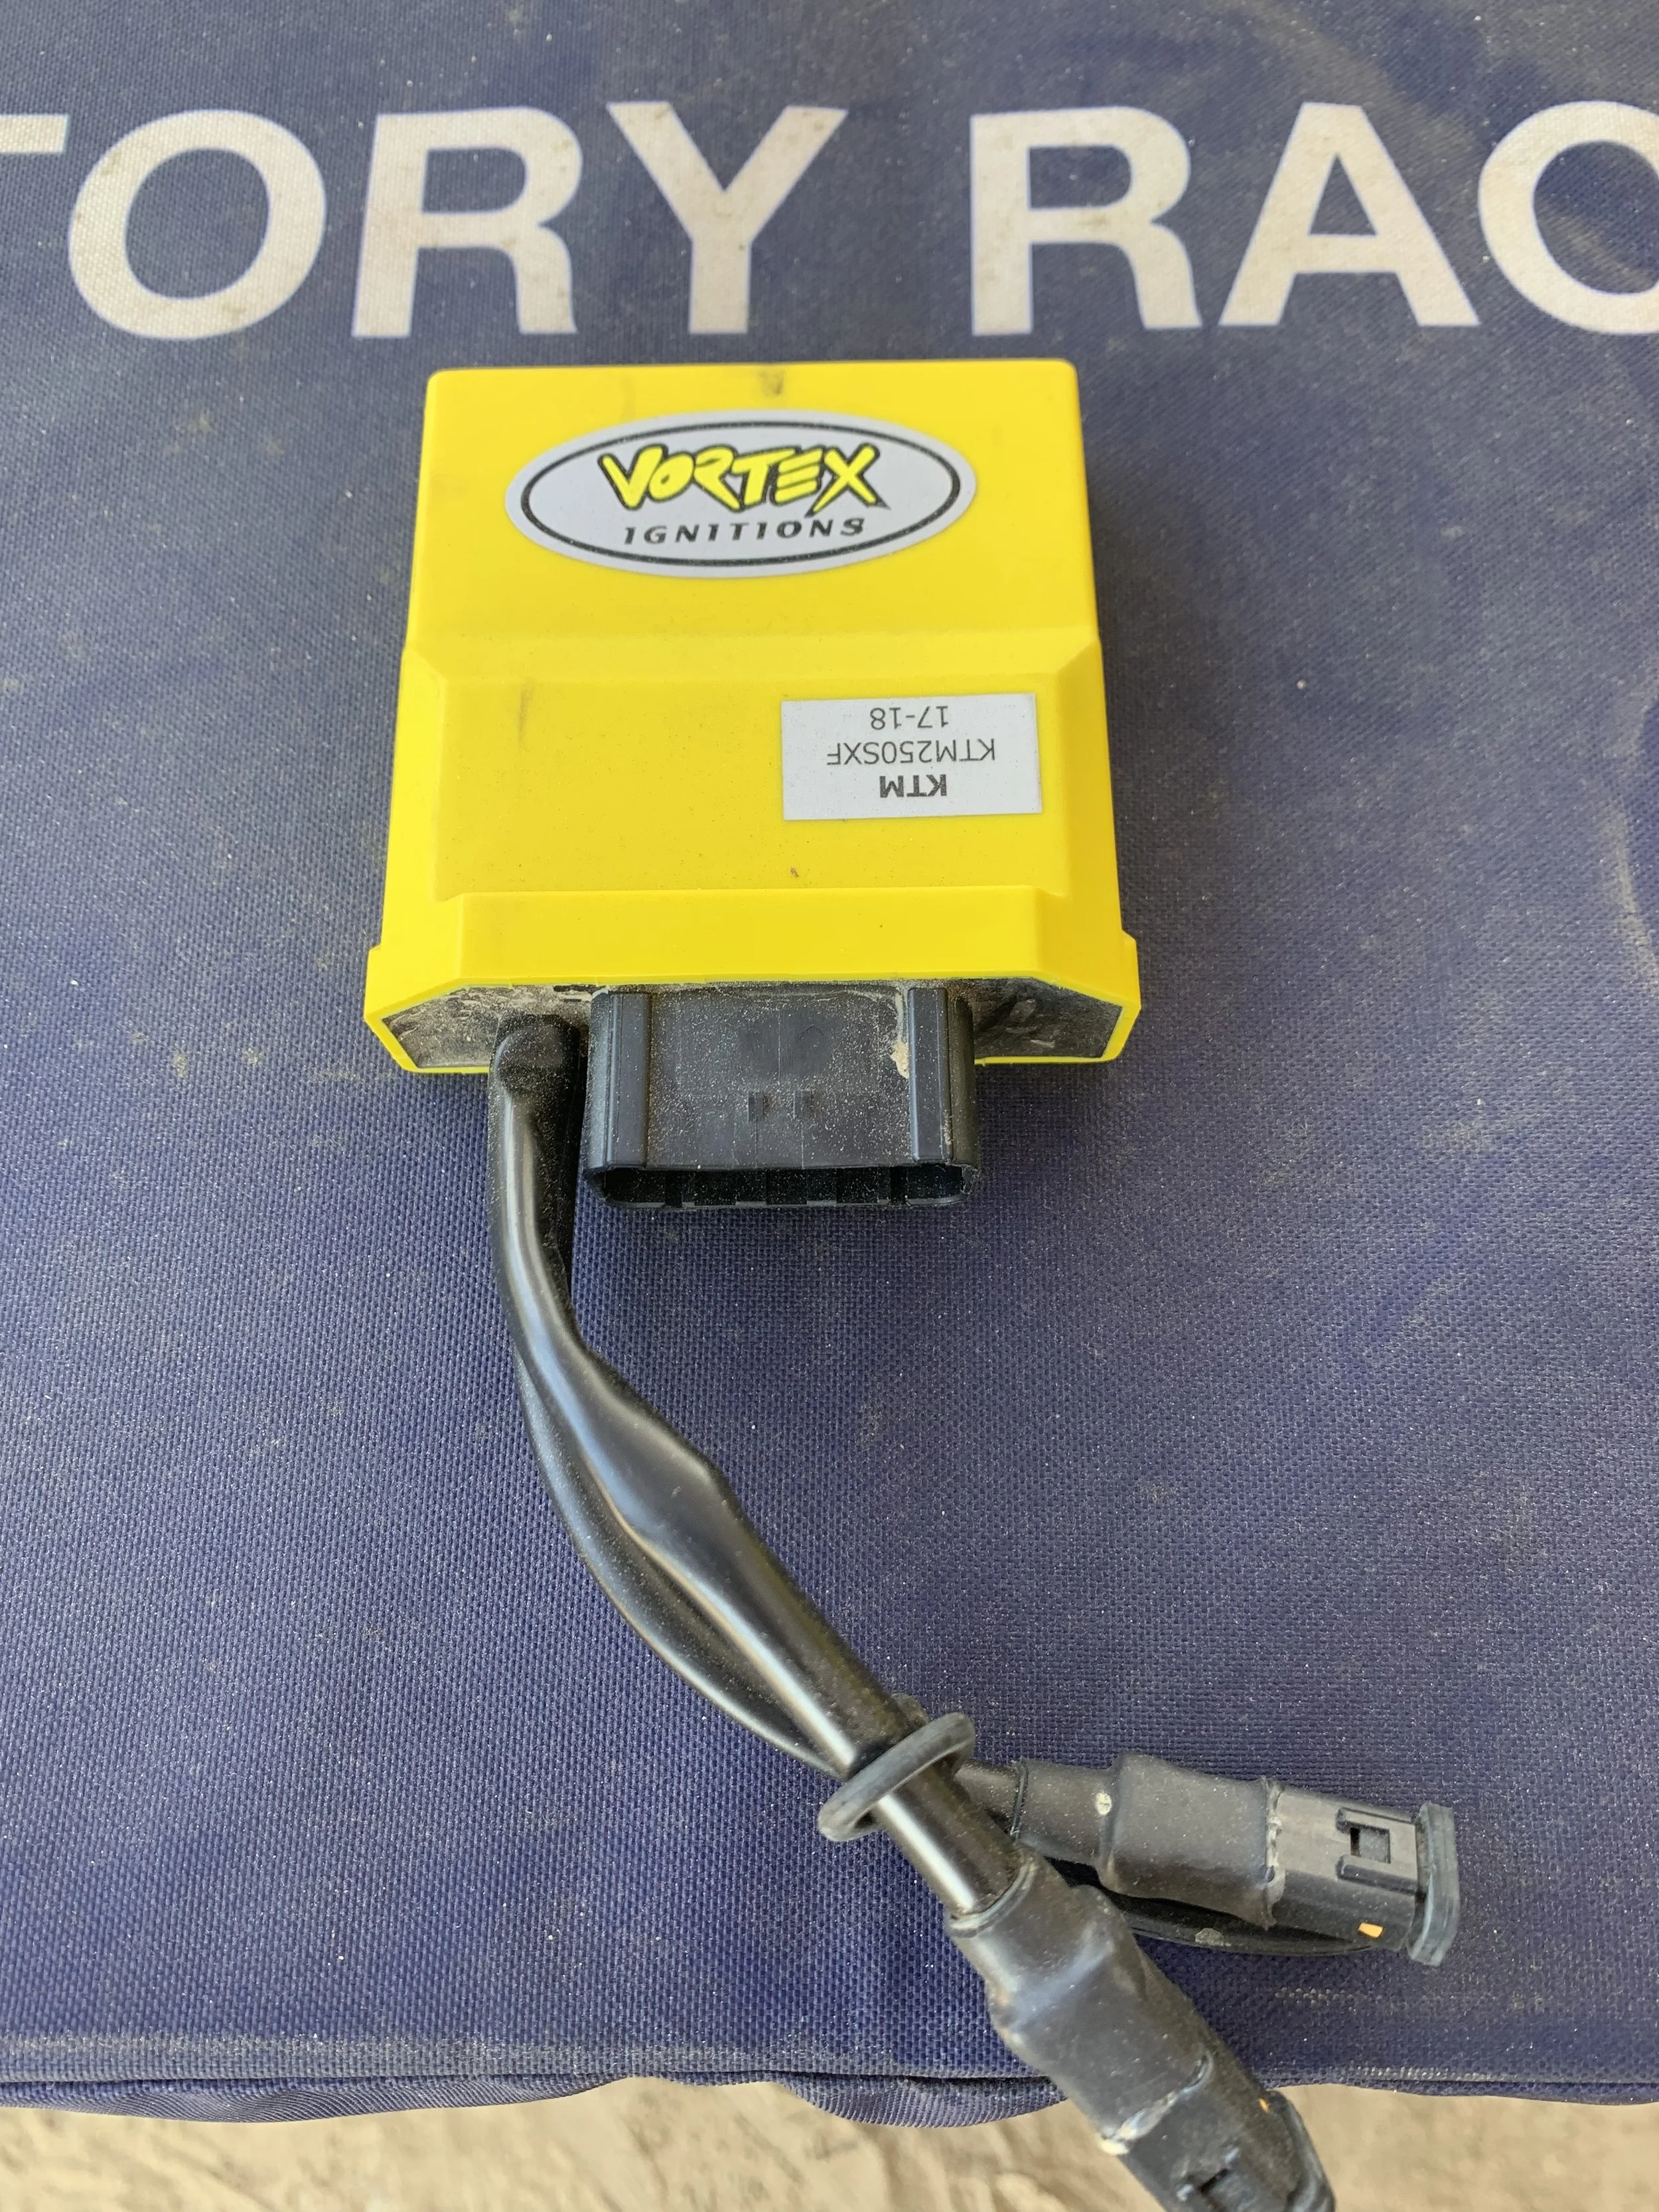
Vortex ECU Mapped By Chad At XPR Motorsports or Jamie at Twisted Development (More pulling power as well as response through the rpm range)

Dunlop MX3S Front Tire (Better front end lean angle grip than MX33)

VP T4 Race Fuel (Better throttle response and low end delivery)

REP Re-Valve Of AER Fork (More comfort through mid stroke and more predictable mid moto)

If you have any questions about these mods, please feel free to email away at kris@keeferinctesting.com

Top 5 Mods To The 2021 Kawasaki KX250

We have just over 25 hours on the 2021 KX250 and so far we really love this machine. The KX250 is one of our favorite 250F’s to ride due to the work the Kawasaki R&D engineers made to the 2021 model . Although there will be a follow up article soon with some ECU and engine mods we thought why not throw up our initial top 5 mods that we have done to our worn in 2021 KX250. These mods below have improved the engine and chassis feel even more and as given us more confidence in the machine.

IMG_0408-2.jpg

1. Pro Circuit Ti-6 Muffler System: Normally I DO NOT get more bottom end with a PC system (versus stock) on any brand of bike, but I was surprised that I got a little extra bottom end pulling power out of the PC system. RPM response is a little softer than the stock system, but when opening up the throttle out of corners the KX250 with the PC system pulls harder than the stocker. Mid range is where you will feel the meat of this power. When accelerating out of the corner and shifting to third, the KX250 doesn't have that “empty” feeling that the stock muffler has at times when the track is tilled deep. The PC system keeps pulling once the KX250 is shifted into third gear and continues to pull harder into the top end of the machine. Over-rev is as good as stock and I didn’t notice any loss of over-rev when swapping the two mufflers back and forth. 

 The only real negative I have found from the PC system is I wish it would have a little more low end RPM response. Like I mentioned that stock muffler has a great initial touch of throttle which can make the bike feel a little lighter when hopping over bumps or popping out of blown out berms. The PC system pulls better out of corners, but is just a smoother initial touch (AKA, low end RPM response). If you want more low end RPM response and could stand to lose some pulling power then take the screen out of the Ti-6. Doing this will give you more low end RPM response, but will hurt some mid range.

IMG_0242-2.jpg
IMG_0245-2.jpg

2. ECU Re-Mapping: If you want more pulling power as well as more top end install the “Chavez Map” with your Pro Circuit Ti-6 or any other muffler system and thank me later.  We used Kawasaki’s Calibration Tool to tweak the fuel and ignition timing in order to try and get some more pulling power out of the 2021 KX250. The map you see above will get you some extra torque when exiting corners while maintaining the excellent mid-top end power that the 2020 comes with. Use the stock green coupler with this ECU setting…

3. Gearing: 13/50 gearing is just fine for the Intermediate to Pro level rider with either the green or white coupler. If you’re a heavier rider that is lazier in corners you can try a 13/51 gearing to help you get back into the meat of the power sooner. We suggest using the green coupler with our preferred ECU setting with the 13/51 gearing however. This will ensure that mid-top end pulling power doesn’t fall off too soon.

IMG_4153.jpg

4. 110 Rear Tire: A few manufacturers still like to run a 100/90-19 rear tires because it’s lighter. However, the 110/90-19 rear tire offers more traction and has better comfort on square edge, hard pack areas of the track. The 110 doesn't weigh the 2020 KX250 down in deeper soil that much and in fact, I see no negative on the track to going up a size on the rear. The Kawasaki has plenty of mid-top end to carry the small amount of extra weight the 110 carries. You will get more lean angle bite coming out of corners as well as increased stability with the 110. The 110 will fit on your 1.85 rear rim so don’t worry about your standard current rim size with the 110 rear tire sizing. I am currently running a 110/90-19 Dunlop MX33 on the rear of the KX250 with good results in soft to intermediate terrain. 

5. Pro Taper EVO Handlebar: 

 The stock Renthal Fatbar 839 handlebar is a great bend, but for me it’s still too stiff. If you’re looking to get less vibration and more flex out of your 2021 KX250 look into a Pro Taper SX Race bend as it’s only a couple millimeters lower than the Renthal 839 bend in height. 

Honorable Mention: Ride Engineering makes awesome one piece rubber mounted bar mounts that DO NOT twist like the stock ones have/can. The stock bar mounts are soft so going to these 100.00 bar mounts ensured my handlers do not twist in my clamps. I like the stock triple clamp for this machine so I left stock triple clamps on.

IMG_4146.jpg

Maintenance Schedule: 

  • Change oil every 2.5 engine hours with Blud Racing Pro Series 10/40

  • Oil filter every other oil change

  • New Chain guide/slider at hour 15

  • Purchase a new throttle tube when getting new grips. (Stock grips are vulcanized to the tube)

  • New DID ERT3 gold chain at 10 hours

  • Running VP T4 race fuel

  • Using Dunlop MX3S front/33 rear combo at 13.5/12.5 PSI

  • Acerbis Plastic Kit at 20 hours

  • Throttle Jockey Team Green Graphics Kit


2021 KTM 450 SX-F Baseline Settings/Top Mods

The 2021 KTM 450 SX-F orange brigade is an amazing machine to ride! It only gets better with some modifications and some tweaks. The KTM 450 SX-F responds well to a few mods and with that makes for one hell of a fun motorcycle to ride/race. Here are few things that you can do to make your 2021 KTM 450 SX-F better. Do one or do them all, but just note that each mod makes enough difference on the track for my tired old ass to type about it when I get back to the office.   

IMG_0122.JPG

Engine/ECU: For 2021 KTM has a better ECU setting and although it’s clean, I still would like some more added RPM response/puling power. I have been on the Vortex ignition bandwagon for a couple years with this machine and for 2021 it hasn't wavered. If you want the same great rear wheel connection as well as more pulling power everywhere, look into a Vortex ignition from Chad at XPR Motorsports or Jamie at Twisted Development. I have turned a lot of KTM riders onto this mod and have had a 100% approval ratio. What I like about this modification is that it doesn't hurt reliability and makes for a very usable yet powerful engine for almost every type of rider. Yes, it will set you back around $800.00, but to me is much better than slapping on a muffler system and will do more for your engine. A stock re-map will not get you nearly the rpm response or pulling power that a Vortex will give you. Another good reason to get a Vortex ECU is that they have great resale value. You will also most likely be able to keep that Vortex ECU in circulation (if you get a new 2022 KTM) until 2022.5 as that will most likely be the year that KTM will release it’s new model. 

Suspension: If you haven't listened to my WP XACT Pro Components suspension podcast you may want to at least check that out, but if you're sticking with the stock suspension for a while, you can try this setting to see if this helps comfort when the track gets rough. This setting below should be in the ballpark for riders around 165-200 pounds, but if you’re heavier than 200 pounds going to a stiffer rear spring will help the ride attitude of the KTM. I have went to several tracks and tried many different settings, but this specific setting had the most “track toughness”. The KTM’s stock WP suspension doesn't quite have the comfort like the Husqvarna does, but the KTM/WP set also holds up more in the stroke, which is a better fit for me personally. To get some added comfort back with the added hold up, try this setting. 

Fork (Stock Triple Clamp): 

Height: 5mm

Air Pressure: 11.0 Bars

Compression: 13-14 clicks out

Rebound: 15 clicks out

*With KTM Hard Parts Triple Clamps or Ride Engineering Split Clamps*

Height: 5mm

Air Pressure: 11.1 Bars

Compression: 15-16 clicks out

Rebound: 13 clicks out

Shock:

Sag: 104mm

Low Speed Compression: 10 clicks out

High Speed Compression: 1-1/2 

Rebound:  11 clicks out


WP XACT Or Spring Conversion:

This is a question I get a lot! Which is better? Should I get a spring conversion or XACT Pro Component fork? I have tried Enzo’s KYB conversion as well as a REP valved XACT fork and both have their advantages. The Enzo KYB conversion soaks up small bump/hard pack chatter better than a REP XACT fork, but the REP XACT fork moves less and to me has slightly better performance with slightly less comfort. Both spring set ups are better than other re-valved AER set ups that I have tried and to me the spring set ups are way more consistent throughout the day. You will have to decide on how much money you want to spend (Enzo KYB Spring Conversion is around $2000.00 and the XACT fork is around $3000.00) as well as what type of rider you are in order to get the most out of your suspension. If you like a fork that moves in the stroke a lot and follows the ground well (front tire contact patch), the KYB conversion is great. If you want the most hold up as well as a fork that allows the rider to charge/hammer through big bumps easier, the XACT fork set up is also a great choice.  

IMG_0189.JPG

Chassis: Aftermarket engine mounts are all the rage right now and some of you may not have the money to spend on a pair of engine mounts for your KTM. I will say that I do feel like the KTM chassis is stiff when new, but be patient as it will break in and feel better after 15 hours or so. I decided to play around with torque specs on the engine mounts for fun and stumbled across some more comfort. If you’re experiencing a stiff feeling chassis sensation and want the KTM to settle while leaning (under throttle), there is an inexpensive way to achieve some extra front end traction (as well as an overall more planted feel). You can torque all top engine mount bolts to 30Nm. This band aid will give you a more planted sensation when on throttle while leaning the KTM 450SX-F through sweepers and fast straights. You will have to make sure that all engine mount bolts have blue Loctite to ensure they do not back out (you should do this regardless if you keep all the bolts in or not). You can also try torquing your swingarm pivot bolt to 95 Nm (instead of 100Nm) to help rear end traction out of corners. The downside to doing these mods is that the chassis will flex a little more, so if you’re riding deep tilled tracks this modification might have too much flex for some (especially when chopping throttle).  

Handlebars: The stock Neken handlebar is too stiff and doesn't offer too much comfort. Throw them in the trash. Get yourself a set of Pro Taper bars and make your arms and hands happy again. The Pro Taper SX Race bar worked well for riders from 5’8 to 6’1. The SX Race bend comes in a crossbar or crossbar-less style and is 800mm width, 87mm height, 54.5 rise, and 54mm sweep. If you’re looking for a better “stand up feel” from your KTM look for handlebar close to this measurement. If you do like the stock bar try the Pro Taper Husqvarna Stock bend with 5mm bar mount risers (Ride Engineering sells these).  

ride clamps.jpg

Triple Clamps: After riding back to back with the stock triple clamps, the KTM factory clamps and the Ride Engineering clamps I have realized that the stock clamps are stiffer. I have since installed the Ride Engineering triple clamps on our 2021 KTM 450 SX-F with excellent results. The front end has more of a softer initial touch on slap downs and the fork action is smoother on de-cel bumps. It’s crazy to think that the fork feels softer now with the Ride clamps installed, but that is exactly how it feels when riding on the track. I was able to increase my air setting on my fork to help hold up off-throttle and kept more comfort through the entire stroke (with the stock AER fork). I also get slightly more lean angle front end traction (or cornering stability) with the Ride clamp because the front end isn't bouncing around inside long/choppy ruts. The KTM factory clamps are close in comfort to the Ride clamps, but offer slightly less straight line front tire feel.  

Screen_Shot_2016-10-03_at_8.56.26_AM_1600x.png

Rear Brake Pedal Spring: Purchase a Honda CRF450R rear brake pedal spring with the rubber around the spring. The KTM rear brake pedal spring vibrates and will break every 3-4 engine hours. Orrrrrrrrr. Get a Fasst Co rear brake return spring and be done with it! Fasst Co’s rear brake return spring offers tunable pedal resistance and a more controllable feel by placing the spring in compression instead of tension, minimizing the "on-off" feel of most rear brakes. 

Gearing: I like the stock 13/49 gearing for most conditions. If you remember last year I thought 14/52 was better in sandier conditions, but have come to the realization that I liked the gear spacing more with the 13/49 gearing. 

IMG_0574.jpg

Twisted Development Exhaust Flanges:

The Twisted Development exhaust flanges are shaped differently than the stock OEM flange, which can change the engine character of the KTM 450 SX-F. I went through several during testing and found out a size/shape that can actually enhance the low to mid range power character. Compared to the stock piece the TD Performance flange will give you better throttle response through area 2-3 (mid to exit) of corners. Another advantage to me is that the TD flange helps pulling power out of corners as well and helps third gear lugability. The TD flange just helps the RPM’s pick up quicker, which in turn makes the KTM feel lighter when the track gets bumpy. There is no need to remap your ECU and it takes minutes to install.  

 The TD flange works with the stock headpipe/muffler system or any aftermarket system. I tried it on a stock muffler system as well as a full FMF system and with both, the TD flange helped in aforementioned areas. For $200.00 bucks, to me, it’s a great way to get a little more snap out of your KTM 450 SX-F. 

IMG_7029-2.jpg

Rear Axle/Axle Blocks: Going to a Works Connection Elite axle block kit or Ride Engineering axle block kit will get rid of the fixed left axle block on the stock KTM’s axle. This will help the rear end to move more freely under throttle and improve the shock’s comfort on acceleration chop. Both are great, but you will have to decide if you want a complete axle/axle block kit like Ride Engineering’s  or just the blocks themselves like WC’s.

IMG_0564.jpg

Muffler: To me, FMF makes the best muffler system for the KTM 450 SX-F. There are some other companies that have other bikes dialed in more, but on the KTM, FMF has got it down. You will get more low to mid RPM response as well as more mid range pulling power. Top end is increased plus the over-rev is as good as stock. It is one of the few times that I was impressed because it was actually better than stock in almost all areas. The downside is that you must keep up on muffler packing (every 10-12 engine hours) because the FMF will blow out and that could damage your expensive titanium can. Did I mention that you will lose almost two pounds with this system? If you slap on spring forks you will be gaining almost three pounds. You can get most of that back with a 4.1 Titanium FMF Muffler system.

If you have any questions about any of these settings or mods please contact me at kris@keeferinctesting.com and I am happy to help you.

2021 Honda CRF250R Baseline Settings/Top Five Mods

My son Aden and I have been riding/racing the 2020 Honda CRF250R for over a year now and since Honda left the 2021 Honda CRF250R unchanged, I decided to get you some notes on some baseline stock settings, as well as some mods that you can do to improve your CRF250R. Some of these settings/mods have evolved since last year as we learned more by going to a wider variety of tracks. 

50511738582-cc8e044150-o.JPG

Suspension: 

In stock form the Showa suspension on the 2020-2021 Honda CRF250R has decent comfort on de-cel bumps, but lacks a little hold up for riders ranging from 160-190 pounds. If you’re over 190 pounds going up a spring rate on each end is your ticket to a better handling CRF250R. After riding with this setting below at more than three different tracks, more than one time around, I figured out that this baseline suspension setting gave the 2020-2021 Honda CRF250R the most “track toughness”. If you happen to feel like the fork is harsher (through the mid stroke) with this setting, simply open up the rebound (faster) back to stock setting. This will help free up the fork slightly under front end load (off-gas). The shock needs just a little more hold up under acceleration so simply going stiffer/slower on low speed compression/rebound gives the rider more comfort and added traction out of corners. I tried experimenting with high speed compression, but the Honda is finicky with high speed. Going stiffer on high speed compression (shock) put too much weight on the front end (fork) creating a harsher feeling front fork.

Fork: 

Height: 3mm (Stock is 5mm)

Compression: 6-7 clicks out (Stock is 9 clicks out)

Rebound: 10 clicks out (Stock is 11 clicks out) 

Shock:

Sag: 102-103mm

High Speed Compression: 2-5/6

Low Speed Compression: 9 clicks out (11 clicks out is stock)

Rebound: 5 clicks out (6 clicks out is stock)

50571582026-fb63affdff-o.JPG

Chassis:

As of right now I prefer the stock engine mounts torqued to the OEM/manual settings. Some bikes react better to aftermarket engine mounts than others and as of right now I feel the best settings (for comfort) come from the stock engine mounts. Another way to get more compliance is to torque the swingarm pivot bolt to 52 ft.lbs. for increased flex/comfort under throttle, while leaning. If you feel like the rear end is planted and doesn't deflect under load on chop please leave it at the OEM/manual torque spec. If you feel like the Honda is standing up through mid corner simply go back up to 5mm on fork height with the above suspension specs to help mid corner lean.

Gearing: 

I went back and forth between the stock 13/48 gearing and 13/49, but ultimately decided on sticking with the 13/49 on softer tracks. Why? I felt the 13/49 gearing made second gear less usable, but helped me get into third gear quicker. If you’re riding a tight track and suffer from bad corner technique going to a 13/49 could benefit you more. Decide which tracks you ride the most and what type of rider you are in order to decide which way to go with your gearing. 

Steering Head Nut:

Do yourself a favor and tighten up the steering head nut a little on the 2020-2021 Honda CRF250R. The steering comes too loose from the factory and can cause some knifing in corners and can give you slight head shake on de-cel. Simply tightening the steering head nut a little makes the Honda’s front end feel more planted (less loose feeling) when performing corners/initial lean/turning the handlebars. This is a simple modification, but really helps the Honda’s ride attitude around the track. Sometimes it’s the simple/easy things in life that make a difference. Dirt bikes are no different. 

ECU Map Switch:

I like map three the best for most tracks around these parts and for more torque out of corners. Even though Honda improved their torque for 2020-2021, it still lacks some pulling power out of corners, compared to the Yamaha. Running the 2020 CRF250R in map three will benefit you the most in this situation. This is my preferred map, but map one is also very usable and can pull pull you farther in second/third gear. 

Clutch:  

Going to a Rekluse Torque Drive Clutch Pack will give you better clutch lever feel as well as clutch life. The engagement of the lever ratio doesn't change, but it lets you put more of that horsepower to the rear wheel, without slipping, when hard on the throttle in soft dirt. This is simply a clutch pack and not the complete system. You use the stock OEM inner, outer, basket clutch pieces with this kit. 

Cooling:

I am not going to sit here and say that Honda fixed ALL of their cooling issues with the radiator change they made for 2020-2021. The Honda CRF250R still runs hot and will puke some radiator coolant out of the overflow when riding in the higher RPM’s during a long moto (20-30 minutes). Just keep an eye on your coolant level if you’re riding in hot an or deep sandy conditions. I had to add a little coolant to the radiator on longer, hotter days here in Southern California. Don’t be lazy and you’ll be fine. Oh and don’t sit there in the pits, talking to your buddies while your CRF250R idles. IT WILL PUKE OUT COOLANT! See below for a band aid fix. 

50592620542-488a3183db-o.jpeg

Another Inexpensive Way To Get Less Rigidity:

Renthal Fatbars come stock on all CRF’s and while we like the strength/bend of the new bar, I still feel like they are stiff on slap down landings/square edge. Going to a Pro Taper EVO handlebar will take away some rigidity as well as give you less vibration to your hands. The 4mm wall thickness of the Pro Taper EVO bar is something I have tested back to back against the Renthal Fatbar. Even if you painted both bars black and sent me on a blind test, I would come back within a lap and tell you which bar was which. It’s that noticeable. If you like the stock bar bend try the Pro Taper EVO SX Race bend as that is the closest bend to the stock 839 Honda Fatbar. 

Renthal 839 Fatbar    (L) 802 (H) 91 (R) 51 (S) 51 (mm)

Pro Taper SX Race    (L) 800 (H) 87 (R) 54 (S) 54 (mm)

50592563276-eb5633168d-o.JPG

Top Five Mods:


Clutch:

Going to a Rekluse Torque Drive Clutch Pack will give you better clutch lever feel as well as clutch life. The engagement of the lever ratio doesn’t change, but it lets you put more of that horsepower to the rear wheel, without slipping, when hard on the throttle in soft dirt. This is simply a clutch pack and not the complete system. You use the stock OEM inner, outer, basket clutch pieces with this kit. 

Steering Head Nut:

Do yourself a favor and tighten up the steering head nut a little on the 2020-2021 Honda CRF250R. The steering comes too loose from the factory and can cause some knifing in corners and can give you slight head shake on de-cel. Simply tightening the steering head nut a little makes the Honda’s front end feel more planted (less loose feeling) when performing corners/initial lean/turning the handlebars. This is a simple modification, but really helps the Honda’s ride attitude around the track. Sometimes it’s the simple/easy things in life that make a difference. Dirt bikes are no different. 

Chassis:

Just like I mentioned above, I think the stock engine mounts are the best for feel on the track, but you can drill a 5mm hole in the middle of the top engine mounts if you still feel like you need more chassis compliance on square edge choppy tracks. This is a “FREE” mod that does help! I have learned this with the 2020 Honda CRF450R and this can also apply to the CRF250R

Boyesen Supercooler Kits:

The Boyesen Supercooler flows more water than the stock water pump on the 2020-2021 Honda CRF250R. Boyesen has been working on water pumps since the 90’s and the switch to four-strokes has only made Boyesen’s effort more important. The Honda CRF250R runs very hot. The Boyesen Supercooler can reduce engine temperatures by as much as ten degrees, as confirmed by tests at Team Geico Honda. How does the Supercooler achieve this? Hydrodynamics. Boyesen’s investment-cast aluminum water pump cover has bigger water inlets, a sculpted design, no casting seams, less restrictive corners, a more efficient impeller and less cavitation. Stock water pumps aren’t very hydrodynamic. Their internal shape and impeller can create excessive amounts of air bubbles in the coolant. Air bubbles lessen not only coolant flow, but the amount of coolant per cubic gallon. Boyesen’s Nautilus-shaped cover and impeller increase pump capacity. Boyesen’s water inlet has an increasing diameter and curved shape. This is a big improvement over most stock inlets, which decrease in diameter as they near the impeller and have a 90-degree bend at the pump. Boyesen’s patented impeller design is 25 percent more efficient at moving water than the stock Honda CRF250R design. While I don’t get much overheating in Southern California dirt, I have experienced some of those problems in deeper east coast dirt. Installing this Boyesen product has relieved some of the heat stress on the Honda and has allowed me to go more than one moto without having to add coolant to the Honda’s radiator. 

IMG_0947.JPG

Yoshimura/FMF Muffler Systems:

Either one of these systems will give an increase in mid range pulling power (compared to stock) as well as some added low end recovery. The FMF has more snap off the bottom than the Yoshimura system, but the Yosh system will give you a little more mid range meat. Compared to the stock system either one of these systems is an improvement to me. The FMF mufflers are considerably louder than the stock system and the Yosh mufflers have a deeper tone in comparison to the stockers. For the money that you will spend on mufflers just know that you will NOT be getting a drastic change in overall power character. Both of these systems alter the engine character some, but don’t expect it to be a mind blowing experience after bolting either one of these systems on. Some motorcycles react better to aftermarket muffler systems than others. 

** Aden (my son) preferred the FMF system on his race bike as he felt more excitement from the FMF system compared to the Yosh system. 

Optional More Expensive Way To Get More Pulling Power:

The Vortex ignition mapped by XPR Motorsports or Twisted Development will give you more low end grunt as well as a pulling power that will increase the length of each gear. The maps that Chad at XPR and Jamie at Twisted have created will allow the rider to lug a little more without the Honda falling off as easy (AKA, more recovery). The down side is that it will cost you around $800.00 to get this mod. However, the plus side to this mod is that it will give you more overall pulling power than an aftermarket muffler system. 

Race Tech Re-Valved Suspension: If you’re looking to get your suspension re-valved for your ability and weight, Race Tech has great settings for Honda CRF’s. Some of the best suspension that I have tried on any late model Honda has been Race Tech. The stock Showa suspension is very good, but for my 170 pound frame it can be a little soft. Getting the Honda re-sprung as well as adding Gold Valves to my fork/shock has dramatically improved how I can push around the track when it gets rough. This mod is not for everyone as some can simply get away with stock suspension, but for those that are competitive and want to push harder into corners, Race Tech can be a great option for you Showa bump sticks.

If you have any questions about this test or the Honda CRF250R please feel free to email me at kris@keeferinctesting.com


2020 Suzuki RM-Z 250 Blue Collar Project Part three

By: Colton Aeck

As you all might know I was assigned the 2020 RM-Z 250 and started the project of finding some horsepower as well as handling improvements on a small budget. If you haven’t checked out the first two parts of this article, go back and give them a read for a more in depth look on what we’ve done so far. For a quick recap, here is what we got so far: with the help of an FMF 4.1 muffler, a Rekluse clutch, a NoToil air filter kit and a couple mods to the airbox, we were able to find some hidden power on the RM-Z. Race Tech also stepped in and got the suspension more comfortable than stock so I was able to actually push hard late into motos. 

image3-4.jpeg

While we had already made a big improvement to the RM-Z power plant, I still wanted more. We’d done just about everything we could without opening up the money wagon to the engine so in order to get some more horsepower as well as save some money, our next move was to send the head off to Race Tech’s engine department. Andrew at Race Tech did a five angle valve job and custom porting to the head. He also gave us a custom mapped Vortex ECU to match the head work they performed. This is something that is relatively easy to do yet can make dramatic differences on the track.

After I tested this machine for a few days I went and asked Andrew a few questions about the mods. He said that on the dyno, the numbers reported a 10% Horsepower increase through the midrange and top end. Dyno’s are not the end all be all of on track facts, but for this test I did have to agree with what the dyno had to say. In stock form the RM-Z makes decent bottom end, but doesn’t do anything exciting when exiting the corner. It has a mid range that feels flat and lacks pulling power on top. In other words I can’t let it rev out too far. I have to short shift, but when I do that the Suzuki still doesn’t have enough recovery to get back into the meat of the power. Race Tech’s head helped the Suzuki right where it needed it and made the spread of power broader and easier to ride. I didn’t notice any increase in bottom end, but I didn’t notice a loss either, which was acceptable to me. 

image4-4.jpeg

The total cost of the head work and ECU comes in right around $1500, which isn’t a whole hell of a lot, when you’re looking at what you’re getting on the track. That’s only a little more than you’d spend on a full system exhaust, but in comparison I think you get more bang for your buck with the head/ECU work. A pipe can usually improve on the stock engine character, but in this case I feel the head work actually changed the engine character for the better. Being able to use second gear longer through corners helped make this an even more fun yellow bike to shred ruts with. Third gear is still not an option on tight corners, but now that second gear is longer, I am not worried about pulling third so early. I used the stock gearing, but am looking to possible go up a tooth in the rear to see what it can offer me in third gear exiting corners. With the head work and Vortex ECU the Suzuki pulls down each straight farther and has slightly more recovery when I make that mistake. I like that the Race Tech mods gave me the sensation of a more playful yellow zook while keeping the reliability of this machine in tact. Yes, the Suzuki is reliable! I have been riding/racing the crap out of this bike and have experienced zero issues with it. After racing long/fast GP style courses as well as the tight ruttier technical mx tracks, the Suzuki has been easy to work on in the garage. 

After we got the motor sorted out, I made a few mods just for personal preference. I’ve been a Renthal guy all my life, but since testing with Keefer, I’ve really begun to like Pro Taper’s SX Race handlebar, so that’s what I chose for the RM-Z. They also sent me their “Twister” throttle tube, which is an aluminum tube with a bearing on the end of it. I honestly thought it was a bit of a gimmick, but I fell in love with how smooth and easy it makes the throttle pull. I’ll be running those on all my personal bikes from here out! The stock seat cover looks grippy, but I found myself sliding around quite a bit under acceleration. Motoseat fixed that problem with a ribbed gripper seat, yet it wasn’t so aggressive where it hurt my rear end after a long day in the saddle. 

My personal favorite tire combo is the Hoosier 25S front and 25 rear, so that’s what I chose for the RMZ. I like this combo because the tires have a great carcass feel an have excellent lean angle traction for me. Hoosier has a reinforced sidewall with the “S” models, so if you’re looking for a bit of a longer life span, look at the 25 “S” Hoosiers. Finally Elusive Graphics made it look pretty with a custom set of Keefer Inc Testing graphics. 

So now the big question. With the work we did, is the RMZ 250 competitive with the other bikes in its class? Yes and no. Does it have have the bottom end torque of a Yamaha? 

It still DOES NOT! Does it have the pulling power and over-rev of a KTM or Husky? No. 

The RMZ engine isn’t the best in any category, but with the work that we performed to it, it still can be respectable racing machine without the pricing of the other five manufacturer models. 

Where the Suzuki really shines is in handling. It corners as good or better than any bike on the track and it remains predictable and stable at speed after some suspension work. Simply put, it’s easy and fun for me to ride. I still ride at a high level and I would take this bike to race (with these mods) any day. 

image1-10.jpeg

So who is the RMZ 250 best for? 

I think it is best suited for a younger rider moving up to big bikes, a novice without a lot of experience or just your average guy who wants a great handling 250F that’s super fun to ride without breaking the bank. 

For the serious racer in the 250 class, horsepower is a massive part of the right? Simply put the RM-Z is down on power compared to its competition. Unless you have a big budget for engine mods, you’ll be fighting an uphill battle, but Race Tech helps soften that blow with a reliable head mod that makes more power. 

Suzuki has the handling/ chassis figured out. All they need is a faster engine and I think they could be in the running to win shootouts. Only time will tell if Suzuki has the budget to figure that part out, but just know there are modifications to the head that Race Tech offers you RMaRMy members without breaking the bank!

Bonus Tip:

If you own an 2019-2020 RM-Z 250 and you experience some chassis stiffness, think about giving this a try. 

I drilled a 4mm hole in the center of the upper engine mounts (in the middle). On the track it will give you a slightly softer feel through small chop as well as hard slap down landings. What I didn’t expect though, was increased front end bite on initial lean while turning. 

It’s a subtle change, but definitely something you all should feel. On hard packed So Cal tracks, it was a welcomed improvement. 

Stay tuned to the Keefer Tested podcast in the coming weeks where Kris and I will sit down for a little wrap up on my experiences with the 2020 RM-Z 250. 

2020 Suzuki RM-Z250 Tips/Tricks Part #1

Written By: Colton Aeck

Greetings, I’m Colton Aeck. You may recognize my name from slugging it out as a privateer at your local Supercross or Outdoor National. If not, I’m 24 years old, a professional racer and working on being a half decent test rider too.

image4.jpeg

While practicing in between Supercross races in January I had a mechanical failure that resulted in a bike crash. I broke several vertebrae, a few ribs and punctured a lung, but most important it got me thinking about my situation. Is busting my ass every week, traveling every weekend, risking major injury and sacrificing time and relationships with loved ones all worth it? For what? To come out profiting a few hundred bucks a week? It’s certainly used to be, after all I’ve worked my whole life to get this far, but getting injured sucks and maybe it’s just time to go back to why I started this all in the first place. Because I love to ride!

Cut to now, a few months later. I’m healed up and getting the itch to ride again. I have tons of great memories racing 2 strokes growing up. One day I stumbled on a super clean 2004 KX250 and thought “Perfect, this will be the most fun I’ve had in years!” WRONG... I love two-strokes as much as the next crazed pre mixed guy, but let’s be real, compared to today’s four-stroke machines they are slow and poorly suspended. I should’ve know better buying a 16 year old bike! 

Since I was regretting my two-stroke purchase I called up Keefer to see if he had anything I could ride. His 2020 RM-Z 250 needed someone with a purpose and it seemed like I needed one at this time, so I found a home for the yellow zook. To be frank, the 2020 RM-Z 250 gets a bad rep (and rightfully so in some cases). It’s down on power compared to its competition and in the 250 class, power is almost everything.

image2-5.jpeg

My first impression of the Suzuki is that it has good throttle response and bottom end pull, but once you really start riding harder it feels choked up, like it’s starving for air. There just isn’t a whole hell of a lot of pulling power after I gt out of the corner. After taking the seat off I knew the first mod I wanted to make was to try and open up the airbox. On the inside of the number plates there is a triangle shaped snorkel piece that sticks into the airbox. Using a heat gun or a torch, lightly heat up the plastic to soften it a bit (don’t melt it!) and take a sharp razor knife and cut the snorkels off flush with the inside of the plates. 

image3-2.jpeg

I recommend doing this at the track, in between motos so that you can feel the difference, but if you can’t doing it at home will be justified on the track, trust me. Just taking the bike off the stand and starting it, I already noticed improved throttle response and a quicker/freer revving engine character. On the track you will feel improved power across the RPM range. Coming out of corners the bike pulled longer and gave me a slightly more exciting feeling. 

image2-6.jpeg

While I had the side plates off I noticed the stock airbox seems very closed off. Almost like something you’d see on a trail bike.Once again, with a heat gun and a razor knife and a little patience I opened the airbox up a ton. I cut around the outside edges along the subframe and the front edge where the number plate attaches. Make sure to leave enough plastic on the front edge so the tabs on the number plate still have somewhere to lock into. On the track I noticed another significant improvement to throttle response and it overall an improvement in pulling power across the whole rpm range. This Suzuki is starting to wake up a little and I have yet to spend any money! Winning! With almost any kind of mods you’ll have some downsides. Opening up the airbox is a big improvement on the track, but you will notice your bike is a bit louder (more intake noise) and your air filter will get dirtier a little sooner on sandier tracks. Unless you’re lining up at a Supercross, sound is probably not an issue for you so I didn’t work about it.

image1-7.jpeg

The next obvious choice for me to make that did cost me a little was to install a FMF Factory 4.1 full system. The FMF is much lighter than the stocker and improved bottom to mid pulling power. I didn’t notice any major improvements in top end/over-rev, but the FMF was another step in the right direction towards getting some more meat inside the the RM-Z250’s engine. 

With only these two mods the RM-Z250 makes me smile a lot more than when I picked it up from Keefer. Stay tuned for more tips/tricks and mods as I dive into the suspension as well as inside the motor on the next installment of project yellow zook. If you have any questions about the Suzuki RM-Z250 you can email Kris at kris@keeferinctesting.com and he will make sure to pass it on to me. 

2020 Honda CRF450R Start Up/Baseline Settings/Tips/Tricks

The Honda CRF450R has only minimal changes for 2020, but that doesn't mean all the settings roll over from the 2019 version. Yes, some of the tips/tricks will remain the same from your 2019 Honda CRF450R, but we have come up with a couple new tricks since the 2019 model was released. With the new Internal valving suspension changes, the Honda has more hold up in the front on de-cel, but we went to work and came up with some baseline settings that we feel would benefit most Honda riders. I have done all of these modifications to my Honda CRF450R test steed and it quickly became one of the most fun bikes to ride at a wide variety of tracks. The Honda requires more attention than other machines in its class, but once you pay attention to her and purchase her a few gifts, she will reward you with lower lap times, increased smiles, and a bike that will make you more comfortable out on the track. Hey married dudes, sound familiar?  

IMG_3655.JPG

Suspension: The Honda CRF450R is the toughest bike to find that “track toughness” we all want out of our motocross machines, but once you do find that magic setting, this bike is insanely fun to ride.The CRF450R’s suspension holds up higher in the stroke for 2020 and gives the rider a decent amount of comfort on the small chop, but don't expect it to be better than the KYB suspension that comes on the Yamaha. All riders that helped me test this bike (165, 170, 190 pounds) went stiffer on the fork to help the Honda from diving under heavy braking. Even with the fork changes Showa made for 2020 we still wanted some more hold up. If we rode the CRF450R around at 80%, the fork had enough comfort and hold up, but when pushing the bike hard the fork needed some added performance. Once going a little stiffer (compression) and slower (rebound) the front end felt calmer and allowed for a more aggressive riding style. The shock has a ton of comfort initially, especially coming out of rough/choppy corners, but on heavy g-outs or steep jump faces the end of the stroke is empty (soft) feeling. Going stiffer on high speed compression a quarter turn will help hold up and prevent you from going to the chiropractor later that afternoon. We ended up going with a 105mm of sag as that pleased all three riders and left them with the best balance on and off throttle. Try this setting at your local track to get the most comfort out of your Showa suspension.  

Fork: (Rider weight 165-190 pounds)

Height: 3mm

Compression: 6 clicks out

Rebound: 8 clicks out


Shock: 

Sag: 105mm

Low Speed Compression: 8 clicks out

High Speed Compression: 2-3/4 turns out

Rebound: 7 clicks out


Swingarm Pivot Bolt Torque Spec: This costs zero dollars and should be done as soon as you get your 2020 Honda CRF450R. The stock swingarm pivot bolt torque spec is 65 ft.lbs., but re-torque it to 60 ft.lbs. What does this simple adjustment do? It can help the stiffer feel underneath your butt/rear of machine when accelerating out of corners (because your shock’s high speed compression is stiffer) and also gives the Honda more rear wheel traction. The Honda chassis has a stiff natured character to begin with so loosening up the swingarm pivot bolt a little helps free it up. Trust me, it helps! 

IMG_4609.jpg

Vortex ECU (Mapped By XPR Motorsports): I have done a few projects with Chad at XPR Motorsports and he continues to impress me with his impressive ECU settings. The Honda doesn't need more horsepower, in fact it wouldn't hurt if it had a slightly mellower delivery. So why install a Vortex ECU? The XPR mapped Vortex ECU will give you more horsepower, but will spread out that newfound horsepower with a longer and smoother delivery than the stock 2020 ECU can. The stock ECU still has that herky/jerky roll on power in map one/three through corners and that really upsets the chassis and my corner speed at times. That pisses me off! If your corner speed is off then you’re going to have a bad day at the track.

Chad has several maps that smooths out that low end feel just enough to where you can roll your corners easier and have a broader pulling power down the straight. The over-rev that this Honda gets with this XPR Vortex ECU/mapping alone is worth the price of admission because it allows me to use second gear longer. It also allows you third gear riders to use that gear more and be lazier, if that’s how you like to ride. Chad has the mapping down and can get you a cleaner, smoother, broader, more exciting power with this simple mod. Did I mention that it helps the stiff chassis feel? Well it does because you can now ride the CRF450R in the lower RPM range (thanks to more torque) and that frees up the frame on chop, square edge, and braking bumps. Yes, sometimes improvements to the engine can directly affect chassis feel. 

E0A6BFBD-F16E-418A-B221-0E91B71562EB.JPG

Gearing: This gearing will only work best if you have the above three modifications done. I stumbled across this gearing on a test day and found out that I really liked it. The 14/52 gearing allows you to run your axle farther back (which the Honda needs) and gives the engine a more connected feel to the rear wheel. Try this gearing if you have done the above three mods. If you’re running the stock ECU/engine configuration you can try going with a 13/48 gearing. Going down a tooth will help with roll on power delivery and give the Honda a smoother more manageable low end power. 

mx19-rd02-165-keefer-008.JPG

Full Muffler System: If there is a couple companies that knows how to make a better Honda power delivery it’s Yoshimura and Akrapovic! Both mufflers makes broader horsepower, keeps the strong bottom end pull intact, and gives the Honda a deeper more throaty sound. Just bolting on either one of these systems (without the ECU change) will help the Honda’s map one/three on/off feel from 0-15% throttle opening. This is where the Honda needs help and both mufflers help smooth the CRF450R in this area. You will also lose just over 1.5 pounds with these systems. However, good luck trying to get an Akrapovic muffler system as they are not easily accessible to the consumer. 


Rekluse Torque Drive Clutch Pack: How’s that lever pull doing for you on your CRF450R? Not that great right? I hated going from a light clutch lever pull (on other machines) to the hard feel of the 2020 Honda CRF450R. The CRF450R needs some longer clutch life (because I am a clutch dragger), so installing the Rekluse Torque Drive Clutch Pack has increased my life and gives me less fade in longer motos. This kit leaves your stock internals intact, but increases your clutch plate count by using the “Torque Drive” technology. This mod also gives you a better clutch pull at the lever as it’s not as stiff because the Rekluse Torque Drive Pack allows more disks in your OEM’s footprint.


Custom Clutch Arm: The Honda’s clutch engagement point is very narrow and although the Rekluse Torque Drive Clutch Pack helps the life/pull, the engagement is still too on/off for me. Chad at XPR Motorsports makes a custom clutch arm that really helps get an increased linear feel out of your clutch engagement. Not only is my engagement point wider, but it also delivers the power to the ground smoother, which in turn gave me more throttle to rear wheel feel. What does that mean? More consistent starts and better mid-exit corner rear wheel connection. This is a modification that you would never know was on the factory bikes when walking the pits at a Supercross because it’s difficult to see from the naked eye. For the right price I am sure Chad at XPR Motorsports could make you one. Thank me later! 


Handlebar Map Switch Care Instructions: If you have a Honda CRF450R you will need to pay close attention to your map switch on your handlebars when washing. If you haven't had condensation/water get into your map switch yet, consider yourself lucky. I get a ton of emails that are titled “Honda Will Not Start”. I come to find out that most of these CRF450R’s are getting water inside the map switch cluster while the consumer is washing the unit. This shorts out the connection and prevents the red machine from starting. Best thing you can do before you wash your Honda is wrap the map switch cluster with some type of plastic (I use a ziplock bag) and then duct tape the plastic around the handlebar/map switch. This will prevent water from getting into the cluster while you’re washing. You can also take apart the cluster and squirt more dielectric grease near/around the connections, but doing this will not complete prevent this mishap from happening. 


Air Filter/Cage: You can bend out the little metal tabs on your air filter screen and throw it in the trash. By using just the plastic air filter cage without the screen can give the Honda more airflow  and can give you more mid range pulling power as well as RPM response. 


Maintenance: I am very meticulous when it comes to oil changes with the Honda CRF450R. I change my engine oil every 2-3 engine hours on this model because I noticed that no matter oil I run or try in this machine that it is fairly burnt after three hours. In other machines I do not notice the oil being as dark in color after three hours as the Honda so I change oil religiously. Doing this has given me increased clutch life as well as ensures that I have no oil related engine issues.  

If you have any questions about your 2020 Honda CRF450R please feel free to email me your questions and I will ry to help as much as I can. kris@keeferinctesting.com


2020 Husqvarna FC250 Start Up/Baseline Settings/Tips/Tricks

I had the chance to spend some extra time on the 2020 FC250 and managed to try several settings to see which direction could be the correct way for you Husqvarna owners. Here are a few baseline settings you can try to get more comfort out on the track. 

IMG_5146.jpg

Suspension: For 2020 the Husqvarna theme was to get more comfort out of the WP suspension and although I think they did do that to a certain extent they might of went too soft for most of the riders that will be purchasing this machine. Here are a couple different settings (based on weight) to try next time you’re out on the track. Note: When adjusting your air pressure in your fork, make sure to check your fork pressure before you start riding as well as after your first session. Your AER fork air pressure will build up the first time out considerably within 15 minutes. After you come back in, let the bike sit for around 10-15 minutes and reset to the desired/recommended air pressure. The AER fork shouldn't go up in air pressure as quick/high for the remainder of the day. It will start to creep up, but the amount in which it does is not nearly as fast as the first time it gets warm. 


Fork: (150-170 pounds)

Air Pressure: 10.4 bars

Compression: 10 clicks out

Rebound: 10 clicks out 


Fork: (170-190 pounds)

Air Pressure: 10.6 bars

Compression: 14 clicks out

Rebound: 11 clicks out 


Shock: (150-170 pounds)

Sag: 105mm

High Speed Compression: 1-1/2

Low Speed Compression: 14 clicks out

Rebound: 11 clicks out


Shock: (170-190 pounds)

Sag: 105mm

High Speed Compression: 1-1/4

Low Speed Compression: 12 clicks out

Rebound: 13 clicks out 

IMG_5152.PNG

Engine: If you’re looking to get more out of your engine without diving into the engine too much there are a couple relatively inexpensive mods you can do. A stock ECU re-map from Jamie at Twisted Development can get you some added RPM response along with some increased pulling power out of corners. If there is one area of the engine that the FC250 needs helps with it’s the low end RPM response and pulling power. The Husqvarna is NOT a torque monster, but instead loves to be ridden in the mid-top end range. With the stock ECU re-map the Husqvarna will get some more “pop” out of corners, have a free-er engine rev feel, as well as pull you out of the corner harder than the stock maps. The beauty is that you still have two maps to choose from, but now both newly programmed maps have more pull than the stock maps provide. It’s a relatively low cost item for the performance gain. Of course if you have the money a Vortex ignition is always a good idea, but that also will set you back 800-1000 bucks. The Vortex will give you increased power everywhere in the RPM range and can make your engine have an even free-er rev feel, which makes the FC250 more exciting to ride. A lot of times a Vortex ignition, muffler system, and suspension work is all I ever do to my race bikes.

IMG_5145.jpg

The second option is going with an aftermarket muffler like a FMF 4.1 or even a Akrapovic. Both of these mufflers provided more mid range and top end but also increased throttle response. You will not be getting any added bottom end, but the good news is that you will not be losing any as long as you keep the inserts in. The FMF requires you to install the insert/spark arrestor and the Akrapovic comes with it already installed. LEAVE THEM IN! Back pressure is the Husqvarna’s friend. 


Gearing: Going to a 14/52 or 53 gearing helps with rear wheel placement and of course using third gear around the track more. Using this gearing puts the rear wheel back further and can increase the stability of the FC250 without sacrificing too much lean in when coming into corners. Also this modified gearing ratio will help get you out of second gear sooner and let you use the engine where it’s intended to be used. Second gear can bind this chassis up more than other machines (feels much tighter in second gear than Japanese bikes) when the track gets rough. Third gear has such a free-er feel (compared to second gear) on the FC250 that you will be able to pull yourself out of corners without the high rev/binding nature of second gear. Using this 13/52 gear ratio frees up the rear end under load/heavy throttle and allows for increased rear wheel traction. If you feel like you’re having to shift the FC250 too early coming out of corners, try 14/52-53 and use third gear. Boom! 


Triple Clamp Torque Specs: If you’re still living with the stock clamps you can try this torque spec setting on the pinch bolts for a more complaint front end feel (on braking bumps) with increased lean angle traction. If you DO NOT feel like you need more front end compliancy on the FC250 please disregard this and keep living your life. This was just an option that I stumbled across that can make some difference in comfort. Going slightly lower on the lower clamp torque spec helps with front end flex and fork stroke movement. Going to a factory Husqvarna accessory triple clamp eliminates binding and gives the FC250 a softer initial touch with more de-el front end comfort, but those are expensive right? Doing this minor torque spec mod helps bridge some of that gap between stock clamp and accessory clamp.  

Top Clamp Torque Spec: 17Nm

Bottom Clamp Torque Spec: 9Nm 

IMG_5060.jpg

Axle Blocks: Invest in the Ride Engineering or the Works Connection Elite axle block kit as either or will give you more rear end traction and keep the left side axle block from binding up rear wheel/swingarm area. This is an old KTM Race Team trick. 


Engine Mounts: The stock torque specs on the FC250’s engine mounts are just fine and since we are talking about the engine mounts, the stock mounts are just fine as well. There is NO need for aftermarket engine mounts on this machine. Especially if you’re doing these chassis mods above, the frame flex character should be plenty compliant enough on wide variety of rough tracks. 


Black Throttle Cam: This goes without saying… Use the black throttle cam for best overall power to rear wheel connection. 


Maintenance Intervals: I change my engine oil every 2-3 hours of ride time, but for the normal weekend warrior you can go as far as 4 engine hours. I use Motorex, Blud, Maxima or FirePower 10/40 synthetic engine oil as they all work well on this machine. Keep a fuel filter handy in your tool box as they can get dirty and cause issues down the road with starting or even give you a dirty/rich feeling sensation when they are clogged. 


2020 KTM 450 SX-F Start Up/Baseline Settings/Tips


The 2020 KTM 450 SX-F came to us with only minimal changes from the 2019 version, but since then we have gained some more knowledge because I have spent so much time on the 450 SX-F. Here are some baseline settings, suggestions, as well as some tips/modifications you can do to help increase the comfort of your new orange brigade machine. 

IMG_4675.JPG

Engine/ECU: For 2020 KTM fixed most of the 450 SX-F’s ECU problems with the help of some of us media testers. Last year the 2019 ECU setting was rich off the bottom and slightly lean on top, which made for a lethargic/inconsistent throttle delivery. For 2020 the ECU is better and has a more lively feel coming out of corners and still has the super connected rear wheel feeling. I am usually a “map two” kind of rider due to its increased pick up/recovery feel, but sometimes I am looking for that extra puling power that is needed when the track is tilled deep or soft. I have been on the Vortex ignition bandwagon for a couple years with this machine and for 2020 it hasn't wavered. If you want the same great rear wheel connection as well as more pulling power everywhere, look into a Vortex ignition from Chad at XPR Motorsports or Jamie at Twisted Development. I have turned a lot of KTM riders onto this mod and have had a 100% approval ratio. What I like about this modification is that it doesn't hurt reliability and makes for a very usable yet powerful engine for almost every type of rider. Yes, it will set you back around $800.00, but to me is much better than slapping on a muffler system and will do more for your engine. 

IMG_4676.JPG

Suspension: If you haven't listened to my WP XACT Pro Components suspension podcast you may want to at least check that out, but if you're sticking with the stock suspension for a while, you can try this setting to see if this helps comfort when the track gets rough. This setting below should be in the ballpark for riders around 165-200 pounds, but if you’re heavier than 200 pounds going to a stiffer rear spring wild help the ride attitude of the KTM. I have went to several tracks and tried many different settings, but this specific setting had the most “track toughness”. The KTM’s stock WP suspension doesn't quite have the comfort like the Husqvarna does, but the KTM/WP set also holds up more in the stroke. To get some added comfort back with the added hold up, try this setting. 

Fork (Stock Triple Clamp): 

Height: 5mm

Air Pressure: 10.7 Bars

Compression: 14-15 clicks out

Rebound: 16 clicks out


*With KTM Hard Parts Triple Clamps*

Height: 5mm

Air Pressure: 10.7-10.8 Bars

Compression: 12 clicks out

Rebound: 15 clicks out

Shock:

Sag: 103mm

Low Speed Compression: 13 clicks out

High Speed Compression: 1-1/2 to 1-3/4 turns out

Rebound:  12 clicks out


Chassis: Aftermarket engine mounts are all the rage right now and some of you may not have the money to spend on a pair of engine mounts for your KTM. I will say that I don’t feel like the KTM chassis is stiff, but I have heard from other vet riders that it can be at times, so I decided to play around with torque specs on the engine mounts and stumbled across this. If you’re experiencing a stiff feeling chassis sensation and want the KTM to settle while leaning (under throttle), there is an inexpensive way to achieve some extra front end traction (as well as an overall more planted feel). You can remove the left side upper engine mount bolt (upper right bolt only, as shown) and torque all other top engine mount bolts to 30Nm. This band aid will give you a more planted sensation when on throttle while leaning the KTM 450SX-F through sweepers and fast straights. You will have to make sure that all engine mount bolts have blue Loctite to ensure they do not back out (you should do this regardless if you keep all the bolts in or not). You can also try torquing your swingarm pivot bolt to 95 Nm (instead of 100Nm) to help rear end traction out of corners. The downside to doing these mods is that the chassis will flex a little more, so if you’re riding deep tilled tracks this modification may be too “flexy” for some (especially when chopping throttle).  

91BC227E-3382-4BC6-8A34-08BC586BB18D.JPG


Handlebars: The stock Neken handlebar is too stiff and doesn't offer too much comfort. Get yourself a set of Pro Taper bars and make your arms and hands happy again. The Pro Taper SX Race bar worked well for riders from 5’8 to 6’1. The SX Race bend comes in a crossbar or crossbar-less style and is 800mm width, 87mm height, 54.5 rise, and 54mm sweep. If you’re looking for a better “stand up feel” from your KTM look for handlebar close to this measurement. If you do like the stock bar try the Pro Taper Husqvarna Stock bend.  

IMG_5038.jpg

Triple Clamps: After riding back to back with the stock triple clamps and the KTM hard parts clamps I have realized that the stock clamps are stiffer. I have since installed the KTM Hard Parts triple clamp (or the 2019.5 Factory Edition clamp) on the 2020 KTM 450 SX-F with excellent results. The front end has more of a softer initial touch on slap downs and the fork action is smoother on de-cel bumps. It’s crazy to think that the fork feels softer now with the “Hard Parts” clamp installed, but that is exactly how it feels when going to the “Hard Parts” clamp. I was able to increase my compression damping a little to help hold up off-throttle and kept more comfort through the entire stroke (with the stock AER fork) with the “Hard Parts” clamp. I also get slightly more lean angle front end traction (or cornering stability) with this “Hard Parts” clamp because the front end isn't bouncing around inside long/choppy ruts. 

Rear Brake Pedal Spring: Purchase a Honda CRF450R rear brake pedal spring with the rubber around the spring. The KTM rear brake pedal spring vibrates and will break every 3-4 engine hours. Orrrrrrrrr. Get a KTM rear brake pedal spring and wrap it with plastic tubing, but to me it’s easier just to get the Honda spring and be done with it. 


Gearing: I like the stock 13/49 gearing, but for sand I prefer the 14/52 gearing for mid rpm recovery and chassis feel. Yes, going to a 14/52 will put your rear wheel back more than the 13/49 and get you some extra high speed stability with the 14/52. At tracks like Glen Helen I go with a 14/52 because I get that extra planted/stable feeling coming down hills. 

IMG_4871.JPG

Rear Axle/Axle Blocks: Going to a Works Connection Elite axle block kit or Ride Engineering axle block kit will get rid of the fixed left axle block on the stock KTM’s axle. This will help the rear end to move more freely under throttle and improve the shock’s comfort on acceleration chop. Both are great, but you will have to decide if you want a complete axle/axle block kit like Ride Engineering’s or just the blocks themselves like WC’s.


Muffler: To me FMF makes the best muffler system for the KTM 450 SX-F. There are some other companies that have other bikes dialed in more, but on the KTM, FMF has got it dialed. You will get more low to mid RPM response as well as more mid range pulling power. Top end is increased plus the over-rev is as good as stock. It is one of the few times that I was impressed because it was actually better than stock in almost all areas. The downside is that you must keep up on muffler packing (every 10-12 engine hours) because the FMF will blow out and that could damage your expensive titanium can. Did I mention that you will lose almost two pounds with this system? If you slap on spring forks you will be gaining almost three pounds. You can get most of that back with a 4.1 Titanium FMF Muffler system.   

If you have any questions about your KTM please feel free to email me at kris@keeferinctesting.com


2020 Yamaha YZ250F Baseline/Start Up Settings/Tips

The Yamaha YZ250F is un-changed for 2020 so this baseline set up article can be used for the 2019 YZ250F as well. The Yamaha is the easiest small bore four stroke motocross machine to ride with its torquey low end and improved top end pulling power that Yamaha came up with in 2019. For this test we focused on trying to keep the comfort that the Yamaha comes with, but also try to get the YZ250F to accept a rider that wants to push his limits on this bike. Below are some settings that we think may be able to help drop your lap times while keeping the Yamaha planted underneath you. 

IMG_3192.JPG

Suspension:  

The KYB/SSS/Yamaha suspension has the most comfort out of any bike in stock form, but if you want to start pushing the bike’s limits it can get soft and spongy feeling. After our initial test we took the 2020 Yamaha YZ250F to three vastly different types of tracks and noticed as the bike broke in all riders wanted more hold up from the suspension. We tried going to a heavier 4.8N/m fork spring (4.7N/m is stock) with the stock valving and to all three testers (160, 170, 190 pounds) liked the hold up and calmness that the stiffer spring came with. The heavier front spring helped the Yamaha’s chassis under heavy braking and each rider was able to push into rough corners harder without as much pitching. Settling into ruts was also easier because of the calm front fork feel. The rear of the bike can accept heavier riders better than the front so going to a stiffer rear spring for us wasn't warranted. What we really liked about this setting is that it didn't upset chassis balance and only improved the bike’s overall feel out on the track. Only a small increase of firmness was felt on the top of the fork’s stroke, but all riders agreed that the trade off was worth it. 


Fork: 

 Height: 5mm (Stock is 7mm)

Spring Rate: 4.8N/m (Stock is 4.7N/m)

Compression: 12 (Stock is 11 clicks out)

Rebound: 9-10 clicks out (Stock is 9 clicks out) 


*Optional Stock Spring Fork Setting*

Height: 4mm

Spring Rate: 4.7N/m

Compression: 8 clicks out

Rebound: 7 clicks out


Shock:

Sag: 105mm

Spring Rate: 55N/m

High Speed Compression: 1.25 Turn Out (1 Turn Out Is Stock)

Low Speed Compression: 8-9 clicks out (10 clicks out is stock)

Rebound: 9 clicks out (11 clicks out is stock)


ECU/Yamaha Power Tuner:

I really felt that the 2020 Yamaha YZ250F could benefit from a free-er engine feel on de-cel so I worked on a map to try and achieve this. This “Keefer Free Feeling” map gives you less pitching on de-cel coming into the corners and also made the Yamaha feel lighter through mid-corner, which helped keeping the lean through corners as well as change of direction. I felt like I could give up a small amount of torque to achieve this and that is what you will find when going to this map. You will get slightly less torque, keep that great mid-range pull as well as a slight increase in top end. If you want to also sacrifice a little torque feeling and increase the second and third gear pulling power (with the same amount of engine braking the stock map gives) go to the “Hard Hitting Map” Yamaha has pre-programmed on your Yamaha Power Tuner App. I use the “Hard Hitting” for my base map and the Free Feeling” map for my secondary map. Please don’t forget to update your apps on your phone as Yamaha does update their Power Tuner with new maps from time to time. 

image000000.jpg

Chassis: 

Please for the love of all things holy DO NOT screw/change the engine mounts on this machine. I will say that some aftermarket engine mounts will help some other OEM’s frame feel for the better, but in the case of the Yamaha YZ250F, it really doesn't need aftermarket mounts. I have no problem pushing products that work, based on each individual machine, but that doesn't mean that specific part works for every single machine. Some machines could benefit with a softer/stiffer mount combo, but to me Yamaha did a great job of blending comfort with cornering stiffness for 95% of us “normal” folk. When trying some aftermarket engine mounts on the 2019 YZ250F it made the bike have less predictability when the track got rough. When smooth I could see some benefit on initial lean through corners (lighter feel), but when the track got hammered the Yamaha was tougher to get into the corner because the damping character of the chassis was harsher on de-cel bumps. Could you make aftermarket engine mounts work on this bike? I am sure you could with the help of some suspension tuning, but the purpose of this article is to get you increased comfort/more performance with less hassle and money. If we were talking 2018 Honda or 2019-2020 Suzuki, I would be steering you into the aftermarket engine mount direction, but we are talking bLU cRU here people! 

IMG_5015.jpg

Gearing:   

Two out of three test riders preferred the stock 13/50 gearing, but our slower heavier guy with less cornering technique liked going more the MXA (one tooth up) (13/51) route. Say what you want about going only “one tooth” up on a sprocket, but I can tell you that it does help on some machines with riders that have problems with using third gear in corners. The Yamaha has enough torque for intermediate type riders to use third gear in corners, but novices will appreciate a 13/51 ratio more to help them recover from mistakes. Going to this gearing will shorten the length of second and third gears, but it will allow you to short shift better and use the meat of the Yamaha’s power just like it was developed/intended. 


Seat: 

Do yourself a favor and get a 2020 YZ450F seat or a GUTS Racing firm seat foam. Yamaha changed the seat shape/stiffness in 2019, but still the middle of the seat can breakdown quickly and get soft. The fuel tank and subframes rails are not friendly when leaning on the edge of your seat or when you decide to seat bounce an obstacle out of a corner. 

IMG_2957.JPG

Rider Triangle:

Yamaha’s rider triangle can be cramped for some taller riders, but simply going to the forward bar mount hole (on the triple clamp) with mount faced back will get you 16mm’s of more room. The 2020 YZ450F comes like this stock, but you can do that slight tweak yourself and get more weight over the front end. I am 6’0 and prefer the rear hole with the mount forward, but I have heard more than one taller rider complain about being cramped on the Yamaha. I have yet to try moving the pegs down/back, but will look into this as an option for you taller riders.

IMG_3026.JPG

Maintenance: 

We have ridden the 2019 YZ250F a ton and although haven't had anything major go wrong with our YZ250F we did go through two stock batteries. Our YZ450F has never had a battery issue, but our YZ250F needed help in this area. We installed a FirePower battery in our test bike and had no other battery related issues. I also have received emails about timing chains going out and if we ran into this problem. The answer is no, but if you are a high revving, faster intermediate/pro type of rider, changing a timing chain every 20 hours is not uncommon. Follow your owners manual for regular scheduled maintenance, but just know that those maintenance schedules that Yamaha “suggests” aren't based on every type of rider. Each rider is different, but for the average rider/racer the Yamaha still has superb durability and is one of the few bikes that gives me less headaches during the course of the year. Please don’t believe everything you read on message boards and consider asking and trusting people and/or media outlets that spend a lot of time on these machines. I mean if I search up “headaches” on WebMD, I usually will read that I have some sort of Cancer and I should go to the hospital ASAP. Just because “Bobby Two Stroke” says Yamaha’s are ticking time bombs doesn’t mean they really are. Oh and you most likely DO NOT have Cancer, so everyone chill down. Sometimes message boards are a lot like WebMD, so proceed with some sort of caution. I am all not saying that a YZ250F’s will never blow up because they can just like any other machine. Take care of this bike and most likely it will take care of you.

IMG_2962.JPG

Throttle Play:

Check your YZ250F’s throttle play when you get it home. Most of the units I have seen have had a ton of free play in the throttle. The bad news is you are not able to adjust it all the way out with the top throttle cable adjusters. You will have to adjust the cables play on the throttle body in order to get most of it out. After adjusting the throttle play on the throttle body, proceed to adjust the top throttle cable adjusters to get the desired free play. Throttle play is a preference, but to me there is way too much throttle play, off the showroom floor, on the YZ250F. I have went to a couple dealerships and blipped throttles just to check and most had A LOT of play. Check your throttle free play!   

Wear Items:

I am not a huge fan of the stock grips on the YZ250F as they feel fat, the chain guide and slider are actually pretty damn good on the YZ250F compared to other Japanese machines, sprockets and chains are your average 10 hour change out items, I go through clutch plates every 10-12 hours and I am fairly abusive on clutches, the 2020 air filter seals better thanks in part to a rubber grommet in the middle of the filter, but leave the backfire screen in for added dirt/particle safety, and the Bridgestone X20’s provide a good amount of traction and lean angle grip, but when they wear down slightly they are very un-predictable under hard lean angle.

If you have any questions about the 2020 Yamaha YZ250F please feel free to ask away at kris@keeferinctesting.com. Hopefully we can give you an intelligent and enlightening answer, but if we don’t know the answer to your question, we simply will reply with an “I don’t know”. We don’t know everything.

2020 Honda CRF250R Start Up/Baseline Settings/Tips

I have been testing the 2020 Honda CRF250R at more than a few different tracks trying to get this baseline setting article out to you all. I have finally found a few settings that I think most of you could appreciate as well as benefit from. With Honda being one of only two manufacturers to change their 250’s significantly for 2020, I wanted to make sure all you new 2020 CRF250R owners or future buyers had a great starting point. Here are some settings that will help you enjoy your ride more and tinker with less: 

IMG_3909.JPG

Suspension: 

In stock form the Showa suspension on the 2020 Honda CRF250R has decent comfort on de-cel bumps, but lacks a little hold up for riders ranging from 160-190 pounds. If you’re over 190 pounds going up a spring rate on each end is your ticket to a better handling CRF250R. After riding with this setting below at three different tracks, more than one time around, I figured out that this baseline suspension setting gave the 2020 Honda CRF250R the most “track toughness”. If you happen to feel like the fork is harsher (through the mid stroke) with this setting, simply open up the rebound (faster) back to stock setting. This will help free up the fork slightly under front end load (off-gas). The shock needs just a little more hold up under acceleration so simply going stiffer/slower on low speed compression/rebound gives the rider more comfort and added traction out of corners. I tried experimenting with high speed compression, but the Honda is finicky with high speed. Going stiffer on high speed compression (shock) put too much weight on the front end (fork) creating a harsher feeling front fork.


Fork: 

Height: 3mm (Stock is 5mm)

Compression: 7-8 clicks out (Stock is 9 clicks out)

Rebound: 10 clicks out (Stock is 11 clicks out) 

Shock:

Sag: 100-101mm

High Speed Compression: 2-5/6

Low Speed Compression: 10 clicks out (11 clicks out is stock)

Rebound: 5 clicks out (6 clicks out is stock)

190814_drp_jonnum_honda_crf250r_0569_web.jpg

Chassis:

As of right now I prefer the stock engine mounts torqued to the OEM/manual settings. Some bikes react better to aftermarket engine mounts than others and as of right now I feel the best settings (for comfort) come from the stock engine mounts. You can however torque the swingarm pivot bolt to 52 ft.lbs. for increased flex under throttle, while leaning. If you feel like the rear end is planted and doesn't deflect under load on chop please leave it at the OEM/manual torque spec. If you feel like the Honda is standing up through mid corner simply go back up to 5mm on fork height with the above suspension specs to help mid corner lean.


Gearing: 

I went back and forth between the stock 13/48 gearing and 13/49, but ultimately decided on sticking with stock. Why? I felt the 13/49 gearing made second gear less usable and didn't help me get into third gear any quicker. The 13/49 robs too much top end away from second and third gears on medium to faster flowy tracks. If you’re riding a tight track and suffer from bad corner technique going to a 13/49 could benefit you more. Decide which tracks you ride the most and what type of rider you are in order to decide which way to go with your gearing. 

190814_drp_jonnum_honda_crf250r_1722_web.jpg

Steering Head Nut:

Do yourself a favor and tighten up the steering head nut a little on the 2020 Honda CRF250R. The steering comes too loose from the factory and can cause some knifing in corners and can give you slight head shake on de-cel. Simply tightening the steering head nut a little makes the Honda’s front end feel more planted (less loose feeling) when performing corners/initial lean/turning the handlebars. This is a simple modification, but really helps the Honda’s ride attitude around the track. Sometimes it’s the simple/easy things in life that make a difference. Dirt bikes are no different.


ECU Map Switch:

I like map three the best for most tracks around these parts and for more torque out of corners. Even though Honda improved their torque for 2020, it still lacks some pulling power out of corners, compared to the Yamaha. Running the 2020 CRF250R in map three will benefit you the most in this situation. This is my preferred map, but map one is also very usable and can pull pull you farther in second/third gear. 

190814_drp_jonnum_honda_crf250r_1985_web.jpg

Clutch:  

Going to a Rekluse Torque Drive Clutch Pack will give you better clutch lever feel as well as clutch life. The engagement of the lever ratio doesn't change, but it lets you put more of that horsepower to the rear wheel, without slipping, when hard on the throttle in soft dirt. This is simply a clutch pack and not the complete system. You use the stock OEM inner, outer, basket clutch pieces with this kit.


Cooling:

I am not going to sit here and say that Honda fixed ALL of their cooling issues with the radiator change they made for 2020. The Honda CRF250R still runs hot and will puke some radiator coolant out of the overflow when riding in the higher RPM’s during a long moto (20-30 minutes). Just keep an eye on your coolant level if you’re riding in hot an or deep sandy conditions. I had to add a little coolant to the radiator on longer, hotter days here in Southern California. Don’t be lazy and you’ll be fine. I am looking into trying a couple things to help this situation in the future so check back here for more updates on this.

190814_drp_jonnum_honda_crf250r_0398_web.jpg

Inexpensive Way To Get Less Rigidity:

Renthal Fatbars come stock on all CRF’s and while we like the strength/bend of the new bar, I still feel like they are stiff on slap down landings/square edge. Going to a Pro Taper EVO handlebar will take away some rigidity as well as give you less vibration to your hands. The 4mm wall thickness of the Pro Taper EVO bar is something I have tested back to back against the Renthal Fatbar. Even if you painted both bars black and sent me on a blind test, I would come back within a lap and tell you which bar was which. It’s that noticeable. If you like the stock bar bend try the Pro Taper EVO SX Race bend as that is the closest bend to the stock 839 Honda Fatbar. 


Renthal 839 Fatbar    (L) 802 (H) 91 (R) 51 (S) 51 (mm)

Pro Taper SX Race    (L) 800 (H) 87 (R) 54 (S) 54 (mm)

If you have any questions about your Honda or anything in this article please feel free to email me and hopefully I can help you out. kris@keeferinctesting.com


2020 Husqvarna FC450 Baseline/Start Up Settings

The 2020 Husqvarna FC450 has minimal changes to it from the 2019 FC450 and 2019.5 Rockstar Edition, so we took what we have learned with those bikes and tinkered with the 2020 version in order to get you the best baseline setting we could for a wide range of riders. After numerous hours and tests later we have come up with these suggestions as the best baseline setting so you can just go out and ride. 

92AAE07A-E27E-40F0-A415-6036DD2A4A55.JPG

 Suspension: The factory fork and shock settings are much softer on the 2020 FC450 so we did go a little bit stiffer on air pressure and softer on compression settings, but have found improved results in comfort, not just performance. All three test riders (155, 170, 195 pounds) that tried this setting agreed that the bike/chassis was calmer on acceleration and de-cel bumps. This setting will give the Husqvarna better hold up as well as help the front end from feeling stinkbug coming into corners. This setting was also well perceived on the 2019.5 Rockstar Edition as well. Our 195 pound rider preferred a 48N/m shock spring with the recommended shock settings below.

Fork:

Air Pressure: 10.9 bar

Compression: 14-15 out

Rebound: 11 out

Fork Height: 5mm


Shock:

L/S Compression: 11-12 clicks out

H/S Compression: 1-3/4 turns out

Rebound: 12 clicks out

Sag: 104-105mm


Shock: (195 pounds and over)

Spring Rate: 48N/m

L/S Compression: 14 clicks out

H/S Compression: 2 turns out

Rebound: 13 clicks out

Sag: 104-105mm

IMG_2728.JPG

Rider Triangle: The standard Pro Taper handlebar that comes on the FC450 is low and flat, but fits the Husqvarna’s cockpit very well for most. I did want more height from my bar when I stood up, so I went with a Pro Taper Fuzion SX Race bend and this helped me get over the front of the bike more when standing. The SX Race bar worked well for riders from 5’8 to 6’1. The SX Race bend comes in a crossbar or crossbar-less style and is 800mm width, 87mm height, 54.5 rise, and 54mm sweep. If you’re looking for a better stand up feel from your Husqvarna look for handlebar close to this measurement. If you do like the stock bar try cutting the bar down to 803mm instead of the longer/standard 811mm. This will help you corner.   

ECU Settings: The 2020 FC450 has a much better map 2 ECU setting and doesn't need a re-flash like the 2019 or 2019.5 Husqvarna did. Map 2 is my preferred standard map in most conditions as it comes on a little sooner and pulls slightly harder than map 1. However, if you want to get more power, I recently tested a Vortex ignition mapped by Chad at XPR Motorsports on the 2020 FC450 with great results. If you’re looking for increased bottom to mid range while keeping that smooth/linear engine character Chad over at XPR has a couple maps that you could really benefit from. If you already have a Vortex you can simply send Chad your ECU and he can send you a “Keefer” map that we have tested on the 2020 FC450. A Vortex ignition isn't needed in all bikes but he Husqvarna really benefits from this modification.


Gearing: The 2020 FC450 comes with a 13/49 gearing ratio. This gearing should be just fine for most tracks, but if you want a little more mid range engine recovery and free-er feeling shock on acceleration, a 14/52 gearing ratio works well. The 14/52 gearing will require a new chain length and I usually go with this gearing when riding tracks similar to Glen Helen (aka faster choppy tracks) to settle the rear end under load.   

IMG_4513.jpg

Chassis: Aftermarket engine mounts are all the rage right now and some of you may not have the money to spend on a pair of engine mounts for your Husqvarna. I will say that I don’t feel like the Husqvarna’s chassis is stiff, but I have heard from other lighter riders that it can be at times, so I decided to play around with torque specs on the engine mounts and stumbled across this. If you’re experiencing a stiff feeling chassis sensation and want the Husqvarna to settle while leaning (under throttle), there is an inexpensive way to achieve some extra front end traction. You can remove the left side upper engine mount bolt (upper right bolt only, as shown) and torque all other top engine mount bolts to 30Nm. This band aid will give you a more planted sensation when on throttle while leaning the FC450 through sweepers and fast straights. You will have to make sure that all engine mount bolts have blue Loctite to ensure they do not back out. You can also try torquing your swingarm pivot bolt to 95 Nm (instead of 100Nm) to help rear end traction out of corners. The downside to doing these mods is that the chassis will flex a little more, so if you’re riding deep tilled tracks this modification may be too “flexy” for some (especially when chopping throttle).  

IMG_4512.jpg

Rear Axle Block Kit: Going to a Works Connection axle block kit or Ride Engineering axle block kit will get rid of the fixed left axle block on the stock Husqvarna’s axle. This will help the rear end to move more freely under throttle and improve the shock’s comfort on acceleration chop. Rear wheel placement isn’t as crucial on the Husqvarna as it is on some other 450’s we have tested so if your rear wheel placement is somewhere in the middle of the axle block marks, that will be sufficient for these recommended suspension settings. 


Airbox/Side Panel Modification: If you’re a 2019 or 2019.5 Husqvarna owner do yourself a favor and get the 2020 left side airbag cover as that will get you snappier throttle response at low rpm’s. 

IMG_7990.JPG