Performance

Pro Taper Fuzion Handlebar


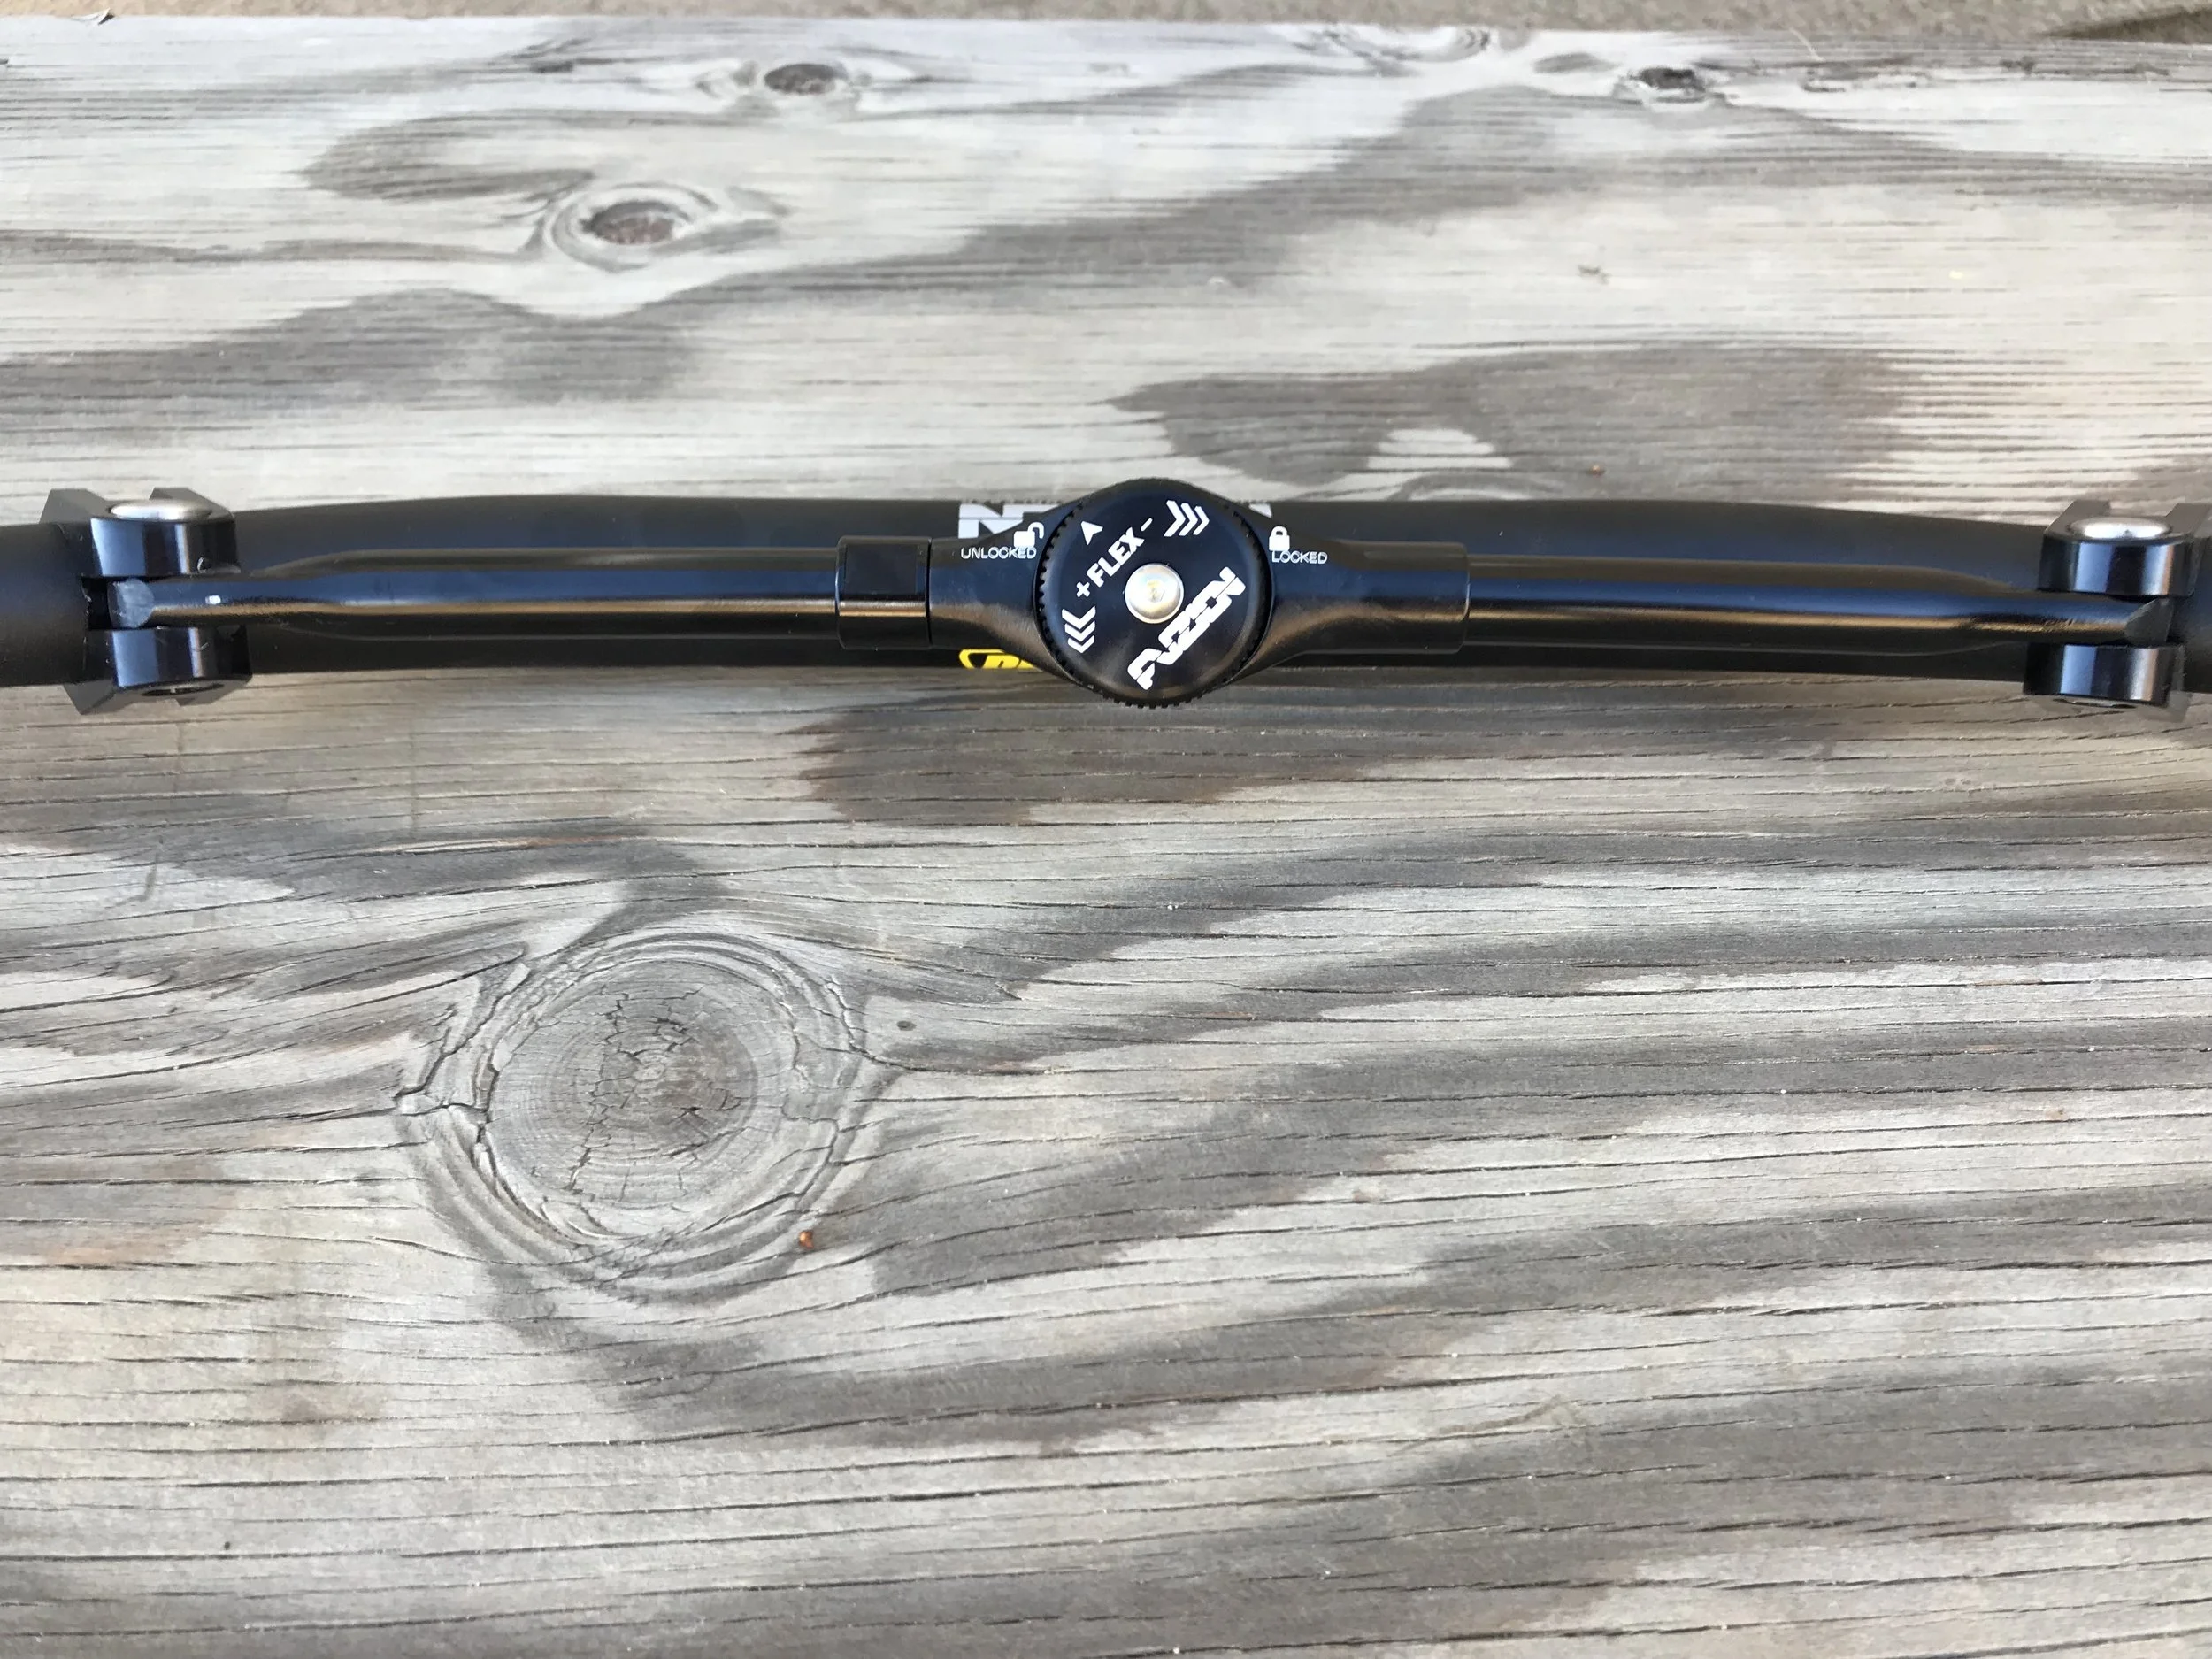
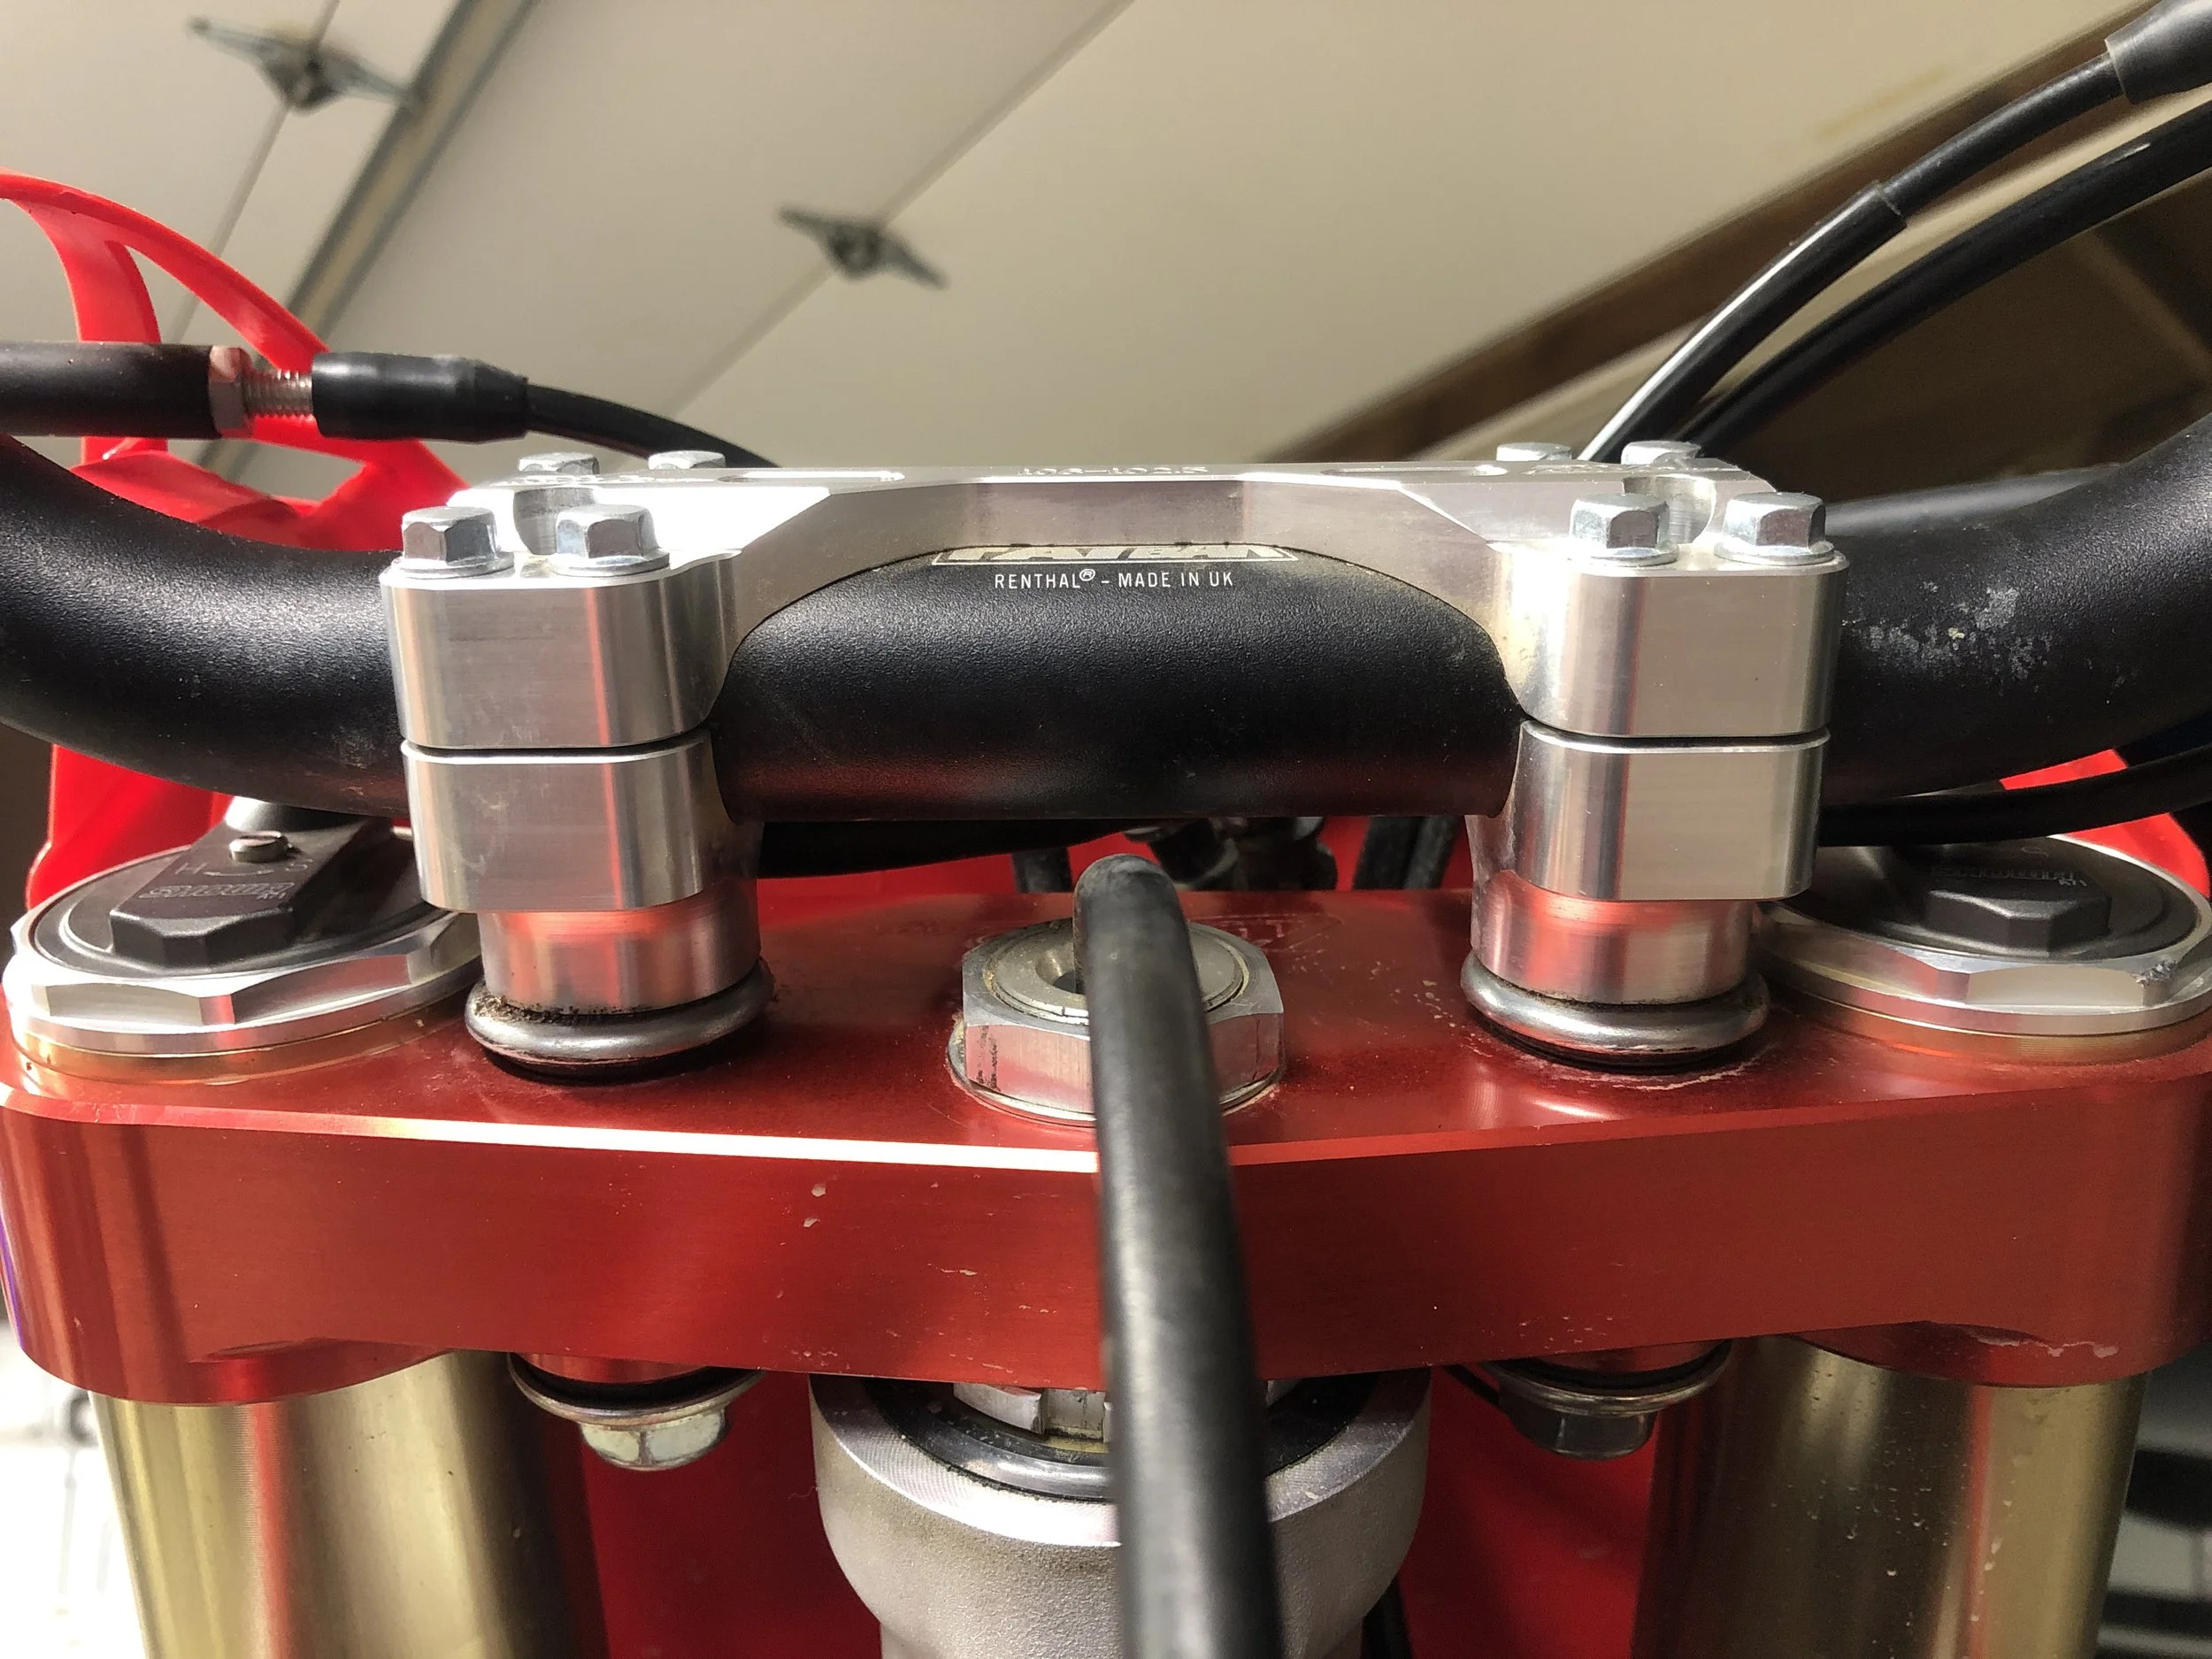
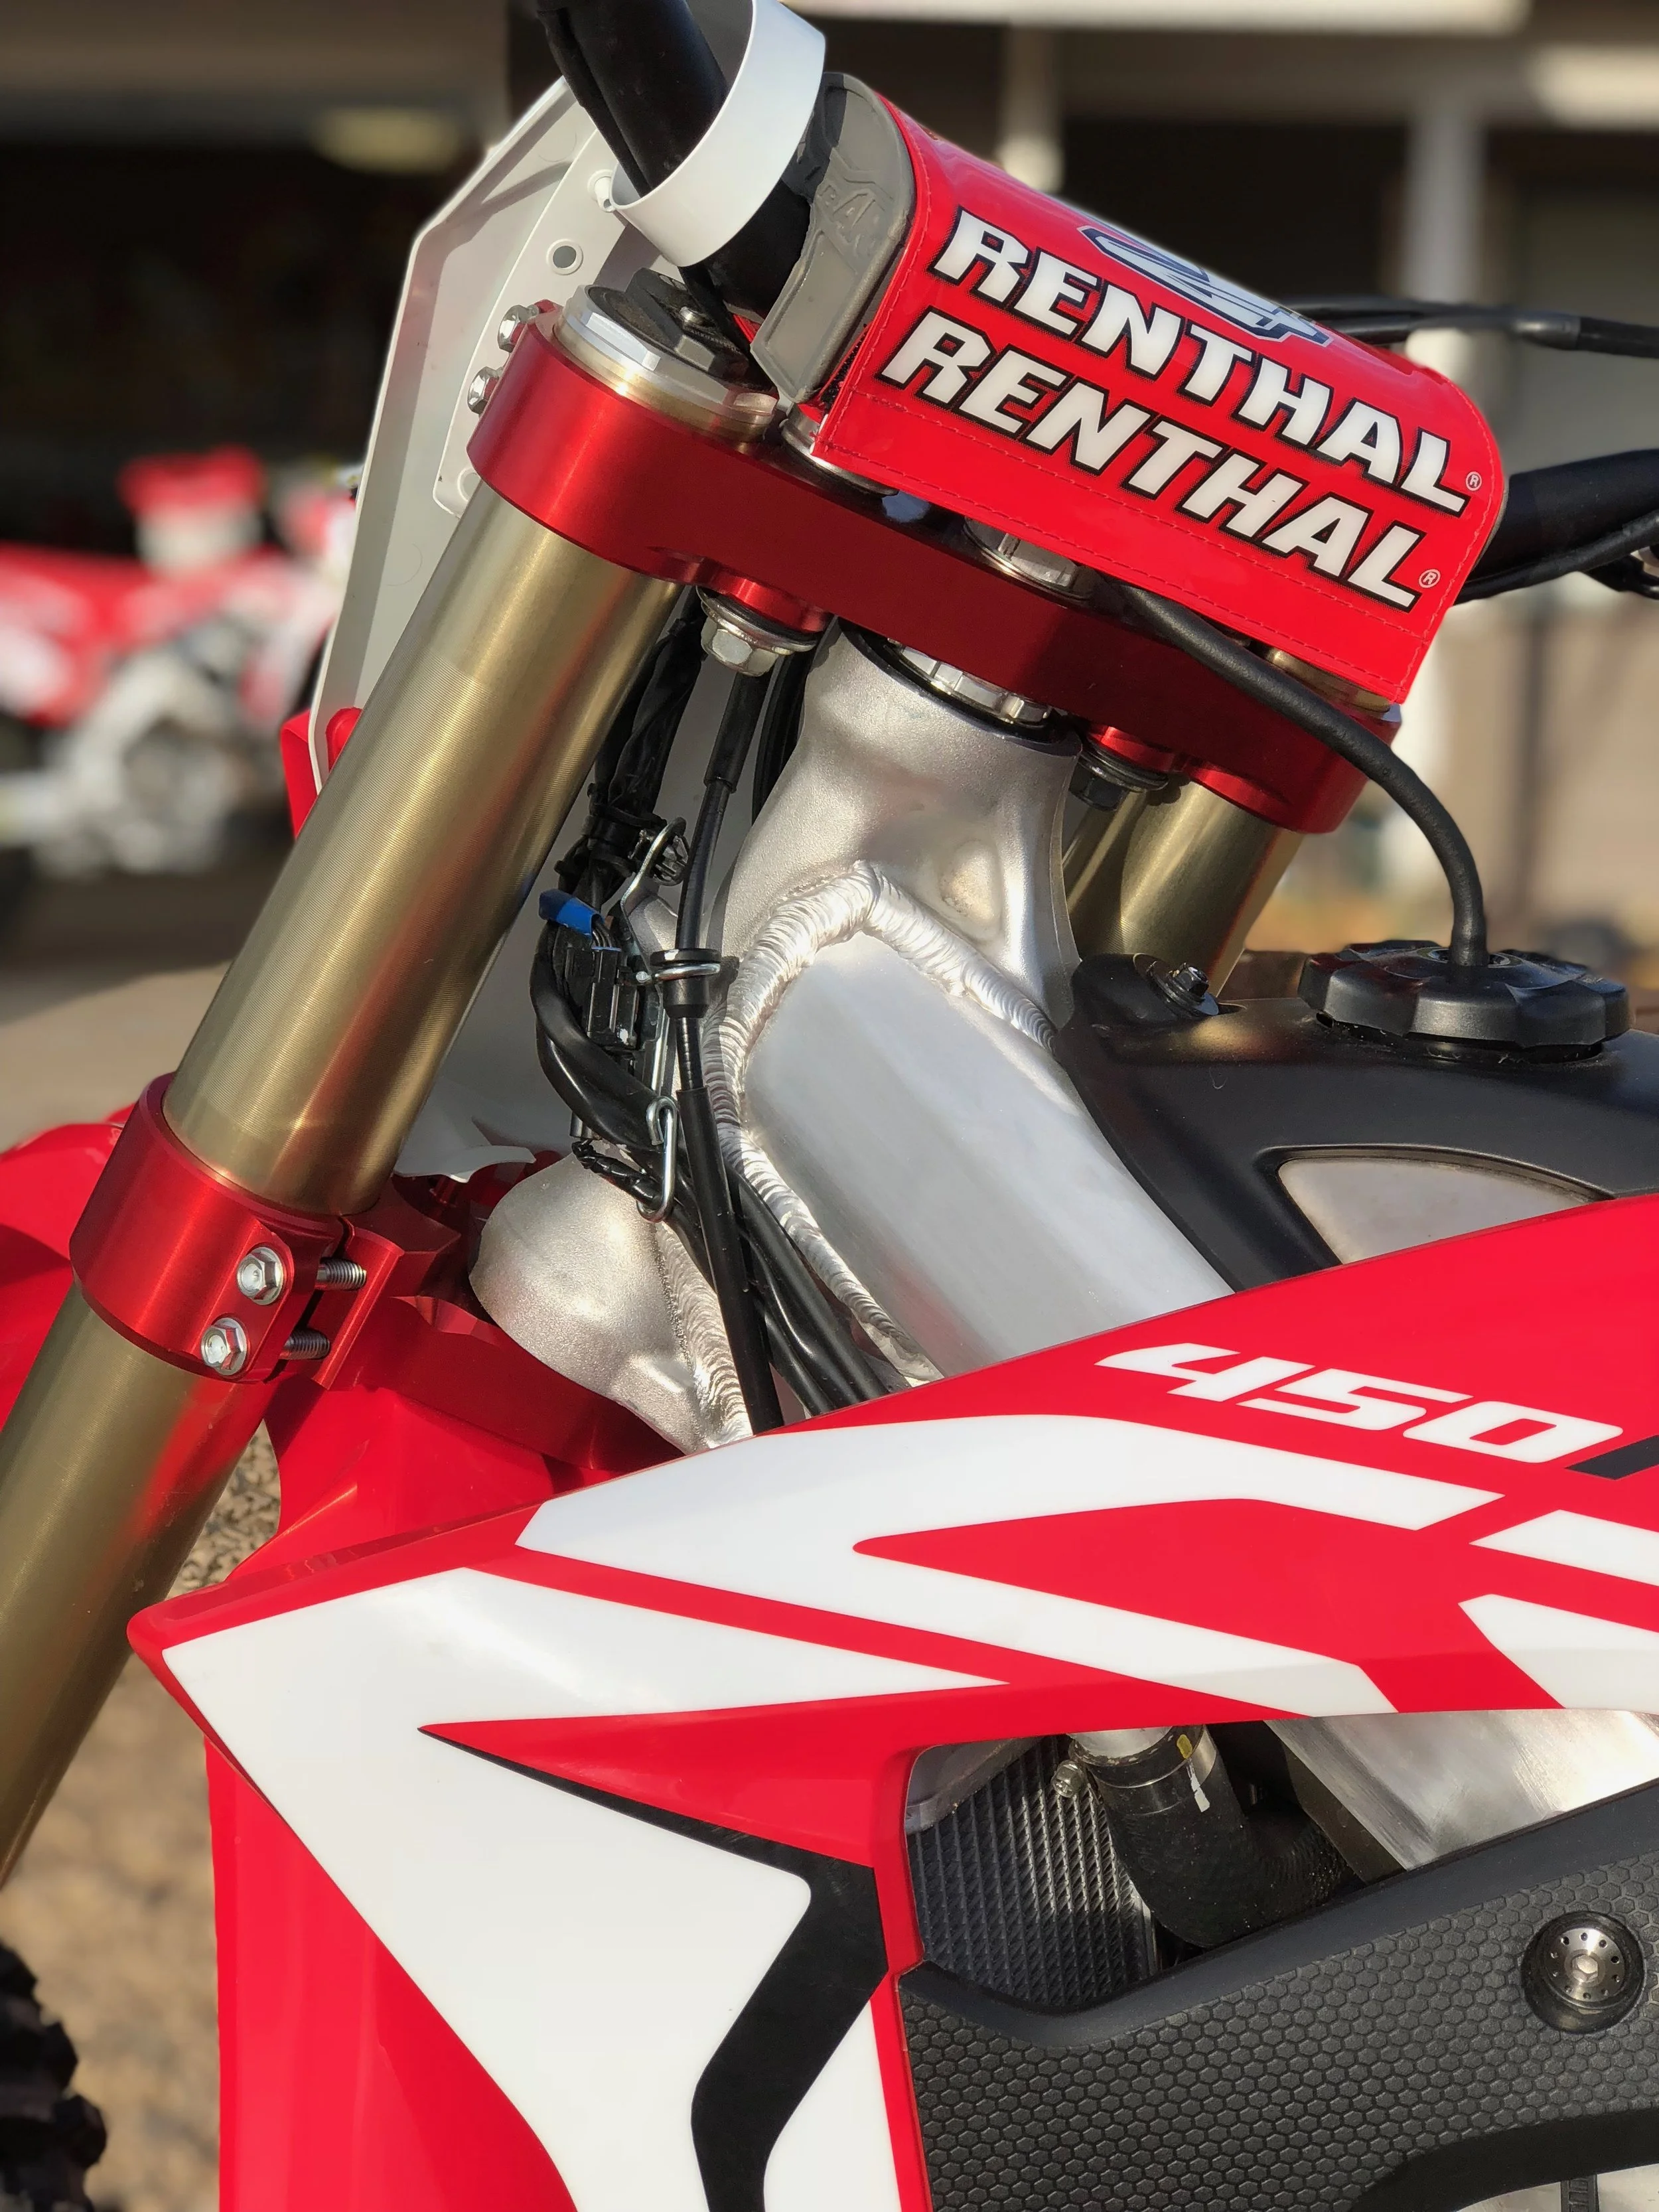
The Pro Taper Fuzion handlebar has been around for a while now and was a totally new concept to the off-road world (for crossbar lovers) when it was released a few years ago. The flex/locking system allows riders to choose between a stiffer/more controlled handlebar feel or a softer more shock absorbing feel depending on terrain and rider preference. Changing the bar from “Locked” to “Unlocked” takes only seconds by simply removing the bar pad and turning a knob. The Fuzion utilizes Pro Taper’s exclusive aluminum alloy, 4mm wall design for lightweight, strength and comes in six different bar bends.

IMG_1394.JPG

 Depending on what type of bike I am riding depends on if I like running a crossbar or not. For example, lately when I have been riding a KTM/Husqvarna I like to run a crossbar because it feels better through corners to me visually (I know, don't ask). When I ride a Yamaha I go to a handlebar without a crossbar. Why? You guessed it, because they come stock with that style and it feels normal to me. I usually can tell the difference in stiffness when I go back and forth between each type of bar I ride with, so this made me want to test the Fuzion technology.

IMG_2895.jpg

 The 1-1/8 Fuzion handlebar weighs in at 1lb,15oz. and was put on several of my test bikes. The easy-to-adjust locking system can be adjusted by simply taking the bar pad off and turning the knob in the middle of the crossbar. If you’re used to running a 7/8 bar with a crossbar on your bike, but want some added strength, the Fuzion can be a great option. The downside to using a standard oversize bar with a crossbar is getting added rigidity through the bars that could be hard on the arms/wrists. Setting the Pro Taper Fuzion to the “unlock” position was most noticeable on the 2019 Honda CRF450R due to it being a more rigid feeling chassis. In stock form the Honda comes with a Renthal Fatbar handlebar and putting the Fuzion bar on gave me a less rigid through my arms. On braking bumps and hard slap down landings the Fuzion bar flexed as if I didn’t have a cross bar on. Does it flex more than an oversize crossbar-less handlebar? After spending more time on both types of bars I would say it’s very similar, but the crossbar-less handlebar still has a bit more flex to it.

IMG_2315.JPG

 I am very picky when it comes to handlebars and I felt that the Fuzion handlebar (when in the “locked” position) is slightly more precise (than on the unlocked position) when trying to corner on hard pack slick surfaces. Also, to my surprise only a little more rigidity was felt on braking bumps and on flat landings when “locked”. The smoother the track surfaces the better the Fuzion worked in the locked position. However, 90% of the time I felt the Fuzion felt best when “unlocked”. Especially for the hacked out, choppy, desert tracks I test on.  A few tip overs and one big get off left me praising the Fuzion’s durability. This happened on the Husqvarna and the handlebar got twisted in the bar mounts, but the handlebar itself wasn’t bent.

IMG_6237.jpg

 So at the end of the day why not just use an oversize crossbar-less handlebar you ask? The Fuzion handlebar eliminates having “crossbar lovers” cut their oversized crossbar handlebars for increased flex (and avoiding potential handlebar failure to achieve desired flex when he/she demands a crossbar). I like that ProTaper addressed the need for this niche market and cater to picky people like myself. Yes, it’s more expensive (at $129.99) than your average 7/8 handlebar, but it also will withstand a bigger crash.  

Fire Power Featherweight Lithium Battery


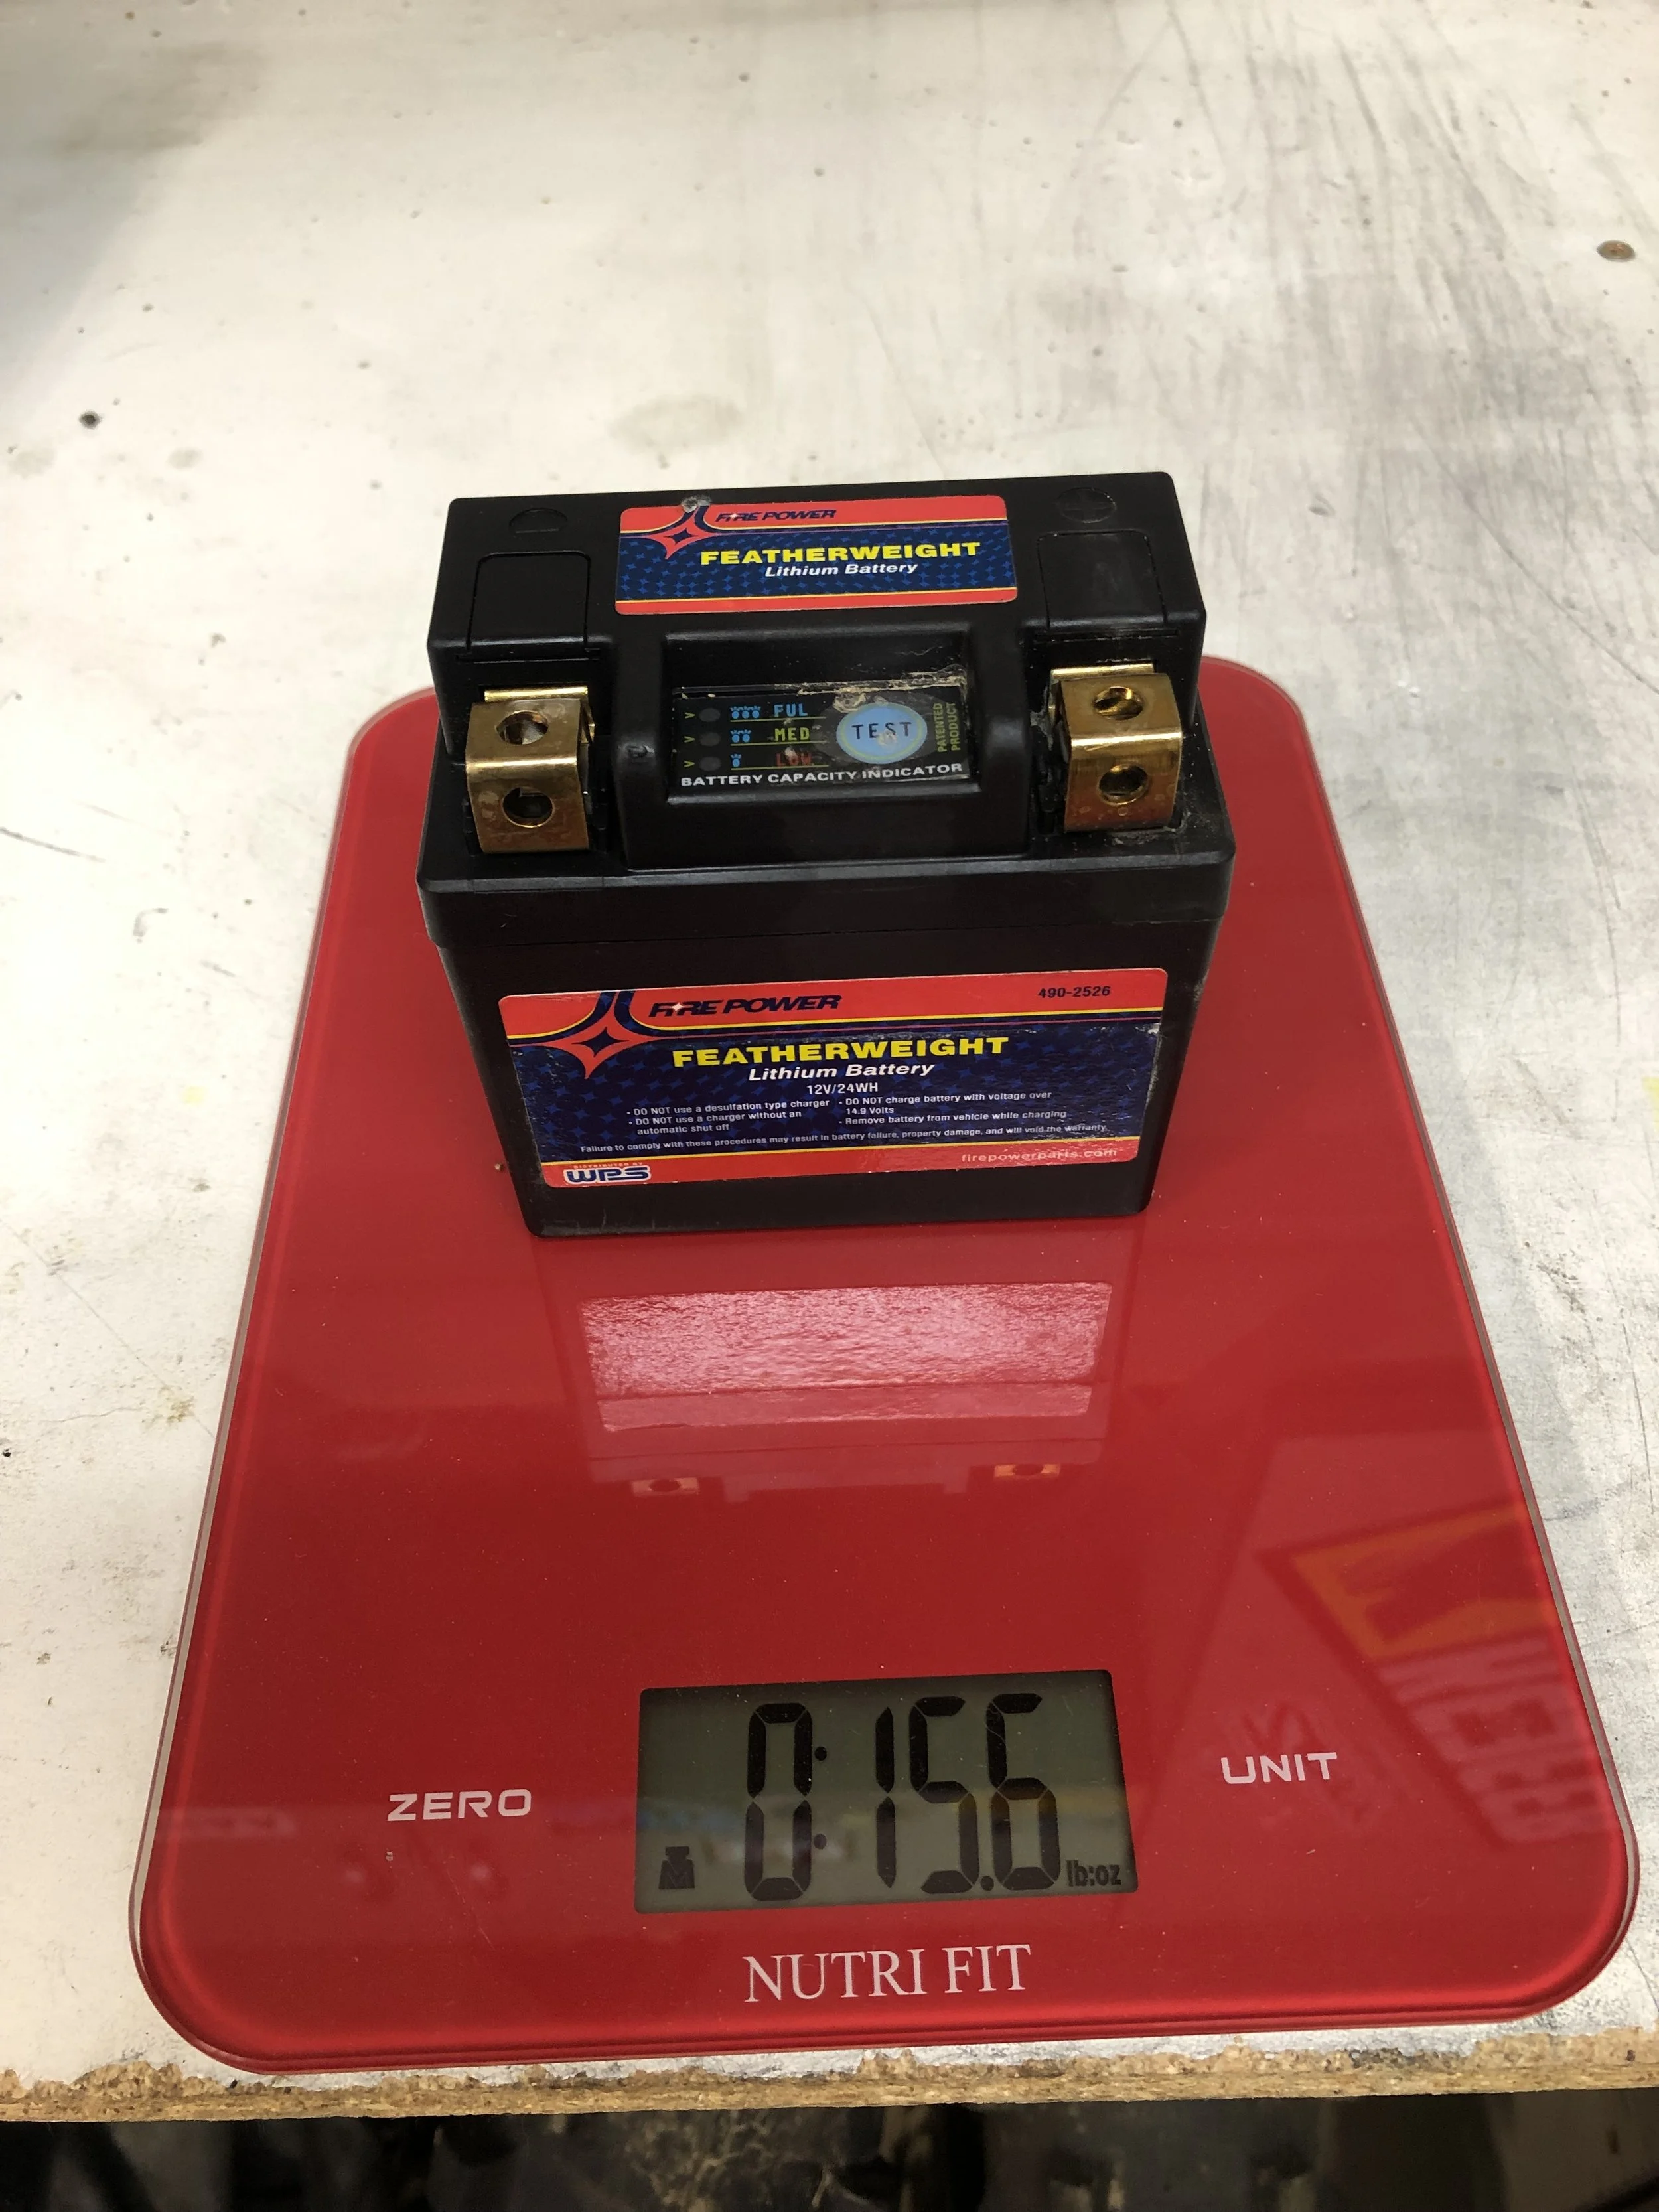
Fire Power is company owned by WPS (Western Power Sports) and they have recently come to market with a new Lithium battery to replace your OEM battery. The Fire Power battery components are designed, manufactured, assembled and packed in one location assuring high quality and consistency, are lighter than your standard OEM battery, has a built-in LED test gauge, has increased cranking amps over lead acid batteries, a fast recharge that can be brought up to a 90% charge within 6-7 minutes, has a claimed longer cycle life compared to lead acid batteries, a longer shelf life (up to 1 year before requiring recharging), can be mounted in any position, comes with no hazardous acid or heavy metals, non-explosive and non-combustible, and comes with a two-year warranty. 

IMG_5746.jpg

We tried a Fire Power battery in our 2019 Yamaha YZ250F and our 2019 Honda CRF450R with great results. The Yamaha YZ250F is sluggish to start and absolutely hates starting in gear. The YZ250F battery also took a crap on us (completely died) only a couple months in, so a new battery was in order. After installing the Fire Power battery into our CRF450R/YZ250F not only did they fire up quicker, but starting both in gear was slightly better as well. Fitting it into both machines was easy, but we didn’t like that the little square threaded nut (inside of the posts) could fall out, if the battery was tipped, so be aware of that when installing. The Fire Power battery on the Honda is slightly smaller than the OEM battery, so there will be a little more space inside the cage (in the airbox).   


Letting our Honda sit idle in the shop for over one month proved to not be a problem for the Fire Power battery as the red bike fired up instantly. The LED test light is also a nice feature just in case you decide the night before that you want to ride the following day. Not all of us ride every weekend, so this feature helps with the rider who may take a longer breaks in between riding sessions. Simply take your seat off, push the LED test light button and make sure your good to go for the following day’s activities. 


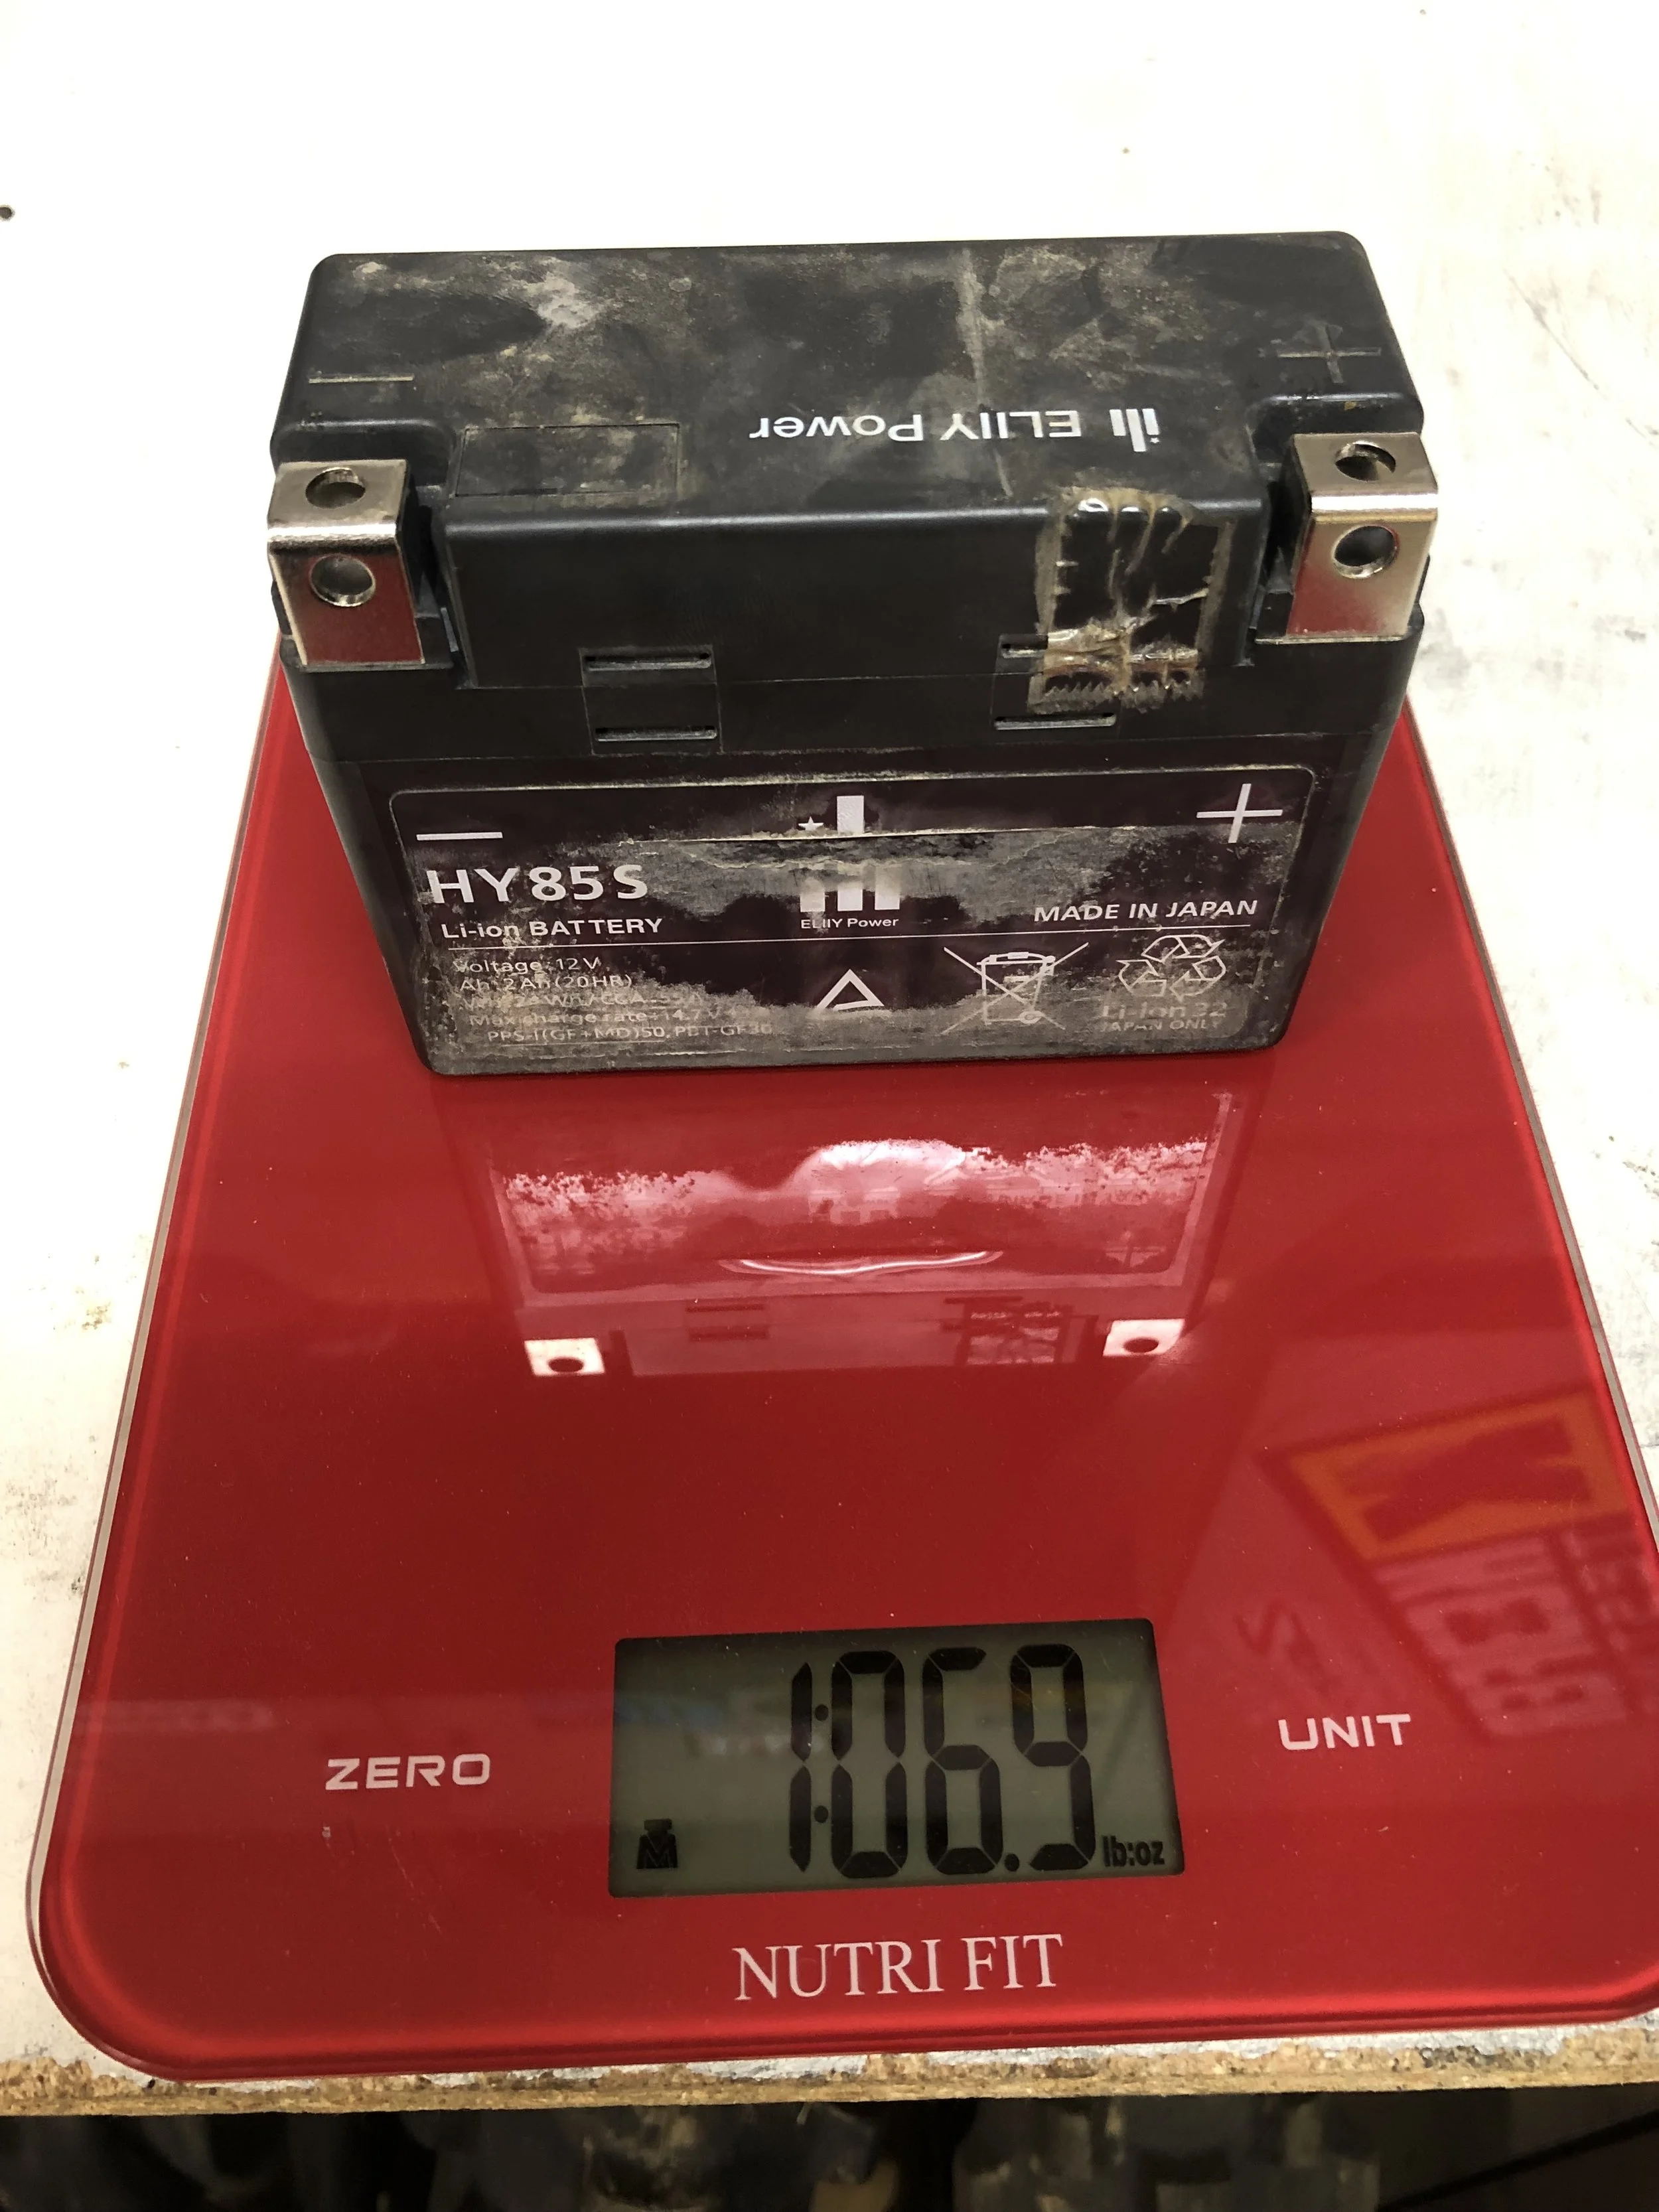
What about weight? The stock OEM Honda CRF450R battery weighs in at 1.06 pounds and the Fire Power battery weighed in at 0.95 pounds. Cutting some weight up high on any dirt bike is essential and will improve the handling character, especially leaning into corners. is it enough weight for you guys to feel on the track? Probably not, but it doesn't hurt to lose weight and add some cranking power on a four-stroke at any time. 

IMG_5742.jpeg
IMG_5741.jpeg

For $119.95 this Fire Power battery is a fairly inexpensive way to get some starting security on longer trail rides, days at the moto track, and lose a little weight in the process. You can check out all the Fire Power products over at firepowerparts.com or if you have any questions feel free to email me at kris@keeferinctesting.com. I’m an open book!  


Yoshimura RS-4 SS/AL Full Muffler System For 2019 Kawasaki KX450

By: Dominic Cimino

Any of you that stay up to date with us here at Keefer Inc. are aware that I really enjoy riding the 2019 KX450. Like I really enjoy it. Maybe it is because we have the chassis and suspension dialed in just for me or maybe it’s just because the bike is so damn fun. Either way, I am excited to continue making improvements to this bike in the upcoming months because every time I ride it I feel faster. Next on the chopping block is the motor department and we decided to start with exhaust first. I wanted to test the RS-4 Stainless Steel Yoshimura system because I have had great luck in the past using their systems on other bikes and the guys over there always take great care of us. 


Yoshimura exhaust systems are made from scratch right here in Southern California. Their R&D facility houses everything from the race team shop, dyno/engine rooms, to the space where they lay all of their own carbon fiber. The attention to detail and quality of product is top notch in everything they produce and to give you a little more background on Yosh, you can watch this short clip:

https://www.youtube.com/watch?v=V5J5kltNfvQ

Although it is a couple years old and mainly showcases road racing disciplines, trust me when I say that it all translates equally into motocross. You can sleep peacefully knowing that your investment is going to be worth it. 

IMG_1659.jpeg

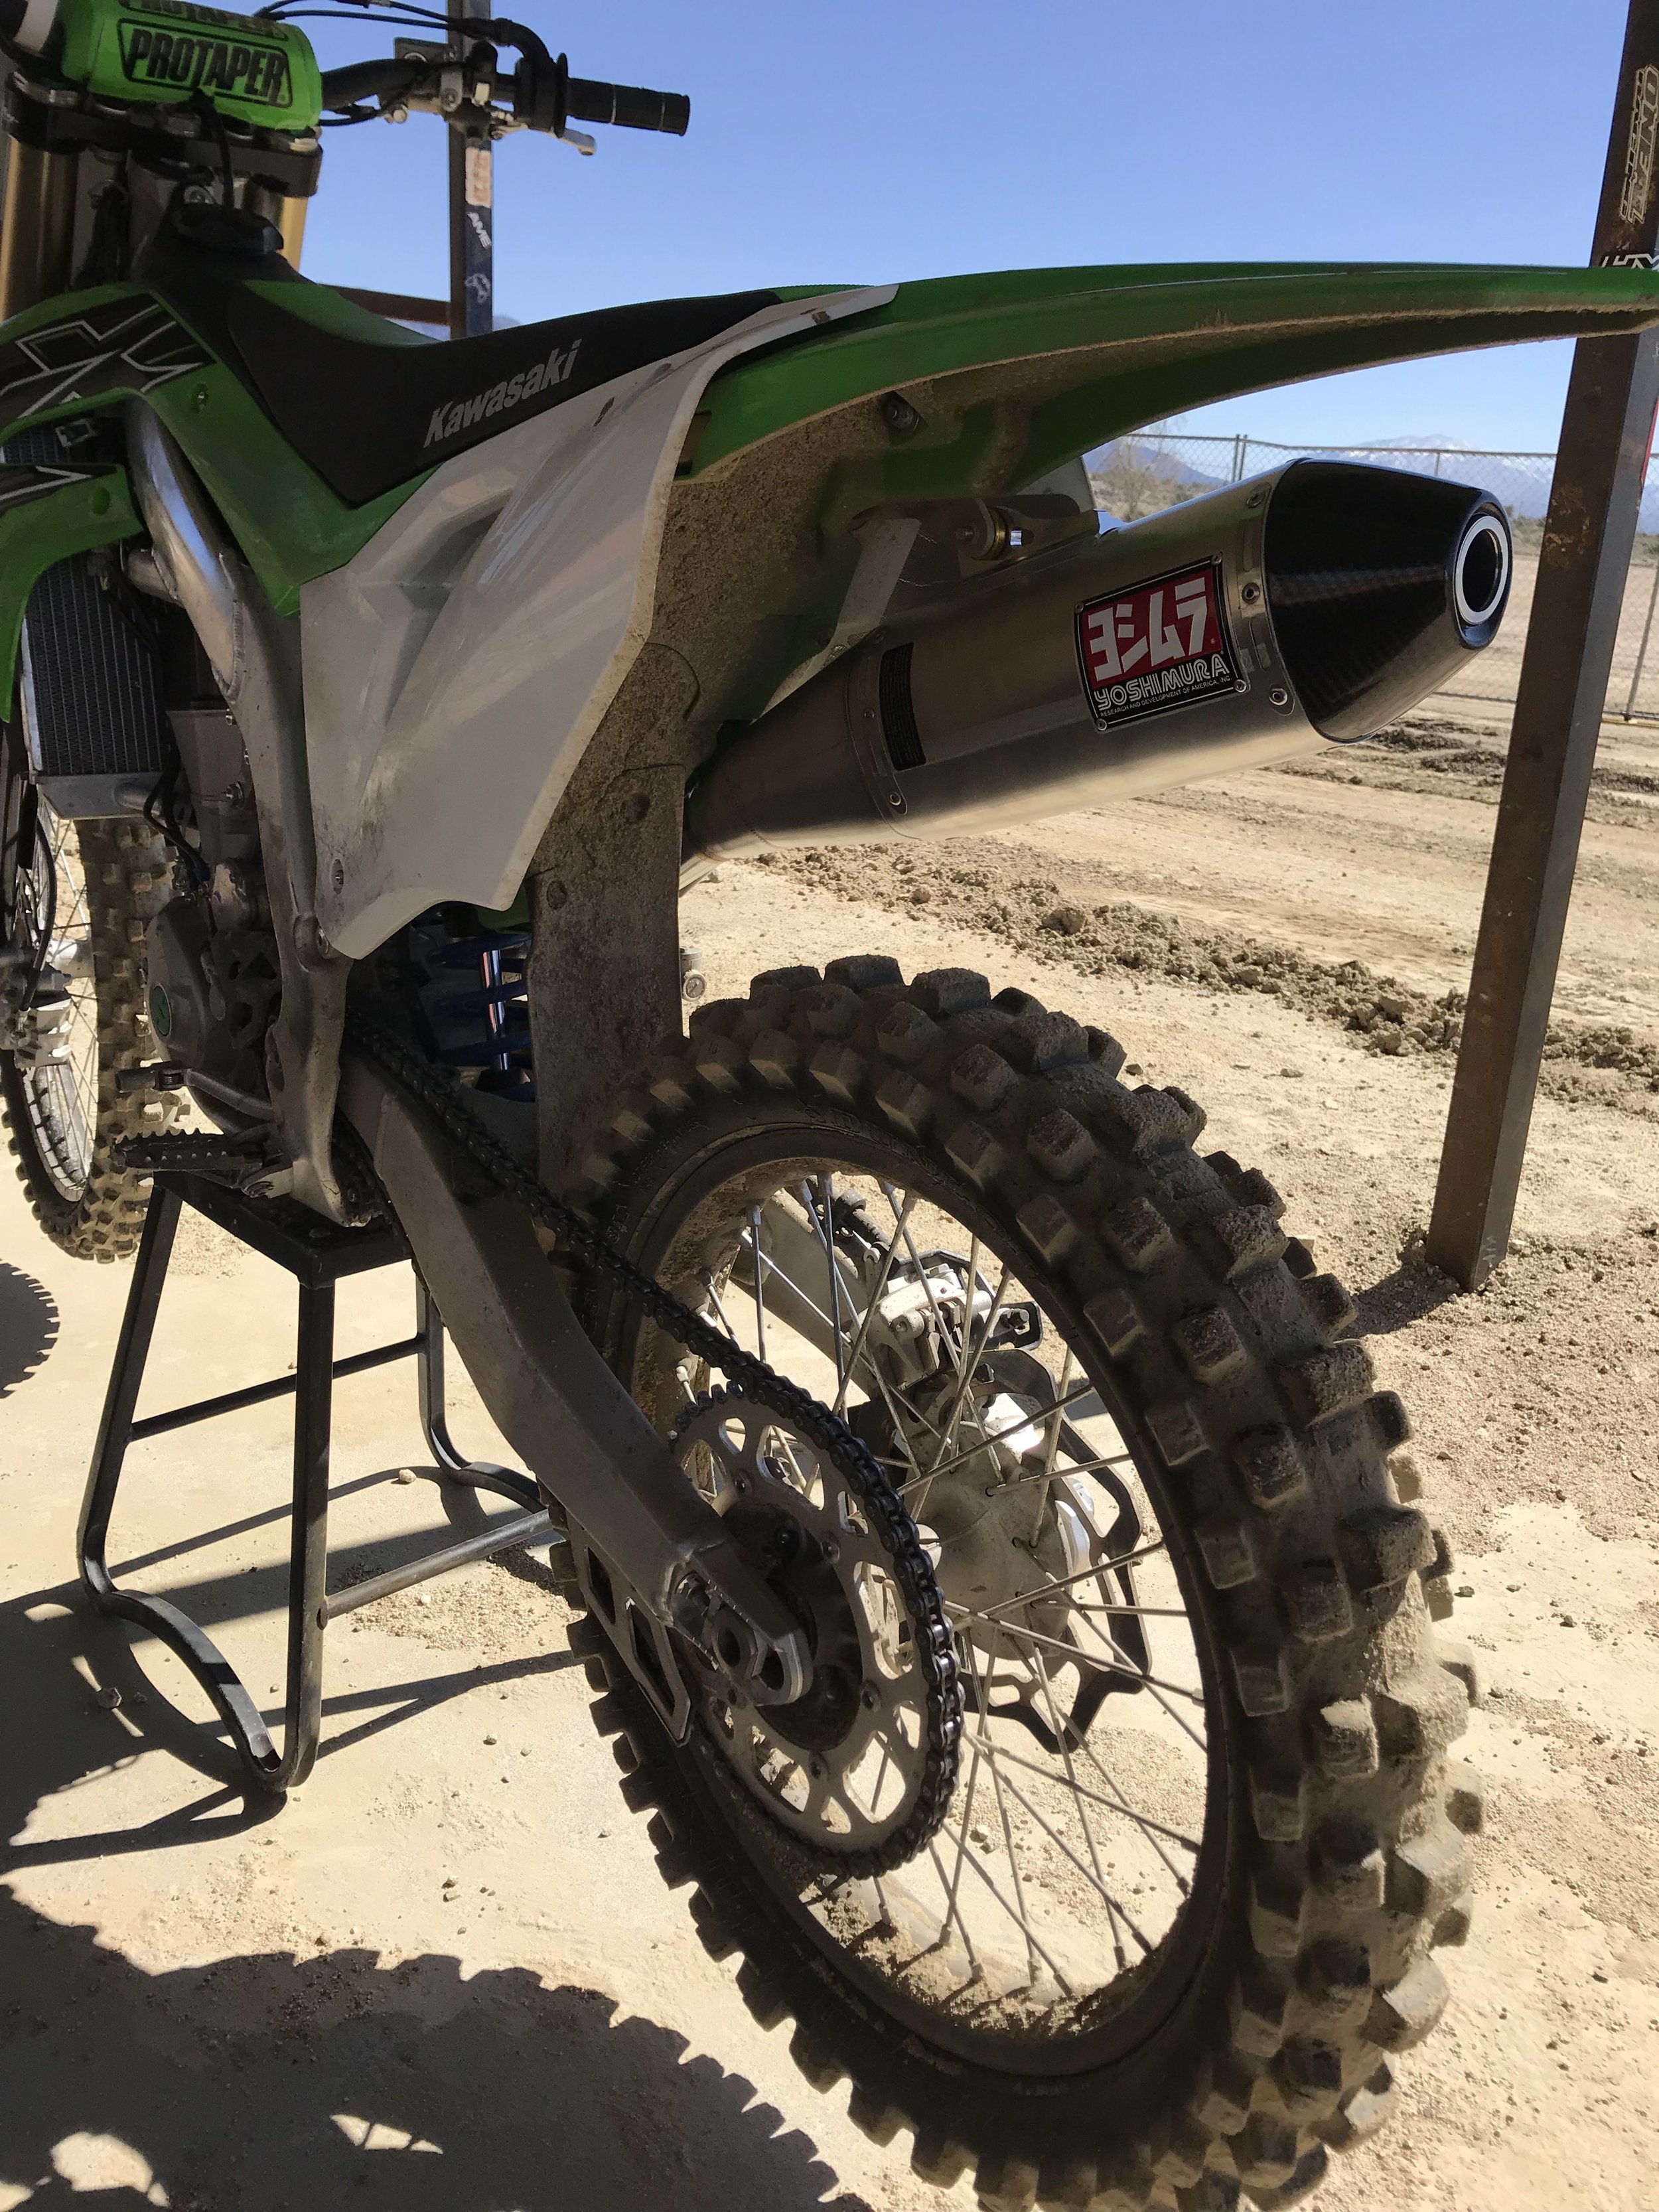
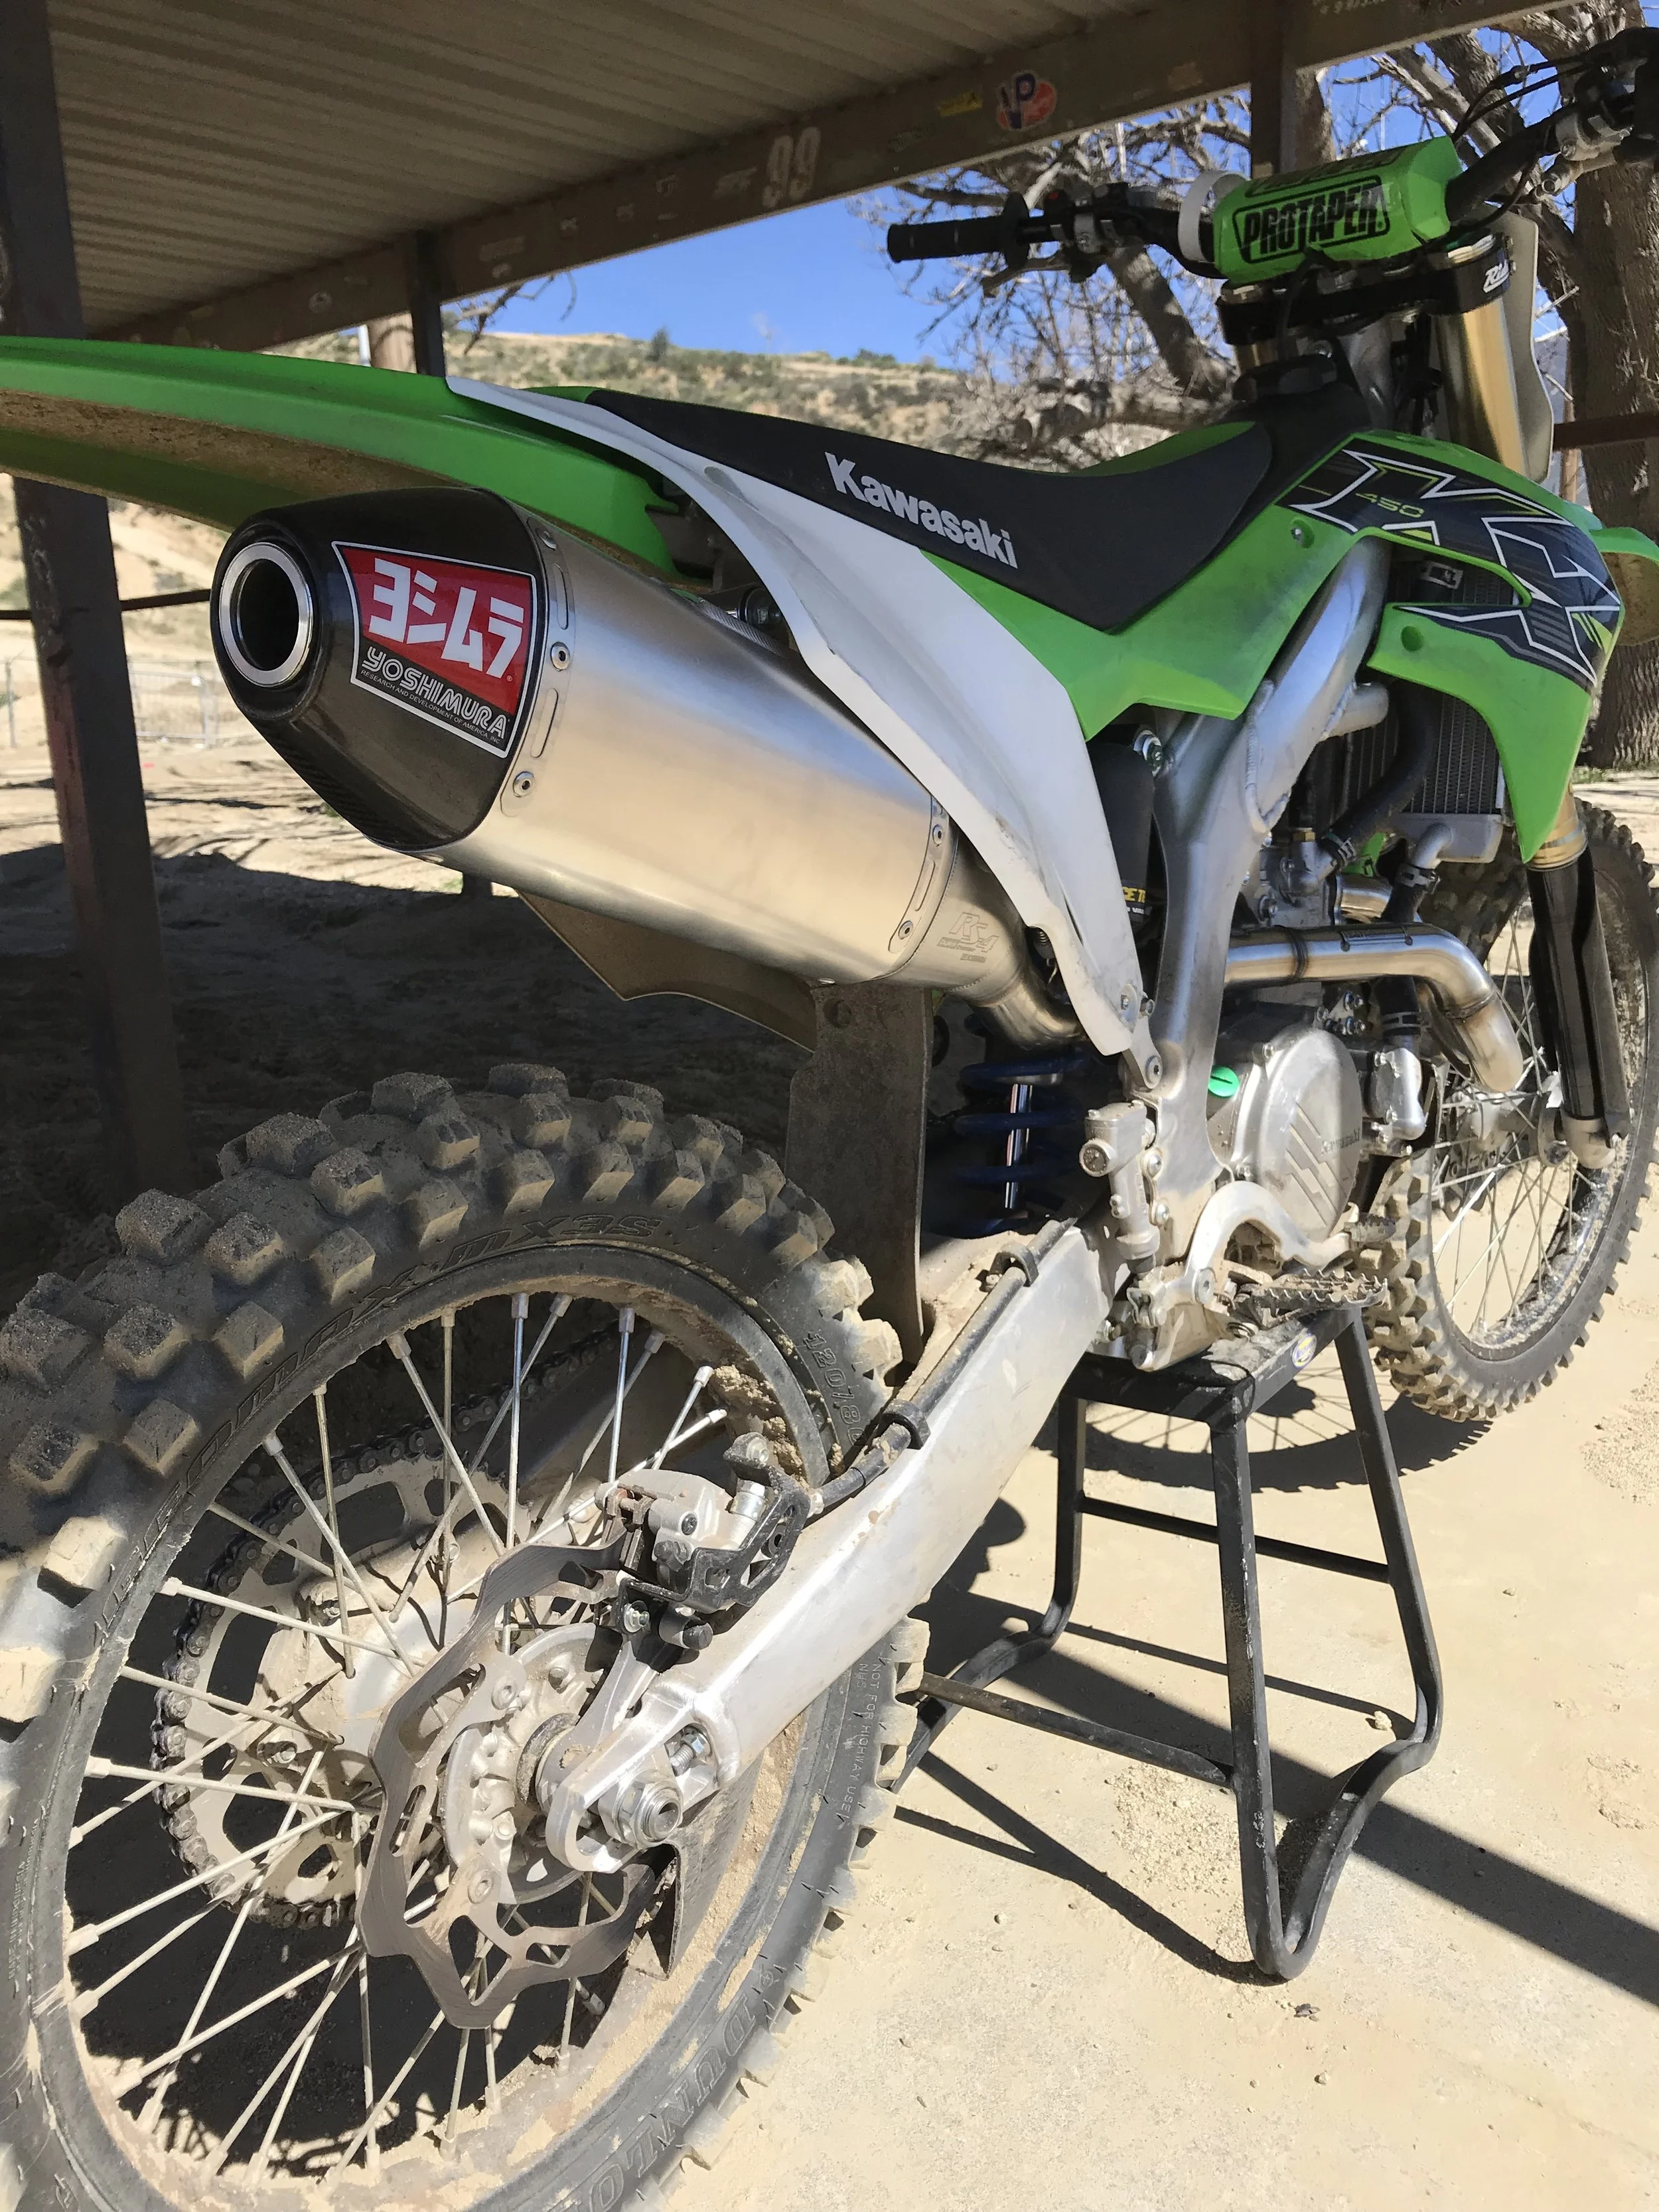
The stock exhaust system on the 2019 KX450 is not too bad overall. Beside it looking really bad (that is a no-contest) and weighing a decent amount, it produces a good tone and useable power. I think this exhaust compliments the motor and power delivery well by keeping things linear and quick revving - one of my favorite traits about this bike overall. But on the flip side, the motor does lack some “meat” in the RPM range and the over-rev tends to sign off relatively quickly at the top. Installation of the new Yosh was quick and easy with every single piece fitting in place perfectly. I love when that happens! The stainless/aluminum system that I tested weighed over a pound less than the stocker and comes in at a fair price of $675.78. In roughly ten minutes, the KX looked better instantly with the new system in place, and when I pushed the button to wake her up, she sounded healthier too. I am not a fan of obnoxiously loud exhaust systems so I was happy to listen to the Yosh when cracking the throttle on the stand. Definitely louder than stock, but not deafening. 

IMG_1662.jpeg

Before installing the new Yoshimura system, I did a couple morning motos at Glen Helen to get the best gauge of the stock comparison. The most obvious difference when cruising back onto the track was the tone, as it has a deeper/healthier sound. But when in stride, the exhaust made the KX come to life from the mid range and beyond. The linear power curve stayed true on delivery, but exemplified a more crisp powerful feel when on throttle. I felt the Yoshimura system was able to harness a little more “meat” that I have been searching for and also helped push the bike into the higher revs more efficiently. On the top end, over-rev was increased quite a bit as the KX seemed to pull longer and harder overall. I noticed when charging down Mt. Saint Helen I could hold 2nd gear almost half way down the hill before hitting the limiter. The stock exhaust would sign off way earlier than that in the beginning part of the day. I also realized I stayed in 2nd gear almost all the way around the Glen Helen circuit. This is a testament to the linear power I have been talking about on this 2019 KX450, and the Yoshimura system makes it even better. Where I didn’t notice a substantial improvement was bottom end power delivery. The KX is not a torquey bike in stock trim by any means, but I was expecting to get a little more bark with the new system. This was not the case and I found myself clutching the bike in the soft corners to wake it up in order to get back into the mid range, where I think it excels. 

IMG_1663.jpeg

Overall, the new Yoshimura exhaust system is a great performance improvement to this already great bike. Looks good, sounds good, and runs good - thats what it’s all about, right? Obviously, I am going to set my sights on continuing to improve the power delivery to round out this new KX450. I am happy with the mid/top end feel, so maybe we can experiment with new map settings to get a little more lovin’ down low.  As always, stay tuned for what is next here at Keefer Inc. If you have any questions about the 2019 KX450 please feel free to email me at dominic@keeferinctesting.com.  Or you can head over to Yoshimura-rd.com to see what they offer for your green machine.

Ride Engineering Billet Kill/Engine Starter Button

 By: Matt Sirevaag

Modern day dirt bikes are getting more complex with electronics, buttons, switches, and other high tech gadgets. This seems to leave less room on the bars for handguards, GPS mounts or any accessory that the consumer may want to install on the bars. I am not like Kris however, because “I love hand guards”,  so I was a little sad when there wasn’t much room on our 2019 FC350 handlebars to mount any. Since I was bummed, Kris suggested that I test out Ride Engineering’s Billet Engine Kill/Starter Button. Ride Engineering designed the button in hopes to clean up some of the clutter as well as gain a little room for anything that you may want to mount.

New Way…

New Way…

As the heading states you can use the Ride Engineering button for a kill switch or a starter button. The new button/switch mounts on most current bikes via the clutch or brake lever mount and to me seems like a smart idea as you kill two birds with one stone. You already have real estate on your handlebars for a brake or clutch so why not mount your kill/starter button to one of those and free up some room right? However just not that installation on any Husqvarna and KTM will only allow the Ride Engineering button to be mounted to throttle tube housing. Installation is fairly easy as I unbolted the throttle tube housing on our 2019 Husqvarna FC350, used the supplied bolts (that are longer than stock), and mounted up the new switch as my starter button. There are a couple of ways to wire this switch after cutting the old one out, but I suggest soldering the wires and using shrink tubing. This will make sure you have a good corrosion and water resistant connection. 

Old Way…

Old Way…

The Ride Engineering starter/kill button does exactly what it was designed to. It leaves you more room on the handlebars as well as give your cockpit a cleaner appearance. I have had zero issues (while riding) using the Ride Engineering button and it hasn't missed a beat, even after riding in freak Southern California rain storms (as well as with bike washes). The only squabble I had is that the button position is at the mercy of your throttle tube housing and or lever angle. I would like to have my starter button facing upwards in case I stall the bike and need to push the button in a hurry. This is nothing more than a personal preference, but something I wanted to mention. The Ride Engineering starter/kill button comes in polished aluminum or anodized black and retails for $54.95. You can find all Ride Engineering products over at ride-engineering.com.

Acerbis Footpeg Protectors


Have you ever been ripping ruts or laying it over in a corner only to find that your footpegs are stuck upwards? You either spend the next straight slamming down on the peg (with your boot) or maybe you find yourself pulling off of the track to get the dirt out between your return pedal spring/pegs. Yes, it’s a pain in the ass and some bikes are worse than others (like the Honda CRF450R). Well, Acerbis has been making these rubber footpeg protectors for sometime, but a lot of you may not know about them. 

IMG_2402.jpg

Constructed of EPDM 40 rubber, the Acerbis footpeg covers are designed to keep dirt out of your footpeg/return spring area so that the pegs can return properly once you bury it into a rut/corner. The installation takes some patience, but once you manage to spread the rubber around the peg and onto the footpeg mount/spring area, you can position it so that it is tucked up in there neatly. 

IMG_2399.jpg

The Honda CRF250R/450R collects the most mud/debris in the footpeg area and I frankly got sick of trying to stomp down my pegs after I have ripped a deep rut. The Acerbis rubber protectors kept the dirt out of the footpeg springs throughout each moto and I never once had to worry about getting my footpegs hung up. The rubber is fairly durable and can withstand some abuse of rocks, sand, and the occasional strong power washes. I have only ripped one rubber protector (at Glen Helen) on a rock and although it sliced the bottom of the rubber, it still held onto the peg and did its job for the rest of the day. 


For around $20.00 I would keep a couple sets of these Acerbis footpeg protectors handy in the tool box for early morning motos or just leave them on 24/7. The Acerbis footpeg protectors fit all modern Honda, Suzuki, Yamaha, KTM, Husqvarna, and Kawasaki dirt bikes. You can get these at rockymountainatvmc.com or acerbis.com


Hoosier MX Tire Test

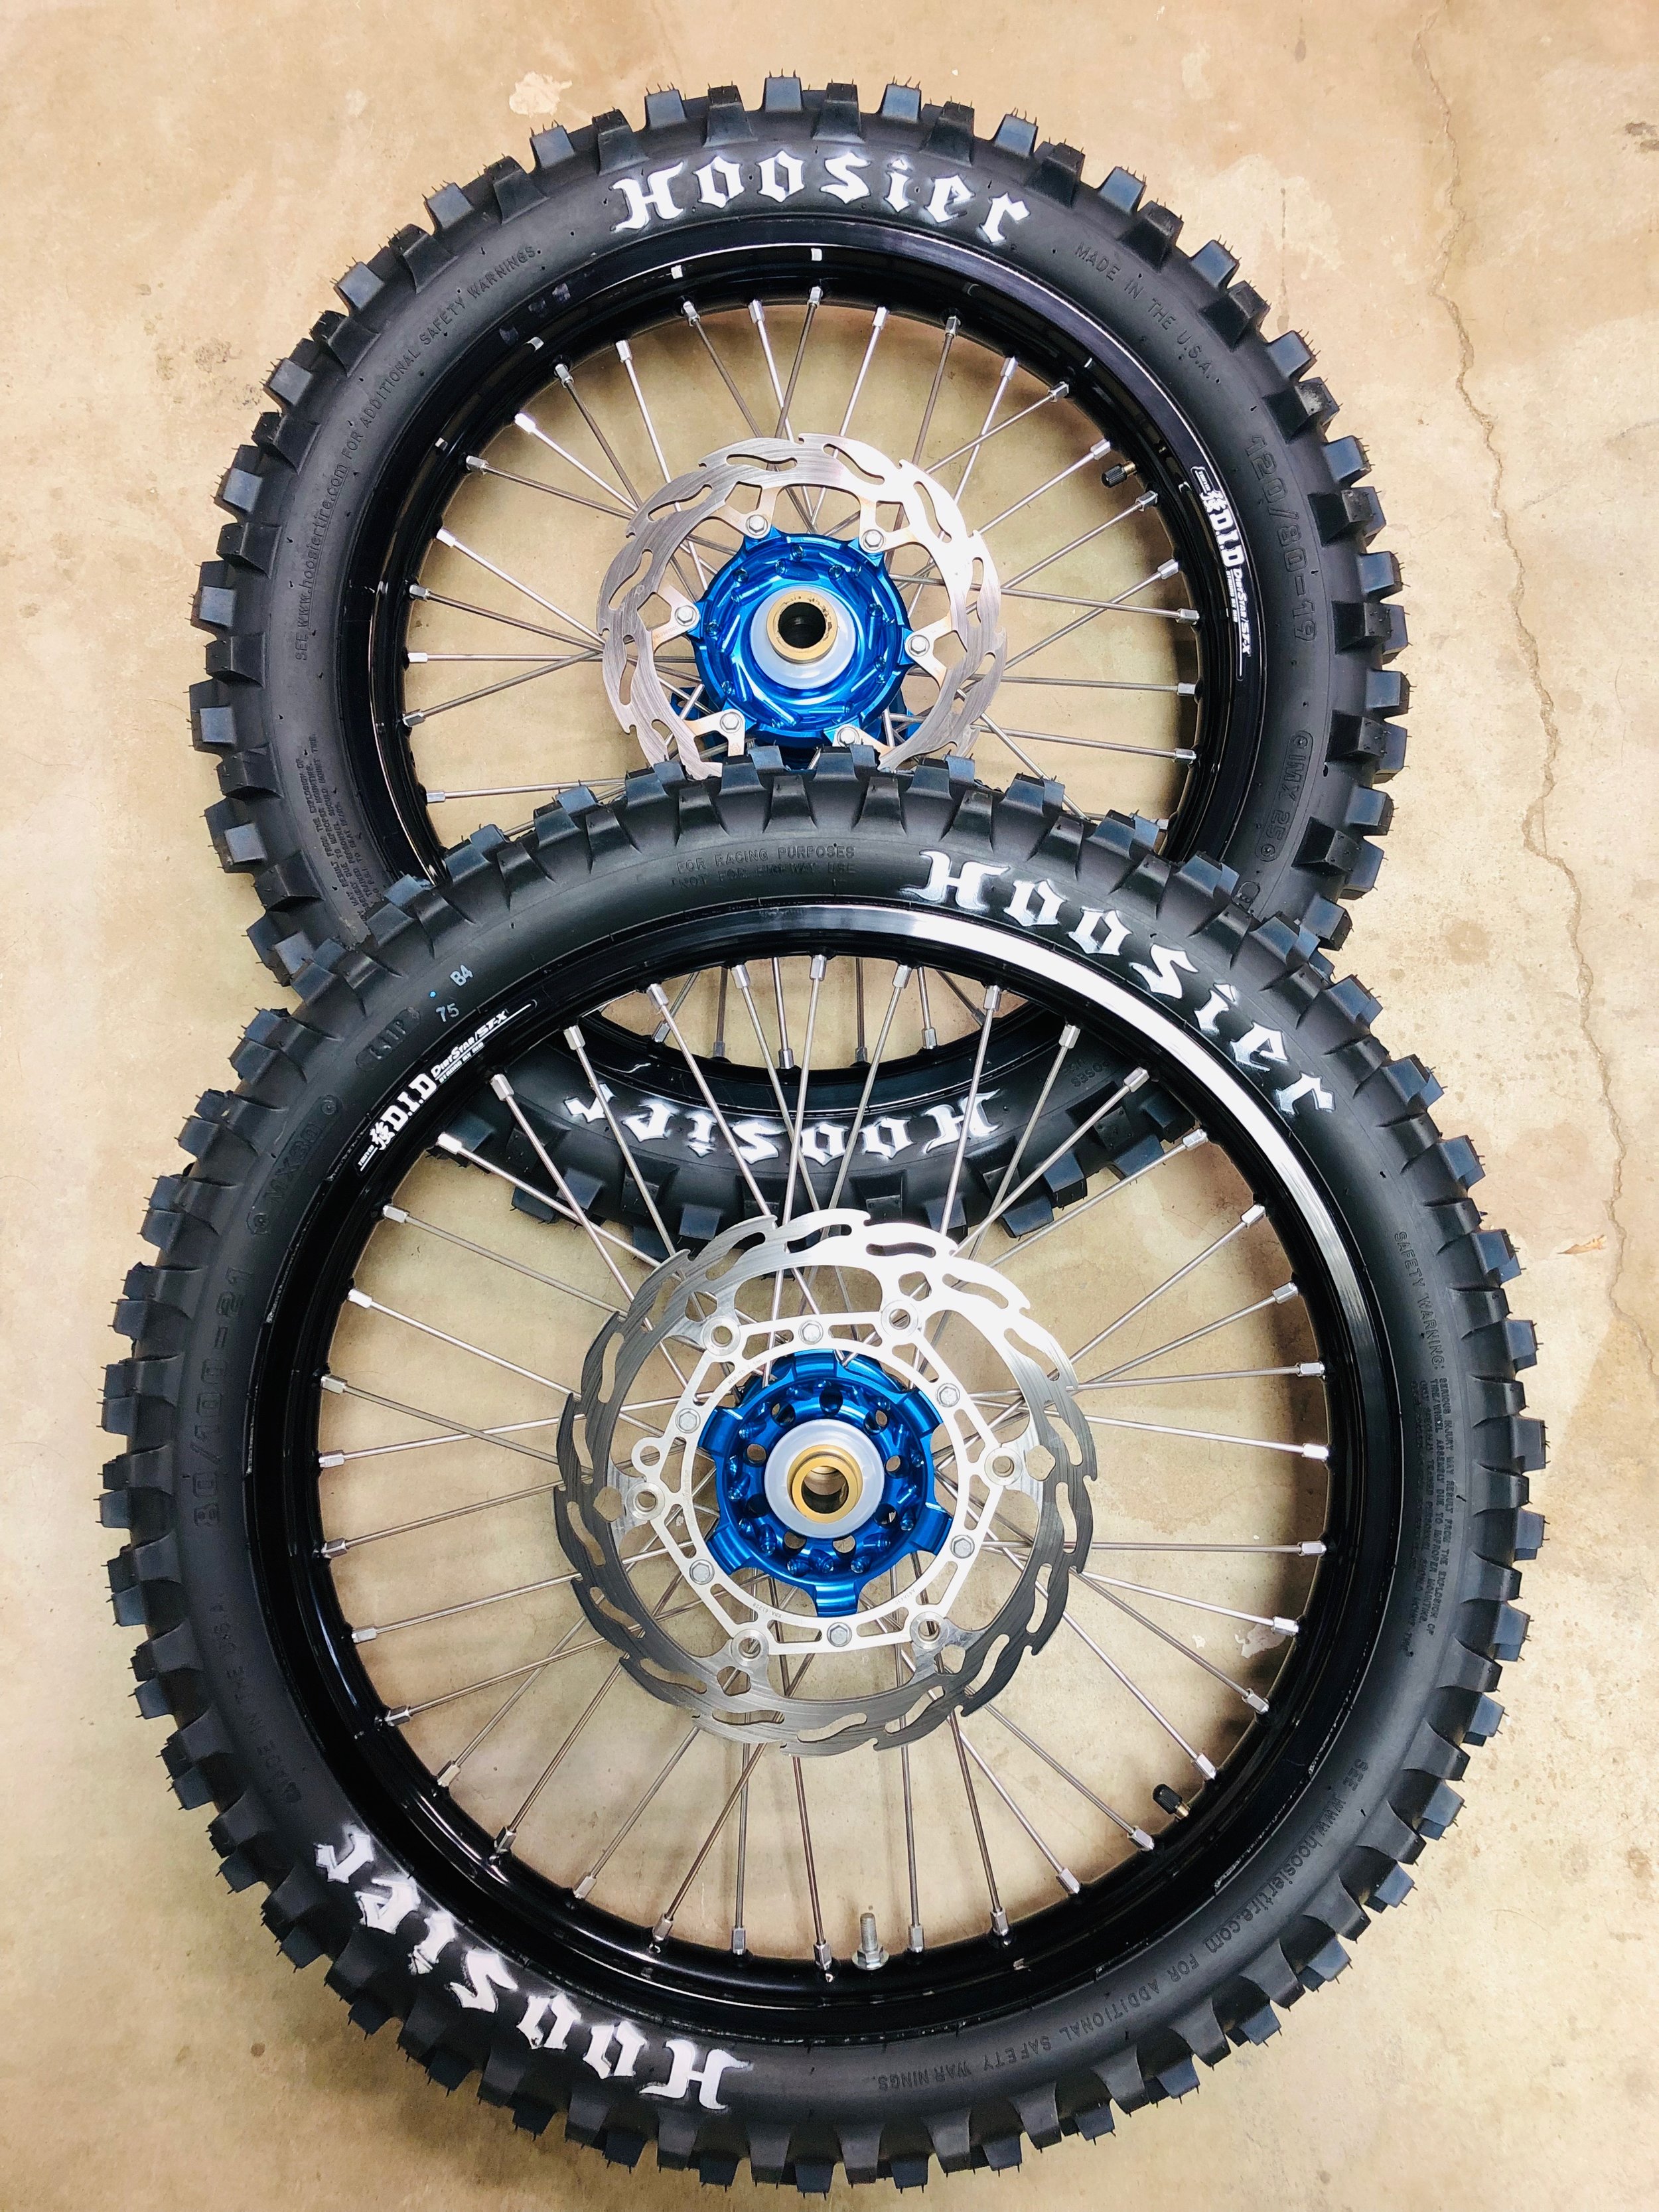
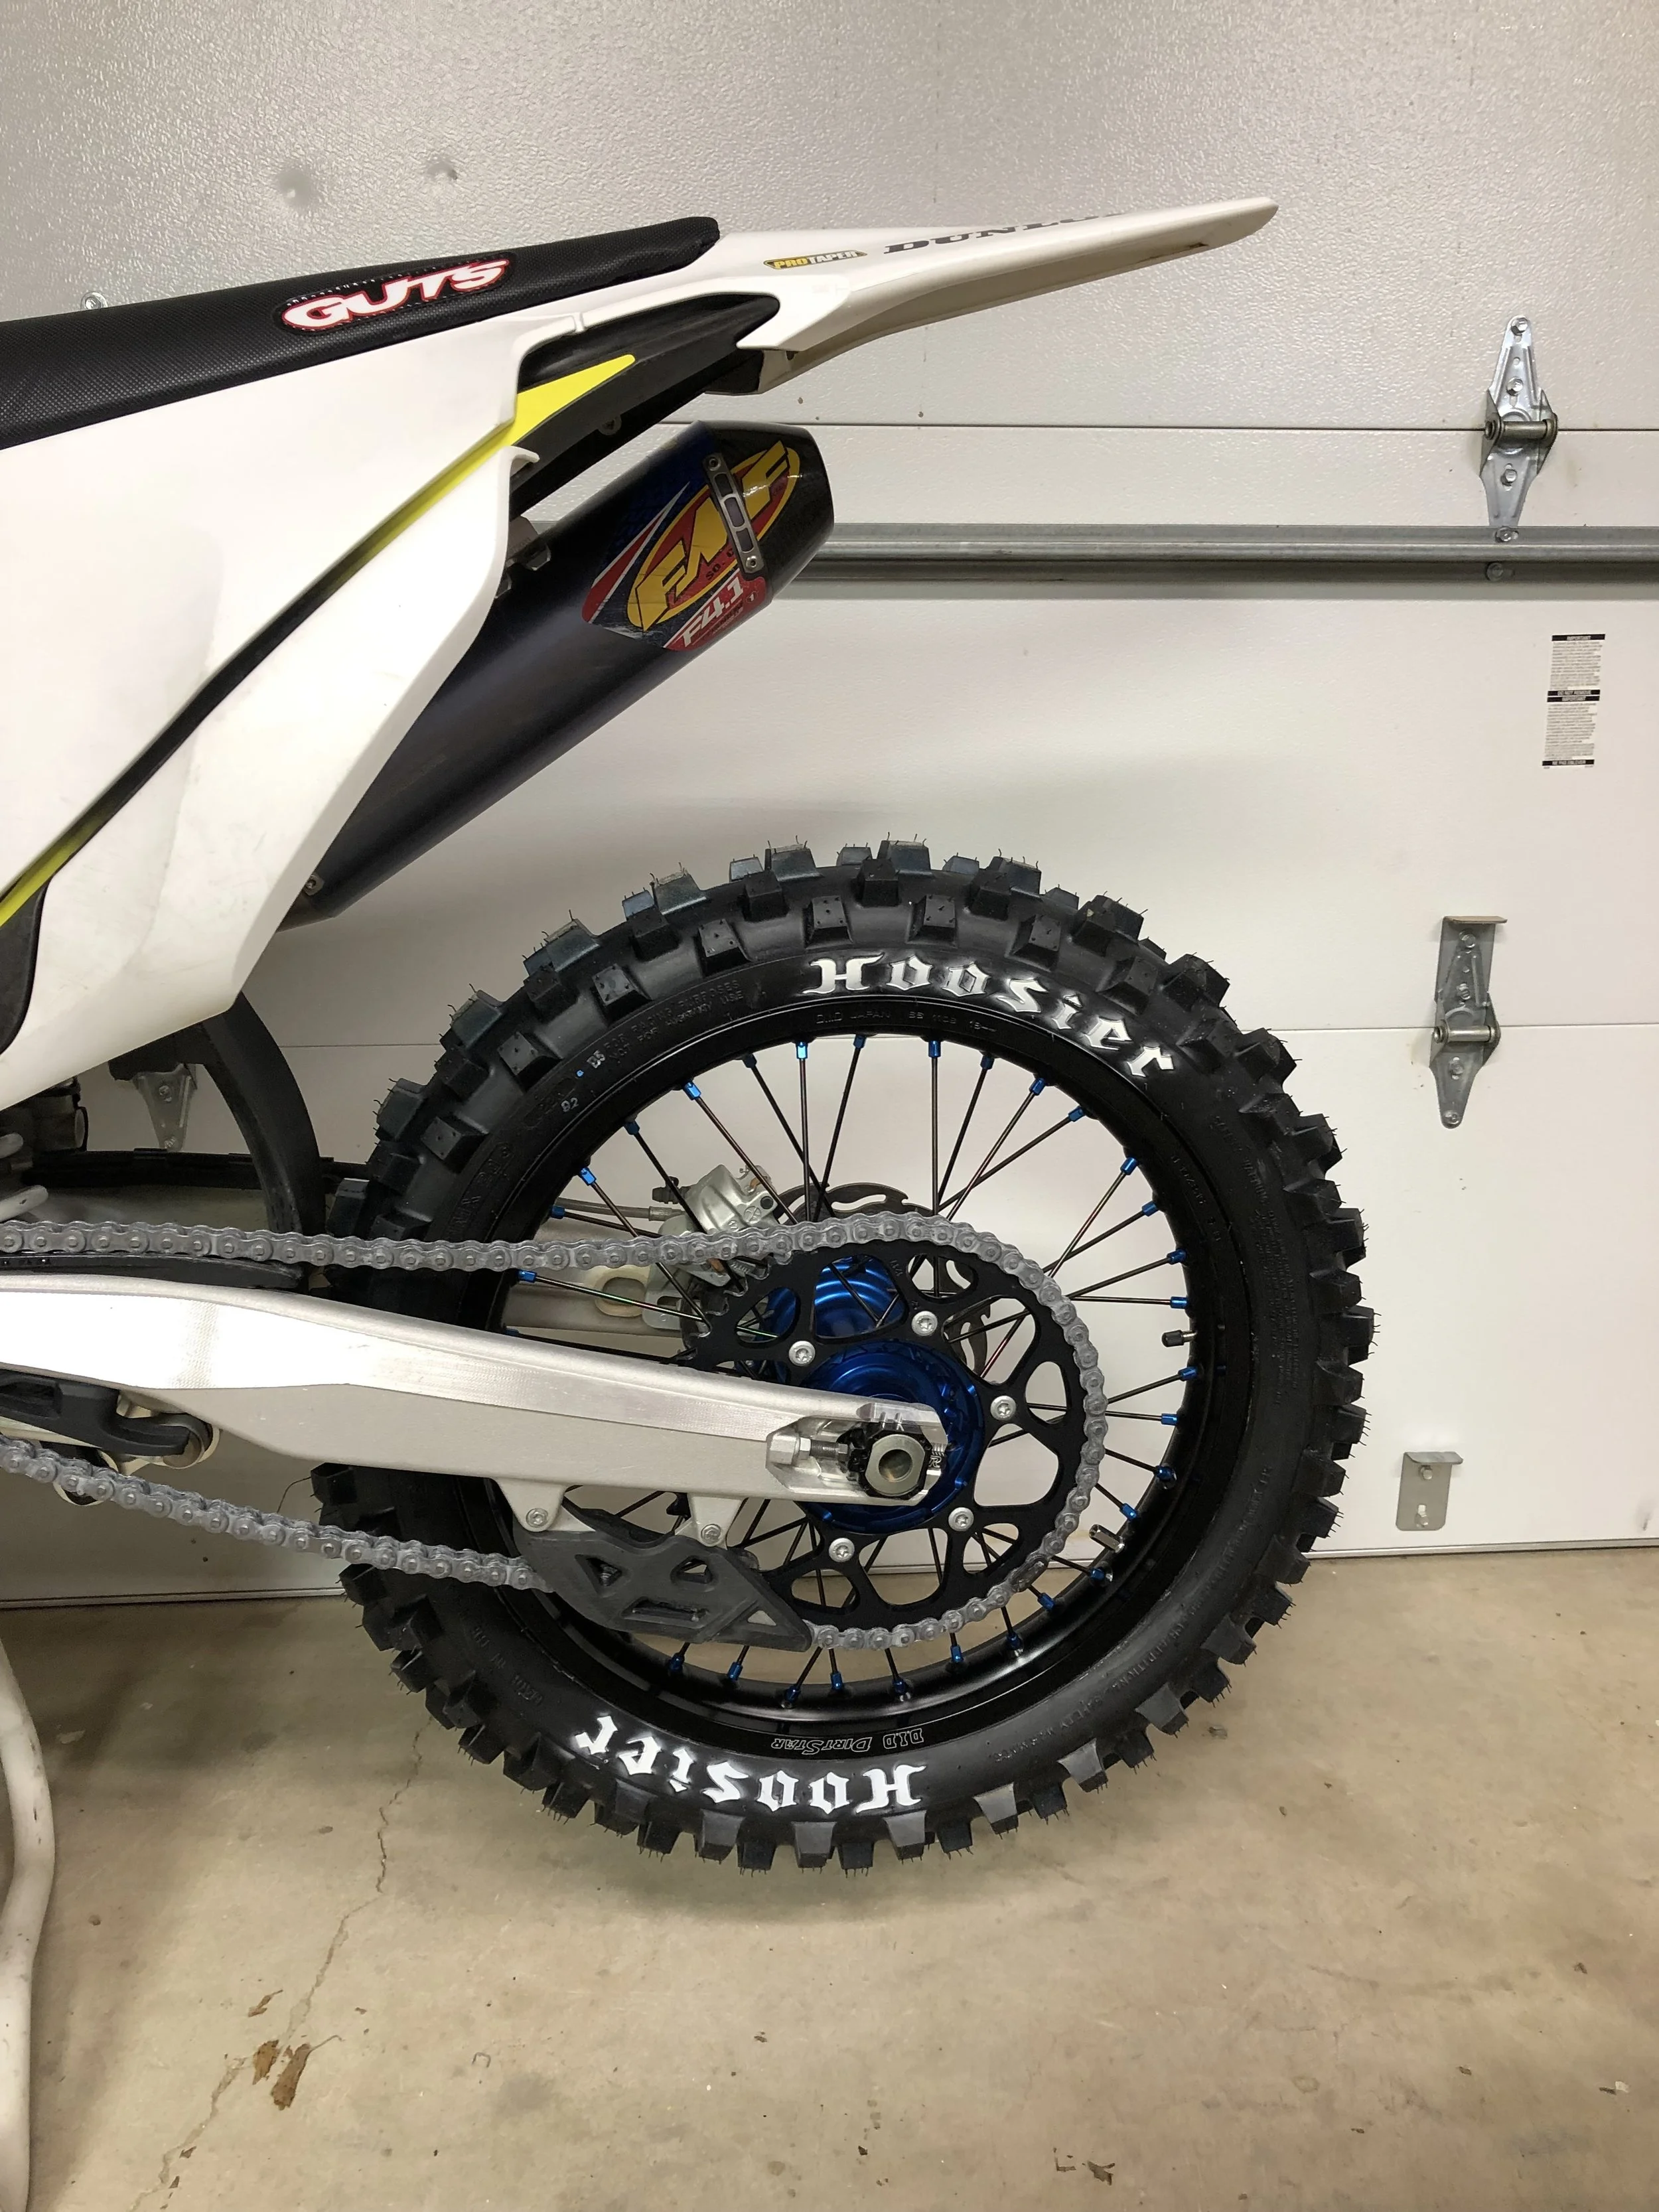
The name Hoosier has been around four wheel racing for quite sometime, but only recently have we become to know Hoosier in the two-wheel motocross market. Hoosier was purchased by Continental Tire in 2016, but since has continued its racing heritage by manufacturing racing tires for many types of racing platforms. Since I have spent tons of time testing tires over my years, I was very intrigued by the tire and the brand’s willingness to enter into the motocross market. Hoosier has no problem claiming that their motocross tires are “racing” tires and should be looked at in that way. I got my hands on a couple sets of Hoosier tires to try, with different compounds, to see if in fact they were good enough for me to purchase some for myself. 

FullSizeRender-8.JPEG

 Hoosier has three different compounds set up for the consumer (MX20, MX25, MX30). They also offer an 18 inch version for you off-roaders, but not a 100/90-19 version yet for you 125 two-stroke guys. Each compound has a different carcass stiffness/feel and is there for the consumer to customize their own set up for what type of conditions or feel he or she rides/wants. I tested the MX25 front/MX20 rear and a MX30 front/MX25 rear compound on a Husqvarna FC450 and Honda CRF450R. If you want to know more about these tires go check out the Rocky Mountain ATV/MC Keefer Tested Podcast right here on keeferinctesting.com or Pulpmx.com to get even further analysis.


Tracks Tested At And Conditions: 

Sunrise Cycle Park = Soft to intermediate terrain.

Private Test Tracks = Hard to intermediate terrain.

Local Riverbed Sand Track = Sandy to soft. 


Mounting: There wasn't anything abnormal that stood out to us when mounting the Hoosier’s on several sets of rims. The Michelin and Pirelli tires go on a little easier, but for how hard the tire feels to your fingers (when pushing on the knobbies/side wall) it goes on relatively well.


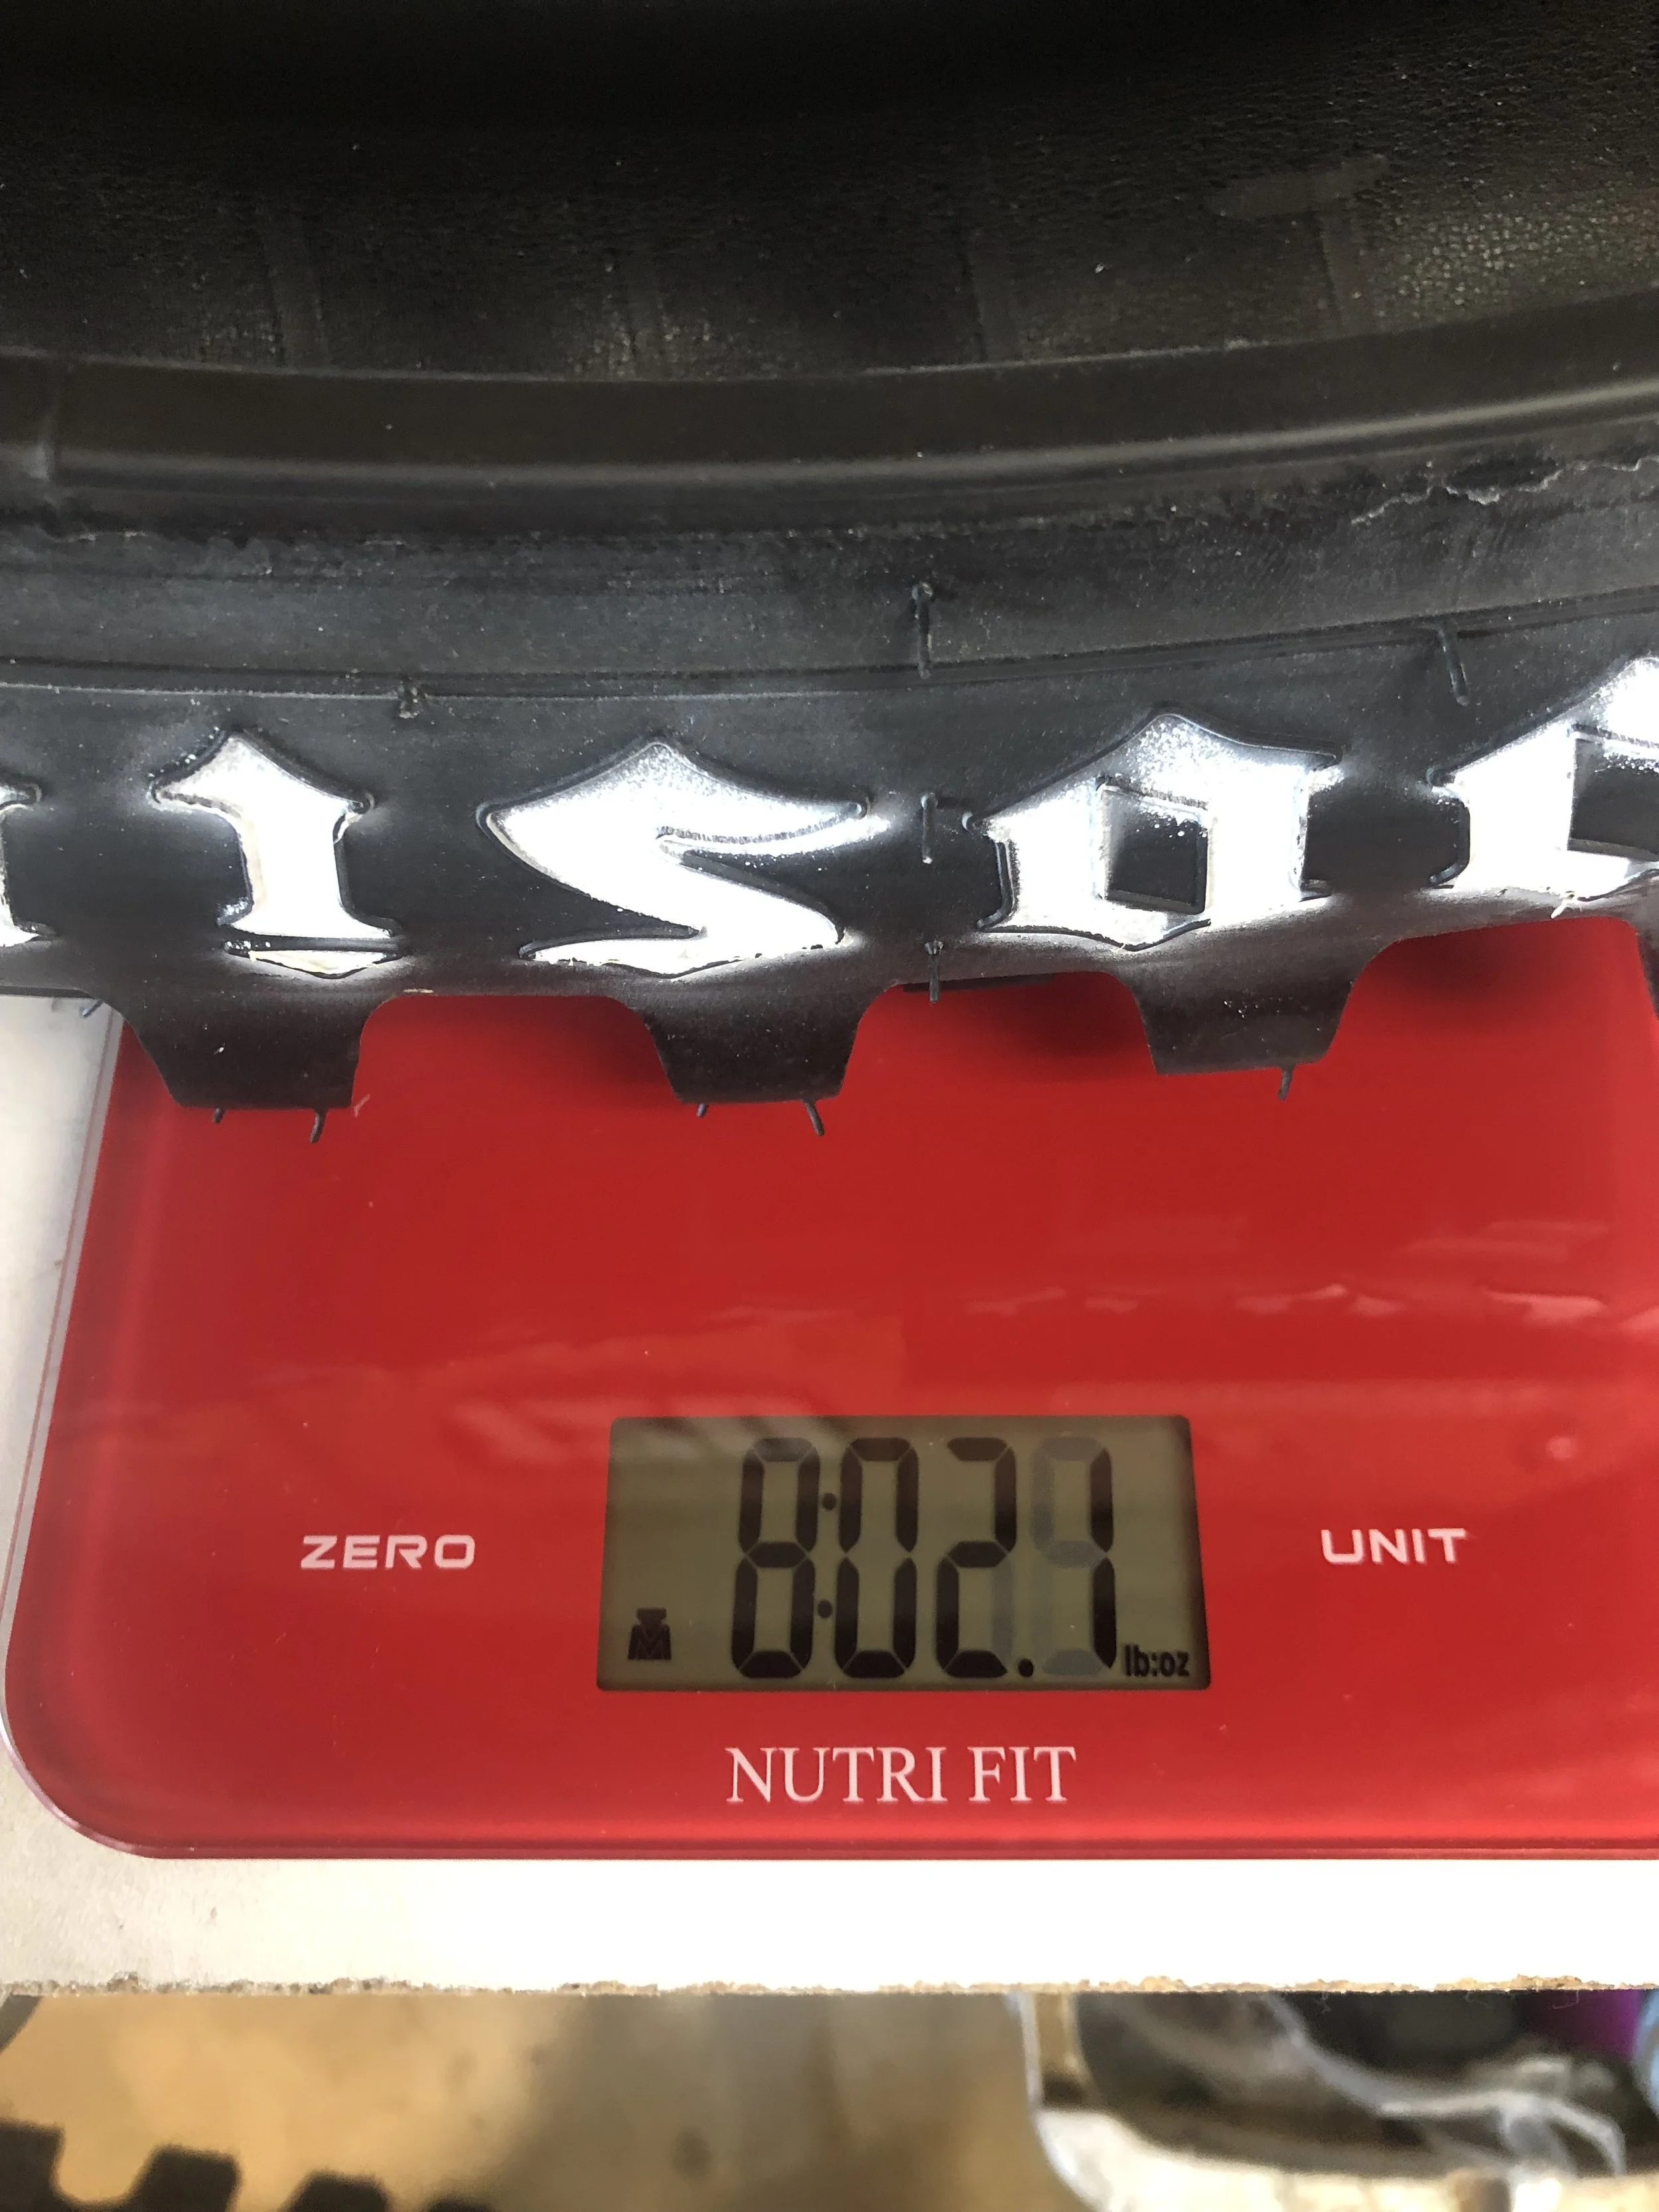
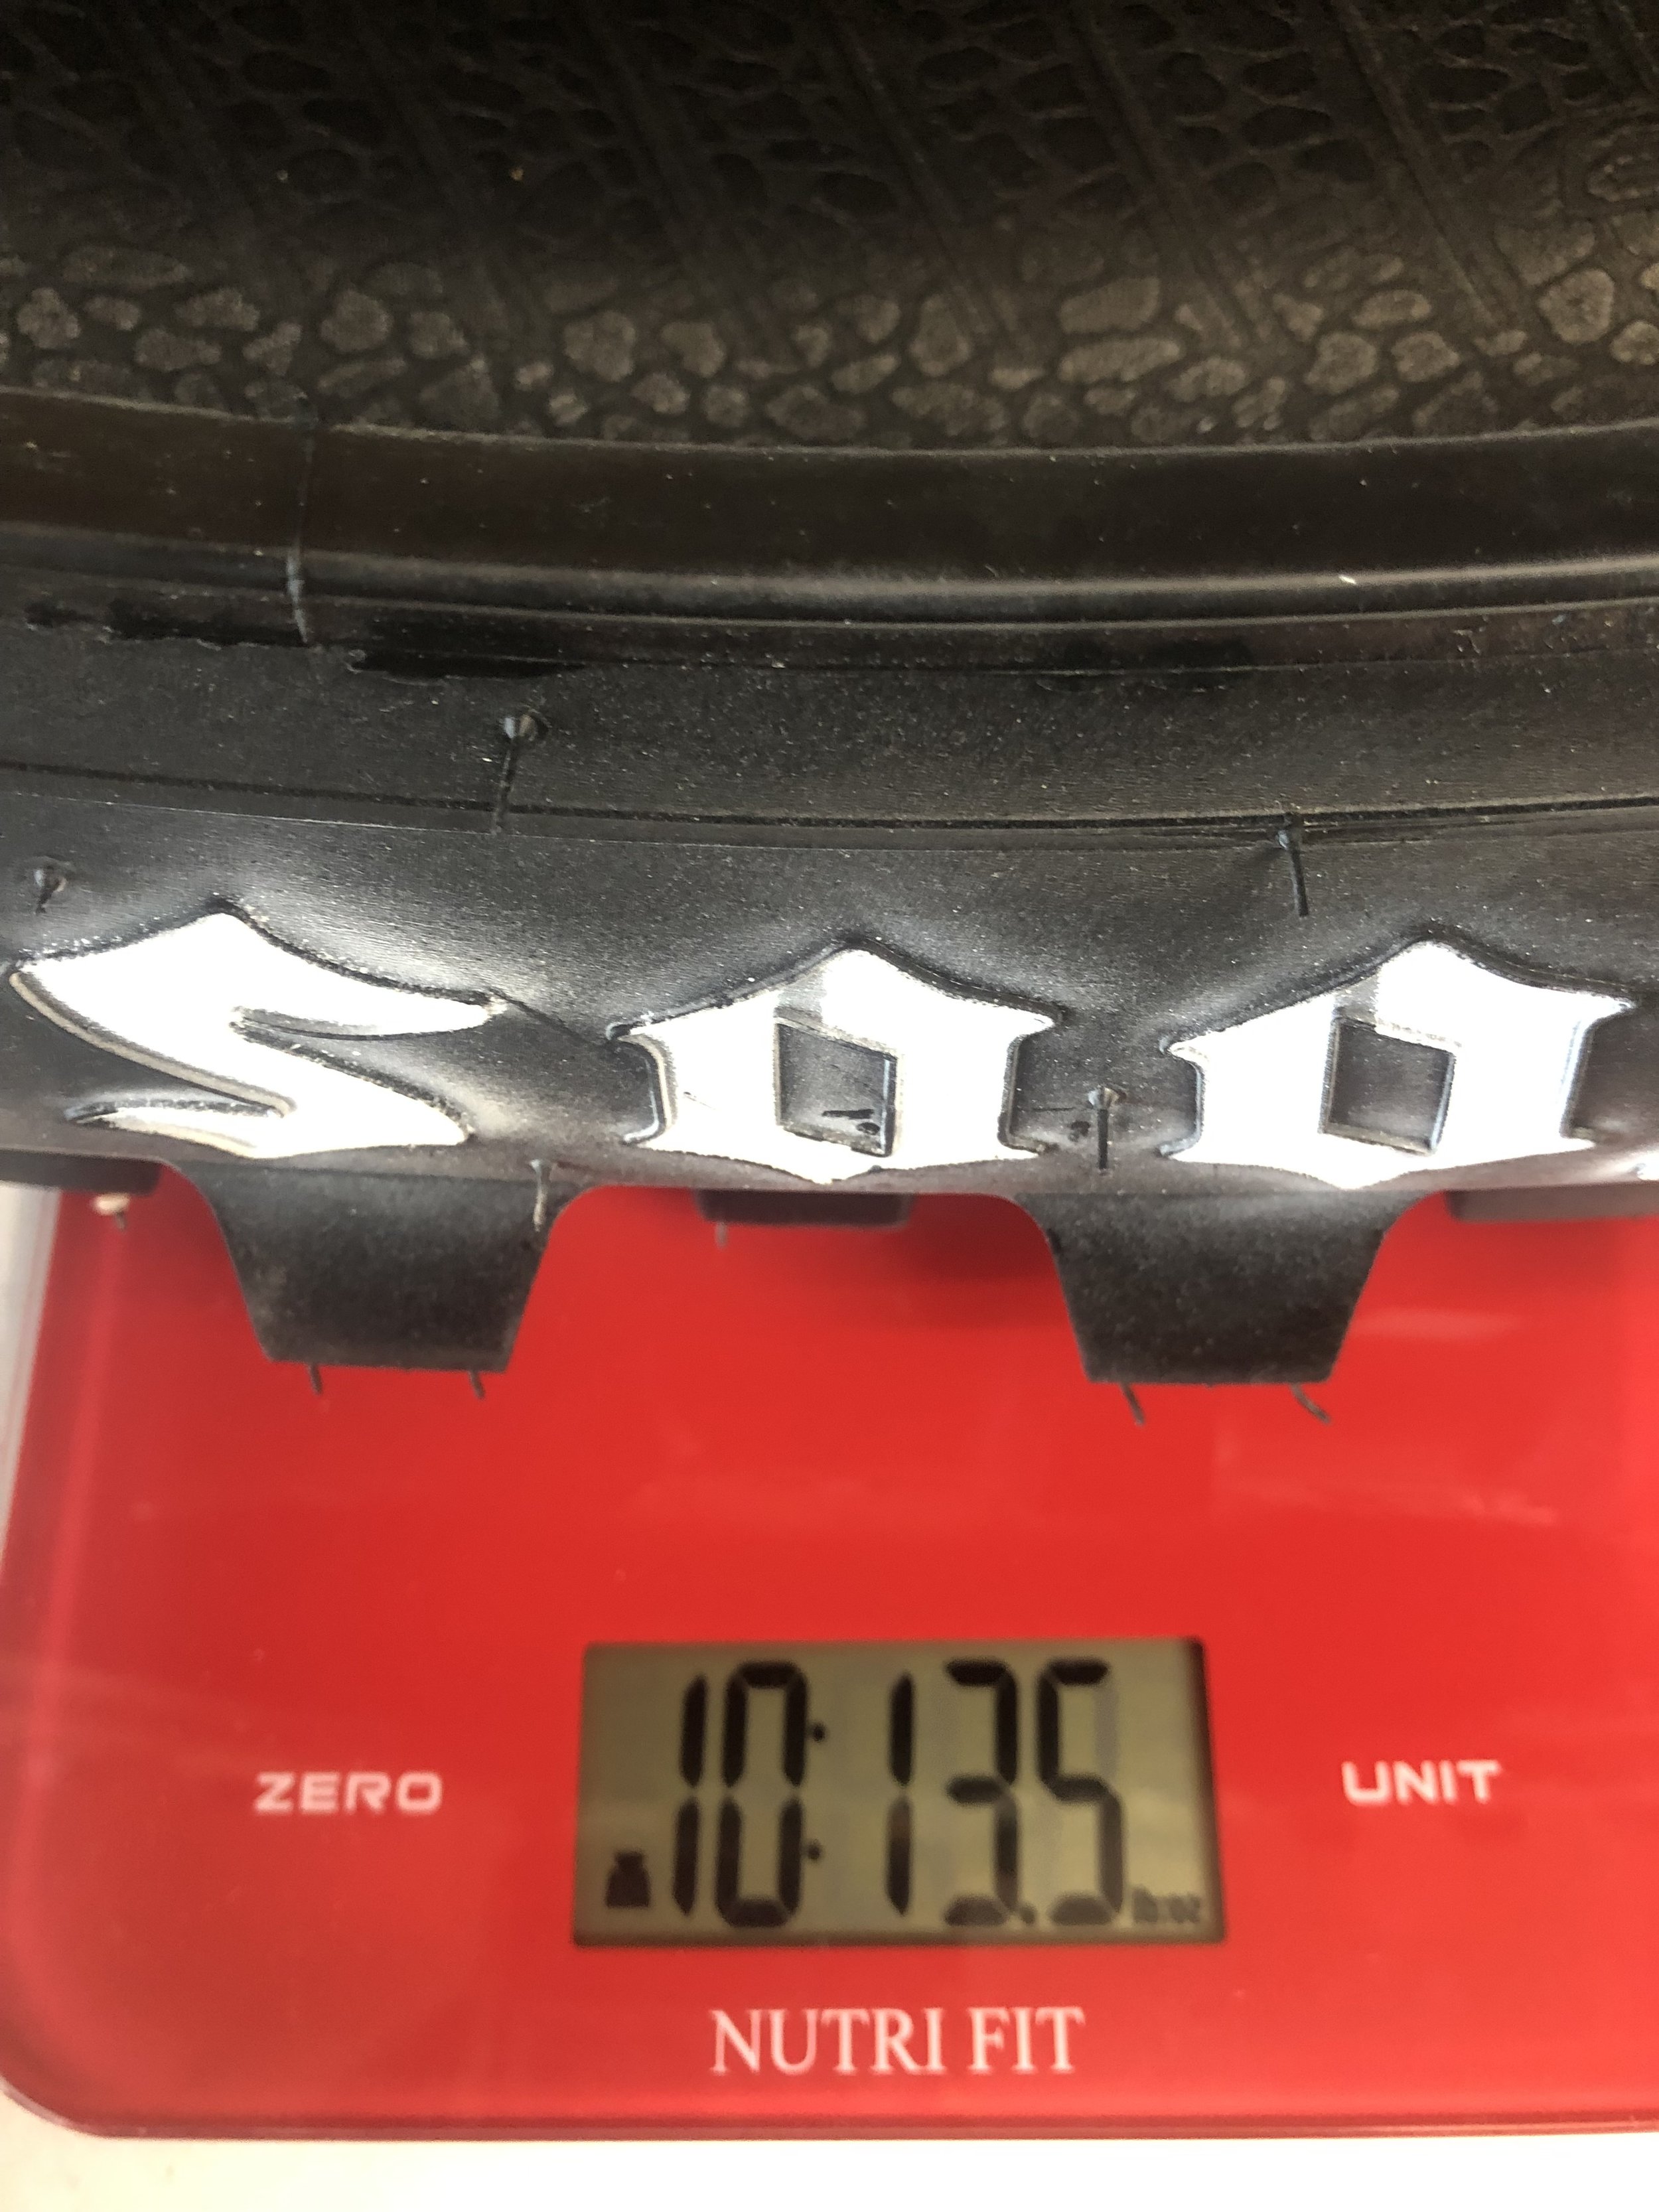
Weight: The Hoosier tires are extremely lightweight coming in at 8.02 pounds for the 80/100-21 front tire and 10.1 pounds for the 120/90-19 rear tire. Compared to a Dunlop MX33 front tire at 9.01 pounds and 12.04 pounds for the MX33 rear tire. 

IMG_5075.JPEG
IMG_5078.JPEG


MX25/MX30 Front Tire Performance:   

I am super picky when it comes to front tires and to be completely honest I haven't had a front tire that I am completely happy with since the Dunlop 756RR. I do like a Michelin StarCross 5 Soft tire, but to me since the Dunlop MX3S is discontinued that’s all I have to choose from. That is until now… The Hoosier MX25 front tire has a carcass feel unlike any other tire on the market. It's soft playable nature is reminiscent of a factory spec tire that I have only had the pleasure to ride on a handful of times. It soaks up a lot of square edge and bumps on different types of soil and acts like a second set of suspension. The MX25 front tire adds front end chassis comfort to a Honda CRF450R, which is huge on this type of a more rigid feeling machine. The MX25 front tire has more lean angle bite (off-throttle) when starting your lean for corners than any other tire I have tested the past few years. As soon as you get off the throttle to enter a rut or berm, you will notice the tire pulls down the front end more while biting the ground (very grabby). This may take some time for some riders to get used to, but I like the fact that it doesn’t have that initial vague feel of a Dunlop MX33. Once the Hoosier MX25 gets into the corners its side knobs work well in a wide variety of terrain (from mild hard pack to soft terrain). I do notice that all Hoosier front tires look/feel wider and taller than other 80/100-21 tires, but in the world of tire sizing, I am told there is a spec range for each size tire to vary from (and the Hoosier MX25 is within spec of the 80/100-21 range). I do notice however once installed the MX25 front tire makes your front end ride a little taller (compared to other manufacturers front tires), which can lead you to adjusting your fork height. I ended up dropping my fork height 2mm’s on the Husqvarna to compensate for the taller front end feel and that helped with balancing the bike out coming into corners. However on the Honda, it actually helped the low front end/stinkbug feeling rear end somewhat. 


To me if you're an aggressive type of rider that pushes the boundaries of the side wall of the front tire you will like the Hoosier’s MX30 front tire’s compound a little more. I found when going to harder clay base types of tracks this tire didn't roll as much on lean angle and provided me with almost as much carcass comfort on square edge/braking bumps. I also liked cornering stability a little more with the MX30 front tire versus the MX25 due to its more predictable/less rolling nature. The MX30’s braking is not as grabby as the MX25, but I am highly sensitive to this (some of you less sensitive riders may not notice). I let my other novice test rider ride both front tires back to back and he couldn't tell any difference on straight/lean angle braking performance. 

IMG_5084.JPEG


MX20/MX25 Rear Performance:


The MX20 rear tire has incredible straight line traction (on-throttle) and gives the Husqvarna and Honda an amazing amount of traction coming out of corners. Lean angle traction was superb when the conditions were soft, but when the track hardened up this carcass felt like it rolled on the rim too much and had a tendency to wash out. Just like the front tire, the MX20 rear tire’s carcass feel has so much comfort, it really makes the suspension on the Husqvarna and Honda have an increased damping feeling that I haven't felt from a production tire. Inside shallow ruts the rear tire’s ability to drift is not as apparent and if you want to brake slide around corners this tire makes it tough to do so. For me I love that feeling because I steer with my front tire, but some of you rear end steering riders may not like this feel. To me this is a pure soft/sand type of rear tire that doesn't like too much sidewall pressure (on intermediate to hard terrain) for aggressive riders. 


The MX25’s tire cushion was just as friendly as the MX20, but also could be pushed harder on the sidewall under throttle. When hard on the gas (on fast sweeping corners) the MX25’s ability to not drift was a welcomed feeling. I could leave the throttle on under lean and not get a rear end wash feel like the MX20 had. Slap down landings on the rear tire was one of the first positives I noticed from the MX25, once I entered the track. Over jumping certain singles to flat didn't give me as much of a harsh feel as other production tires and that gave me less fatigue during a longer moto. Maneuverability or the ability to change directions of the MX25’a knobbies let you make quick line choice decisions without any rear end push. The MX25 just has a comfort level that most tires do not have when the track gets imperfections late in the day. 


How Does The Lack Of Weight Affect The Handling Of The Bike?:

The Hoosier tires are lightweight… Although Hoosier wouldn't indulge too much on how they achieved such a lightweight tire, I will give you some insight on what I feel when I slap a set of these Hoosier’s on (compared to a Dunlop MX33). The Hoosier tires feel unlike any other tire on the market. For how stiff they feel off the bike, they feel extremely soft and supple when riding with them. You really have to pay attention to the tire pressure (of the Hoosier’s) and forget about what pressures you’re running on other tires as well. When pushing into corners I can feel the initial part of the sidewall flex fairly easy, but then get progressively stiffer as more pressure is applied (front and rear). This is a unique feeling and took me a few added laps to get used to, but adjusting tire pressure helps dial in the firmness the initial part of the sidewall has.  


Positives Of The Hoosier Tires:

  • Lean angle traction (MX25 front/rear)

  • Rear tire straight line traction  

  • Carcass feeling

  • Lightweight 


Negatives Of The Hoosier Tires:

  • Knob chunking on MX20 rear tire

  • If worn down somewhat the excellent lean angle traction isn’t as apparent 

  • Tire pressure is critical with these compounds (must check air pressure during the course of the day more)


Durability Of The Hoosier Tires: 

So if you're slapping down $125.00 per tire, I am sure you want to know about durability right? The Hoosier MX20 rear tire will chunk if using it on harder terrain (around the 4 hour mark). I put around almost 10 engine hours on the other compounds (MX 25 and MX30) and although worn, they didn't chunk. The downside to the Hoosier’s is that when the tire gets half worn, the performance drops a considerable amount (compared to a Dunlop MX33). To me the Hoosier is a pure racing tire and should be taken as such.  


Tire Pressures:   

MX20 Rear: 14-15 PSI

MX25 Rear: 13.5-14 PSI

MX25 Front: 13.5-14.5 PSI

MX30 Front: 13-13.5 PSI 


You can check out the Hoosier’s over at hoosierracing.com


FMF Factory 4.1 Slip-On (2019 Yamaha YZ450FX)

Story By: Michael Allen

The simple fact that more manufacturers are offering off-road closed course competition bike’s brings a smile to my face since at heart I’m an off-road lover. That being said I feel like most manufacturers should know that 99% of all off-road racing organizations require race bikes to be equipped with a spark arrestor. Although the bikes are really good in stock trim, this issue has opened up a nice market for aftermarket exhaust manufacturers to be able to come in and save the day while making bikes race legal. I recently ran into this issue when I decided to race our 2019 Yamaha YZ 450FX at a local District 37 Sprint Enduro and realized last minute that I needed a legal muffler. I made a couple calls, but before I knew it FMF saved the day and I had a slip on Factory 4.1 on its way (two days before heading to the race). 

IMG_3591.jpg

When I got the new 4.1 slip on muffler I immediately installed it, which was very self-explanatory and the fit and finish of the stainless can mated to the carbon endcap was top notch. Now here is the part of the story where Kris gave me crap about the spark arrestor… Admittedly I was putting on the muffler last minute and rushing to get all of my stuff ready to race the next day and I did what everyone says not to do; I assumed…. I assumed that the muffler came from FMF with the spark arrestor screen already installed, so I didn’t even think twice before loading up my bike and heading to the race. Well… I soon found out (thanks to my friend Brendon) that I didn’t have a spark arrestor because as Kris warned me about (and I forgot) FMF puts the insert in the bottom of the muffler box, where it stayed in my recycle bin until I got home that night. Luckily I was able to squeak through sound and spark arrestor testing and go to the start line. 

IMG_3594.jpg

Initially what I noticed when I fired the 450FX up was that the new muffler was slightly louder (without the screen insert) than the stock muffler. This slightly louder sound was deeper than the somewhat raspy sounding stock muffler. The performance of the stock muffler was by no means hampering the 450FX power character, in fact it was quite good, but like I said, I needed a spark arrestor. The new 4.1 has a larger opening than the stock muffler, which in turn gives the 450FX slightly less back pressure. With a little less back pressure the FX lost a touch of smoothness in the very bottom end, giving the bike a more on/off feel. The tradeoff for the on/off feeling on the other hand was that the bike gained some over-rev and seemed to pull slightly longer into the RPM range. During the race I changed maps to try and smooth out the bottom end which helped, but didn’t completely remedy the bottom end touchiness. After getting home, going into my recycle bin (thankful the trash man didn’t come) and installing the spark arrestor insert, the bottom end delivery smoothed back out. With the insert comes a quieter sound, which was welcomed as well as some added back pressure. The back pressure gives this bike a little more lugability without wanting to flame out, so I didn’t have to worry as much about covering the clutch in tighter sections of the trail. 

IMG_3590.jpg

The bottom line is that all bikes marketed to off-road racers should come with spark arrestor inserts, they don’t. That being said, FMF has done a great job at providing the off-road community a multitude of choices for whatever their specific type of riding entails. From full titanium systems, to more affordable aluminum slip on mufflers, FMF seems to have all the bases covered. At $449.99 for the stainless/carbon slip on that I installed, I think it’s a good combination of not breaking the bank while still looking slick at the track (not to mention that it takes almost two full pounds off your bike). If you have any  questions, or just want to tell me I’m a dumbass for not seeing the spark arrestor in the box, feel free to reach out to me at Michael@keeferinctesting.com . 

Rekluse Torque Drive Clutch Pack

I am hard on clutches. Why? Well…Instead of letting off the throttle when the front wheel starts to loft upward, I simply just slip/drag the clutch a little to modulate the power, so I can get to point A to point B in a faster manner, without letting off of the throttle. This way of riding puts a lot of strain on the clutch and the plates that are inside any given bike’s engine. I usually can get anywhere between 8-10 hours on a Yamaha YZ450F clutch and the boys at Yamaha are frankly sick of handing me clutch plates every other week. We have tested the Rekluse Torque Drive kit in our Honda CRF450R. However, if you do not want to spend that kind of money on your clutch, Rekluse offers a Torque Drive Clutch Pack that utilizes the OEM clutch parts that replace your stock fibers, steels, and springs with their thinner plates and basket sleeves. 

IMG_5184.JPEG

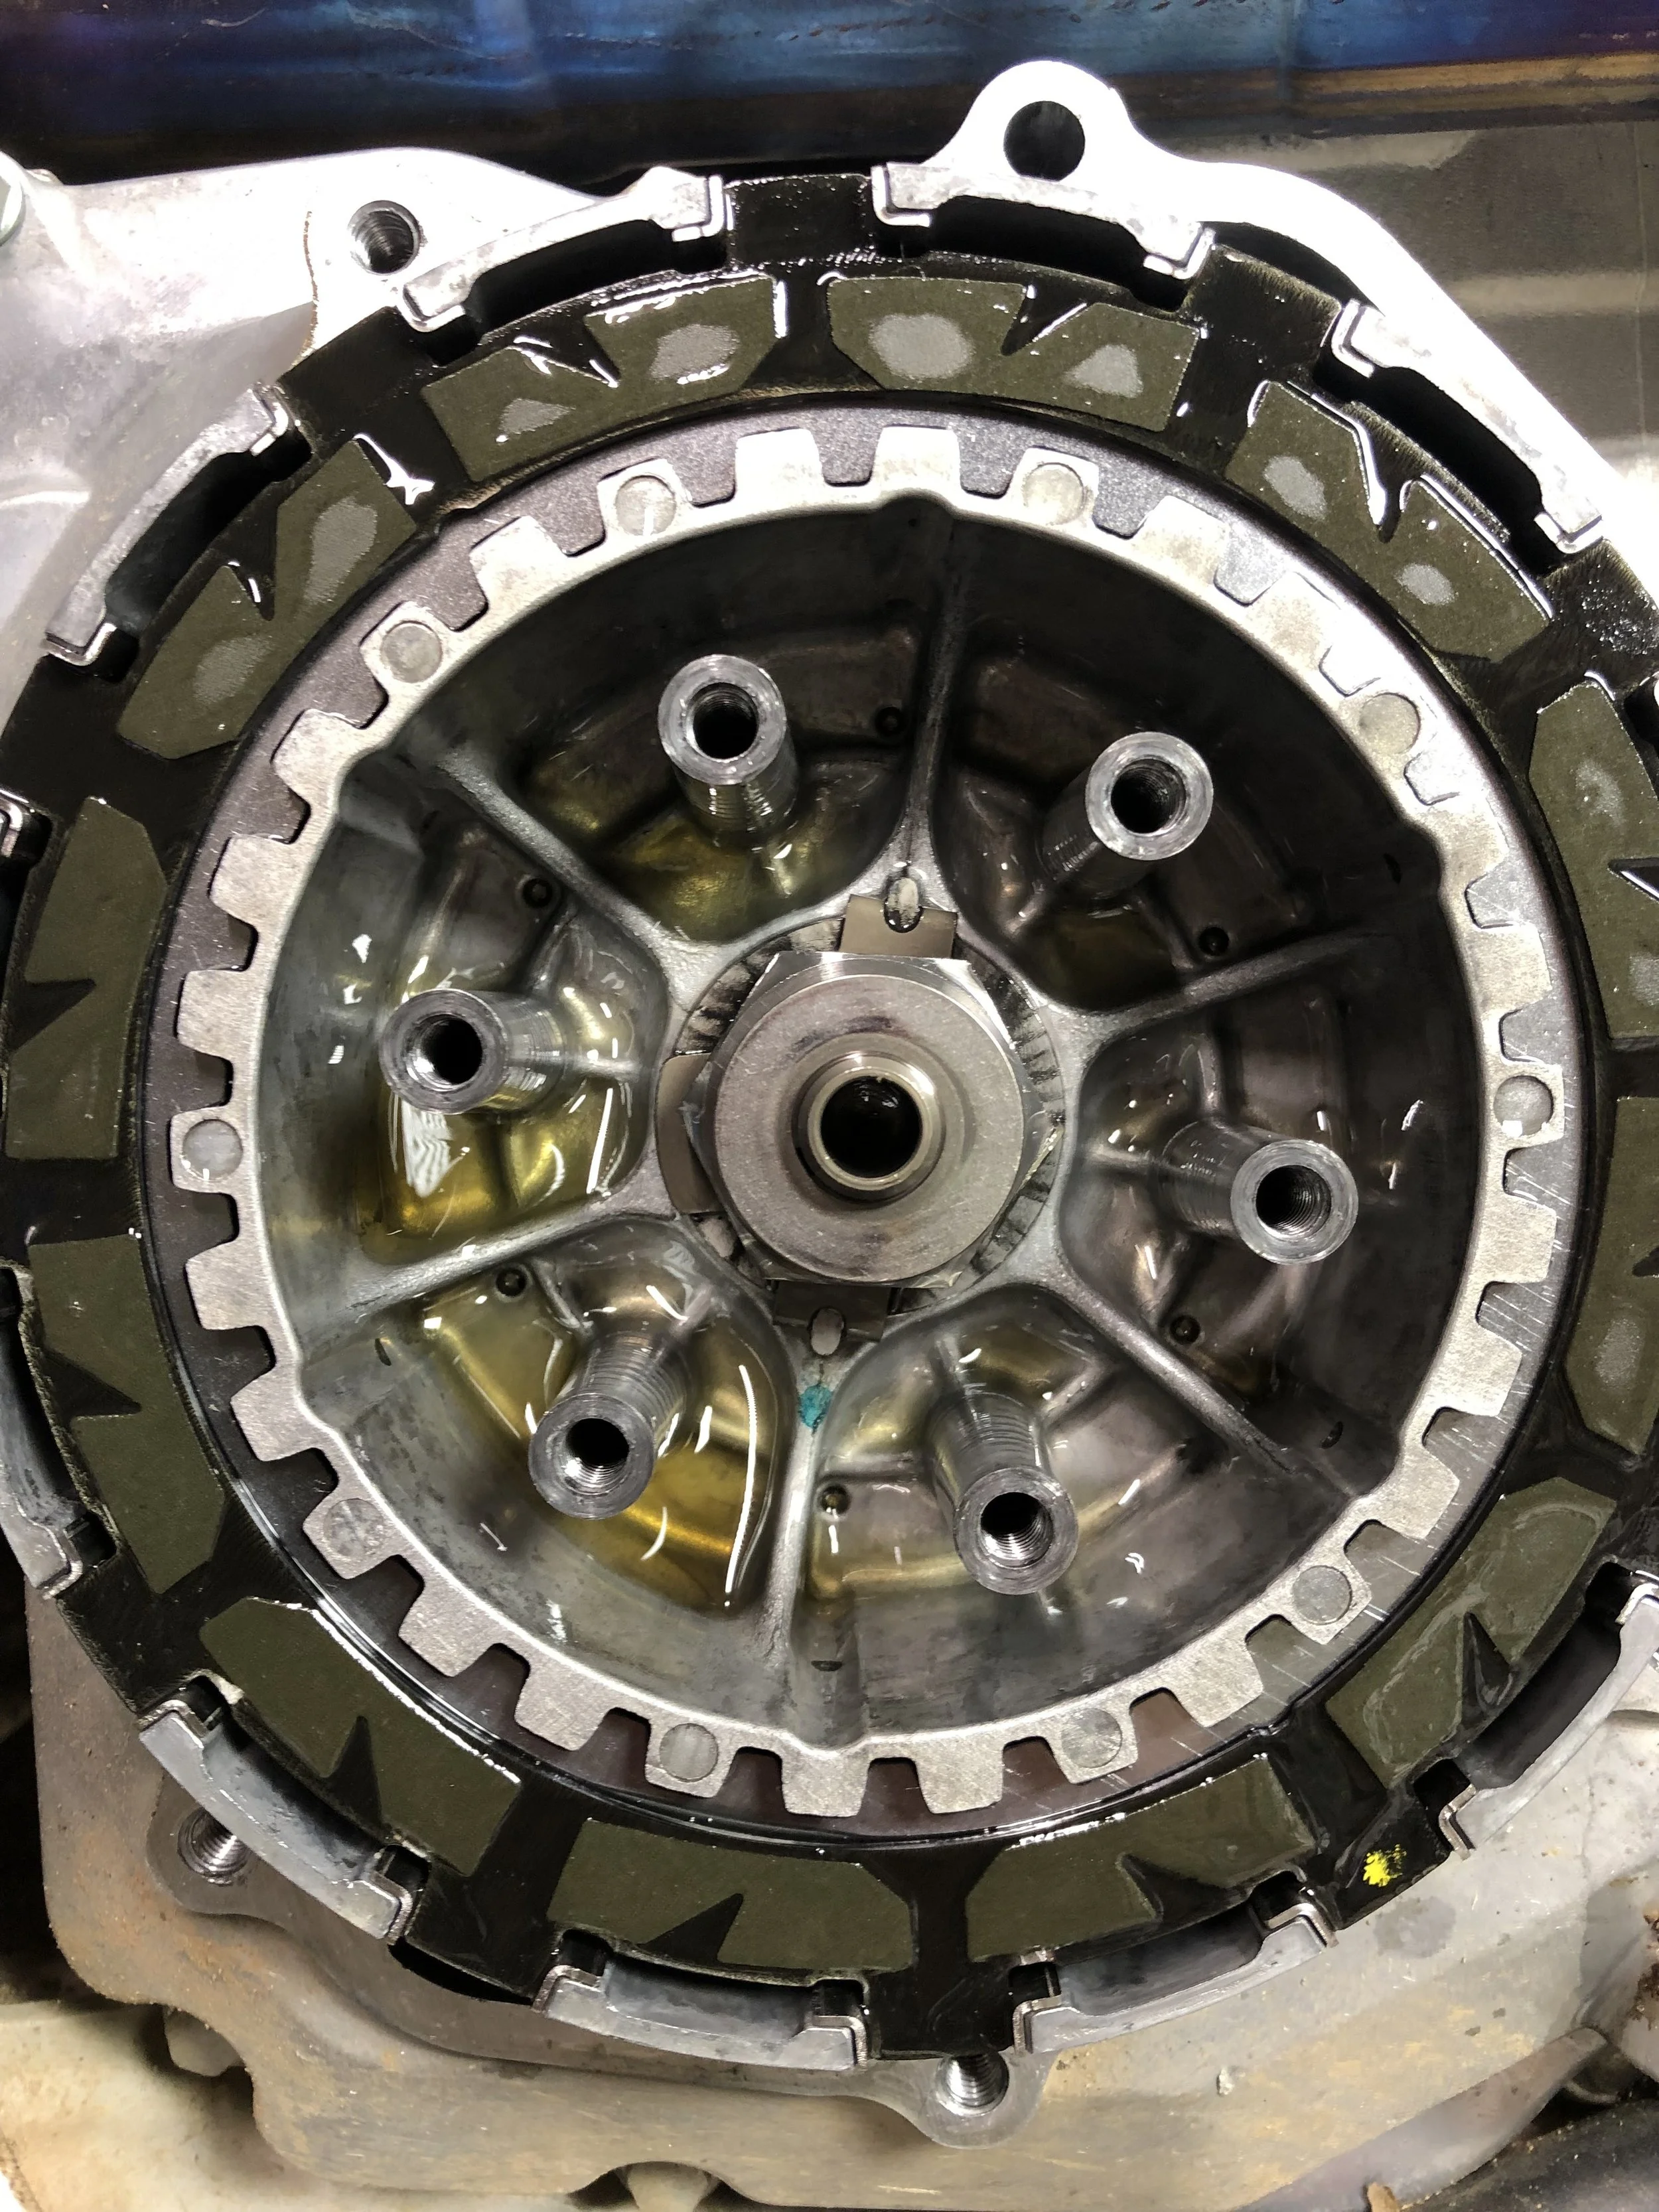
The Torque Drive Clutch pack on the Yamaha YZ450F utilizes 12 friction plates, 10 steel plates, six springs, and steel basket inserts to fit over every finger of your clutch basket. The idea behind Rekluse’s clutch pack is to use what they learned with their Torque Drive system and put it into an OEM platform. Rekluse is setting out to increase your OEM’s clutch capacity by increasing the number of plates, so you can get more of a positive connection at the rear wheel (AKA less slipping). 

I wanted to do this test and run the stock clutch and Rekluse clutch back to back, so I started the test with one moto on the stocker and one moto with the Rekluse. The clutch pack doesn't take much time to install, but be careful sliding the steel sleeves onto your basket as sometimes they can be slippery. You don't want to be fishing sleeves out of your engine/clutch basket all day. Once installed and out on the track (with the Rekluse) the first thing I noticed is a lighter clutch pull feel than the already fairly light feel of the Yamaha YZ450F. After doing my first 25 minute moto with the Rekluse I could tell that there were some improvements in performance. Coming out of corners I could roll on the throttle without modulating/covering my clutch because I had increased positivity to the rear wheel. With the Rekluse I also felt like I had a small increase in throttle response from 0-10% throttle opening. There wasn't much of a torque/pulling power increase, but I did notice (at crack of throttle) the Rekluse had more bite/snap. The good news about getting this extra response is that it didn't affect control or power delivery through deep ruts. 

IMG_5185.JPEG

The clutch engagement however was little more grabby on/off feel than the stock one, but wasn't so bad where I couldn't feed my clutch properly while doing starts. The real benefit to me was the lifespan of my clutch in two aspects. One aspect is the toughness this clutch pack has in longer motos (Testing Term: Track Toughness). Since it’s been raining a lot in Southern California I have been testing on sand tracks more than usual and the Rekluse Torque Drive Clutch Pack has provided me with less clutch drag when the engine heats up. I love to run third gear through corners, lug coming out, slip the clutch while exiting, and start to accelerate down the straight. Doing this puts a heavy load on my engine and the Rekluse Clutch Pack allows me to do this more without getting the plates too hot to where they start slipping during a moto. The second aspect that the Rekluse has sold me on was the overall lifespan that I am able to get out of the Rekluse. I have used the Rekluse Clutch Pack almost 14 engine hours and am just now starting to feel it slip/drag. I am getting a six hour increase in life, which is huge for me! 

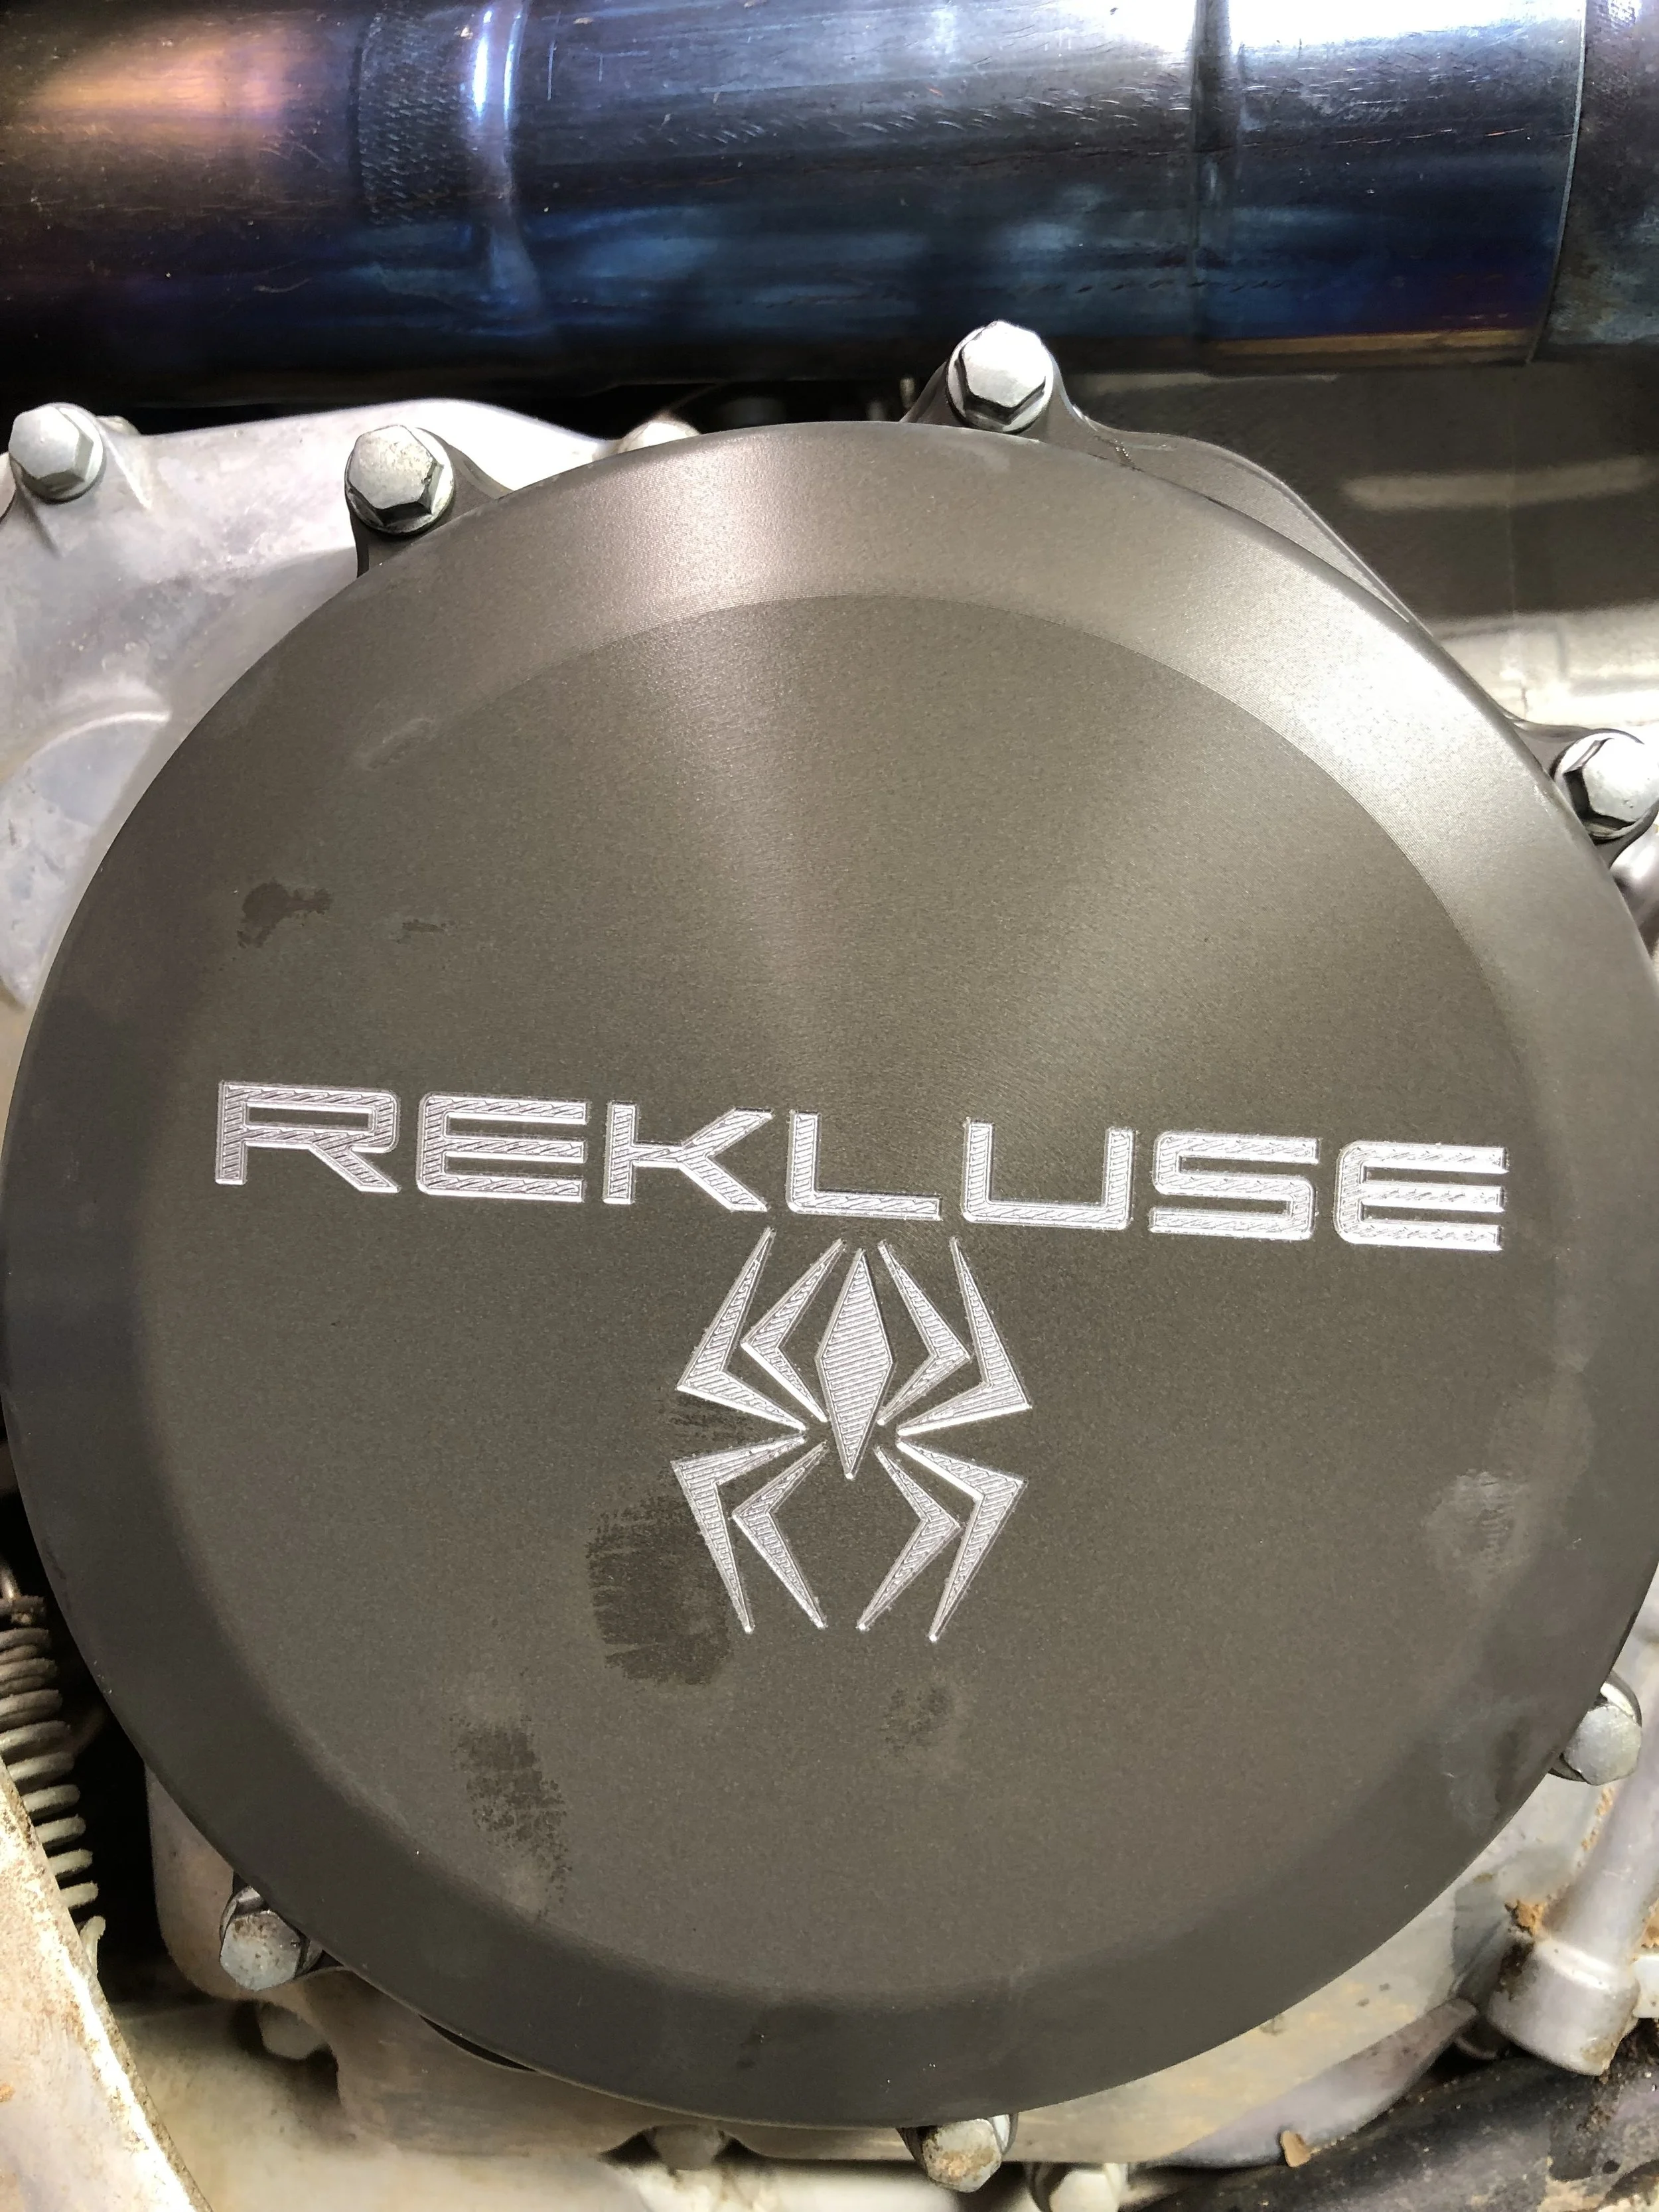
The only downfall to the Rekluse Clutch Pack is that it is more expensive than buying an OEM clutch kit. At $349.00 it’s over a $120.00 more, but then again, you will be getting more life out of a Rekluse Torque Drive Clutch Pack than your OEM plates. The cool looking Rekluse cover (which you don't need with the kit) doesn't come with the kit, but if you want to bling out your steed, the cost for the cover is $159.00. If you're hard on your clutch or maybe you're a hard core racer that wants the benefit of a Torque Drive clutch without the cost, the Rekluse Torque Drive Clutch Pack is an excellent purchase.

Hinson Nine Plate And Rekluse Torque Drive Clutch Comparison

I originally wanted to do a Hinson versus Rekluse clutch test for the 2019 Honda CRF450R, but after going back and forth for a few weeks (testing these parts), I decided that both of these mods are such an improvement over the stock clutch system, that there shouldn't be a “winner”. Each clutch has a specific character/feel on the track, but both are equally as impressive and much better than the stock system. Since we had to purchase our own 2019 Honda CRF450R test bike this year, I wanted to really try/test quality upgrades, that this bike absolutely “needed”, since we would be having to sell this unit at the end of the year. The 2019 CRF450R “needed” a clutch upgrade and so this evaluation process was born. I let my resident mechanic/blue collar test guy Matt Sirevaag install and ride with each clutch system initially and then I tested each to get my impression. This article is based on what we thought collectively, but if you want to hear even more background/feedback about these parts, check out the Rocky Mountain ATV/MC Keefer Tested Podcast that will be up very shortly. -KK


 For years Hinson has been one of the go to clutch manufacturers for factory motocross and off-road race teams. In the last few years Rekluse has been making a name for itself as they are now on a ton of race teams in any given paddock as well. So when it was time to install a clutch in our 2019 Honda CRF450R test bike, it only seemed right to ring up Hinson and Rekluse to see what they had to offer for a bike that needed help in this department. Hinson sent us their complete nine plate clutch kit (part # HC989-1901 ) that adds two extra friction plates (to a total of nine), while the stock Honda CRF450R uses seven friction plates. The Hinson complete clutch kit comes with a new clutch basket, inner hub, pressure plate, fibers, steels, clutch springs and let’s not forget the icing on the cake, a billet proof clutch cover. This is a complete kit that replaces all of your stock clutch components. 

IMG_4216.jpg


Rekluse sent us their Core Manual Torq-Drive clutch kit (part # RMS-7101002). This kit goes a couple steps further using twelve friction plates. Yes, you read that right twelve plates! The Rekluse Torque Drive Kit comes with inner clutch hub, Torq-Drive friction plates, thin steels plates, pressure plate, core clutch springs, spring screws with screw sleeves, basket sleeves, new tab washer, and a beautiful Rekluse clutch cover.

IMG_4217.jpg

When it comes to the 2019 CRF450R there are a couple items that can be addressed to improve the clutch. It has been well known that Honda has not exactly led the 450cc class in clutch life and/or in the clutch lever pull department. These have been weak points on the Honda CRF450R for quite sometime and usually the bike gets ranked down in shootouts because of it. Honda has made progress from their old four spring clutch as the new CRF450’s have gone back to a six spring clutch. The stock 2019 CRF450R clutch has a very narrow window of engagement and is tough to really get a linear engagement/progressive actuation when attacking the track. This makes it very hard to modulate the power in corners as the clutch makes the power similar to a light switch that has an on or off type of feel. I am sure most of you Honda guys can relate as our email inbox has seen a flood of Honda clutch questions. The clutch pull takes He-Man type strength and can expedite arm pump in a moto, which sucks huge for us blue collar riders! With a narrow window of clutch engagement and a very hard clutch pull it really makes it difficult to manage the power (of the Honda), especially late in the moto as fatigue starts to set in. The stock Honda clutch also tends to fade as the moto’s get longer and if you're a clutch dragger like Keefer is, things can get ugly (or hot) in a hurry. This leads us to clutch life; I am not even close to what you call a clutch abuser (like Keefer), but I have always taken pride in the life I can get out of a stock clutch on other machines. With this Honda CRF450R I even showed signs of wear and slightly burnt clutch plates at less than twenty hours. This was a problem that needed to be addressed. 

Besides riding these dirt bikes, I love working in the garage and wrenching on them. When the Hinson package arrived I told the wife I would be eating dinner in the shop and I began to tear into the 2019 CRF450R’s clutch. Just be forewarned that this Hinson system is a more in-depth install then just changing out clutch fibers and steels. There are some special tools needed to help with install of the clutch basket. Besides your basic hand tools you will need a clutch hub holding tool to remove and Install the new clutch hub. Also needed is a drill or grinder to remove the primary drive gear from the stock hub, so that you can re-install it onto the new Hinson billet hub. Hinson provides great instructions with pictures, which are very helpful for you novice mechanics out there (cough, cough, Keefer). Lastly don’t forget to use your OEM Owners Manual to provide you with the correct torque specs. Hinson also states adding 300cc more oil than stock, so 1300cc without changing an oil filter and 1350cc with oil filter replacement is your new levels with the Hinson Kit.

IMG_3143.jpg

The first test of the Hinson clutch system was during the Dubya USA Vet Nationals at Glen Helen. Right off the bat I noticed that the clutch pull was slightly easier, which made me happy right away. The second positive aspect of the Hinson clutch that I noticed was that the engagement of the clutch was not nearly as narrow (or on/off) as the stock clutch. I feel this was the best part about the Hinson set up because it really helped open up my corners. I now had a clutch that I could easily modulate the power of the Honda’s engine character without shutting off the throttle. Most times with the stocker I would have an issue with the front tire jumping out of ruts or wheeling right out of a corner because I had trouble with the on/off engagement feel. However now I found myself rolling through corners with more speed and confidence knowing that I was hooking up better. The Hinson gives the sensation of added rear wheel traction and a more connected feel to the track. I didn’t notice any clutch slippage or jutter while abusing the clutch during motos and Keefer even mentioned that he could ride/slip the clutch (during his 30 minute motos) without the clutch fading.

The Rekluse Torque Drive clutch install is easier and at the same time harder to install than the Hinson. Why? Let us explain… It’s easier in a sense because you are using your stock outer clutch basket, which means there is no need for any grinders. It’s slightly more difficult because there are a lot more moving parts like the basket sleeves, which will test your patience, while installing the fibers and steels. Having said that the other important part to pay attention to is the Rekluse Torque Drive starts and ends with a steel plate, not a fiber. Another difference from most clutch kits is that Rekluse provides (in the kit) three different clutch springs to help tailor the clutch feel/delivery to the rider. Silver giving you the easiest clutch pull, gold, and then red being most aggressive with the hardest clutch pull/bottom end hit/delivery. You can run three silver and three gold or three gold and three red to really help get the clutch feel/power delivery that you prefer. I decided to go with three silver and three gold springs in hopes to help clutch pull feeling at the lever. Just note that the stiffer the clutch spring the harder it is on your transmission under heavy load (acceleration).

IMG_4215.jpg

As I rode to an undisclosed location (Keefer’s Test Track) with the Rekluse Torque Drive I immediately noticed a much better lever feel than stock and a slightly lighter pull than the Hinson. As I made my way around Keefer’s new test track or I should say turn track, I noticed that the Rekluse has a wider window of engagement than the stock clutch, yet very close to what the Hinson had to offer as well. This makes it a lot easier to modulate the power of the Honda just like I mentioned above. You can really slip the clutch and feed the power better to the rear wheel. This gave me a new found confidence as I was able to cover the clutch and keep the Hondas front tire from lifting out of corners (similar to the Hinson). If anyone knows Kris, you know that you’re always on the clock when you’re riding, which meant thirty minute moto’s to test the Rekluse’s durability. As it neared the end of each moto (which we did over the course of several weeks) the feel at the lever stayed consistent and never seemed to fade on either Kris or I very much at all. Messing with the lever play while riding was minimal and Keefer even mentioned that he barely had to adjust the free play during his sand motos. As with the Hinson, the Rekluse clutch definitely got the power to the ground and gave both of us a little more snap (bottom end response) out of corners. The Rekluse got the power to the rear wheel better than the stock unit and nearly as good as the Hinson. The only difference we both felt was that the Rekluse had a little more bite (or pop/excitement) out of corners than the Hinson. The Hinson had slightly less bottom end hit than the Rekluse, but had slightly better rear wheel traction. The Rekluse made the Honda feel more exciting and playful out of corners without sacrificing traction. Both clutch kits provided much better power delivery/traction than the stock system and have lasted much longer as well. Another positive attribute of the Rekluse Torque Drive is that it actually improved the recovery time of the engine when I found myself in the wrong gear (mostly third gear in tight corners). With just a flick of the clutch the Honda’s engine was right back in the RPM it was supposed to be in.

IMG_4218.jpg


This was a very educational test for me as I have never tested or used an aftermarket clutch in any of my bikes. Keefer thought it would be a great way for both of us to feel the differences between two companies that know a thing or two about clutches. The Hinson and/or Rekluse Torque Drive clutch systems are just what the Honda needs. They both improved performance as well as reliability, which to me is the most important piece to this test. I am a blue collar type of guy that works to put food on the table for my family, not pay for unwanted parts/bling for my dirt bike.

Hinson’s nine plate clutch kit retails for $1,184.99 and is not exactly what you call inexpensive, but to us, this Hinson Nine Plate set up could pay for itself if you’re hard on clutches like Keefer is. The Rekluse Core Manual Torq Drive retails for $899.00, but since you re-use your stock outer clutch basket, we can see why this costs less (than the Hinson). If I was to go purchase a clutch for my personal Honda, which this one kind of became, I would choose either one of these because they both fixed my two major gripes with the stock 2019 CRF450R clutch. Either one is a great choice, it’s just a matter of how much money is in the ol’ bank account. -Matt Sirevaag

If you have any questions or concerns about either of these products feel free to email kris@keeferinctesting.com and he can hopefully guide you into the right purchasing direction.


Pro Tech Wrap Around Fork Guards


Not only motocross riders, but ALL motorcycle riders alike can agree on one thing; there is almost nothing worse than going to load up your bike to go ride and noticing a leaky or blown fork seal. CRAP! There are two main ways fork seals end up leaking; one is from letting mud dry on your fork tubes, then going riding and forcing the dried mud into the seal, which tears the seal. The other is from small rock nicks on the fork tube, which can create sharp high spots that tear the fork seals as well. 

Pro Tech is a company out of the United Kingdom that reached out to us to test some of their fork guards that are meant to help keep your fork tubes a little more out of harm’s way. Pro Tech noticed that modern day fork guards on production bikes are very bare and exposed on the back side, that leaves the fork tubes susceptible to being chipped by rocks/mud. Along the lines of what KTM used to do with their full wrap around production fork guards, Pro Tech designed their guards to wrap slightly further around the back of the fork leg, which made for an easier installation process than the old KTM guards. I mean it’s fork guards people, let’s not make it rocket science to install right? The theory is that with less area for rocks to get past the guard there is less of a chance at damaging the fork seals. 

IMG_3572.jpg

We used these guards first on our 2019 KTM 450XC-F test unit seen zero nicks/chips on the forks when we took them off. The next bike we put them on was our KTM 300 XCW TPI and after riding in plenty of mud, following other riders at speed on high speed gravel trails, we have yet to have a fork seal failure. The guards come with all the necessary mounting holes and/or clamps to hold the front brake cable or trip meter wire to the guards as well as coming in a few different color options. The fit of the guards are spot on, but I don’t think they look quite as good or have the quality of production fork guards. However, to me, if they truly make the seals last longer it’s worth the slightly less looking quality. Most production fork guards plastic structure feels sturdier to the hands compared to the Pro Tech guards, but the PT guards didn't break or crack under the normal bush whacking we do out here in California. One other area where the Pro Tech guards are lacking is in the diversity of brands. So far they only offer guards for KTM, Husqvarna, Sherco, and Honda, but after talking with Pro Tech they told us that the next step is to make guards for more models as long as the demand is there. Although we don’t get that much mud on the west coast, I have put a lot of hours on these guards and like previously stated, I haven’t seen an issue yet. For around $50.00 they are a relatively inexpensive way to protect your forks a little more. If you want some extra insurance on those long off-road or muddy motos maybe this could be an option for you riders out there. You can check out Pro Tech at https://www.protechguards.co.uk/ to see if they have guards for your machine. If you have any questions about the Pro Tech fork guards feel free to reach out to me at Michael@keeferinctesting.com

IMG_3570.jpg

Keefer’s Thoughts: I was told that KTM went away from the wrap around fork guard for production because of mud collecting near the tops of the fork guards at times. When we tested those models (that I had the wrap around fork guards back then) at home we didn't have an issue, but that doesn't mean it couldn't happen. I know for drier conditions the wrap around fork guard is a great way to protect more of the lower fork tube and this is a good thing. Just be aware of mud collection near the fork guard when you're riding long, deep, mud ruts. 

We are fully committed to keeping up with our complete transparency of tests, so we will always make sure that the consumer is completely communicated to about any product. -KK 

Raptor Titanium Footpegs 


There are many aftermarket parts that are easy to improve upon with stock motorcycles, but there are also some that are pretty damn good in production form. Some people don’t realize how much goes into making a stock footpeg work so well, but listening to Keefer talk about how much he has tested production footpegs got me thinking. Footpegs basically don’t get the recognition they deserve because frankly, if you aren't talking/complaining about them, that means they are doing their job. You never hear a rider say “hey bro, my footpegs are working great out there”. No instead, no news is good news, when it comes to footpegs. However, there are many aspects to look at such as pitch, sharpness, folding ability, etc. About a year ago I bought myself a personal bike, a 2006 YZ125, which has been a blast, but after many off-road rides, the pegs were looking a little tired, dull, and tattered. Kris saw my beat up pegs and said I should try a set of the Raptor pegs he had in the shop and since most all current Yamaha pegs are the same, they bolted right up to my 2006 personal steed.

IMG_3513.jpg

The look of the Raptor pegs are quite aggressive with large, pointy, titanium edges that appear hungry to eat any boot sole they come in contact with. The fit and finish of the Raptor pegs are top notch and being a metal fabricator myself, I can truly appreciate the craftsmanship of quality material/good looking welds. On my initial ride with the new pegs I noticed the slightly larger than stock platform which I like because it adds some comfort when standing. I also noticed that the pegs sit flat and not upward like smoother aftermarket pegs we have tried in the past. Although they do look aggressive they don’t seem to chew up boot soles any quicker than stock foot pegs.  My foot placement/grip is slightly better than stock when it comes to forward and back movement, but when it comes to side to side movement, I think the raptor pegs are somewhat lacking in grip. The reason I say this is because if you look at most stock foot pegs, the three or four outside teeth are taller than all the others, which helps keep your foot from sliding off the side of the pegs. The Raptor pegs are flat all the way across, there aren’t any built up teeth near the end of the peg, which led to my feet slipping off the sides of the pegs a couple times when the riding got wet/slippery. One other negative thing I noticed with the Raptor pegs was that the brake side peg, when folded up, started putting a small crease in my brake pedal where the pivot bolt is. This didn’t cause a problem, but I could possibly see over time, with a big enough hit, this possibly being an issue. 

IMG_3509.jpg


After many HARD off-road miles on the Raptor pegs they show no sign of wear and because of the strong titanium material, they take abuse without ever bending, denting, or getting dull. Like I said in the beginning of the story, there are some parts that are hard to improve upon and I think Raptor did a good job of improving the stock foot peg in some areas, but also came up slightly short in others. Footpegs are very much a rider preference part and for me I’ll take the couple shortcomings in order to have an overall stronger foot peg that will stay sharper for a longer period of time. 

If you have any questions about the Raptor pegs feel free to reach out to me at Michael@keeferinctesting.com. -Michael Allen


Yoshimura RS-9T Full Titanium Sytem For 2019 Honda CRF250R


It’s no secret that the Honda CRF250R is still lacking some bottom to mid range power when compared to the other competitors in the 250 class in 2019. Seeing as how I’ve been logging some hours on this machine as of late, I decided to test the full Yoshimura RS-9T titanium system to see if we can get some added low end power. Installing the new full system took me less than 20 minutes and the instructions were very detailed. All of the parts that came inside the box fit perfectly and no curse words were thrown out in the garage while installing the Yoshimura exhaust.

Now to the part that everyone wants to know. Does the Yoshimura help the 2019 CRF250R? The simple answer is yes, but who likes simple answers? Not me! With the stock system, the Honda pulls nicely from mid top end, but when exiting corners and trying to grunt up obstacles, the engine needed some assistance. The best way I can explain the stock feeling 2019 CRF250R is that it needs help on “recovery" when the rider makes a mistake. “Recovery” basically means how long it takes the engine to recover by getting in the meat of the power again. When you're tired or lazy and miss a shift, this is where the Honda CRF250R gets smoked by the Yamaha YZ250F. I had to ride a gear lower at times in corners (with the stock CRF250R compared to other 2019 250F machines) and if I didn’t, it took a bit of clutch feathering and more coaxing to get the bike pulling hard again. If the track is flowy and fast the stock Honda works great, but when the track is tighter, this engine suffers.

10751012336__MG_1499.jpeg

As soon as I fired the bike up with the new exhaust it was clearly a bit louder, not obnoxious, but a nice throaty sound that was deeper. I tested the stock system back to back with the Yoshimura system on consecutive days, so it was interesting to see the places (at each track) where the bike really felt different. 

10750702816__MG_1503.jpeg

The most noticeable place the bike felt better was out of tight inside ruts that exited up jump faces. With the stock system I had to slightly slip the clutch all the way up the lip (to be able to clear the jump). When I bolted on the Yoshimura system I could leave it in second gear and just use the meat of the newfound bottom end power to pull me up and over those types of jumps. When I had to be in second gear and scream the bike (with the stock system), I could now be in third gear and use the smoother/stronger part of the power to exit the turn with the Yoshimura muffler system. RPM response was improved as well and this made the Honda feel even lighter when popping out of corners. Connectivity to the rear wheel was improved and even with that extra RPM response I gained with the Yosh system, I received more rear wheel traction. From mid to top end I only noticed a sightly better pulling power down each straight with slightly more over-rev. This part of the muffler wasn't mind blowing, but took me a couple tracks to figure out that there was a little extra “meat” through the mid range (compared to stock). Overall the little Honda just has a little more RPM response, better pulling power through second and third gears, and a small gain when revving the bike out in each gear.   

10751033040__MG_1493.jpeg

 This doesn't mean that your new Honda CRF250R (with the Yoshimura exhaust) is going to be a YZ250F killer, but it closes the gap a little. If you have a 2019 Honda CRF250R and feel like you’d like a bit more bottom-mid range power I’d definitely look into the RS-9T system. There are three types of Yoshimura mufflers that you can choose from; a slip on muffler system ($763.15), the full stainless system ($947.36), and the full titanium system ($1463.15). Admittedly none of these are super inexpensive options, but it’s one of the few things in today’s four-stroke world that provides a true bolt on benefit. Besides, if you were looking to save a few bucks, I don't think you would be rocking a new 2019 Honda CRF250R right now anyway. 

Ride Engineering One Piece Oversize Bar Mount

The Ride Engineering One Piece Oversize Bar Mount has a one-piece top that is designed to resist bending much better than the stock bar mount. Precision machined from aircraft quality aluminum, there is also a 6mm difference between the forward and back mounting positions. Ride Engineering also machines their own stainless steel posts that prevent over tightening, unlike some other competing brands that DO NOT use quality posts. 

56557950284__5ACCCBB1-A210-4022-908C-E38F257C5D38.JPG

We stuck the Ride Engineering one piece bar mount on our 2019 Honda CRF450R and ran it with the stock triple clamps and Ride Engineering’s Works Edition Red Triple Clamps as well. I hate realigning bent, twisted and misaligned front ends, especially during a race. I rarely bend handlebars, but I do have some screwed up twisting going on after some wash outs/tip-overs. Usually, the standard rubber-mounted bar mounts get tweaked and I've even bent the bar-mount stem a time or two while the handlebar somehow stays straight. One of the best products I've found to keep me pointing in the right direction is the Ride Engineering One Piece Bar Mount, in which I tested on our 2019 CRF450R. This $104.95 all aluminum bar mount is sturdy enough to take some crashes, but doesn't cause any added rigidity problems. I would know because I am super sensitive to any added rigidity in my front end. The flex I got on the track (from the Ride mount) is as good as the stock flex and Ride Engineering’s rubber cones are also as flexible as stock. Ride does offer a variation of different elastomers/rubber cone compounds for a custom desired flex, just in case you need a stiffer or softer feel. The Ride Engineering Fourth Generation One Piece Mount has been refined over the years to weigh as little as possible, yet stay strong. The final product is a little heavier than stock, but for the added strength that I am getting, it’s worth its “weight” in gold. 

IMG_4179.jpg

Installation is simple as the Ride Engineering One Piece Mount easily goes on with the stock Honda rubber cones or you can choose to get Ride’s rubbers (like I mentioned above) as well. The top mount is a one piece design held on with eight 8mm head bolts and when placed over a Pro Taper EVO bar, the machined guidance holes (in the mount) lined up perfectly, making it easy for me to set my bar at the right angle. Once tightened up, I forgot about this mount and didn't stress on the average tip over or any normal sized spill I may take. So, if you're like me and your bike hits the ground on occasion, this mount is money well spent. Head over to ride-engineering.com to check them out or get yours. If you do decide you need this piece, use the code Keefer-20 to see some dough. 

Pro Circuit Ti-6 Pro Titanium Muffer System


The 2019 Yamaha YZ450F won the Keefer Inc. Testing shootout this year because it has all tangibles that are needed to let a rider go fast on the track with the least amount of work. I am a fan of the stock muffler system on the 2019 YZ450F, but was looking for a full system to help me lose some weight and gain a little more mid range pulling power without sacrificing low end delivery, that the stock system does so well. I went to Pro Circuit to seek out Mitch Payton and see if he would give me a Ti-6 Pro Titanium System to try out. I managed to walk out with a system, but missed out on the opportunity to speak with Mitch. He probably doesn't even know who the hell I am, but I appreciate that he got me a system to test out. I haven't tested that much Pro Circuit products in 2018, but our next couple project builds will have some PC products on board or 2019. 

IMG_1071.jpg

The Pro Circuit Ti-6 Pro full system was created for professional racers competing in a series such as AMA Supercross or AMA Motocross to ensure they pass AMA/FIM sound regulations. The Ti-6 Pro Titanium Exhaust System is constructed of titanium throughout the head pipe, mid pipe, and canister while the end-cap is carbon fiber. I wanted the “Pro” system because I have learned that loud mufflers are not the best mufflers for power feeling on the track and sometimes putting an insert in “some” mufflers actually helps power delivery.

IMG_1073.jpg

Installation of the PC system was painless to install (for Yamaha standards), but always make sure to install the headpipe on the cylinder head studs and then connect the mid pipe. Once the mid pipe is slipped onto the headpipe you can begin to tighten the headpipe nuts. This assures that the mid pipe doesn't bind and is free. 

IMG_1063.jpg

So how does this sucker feel out on the track? The exhaust note on the Pro Circuit Ti-6 Pro is not near as loud or weird sounding as the Ti-6 or T6. The exhaust note on the “Pro” is deeper and slightly quieter, which I personally like more. The power delivery is slightly smoother down low, but only on throttle opening. At 0-5% throttle position there is a slightly softer RPM response, which I didn't mind on nasty, dry, choppy tracks in Southern California. If I needed more bottom I simply ran a more aggressive map and that helped the “pop” I was looking for out of corners. I usually ran the TP 2.0 map with the Pro Circuit system and it made me happy with the amount of smooth roll on power I had. The rear wheel definitely feels connected to my throttle hand and in comparison the PC system has more bottom end power than that of the Akrapovic that I tested a couple months ago. The mid-range is where I wanted more power out of the Yamaha and this is where exactly the PC system delivers. The meat of the Ti-6 Pro’s power out of corners and accelerating down the next straight is much better than stock. I am able to use second and third gears longer with the PC system (compared to stock) and even though the low RPM response is slightly softer than the stock system, the mid-range RPM response is much more instant. Mid- range RPM response is crisp and makes the Yamaha feel “lighter” when trying to hop over square edge choppy areas of the track when accelerating. Top end pulling power is as good as stock as the PC Ti-6 Pro doesn’t pull harder up top, but the PC system does have slightly more over-rev. I am able to be slightly lazier with my shifting and can decide to shift later after each corner. 

I was impressed how the Pro Circuit Ti-6 Pro delivered and spread out its power and to me made the Yamaha even more fun to ride. If that is possible? The PC Ti-6 Pro Titanium System runs $1,064.95 and is available over at procircuit.com. I will be doing a 2019 Yamaha YZ450F Muffler Shootout Podcast in the very near future, so if you want to hear how it stacks up against its competitors listen and subscribe to the Rocky Mountain ATV/MC Keefer Tested Podcast right now. 

If you have any questions about this test please feel free to email me at kris@keeferinctesting.com.


Keefer's Handlebar Dimension Recommendations


When it comes to handlebars I am a very picky person. The height, width, rise, and position is very important to me. I find that you can’t run the same handlebar bend on every bike, even though I like a bend on one bike, sometimes it doesn’t feel as good on another. Every bike has a different rider triangle so you must adapt to different bar bends as you change motorcycles. As the years progress, dirt bikes evolve and so do their dimensions. As you may have heard in my “Handlebar 101” podcast (show #70), if the bar feels too low (height), you should try to get the bar height from your bar mount and not the handlebar itself. Getting the height from your bar mount allows you to keep proper technique (position) through corners (where most of the time is made up on a track). I wanted to break down some of my favorite bar bends right here (for each new motocross machine) and give you a recommendation on bar mount height for different sized riders.

AZ7Y0201.jpg

As you will notice most of these handlebars on this list are Pro Taper and Renthal. This doesn’t mean that I am trying to sell you these handlebar brands. This is just what I personally like myself and should be taken as such. If you like another bar brand, that is fine, simply look at the dimension of the preferred handlebar and try to mimic that dimension to your favorite handlebar company. There are tons of handlebar companies out there, but for me, Renthal and Pro Taper are the bars that I prefer. For testing purposes, I tried a wide range of handlebars in my shootout so go give that podcast a listen when you can (Show #70). There are some great options out there. Again….This doesn’t mean other handlebars are crap. For transparency reasons, I am letting you know that these are the companies I prefer. I receive ZERO dollars from Renthal or Pro Taper.

  • We are using 2019 models for reference, but if you have an older model and are concerned on which handlebar to run please feel free to email me at kris@keeferinctesting.com.

  • All Dimensions are in (MM).

FullSizeRender-4.jpeg

2019 Honda CRF 450R/250R:

Notes: The stock bar bend on the 2019 Honda CRF 450R/250R has finally been updated to a bend that is lower and flatter than previous years. This bend is actually quite good and we usually leave the stock Renthal handlebar on the Honda. If you think you would like more flex you can try the optional bar bend below.

Preferred:

Stock Renthal 839 FatBar (W)802 (H)91 (R)52 (S)51

Optional:

Pro Taper EVO SX Race (W)800 (H)87 (R)54.5 (S)54

Bar Mount Height: Stock 

DL4_0226.jpg

2019 Yamaha YZ450F/250F:

Notes: Yamaha also did a good job on creating a bar that is fairly neutral for different sized riders. It’s lower height seems to fit a wide variety of riders (5’8-6’2), but taller riders may want to put bar mount in forward hole/back position.

Preferred:

Pro Taper EVO SX Race (W)800 (H)87 (R)54.5 (S)54

Optional:

Renthal Fatbar 602 bend (W)801 (H)89 (R)59 (S)56

Bar Mount Height: Stock

9X1A5071.jpg

2019 Kawasaki KX450/250:

Notes: 7/8 lives on! Kawasaki managed to keep the good ol’ 971 Renthal 7/8 bars, which are pretty damn good! I like a 7/8 bar and I actually stick with the 7/8 theme if I can. The 7/8 bar does bend a little easier, but you get a lot of flex when the track gets rough. If you’re an aggressive rider who likes a little more positive steering than go to a 1-1/8 handlebar for increased stiffness.

Preferred: Renthal 7/8 983 bend (Villopoto/Stewart) (W)808 (H)95 (R)58 (S)55

Oversize Option: Pro Taper Fuzion Henry/Reed (W)800 (H)92 (R)66 (R)40 (S)55

Bar Mount Height: Stock

Keefer Shootout Day 1-33.jpg

2019 Suzuki RM-Z450/250:

Notes: The stock Suzuki bend has some sweep to it, which makes the bike feel small at times. I prefer to open the cockpit up a little.

Preferred: Pro Taper EVO SX Race bend (W)800 (H)87 (R)54.5 (S)54

Optional: ODI Podium Flight CountryBoy bend (W)803 (H)92 (R)56 (S)57

Bar Mount Height: Stock

IMG_7171.JPG

2019 Husqvarna FC450/250:

Notes: Husqvarna comes with a very low bend and that fits the ergos of this bike, but the width of the bar is too long. I actually like the stock handlebar bend on the Husqvarna, however I cut the handlebar down to 803mm, which really helps the character of the Husqvarna when leaning into corners.

Preferred: Stock Pro Taper EVO handlebar cut to 803mm (W)811 (H)80 (R)39.5 (S)51

Optional: Pro Taper EVO Carmichael bend (W)800 (H)77 (R)40 (S)55

Bar Mount Height: Plus 5mm

IMG_4644.jpeg

2019 KTM 450SX-F/250SX-F:

Notes: The stock bar bend shape on the orange brigade is also decent, but it is too stiff and long. If you don’t think it is too stiff, you can simply cut the bar to 803mm and run it!

Preferred: Renthal 821 bend cut to 803mm (W)813 (H)78 (R)42 (S)54

Optional: Pro Taper EVO Husqvarna Stock cut to 803mm (W) 811 (H)77 (R)40 (S)55

Bar Mount Height: Plus 5mm

Yoshimura RS-9T Titanium Signature Muffler System For The 2019 Honda CRF450R

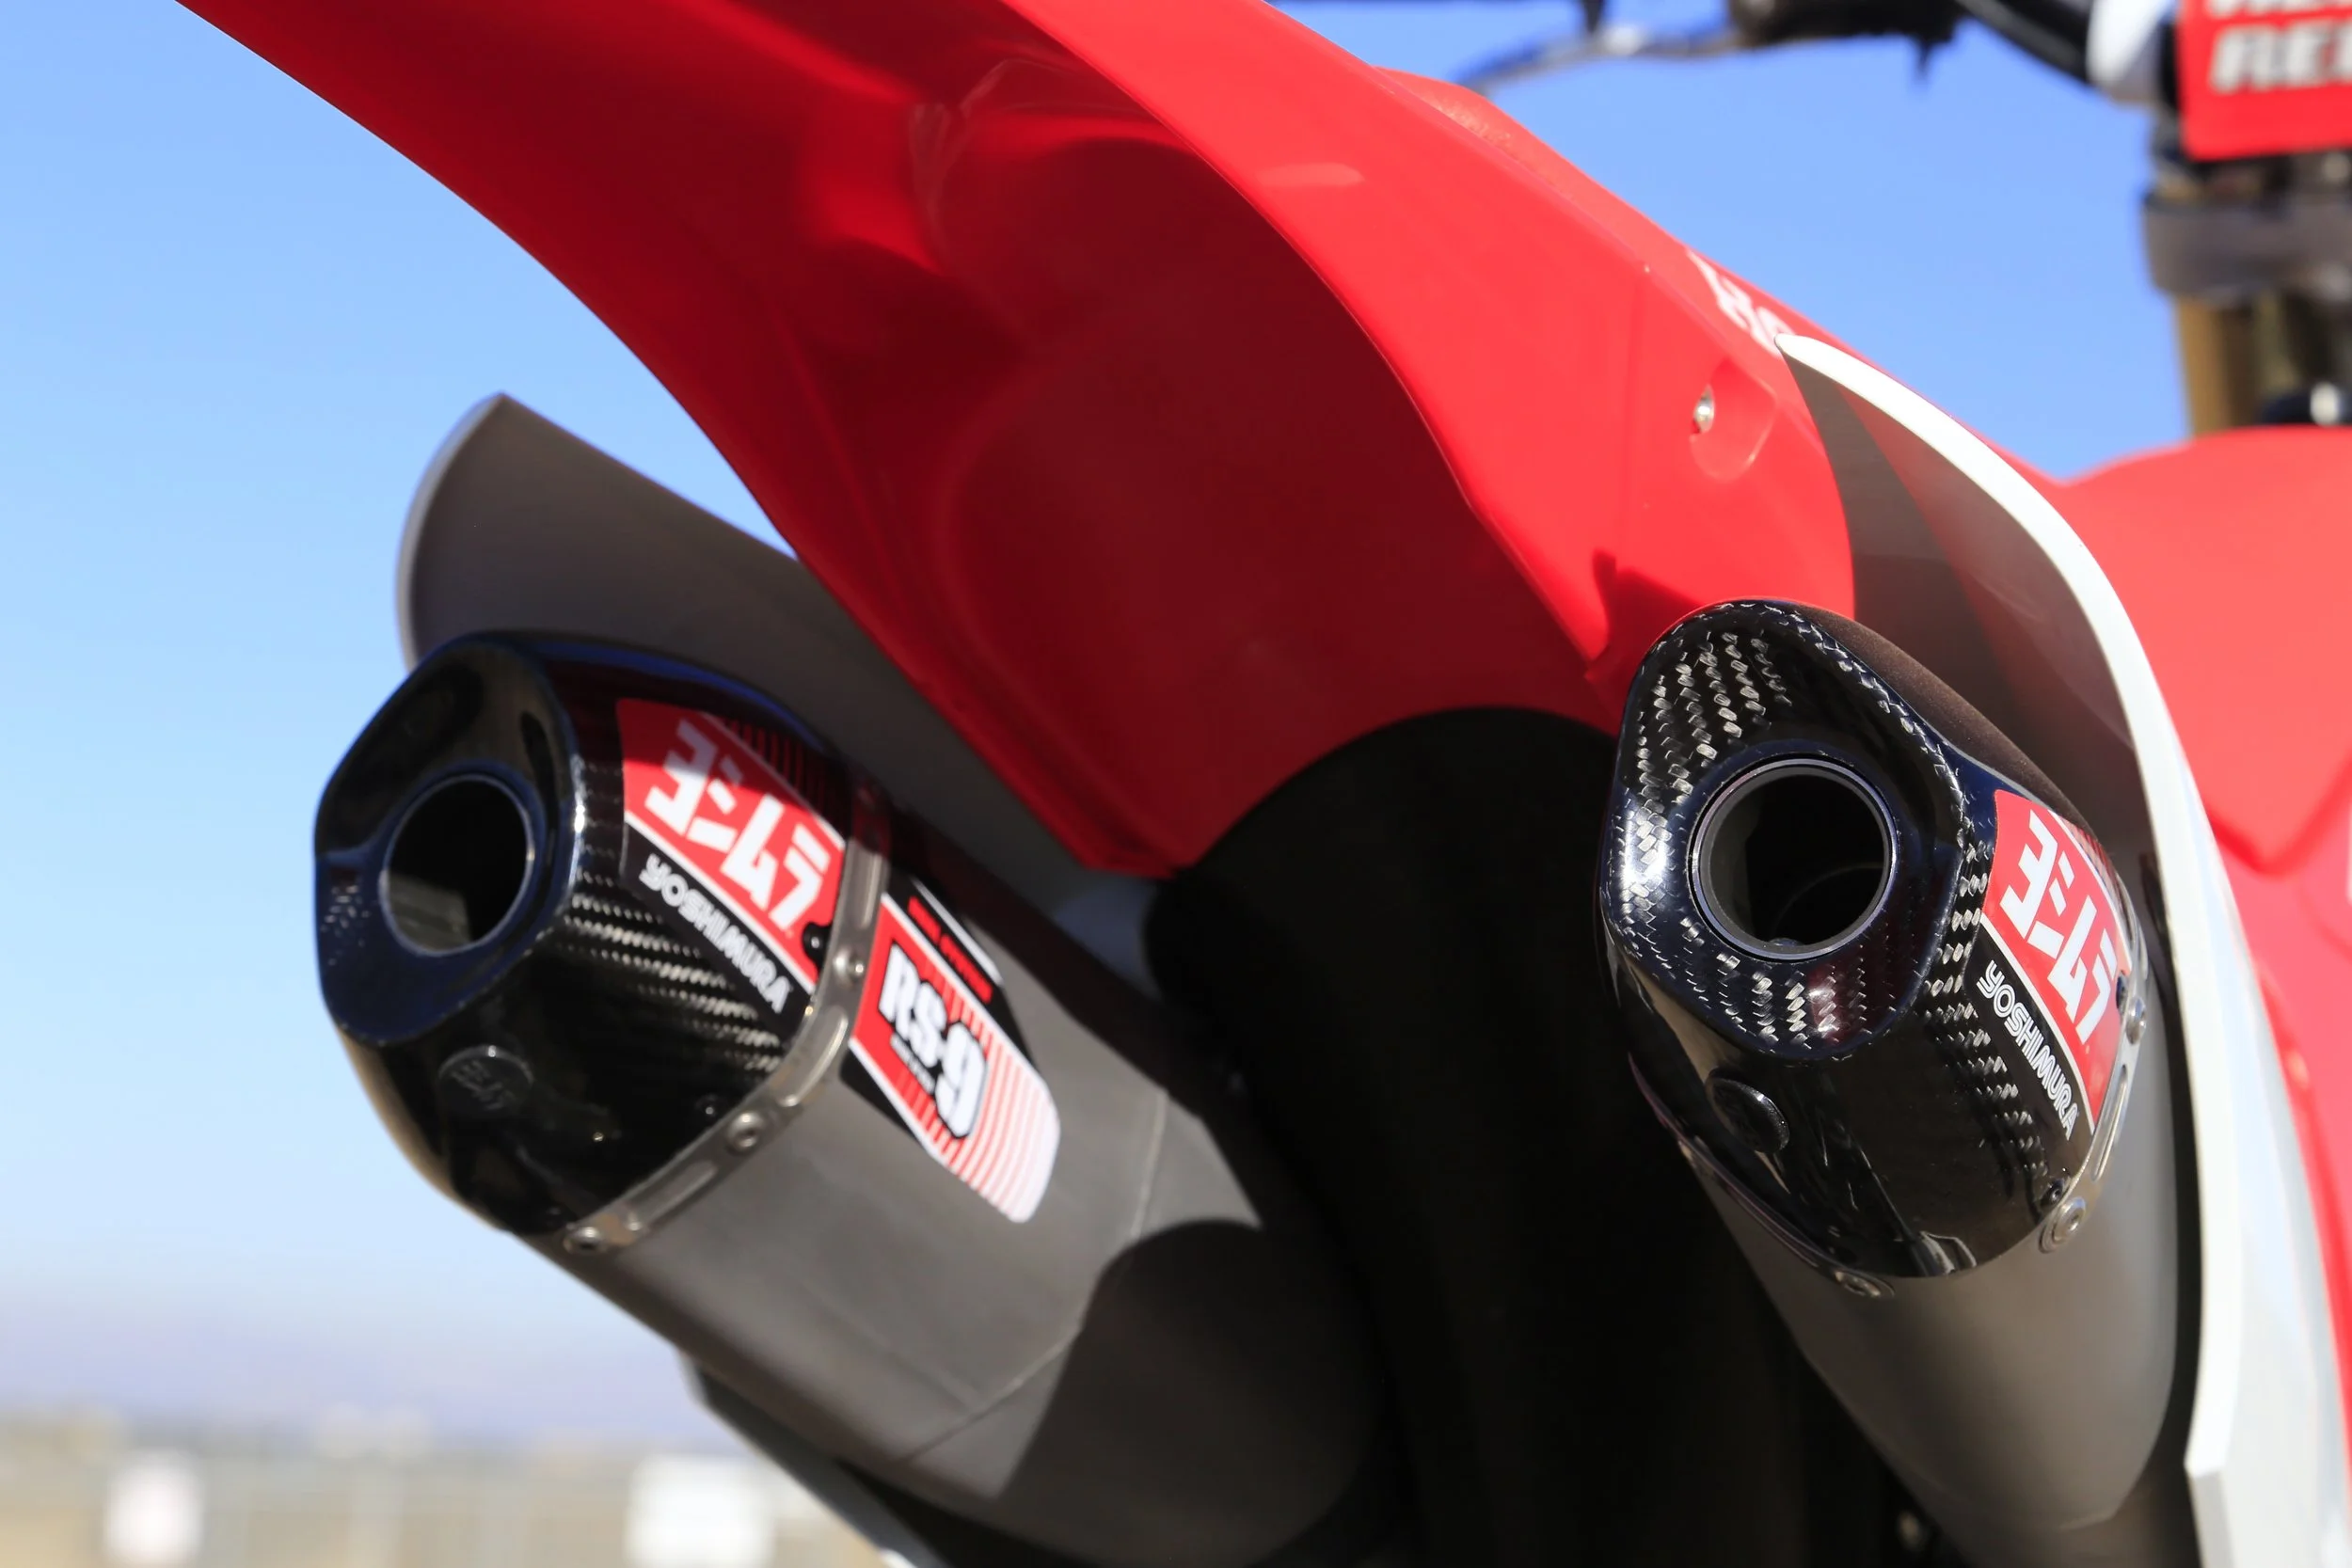
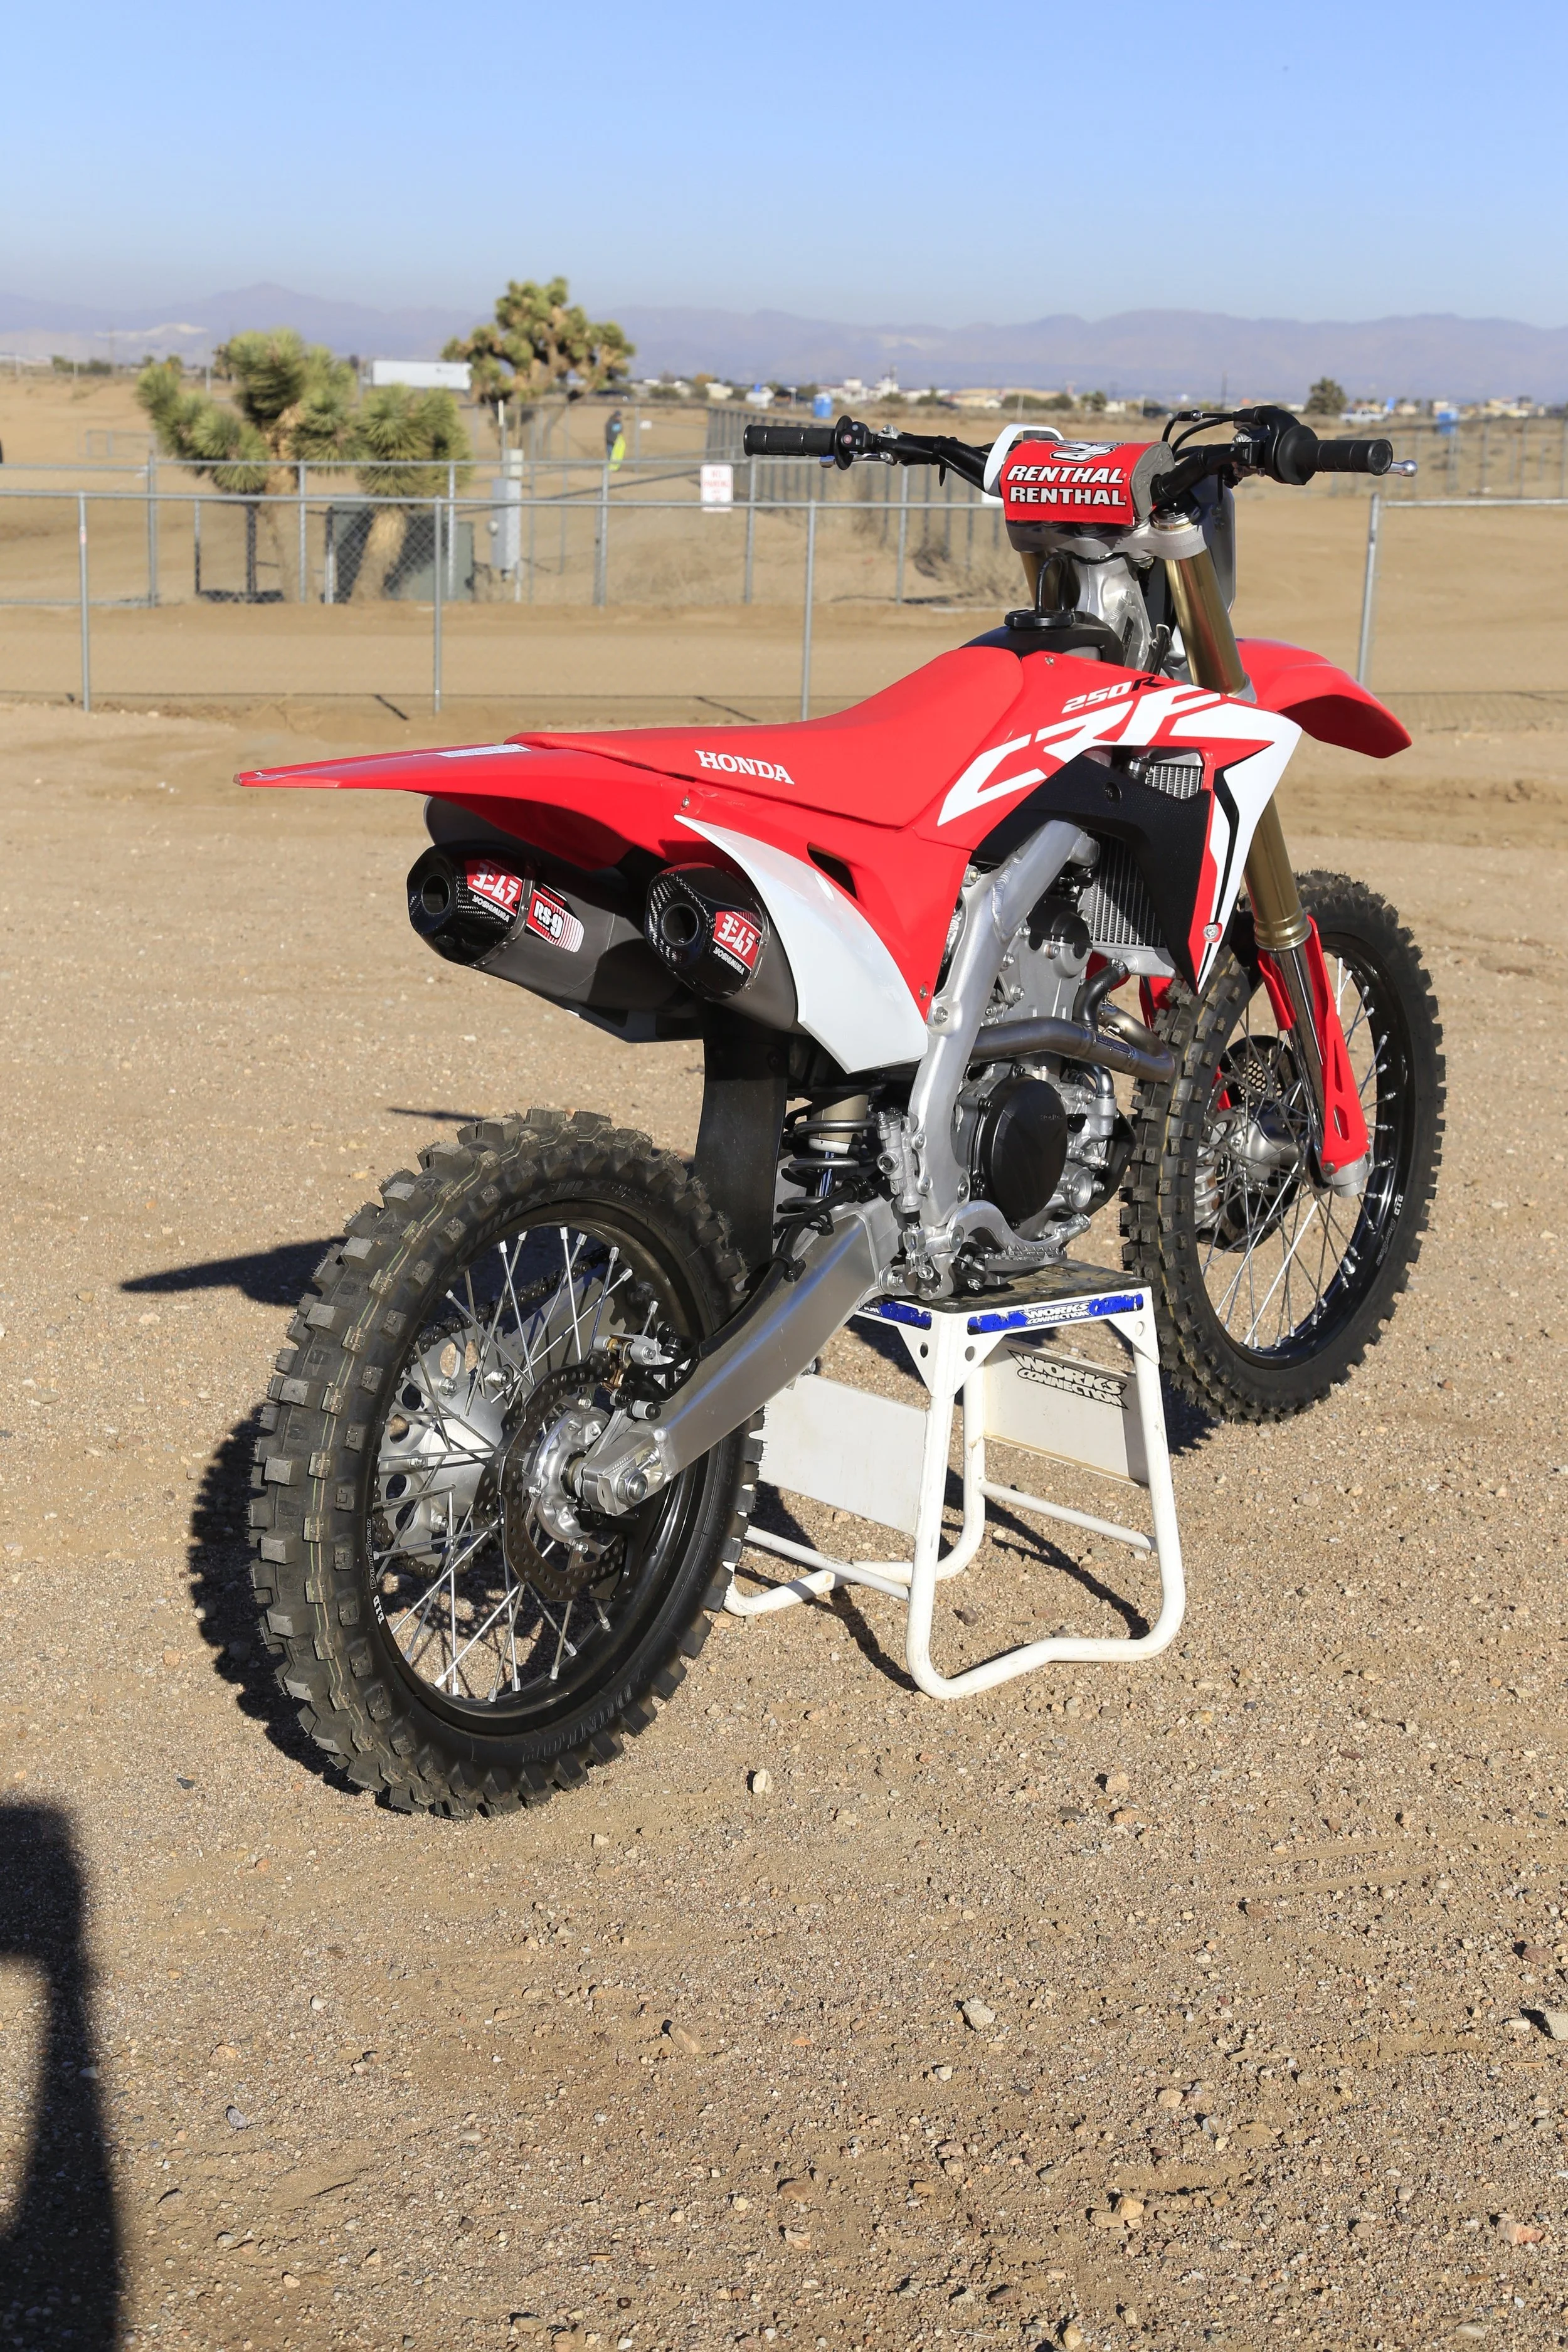
If there is one 2019 450 motocross machine that I think has the fastest overall engine character, it would have to be the Honda CRF450R. This engine is basically a race engine out of the crate. If you want to get to point A to point B in a quick manner, this Honda is the engine for you. So why on earth would you need more power? To me you wouldn’t need MORE, but maybe you can massage that power and move it around so that the engine delivery is slightly more controllable. This is where the KTM and Yamaha engines are better than the red machine. Both have more controlled power when the track gets rough or slippery. Controlled power is crucial in today’s 450cc world and a good muffler system can give you exactly this, if it’s a good system. Key word here people is “IF” it’s a good system. It is not as simple as reading dyno charts and slapping it on your bike. It requires real world track testing to feel the power character as well. We wanted to install/test a muffler system on our 2019 Honda CRF450R (that we purchased ourselves) to see if we could improve on a power plant that was already pretty damn impressive. We chose the Yoshimura RS-9 full titanium muffler system to try back to back with the stock system to see if it was in fact, what we were looking for.

FullSizeRender-6.jpeg

 When we originally tested the 2017-2018 CRF450R Yoshimura RS-9 system, we thought it was a pretty damn good system that was better than stock. However, the 2019 CRF450R stock exhaust changed for the better, so Yoshimura went to work on a new headpipe design to try and achieve even more power (than the stock 2019 exhaust system). Yoshimura also wanted to tuck in the new headpipe design, so it was less susceptible to crashes.

 Once installed and on the track the Honda’s exhaust note turned from the high pitch semi raspy stock sound to a deep throaty, more traditional 450 factory race bike sound. The crack of the throttle (or RPM response) is slightly smoother and less crisp than that of the stock system, but bottom end pulling power is increased over stock. Rolling out of corners, in second or third gear lets the rear wheel find increased traction over stock and was more controllable while accelerating out of hard pack corners. The slightly smoother RPM response takes away the Honda’s exciting feel slightly, but helps you gain a little more control coming out of corners. This is what I was looking for in a Honda CRF450R muffler! The mid range pull is healthier, with more meat, than stock and while the stock system had a tough time pulling third gear in tight/slower corners (without a gearing change), the Yoshimura system will give you an easier time rolling third gear in those tighter corners. With just the flick of the clutch lever (in third gear) the Honda will be in the meat of the power once again and have you down the straight in a hurry. We noticed top end and over-rev was better than stock, as the Yoshimura system helps the Honda carry second and third gears longer. It pulls amazingly well on deeply tilled dirt in second and third gear and there wasn’t a time where I thought to myself  “I need more top end pulling power”. You could tell Yoshimura was focused on controlling, yet increasing, the bottom to mid-range pulling power when they designed this 2019 CRF450R muffler system and they succeeded in doing so. It’s also impressive that they didn’t lose any top end and over-rev in the process, in fact they got some extra!

Craftsmanship is second to none with the Yoshimura RS-9 titanium mufflers.

Craftsmanship is second to none with the Yoshimura RS-9 titanium mufflers.

After weighing both the stock and Yoshimura RS-9T systems you will be saving almost two full pounds, which is great since the Honda is on the heavier side (on paper) for a 450cc motocross motorcycle. This is a significant weight loss but for $1,499.00 it is a very pricey bolt on modification. If you are looking to save a little money, Yoshimura offers the stainless steel/carbon version for $980.00, but you will not be saving much weight (only half a pound). 

IMG_3545.jpg

Again you can’t say enough about the craftsmanship that goes into a Yoshimura system. The welds are flawless and the mufflers tuck up inside the side number plates for a stealthy, compact look. If you’re looking for a little added pulling power, with more control/connection on the track, and not to mention sexiness out your new 2019 Honda CRF450R, the Yoshimura RS-9T system will help you do all of those things very well. You will have to decide if you want to dip into your checking account to pay for these added features, but if you're in the market for a 2019 Honda CRF450R muffler, there is not a better system out there for this model. The Yoshimura system has held up great over my years of testing them and you can even send your system back for Yoshimura to re-furbish if you choose (for a fee of course). You can head over to Yoshimura-rd.com to get yours or call them at 800-634-9166.

2019 Honda CRF-450R Dyno.png


GUTS Racing Firm Seat Foam And Gripper GR1 Seat Cover 


If there is one area that the 2018-2019 Yamaha YZ250F/450F is lacking in, it would have to be the seat foam/seat cover area. Yamaha firmed up the seat foam for 2019, but to me it just wasn't enough for my skinny ass. If you have a Kardashian butt it might be ok, but for us skinnier riders we need a foam that doesn't sink into the fuel tank when slamming into corners. While I was searching for a firmer foam, I thought why not get a seat cover that has some ribs on it, in order to keep my but in place when coming out of corners as well! 

So I called up Andy over at GUTS Racing and he sent me their standard firm foam (not Phantom foam) and GR1 ribbed seat cover with extra padding sewn into the sides of the seat cover. Guts offers many different styles of covers and foam densities so make sure to check out gutsracing.com for all of their offerings. Swapping out seat foam isn’t that hard, it just takes patience and some trial and error to get the new cover on the seat. The foam shape is pretty much identical to the stock foam and went on the seat base without issue. The seat cover went on without much of a fuss either, but there might be a little extra material that you may have to trim once all of the staples are in.

IMG_0706.jpg

So when you think of the words “hard” or “firm” you may think of uncomfortable right? Well in this case you would be wrong. The “firm” GUTS foam is just what the doctor ordered, especially when I am slamming into corners. The stock 2019 YZ450F foam is a little better (than the 2018 foam), but lacks density on the sides where my butt is forcing the foam down. With the GUTS firm foam the density is harder in the middle of the foam, but also on the sides of the foam where you need it (especially when riding aggressively). Your butt is not always placed directly in the middle of the seat when you're riding, so why just make the middle part of the foam firm? GUTS thought of this because all of us riders need to have a firm feel on each side of the foam as well. The GUTS Racing foam provides the correct amount of density so I am not pushing my tushy through the foam and into the plastic of the fuel cell. My butt bone thanks you GUTS Racing! 

The GR1 GUTS Ribbed Seat Cover is unique because of the extra padding that is sewn into the cover on each side. Since the Yamaha seat is designed so thin near the middle portion and on the sides, I felt like I could use a little extra padding when working the sides of the seat through flat corners. Not only did I feel like the extra foam on the sides helped me through flat corners with the slightly wider nature of the seat cover (due to the foam inserts), but it helped me grip the Yamaha better with my legs. Not to go full Ryno on you, but using your legs is crucial to going fast on a motorcycle. Gripping the machine with your legs is sometimes overlooked to an amateur rider, so with these extra foam inserts inputted into the seat cover, it really helps me grip the side of the Yamaha when I am getting tired. It may not be the most attractive looking cover (due to its width), but it sure does do what its supposed to do. The ribbed portion of the seat cover also keeps me in place, but the gripper material isn't so gnarly that it is chaffing my ass on long test days. Some gripper materials out there are so aggressive that you can only ride one full day on it before you have to have your wife rub chamois cream on your ass. 

IMG_0708 2.jpg


If you own  2018-2019 Yamaha YZ250F/450F do yourself a favor and get a GUTS Racing firm seat foam and ribbed GR1 cover. Your ass can thank me later. The GUTS Racing standard height/firm seat foam will run you $89.90 and the ribbed GR1 seat cover with foam inserts on each side will cost you $149.90.     

X-trig ROCS Tech Triple Clamps And PHDS Mounts 


Photos By: Jeremy Doerksen

It’s hard to find aftermarket triple clamps that are better than stock these days. So much is involved in making a triple clamp that flexes enough, but also has enough rigidity to aid the machine in corners as well. With the triple clamp flex character so important to chassis handling (on all motocross bikes) sometimes it’s tough to find anyone that can make a “comfortable” set of aftermarket triple clamps. Why do you need aftermarket triple clamps? Well sometimes it’s just for looks with some riders, but there are occasions where you might want another offset to help you get more stability or a sharper turning character out of your machine. In this case I was looking for the standard offset for a 2019 KTM 450 SX-F, but felt like the stock KTM triple clamps were a little on the rigid side when the track got hard pack and rough.  

IMG_0427.JPG


Enter X-trig’s ROCS Tech Triple Clamps and PHDS Mounts. “ROCS” stands for “Revolutionary Opposing Clamp System”. The ROCS clamp allows for precise alignment of the fork tube with opposing clamping surface patterns, the stiffness of the steering stem is specifically tuned to the respective motorcycle model, the steering-head bearing is already mounted on the shaft tube for convenience, a special fork slot and clamping area for precise fork operation, precise clamping with special screws for low torque specs, OEM attachments can be mounted without auxiliary material, and flexibility that is adapted to the fork with anodizing in the technical factory OEM look. The difference between the ROCS “Tech” and the ROCS “Pro” is the “Tech” uses a standard offset with a pressed shaft tube. The “Pro” has two offsets you can choose from by simply adjusting the shaft tube (or steering stem). I didn't feel like the KTM needed an offset change as the KTM is predictable on straight line and corners well, so I stuck with the “Tech” clamps. 

Revolutionary Opposing Clamp System

Revolutionary Opposing Clamp System

The PHDS (Progressive Handlebar Dampening System) is a system supported by elastomers designed to absorb engine and chassis vibrations. The system also dampens the forces acting on the handlebar in a horizontal and vertical direction, maintaining steering precision. The handlebar can be adjusted in 12 different positions when the PHDS is mounted. The KTM vibrates more in the handlebar area than any other 450 motocross bike, so this is something that I feel the KTM needs, in my opinion. 

PDHS “Progressive Dampening Handlebar System”

PDHS “Progressive Dampening Handlebar System”

Installation of the ROCS clamp is fairly straight forward (with the pressed shaft tube). All you need to do is grease up the steering head bearing and slide the bottom clamp up in the head tube of the frame. All of the front fender mounting points and even the OEM hour meter bolts up the same way with the X-trig clamps. Super clean! Mounting up the PHDS bar mounts is a little tricky as the mounts themselves have a lot of moving parts, so make sure to read the instructions to ensure proper mounting. Technical Touch offers optional PHDS bar mount elastomers that come in soft or firm, but I chose to run the stock medium style elastomers, which seem to be just fine for motocross conditions. 


IMG_0437.jpg

I am super picky about bar positioning, shocking I know, so I went with the mounting hole closest to me (when sitting on bike) on the triple clamp with the PHDS mounts forward. This handlebar position gave me a +3mm bar position (forward from stock), which I preferred as the stock positioning is a little cramped for my 6’0 frame. The PHDS bar mount itself is the same height as the stock bar mount, which I was just fine with as I am using a Husqvarna Pro Taper EVO handlebar on the 2019 KTM 450 SX-F. Having so many positions available for the rider is definitely a huge positive for adjustability with these ROCS clamps. If you feel like you need a higher PHDS handlebar mount, X-trig also offers spacers to go under the PHDS mounting system. You can pick from 3mm, 5mm, and 10mm spacers.

IMG_4640.jpeg


So what did the X-trig ROCS Tech Triple Clamp and PHDS handlebar mounts do on the track? My goal for this test was to find less front end vibration, try to get a more precise front end feel through corners, without getting added rigidity on hard pack/rough straights. Basically get a more compliant KTM 450 SX-F, tough to do right? The good news is that this is exactly what I found with the X-trig ROCS Tech/PHDS system. (Full Disclosure: I have found on other machines that I tested the X-trig ROCS clamps on weren’t as favorable as this KTM test) The X-trig ROCS Tech clamp on the KTM 450 SX-F provided enough flex and doesn’t feel like it negatively affected front end bump absorption, but was also stiff enough to give me a positive front wheel feel through flat corners. The ROCS Tech clamp is most noticeable when diving deep into a rut where there is a huge load put on the front end, forced by the rider. The chassis positivity through this area is much better than the stock clamps. The stock clamps has a tendency to flex too much and give the rider a wiggle on de-cel (on deeply tilled tracks or soft dirt) or give the rider an unsettled (dive) when dropping into a long/deep rut (this sensation can only be felt mostly by faster or heavier riders). The X-trig ROCS Tech clamp gives the front end less wallow (firmer) and more cornering stability (without upsetting chassis balance). Straight line stability is as good as stock and front end bump absorption is only minimally stiffer feeling on braking bumps/square edge. 

IMG_4644.jpeg

The PHDS mounts do not vibrate nearly as much as the OEM rubber mounted bar mounts. The PHDS bar mounts flex as good as stock with the standard elastomers (up and down), but dampen vibration noticeably better around the track (especially at higher RPM’s). Slap down landings are improved slightly and front end positivity (entrance into corners) are as good as an OEM feel. Simply put the vibration characteristics the PHDS mounts provide are well worth their weight in gold. I use “weight” because they are heavier than stock ones by quite a bit, but I will gladly take some extra ounces over vibration any day. 

The cost of the X-trig ROCS Tech Triple Clamps and PHDS handlebar mounts are $800.00. The cost is more expensive than other triple clamps out on the market by a couple hundred bucks. However, there are only two triple clamps that I have tested, that to me, are as good or better than stock. If you're looking to get some of those KTM “vibes” dampened a little, pick up some front end cornering stability, and improve the looks of your KTM, X-trig has some really nice clamps and handlebar mounts available for your motocross machine. You can check out and purchase all of the X-trig products over at technicaltouchusa.com.   

If you have any questions about this test please feel free to email me at kris@keeferinctesting.com

Ride Engineering's 2019 Honda CRF450RWE Triple Clamp 


Matt Sirevaag is your average dirt bike fanatic. He works overtime just so he can purchase extra “goodies” for his 2019 Honda CRF450R. He is only “allowed” (you married guys out there know what I am saying) to buy stuff for his bike if he makes extr…

Matt Sirevaag is your average dirt bike fanatic. He works overtime just so he can purchase extra “goodies” for his 2019 Honda CRF450R. He is only “allowed” (you married guys out there know what I am saying) to buy stuff for his bike if he makes extra cash. Matt works side jobs and puts in OT just so he can get his bike just the way he likes it. To me this is a real world test because of the test rider that has written it. -KK


I am just the average nine to fiver and weekend warrior. I get up at 4AM, go to work, and think about dirt bikes (probably like most other riders out there). I walk through the race pits, drool over the factory machines, and wish I could just have one piece of eye candy that graces the factory riders machines. This is where Ride Engineering decided to give their CRF450R clamp that factory Honda like touch. They took their CRF450R clamp, moved the logos, and anodized them cherry red just like Ken Roczen’s factory machine. The Ride Engineering factory 450RWE triple clamp retains the stock 22mm offset that comes on 17-19 CRF450’s and can be used in conjunction with the stock bar mounts or Ride Engineering’s one piece bar mount.

Ride Engineering worked to try and make this Honda triple clamp retain the stock clamp characteristics (flex/rigidity balance). They also used 2024 aluminum, which is the same alloy aluminum that a lot of the factory teams use for their clamps. Just to add to the factory flare we put the new clamp on the scale and it weighed in at 7.9oz. lighter than the OEM clamp! The 450WE clamp fits both the previous 48mm and the new 49mm Showa forks. It also fits 2013-2019 Honda CRF450R, 2017-2019 CRF450RX, 2014-2019 CRF250R and let’s not forget the 2019 CRF450RWE. This is not Ride Engineering’s first rodeo as they have been building triple clamps with different offsets to help change the character of motocross machines for years. 

FullSizeRender-5.jpeg

Installation was a breeze as any novice mechanic can handle this job with a little time in the garage. I would suggest using the owner’s manual as torque specs are always crucial when it comes to suspension components. The torque spec on Keefer’s 2019 CRF450R test bike is: (upper pinch bolt 16 lb-ft, lower pinch bolts 15 lb-ft, and steering stem nut 80 lb-ft). As I hit Sunrise MX on my usual Saturday track day, I was not only excited to ride after a long work week, but I was hoping one of my favorite aspects of the new Honda (front end feel) was not gone. To my delight it was really hard to pick apart any huge differences between the two clamps on the track. As I put down my 30+2 lap moto (Thank you Kris Keefer! Yes, that is sarcasm) the Honda retained that front end feel that I loved with the stock clamp, but I did notice two small differences after I put more time on them. The Ride Engineering clamp does make the front end “turn in” slightly easier and also gives me a little firmer front end feel on hard pack square edge. This wasn't a drastic difference, but it is something I noticed after a few hours on the clamps. I am a heavier guy at over 200 pounds so a little firmer feel wasn't a deal breaker for me. I am the type of rider that is very sensitive to vibration or any unwanted feed back through the bars so I was pleased that I didn't get any increased vibration. Ride-Engineering utilizes the stock rubber’s for their bar mounts and this helps retain that OEM comfort while adding cushion over some other solid mounted bar mounts I tried last time. If you’re a vet rider and are looking for more comfort, make sure your bar mounts are rubber mounted! The Honda’s cornering manners were kept in tact, but with just a little more positive lean in, I did notice that the bar position was slightly more comfortable which I discovered most on deeply tilled up tracks/soil. The Ride Engineering clamp only has one location to mount the bars, but I did notice that the bar position was slightly more comfortable. The mounting position on the Ride Engineering clamps locates the bars three millimeters forward over the OEM mounting location. If you don’t like this bar location you can always turn around the stock bar mounts to pull the bars back.

FullSizeRender-4.jpeg


As you can tell the Ride Engineering CRF450RWE triple clamp is more of a factory look than a clamp that gives more performance. Having said that Ride Engineering does offer different offset triple clamps for the Honda CRF450R that come in 20mm, 21mm, and stock 22mm offsets. They also come in a black or red colorway. These other offset sizes are not the “450RWE” clamps and will have a Ride Engineering logo on the side. On a side note; try to keep the Ride Engineering colored triple clamps covered up from the bright sun. Too much sun (like sitting in the pits for an extended period of time) will fade the color a little. I simply put a towel over my bars to help shade the triple clamps as much as I can. The CRF450RWE clamp includes the top clamp, bottom clamp, pressed in stem, and lower bearing and it retails for $549.90. You can check out all of Ride’s accessories over at Ride-Engineering.com and take a look at what they have to offer for your trusty steed.

Matthew Sirevaag 205lb Novice

Full Time Electrician/Husband/Father/Dirt Bike Fanatic


Pro Taper Clamp-On Grips


There are certain things on motorcycles that are easy to improve on (seats, handlebars, foot pegs etc). Then there are grips, which for the most part are just rubber pieces on the ends of your handlebars that help keep you connect to the machine. However, for being just "rubber pieces" most riders are particular about which ones they use. Most riders have their favorite sets of grips and usually stick to those as long as they're riding. As of late there are a few companies out there who have decided that the grip needed a revamp and could be made better. Pro Taper is probably the largest handlebar company to jump into the clamp-on grip market and I was happy to get my hands on a set (pun intended). I wanted to see for myself if the days of safety wire and glue were a thing of the past. Instead of just molding rubber over plastic like some other companies have done, Pro Taper took a deeper look at the clamp-on grip to see how they could be made better. They windowed the clutch side plastic housing so there’s more cushion for the rider’s palm and fingertips. In addition to the windows in the housing they also made the overall diameter of the left side grip slightly smaller. 


IMG_1901.jpg


 I got the PT grips (I got ½ waffle, but they offer 3 grip patterns) for the 2019 YZ 250F test bike and figured the neon blue/black (they have a magnitude of colorways) would look decent so I started the install process. The clutch side is as easy as it sounds, cut off the old grip, make sure the bar is clean, slide the new clamp-on grip on and tighten the pinch bolt once the waffle is oriented the desired way. For the throttle side Pro Taper gives you a selection of throttle cams that lock onto the throttle tube. In the instructions they give you a list of the cams they provide and what bike they go to. You just have to match the number with your bike, index the gears on the cam and throttle in the orientation you want the waffle. Next you need to remove the stock throttle tube and replace it with the new Pro Taper Clamp-On Grip/Tube combo. This is where it can be slightly annoying because once I got the throttle side reassembled, I realized the teeth were off by one so I had to take the whole throttle assembly back apart to re-index it (I’m anal with how my grips and levers are oriented). Once back together the grips are 100% locked on and they haven’t moved on me since the install.


IMG_1903.jpg


 The first thing I noticed when I rode the bike was the smaller clutch side grip. I was personally not a fan of the smaller diameter because of my large hands (I wear an XL glove), but some other testers with smaller hands have mentioned they like the smaller size. I’ve ridden with other brands of clamp-on grips and noticed a definite increase in vibration to my hands over traditional style grips, but this wasn’t totally the case with the Pro Taper Clamp-On Grips. Although the vibration is much less than other “Clamp-On” brands, I still notice a slight increase in vibration over the stock Yamaha grips on both sides. They never twisted after riding in mud or after being washed, nor did the clamp ever come loose. All that being said let’s get to the point; although a good idea, I don’t think clamp-on grips are for me for the following reasons. I don’t like the slight vibration felt through the grips. I don’t like the smaller clutch side grip (could just be my large hands). I don’t like having to take the throttle assembly apart to change grips. Lastly, are “we” that lazy that “we” can’t put on some glue and slap on a grip? If the reasons I just listed don’t apply to you then these grips just may be for you. Maybe you don’t like safety wiring on grips? Maybe you hate grip glue or maybe you just don’t like having to slide on new grips and would rather clamp them on. For me however, I think I’ll just stick to the old school rubber things on the ends of my handlebars. -Michael Allen


IMG_1905.jpg


Second Opinion: I also have put some time on the Pro Taper Clamp-On Grips…I am much like Michael where I prefer glue on/old school grips. I get what companies like Pro Taper are trying to do here though, I am not oblivious. They are making it easier for the customer to install new grips and giving them more choices. I believe this is a great business model for the weekend warrior and to me there is no real negative to the Pro Taper Clamp-On Grips…Except getting a slightly firmer feel than my glue on style 1/2 waffle soft grips. The Pro Taper Clamp-On Grips are not as rigid feeling as the ones that come on the KTM’s so that's a plus. Just like Michael said, if you’re a “Clamp-On” type of rider then you will be impressed by these grips. I prefer a glue feel, but I am super annoying and picky. -Kris Keefer