Test

Akrapovic Evolution Muffler System (2021-2022 Honda CRF450R)

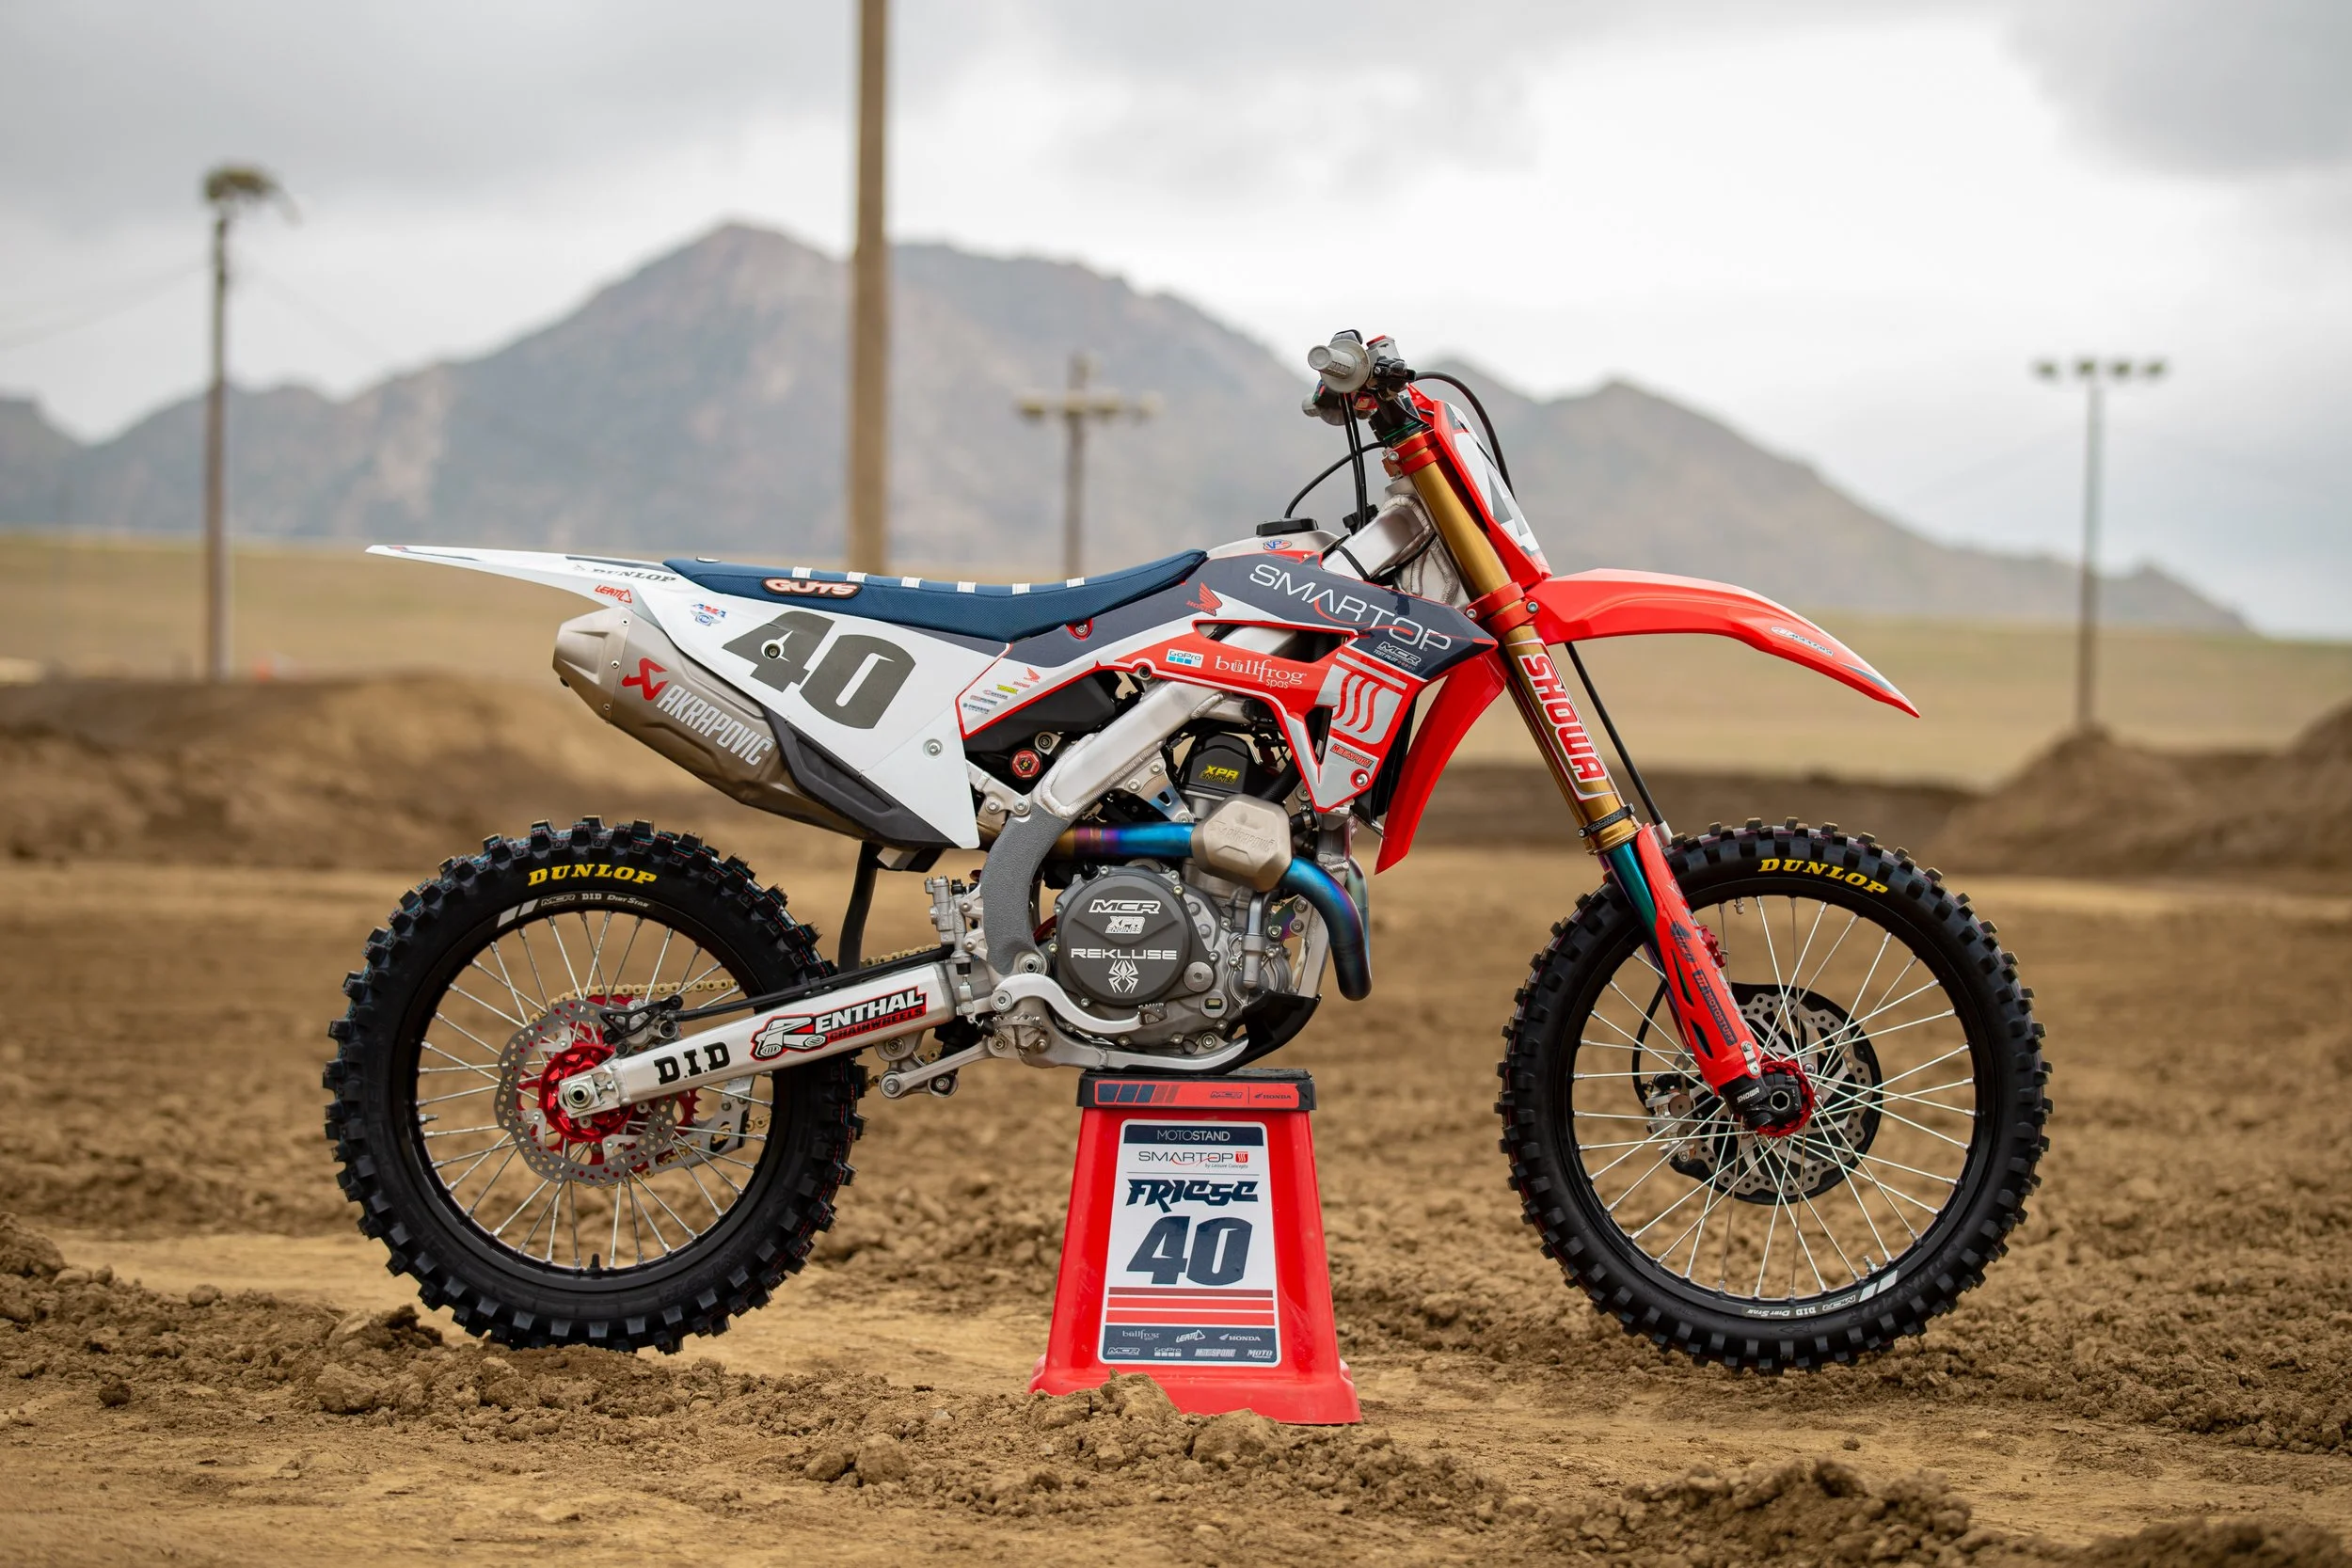
I had the initial impression of the Akrapovic Evolution muffler system as I was doing a MotoConcepts/Bullfrog Spas Honda team test. I noticed that they have been running Akrapovic systems on their bikes, so I asked if I could borrow one to see how it worked. Akrapovic's Evolution line is their full titanium muffler system and includes more in the complete package than other system that I have unwrapped. The welds are beautiful and to me the quality of the complete system is second to none. Installing the Akrapovic takes a little bit of finagling, but with some patience it does line up and fit well, as long as you leave most of the bolts loose when installing. 

Once out on the track is when I realized that this Akrapovic muffler system could actually help this Honda chassis calm down just like it did to the 2020 chassis. The Evolution system lets the Honda’s engine roll on smoother at low RPM’s and that smoother feel helps the rear wheel connection as well as provides less pitching (off throttle) than the stock system. AKA MORE COMFORT!!! The Honda CRF450R now builds a smoother roll delivery and a pulling power that is longer through the mid range than the stock system. This type of character can allow you to use second gear in corners more because the second gear hit is not as abrupt or quick and that doesn't upset your technique or the chassis. The Akrapovic also allows the rider to shift later out of the corner with its increased over-rev capabilities. Pulling power up top is increased slightly as your shifting points can be altered now because of the longer pull in each gear. The mid range recovery of the Akrapovic is not as good as the stock system, but honestly that is not a bad thing. The Honda has so much power to work with that a little less “hit” as well as “recovery” actually helps me roll my corners better and allows me to be more aggressive on the Honda. I want to be able to ride this red bike and not let it ride me after 15 minutes into a moto. The Akrapovic system relaxes the engine as well off throttle. There is not nearly as much engine braking with the Evolution system and that also helps your fork from feeling harsh on small de-cel bumps.  

The pitch of the Akrapovic is ridiculously quiet when on the track and will almost give you that MXGP sound and feel. It still has that racey, crisp sound, but just not that raspy high pitch tone of the stock muffler. I was normally a map two guy with the stock muffler, but with the Akrapovic installed I am now a map one guy all day long because of the added rear wheel/friendlier connection. The only other muffler that I have tried that made a big difference on this bike was the FMF system, but this system really gives you a wider pulling power than the FMF. 

The Evolution muffler is the largest possible muffler for the space available. This allows increased sound silencing, which mitigates the impact on the natural environment while also facilitating improved flow for the exhaust gases to make their way from the combustion chamber with as few restrictions as possible. The added strength created by the design aids durability and provides enhanced resilience in the most demanding conditions. The Akrapovic mufflers have been one of the toughest mufflers that I have encountered over the past couple years when I have tested them! Akrapovic muffler packing usually outlasts others and to me just feels like quality stuff.

The Akrapovic system will save you 2 pounds over stock and will set you back a whopping $1547.00! Is the cost worth it? I wouldn't go that far, but it is one of the better muffler systems that I have tried on the 21-22 Honda CRF450R. If I was a Honda owner I would rather invest in a Vortex ECU, have it mapped, and save a few hundred bucks, because the Vortex ECU can do more to help the power character/chassis feel than that of the Akrapovic system. However, if you do have a deep pocket book and are going to get a muffler system anyway, this Akrapovic would be a great choice along with the Vortex. The combo is an amazing feeling once out on the track! It’s a beautiful system and works very well on a wide variety of terrain/tracks. 

Go to akrapovic.com to locate your nearest dealer. 

X-Trig ROCS Tech Triple Clamp (2022 YZ450F)

It’s hard to find aftermarket triple clamps that are better than stock these days, especially on the Yamaha YZ250/450. So much is involved in making a triple clamp that flexes enough, but also has enough rigidity to aid the machine in corners as well. With the triple clamp flex character so important to chassis handling (on all motocross bikes) sometimes it’s tough to find anyone that can make a “comfortable” set of aftermarket triple clamps. Why do you need aftermarket triple clamps? Well sometimes it’s just for looks with some riders, but there are occasions where you might want another offset to help you get more stability or a sharper turning character out of your machine. In this case I was looking for the standard offset for a 2022 KTM Yamaha YZ450F and wanted to see if installing X-Trig’s on the Yamaha hurt or helped it. I was hoping to help cornering positivity without sacrificing rigidity balance. Oh and I also purchased these myself for $850.00! 

IMG_4249.jpg

Enter X-trig’s ROCS Tech Triple Clamps and PHDS Mounts. “ROCS” stands for “Revolutionary Opposing Clamp System”. The ROCS clamp allows for precise alignment of the fork tube with opposing clamping surface patterns, the stiffness of the steering stem is specifically tuned to the respective motorcycle model, the steering-head bearing is already mounted on the shaft tube for convenience, a special fork slot and clamping area for precise fork operation, precise clamping with special screws for low torque specs, OEM attachments can be mounted without auxiliary material, and flexibility that is adapted to the fork with anodizing in the technical factory OEM look. The difference between the ROCS “Tech” and the ROCS “Pro” is the “Tech” uses a standard offset with a pressed shaft tube. The “Pro” has two offsets you can choose from by simply adjusting the shaft tube (or steering stem). I didn't feel like the Yamaha needed an offset change as the Yamaha is predictable on straight line and corners well, so I stuck with the “Tech” clamps. 

IMG_4250.jpg

The PHDS (Progressive Handlebar Dampening System) is a system supported by elastomers designed to absorb engine and chassis vibrations. The system also dampens the forces acting on the handlebar in a horizontal and vertical direction, maintaining steering precision. The handlebar can be adjusted in 12 different positions when the PHDS is mounted. The Yamaha doesn’t necessarily vibrate more in the handlebar area than any other 450 motocross bike, so this isn’t something I feel the Yamaha needs particularly, but if it helps, so be it.
Installation of the ROCS clamp is fairly straight forward (with the pressed shaft tube). All you need to do is grease up the steering head bearing and slide the bottom clamp up in the head tube of the frame. Super clean! Mounting up the PHDS bar mounts is a little tricky as the mounts themselves have a lot of moving parts, so make sure to read the instructions to ensure proper mounting. Technical Touch offers optional PHDS bar mount elastomers that come in soft or firm, but I chose to run the stock medium style elastomers, which seem to be just fine for motocross conditions. 

I am super picky about bar positioning, shocking I know and the Yamaha isn't the best rider triangle out there, so I went with the second mounting hole closest to me (when sitting on bike) on the triple clamp with the PHDS mounts back. This handlebar position gave me a +3mm bar position (forward from stock), which I preferred as the stock positioning is a little cramped for my 6’0 frame. The PHDS bar mount itself is +2mm higher than the stock bar mount, which I was just fine with as I am using a SX Race Pro Taper EVO handlebar on the 2022 YZ450F. Having so many positions available for the rider is definitely a huge positive for adjustability with these ROCS clamps on the Yamaha to open up the cockpit for you bigger riders (5’11 and up). If you feel like you need a higher PHDS handlebar mount, X-trig also offers spacers to go under the PHDS mounting system. You can pick from 3mm, 5mm, and 10mm spacers.

So what did the X-trig ROCS Tech Triple Clamp and PHDS handlebar mounts do on the track? My goal for this test was to dissect the anti-vibration qualities as that seems to be the easiest to feel asap. I honestly didn’t notice any less vibration/harmonics through my Pro Taper’s, but I did notice slightly less vibration on higher RPM’s which I found strange. The PHDS mounts do help flex and are a little kinder to my wrists than the stock mounts. While I was looking to get a more precise front end feel through corners, without getting added rigidity on hard pack/rough straights, that is not quite what I found. Basically I got slightly less compliance on lean angle bump absorption so the front tire didn’t exactly feel like it was digging into the dirt enough for me on faster sweepers with chop. The X-Trig ROCS Tech clamp on the Yamaha YZ450F provided enough flex if I was heading straight into bumps, but once I started leaning into braking bumps to set up for the corner, there was definitely less comfort in that area compared to stock. There was some added rigidity when leaning when bumpy and that cause the fork to feel harsher. The ROCS Tech clamp is most noticeable in a positive way when diving deep into a rut where there is a huge load put on the front end, forced by the rider. The chassis positivity through this area is much better than the stock clamps. The stock clamps has a tendency to flex too much and give the rider a wiggle once off throttle in area 1-2 of corners, (on deeply tilled tracks or soft dirt) or give the rider an unsettled (dive) when dropping into a long/deep rut (this sensation can only be felt mostly by faster or heavier riders). The X-trig ROCS Tech clamp gives the front end less wallow (firmer) and more cornering stability once inside the rut (without upsetting chassis balance). Straight line stability isn’t as good as stock as you do feel more of the track under you (front end) on hard pack west coast conditions.

IMG_4254.jpg

I do feel like slap down landing of the PHDS mounts are more absorbing and I like that feel to my wrists. I am almost keen to try these mounts on the stock clamp to see if that works as good on my old ass wrists! The overall weight of the X-Trig clamp and PHDS mounts are heavier than stock so know that you will be gaining almost a pound of front end weight on your machine. So at the end of the day am i happy with my purchase? I would say for this bike, no I am not. I will say that I have tried X-Trig’s on a KTM with really positive results, but this confirms to me that the average rider DOES NOT need these for his Yamaha YZ450F. Does that mean all aftermarket clamps are rated under the same umbrella? Absolutely not! Not every clamp is created equal. I will try some more aftermarket clamps on this machine in the coming weeks to see if we can keep the stock bump absorption while adding to that positive front tire feel in ruts. Stay tuned! 

Akrapovic Evolution System (2021-2022 KTM 250 SX-F)

When you purchase a 2021 KTM 250 SX-F TLD version the bike comes with a slip on Akrapovic Evolution muffler. However, I know that sometimes, certain machines react better to full systems rather than slip ons, we decided to get the full Evolution system to see how it changes the KTM 250 SX-F’s engine character. 

The Akrapovic Evolution full muffler system has a similar character to the slip on version that comes with the Factory Edition, but with added bottom end roll on and mid range. If you’re expecting a ton of added RPM response (excitement) from your full system compared to your standard slip on, you will be disappointed. You simply will not be getting that much added rpm response with the Akrapovic full system. Instead of a smooth roll on that the TLD version comes with, it now has a little more pulling power in second and third gears and pulls those gears much longer.
IMG_3757.jpg

Mid range pulling power is increased, but the muffler pitch is so quiet that you never really feel like you’re “on the gas”. The mid range pull is much more linear and longer than the standard slip on or stock muffler and being able to shift a little earlier with the full system makes it easier to ride in softer conditions. I had a hard time with the KTM 250 SX-F at softer tracks not recovering, if I shifted early out of a corner. With the full system at the same track I was able to shift into third and not have to worry about covering the clutch as much. The full system just simply gives me more “meat” in the mid range.
 Top end and over-rev is where this Akrapovic Evolution system shines. Adding top end and over-rev to the already very capable KTM 250 SX-F only makes this machine more fun to ride. Again, I can’t stress on how deceiving this system is because of it’s quiet nature. I really had to focus in and feel how quick I was going from point A to point B on the track because the pitch of the muffler never sounds “racey”. However even with its quiet note, the Akrapovic full system lets the KTM pull so much farther that it almost feels like I swapped to an aftermarket ECU. The connection to the rear wheel with the full system is unmatched and even though it may seem like it’s not very responsive, the KTM with the Akrapovic full system allows the rider to get on the gas sooner through corners. 

As described the Akrapovic badging will eventually get marked off when cleaned.

As described the Akrapovic badging will eventually get marked off when cleaned.

If you’re reading this and wondering why you can’t simply purchase an Akrapovic headpipe for your Akrapovic slip on, the answer is they will not mate up. The Akrapovic slip on has a smaller diameter OD, (where it meets the stock headpipe), so purchasing just the headpipe will not work. 

A couple of durability notes: 

-The Akrapovic lettering on the headpiece resonance chamber will wear off after a few washes. 

-The Akrapovic muffler stickers will burn away around the 7 hour mark. 

-The overall quality of the system and the parts inside the muffler are second to none. The muffler packing lasts longer than other aftermarket systems and the hardware it comes with is superb. 

-Is the system worth the $1200.00 price tag? Comparing it to other systems out there, I would say you’re getting what you’re paying for. A lighter, race oriented system that gives the rider better overall power throughout the rpm range. 

Dubya Edge Wheel Set

I will be straight up with you all… I am not a huge fan of $1500.00 wheel sets. Most of the time, I am a big stock wheel/hub guy, but in some cases I do need a little more security or toughness  in my wheels. I am a big believer of bringing an extra set of wheels to the track just in case you get a flat or have some sort of wheel failure. Full disclosure: The Dubya Edge Wheel set has been in my shop for more than a year and I am just now getting the information out to you guys now! Why? A couple reasons… I am normally a stock wheel set kind of rider and I am very finicky with rigidity, yet most of the time aftermarket wheel sets have given more rigidity that I wasn’t looking for. Finally, after a year or so, I got off my ass and put them on my 2021 Honda CRF450R as I have experienced some wheel problems with my Honda’s in the past. So why not test the Edge wheel set with a bike that actually could use it! 

Mart family_-77.jpg

The Dubya Edge wheel set was created for the blue collar type of rider that is looking for some added bling with durability. Each Edge wheel set centers around a forged aluminum Edge proprietary hub, which are laced to a Dubya by Excel rim, using stainless steel Dubya spokes and nickel plated steel nipples. Each wheel set is pre-assembled in Dubya USA’s Southern California facility by the same technicians who assemble all of Dubya’s top professional factory riders and teams wheel sets. Instead of using your stock wheel spacers, the Edge wheels come with their own specific spacers to each bike. I actually like when aftermarket wheels come with their own spacers as it can make your dollar stretch further! How? Well, we have a couple Yamahas in the shop that have different axle sizes (two and four stroke) so it’s nice all we need to do is swap spacers instead of getting another hub. It just makes swapping wheels more seamless. 

Mart family_-78.jpg

We have put nearly 50 hours on the wheels themselves and so far we have been pleased. The hub has been surprisingly not as rigid as I initially thought and the rim also has held up to the standard local motocross abuse. I am not over jumping landings or slamming into faces of jumps on purpose, but I feel like I am fairly hard on a bike, yet these Dubya wheels have given me zero headaches. The stainless spokes needed to be adjusted a few times after break in, but since then, they have stayed within a quarter turn of true. For $639.00 I feel like this wheel set is a great purchase for the rider who wants a fresh look on his/her bike as well as some durability that you maybe can’t find at times from your stock wheel set. I also like that the color of the hub doesn’t fade or beed out after several rides/washes. I don’t trust a lot of “inexpensive” wheel sets, but this is one that I am happy to put my hard earned money on. The weight of the complete wheel set is just north of the stock wheel set by a half a pound, but this is something that I did not feel once out on the track. 

The Dubya USA Edge wheels are available with the standard front rim size 21×1.60, while the rear wheels come in 19×1.85, 19×2.15 or 18×2.15 rim sizes. If you’re looking for some cool colors, the rims come in either black or silver, and the hub color matches the brand of machine you’re riding. The only brands that can mix and match the Dubya USA Edge hub colors are KTM (orange) and Husqvarna (blue), since they are exactly the same, but I don’t think you will be running blue on your KTM. Dubya currently doesn’t offer an Edge set up for the #RMaRMy, but hopefully you Suzuki lovers can do your battlecry loud enough, so that John and Kristen from Dubya can hear you.   

If you have any questions about this test please feel free to contact me at kris@keeferinctesting.com 

FMF 4.1 Muffler System (2021 KTM 250 SX-F)

My son and I have been going back and forth on mufflers for his KTM 250 SX-F and have went though about three until we settled on the FMF 4.1. We have tried the HGS (which was good), a Yoshimura, as well as a Pro Circuit system, but for his riding style and what he was looking for from the engine character, we decided on the FMF 4.1 system. Why? Here are some reasons why the FMF 4.1 system works well for Aden and the KTM 250 SX-F. 

IMG_2904.jpg

First off, the FMF 4.1 system looks beautiful and is easy as pie to put on. Installation literally took 10 minutes and I like that FMF pipe springs last longer than the stock KTM pieces. Aden rides lower in the rpm and only revs his bike in the air (which he thinks helps him but it really doesn’t) so he needs some low end rpm response as well as some low end torque to help get the KTM back into the meat of the power (or “recovery”). You will get more low to mid RPM response as well as more mid range pulling power with the 4.1. Top end is increased slightly plus the over-rev is as good as stock. It is one of the few times that I was impressed with a muffler because it was actually better than stock in almost all areas. THIS IS VERY RARE! Coming out of corners the KTM 250 SX-F now has some more excitement in second gear and pulls harder than the stock system. Third gear roll on is also noticeably more reactive to your throttle hand (increased connection) and can allow for a lazier rider to have more pull in softer loam. We did pull the spark arrestor/insert out with good results and decided to leave it out for maximum throttle response and torque feel. Leaving it in will kill a little low to mid response, yet you still will get better torque feel over stock. 

IMG_2903.jpg

The downside is that you must keep up on your muffler packing (every 10-12 engine hours) because the FMF will blow out and that could damage your expensive titanium can. Just in case you’re numbers guy, did I mention that you will lose almost two pounds with the titanium 4.1 system? If you slap on spring forks on your KTM, you will be gaining almost three pounds. You can get most of that weight gain with the spring fork back down with a 4.1 Titanium FMF Muffler system.

IMG_2905.jpg

Things to look out for? I can burn a lot of pants on the headpipe of the FMF system. The magabomb portion of the headpipe can burn your pant just above the boot when sticking your leg out in deep ruts. This has happened on only a couple different brands of gear (FXR, FLY) with the FMF headpipe installed. Overall we are happy with this system for the way Aden likes to ride and will be refurbishing his mufflers every 10-12 hours in order to keep the most performance possible. Hopefully FMF will have these back in stock in the near future so be on the lookout over on their website that gets updated weekly on what is in stock. Damn you Covid!

Ride Engineering 23.5mm Offset Split Triple Clamps (2021 Honda CRF450R)

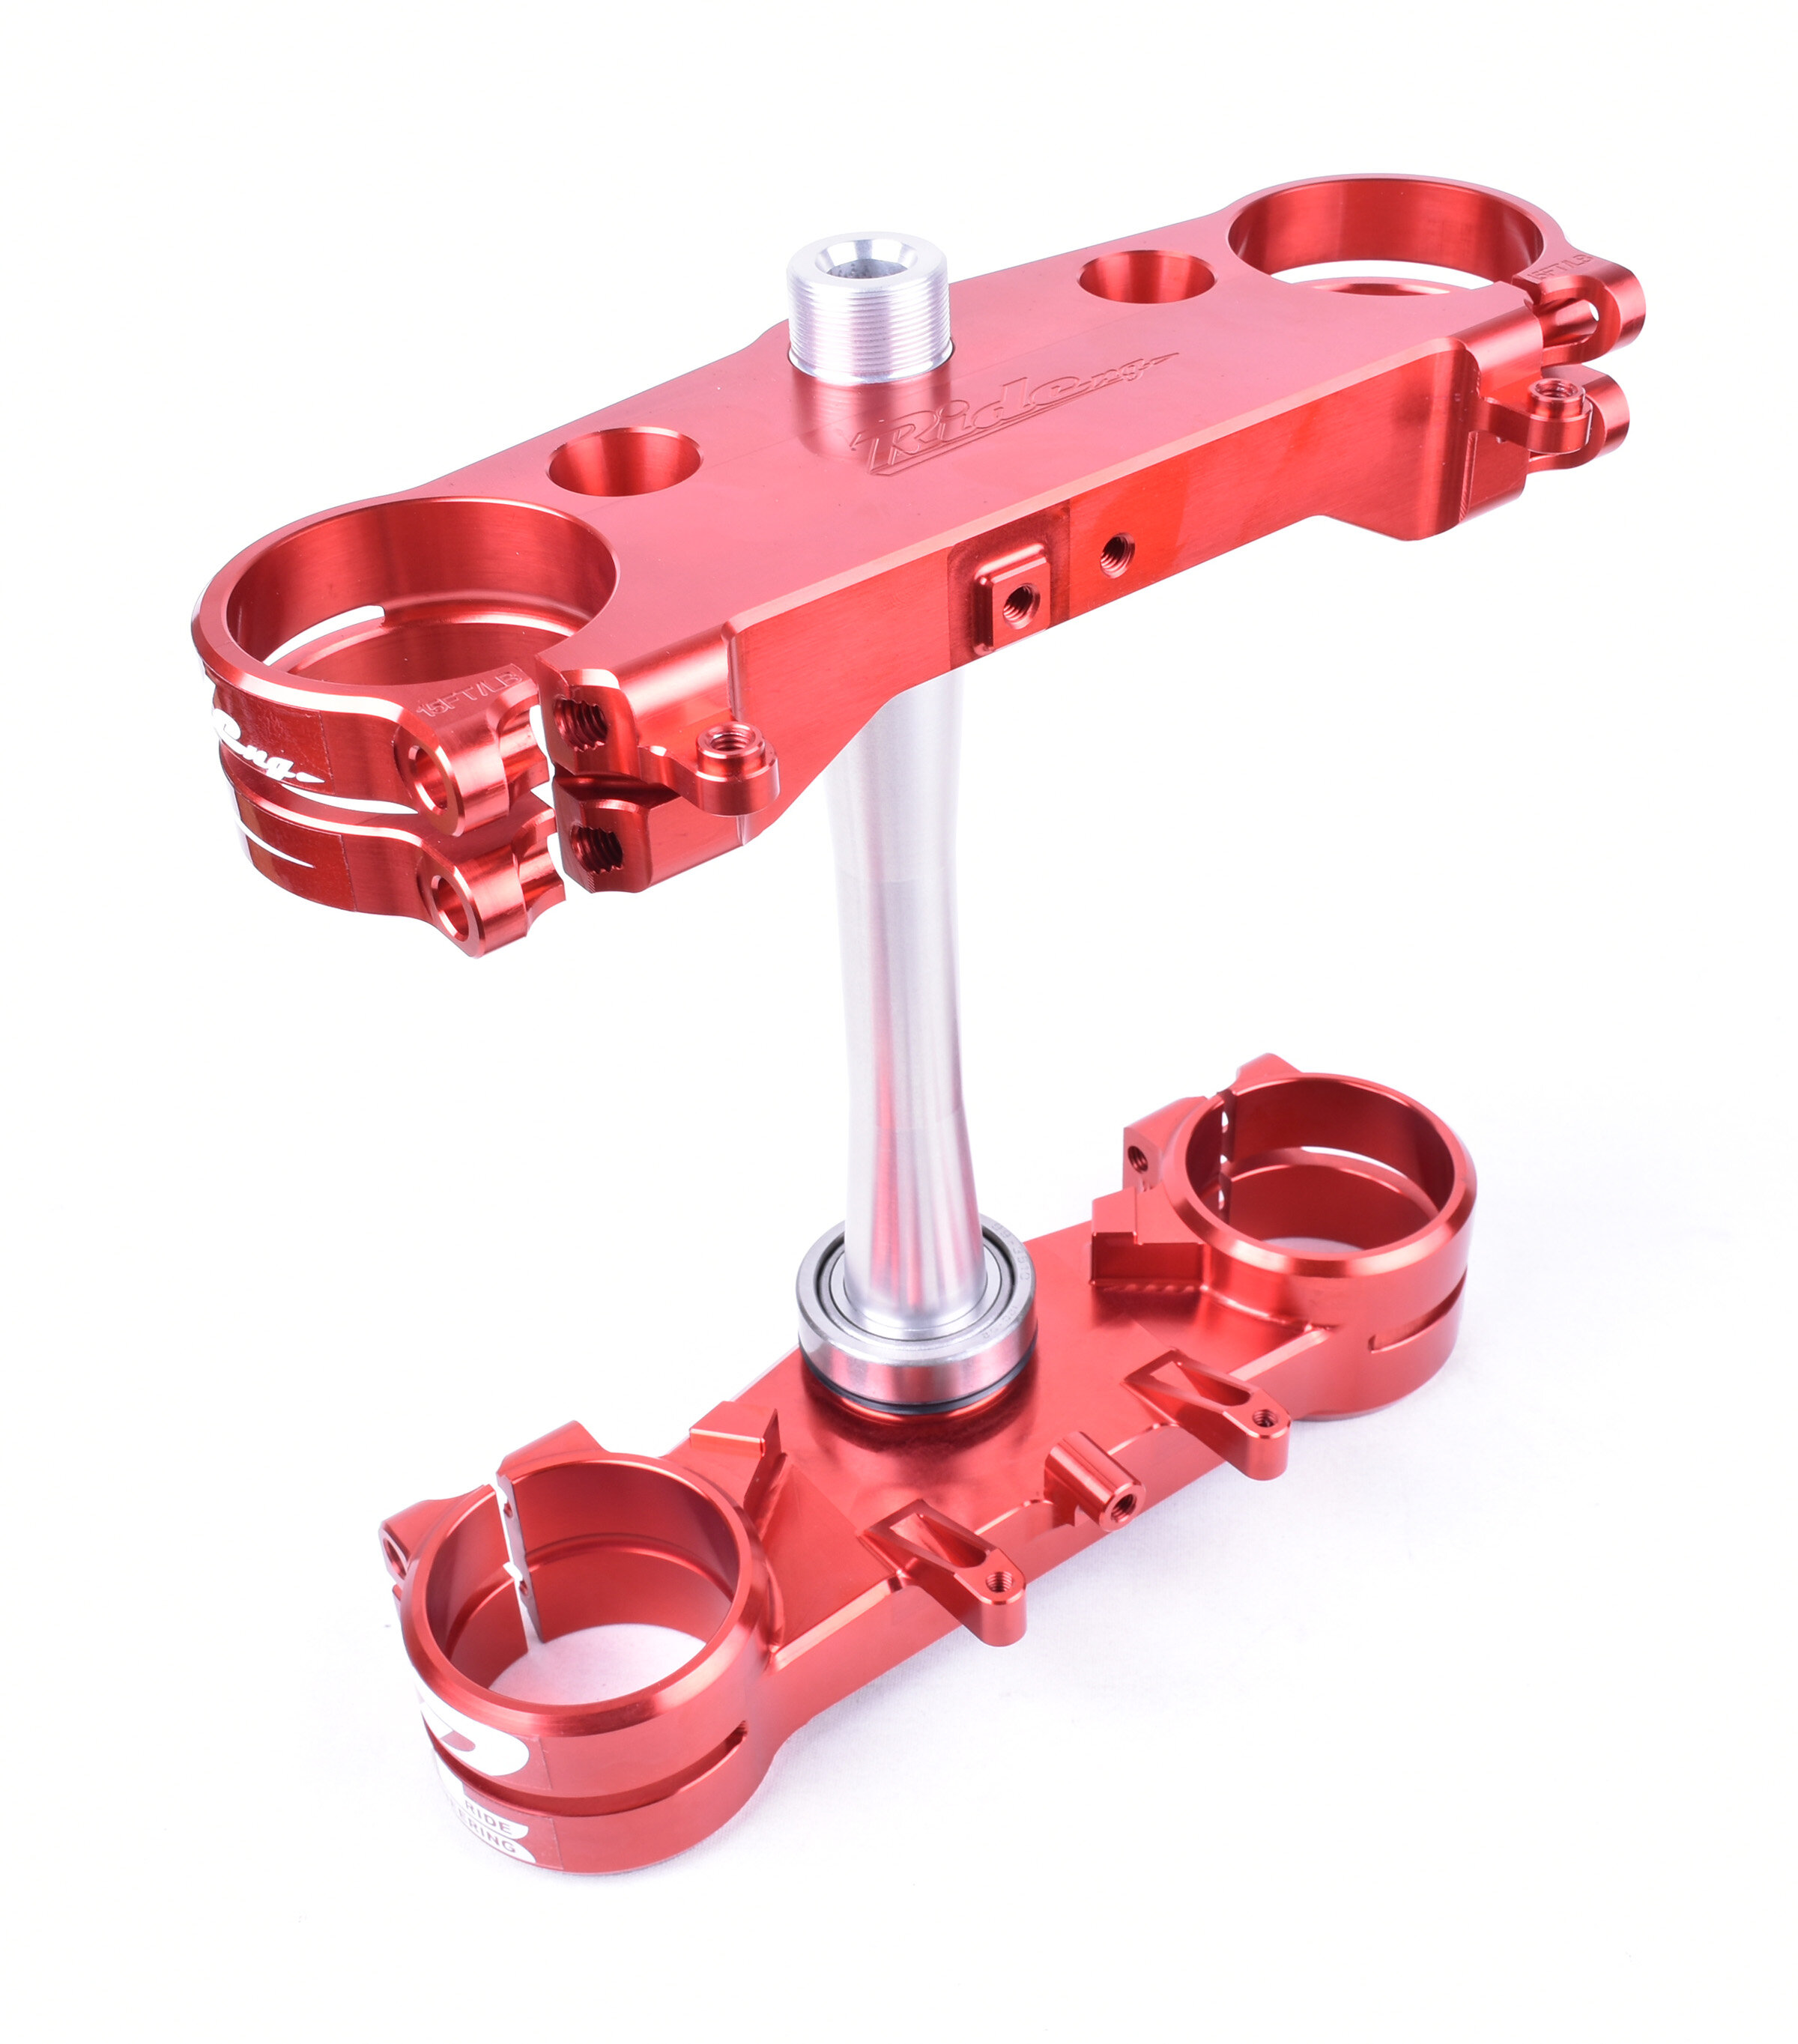
I have been looking for some added stability and comfort from my 2021 Honda CRF450R test machine since I got it and although my suspension setting has evolved/improved over time, I still need some compliancy from this machine. I have been working with Adrian over at Ride Engineering on some split triple clamps for over a year now and we finally have come up with a feel that I think is better than stock. I have yet to test any other competitors clamps back to back as Ride Engineering is one of only a couple aftermarket companies that are making different offset clamps. I have tried a 24mm offset on the 2020 Honda CRF450R and really liked how it made the Honda have a “slower” feeling chassis. Slower in this sense was a good thing for the Honda as it calmed the chassis down on rough tracks for me. So in order to get some added chassis compliance, I tested Ride Engineering’s 23.5 offset clamp for the new generation Honda CRF450R and here is what I took away from the test. 

422 HI RES crf split 2021 red.jpg

Stats:

The Ride Eng. 2021 CRF450R/RX Split Triple clamps are available in Red or Black, come in two offsets and cost $649.90. Custom colors available for $100 additional if you want a custom set. The Ride clamps save you 10oz. in weight and come in 22mm offset or the new 23.5mm option. A Showa steering damper option is available without drilling your frame so no need to stress on that. The bar position on 22mm offset is 8mm forward of stem hole allowing a 5mm or 11mm bar position, with Ride Engineering’s one piece bar mount ($104.95), also available in 7/8” version. The bar position on 23.5mm is 9.5mm forward of stem hole allowing a 6.5mm or 12.5mm bar position with Ride Eng.’s one piece bar mount (I preferred mine set at 12.5mm). Note: Stock OEM bar mounts will fit and affect the numbers above by 2mm (3mm or 13mm on 22s & 4.5mm & 14.5mm on 23.5s).   

How Do The Ride Engineering 23.5’s Affect The 2021 Honda CRF450R?: 

I will be quite honest with you… We went through a couple of versions before I felt that it was good enough to sell to the public. The first couple versions didn’t have the compliancy I needed nor did we have a different offset yet that I preferred. The first thing that I noticed with the Ride Engineering 23.5mm offset clamps is that it took away some of the dreaded vibration that the 2021 CRF450R has through the bars. Once I pulled out onto the track and started to accelerate I could feel less harmonics/vibration coming through the Pro Taper bars. What I wanted from the 2021 Honda CRF450R (as well as from the Ride clamps) was a calmer entrance in/through corners, less oversteer, better straight line stability, and increase in front tire tracking. 

DSC_0294-72.jpg

I got all of this with the new 23.5 Ride Engineering setting! With my fork set at 2-3mm in the clamps as well as a rear shock sag measurement of 105mm I had a CRF450R that was less harsh feeling through my hands. Now the Honda didn’t quite give that sting through my arms on flat landings and gave the front end an increased flex feeling. Diving into ruts that start to get hooked, didn’t give me the front end knifing (oversteer) that I experienced at times with a 22mm offset. We call this cornering stability in the testing world and the new 23.5mm setting gave me increased cornering stability. Let’s face it, we all love the way the Honda corners, but sometimes it can corner too good and cause some in consistencies in your cornering technique. This 23.5mm offset Ride clamp still gives you that easy to lean front steering feel of the Honda, but improves area 2-3 (mid-exit) in corners.
Straight line comfort has also been improved thanks to losing some rigidity up near the head tube area. When testing the Honda CRF450R I never could have suspected that the OEM clamp was some of the problem when it came to getting a harsh feeling. Hitting square edge and braking bumps with the 23.5 Ride clamps gave me less harshness and improved my fork feel. The fork now seemed to move more in the stroke and had a slightly softer feel to it, which was nice, but also forced me to adjust my fork setting somewhat. With the Ride 23.5 clamps, I had to stiffen up my fork setting one click and slow the fork don one click also. Doing this gave me a better front tire feel when leaning on throttle. I ended up getting better front tire tracking (when stiffening/slowing the fork) when cutting across rough sections of the track. Once I figured that I could go stiffer with my setting it actually brought up the performance/comfort feel of the Honda CRF450R. The stock torque specs of 15 ft. lbs. on the top clamp and 12 ft. lbs. on the bottom clamp is recommended, but if you end up purchasing a raw/silver clamp, you can go to a 14/11 setting. 

IMG_2330.jpg

So what’s the negatives? Honestly for a vet rider like myself, there aren’t too many… I do know that this isn’t a cure all for the rigidity issues of the CRF450R, but it does help a noticeable amount. When I let another Honda rider/owner try my test bike with the clamp, he immediately thought his OEM clamp was too stiff feeling. The negative for me is that you may have to adjust your suspension (to compensate for the softer feeling clamp) a little after installation, but to me having to do some minor clicker adjustments isn’t too much to ask for added comfort. Plus, y’all are Honda owners. You’re used to tinkering on your bikes right? I know I am when I ride this machine. This Ride Engineering 23.5mm offset split clamp will eliminate some of the tinkering you’re doing at the tracks most days by 40%, so you can ride more and be a test rider less. 

If you do end up getting the red colorway, please try to cover your clamps up with a towel or something when your bike is siting in the pits. The sun will fade the anodizing over time, so bring an EZ-UP or a towel to cover up your investment. These clamps are sexy looking so take care of them! If you’re a C rider worried about if you will lose that cornering ability of your Honda, have no fear, adding these clamps to your machine will not negatively affect how easy the Honda will lay over in corners. In fact, it might help you improve your corners as the CRF450R will setting into the corners better with this 23.5 offset. 

There is a discount code available if you decide that this may be something you're interested in. KT20 will save you 20% off your order over at ride-engineering.com. If you have any questions or concerns  about this test please feel free to email me at kris@keeferinctesting.com.   

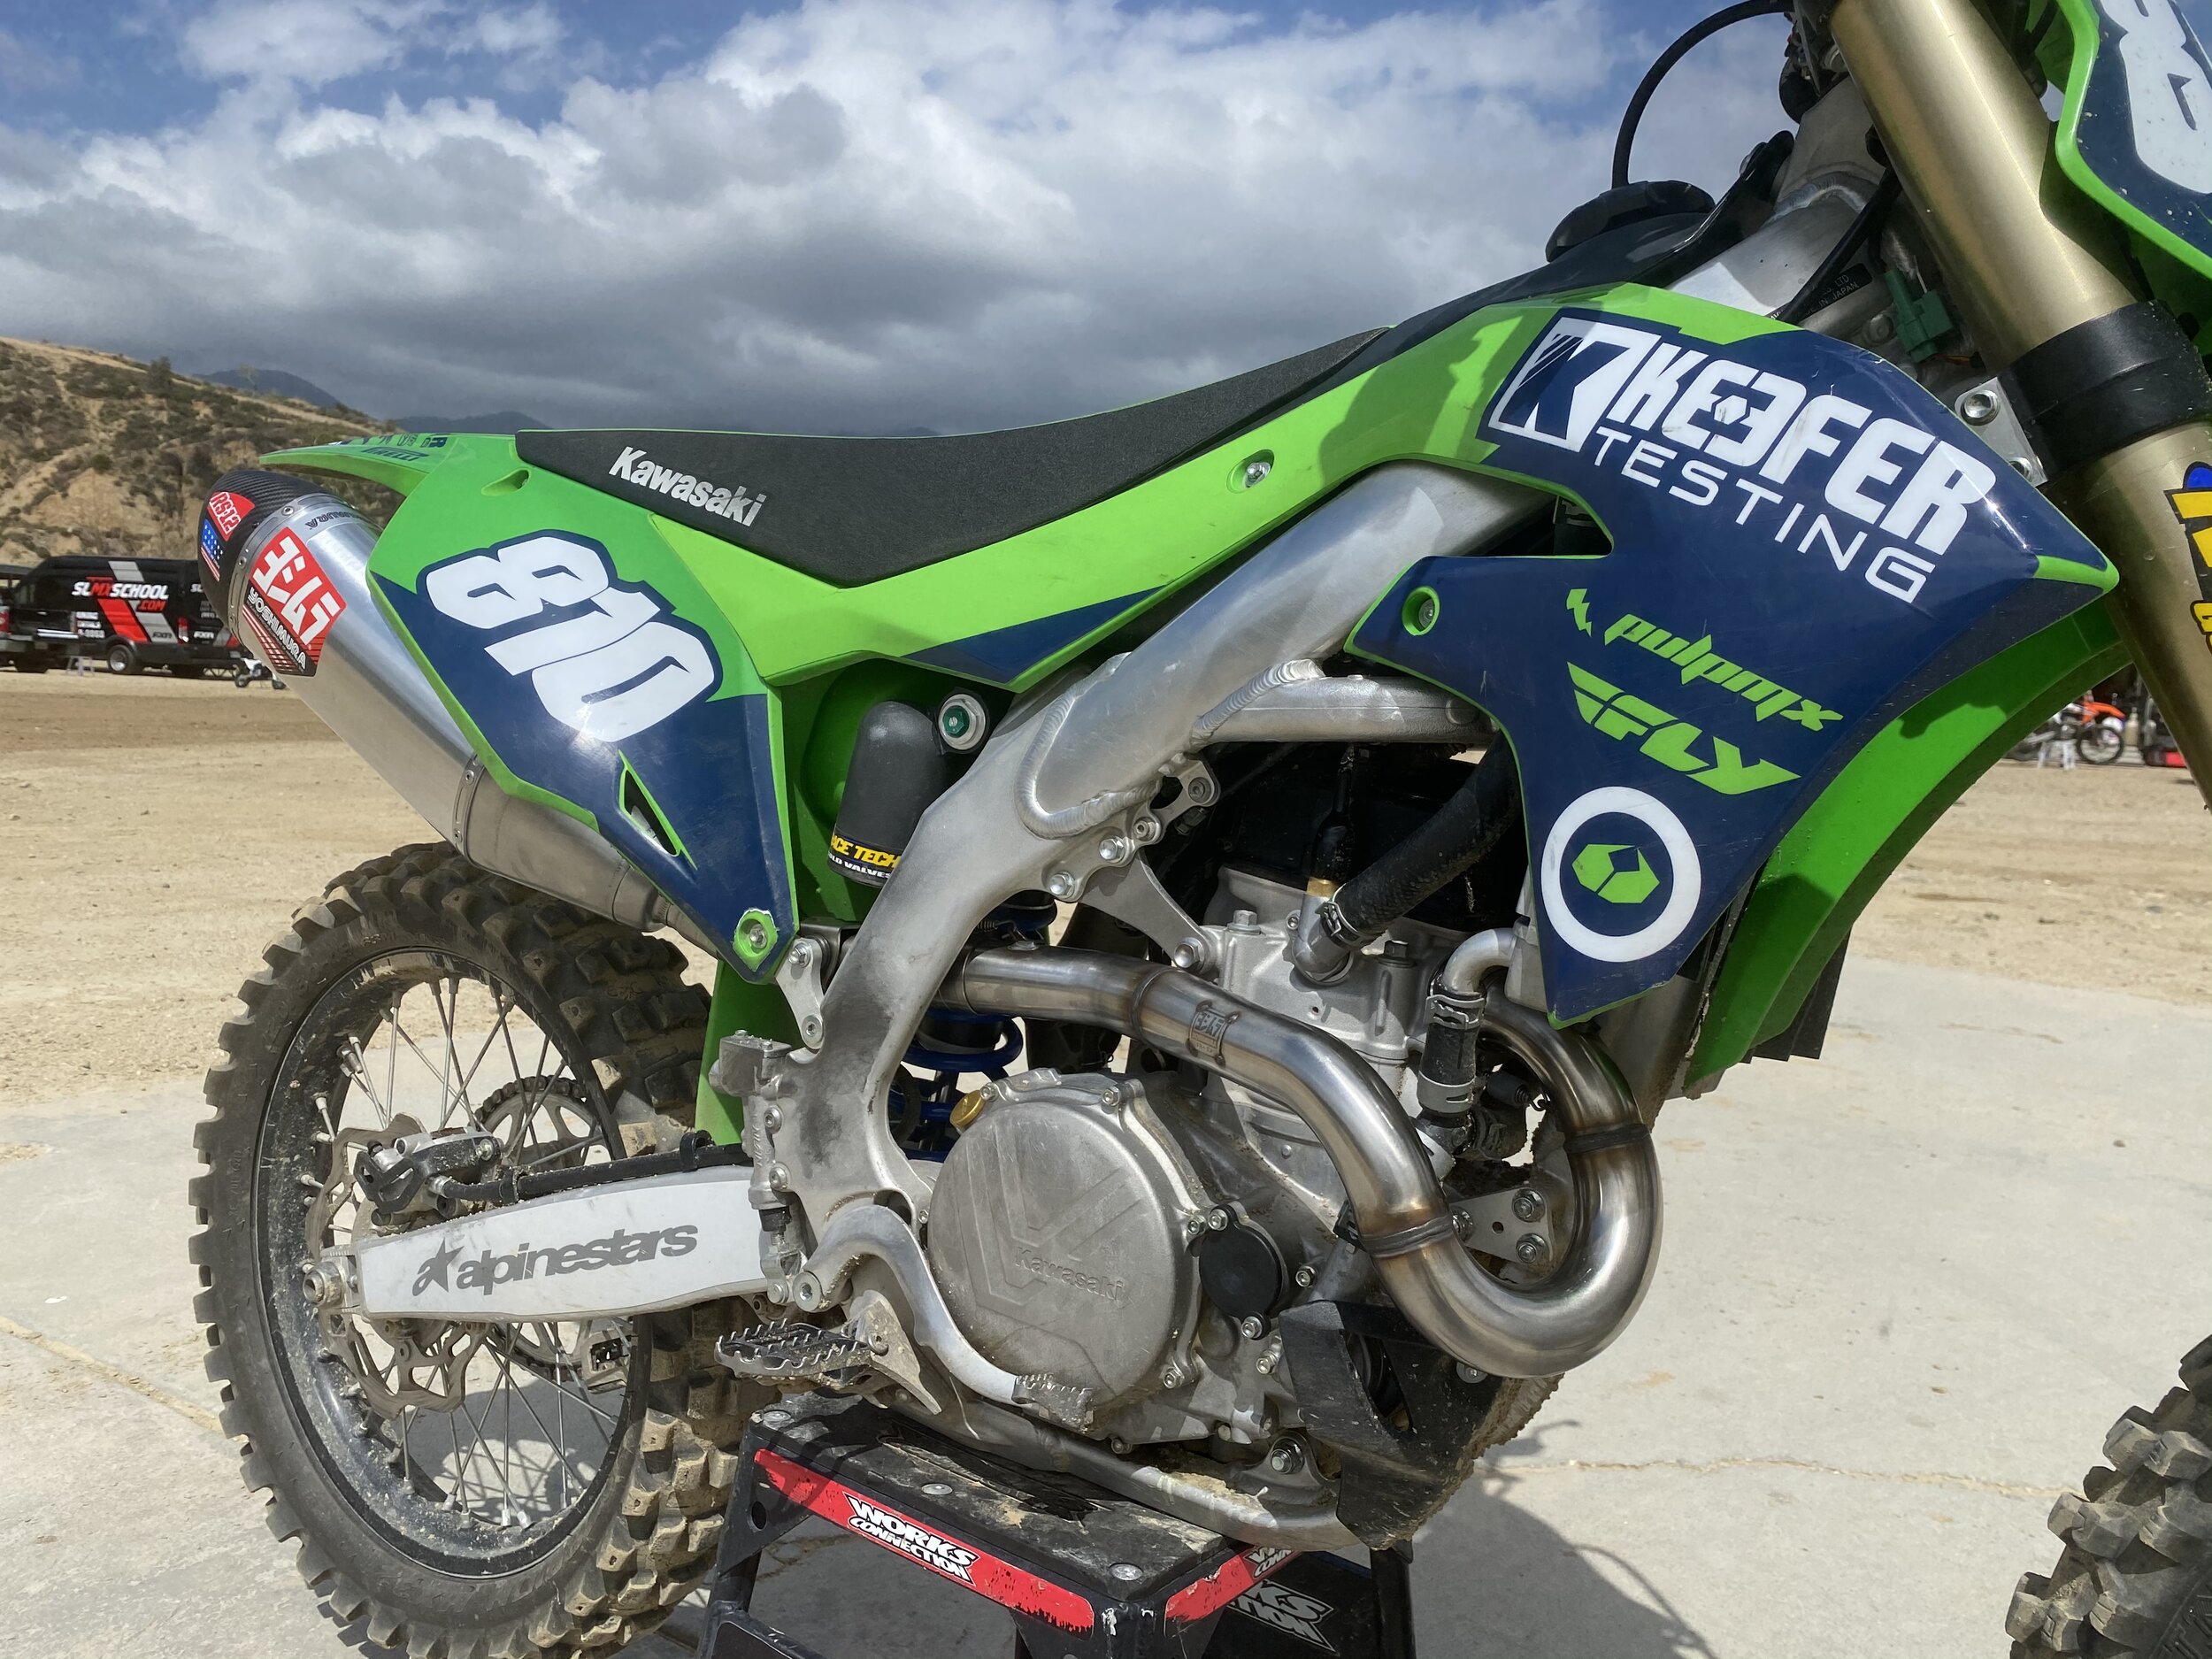
Yoshimura RS-12 Stainless Muffler System (2021 Kawasaki KX450)

The stock 2021 Kawasaki KX450 is pretty damn good machine, but that muffler looks atrocious right? We called up on Yoshimura to see if we can get a more attractive aftermarket muffler system that is actually better than the stock system. I will say that the stock KX450 muffler system works pretty damn well, but as always we are constantly looking to try aftermarket pieces because as we all know, you are only as good as what you try! 

IMG_3296.jpeg

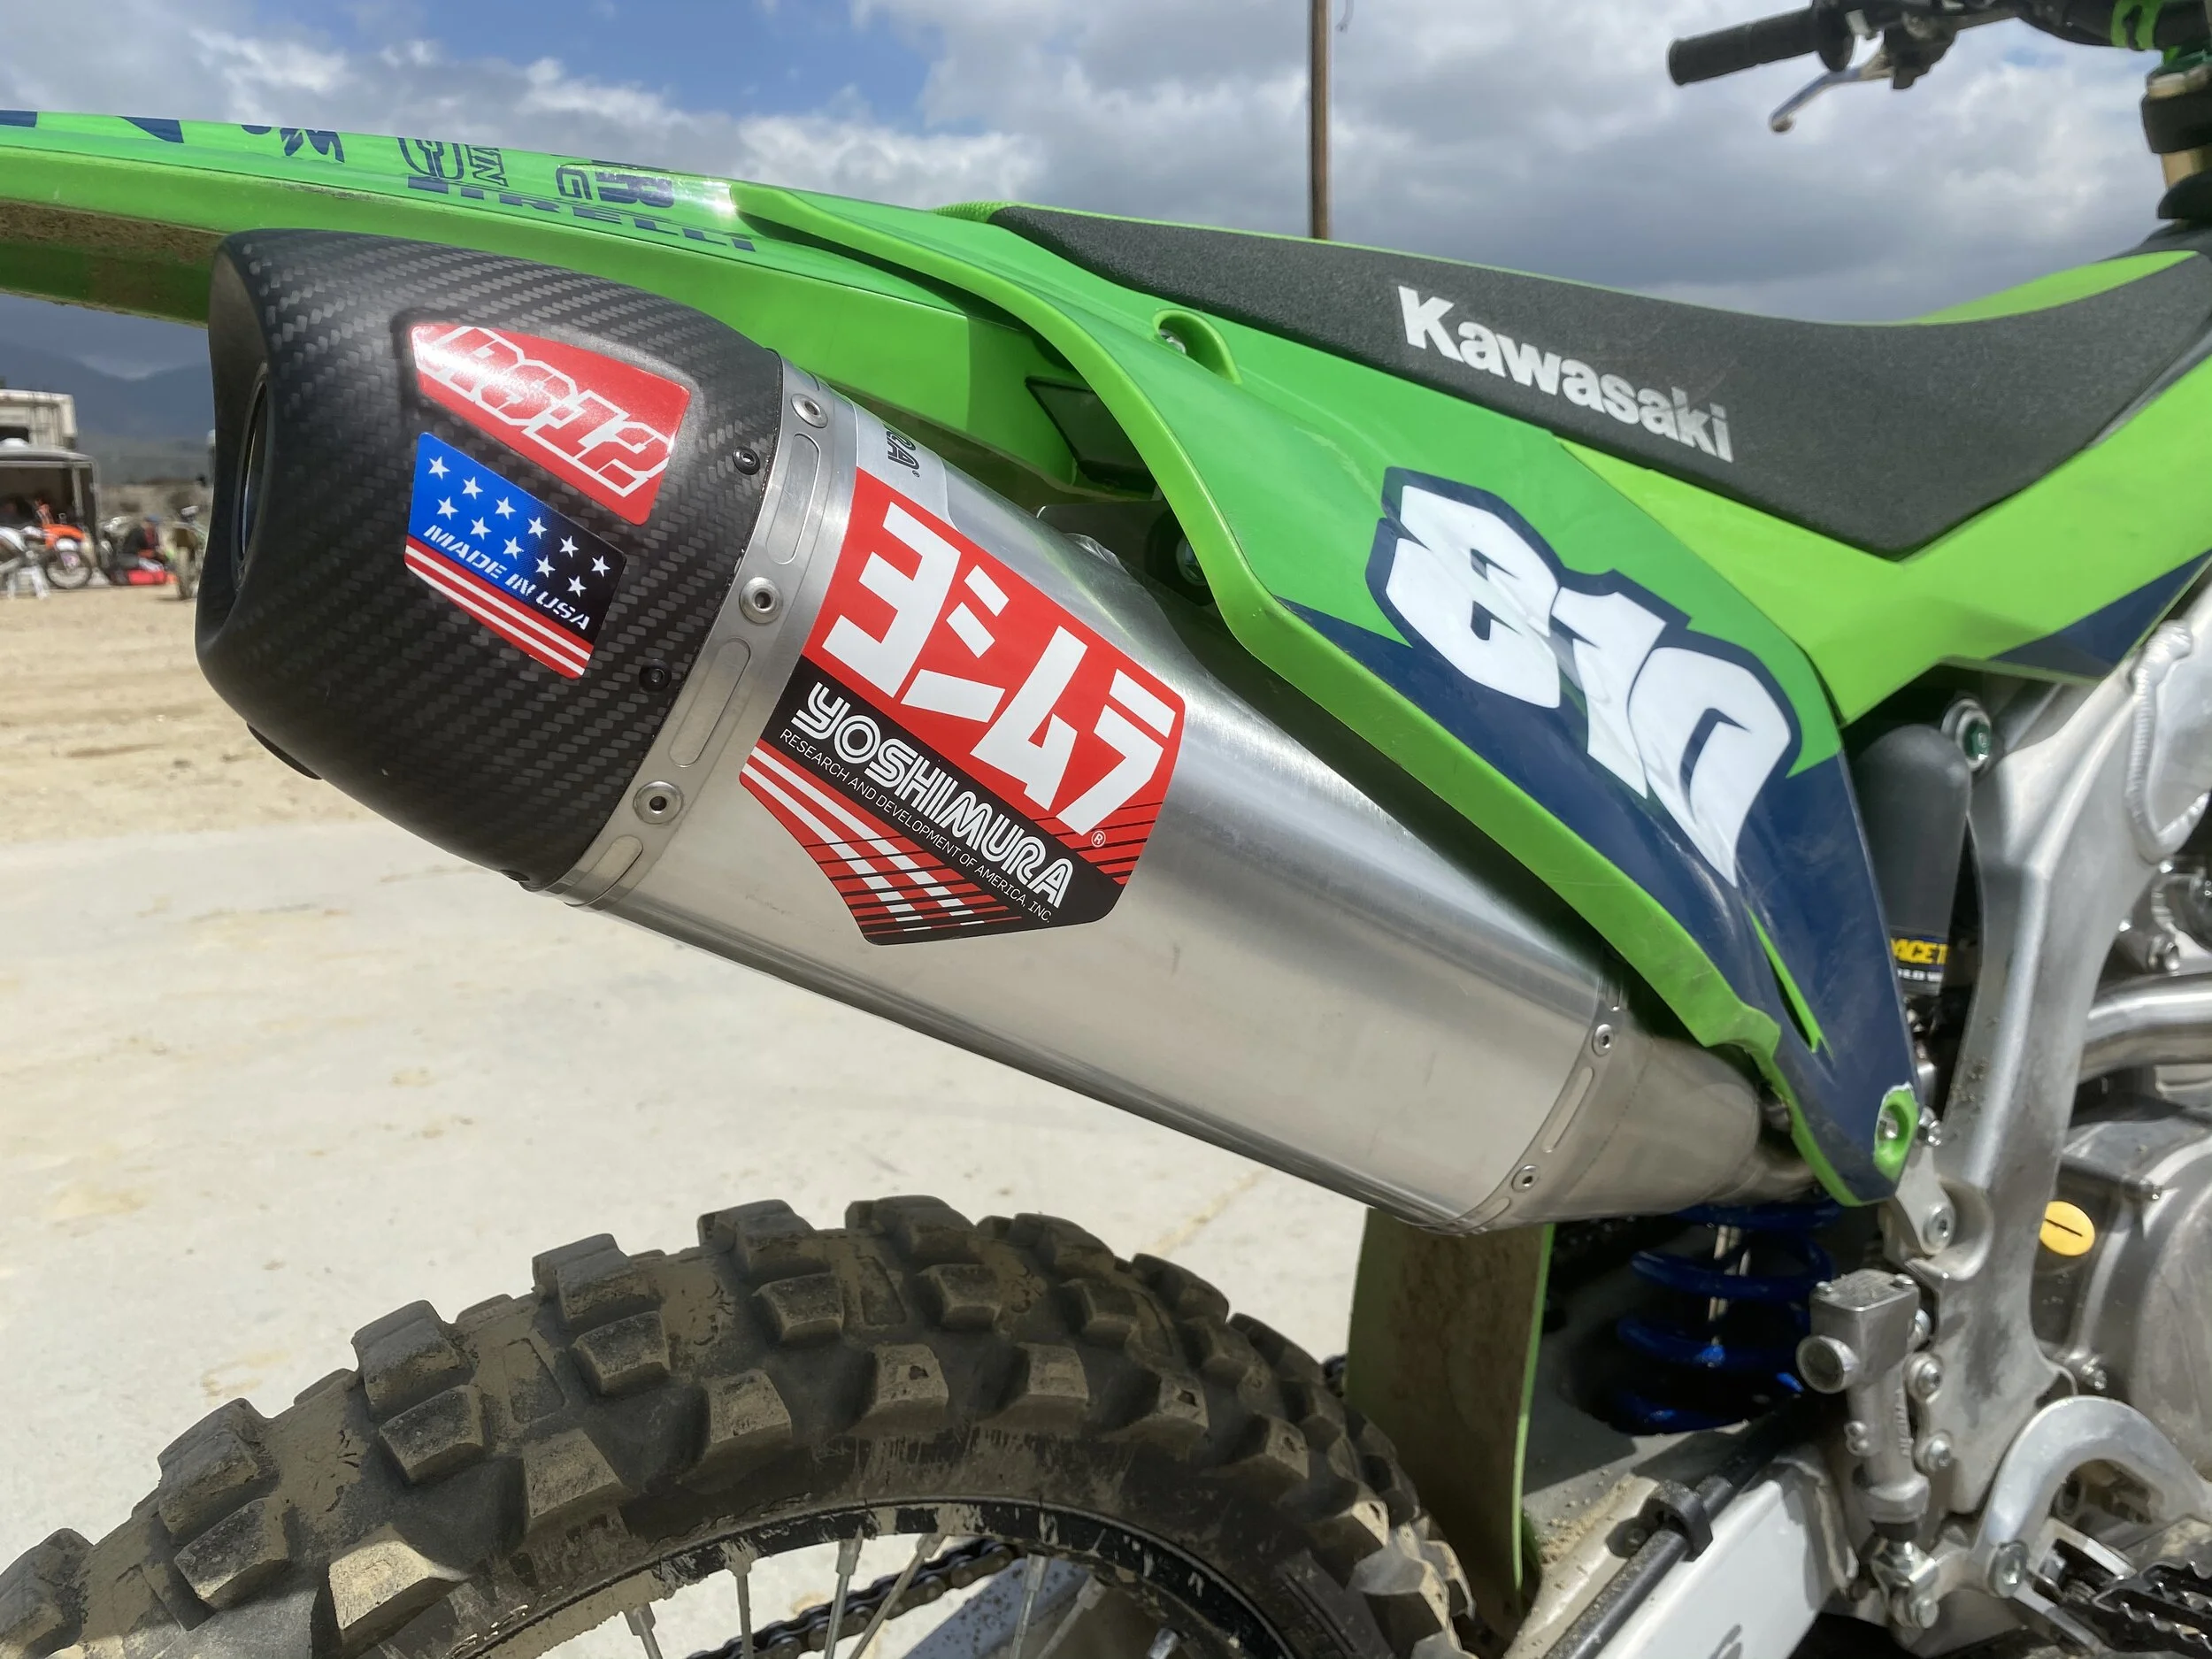
The Yoshimura RS-12 Stainless System is made in the USA, is rubber mounted to the subframe, its asymmetrical shaped muffler allows maximum capacity and incorporates a resonance chamber for managing sound and increasing usable power, the unique shape also provides more clearance for tire and brake caliper, has a new patent pending Precision Taper Fit (PTF) insert ring that can make it easy for the consumer to install and remove sound inserts as well as spark arresters, comes with a carbon fiber end cap and can be fully rebuilt with repacking kits that Yoshimura sells. If you’re looking to lose a little weight with the muffler, you will have to look towards the titanium system. The stainless system weighs in at 9.12 pounds, which is slightly heavier than the stock muffler, that comes in at 9.1 pounds. We aren’t necessarily looking to lose weight in this instance, as power, sound and reliability are more important to us with this unit. 

IMG_3298.jpeg

The stock muffler system is pretty damn good, as the power character of the KX450 is long and linear, but the stock KX450’s engine character could use a little more pulling power and more mid rpm response. Installing the Yosh RS-12 was painless enough and we really appreciated the rubber sub-frame mount that the Yosh muffler comes with. Having a rubber mounted rear muffler mount helps avoid the sub frame tab breaking off due to solid mounting. Once on the RS-12 is visually still big looking, but the RS-12’s exhaust note is so much better to the ears that we lost focus on how big the RS-12 looks. Out on the track we noticed how much easier the KX was to corners because there was less on/off feel from the engine on low RPM because the Yosh builds power a little more smoothly between 5000-7000 RPM. The RS-12 is less touchy to the riders throttle hand and to me that helped calm the chassis down in area 2-3 of corners. You will not get as much throttle response from the RS-12 as you do a FMF or a stock system, but to me this is a good thing. The mid range pulling power is what you will come to love from the Yosh system. Pulling power out of corners is noticeably better than stock and the rider can shift into third earlier without having to use the clutch in order to get the engine to recover (back into the meat of the power). Rear wheel traction was also an improvement on hard pack tracks as the KX450 had a better second gear flat corner sensation to the rear wheel than the stock system. Top end feels as good as stock with maybe a little more over-rev, so if you’re a little lazy the RS-12 can help you slightly in that area as well. 

If you’re looking for a more explosive rpm response from your KX450, the RS-12 may not be the muffler you want to go with, but if you want added pulling power out of corners as well as more rear wheel traction with a better exhaust note, then this Yoshimura RS-12 stainless system for your KX450 is a great buy. The benefit about stainless steel is that the overall construction of the muffler will last longer than titanium. Most of my practice bikes over time had stainless systems on it for the sake of durability. Slip fit titanium joints just don’t last as long as stainless. For $850.00, the RS-12 system is a good buy with quality construction that you expect from Yoshimura.  

ARC RC-8 Clutch Assembly With Aluminum Black Smooth Lever

I will admit that I am usually a stock perch/lever or a Works Connection Elite Perch/Lever kind of rider and although I have tried many different perch/lever set ups those are the two that I normally gravitate towards or back to. I have tested a lot of combos and have come to the conclusion that it’s tougher to make a better than OEM lever feel, perch and engagement feel. Now enter the ARC RC-8 Clutch Assembly With Aluminum Black Smooth Lever and I have found another perch/lever combo that I am genuinely happy with. Other perch/lever set ups that I have tried have either screwed up clutch engagement points with their odd ratios (and messed my corners up) or the lever is simply doesn’t have the right shape for my size large hands (lever shape is a key component to feeling comfortable with your rider triangle). Designing/making a perch/clutch lever is harder than most people think obviously. If you don’t get the lever ratio correct, you will have a clutch feel that is on/off or an engagement that is too grabby or slow feeling. Not easy. 

IMG_1956.jpg

This ARC Billet Aluminum CNC-Machined lever assembly is the one that a lot of top teams run. If you haven’t met ARC Bob then you are really missing out. You might have heard me talk about him on some Racer X videos because the guy is a mad scientist of levers/perches. He will not rest until he’s created massive headaches for consumers due to the fact that he gives us so many damn options!  The features of this perch/lever combo start with the ARC aluminum smooth lever with a 27mm ratio, which I am a fan of. I am not a foldable lever kind of guy because I like a solid feel to my finger when I am pulling in the clutch. It just gives me a more positive feel and this lever seems to give me just that. Not to mention that the lever shape is one of only two shapes in the aftermarket lever business that I can get along with. There is a nylon sleeve that contacts the handlebar that allows for rotation in a crash, which is nice when you have a tendency to tip over in corners from time to time.

IMG_1960.jpg

The cable 1/8 turn quick adjust has a large diameter rubber wheel that is easy to reach for/adjust on the line or in the air. yes, even if you’re a novice rider, you will be able to adjust it in the air! One of the other highlights is the "external pivot". The pivot bolt screws into the lever and the bolt rotates in the perch on replaceable bushings. Whaaaat! This eliminates almost all up and down play in the lever and gives me the positive engagement feel that I look for. In the world of tighter tolerances, this is what you want from a big four stroke. When you have horsepower, you could possibly get more vibration and that can radiate towards the ends of your levers. When you have a tighter tolerance in your levers, you get less vibration feel and more positivity on each end of your bike. It may not seem like much, but it’s the little things that make a difference when it comes to “feeling factory”.  It’s also nice that the clutch pull gets a little easier on the bike that I installed the ARC perch/lever on (2021 YZ450F).

At a cost of $205.00 for the complete perch/lever it’s a sizable investment, but with the quality of Bob’s work at ARC, I am happy to pay for something that I know I am going to love as well as last! ARC gives you a lot of ratio and lever options, so go visit the mad scientist of levers website at www.arclevers.com


The Makings Of A Great WP Pro Component Settings On The KTM 450 SX-F (With REP Suspension)

Let me preface this article with how much I like to ride the KTM 450 SX-F. But… Yes, of course there is always a “but”, right? I like a lot of things about the KTM 450 SX-F, but the stock suspension isn’t one of them. The AER fork is a slight headache for me as it’s stiff as hell when new, then once broke in, moves more in the stroke, yet still gives a harsh mid stroke feel on braking bumps. Not as much as in year’s past, but it still isn’t a spring feel. Raising the air pressure only makes the harshness worse and decreasing air pressure allows the fork to ride too low in the stroke for my taste. I am a front end steering rider and that means that I really like a spring fork feel. Now, I have tried some other companies spring conversions and although better than the AER fork with front end traction/feel, I just wasn’t sold on the performance it gave me on rough tracks. After doing some of these tests, I then resorted to a WP Cone Valve fork. Now I am not going to sit here and tell you that slapping on a set of WP Pro Components is the answer to your front end problems, as I did have to go through several setting changes in order to get a feel that I personally liked. I thought why not walk you through some of the process to create settings as well as tell you about the latest one I have on our 2021 KTM 450 SX-F test machine. 

IMG_1227.JPG

You know who helped me get to this blend of KTM comfort and performance promise land that I am in? Mark Johnson at REP Suspension. I am a serious pain in the ass when it comes to KTM suspension, probably because I love that damn Yamaha KYB/SSS fork so much (yes, I know there are KYB conversions and we are going to test one soon, don’t yell at me). Although Mark made my WP Pro Components better than my stock stuff the first time he did it, I felt like I wanted more comfort on rough tracks. I complained to Mark that my rear end always felt too low under acceleration and the front end still had a firm feel on slap down hits through my handlebars. I complained. He listened. That is what great suspension tuners do. They listen to the customer. There are several companies like this out there and REP is one of those companies. Mark emailed me one night about a setting he came up with, that he thought I might rather enjoy. I honestly thought what I had was decent, but as one old test rider once told me, “you’re only as good as what you try right” and I am in the business to try and relay that back to you all right? So I immediately got excited about another suspension test that could really be “THE ONE”! 

I met Mark at GH one Thursday and we literally stayed there all day. This is nothing new, but as a guy who has been doing this 20 or so years, I still love it! I wanted to make sure that I left GH near dark and when the sun decided to set behind the hills of Glen Helen, I wanted to make sure that I had comfort along with performance, before I gathered my things and left. This is the only way I can sit here and type to you all and say if it’s better or not. When you move from a stock WP AER fork to a WP Pro Component set up you will immediately feel a heavier turn in, yet will receive more front end traction. It’s a give and take and I will gladly take a heavier steer in (area 1 of the corner) for added traction. I don’t have near as much of a problem with the rear of the bike, but the stock shock, once hot, fades away into oblivion and gives no real damping character at the end of a longer/rough Moto. I wanted consistency, comfort and traction. Is that so much to ask from a bike? The Kawasaki gives it to me. The Yamaha gives it to me. I want the KTM to give to me as well with WP components on it! 

IMG_1464.JPG

As usual I make sure that each test is a blind test. I make damn sure I know nothing about what Mark and the REP crew do to each setting and that I am going strictly off of feel when riding. I make sure I hit the same lines on the track through out the day for consistency and that ensures proper feedback to the REP crew (as well as you the reader). When all was said and done, what REP gave me was the best setting I have ever felt from any KTM set of suspension I have tried. Oh and I have tried a lot. Is it the best suspension that I have ever met period? No, but it was the best KTM stuff I have tried, hands down. I was starting to consider that the WP Pro Components were just built for performance and not comfort, but Mark and the guys proved to me otherwise.

 The WP fork with the REP setting not only had hold up, but had comfort as well. Most of the time when you go to an A-Kit style fork, you will lose comfort and gain performance, but both of those categories went up equally for me. RARE! This has only happened twice in my time of testing! Using a 4.8 N/mm spring rate along with the parts listed below gave me great lean angle traction (off or on throttle). The downside to my previous CV fork setting was that if I loaded the front tire on lean (under throttle) the fork deflected and felt harsh. The new updated setting felt more supple initially and progressively had more damping feel as the fork went down. There was no unexpected stiff shelfs in the travel as the fork moved and in return, that gives the rider better feel to the front wheel/tire. AKA more tire contact patch! Boom! Gone is the harsh slap down feel to my hands and that increased my ability to be more confident in how hard I can push into/through jumps because I know that if I wanted to overjump a section (on purpose or maybe by mistake) I could do it without an issue. 

IMG_1466.JPG

The WP Pro Component shock has always been a struggle for me to set up. I always felt like my rear end was too low and when I managed to get the rear end up, it was god awful coming out of corners (harsh and wasn’t fun on my back). Although I gained consistent damping feel over a longer Moto with the Pro Component shock the comfort was difficult to find at times. To help this I ran REP’s knuckle without the longer rods, along with a sag setting of 98mm. I wanted to change the curve of the linkage ratio to help acceleration comfort, but try to keep that rear end up under throttle. This did get me slightly more comfort, but felt like it pushed on the front end too much once transitioning off the throttle. Mark suggested that I try a 1mm longer shock shaft and that really changed the character of this bike. Once I had the chance to ride with that, it altered my outlook on how the KTM’s ride attitude could handle rougher style tracks. The rear end stayed up higher in the stroke and for my 5’11 front end steering frame, this was a game changer. The KTM became more balanced on throttle and allowed me to accelerate harder/sooner out of choppy corners. I now could get my sag numbers back to normal range (103-105mm), which left me with a balanced feeling coming into corners (off throttle). Having this 1mm longer shock shaft also allowed me to run REP’s longer pull rods, which increased rear wheel traction and took some bite/harshness out of any initial braking bump hit. 

Now on to the question that I will get asked after this is published… Keefer, I just spent 11K on my KTM and now you are saying to purchase 5K on suspension  as well as put another 800.00 into those Pro Components? Holy shit! Yeah, I know, right? However, it’s crazy how many people actually do this. So to cater to those people as well as to others, I will also be doing a stock re-valve story just like this one coming in the next few weeks. So hold tight! Not everyone has the money for Pro Components and I am not blind to that fact. I really wanted to get this article up because I had my doubts about these WP Pro Components at times and get tons of emails about them. Mark and the REP crew worked their asses off to make me happy and it took me a while to get there, but hopefully with all of my testing that I have done, as well as REP’s work, you all will benefit from a one and done setting! 

IMG_1467.JPG

Below are the parts that REP incorporated into my WP Pro Components and what each part’s purpose really is: 

  Fork:

1. Cone Spring Perch System $349.99

Gives more bottoming resistance/progression allowing for a softer more plush setting to be utilized for better top of the stroke feel without losing bottoming. (The concept comes from KYB which I have played with a lot).

2. Low Speed Valves $120.00

Allows us to valve the flow of the needle and is fully tunable to each rider. Riders typically comment less front dip/more controlled front under braking.

3. 13 Degree cones $160.00

WP only makes 3 degree options 15, 11 and 8. Mark makes 13 as well for MX/Off-Road and 8 for SX. This helps bridge the gap between the degrees to get a specific damping the rider is looking for.

4. Low Friction O-Ring Kit $11.99

Lower cartridge friction compared to the standard o-rings that come in the fork.

Shock:

1. Trax LSV $250

Similar to the fork LSV, it gives REP another shim stack to play with, that normally is not in the shock. The shim stack controls the needle flow and is fully tunable. (This is the part that I felt gave firmness without taking away comfort). It also majorly decreases hysteresis, or pressure differentials, in the shock, which results in a more consistent feel and performance in the shock. 

2. Shock Spring Thrust Bearing $62.99

Springs naturally want to turn as they are compressed which causes binding. The bearing is fitted on top of the spring to allow it to turn and can be put on without the damper being disassembled.

3. RCU Spacer $21.99

REP has spacers made that go on both sides of the shim stack that are surfaced ground to be more flat than production. The spacer makes for a more consistent and predictable build as far as dyno and rider feel is concerned.

4. 1mm Longer Shock Setup $112.99

Helps balance of the bike for most riders, but also gains comfort as it puts the linkage into a softer part of the stroke.


Chassis:

1. REP MW1 Knuckle $299.99

Price jumped from up from the last write up I did because they now build them with OEM Bearings and seals.

2. 149mm Pull Rod $219.00

It’s longer compared to the standard 148.2mm for the flatter leverage curve Mark was looking for, also built with OEM bearings and seals.


DR.D Stainless Full Muffler System

By: Michael Allen And Kris Keefer

It’s no secret that Doug Dubach knows Yamahas. That being said, after years of testing for Yamaha Doug started Dubach Racing Development where he builds finely tuned exhaust systems for other major motocross models. However, this isn’t one of those “other” motorcycles and we wanted to take that atrocious sounding stock muffler and try something we haven’t tried.  I met Doug through Kris and have had the privilege of hearing some old testing stories, listening to him give Kris shit, giving me the basic inner workings of exhausts and testing in general explained to me. I really look up to Doug and Kris’s testing abilities both, so when they sent me a DR.D system to try on the 2021 YZ 250F, I was excited and nervous at the same time. Excited because if anyone knows how to make a Yamaha work well its Doug. Nervous because I knew the exhaust wasn’t the only thing being evaluated; Kris always expects me to go into any test with no pre conceived notions about the product and he’s always evaluating my ability to test which is a bit nerve racking.

IMG_1380.jpg

It’s no secret that the Yamaha YZ 250F has a damn good production engine. When the bike was redesigned in 2019, the power characteristics of the engine slightly changed from making the majority of its power lower in the RPM range, to slightly shifting the peak power up in the RPM range giving the bike a lighter, free revving feeling. While this more playful feeling is fun to use, there was still a part of me that missed the low-end grunt of the previous engine character. After Randy Richardson gave the bike a proper break-in at the Dubya USA World Vet Nationals, the stock muffler packing was extremely blown out, there was seemingly no packing left in the can. I love doing back to back testing because the difference in performance (good or bad) of a product will be far more obvious if the comparison is made the same day. So when at Glen Helen racing the Swap Moto Series I decided to race the first moto with the blown out stock muffler, and the second moto with the DR. D system. 

IMG_1381.jpg

Although some people may think that since the exhaust wraps around the engine it must be a pain to change it was very straight forward. There was only one step that I found I needed help with to make the process easier, which involved my wife, her butt and me asking for her to sit on it….. With the stock system removed, I simply needed my wife to sit on the bike so that the shock would compress and move back enough in order to get the head pipe between the frame, shock and engine. One other tip is to tighten the two exhaust stud bolts before installing the muffler because leaving the muffler off allows for more room for a wrench. Aside from that step, leave all the bolts finger tight until all the parts are installed, so that there is a little wiggle room. 

IMG_1383.jpg

After racing moto one I’m sure most of the spectators ears were pleased when I rolled up for the second moto with a fresh exhaust. The first thing I noticed was the change in the exhaust note, gone was the raspy clapped out tone that bellowed from the rear end of the 2021 machine. That raspyness had been replaced by a more throaty sound that obviously had more backpressure and sounded crisp. As the man in overalls ran back to the doghouse to drop the gate I focused solely on my technique and to my surprise when the gate fell I instantly felt far more connectivity from my throttle hand to the rear wheel. I got a great jump, and stayed right with the KTM 350 that was next to me until about half way through third gear. It doesn’t matter what exhaust you have, nothing is going to make up for 100ccs, not to mention all the 450 machines in my class. In addition to the improved connectivity, the power with the new system has been smoothed out. Don’t let that be confused with mellowed out; in fact the DR.D system has noticeably more mid to top end over stock, yet also gave me a little more low end that I wanted back from the Yamaha. Instead of just making noise and spinning, the bike is now able to put that power to the ground and drive forward. The DR.D system not only helps get the power to the ground, it helps clean up some of the FI setting near the low end range on slower corners. I felt like the NS-4 muffler brought some added mid range meat to third gear and allowed me to make my shifting points later than the stock system did. 

To be honest, most manufacturers in 2021 make very good stock exhaust systems that don’t leave much room for improvement. When it comes to performance gains over the blown out stock system, this DR.D full system surprised the hell out of me and I think an exhaust shootout may be in order soon. With a price tag of $659.95 this stainless and aluminum system is a great deal when compared to the price of other manufacturers and is still lighter than stock by over a pound. It may not be the lightest thing on the market, but let’s get real, you and I don’t need the weight loss on our machines. Maybe I need to lose a few before my machine. Once again Doug proved that during all those years helping develop Yamaha’s YZ’s he was taking notes on what works and what doesn’t. If you have any questions about the 2021 YZ 250F DR.D exhaust system, reach out to me at Michael@keeferinctesting.com.

You can get a DR.D muffler system over at www.dubachracing.com.


Keefer’s Notes: 

 I concur on what Michael has written and would like to add that to me the bottom end character is improved with the DR.D on. The bottom to mid RPM response is not only better but to me gives the rider more control around the track. Michael mentioned being more connected to the rear wheel and that right there is what I noticed the most. 

On My Own Dime: My Favorite MX Tires

To keep up with these ongoing “On My Own Dime” articles I thought it would be informative to write about a few of my favorite tires. I don’t use the same tires year round, because quite frankly some conditions/tracks suite different tires better. For example, I raced with a MX3S/33 combo at Loretta’s and then raced with the Pirelli MX32 mid-soft’s at the World Vet’s at Glen Helen. 

I don’t always get free tires, so when I have to go purchase tires for Aden and my own personal bikes, these are the tires that I purchase. These are strictly performance based tires and are not meant to be the most durable tire out on the market. I normally am looking for performance out of my tires and not as much longevity, but I do want it to last more than a couple weekends of racing. Just know this… It is tough to weave performance as well as durability in a tire. You need to know what type of rider/consumer you are. Are you looking for the most traction out of your rubber? Or are you the type of rider that doesn’t need all the traction in the world and is just fine with a tire that last longer with a harder carcass. Below are my top picks of tires when looking to go racing.  

FA306094-63F0-408C-BD5E-9FE695C4286E.JPG

Pirelli MX 32 Mid-Soft Front/Rear:

Pirelli may not be the most popular tire in the AMA Supercross/Motocross paddock, but one look around the MXGP circuit and you will see more Pirelli tires than any other brand. I tested the Pirelli MX32 MId-Soft back in early 2018, but since then, the MX32 Mid-Soft tires are said to have an improved spec and I have been circulating through them regularly o my test bikes. While I don’t have much information on what was improved or why (maybe a vendor change), I did get confirmation that all of the old MX32 Mid-Soft spec tires have been out of circulation for a while. This was a concern to me as I thought some may still be floating around, but I was reassured that if a consumer purchases any Pirelli MX32 Mid-Soft tires, you will in fact be getting the updated versions. Pirelli also noted that they have dropped their pricing down on all their motocross tires $5.00-$15.00. 

Once out on the track I quickly found out that one of the first things that impressed me the most was that the Pirelli Scorpion MX32 Mid Soft’s carcass gives the rider a blend of comfort and control on choppy/square edge terrain. I have more time on Dunlops than any other brand of tire around these Southern California test track, so I am very familiar on what these test bikes feel like when they get rough. When the track does get rougher, the Pirelli MX 32 Mid-Soft rear tire (120/80-19) gives more cushion than the Dunlop I have been riding on lately. The Pirelli carcass acts like another piece of your bike’s suspension and can really help a rigid feeling chassis become slightly better on choppy terrain. It impressed me so much that I tried it on a 2020-2021 Honda CRF450R and it gave me less of a harsh feel. To me that was impressive on this machine, because the Honda needs more comfort and the MX32’s carcass did just that.

Pirelli also offers a 120/90-19 size rear tire as well that was even better on square edge cushion feel, but the 120/90-19 also puts more weight on the front end of the machine, which increases front-end steering, but negatively affects the ride height. If you do decide to go with the 120/90-19 and feel like your rear end is too high after installation, I do recommend dropping your sag 1-2mm to prevent a high feeling rear end on de-cel (stink bug). 

The Pirelli MX32 Mid-Soft rear tire offers great traction on soft/intermediate terrain through ruts and coming out of soft corners. The MX32 works well under lean angle and that lean angle traction is one of Pirelli’s rear tire strong suits, as the rider is able to get on the throttle sooner (while leaning) without washing out. The contact patch that I get with a Pirelli at Glen Helen is unmatched. I feel like my lean angle is more controlled and that sudden line changes are easier with the Pirelli. When riding you want the largest “feeling” contact patchiest you can find from a tire and Pirelli has done this well with the MX 32 Mid-Soft. 

Not only do you have a more controlled lean angle, but you are also able to start your lean sooner (compared to a MX33). Braking predictability gives the rider confidence to pivot and throttle out of flat corners without much hesitation. If you’re a predominately front end steering rider the Scorpion MX32 rear tire will provide you with less sliding ability and let you steer with the front tire more than the rear. If you're a rear end steering rider that likes to drift the back end around, this tire may not suit you as much as a Dunlop MX33. The only complaint I had is when the track surface was on the harder side, I could feel the side of the tire carcass roll when accelerating from flat corners. This gives me a pushing or loose feeling rear end that caused me to be less aggressive with my throttle hand. To combat some of this it’s very important to run the correct air pressure (between 14-14.5 psi) for the Pirelli’s softer style carcass. I noticed that when the Pirelli tire gets half worn, the performance isn't as good as the Dunlop if you don't pay attention to the tire pressure. When the tire gets worn, going to 14.5-15 psi helps the structure of the carcass stay firmer on its sidewall when under lean angle. 

I ran 14 psi on a half worn rear Pirelli and it felt very “washy” or vague so going up to 14.5 psi helped this roll sensation. Remember that just because the actual knobby might not be worn down that doesn’t mean the integrity of the caracass isn’t worn. Chunking wasn't an issue with the set of Pirelli’s I had, as I got well over 10 hours on a rear tire. You will also have to understand that Southern California conditions are much harder than east coast conditions, so lifespan would most likely be better in softer east coast based dirt.  

I am a picky son of a bitch when it comes to front tires! The Pirelli MX32 front tire is great for front-end feel and lean angle traction especially in heavy dirt. The softer the dirt the more responsive this front tire is. I prefer a tire that really digs into the dirt and lets you carve underneath blown out berms or ruts (happens a lot here in Southern California). The Scorpion MX32 Mid-Soft front tire actually makes the steering feel heavy at times because the tire is at maximum grip under initial lean in corners. Like I mentioned above, the MX32 is tailor made for a front wheel steering rider and can be leaned into corners earlier than you would come to expect. It took me a couple rides to fully trust this tire, but it has treated me well once I began trust it more. The only other front tire that has as much front end lean angle traction is a Hoosier MX25. This Pirelli front tire does suffer from predictability when the track is freshly watered while broken in/slick on top (think 1PM at your local track). The MX32 would give the front end a vague/push feel as the bike would have a tendency to slide unexpectedly through flat corners. Again, adjusting the air pressure can remedy some of this, so going up to 14.5 psi helps the tire not to roll so much. 

To me this is a pure soft natured front tire and if the conditions are soft to loamy this tire works great, but if the track gets hard pack, you will get some uncertainty when pushing the front tire’s limits with 13.5 psi. The wear of the MX32 front tire is adequate and unlike most soft terrain tires, the Pirelli will NOT chunk from what I experienced. I typically get 9-11 hours on a MX32 front tire before I start to see some of the performance life start to dissipate. This is a performance based tire and should be purchased knowing this. 14 psi is a good baseline for this tire, but be sure to check the pressure after a couple motos. Tire pressure will rise with heat so make sure to have a good tire pressure gauge handy in the tool box. 

The updated Pirelli Scorpion MX32 Mid Soft is one of my favorite sets of tires to put on for Southern California tracks. The Pirelli tires will require more attention during the course of the day with your tire pressure gauge, but if you stay on top of the air pressure, you will be rewarded with a tire that rivals spec tire cushion feel.

IMG_4472.JPG

Dunlop MX3S Front Tire: 

The MX3S directional front tire is great for front-end feel and lean angle traction, especially over the older MX33 front tire in all conditions. The MX3S front tire actually makes the steering feel “heavy” at times because the tire is at maximum grip under initial lean in corners. It can be somewhat grabby if you're not used to it and can cause some oversteer, but once used to the lean angle feel the MX3S becomes magical in soft to loamy conditions. The MX3S is tailor made for a front wheel steering rider and can be leaned into corners earlier than most other tires very easily. The only other front tire that has as much, if not more front end lean angle traction is a Pirelli MX32 mid-soft. I did have a problem with the MX3S when the track had just been freshly watered and was slick on top (think of the second moto at a Glen Helen-type track). This would give the front end a vague feel (un-predictable) as the bike would have a tendency to push the front-end through flat corners (the MX53 is better in these types of conditions). The wear of the MX3S front tire is not as friendly in hard pack terrain as you can feel the side knobs roll on the hard pack surfaces. The vague/pushing sensation is common once on hard pack so you may want to stick with more of an intermediate to hard terrain tire if your local track has a hard base. Again, just like a performance tire, the side knobs can chunk off rather quickly if you’re riding on intermediate terrain often. I typically get 7-10 hours on a MX3S front tire before I start to see chunking of the side knobs. This is a performance based tire and should be looked at accordingly.

IMG_8381-2.jpg

Bridgestone M59 Front Tire:

The Bridgestone M59 tire has been in production for quite sometime, but for some weird reason I must have missed it while it was in circulation. I have tested the Battlecross tires, but never even knew about the M59 until Aaron Clout (Luke Clout’s brother spoke about it). Installing the Bridgestone M59 was the easiest tire I have literally ever put on. It has a soft carcass and the bead went into the rim nicely without any fuss. Once on the track, I knew I had to experiment with air pressure because I could feel the side of the M59 roll when pushing heavy into ruts (similar to the Pirelli). I started out with 13.5 psi, but finally settled on 14.5 psi as a setting that I would recommend when riding with this tire on a 450. The 450 comes with more weight and that means more roll of this soft sidewall when you’re pushing into corners. If you want to sacrifice some of that carcass cushion on square edge you could go up to 15 psi and get some added control on lean angle. The M59 wasn’t quite as good as the Pirelli on lean, but it did mimic the MX32’s comfort if there was some chop inside of ruts. I could feel more cushion through the front end and that gave my 43 year old hands a welcome sigh of relief. 

Once I decided that 14 psi was the happy medium, I still felt the lean angle traction that I got wasn’t quite as good as the Pirelli MX32 Mid Soft. I could set up for ruts or berms on terrain that varied from loamy to semi hard pack without getting a push or vague feel, similar to the Pirelli, but I could still feel the sidewall’s inconsistency with the Bridgestone when I tried to pivot on flat corners. With the weight of the 450 and the aggressive nature of my front end steering style, the Bridgestone just wasn’t a fan of being leaned over with nothing to bank off of. The overall straight line bump absorption of this front tire wasn’t quite as good as a Pirelli MX32 Mid Soft, but was better than a Dunlop MX3S. It almost felt like the side wall had a different softer flex character and the middle of the M59’s tire was made of some harder/different type of rubber compound. The Bridgestone did suffer from some slip in corners if it was freshly watered, as I couldn’t quite be as aggressive in that area like I could with the Dunlop MX3S. 

What’s odd to me is when I tested the same tire on a 250F, I got a completely different feel. The front end could be loaded and pivoted without getting a push or a vague feel. The straight line bump absorption was about the same as on the 450, but the lean angle traction was much better. I think this has something directly due to the M59’s carcass and how much of a load it can handle on lean angle. I don’t know what Bridgestone’s target was when making this front tire, but to me this M59 is tailor made for 14 psi on a 250F or smaller machine and maybe 14.5 on a heavier 450. I rode just as aggressive on the 250F as I did on the 450 and it had a consistent lean angle feel. I also feel like this could be a great off-road tire, especially if you ride a ton of rocks. The carcass feeling of the M59 could be a welcome feeling in extreme off-road conditions.

21 KTM 350 -7783.jpg

What About The Dunlop MX33 Rear? 

Yes, I do like the Dunlop MX33 rear tire way more than I do the 33 front, so when I go to a 3S front, I usually match it up with a 33 rear. The 33 rear is heavier than the Pirelli MX32 mid-soft and the carcass isn’t quite as comfortable as the 32, but the Dunlop MX33 rear does give you a solid/non-roll type of feel when under lean while accelerating. I also like that the 33 rear feels like it has more traction than the Pirelli when worn down. I run the 33 rear at 12.5 psi because the carcass is stiffer and that seems to get me the best forward bite. I normally get around 10-12 hours of life from this tire around Southern California, depending on track conditions.

Ride Engineering Split Triple Clamps (KTM/Husqvarna)

The stock KTM/Husqvarna clamps are too stiff for me! What about you? Well, if you’re here reading this, chances are they might be too rigid for you as well!  It’s odd because most other manufacturers OEM clamps are on the soft side, but the Austrians had something more rigid in mind when making these stock clamps. So in search of other options besides an X-Trig ROCS or a KTM Factory Edition clamp, I went out and tried Ride Engineering’s new split clamp. When Ride Engineering set out to build the KTM clamps, they’ve been designed with four goals in mind: 1) Optimize body position: (Bar position 3mm back from stock). Ride Engineering also offers optional offset for their bar mounts providing 4 bar positions as measured from the stem hole: 6mm forward, 9mm forward, 15mm forward & 18mm forward (using stock bar mounts your positions are either 7mm or 17mm forward); 2) Flex: this new split design made from 2024 aluminum is said to provide better comfort; 3) Improve the handling with a new gull wing design; 4) Place the upper pinch bolts in the front and allows for different aftermarket handguard mounts. Each set comes with a frame mounted hour meter relocation bracket so that you can retain your OEM hour meter. So how did they perform on the track? We break it down for you here. 

ride clamps.jpg

The stock KTM triple clamps are stiff natured and can make your orange bike feel rigid/harsh. My goal for this test was to find less front end vibration through the bars, more front end comfort, as well as try to get a more precise front end feel through corners, without getting added rigidity on hard pack/rough straights. Basically get a more compliant KTM 450 SX-F, but that is sometimes tough to do right? The good news is that this is exactly what I found with the Ride Engineering Split Clamps. The Ride Engineering clamp on the KTM 450 SX-F provided enough flex on small bumps, which gave me less of a stiff feel through the bars, yet was also stiff enough to give me a positive front wheel lean angle through flat corners. The Ride Engineering clamp is most noticeable when diving deep into a rut where there is a huge load put on the front end, forced by the rider. The chassis positivity through this area is much better than the stock clamps. The stock clamps have a tendency to give the rider a rigid feel when weighting the front end (although slightly more positive feeling), deflection on de-cel bumps and vibration that is not very friendly. The Ride Engineering clamp gives the front end more tire contact patch feel because it allows the front end to absorb more of what the track is offering the rider. Going firmer on the triple clamp can give a rider more positivity at times, when leaning into a corner, but in this case, I felt like I could get into a corner much easier with the Ride clamps. Straight line stability is improved because of the bump absorption character of the Ride clamp and vibration is also down which gives the bike a tighter, less clapped out feel. Also do yourself a favor and get rid of those stock Neken handlebars. Buy some Pro Taper EVO bars and thank me later!

ride clamps sl.jpg

Compared to a factory KTM clamp (that comes on the Factory Edition) the Ride Engineering clamp does have a little more flex to it than the KTM FE clamp. The two share the same split design, but offer different flex characters on the track. The KTM FE clamp does have a slightly firmer feel, which does help area 2 of corners when pushing your front tire/front end hard while banking off of ruts. The KTM FE clamp does give a little more positivity in that area, but in all other areas of the track the Ride Engineering split clamp just has more comfort.  I tried the Ride Engineering Split Clamps with the stock mounts and the rider triangle of the bar mount position on the clamp wasn’t an issue for my 6’0 frame. I also have tried the Ride Engineering bar mounts, so if you’re taller and looking for more room, you might want to look into a set of the two piece bar mounts from Ride as well.

A lot of back to back testing went down against the KTM Factory Edition clamps in order to figure out how much flex was too much or too little.

A lot of back to back testing went down against the KTM Factory Edition clamps in order to figure out how much flex was too much or too little.

Ride Engineering offers two offsets (22mm and 20.5mm), comes in four colors (black, orange, silver, LE blue) and redesigned with a 90mm span to accept the stock bar mounts and mounting hardware. The $689.90 price tag is also not as steep as some of the other clamps in its class and to me Ride Engineering is one of the few aftermarket chassis part companies that actually test their own products. To have an owner that rides his own parts, then makes an educated decision on if it’s better than stock, is pretty damn cool. You can check the Ride Engineering Split Clamps out at ride-engineering.com

If you have any questions about these clamps, or any others for that matter, or maybe want a discount code, hit me up at kris@keeferinctesting.com


Hinson Momentum Steel Clutch Basket

Hinson makes steel clutch baskets that replace the aluminum standard baskets on Honda, Yamaha, Suzuki and Kawasaki MX machines. If you’re wondering what the benefits are, let me tell you how I stumbled across this basket years ago. I was looking to smooth out the hit of one of the first generation YZ450F’s and there weren’t any flywheel weights available, but Hinson was offering a heavier steel clutch basket. Fast forward to 2021 and I have found it tough to find a slightly heavier flywheel for the YZ450F so guess what? I thought I would revisit this and see how it works in my 2021 YZ450F test machine. First the steel adds durability and strength to a part that wears, often the aluminum of the basket’s fingers develop grooves where the drive plates press on them. Over time this makes the clutch action poor and increases slop in the drive of the bike. The end result is often broken baskets and even worse, broken cases as the clutch basket comes apart.

Secondly, the added weight adds rotational inertia inside the engine helping to keep the rear wheel from spinning and also smooth the pick-up of acceleration as you increase the throttle. Since the spinning ratio is reduced compared to the crank, the weight effect is slightly less pronounced than a flywheel weight, but still can offer benefits from what I have experienced on our 2021 YZ450F. 

IMG_0700.jpg

A flywheel weight on certain bikes can calm the power delivery. In some cases, heavy flywheels can smooth low end power and just replace the point of power that is now smoother, somewhere else in the power range. That is NOT always great! I am fairly picky about the engine delivery of a big 450, so as much as I love a Yamaha YZ450F, I wanted to smooth out the power coming out of area three of corners, in order for the rear wheel to hook up more. I have been having a problem wheeling the YZ450F when under the throttle hard as well as getting wheel spin out of corners when accelerating to clear jumps. I can’t seem to tune this out with the YZ Power Tuner, so here we are…  

Enter the Hinson steel clutch basket. Depending on the application it can be up to two pounds heavier than the stock basket. Made from precision machined steel, it is impervious to wear on the ears, like the standard aluminum baskets can be. To install the Hinson steel basket you do have to remove your standard clutch basket, so just be forewarned this process can take a while. You then must drill out the rivets and replace the drive gear on from the back of the stock clutch and install it on the Hinson basket. (Some kits come with a new kickstarter gear and drive cushions as well.) Hinson recommends using their cushions (which come with the basket), especially if your bike has some time on it. This install process takes slightly above normal mechanical know-how and tools, but it isn’t much more than a 90 minute job with the included step-by-step instructions.

IMG_0701.jpg

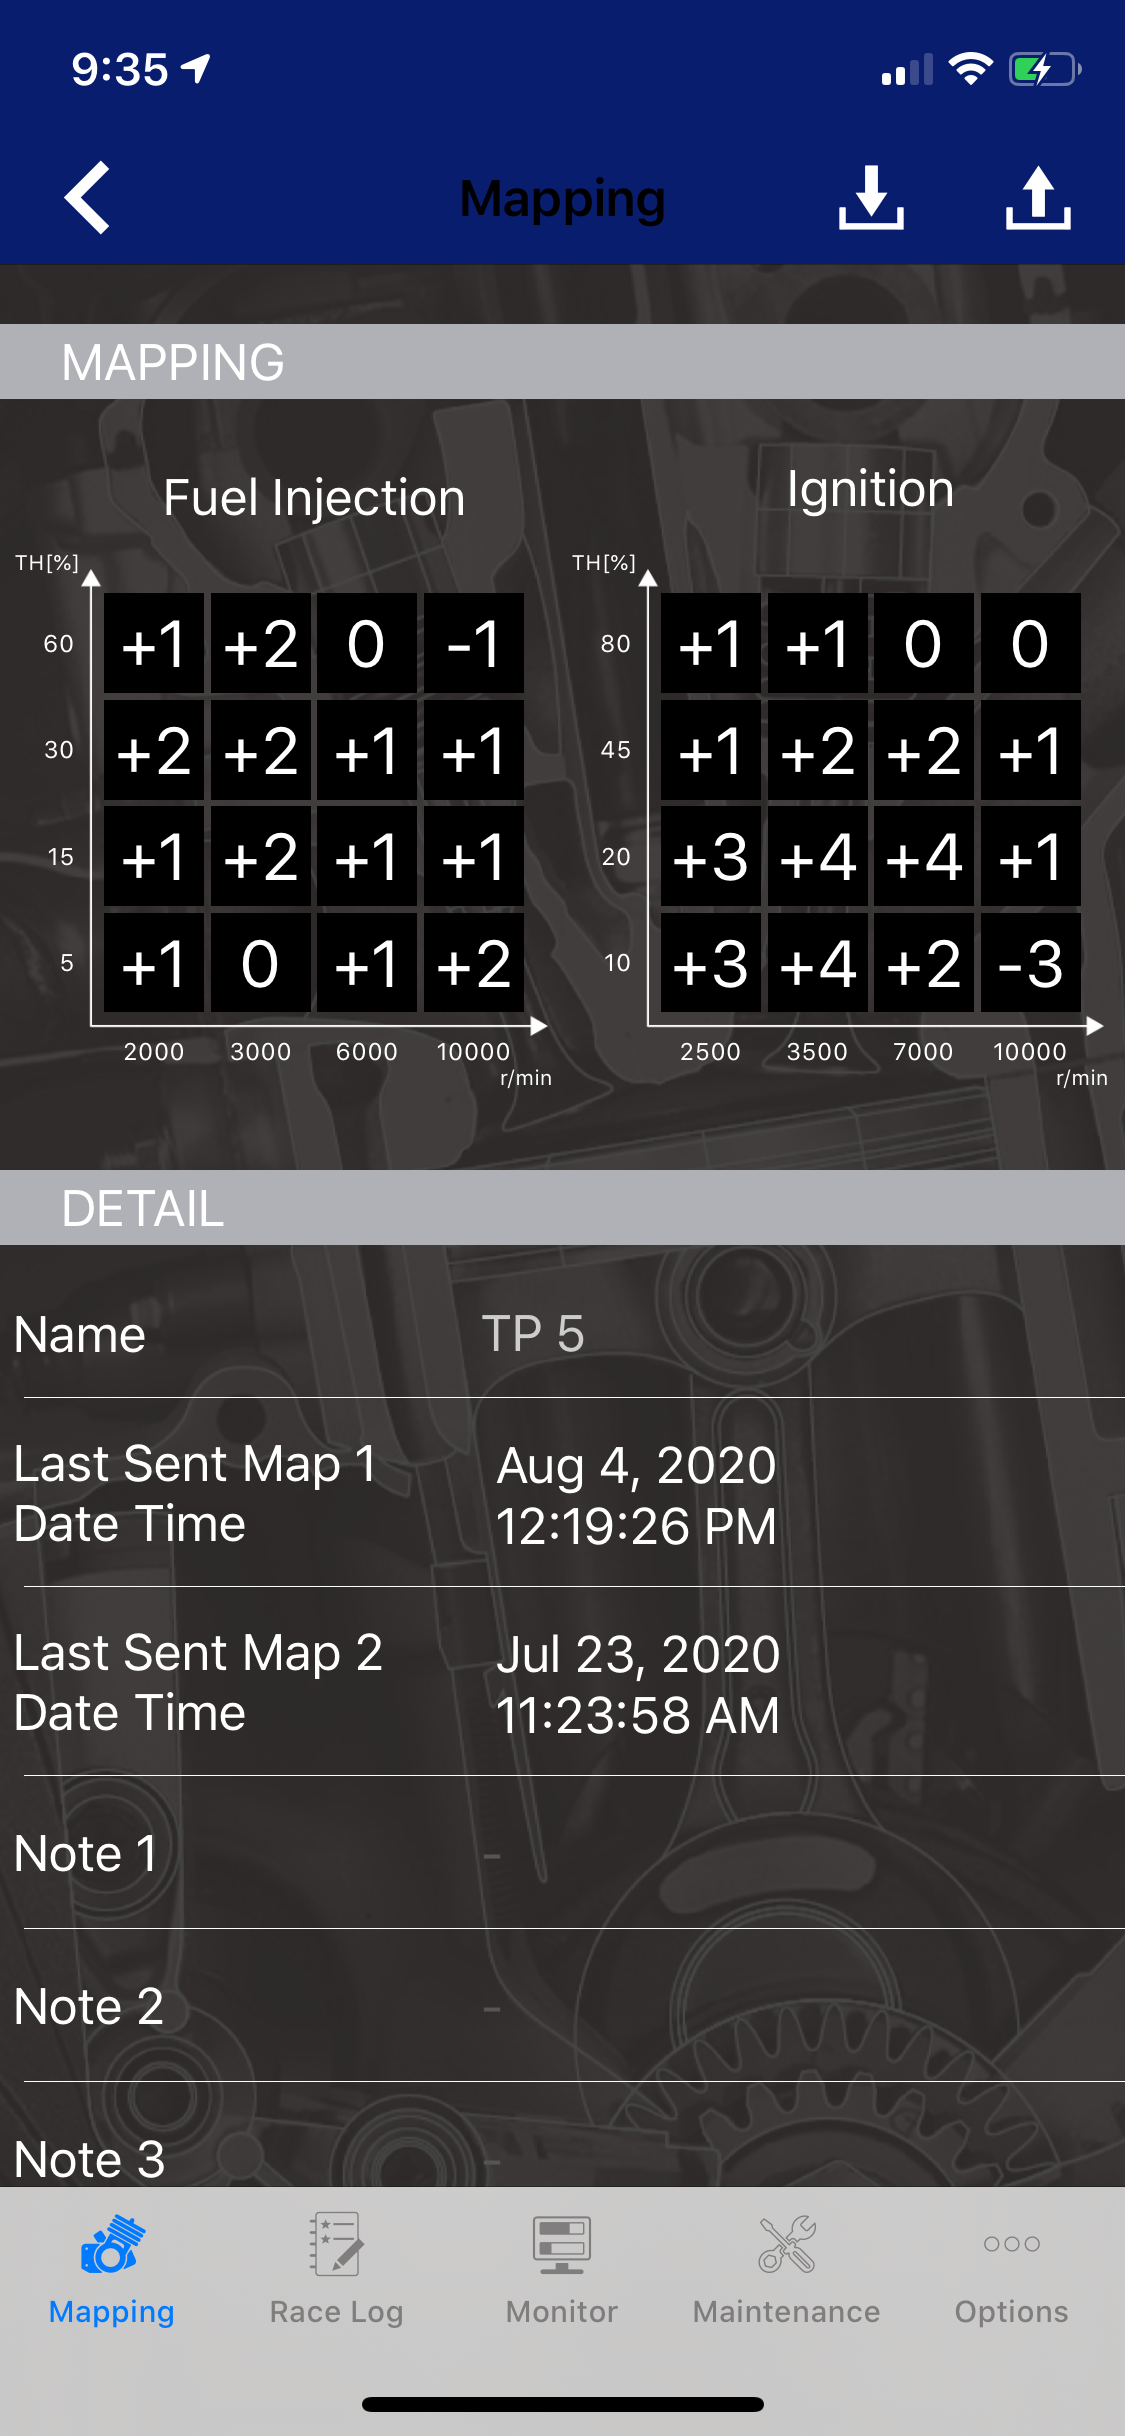
Right from the get go I am able to feel the Hinson steel basket’s effect on the engine character of the YZ450F. It doesn't seem to affect the throttle response much at all, but it does smooth the power out when accelerating out of rut. I don’t know if this mod is something that you east coast/soft dirt riders would necessarily need, but if you ride loamy to hard pack dirt this is something that can help forward rear wheel bite. The YZ450F has a stock engine character that spools up quicker than other 450’s in its class. With that being said, that kind of power can be really good for soft dirt, as it can make the bike feel light and get you out of soft ruts/corners quickly. Now for us west coasters that ride in loamy conditions in the morning and then hard pack in the afternoon, the YZ450F can be tricky to dial in. With the steel Hinson basket installed the YZ450F engine feel gets a calmer delivery to where you can accelerate sooner out of ruts/corners. The rear wheel spin that I got out of corners (under hard acceleration) with the stock basket is much less with the steel Hinson basket. Not only are you getting less rear wheel spin, but the chassis also feels slightly more planted of throttle. Installing this steel Hinson basket gives the rider slightly more front end traction off throttle on your initial lean. Yes, you will get a little more engine braking, but with the TP 5 map shown here, it does lessen the drag off throttle. 

IMG_9968-2.PNG

For $310.00, it’s worth the price, if you’re looking to smooth out your YZ450F a little in the areas I mentioned. The only negative to this part is that it does make a little more engine braking, but with the map attached here, it does help lessen that somewhat. I am very sensitive to engine braking, but when I asked my other test rider to ride his YZ450F and my test bike back to back, he didn’tt notice much engine braking at all. This is a part that maybe you don't know you need, until you try it. I am glad I remembered that Hinson offers the Momentum Steel Clutch Basket. You can check the momentum basket out right here: https://hinsonracing.com/p14400-momentum-clutch-basket-2020-yz450f

If you have any questions about this test, please feel free to email me at kris@keeferinctesting.com 


2020 FMF Factory RCT 4.1 Stainless Full System (Suzuki RM-Z450)

FMF has helped us on many builds and you may be wondering why do we use them so much? Well… A couple reasons are because FMF is a great American made company, they are easily accessible to us dumb media people and they actually care about the results of their product. If for whatever reason they missed the mark on a muffler setting they are willing to make changes asap to make their product even better. There are only a few companies that are easy to work within this business and FMF is one of those. 

perris-8975.jpg

Suzuki hasn't won a shootout or for that matter won any professional races in quite sometime, but that doesn't mean it can’t be a great bike for the motocross enthusiast. One of my photographers/test riders Dallas Dunn purchased a RM-Z450 because this is what he could afford and he wanted to ride a dirt bike. Suzuki is selling their machines at a much cheaper price than other manufacturers and that is important to the growth of our sport. We need companies like Suzuki to stick around and help this sport grow. With that being said I wanted to try and get the heavy monstrosity that is the RM-Z450 muffler system off and get an FMF 4.1 system on in order to get you guys some feedback on what it can do to the RMaRMY’s power character. 

perris-8978.jpg

First thing’s first. We picked stainless steel because it costs less and is more durable than a titanium slip fit joint. The titanium joints are known to wear out a little faster and you’re not going to save a crap ton of weight going to titanium. If you’re the type of rider that wants lightweight and looks then titanium is your jam, but if you’re looking to just lose some weight over stock and get some durability there is nothing “not cool” about stainless. Speaking of weight the stainless FMF 4.1 system weighs in at 6 pounds 11 ounces which is almost a three pound weight loss from the stock piece. WOW! Bolting on the FMF 4.1 system is simple and takes almost not time at all. 

perris-8979.jpg

On the track the FMF’s muffler pitch has a deeper more throaty pitch to it and sounds clean (with stock or lean couplers installed). We will say that you will not get a noticeable amount of more bottom end with the FMF 4.1 system installed, but what you will get is a cleaner, more linear, longer pulling power than the stock system. Out of corners you will feel more connection to the rear wheel and an overall lighter revving feel. It’s tough to find more connection when getting a lighter revving feel, but for whatever reason this is how the Suzuki’s engine and FMF system blend itself together. Pulling second and third gears longer is made easier with the FMF installed, so if you want to be slightly lazier with your shifting after the corner (leave it in second gear longer), the FMF system can provide that for you. One thing you will not be getting is more third gear recovery, so if you’re looking to lug the RM-Z450 more with the FMF 4.1, it will not magically give you a ton more pick up in third gear. That area of the power remains similar to the stock muffler character. The over-rev of the 4.1 is noticeably better with the standard coupler, but if you’re using the white (lean) coupler you may want to give the stock coupler a try again to gain even more over-rev from the stock system. For $749.99 the FMF 4.1 stainless system is a good upgrade from your heavy, slightly lethargic feeling stock muffler engine delivery. Visit fmfracing.com to get yours or you can go to keeferinctesting.com and click on the RMATVMC banner to take you to their website to purchase. 

Weights:

Stock System 9.07 oz

FMF 4.1 Stainless System 6.11 oz

Recommended Handlebar Specs For 2020 MX Machines

When it comes to handlebars I am a pain in the ass. The height, width, rise, and position is very important to me between each bike that I test. I find that you can’t run the same handlebar bend on every bike, even though I like a bend on one bike, sometimes it doesn’t feel as good on another. Every bike has a different rider triangle so you must adapt to different bar bends if you change motorcycle brands. As the years progress, dirt bikes evolve as well as their dimensions so don’t be that rider who sticks with a Honda High bend that you ran back in 1997. As you may have heard in my “Handlebar 101” podcast (show #70), if the bar feels too low (height), you should try to get the bar height from your bar mounts and not the handlebar itself. Getting the height from your bar mounts allows you to keep proper technique (position) through corners (where most of the time is made up on a track). This article was a big hit last year and by the shear number of emails I get about handlebars, I wanted to update some bends for 2020. Here are some of my favorite bar bends right here for 2020 as well as a recommendation on bar/bar mount heights for different sized riders.  

As you will notice most of these handlebars on this list are Pro Taper and Renthal. This doesn’t mean that I am trying to sell you on these handlebar brands. This is just what I personally like myself and should be taken as such. If you like another bar brand, that is fine, simply look at the dimension of the preferred handlebar and try to mimic that dimension to your favorite handlebar company. There are tons of handlebar companies out there, but for me, Renthal and Pro Taper are the bars that I prefer. Again as always for testing purposes, I tried a wide range of handlebars in my shootout so go give that podcast a listen when you can (Show #70). There are some great options out there. Again….This doesn’t mean other handlebars are crap. For transparency reasons, I am letting you know that these are the companies I prefer. I receive ZERO dollars from Renthal or Pro Taper.

• We are using 2020 models for reference, but if you have an older model and are concerned on which handlebar to run please feel free to email me at kris@keeferinctesting.com. 

• All Dimensions are in (MM). 

2020 HONDA CRF 450R/250R:

IMG_8707.JPG

Notes: The stock bar bend on the 2019/2020 Honda CRF 450R/250R has finally been updated to a bend that is lower and flatter than previous years. This bend is actually quite good and we usually leave the stock Renthal handlebar on the Honda. If you think you would like more flex you can try the optional bar bend below.  

Preferred: Stock Renthal 839 FatBar (W)802 (H)91 (R)52 (S)51 

Optional For More Flex: Pro Taper EVO SX Race (W)800 (H)87 (R)54.5 (S)54

Optional For 6’0-6’2: Factory Suzuki (W) 800 (H)92 (R)62 (S)47

Bar Mount Height: Stock 

2020 YAMAHA YZ450F/250F:

IMG_8289.JPG

Notes: Yamaha also did a good job on creating a bar that is fairly neutral for different sized riders, it’s just too bad their seat and footage height is all screwed up for taller riders. It’s lower height seems to fit a wide variety of riders (5’8-6’0), but taller riders may want to put the bar mounts in forward hole/back position.  

Preferred: Pro Taper EVO SX Race (W)800 (H)87 (R)54.5 (S)54

Optional 6’0-6’2: Renthal Fatbar 602 bend (W)801 (H)89 (R)59 (S)56

Bar Mount Height: Stock 

2020 KAWASAKI KX450/250: 

imagejpeg_0-4.jpg

Notes: 7/8 lives on! Kawasaki managed to keep the good ol’ 971 Renthal 7/8 bars, which are pretty damn good! I like a 7/8 bar and I actually stick with the 7/8 theme if I can. The 7/8 bar does bend a little easier, but you get a lot of flex when the track gets rough. If you’re an aggressive rider who likes a little more positive steering than go to a 1-1/8 handlebar for increased stiffness. 

Preferred: Renthal 7/8 983 bend (Villopoto/Stewart) (W)808 (H)95 (R)58 (S)55

Oversize Crossbar Option: Pro Taper Fuzion Henry/Reed (W)800 (H)92 (R)66 (R)40 (S)55

Optional For 6’0-6’2: Pro Taper EVO Factory Suzuki (W) 800 (H)92 (R)62 (S)47

Bar Mount Height: Stock

2020 SUZUKI RM-Z450/250:

FullSizeRender-13.jpeg

Notes: The stock Suzuki bend has some sweep to it, which makes the bike feel small at times. I prefer to open the cockpit up a little. 

Preferred: Pro Taper EVO SX Race bend (W)800 (H)87 (R)54.5 (S)54

Optional: ODI Podium Flight CountryBoy bend (W)803 (H)92 (R)56 (S)52

Optional For 6’0-6’2: Pro Taper EVO Factory Suzuki (W) 800 (H)92 (R)62 (S)47

Bar Mount Height: Stock

2020 HUSQVARNA FC450/250:

clean keefer inc -0206.jpg

Notes: Husqvarna comes with a very low bend and that fits the ergos of this bike, but the width of the bar is too long. I actually like the stock handlebar bend on the Husqvarna, however I cut the handlebar down to 803mm, which really helps the character of the Husqvarna when leaning into corners. 

Preferred: Stock Pro Taper EVO handlebar cut to 803mm (W)811 (H)80 (R)39.5 (S)51

Optional: Pro Taper EVO Carmichael bend (W)800 (H)77 (R)40 (S)55

Optional For 6’0-6’2: Pro Taper EVO Factory Suzuki (W) 800 (H)92 (R)62 (S)47

Bar Mount Height: Plus 5mm 

2020 KTM 450SX-F/250SX-F:

IMG_8778.JPG

Notes: The stock bar bend shape on the orange brigade is also decent, but it’s too stiff and long. If you don’t think it is too stiff, you can simply cut the bar to 803mm and run it! 

Preferred: Renthal 821 bend cut to 803mm (W)813 (H)78 (R)42 (S)54

Optional: Pro Taper EVO Husqvarna Stock cut to 803mm (W) 811 (H)77 (R)40 (S)55

Optional For 6’0-6’2: Pro Taper EVO Factory Suzuki (W) 800 (H)92 (R)62 (S)47

Bar Mount Height: Plus 5mm


Fastway Air EXT Foot Pegs

Fastway Air EXT pegs are on a mission to reduce ankle injuries, or at least limit the severity when an impact goes wrong. The basic idea is a wide but fairly conventional 2024 billet aluminum footpeg with a teardrop-shaped sort of heel peg welded to the rear of the normal peg. The teardrop ankle-saving portion isn’t welded at the same level as the footpeg however. The contact point is lower than the surface of the peg, but the patented height, traction, and camber (tilt) adjustability, is fully customizable. The idea being that you never feel the Air EXT pegs until you suffer an extreme landing that puts excessive loads on your feet and/or ankles. The Universal Collar System (UCS) lets you customize your mount in either the stock or lowered positions on most bikes – simply by reversing the collar. Fastway’s patented replaceable traction cleat system allows you to customize the shape and traction level of your foot bed as well.

IMG_0792.jpg

The reality is that you do feel the Air EXT’s rear portion fairly often on the track, but I only felt it in positive ways. No question, when you land short or long, your feet, ankles and even knees would be smiling if they had lips. Impacts that clank the suspension hard enough to hurt your ears don’t bother my 42 year old ankles. The Air EXT’s look like they will would limit the kickstarter, if you still have one of those, but they didn’t on our Suzuki RM-Z250 when we tried them on that machine. Perhaps if you were sloppy with foot placement, your boot heel could contact them and that would be annoying, but we didn’t have a problem. In whoop sections and while approaching jumps while standing up, you can even incorporate your heels to load the suspension to get increase height, similar to a seat-bounce. The bigger your feet, the more likely you are to feel the rear portion of the peg and that means in a positive way-absorbing abuse-and just being aware that it’s there. I wear a size 11, and I’d probably like the teardrop portion better with the teeth slightly dulled a little, but then again after about a couple hours on the pegs I was getting more used to them. I have never really feared landings, but I can appreciate what these pegs offer riders with Achilles and ankle injuries. Or maybe you’re learning how to ride on the balls of your feet, the Air EXT’s give the rider confidence when placing their feet back, when getting to the correct attack position. Ask Ryno how important riding on the balls of your feet are! #TwoChickens

IMG_0794.jpg

While riding through deep ruts, these pegs can help allow large footed riders place their feet on the balls to keep their toes safe. I have had a couple of our bigger testers try the Air EXT’s and they comment they have less ankle/knee fatigue at the end of a long day of moto’ing. The Air EXT’s are like virtual floorboards for your dirt bike. The thing you have to remember when riding with these pegs is that the space to the rear brake pedal or shifter is greater. You will have to cover more ground and remember that when trying to make a shift or use the rear brake, when riding on the back of the Air EXT’s. 

I ended up going with the smallest cleat option on the pegs as those provided enough traction without feeling too tall on the bike. If you’re on the shorter side you could definitely benefit from the replaceable cleat height design and the difference it can make with your rider triangle. I didn’t however try the Universal Collar System (UCS) yet, which allows you to lower the footpegs from the stock position, but plan to with a couple test machines soon. 

At $255.95 for the Air EXT pegs and $19.99 for the fit kit, it’s not a cheap aftermarket footpeg purchase, but this is still a less expensive option than some other titanium offerings out on the market. Check these pegs out at Fastway.zone.com.

Specs:

•Weight: .85 pounds per set

•2024 billet aluminum

•Unique universal footpeg

•Precision engineered, manufactured, and assembled in the U.S.A.

•All footpegs ship with 2 sets of F3 threaded cleats– short 10mm, and tall 12mm cleats

•Requires Fastway Footpeg Fit Kit 

2020 Honda CRF450R Three Way Muffler System Comparison

The 2020 Honda CRF450R is a popular machine. After all of my years with Dirt Rider Magazine as well as doing my own thing over here at Keefer Inc. Testing there has been one thing that hasn't changed… The amount of page views and questions that I get about the Honda are always more than any other color! As a test rider, I like the Honda CRF450R because it’s one of the most difficult bikes to set up for a wide variety of tracks, so that keeps me trying different products and thinking of ways to try and make it better. As a consumer or a local racer, the 2020 Honda CRF450R can drive you nuts at times right? It’s super fun to ride, but sometimes can be a handful at certain types of tracks.

In this article I am going to test the Yoshimura RS-9T, FMF 4.1 RCT, Akrapovic Evolution titanium muffler systems for the 2020 Honda CRF450R and give you some feedback on each one’s engine delivery character. I picked these three muffler systems because they have been one of the best three that I have tried on this particular machine. This isn't a shootout as much as what each system can bring to the table. These three muffler systems have similar characters in some areas of the powerband, but also have enough differences in which you can make a decision based on what type of power you want from your Honda.

Fun Fact: I tested these mufflers on the 2020 Honda CRF450R as well as the 2020 Honda CRF450RWE just to see if the ported head, that the RWE comes with, would change the way each muffler delivered its power. After going back and forth on each machine, the character of each muffler system was the same on the stock cylinder head as it was on the hand ported Works Edition head. The description/results below is accurate for both machines.

IMG_0280.jpg

FMF 4.1 RCT Muffler System:

The FMF 4.1 muffler system has more bottom end and throttle response than the other two muffler systems in this class. The Honda doesn't necessarily need more bottom end, but the way the FMF system delivers its power can give the rider some added freedom when trying to ride third gear through corners. The bottom end comes on strong and the Honda keeps its exciting, crisp RPM response feeling, but lets you run third gear through corners more than the stock, Yoshimura and Akrapovic muffler systems can. Using second with the FMF system almost makes the Honda a little too much too handle (on roll on) through very tight corners. When going to the FMF 4.1 system I reverted back to map 2 (mellow map) instead of map 1 (standard map) and ran 14/52 gearing. By using map one and going to this gearing ratio, it helped calm the Honda’s chassis down in second gear a little, but still kept its fun natured, snappy engine character. Mid range is broader and pulls farther than the stock muffler, but isn't as good as the Yoshimura system in this area. Up on top end the FMF system almost mimics the Yosh in pulling power feeling on the track with maybe slightly less over-rev than the Yosh system. What I like about the FMF muffler system is that it allows the rider to ride a gear higher in some areas of the track and rewards riders that like to lug their bikes more. The Honda in stock form is not the best lugging machine, but with the FMF system it gives the red bike more of a lazy man’s type of feel by allowing me to use third gear more. The FMF system is louder than the Yoshimura or Akrapovic systems by quite a bit even with the inserts in, but keeps that racey deeper sound. 

The good news is that the muffler packing has lasted longer than I expected. We are over the 12 hour mark on the 4.1’s and they still sound good. I used to get only 8-10 hours on other single FMF muffler systems, but these duals have proved to be more durable. 

IMG_7808.jpg

Yoshimura RS-9 Muffler System With Works Edition Headpipe: 

Once installed and on the track the Honda’s exhaust note turned from high pitch 250F’esq to a deep throaty more traditional 450 factory race bike sound. The crack of the throttle (or RPM response) is slightly smoother and less crisp than the stock or FMF systems, but to me this is a good thing for the Honda chassis. Rolling out of corners, while in second gear, the Honda feels like it has more traction than the FMF and was more controllable while accelerating out of hard pack corners. The slightly smoother RPM response takes away the Honda’s excitement feel ever so slightly, but helps you gain a little more control coming out of corners. The mid range pull is healthier than stock, but with the Yoshimura system you will not be able to pull third gear through tight corners as well as you can with the FMF system. The Yoshimura system is very controlled and has more mid range torque than any other muffler in this test. Even though the Yoshimura system doesn't have that bottom end throttle response like the FMF system the recovery is still very good. With just the flick of the clutch lever (in third gear) the Honda will be in the meat of the power once again and you will be down the straight in a hurry. I noticed top end and over-rev was as good as stock (which is great), but not as good as the Akrapovic. To me the Yoshimura system is like the YZ450F of the muffler world. It does everything “pretty well” and gives you more rear wheel consistency that the Honda needs. You could tell Yoshimura was focused on smoothing out the bottom to mid-range pulling power when they designed this muffler system and they succeeded in doing so. It is also impressive that they didn’t lose any top end/over-rev in the process and gain a little more control.

The muffler packing that the Yoshimura RS-9 mufflers come with is superb and will last you longer than any other packing in this group. Yoshimura also offers the customer refurbishing, just in case you don’t want to DIY. The stickers on the mufflers themselves also last longer and will not turn color as fast as the others in this group.  

IMG_7428-2.JPG

Akrapovic Evolution Muffler System:

Once I swapped to the Akrapovic Evolution muffler system, I could immediately tell this system helped the Honda chassis calm down the most. The Evolution system lets the Honda’s engine roll on smoother at low RPM’s and that smoother feel helps the rear wheel connection as well as provides less pitching (off throttle) than any other system in this test. AKA MORE COMFORT!!! The Honda CRF450R now builds a smoother roll delivery and a pulling power that is longer through the mid range than the FMF or Yoshimura. This type of character can allow you to use second gear in corners more because that second gear hit is not as abrupt or quick, so that doesn't upset your technique or the chassis. The Akrapovic also allows the rider to shift later out of corners and that means second gear is more usable with its increased over-rev capabilities . Pulling power up top is increased slightly as your shifting points can be altered now because of the longer pull in each gear. I ran the 14/52 gearing with this muffler system but decided on going back to the stock 13/49 gearing in order t get some mid range recovery back. The Akrapovic doesn't have the the bottom or mid range throttle response like the FMF or Yoshimura systems so this can give the Honda a slightly heavier feel on tighter tracks. The Honda has so much power to work with that a little less “hit” as well as “recovery” can actually help on faster/flowier tracks, but can also make it slightly heavier feeling than the other two mufflers when moving the Honda side to side. I really like that the Akrapovic system relaxes the engine as well off throttle and provides the CRF450R with less engine braking. This really comes into play on tracks with hard pack chop and small de-cel bumps.

The sound/pitch of the Akrapovic is ridiculously quiet when on the track and will almost give you that MXGP sound and feel. It still has that racey, crisp sound on higher rpm’s, but just not that raspy high pitch tone of the stock muffler. I preferred the quiet inserts left in because it created more back pressure and gave me more traction at the rear wheel (out of corners) in all three engine modes. I was normally a map two guy with the stock muffler, but with the Akrapovic installed I am now a map one guy all day long because of the added rear wheel/friendlier connection. The muffler packing has proved to be durable but the stickers on the mufflers turn color quickly and get blown off.

Overall: I always let people know if you have no problems with your stock muffler system and like the way your Honda runs then by all accounts you can disregard this test. Just because I test something here doesn’t mean you absolutely 100% NEED it! If you’re in the market for a muffler system, have some extra money and want to know which direction to go then study up! If you want to alter or change your Honda’s engine character slightly, this test can help you decide on which direction you want to go. To me all of these systems in this test are better than the stock system because it helps the Honda’s chassis in one way or the other and offer spark arrestor inserts for the off-road guy. The Honda doesn't need more power as much as it needs a broader more forgiving connection to the rear wheel. These systems help the Honda in this area. 

Breaking The Systems Down:

Bottom End: FMF

Mid Range: Yoshimura 

Top End: Akrapovic

Over-Rev: Akrapovic

Low RPM Response: FMF

Mid RPM Response: FMF

Top RPM Response: Yoshimura

Controllability/Connection: Akrapovic

Weight: 

FMF: 8.5 lbs.

Yoshimura: 8.4 lbs.

Akrapovic: 8.4 lbs.

Sound/DB:

FMF: 121.1 DB

Yoshimura: 116.8 DB

Akrapovic: 116.1 DB

Pricing: 

FMF: $1499.99 www.fmfracing.com 

Yoshimura: $1499.99 www.yoshimura-rd.com 

Akrapovic: $1549.99 www.akrapovic.com 

If you have any questions about this test, please feel free to email me at kris@keeferinctesting.com. I am here to help if needed!


RIDE ENGINEERING 2018-2020 Suzuki RM-Z 450 Performance Link

By Dallas Dunn:

I’ve been helping out Keefer with photography content for some time now, but I’ve been wanting to get more into the testing side of things so Kris has gave me the opportunity to ride the 2020 Suzuki RM-Z450 test bike for the year, so the first mod for this bike was going to be the Ride Engineering 1mm longer lowering link. I wanted to give you a normal everyday blue collar perspective. I am by no means a professional test rider, in fact I am a heavy equipment operator that likes to ride his dirt bike. So if you can relate to that and have a RM-Z450, maybe you can relate to this test as well.

48949733217_574a3c15cc_o.jpg

Simply installing the Ride Engineering link helped balance the RM-Z out on de-cel. If you’re running the stock suspension (valving/springs) this simple mod will help the RM-Z from wanting to transfer its weight towards the front end. The RM-Z450’s BFRC shock is known for unloading on de-cel (or riding high off throttle) and that can cause oversteer (knifing) on entrances of corners. Once you install the longer Ride Engineering link arms on the Suzuki it will settle down on de-cel and not pitch towards the front end as much. I noticed right away the bike felt more predictable and compliant coming into choppy braking bumps while keeping the rear end planted with less diving on de-cel. It gave me more sense of predictability and control when entering corners compared to the stock setup. Having comfort and predictability are things I look for when trying to improve my speed and technique. Running the sag at 107mm (fork height 4-5mm) with the link arm will alleviate some of your balance issues on the #RMaRMy. 

victorville--2.jpg

This Ride Engineering link Retails for $219.99 at www.ride-engineering.com.

You can use the code Keefer-20 to save some dough as well.


FMF 4.1 Full System Vs. Akrapovic Evolution Full System Vs. Akrapovic Slip On

We recently received the 2020.5 KTM 450 SX-F Factory Edition and after dissecting it for a few weeks, we thought we would test a couple different muffler systems on it. We wanted to see if we could improve upon the KTM Factory Edition’s delivery. The KTM comes with an Akrapovic slip on we thought since we have never tried one of their full systems, we would give that a go as well as an FMF 4.1 RCT full system to see how each compares to the standard Factory Edition set up. Just in case you were wondering, we also compared each muffler to one other and give you a breakdown of each category below. 

FMF 4.1 RCT Full System ($1049.00):

With the FMF system installed you will not be getting increased bottom end pull on the KTM, but you will be getting a little more bottom and mid-range RPM response (or throttle crack for you newbies). I noticed the added RPM response more out of corners (versus the Akrapovic) and the FMF system makes the KTM engine character slightly more free-feeling and exciting. I also appreciate that I am not getting any added de-cel popping (or lean sensation) with the FMF system. The KTM ran just as clean with the FMF system on then it did with the stock muffler. Where you will notice the most improvement with the FMF system is through the mid-range. The mid-range “meat” you will get out of the FMF 4.1 system is downright impressive. Rolling the throttle on out of corners and accelerating you will notice an increased pulling power that wasn't there with the stock muffler. 

IMG_7703.jpg

Whether you're coming out of a corner in second or third gear, you will notice some extra torque feel getting to the next obstacle. With the added mid-range meat of the FMF system it really helped some of the gearing issues I had on tighter, less flowy tracks I tested at. Gaining some mid-range let me use third gear in some corners that I wasn’t able to with the stock system. With the stock system I would roll into these corners in second gear and have the right amount of "pop" to get me out quick, but I had to shift early once exited, to keep the rear wheel from spinning. Third gear was too tall of a gear to get me out of the corner quick, but provided less wheel spin on the exit. It was always a struggle for me to decide on which gear to use when being pressured from behind, by another rider. 

IMG_7705.jpg

With the FMF installed I could easily use third gear and have enough "pop" to get me out of the corner in a hurry, yet it kept the wheel spin to a minimum by being able to use a taller gear. The FMF’s 4.1 system made me think less and twist the throttle harder, something I like doing. I didn't get any more top-end with the FMF installed, yet it didn't take any away from the orange machine. I did notice slightly less over-rev with the FMF system (from stock) when I got lazy.

Akrapovic Evolution Full Muffler System ($1299.99):

The Akrapovic Evolution full muffler system has a similar character to the slip on version that comes with the Factory Edition, but with added bottom end roll on and mid range. If you’re expecting a ton of added RPM response (excitement) from your full system compared to your standard slip on, you will be disappointed. You simply will not be getting that much added rpm response with the Akrapovic full system. Instead of a smooth roll on that the FE comes with it now has a little more pulling power in second and third gears and pulls those gears much longer.

IMG_7662.jpg

Mid range pulling power is increased and the muffler pitch is so quiet you never really feel like you’re “on the gas”. The mid range pull is much more linear and longer than the standard slip on and being able to shift a little earlier with the full system makes it easier to ride in softer conditions. I had a hard time with the KTM 450 SX-F Factory Edition at softer tracks not recovering, if I shifted early out of a corner. With the full system at the same track I was able to shift into third and not have to worry about covering the clutch as much. 

IMG_7661.jpg

Top end and over-rev is where this Akrapovic Evolution system shines. Adding top end and over-rev to the already very capable Factory Edition only makes this machine more fun to ride. Again, I can’t stress on how deceiving this system is because of it’s quiet nature. I really had to focus in and feel how quick I was going from point A to point B on the track because the pitch of the muffler never sounds “racey”. However even with its quiet note, the Akrapovic full system lets the KTM pull so much farther that it almost feels like a swapped to an aftermarket ignition. The connection to the rear wheel with the full system is unmatched and even though it may seem like it’s not very responsive, the KTM with the Akrapovic full system allows the rider to get on the gas sooner through corners.

If you’re reading this and wondering why you can’t simply purchase an Akrapovic headpipe for your Akrapovic slip on, the answer is they will not mate up. The Akrapovic slip on has a smaller diameter OD, (where it meets the stock headpipe), so purchasing just the headpipe will not work.

Akrapovic Vs. FMF:

Below are your typical engine categories and which muffler is best in what area. 

Bottom End: FMF

Mid-Range: FMF

Top End: Akrapovic

Over-Rev: Akrapovic 

RPM Response: FMF

Rear Wheel Connection: Akrapovic

Weight: (Akrapovic 6.2 lbs.) (FMF 6.9 lbs.) (Standard FE 8.1 lbs.)

IMG_0033-2.jpg

Which One Should You Purchase?

If you’re looking for more bottom end excitement or rpm response look towards the FMF system. If you’re looking for the lightest muffler available and want more top end/over-rev you will love the Akrapovic. Cost is also a factor to me, so if I am looking at the most bang for my buck, the FMF is less money and I’m getting a good performance gain compared to the standard Akrapovic slip on that comes on the FE. The FMF muffler stands up to more abuse as the Akrapovic can look hammered quicker. That being said I was super impressed with the connection that the Akrapovic had on dry/slick tracks, so depending on what conditions you ride could be a factor in your purchasing decision as well.


WP XACT Pro Components Real World Review

When deciding to spend a few thousand extra dollars on suspension for your ten thousand dollar KTM/Husqvarna, you want to know if it’s going to make a difference immediately. Is it going to make me a better rider? Will I be able to ride faster with it? Do the WP’s XACT Pro Components that much better than stock? These are a few of the questions I get when the consumer is trying to make a decision on getting a set of WP XACT Pro Components. I have pounded hundreds of laps and a ton of hours on the stock WP AER fork/shock as well as the XACT Pro Components (on the 2020 KTM 450 SX-F and Husqvarna FC450) to see if it’s worth the risk of your wife losing her mind when she sees the charge on the bank statement. 

GF vet-7.jpg

What Are WP XACT Pro Components and what are the differences between older WP Cone Valve/Trax components? 

WP's Pro Components line is aftermarket suspension designed for riders who want the highest quality components and are willing to pay a reasonable amount of money for them. Pro Components are manufactured to tight tolerances using high quality materials, fine surface finishes, and low-friction coatings. This reduces friction compared to WP’s OEM suspension components, and is perhaps their most significant advantage. In fact, to achieve a similar feeling of stiffness to the OEM suspension, all Pro Components required much stiffer damping. The additional stiction in the OEM components is all due to friction. Friction is perhaps the one thing in suspension where no compromise is involved: less friction is always better. When setup appropriately for the rider, Pro Components can deliver high confidence at high speeds.

The Xact Pro fork is the next evolution in "Cone Valve" technology. It retains the same Cone Valve technology and is available in three basic variants: closed cartridge with coil springs, closed cartridge with air spring, and open cartridge with coil springs. The Cone Valve itself is nothing too extraordinary as it's simply a shimless mid-valve. The cup-in-cone valve actuates via a coil spring, providing the variable orifice function that shims normally handle. The Cone Valve spring rate is linear, unlike shims which are more progressive. Also unlike shims, it does not have a maximum safe deflection distance. It can be setup stiffer and with less float than a shimmed valve without getting too much of a rigid handling ride.

The Xact Pro shock features an updated version of the Trax mechanism used in previous Trax shocks. WP’s Trax system is created to reduce rebound damping when the rear wheel is off the ground, helping get the tire back to traction as quickly as possible. The Trax system is now externally adjustable with a screwdriver, which makes the Trax function much easier to use and understand. The shock uses the same high-end construction as the Xact Pro fork and as a result, it sees a similar reduction in friction compared to OEM shock. It uses a nitrogen bladder instead of a piston separator, which has lower friction, but can require more frequent services compared to WP’s traditional piston separator setup. As with past Trax shocks, it separates high-speed compression and low-speed compression into two separate adjusters instead of one dual compression control (DCC) adjuster. The Trax shock shaft includes a rebound separator valve, which isolates compression and rebound adjustments, and increases low speed compression damping at the mid-valve (which can aid in pressure balance)

 WP’s XACT Pro Components are usually found on all of my KTM’s and Husqvarna’s I race with. Why? I get more consistency and performance out of the XACT Pro Components than that of the stock AER fork/stock WP shock. I tested the stock suspension settings on the 2020 KTM 450 SX-F back to back with the WP Pro Components and came away with this opinion: 

IMG_5973-2.JPG

On The Track:

The first thing I noticed when I go out onto any type of track with the XACT fork is that the KTM turns slightly slower than the AER fork on initial lean (into corners), which is exactly what out of the KTM. The KTM does have a slightly rigid feel to it and can be a handful when riding fast, choppy tracks. You can actually feel the extra weight right away (in the front end) compared to the stock AER fork, but it wasn't a bad feeling. I was just surprised I could feel it as much when entering corners. Usually I run the fork flush on previous Cone Valve forks, but with the slower turn in feel and a the longer length of the new style XACT fork I went with a 5mm height. Along with the extra weight feeling however I gained more front end traction through every corner (especially flat corners). The XACT fork leaves you with a more front tire contact patch sensation on lean angle and you can start your lean earlier in ruts without getting the high front end, vague feeling like you do with the AER fork. With the AER fork I get some pushing in the front end through the middle to end of corners, which made makes me roll off the throttle to try and compensate. With the XACT fork I can lean in the corner and the fork stays planted, which lets my front end settle and bite. The WP XACT fork also feels less active on braking bumps. I am able to jump in and out of bigger bumps that each track I tested at offered, without having the fork rebound too quick and be too active. If I wanted to pound through the bumps, the fork had better damping control feeling through the middle to end part of the stroke. 

IMG_5994.jpg

The most notable change was to my wrists when over jumping/flat landing with the XACT fork. I could get more aggressive with obstacles and have the bike settle into corners better in areas of the track I wasn't able to with the stock suspension. The downside to the XACT fork is that it can make the KTM feel like it has less flex up near the head tube area. This feeling is not as rigid as a Honda CRF450R, but it does give you a firmer feel through your hands on small bumps, compared to the AER fork. The key to the WP XACT fork is getting it set up for you. WP does a great job of getting you the XACT fork with a “ballpark” setting, but going through an authorized dealer that can set it up for your personal needs is the best way to ensure your investment works the best. I tested the XACT fork with their customer setting and although it was better than stock, I could have used a little more hold up on hard braking or when their was deeper braking bumps.

IMG_6017.jpg

The XACT shock holds up better than the stock shock for me on high speed compression and you are able to get more aggressive around the track. I can hit the faces of jumps harder and the KTM did not give me an empty/low feeling sensation that the stock shock sometimes gave me. In order to combat that feeling with the stock shock I would have to crank in the high speed compression so much that I would lose the comfort coming out of corners (and rear wheel traction). The XACT Pro shock provides you with more high-speed damping and you still get a decent amount of acceleration comfort on choppy corner exits. I also noticed a little more connectivity to the the rear wheel (when hard on the gas) on flat corners with the XACT Pro shock compared to the stock shock. The XACT Pro shock is firmer so there is less wallow in the rear end when accelerating, so the rear of the KTM 450 SX-F tracks straighter and doesn't upset the KTM’s chassis as much at speed. “Balanced” is a great word to describe both ends of the KTM, but I did notice the harder I pushed the more it rewarded me. If I tried to ride smoother/slower, the action of the shock wasn't quite as comfortable as the stock shock. This XACT Pro likes to be pushed and will reward the rider that is aggressive because of its much more consistent nature (compared to the stock shock). Again, going to a WP authorized dealer and having it set up for you is key. Thinking that you’re just going to go purchase A-Kit level suspension, slap it on, and then magically be in heaven on the track is completely foolish! Get it set up for your weight, riding ability, and the type of rider you are will ensure that your money is spent correctly. 

Conclusion:

Do you “need” these WP Pro Components on your machine? If you’re a casual rider, of course not. However if you’re a KTM/Husqvarna rider and race consistently, I think the WP Pro Components are worth the price. For around $3499.00 for the fork and $2199.00 for the shock it’s an investment that you should take seriously. If it was me, had one bike, was on either a KTM or Husqvarna, I would invest in a set of WP Pro Components because when I ride/race, I want the most consistent feel I can get. I also know that if you are the type of rider that gets a new KTM/Husqvarna every couple years, you’re able to roll these WP Pro Components over to your new bike. This is an investment that you can continue to roll over with each passing model year. I think it’s safe to say that KTM or Husqvarna will not change their motocross models until the year 2022, so your WP Pro Components will fit at least until then. Even if KTM/Husqvarna change their machines drastically, chances are these newer WP Pro Components will bolt on. 

IMG_6510.jpg

FAQ: 

“Keefer, have you tried a set of standard re-valved WP AER forks and shock”? The answer is yes and although the comfort was improved (over the standard/stock set of suspension), the consistency just wasn't as good as the WP Pro Components. I would say that a set of stock re-valved stuff will definitely be good for your local racer that simply can’t afford new Pro Components. Companies like Race Tech, Kreft, and Enzo all have very good re-valved stock suspension settings. 

E7734C7C-E581-4535-88DB-BE07658EB09E.JPG

“Keefer, is there something I can do about the rigidity I am gaining with the WP XACT Pro Component fork”? Yes, going to a WP/KTM Factory Triple Clamp will help with some of the rigidity that the stock clamps come with. Also, you can go to a bottom triple clamp torque spec of 9N/m. Both will help with comfort on braking bumps, slap downs, as well as get you less rigidity feel through your handlebars. 

If you have any questions about this test, feel free to email me at kris@keeferinctesting.com