Yamaha

ARC RC-8 Clutch Assembly With Aluminum Black Smooth Lever

I will admit that I am usually a stock perch/lever or a Works Connection Elite Perch/Lever kind of rider and although I have tried many different perch/lever set ups those are the two that I normally gravitate towards or back to. I have tested a lot of combos and have come to the conclusion that it’s tougher to make a better than OEM lever feel, perch and engagement feel. Now enter the ARC RC-8 Clutch Assembly With Aluminum Black Smooth Lever and I have found another perch/lever combo that I am genuinely happy with. Other perch/lever set ups that I have tried have either screwed up clutch engagement points with their odd ratios (and messed my corners up) or the lever is simply doesn’t have the right shape for my size large hands (lever shape is a key component to feeling comfortable with your rider triangle). Designing/making a perch/clutch lever is harder than most people think obviously. If you don’t get the lever ratio correct, you will have a clutch feel that is on/off or an engagement that is too grabby or slow feeling. Not easy. 

IMG_1956.jpg

This ARC Billet Aluminum CNC-Machined lever assembly is the one that a lot of top teams run. If you haven’t met ARC Bob then you are really missing out. You might have heard me talk about him on some Racer X videos because the guy is a mad scientist of levers/perches. He will not rest until he’s created massive headaches for consumers due to the fact that he gives us so many damn options!  The features of this perch/lever combo start with the ARC aluminum smooth lever with a 27mm ratio, which I am a fan of. I am not a foldable lever kind of guy because I like a solid feel to my finger when I am pulling in the clutch. It just gives me a more positive feel and this lever seems to give me just that. Not to mention that the lever shape is one of only two shapes in the aftermarket lever business that I can get along with. There is a nylon sleeve that contacts the handlebar that allows for rotation in a crash, which is nice when you have a tendency to tip over in corners from time to time.

IMG_1960.jpg

The cable 1/8 turn quick adjust has a large diameter rubber wheel that is easy to reach for/adjust on the line or in the air. yes, even if you’re a novice rider, you will be able to adjust it in the air! One of the other highlights is the "external pivot". The pivot bolt screws into the lever and the bolt rotates in the perch on replaceable bushings. Whaaaat! This eliminates almost all up and down play in the lever and gives me the positive engagement feel that I look for. In the world of tighter tolerances, this is what you want from a big four stroke. When you have horsepower, you could possibly get more vibration and that can radiate towards the ends of your levers. When you have a tighter tolerance in your levers, you get less vibration feel and more positivity on each end of your bike. It may not seem like much, but it’s the little things that make a difference when it comes to “feeling factory”.  It’s also nice that the clutch pull gets a little easier on the bike that I installed the ARC perch/lever on (2021 YZ450F).

At a cost of $205.00 for the complete perch/lever it’s a sizable investment, but with the quality of Bob’s work at ARC, I am happy to pay for something that I know I am going to love as well as last! ARC gives you a lot of ratio and lever options, so go visit the mad scientist of levers website at www.arclevers.com


Vortex Ignition For 2020 YZ450F

The Yamaha YZ450F comes with the Yamaha Power Tuner App that allows you to change the parameters of the bLU cRU’s ECU settings. It allows the consumer to customize their YZ450F power delivery, so that they can enjoy a more friendly power character or a more aggressive type of delivery. While this system works very well for the average consumer what about the rest of us that may want to tune their YZ450F even further? What about having an ECU that has wider parameters and an ECU that can give you more horsepower, but make it rideable as well? Can we make our YZ450F even better with an aftermarket ECU? Is there a big enough difference in power delivery that it warrants spending an extra grand on an electrical part? I wanted to find these questions out, so I called upon Chad at XPR Motorsports to see if he could map a Vortex ignition for my 2020 YZ450F in order to see if it wold actually make it that much better. 

IMG_8422.jpg

Unlike a KTM 450 SX-F it is very difficult to improve upon the Yamaha’s engine character. The YZ450F is the best production motocross machine made at this moment, so the gains are tougher to get through the aftermarket unlike the orange model. With a KTM I can slap on a Vortex ECU and immediately notice a huge difference in power as well as traction. However, I have been playing with the Vortex ECU on the Yamaha YZ450F for almost a year now and found out that it’s not that easy to make the Yamaha’s engine “better”. Chad at XPR Motorsports is one of only two people in Southern California that I would trust to help me with ECU testing (the other being Jamie at Twisted Development). I told Chad that I don’t necessarily want “more power” from the YZ450F, but I wanted more rear wheel traction with a broader, longer power (similar to a KTM 450 SX-F power spread). I can roll my corners really well on a KTM because it is so damn smooth off the bottom and I wanted to see if we could get some of that character on ol blue here.  

I am not going to sit here and tell you that getting a map that actually made me happy was easy because I think I gave Chad a headache more than once while doing this test. However once we honed in on what I was looking for, it was something that the stock Yamaha Power Tuner simply couldn’t do. With the help of XPR’s mapping and the desired power that I was looking for, I now had an easier to corner Yamaha YZ450F, with more traction out of area 3 (end of corner), as well as a broader/longer overall top end/over-rev. 

I wanted to keep the third gear lugability, but also make second gear more usable so I could make shifts later once exiting corners. This wasn't easy to achieve as Chad and I quickly found out. I got a longer second gear, but was losing some of that easy to ride third gear lugability because the engine was much freer feeling with the Vortex ECU. With a lighter engine feel you get less de-cel pitching, which is great because the chassis stays calmer, feels more exciting, has better recovery, but you also get less chugability when lugging your engine. Chad went went back to the drawing board and gave me another map that split the difference for me and made me really happy. I now had most of that third gear roll on lugging power, but still retained that free feeling engine feel that I loved when the track got rough. Having less engine braking on the YZ450F really helps this chassis stay calm when diving deep into corners with large bumps. 

IMG_8290-3.JPG

I like that the Yamaha YZ450F is easier to start as well as fires up sooner with the Vortex on, so having this ECU on could really benefit a dead engine type of off road rider. With the XPR mapped Vortex, the mapping seems crisper/cleaner and never had a de-cel pop that I sometimes experienced with the TP 3.0 map. We mapped the Yamaha to a Pro Circuit exhaust and originally started with VP Pro 6 fuel, but that was simply too much power down low for me, so creating a map for VP T4/pump fuel made the Yamaha engine much more manageable in hard pack situations. 

The bad news about going to the Vortex ECU is that you lose all of your Power Tuner functions like the maintenance schedule, running time, etc. The Vortex comes with 10 pre-programmed maps as well as three fuel trim knobs that can help with your “Lo”, “Mid” and “High” rpm ranges. This is not an inexpensive mod, but it can help broaden the Yamaha’s power, make the hit more seamless down low as well as help the chassis when pushing the machine when the track gets rough. 

Is the stock ECU good? Yes! If you feel like the stock ECU/Power Tuner App has enough parameters and you’re happy, you DO NOT need an aftermarket ECU like this. 

Do I feel as though the Vortex ECU makes as big of a difference on the Yamaha like it does on the KTM 450 SX-F?  No, I don’t. The Vortex ECU on the Yamaha helps make it easier to ride, but Yamaha R&D did such a great job with their mapping that it may be hard for less picky riders really notice. KTM’s stock ECU mapping is not nearly as good off the show room floor, so the difference from going to a stock ECU to a Vortex on a KTM is noticeable by a wider range of riders.  

Who is this Vortex ECU for? This specific ECU on the Yamaha is for riders who love the stock engine character, but want a little more control off the bottom and more pulling power from second and third gears. Oh and how could I forget that this is not a cheap mod (at around a $1000.00), so you might have some coin saved up in your bank. 

Would I purchase this mod myself? Yes, but I am the type of guy who still likes to be competitive at the ripe old age of 42, likes to have a linear, longer power delivery and loves to tinker with stuff. If you’re like me this mod will make you smile. 

Conclusion: Overall I am happier with the Vortex ECU on the 2020 YZ450F because the bike has more controlled power and it makes it less work for me to ride harder. The downside is coming up with the 1K to purchase it! Guess I will be impatiently waiting on my stimulus.

Contact: Chad @ XPR Performance (951) 813 8873


Pro Circuit Link Arm (2020 Yamaha YZ450F)

I have tried links in the past on previous generation YZ450F’s with less than stellar results, but since Yamaha changed the frame on the 2020 machine, I thought I would revisit a link to see if it helps improves the Yamaha’s feel around the track. 

Pro Circuit's linkage arms are CNC-machined from billet aluminum and are designed to stiffen up the initial linkage curve in order to try and improve the geometry of the YZ450F’s chassis, in order to try and make the bike more stable in certain areas of the track. The linkage arms includes all of the required bearings and seals and is ready to bolt up. I wanted to see how it worked with the stock YZ450F suspension valving, so since Pro Circuit is backordered on them for a while, I purchased the Pro Circuit linkage arm at rockymountainatvmc.com for $189.95 . Once I received the PC link, I went to a few tracks to try the it and the stock link, back to back , to see if the Pro Circuit link is a benefit to the average rider. 

IMG_7685.jpg

One thing that I want from the stock 2020 Yamaha YZ450F is less movement from the rear end under acceleration. With the stock link, the rear end can squat  too much at times (under throttle) and give me the feeling of less connection to the rear wheel under load. I do think the new 2020 frame and suspension valving has helped de-cel pitching, but once the fork is broke in, it can dive a little too much under hard braking. 

After I installed the PC link I re-checked my sag numbers to make sure they were in the spec I desired. I ran 105mm of sag with the stock link and am currently at 105mm of sag with the PC link. With the PC 143.5mm link installed (142.0mm is stock) the Yamaha has a noticeably different feel to it on the track. I immediately noticed that my rear end felt firmer under acceleration, but that feeling wasn't such a positive change. I went back to the van and turned my high speed compression (on the shock) out a quarter turn to help soften up the feeling on acceleration chop. Once I adjusted the high speed compression, I could start to feel the benefits of the Pro Circuit pull rods. 

Off throttle (de-cel) the Yamaha YZ450F felt flatter and less front end heavy, which gave me a YZ450F that now had more control on braking bumps. Corner entry wasn't improved, but I could feel how the Yamaha could lean over better through the middle to end of each corner. With the Pro Circuit link It took slightly less effort for me to continue my lean on the Yamaha, which usually isn't its strong point. Out of the corner (with the softer high speed compression setting) the Yamaha had more rear wheel traction and followed the ground better on acceleration bumps. The rear of the bike was higher in its stroke with the PC rods and gave me more of a plush feel than the stock link. I am able to run a softer high speed compression setting as well as low speed to get more comfort on choppy ruts. 

IMG_7636.JPG

The overall feeling of the YZ450F with the PC link is a slightly calmer chassis off throttle with a better mid to exit cornering feel. If I had to point out a negative about the PC link it would have to be that once you’re off throttle the Yamaha has a firmer rear end feel. Even though I am gaining control on braking bumps, the YZ450F will feel firmer if the rider isn’t aggressive or pushing the bike. I feel the Pro Circuit linkage arms reward a more aggressive rider, so if you’re the average weekend warrior that likes to cruise his Yamaha YZ450F and is comfortable with your set up, these Pro Circuit linkage arms may not be the best purchasing decision. However, if you’re looking for more control on braking bumps, with a firmer feel and an easier area 2 to 3 (see testing term explanation below)  through corners, then the Pro Circuit linkage arms make a positive difference. 

Cornering Testing Terminology: 

Area 1: Beginning of corner (initial lean, tip in)

Area 2: Middle of corner (weight feel, traction, cornering stability)

Area 3: Exit of corner (rear wheel traction/connection, comfort)


Wrench Rabbit Yamaha YZ125 Engine Rebuild Kit

By Michael Allen:

Although one of the main perks or being a part of Keefer Inc. Testing is getting to ride the latest and greatest bikes, there are times when you need to have your own bike. I needed my own bike because I was going to race the Los Ancianos Tecate Enduro that is run in Mexico and I needed to be able to show proof of registration. After a lot of looking around I found the perfect bike, a somewhat abused 2006 YZ 125. I raced it for two years in Mexico and would randomly ride it here and there when I wanted to feel like I was going fast. Here is where the embarrassing part comes in, this last winter we had an abnormal amount of rain in California, which was great, but I was admittedly a little lazy in the maintenance department.  I figured “it’s wet, how dirty could my air filter be getting”? Well after not checking my air filter for about three rides, my $1,800 Yamaha YZ125 decided to come to a quick stop in the middle of a snowy trail ride. As I was on the pipe climbing a sandy canyon the wheel locked up and I came to a skidding stop. I luckily was within pushing/coasting distance back to the truck, but when I got there and pulled the seat off, I immediately knew what happened and felt really stupid. You see when I got the bike I did the current plastic re-style kit from Polisport and when I re-installed the air box, apparently I didn’t do a good job with the hose clamp (that holds the air filter cage onto the air box). To my surprise my air filter and cage was just sitting in the bottom of the air box and I had been sucking dirt into the engine for who knows how long. Fail!  

IMG_6381.jpg

Needless to say when I tore the engine down there was grit everywhere from top to bottom. I knew if I wanted to do it right the whole engine would need to be rebuilt, but I also knew that replacing bearings, seals, gaskets, a top end, and crank with OEM parts would cost more than I purchased the bike for. After talking to Kris he mentioned that Wrench Rabbit sells complete engine rebuild kits and from what he remembered they weren’t all that expensive. After that conversation with Kris, I reached out to them and got the ball rolling on rebuilding my little 125. 

IMG_6730-2.jpg

The Wrench Rabbit kit (Part Number WR101-081) really does come with EVERY bearing, seal, and gasket you need to do a complete rebuild on your bike. To be completely honest I had done a bunch of top ends on previous two-strokes, but this was my first time splitting cases and doing my own rebuild. I took it slow and really tried to do good job of keeping everything organized when I took it apart. Upon disassembly it was then that I realized that it wasn’t as scary as I imagined it would be. When the engine was torn down I found that my issues were a scored piston (luckily the cylinder wasn’t bad enough that it needed to be re-plated or replaced), a blown out rod bearing, and main bearings that were ready to come apart at any time. The Wrench Rabbit kit comes with a brand new crank/rod from Hot Rods already assembled as well as new main bearings to go with it. In the past I had been scared to use aftermarket engine parts, but the quality of the Wrench Rabbit parts were very impressive and every part fit just as good as the factory parts that came out of the bike. 

IMG_7066.jpg

As I buttoned up the cases and slid the cylinder onto the new Vertex piston I was pretty excited to get my 125 running after looking at it sit in the garage for the past five months. I slapped the engine back into the frame at about 11pm and was so excited to get it running I ran to the gas station that night to mix some gas and wake up my neighbors. The child like smile on my 32 year old face said it all when it came to life on the third kick and I was able to take it down the street for an initial heat cycle a midnight. After a few more heat cycles I was able to moto down and I’m happy to report that my 125 runs better than ever. In fact, the rebuild is done just in time for me to head back down to Mexico in about a month for more trails, tacos, and beer. 

IMG_6739.jpg

I learned three main things from this whole process… The first lesson is to never be lazy about maintenance, no matter how well you think you know your bike. The second is to not be scared to do your own bike work, even if you have never done it before. With an OEM Owner’s Manual and a proper set off tools, you are more capable than you may think. I did go out and buy a Motion Pro case splitter (Part # 08-0605), a Motion Pro flywheel puller (Part # 08-0026), Motion Pro bearing driver set (Part # 08-0551), and some Yamabond Liquid Gasket (Part # ACC-BOND4-MC-00) to make the rebuild a little easier  The third and most important is to not shy away from quality aftermarket parts. After adding it up, I saved over $350.00 by using Wrench Rabbit parts. OEM parts are great, if you can afford it, but finding quality aftermarket parts are like riding a unicorn and by the looks and sound of my YZ125, I have found Pegasus. With all the parts supplied, the Wrench Rabbit kit only set me back $514.95. Reason #158 why I love two-strokes! So if you have either a worn out engine (no matter two or four stroke), or in my case are an idiot and blew your bike up because of negligence, give Wrench Rabbit a try, you won’t be disappointed. Also keep in mind that Wrench rabbit doesn’t just have kits for engines, in fact they offer replacement parts for all facets of rebuilding a motorcycle.  You can email me if you’re interested in ordering some parts and getting the Keefer Inc. discount. michael@keeferinctesting.com.

image1-4.jpeg

OR YOU CAN CLICK ON www.wrenchrabbit.com TO SEE WHAT PARTS YOU MAY NEED.


Yamaha YZ125 Wrenh Rabbit Kit Part Number WR101-081 ($514.95) includes-

  • Vertex piston kit (standard compression piston, rings, pin and clips).

    • Premium quality Vertex piston.

    • Complete set of nitride coated or chrome-plated piston rings.

    • Fully case-hardened wrist pin.

    • Circlips.

  • Hot Rods heavy-duty crank (stock stroke - includes wrist pin bearing for two strokes).

    • Factory assembled and trued to O.E.M. specifications, Hot Rods cranks will meet or surpass the O.E.M. in performance and durability.

  • Hot Rods main bearing / seal kit.

    • Like other Hot Rods products, these main bearing and seal kits are built to the highest quality standards that meet or exceed those of the O.E.M.

  • Hot Rods transmission bearing kit (includes transmission bearings, output shaft collar and sprocket lock washer).

    • A must-have for any new transmission or engine case installation or repair.

    • Includes trusted Hot Rods bearings for the primary and secondary shafts of the transmission.

    • Also includes the special needle bearing for the shift drum and the output shaft collar and washer (where applicable).

  • Hot Rods counter balancer bearing kit.

    • A must-have for any new counter balancer or engine case installation or repair.

    • Includes trusted Hot Rods bearings for the counter balancer shaft of most modern 4-stroke engines (where applicable).

  • Hot Rods water pump bearing and seal kit.

    • Hot Rods water pump repair kit includes water pump cover gasket or O-ring, water pump shaft bearing(s), and seal(s) to repair a leaking water pump seal and/or a failed bearing.

    • Precision micro-bearings provide O.E. quality and durability.

    • High pressure / temperature mechanical and rubber seals.

  • Hot Cams cam chain.

    • Replacement cam chain.

    • Meets or exceeds O.E.M. specifications.

  • Vertex complete gasket kit, including seals and O-ring kit (covers top and bottom).

Tools For The Job: 

  • Motion Pro Case splitter Part # 08-0605

  • Motion Pro Flywheel puller Part # 08-0026

  • Motion Pro Bearing driver kit Part # 08-0551

  • Yamabond gasket maker Part # ACC-BOND4-MC-00


YZ450F GYTR Tall Seat

Yamaha has an accessory division called GYTR and when it comes to accessories for your YZ they have tons to offer. I wasn't quite happy with the “pocket” feel that the stock 2020 YZ450F seat has to it once the foam is broken in, but managed to stumble across the Yamaha Accessories tall seat while out testing one day. I am usually not a fan of taller seats, but being that I wasn't completely happy with stock seat, I managed to steal one from the Yamaha R&D guys to try and came away actually impressed. The GYTR taller seat (part number BR9-F47C0-V0-00) is 3/4 inch taller through the middle of the seat and comes complete with seat base, foam, and gripper seat cover. 

IMG_5497.jpg

Once the stock YZ450F foam is broken down (around 15 engine hours) it can feel like you’re riding in the bike too much instead of on top of it and that can make the rider triangle feel uncomfortable for riders 5’11 and up. Installing the GYTR taller seat helped with the rider triangle feel for me when sitting. The seat wasn’t so tall through the middle where I felt like I was too high above the machine, but instead had a firmer feel than stock and enough height to help my form on the bike. I am fan of the Yamaha stock bar bend, but with the stock seat it can almost make the bar bend seem too high at times because of that pocket feel. With the taller seat it puts me into a more neutral/attack position coming into corners, which forces my arms to stay bent, instead of dropping down and relaxing too much. 

5567AD12-8E81-4FF3-AE44-F1DD6CC9C7DB.JPG

The transition from sitting to standing is better and requires less effort under throttle. Seat bouncing is needed at times, but when you’re taller (and old), it’s tough to get off your ass to soak up a jump immediately out of a corner. Having just that little bit of extra foam in the middle of the seat makes it easier for me to get off my ass because I don’t have so far to travel to stand. Yes, 3/4 of an inch doesn’t seem like a lot, but it actually makes a difference. In fact I think a 1/2 an inch would have been enough, but I am not hating on the flatter profile of the 3/4 inch height. I had a couple other testers try this seat that were shorter than me (5’9-5’10) and they even thought it was better for them. The gripper cover that comes stock on the GYTR tall seat is as good as the stock seat, but if it was me, I would be looking into getting a GUTS ribbed cover for increased traction while rolling the throttle on out of corners. GUTS seat covers are made well and last.  

To me a $129.99 for a complete seat is worth it for a roomier rider triangle feel as well as making it easier to be in the attack position while riding. You can check the seat out here: 

https://www.shopyamaha.com/product/details/yamaha-tall-seat?b=Motocross+Accessories&d=42|42&f=2020|141&ls=yamaha-motor-company


FMF Factory 4.1 Slip-On (2019 Yamaha YZ450FX)

Story By: Michael Allen

The simple fact that more manufacturers are offering off-road closed course competition bike’s brings a smile to my face since at heart I’m an off-road lover. That being said I feel like most manufacturers should know that 99% of all off-road racing organizations require race bikes to be equipped with a spark arrestor. Although the bikes are really good in stock trim, this issue has opened up a nice market for aftermarket exhaust manufacturers to be able to come in and save the day while making bikes race legal. I recently ran into this issue when I decided to race our 2019 Yamaha YZ 450FX at a local District 37 Sprint Enduro and realized last minute that I needed a legal muffler. I made a couple calls, but before I knew it FMF saved the day and I had a slip on Factory 4.1 on its way (two days before heading to the race). 

IMG_3591.jpg

When I got the new 4.1 slip on muffler I immediately installed it, which was very self-explanatory and the fit and finish of the stainless can mated to the carbon endcap was top notch. Now here is the part of the story where Kris gave me crap about the spark arrestor… Admittedly I was putting on the muffler last minute and rushing to get all of my stuff ready to race the next day and I did what everyone says not to do; I assumed…. I assumed that the muffler came from FMF with the spark arrestor screen already installed, so I didn’t even think twice before loading up my bike and heading to the race. Well… I soon found out (thanks to my friend Brendon) that I didn’t have a spark arrestor because as Kris warned me about (and I forgot) FMF puts the insert in the bottom of the muffler box, where it stayed in my recycle bin until I got home that night. Luckily I was able to squeak through sound and spark arrestor testing and go to the start line. 

IMG_3594.jpg

Initially what I noticed when I fired the 450FX up was that the new muffler was slightly louder (without the screen insert) than the stock muffler. This slightly louder sound was deeper than the somewhat raspy sounding stock muffler. The performance of the stock muffler was by no means hampering the 450FX power character, in fact it was quite good, but like I said, I needed a spark arrestor. The new 4.1 has a larger opening than the stock muffler, which in turn gives the 450FX slightly less back pressure. With a little less back pressure the FX lost a touch of smoothness in the very bottom end, giving the bike a more on/off feel. The tradeoff for the on/off feeling on the other hand was that the bike gained some over-rev and seemed to pull slightly longer into the RPM range. During the race I changed maps to try and smooth out the bottom end which helped, but didn’t completely remedy the bottom end touchiness. After getting home, going into my recycle bin (thankful the trash man didn’t come) and installing the spark arrestor insert, the bottom end delivery smoothed back out. With the insert comes a quieter sound, which was welcomed as well as some added back pressure. The back pressure gives this bike a little more lugability without wanting to flame out, so I didn’t have to worry as much about covering the clutch in tighter sections of the trail. 

IMG_3590.jpg

The bottom line is that all bikes marketed to off-road racers should come with spark arrestor inserts, they don’t. That being said, FMF has done a great job at providing the off-road community a multitude of choices for whatever their specific type of riding entails. From full titanium systems, to more affordable aluminum slip on mufflers, FMF seems to have all the bases covered. At $449.99 for the stainless/carbon slip on that I installed, I think it’s a good combination of not breaking the bank while still looking slick at the track (not to mention that it takes almost two full pounds off your bike). If you have any  questions, or just want to tell me I’m a dumbass for not seeing the spark arrestor in the box, feel free to reach out to me at Michael@keeferinctesting.com . 

Rekluse Torque Drive Clutch Pack

I am hard on clutches. Why? Well…Instead of letting off the throttle when the front wheel starts to loft upward, I simply just slip/drag the clutch a little to modulate the power, so I can get to point A to point B in a faster manner, without letting off of the throttle. This way of riding puts a lot of strain on the clutch and the plates that are inside any given bike’s engine. I usually can get anywhere between 8-10 hours on a Yamaha YZ450F clutch and the boys at Yamaha are frankly sick of handing me clutch plates every other week. We have tested the Rekluse Torque Drive kit in our Honda CRF450R. However, if you do not want to spend that kind of money on your clutch, Rekluse offers a Torque Drive Clutch Pack that utilizes the OEM clutch parts that replace your stock fibers, steels, and springs with their thinner plates and basket sleeves. 

IMG_5184.JPEG

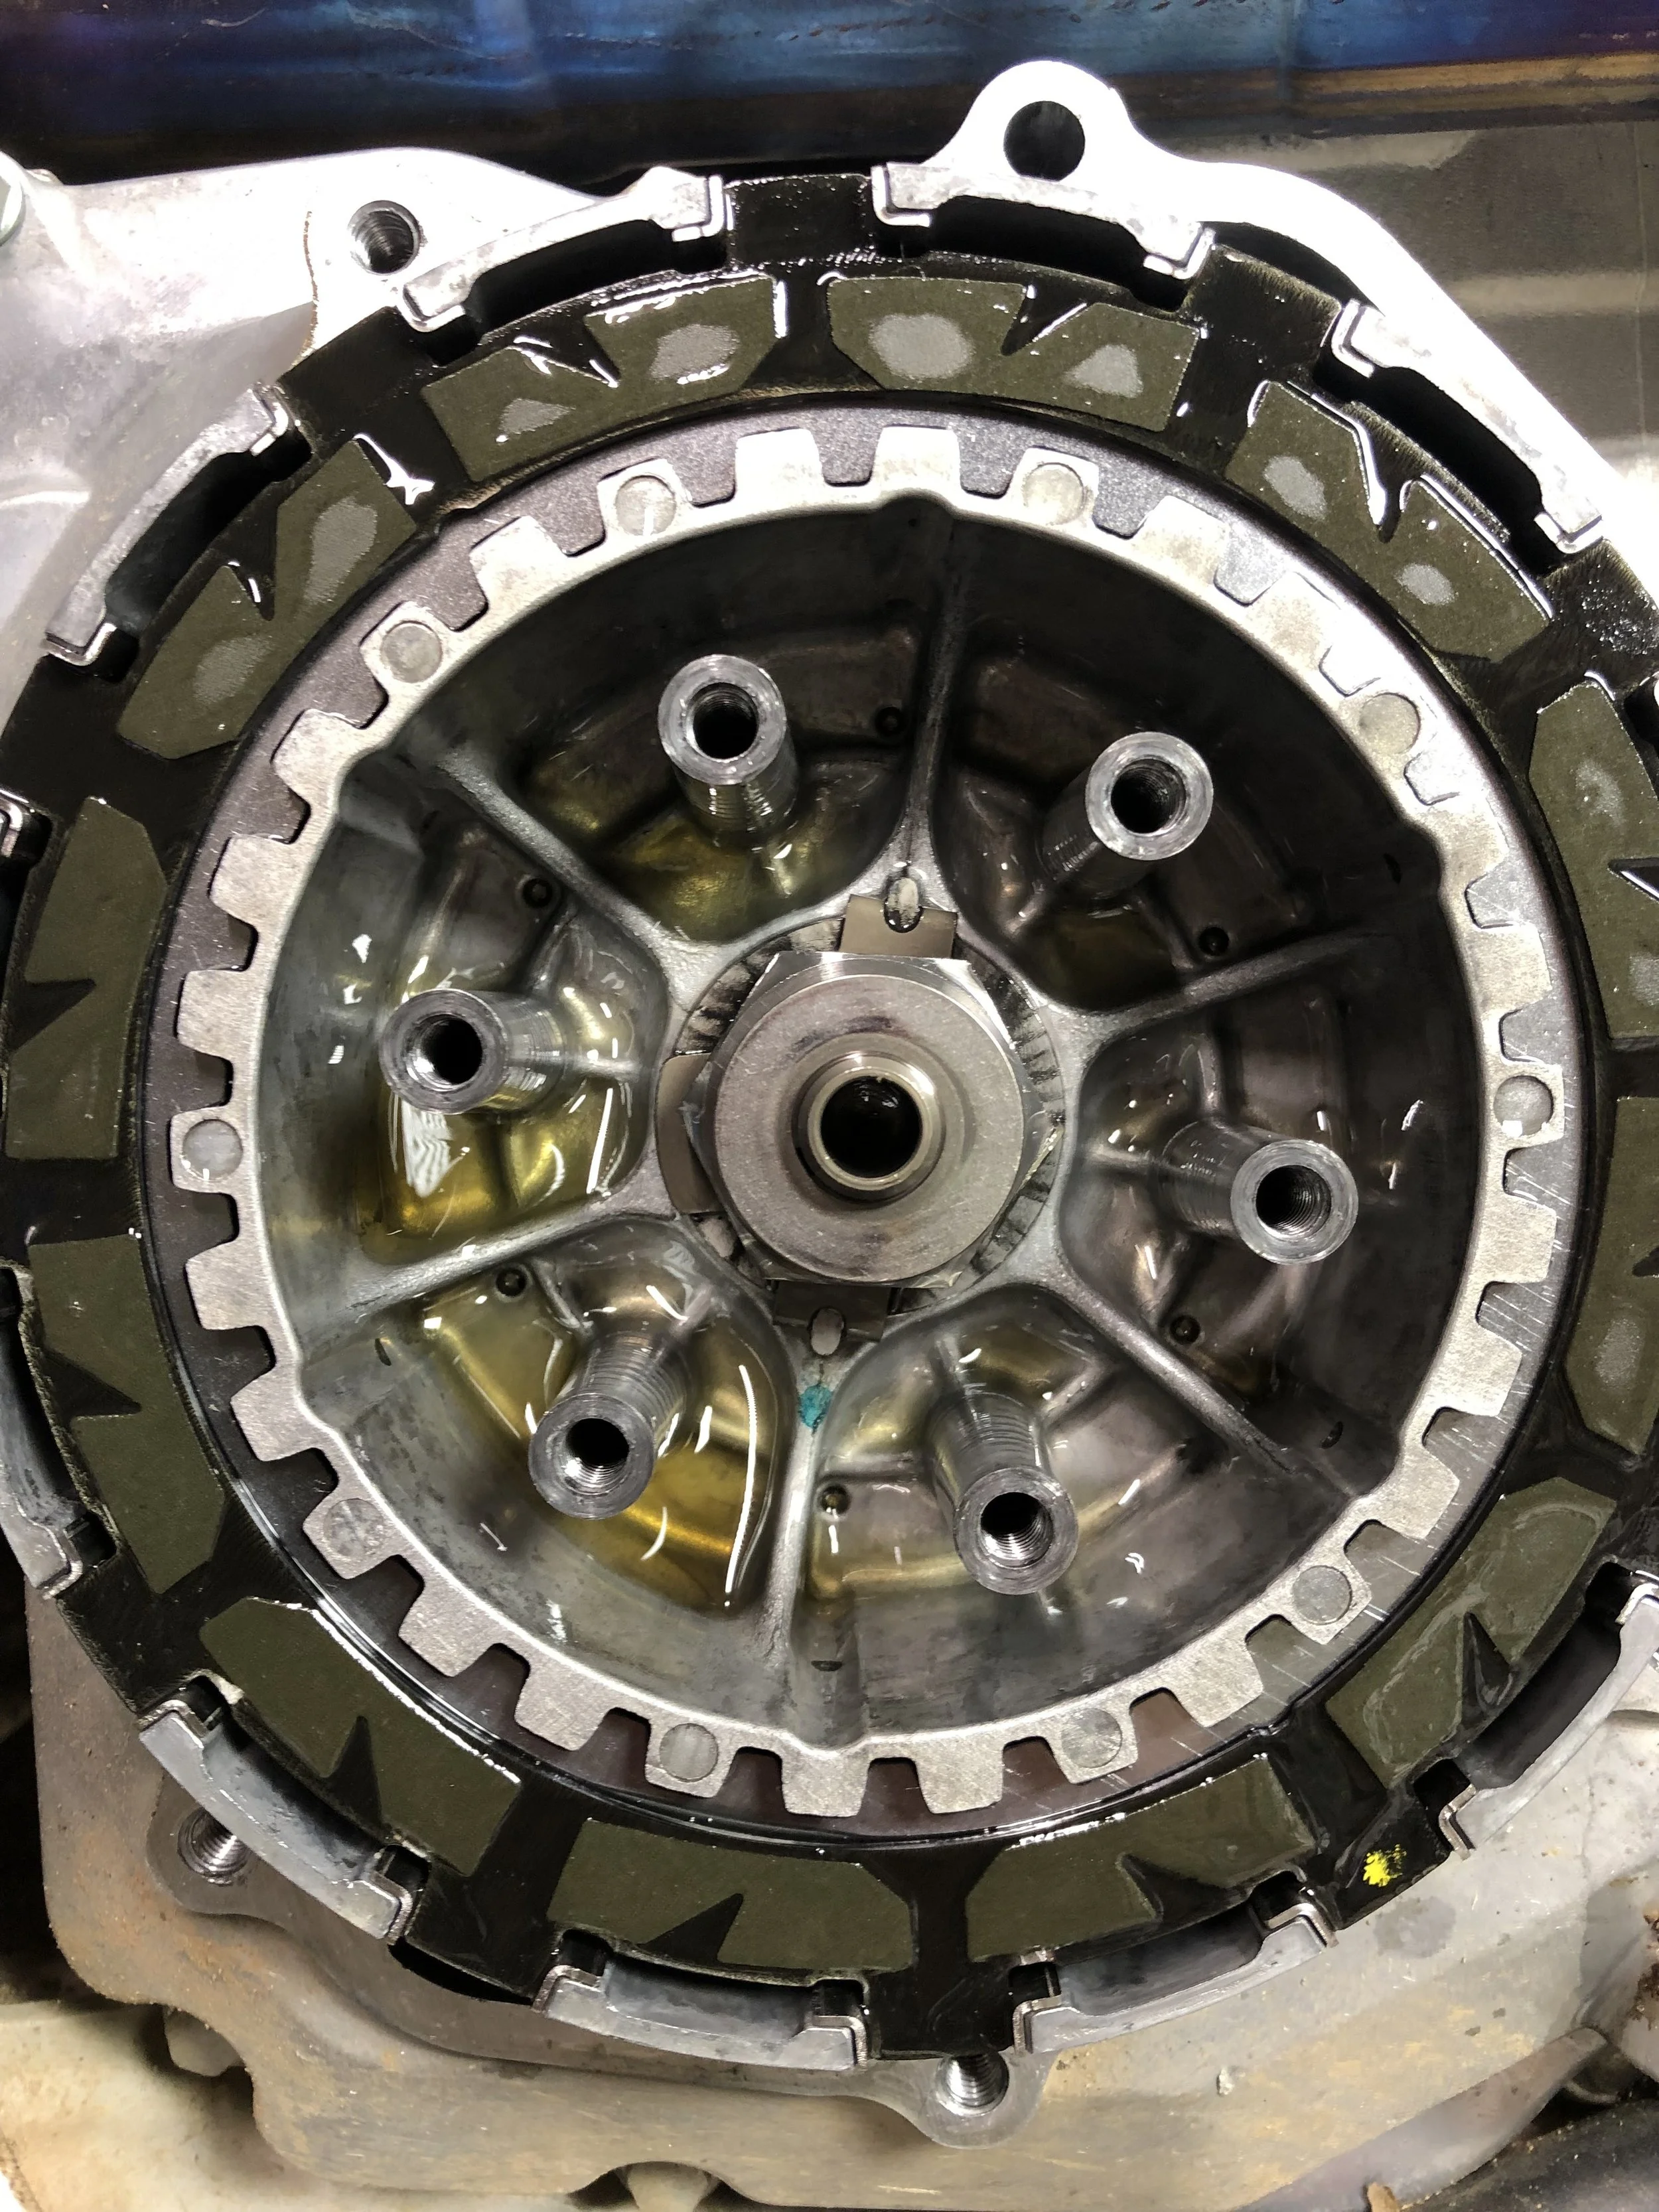
The Torque Drive Clutch pack on the Yamaha YZ450F utilizes 12 friction plates, 10 steel plates, six springs, and steel basket inserts to fit over every finger of your clutch basket. The idea behind Rekluse’s clutch pack is to use what they learned with their Torque Drive system and put it into an OEM platform. Rekluse is setting out to increase your OEM’s clutch capacity by increasing the number of plates, so you can get more of a positive connection at the rear wheel (AKA less slipping). 

I wanted to do this test and run the stock clutch and Rekluse clutch back to back, so I started the test with one moto on the stocker and one moto with the Rekluse. The clutch pack doesn't take much time to install, but be careful sliding the steel sleeves onto your basket as sometimes they can be slippery. You don't want to be fishing sleeves out of your engine/clutch basket all day. Once installed and out on the track (with the Rekluse) the first thing I noticed is a lighter clutch pull feel than the already fairly light feel of the Yamaha YZ450F. After doing my first 25 minute moto with the Rekluse I could tell that there were some improvements in performance. Coming out of corners I could roll on the throttle without modulating/covering my clutch because I had increased positivity to the rear wheel. With the Rekluse I also felt like I had a small increase in throttle response from 0-10% throttle opening. There wasn't much of a torque/pulling power increase, but I did notice (at crack of throttle) the Rekluse had more bite/snap. The good news about getting this extra response is that it didn't affect control or power delivery through deep ruts. 

IMG_5185.JPEG

The clutch engagement however was little more grabby on/off feel than the stock one, but wasn't so bad where I couldn't feed my clutch properly while doing starts. The real benefit to me was the lifespan of my clutch in two aspects. One aspect is the toughness this clutch pack has in longer motos (Testing Term: Track Toughness). Since it’s been raining a lot in Southern California I have been testing on sand tracks more than usual and the Rekluse Torque Drive Clutch Pack has provided me with less clutch drag when the engine heats up. I love to run third gear through corners, lug coming out, slip the clutch while exiting, and start to accelerate down the straight. Doing this puts a heavy load on my engine and the Rekluse Clutch Pack allows me to do this more without getting the plates too hot to where they start slipping during a moto. The second aspect that the Rekluse has sold me on was the overall lifespan that I am able to get out of the Rekluse. I have used the Rekluse Clutch Pack almost 14 engine hours and am just now starting to feel it slip/drag. I am getting a six hour increase in life, which is huge for me! 

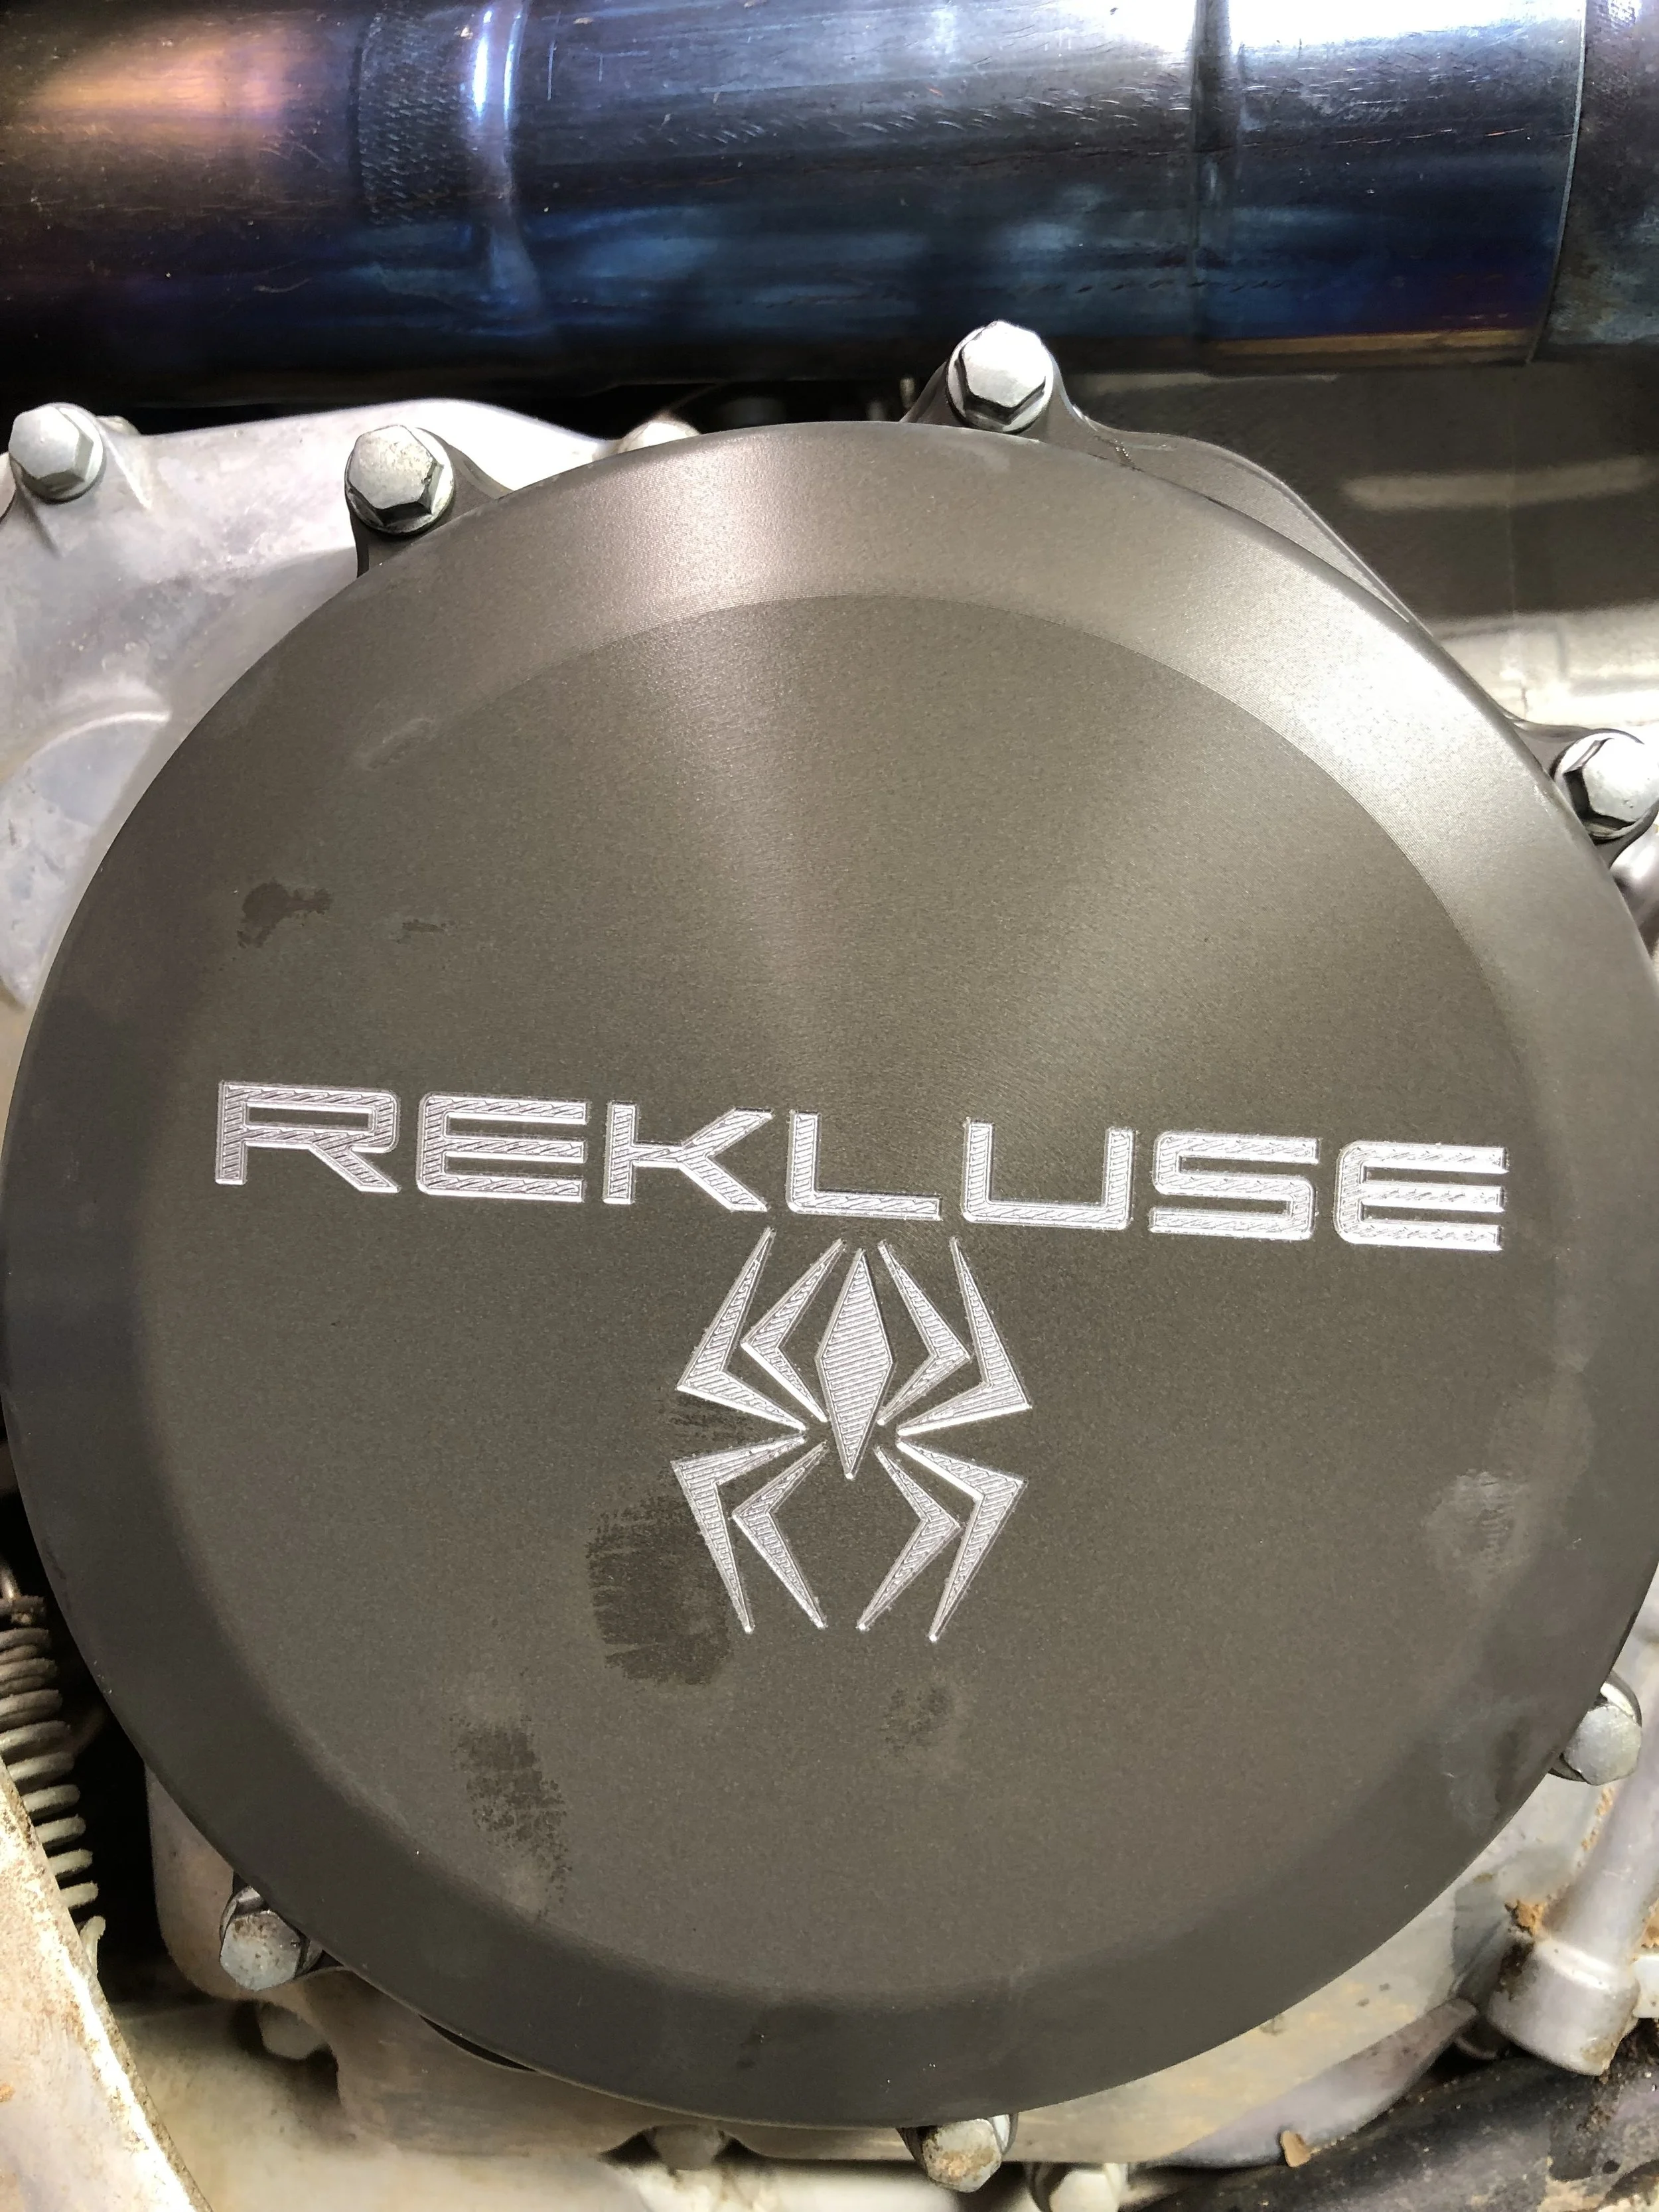
The only downfall to the Rekluse Clutch Pack is that it is more expensive than buying an OEM clutch kit. At $349.00 it’s over a $120.00 more, but then again, you will be getting more life out of a Rekluse Torque Drive Clutch Pack than your OEM plates. The cool looking Rekluse cover (which you don't need with the kit) doesn't come with the kit, but if you want to bling out your steed, the cost for the cover is $159.00. If you're hard on your clutch or maybe you're a hard core racer that wants the benefit of a Torque Drive clutch without the cost, the Rekluse Torque Drive Clutch Pack is an excellent purchase.

FCP Racing Titanium Engine Mounts (2018-2019 YZ450F)


Out of all of the aftermarket parts I test, on any machine, it is the easiest to dissect what is good and what is bad on the Yamaha YZ450F. Why? Probably because it’s one bike (out of three) that I like to ride the most, so I am hypersensitive to any slight changes to any of those three machines. When I get to “choose” which bike I want to ride when I don’t have to “work”, a blue bike is usually one of those machines. 

I tested the FCP Racing engine mounts on the 2018 Honda CRF450R a while back and was impressed with the positive changes that it made on the red bikes chassis balance. When I was presented with some titanium engine mounts for the 2018-2019 Yamaha YZ450F, I of course jumped at the chance to see if it made one of my favorite bikes even better. FCP offers titanium front mounts in soft, medium and stiff for the 2018-2019 YZ450F and I tried all three over the course of several months. Not only did I test at the typical tracks here in Southern California, I even spent time with all the mounts in soft, farm-fresh, deep dirt in Colorado. All you east coasters out there, I got you covered on this one ok! I understand that in most cases what works here for us in California might not work there for you on the east coast. This is why I made sure that I tested these mounts in very deep conditions to really get a full coverage evaluation.  


IMG_0035.jpg


For my weight and ability I can rule out the soft titanium mounts as it makes the bike flex too much (especially on soft dirt) coming into corners (on de-cel) and left me with a vague feeling front end. Maybe if you are a super lightweight rider (under 140 pounds) and wanted some added straight line stability (on-throttle) this could be good, but for what I was looking for this wasn't a good setting. 


IMG_0033.jpg


My favorite set of mounts were the medium titanium mounts as they improved lean in coming into corners and gave me increased front wheel traction. If you are still feeling a vague feel on the 2018-2019 YZ450F through corners these mounts can get you some added front wheel traction. I also noticed an increased tracking ability when landing off jumps when immediately having to turn the bike. Imagine a jump that is immediately followed by a sharp 180 degree corner (with ruts). You must land and immediately find a rut to get into and make the corner. Sometimes this can be tough with the stock mounts of the YZ450F, but this is where the medium titanium mounts improve tracking because it makes the YZ450F feel even more planted in these types of conditions. This allows the rider to get on the throttle sooner (after landing) and lets you lean the YZ450F over through the corner easier.  Another improvement was though flat corners with no rut or berm to bank off of. The 2019 YZ450F is slightly improved in this area (over the 2018), but if you have a 2018 and are looking for increased front end bite through flat corners, these medium titanium mounts can help you with added traction. If there is one negative to these medium titanium FCP mounts it’s that I noticed a slightly stiffer feel (near head tube) when the track gets hard pack and square edge. This isn't a huge difference, but I do want to note that I did feel a slight change. That slight stiffer feel that I experienced gave me a little more deflection (on-throttle) in the front-end (fork). I am going to experiment with some fork settings (updated valving) to see if I can tune this out. I consider these titanium medium mounts an improvement over the stock pieces and if the stock mounts were a baseline 3 the titanium medium mounts were a 3.25. 


IMG_0036.jpg


The stiff titanium mounts only increased that stiff head tube area feel and the YZ450F lost some of that comfort that makes it so appealing to ride. I feel like these mounts are geared towards a bigger sized rider (over 220 pounds) or someone that is racing Supercross. The stiff mounts did increase lightweight cornering feel and also helped side to side movement (“flop” or “tip in”), but for the average consumer I feel like this is too much in the wrong direction. 


After spending a couple months riding back to back with the stock mounts and the FCP Racing titanium mounts, I have come to the conclusion that this is a great option to make your 2018-2019 Yamaha YZ450F react quicker and increase tracking into ruts. For $199.00 plus shipping, it’s not so expensive where you're breaking the bank or pissing off your wife by making the purchase. The bad news is that FCP Racing only has an Instagram (@fcpracing) and Facebook (FCP Racing) page which can make it difficult for old school fellas to purchase. Contact them through direct message and they are usually pretty good about getting back to you ASAP.  


If you have any questions about this product please feel free to email me at kris@keeferinctesting.com or if you see me at the track, come up and ask away!