Off-Road

Wrench Rabbit Yamaha YZ125 Engine Rebuild Kit

By Michael Allen:

Although one of the main perks or being a part of Keefer Inc. Testing is getting to ride the latest and greatest bikes, there are times when you need to have your own bike. I needed my own bike because I was going to race the Los Ancianos Tecate Enduro that is run in Mexico and I needed to be able to show proof of registration. After a lot of looking around I found the perfect bike, a somewhat abused 2006 YZ 125. I raced it for two years in Mexico and would randomly ride it here and there when I wanted to feel like I was going fast. Here is where the embarrassing part comes in, this last winter we had an abnormal amount of rain in California, which was great, but I was admittedly a little lazy in the maintenance department.  I figured “it’s wet, how dirty could my air filter be getting”? Well after not checking my air filter for about three rides, my $1,800 Yamaha YZ125 decided to come to a quick stop in the middle of a snowy trail ride. As I was on the pipe climbing a sandy canyon the wheel locked up and I came to a skidding stop. I luckily was within pushing/coasting distance back to the truck, but when I got there and pulled the seat off, I immediately knew what happened and felt really stupid. You see when I got the bike I did the current plastic re-style kit from Polisport and when I re-installed the air box, apparently I didn’t do a good job with the hose clamp (that holds the air filter cage onto the air box). To my surprise my air filter and cage was just sitting in the bottom of the air box and I had been sucking dirt into the engine for who knows how long. Fail!  

IMG_6381.jpg

Needless to say when I tore the engine down there was grit everywhere from top to bottom. I knew if I wanted to do it right the whole engine would need to be rebuilt, but I also knew that replacing bearings, seals, gaskets, a top end, and crank with OEM parts would cost more than I purchased the bike for. After talking to Kris he mentioned that Wrench Rabbit sells complete engine rebuild kits and from what he remembered they weren’t all that expensive. After that conversation with Kris, I reached out to them and got the ball rolling on rebuilding my little 125. 

IMG_6730-2.jpg

The Wrench Rabbit kit (Part Number WR101-081) really does come with EVERY bearing, seal, and gasket you need to do a complete rebuild on your bike. To be completely honest I had done a bunch of top ends on previous two-strokes, but this was my first time splitting cases and doing my own rebuild. I took it slow and really tried to do good job of keeping everything organized when I took it apart. Upon disassembly it was then that I realized that it wasn’t as scary as I imagined it would be. When the engine was torn down I found that my issues were a scored piston (luckily the cylinder wasn’t bad enough that it needed to be re-plated or replaced), a blown out rod bearing, and main bearings that were ready to come apart at any time. The Wrench Rabbit kit comes with a brand new crank/rod from Hot Rods already assembled as well as new main bearings to go with it. In the past I had been scared to use aftermarket engine parts, but the quality of the Wrench Rabbit parts were very impressive and every part fit just as good as the factory parts that came out of the bike. 

IMG_7066.jpg

As I buttoned up the cases and slid the cylinder onto the new Vertex piston I was pretty excited to get my 125 running after looking at it sit in the garage for the past five months. I slapped the engine back into the frame at about 11pm and was so excited to get it running I ran to the gas station that night to mix some gas and wake up my neighbors. The child like smile on my 32 year old face said it all when it came to life on the third kick and I was able to take it down the street for an initial heat cycle a midnight. After a few more heat cycles I was able to moto down and I’m happy to report that my 125 runs better than ever. In fact, the rebuild is done just in time for me to head back down to Mexico in about a month for more trails, tacos, and beer. 

IMG_6739.jpg

I learned three main things from this whole process… The first lesson is to never be lazy about maintenance, no matter how well you think you know your bike. The second is to not be scared to do your own bike work, even if you have never done it before. With an OEM Owner’s Manual and a proper set off tools, you are more capable than you may think. I did go out and buy a Motion Pro case splitter (Part # 08-0605), a Motion Pro flywheel puller (Part # 08-0026), Motion Pro bearing driver set (Part # 08-0551), and some Yamabond Liquid Gasket (Part # ACC-BOND4-MC-00) to make the rebuild a little easier  The third and most important is to not shy away from quality aftermarket parts. After adding it up, I saved over $350.00 by using Wrench Rabbit parts. OEM parts are great, if you can afford it, but finding quality aftermarket parts are like riding a unicorn and by the looks and sound of my YZ125, I have found Pegasus. With all the parts supplied, the Wrench Rabbit kit only set me back $514.95. Reason #158 why I love two-strokes! So if you have either a worn out engine (no matter two or four stroke), or in my case are an idiot and blew your bike up because of negligence, give Wrench Rabbit a try, you won’t be disappointed. Also keep in mind that Wrench rabbit doesn’t just have kits for engines, in fact they offer replacement parts for all facets of rebuilding a motorcycle.  You can email me if you’re interested in ordering some parts and getting the Keefer Inc. discount. michael@keeferinctesting.com.

image1-4.jpeg

OR YOU CAN CLICK ON www.wrenchrabbit.com TO SEE WHAT PARTS YOU MAY NEED.


Yamaha YZ125 Wrenh Rabbit Kit Part Number WR101-081 ($514.95) includes-

  • Vertex piston kit (standard compression piston, rings, pin and clips).

    • Premium quality Vertex piston.

    • Complete set of nitride coated or chrome-plated piston rings.

    • Fully case-hardened wrist pin.

    • Circlips.

  • Hot Rods heavy-duty crank (stock stroke - includes wrist pin bearing for two strokes).

    • Factory assembled and trued to O.E.M. specifications, Hot Rods cranks will meet or surpass the O.E.M. in performance and durability.

  • Hot Rods main bearing / seal kit.

    • Like other Hot Rods products, these main bearing and seal kits are built to the highest quality standards that meet or exceed those of the O.E.M.

  • Hot Rods transmission bearing kit (includes transmission bearings, output shaft collar and sprocket lock washer).

    • A must-have for any new transmission or engine case installation or repair.

    • Includes trusted Hot Rods bearings for the primary and secondary shafts of the transmission.

    • Also includes the special needle bearing for the shift drum and the output shaft collar and washer (where applicable).

  • Hot Rods counter balancer bearing kit.

    • A must-have for any new counter balancer or engine case installation or repair.

    • Includes trusted Hot Rods bearings for the counter balancer shaft of most modern 4-stroke engines (where applicable).

  • Hot Rods water pump bearing and seal kit.

    • Hot Rods water pump repair kit includes water pump cover gasket or O-ring, water pump shaft bearing(s), and seal(s) to repair a leaking water pump seal and/or a failed bearing.

    • Precision micro-bearings provide O.E. quality and durability.

    • High pressure / temperature mechanical and rubber seals.

  • Hot Cams cam chain.

    • Replacement cam chain.

    • Meets or exceeds O.E.M. specifications.

  • Vertex complete gasket kit, including seals and O-ring kit (covers top and bottom).

Tools For The Job: 

  • Motion Pro Case splitter Part # 08-0605

  • Motion Pro Flywheel puller Part # 08-0026

  • Motion Pro Bearing driver kit Part # 08-0551

  • Yamabond gasket maker Part # ACC-BOND4-MC-00


Dunlop MX53 Tire Review

Dunlop recently introduced their new MX53 intermediate to hard terrain tires last week to the media at Perris Raceway. I was excited about the new tire from Dunlop because quite frankly there hasn't been an intermediate to hard terrain tire that I have been over the moon about in a very long time. I usually am stuck with running a soft to intermediate tire at most tracks, but that always isn't the best decision once second motos roll around. I have been able to ride with the new Dunlop MX53 tires at more than five different tracks, with several types of soil, over the span of seven days. I have put almost 10 engine hours on the tires as well as experimented with air pressure settings. Here is what I know about the new Dunlop MX53 tires.

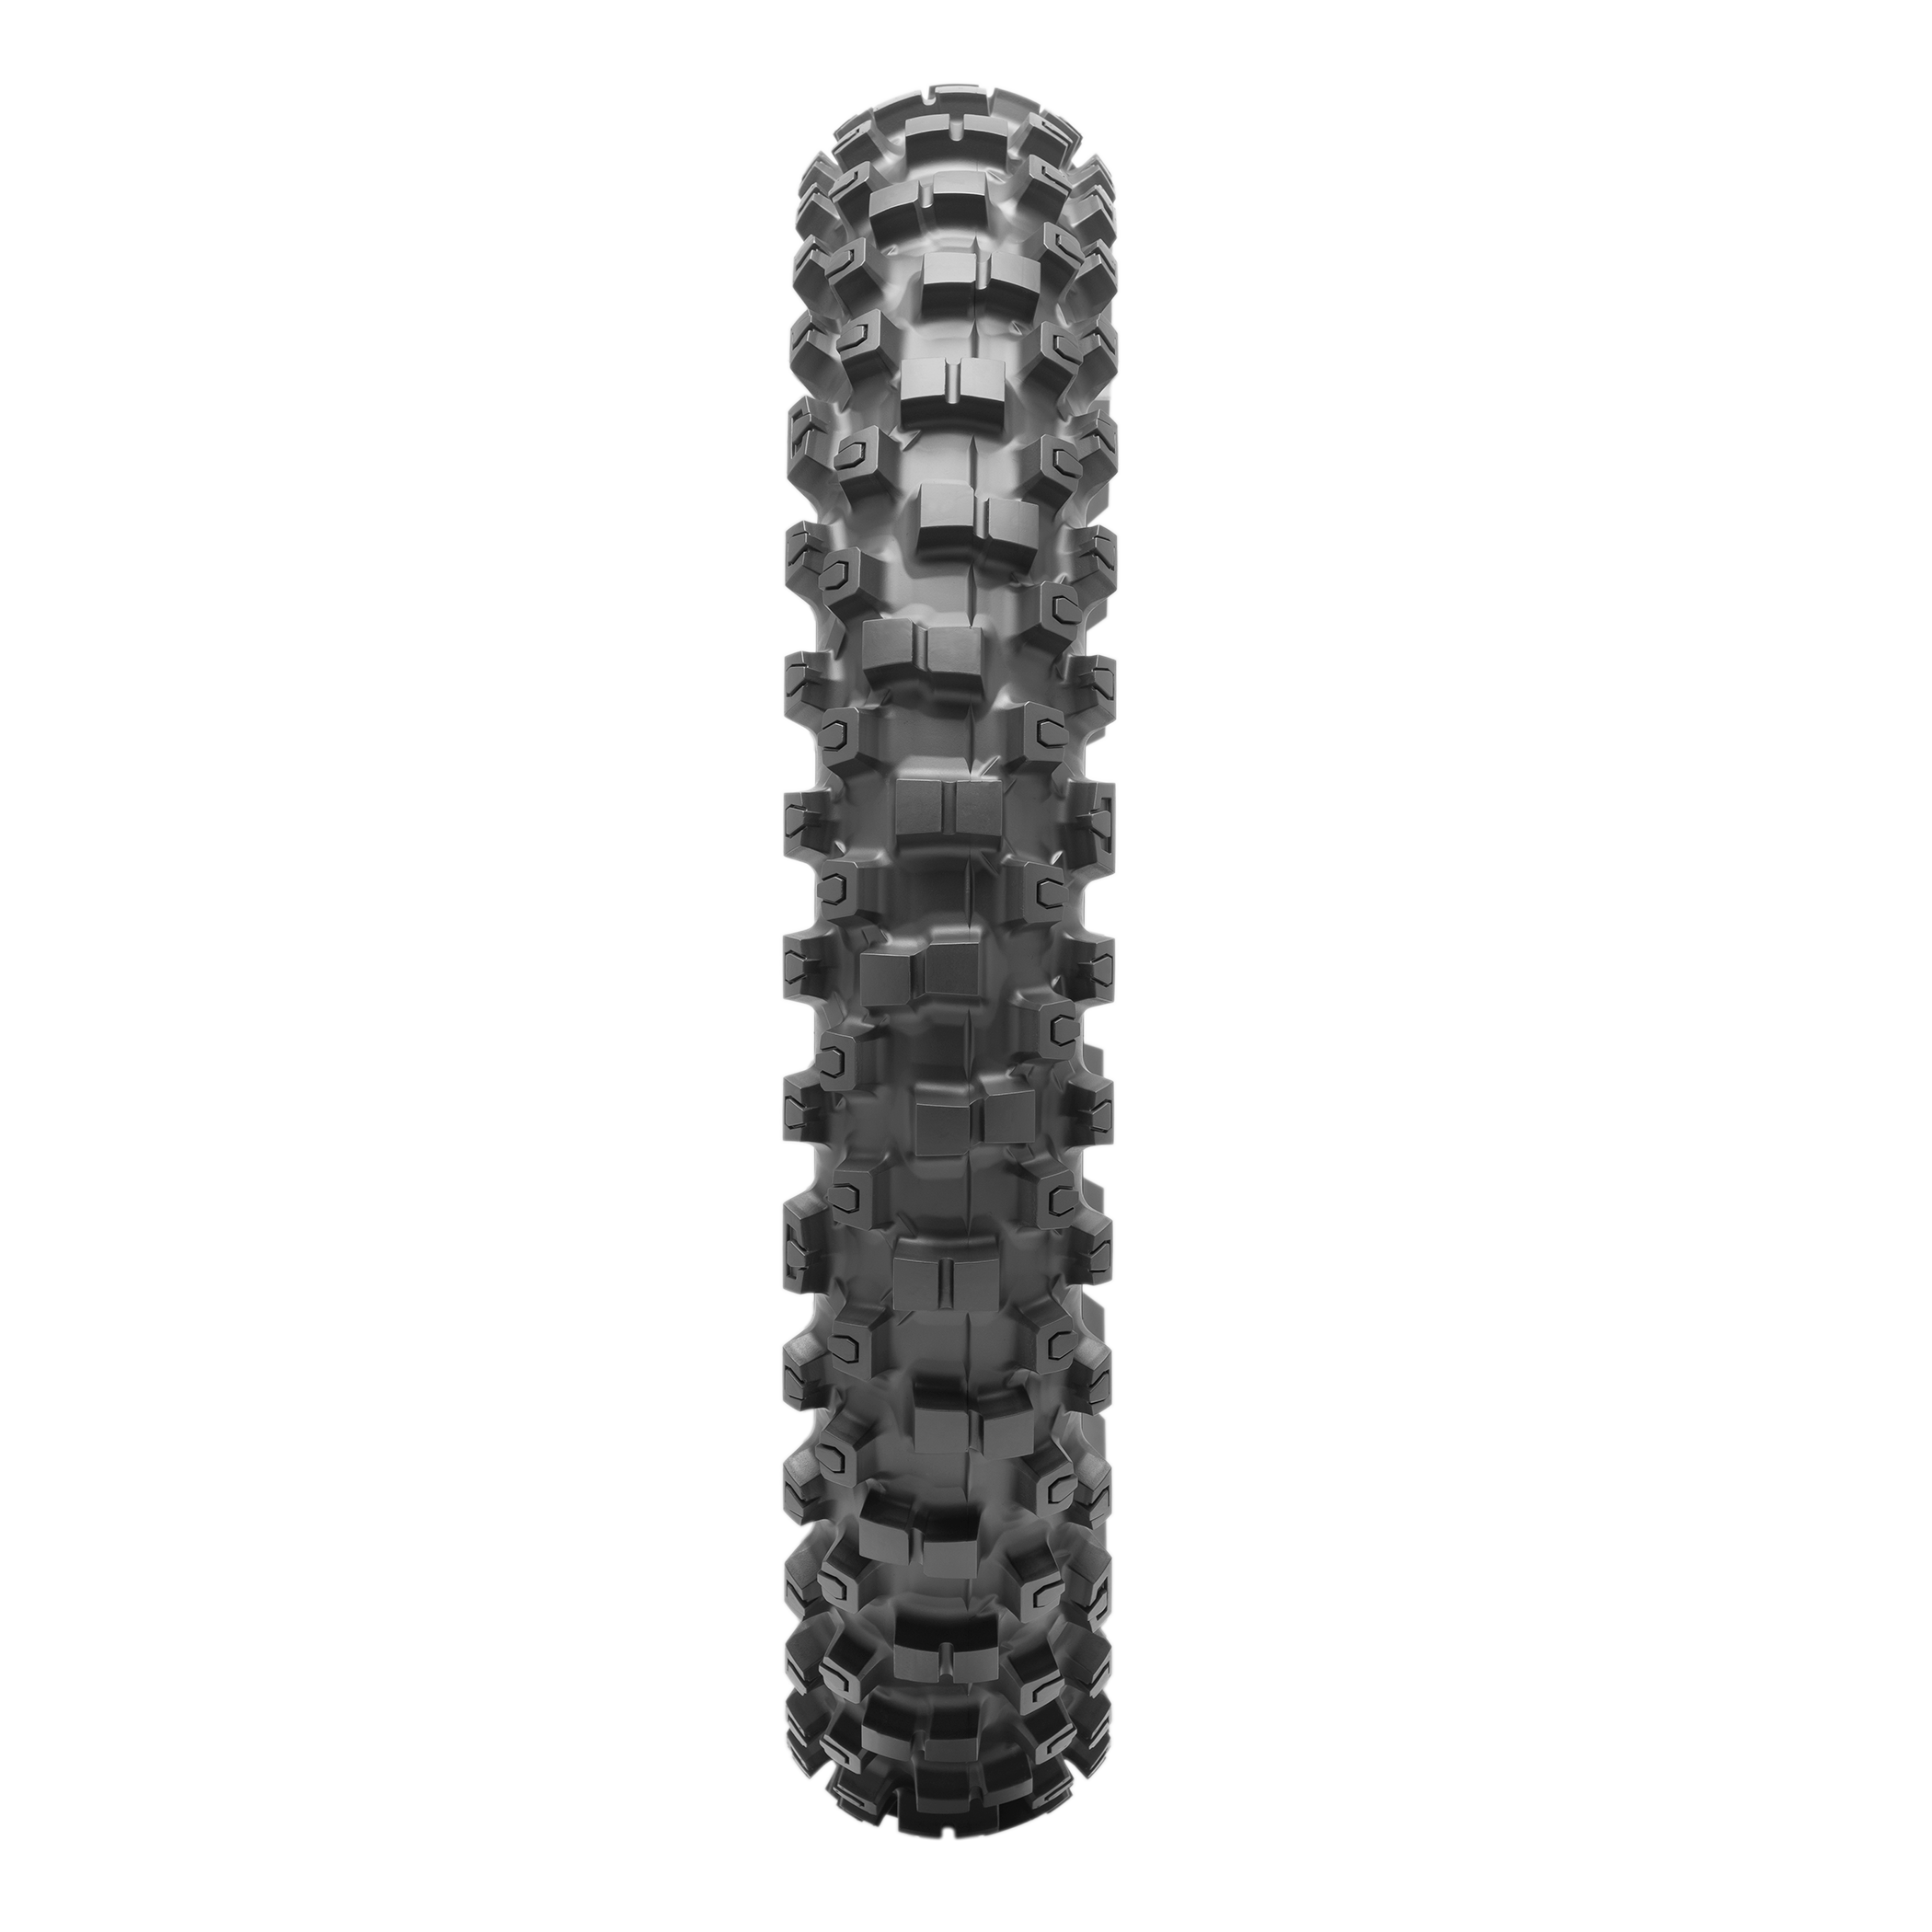
GEOMAX_MX53_FRONT_MED.png

Tread Pattern (From Dunlop):

Front Tire: Dunlop has introduced a horseshoe shaped cluster of knobs to the front tire of the MX53. This horseshoe pattern acts as a giant claw to dig into the ground in order to try and give the rider more traction on hard-packed terrain as well as maximize braking grip. This bold new pattern features hollowed out portions of the center of the tread. The hollow area of this horseshoe cluster results in less stiffness in the center of the tire, in order to give riders better feedback and more compliance. The MX53 also has a taller profile than the previous MX52, providing gentler handling, a higher lean angle and better maneuverability. Additionally, each of the blocks are 1 mm higher than the MX52. This extra height is crucial in allowing the MX53 to perform better in intermediate terrains than the MX52 ever did.

GEOMAX_MX53_REAR_TREAD_MED.png

Rear Tire: The rear tire enhancements include a reemergence of Dunlop’s Tornado Wave block distribution. The staggered placement of the rear tire blocks provide a more linear land ratio for a better ride compliance. The consistent placement of knobs along the shoulder of the tire increases confidence at greater lean angles. However, the interior blocks have more separation, which allows loose soil from softer terrains to clear the spaces more easily, while also exposing more surface area of the knobs to the dirt when more traction is needed for harder surfaces 


Progressive Cornering Block Technology:

Dunlop’s patented Progressive Cornering Block Technology has become an industry standard. A smaller block within the traditional knob, commonly known as Block-In-A-Block, has been incorporated into Dunlop’s rear off-road tires for many generations of tire patterns. Dunlop continues to raise the bar by evolving this traditional block into altered shapes to increase durability and tire performance. 

Block-In-A-Block: The new Geomax MX53 now also features Dunlop’s patented Block-In-A-Block technology on the front tire, which allows enhanced flex on each knob resulting in ultimate grip and even more biting edges. The tie bars connecting the base of the knobs add heightened durability to enhance performance in harder terrains. The individual flex of each knob improves linear tracking and aids in steering, as the block can now flex around various terrain elements. 

The Block-In-A-Block technology in the rear tire incorporates the Diamond Block design that was introduced with great success on the MX33. The diamond shape of this altered knob increases the surface area of the block, enhancing stability and slide control. Two additional angles increase the number of biting edges to dig into the dirt. The updated Block-In-A-Block shape has also been added to the rear tire along the shoulder. This wider knob provides a steady base to maximize traction along the outer edge of the tire’s surface.The compound for the MX53 tires has a higher number of molecular polymer particles. This results in a higher fracture strength, meaning more durability. Dunlop has also added more fine carbon particles. The carbon par-ticles are responsible for grip.

Construction: In the construction process of the MX53, Dunlop has added Advanced Apex Design technology. This component of the tire’s construction is present in both the front and rear tire. The Apex of the tire previously consisted of a small strip of material wrapped around the apex of the bead. By extending this apex further into the tire’s natural construction, Dunlop is able to increase ride compliance by spreading the forces of weight on the tire across the breadth of the profile. Distributing the force in this manner increases bump absorption and allows more flex and better ride compliance. Incorporating this element strikes a perfect balance between a plush ride and a firm feel. 

IMG_5255.JPG

On The Track: I managed to ride five different types of tracks and I will be completely honest here; I came away with a more positive outlook on these tires than after the first day of testing, at Perris Raceway. As you may or may not know I am a front end steering type of rider and I am not a fan of the Dunlop MX33 or MX52 front tires at alI. I am a picky SOB when it comes to front tires!! I was forced to purchase any remaining MX3S front tires that were available and mix matched my way around Southern California with different front to back tread patterns. 

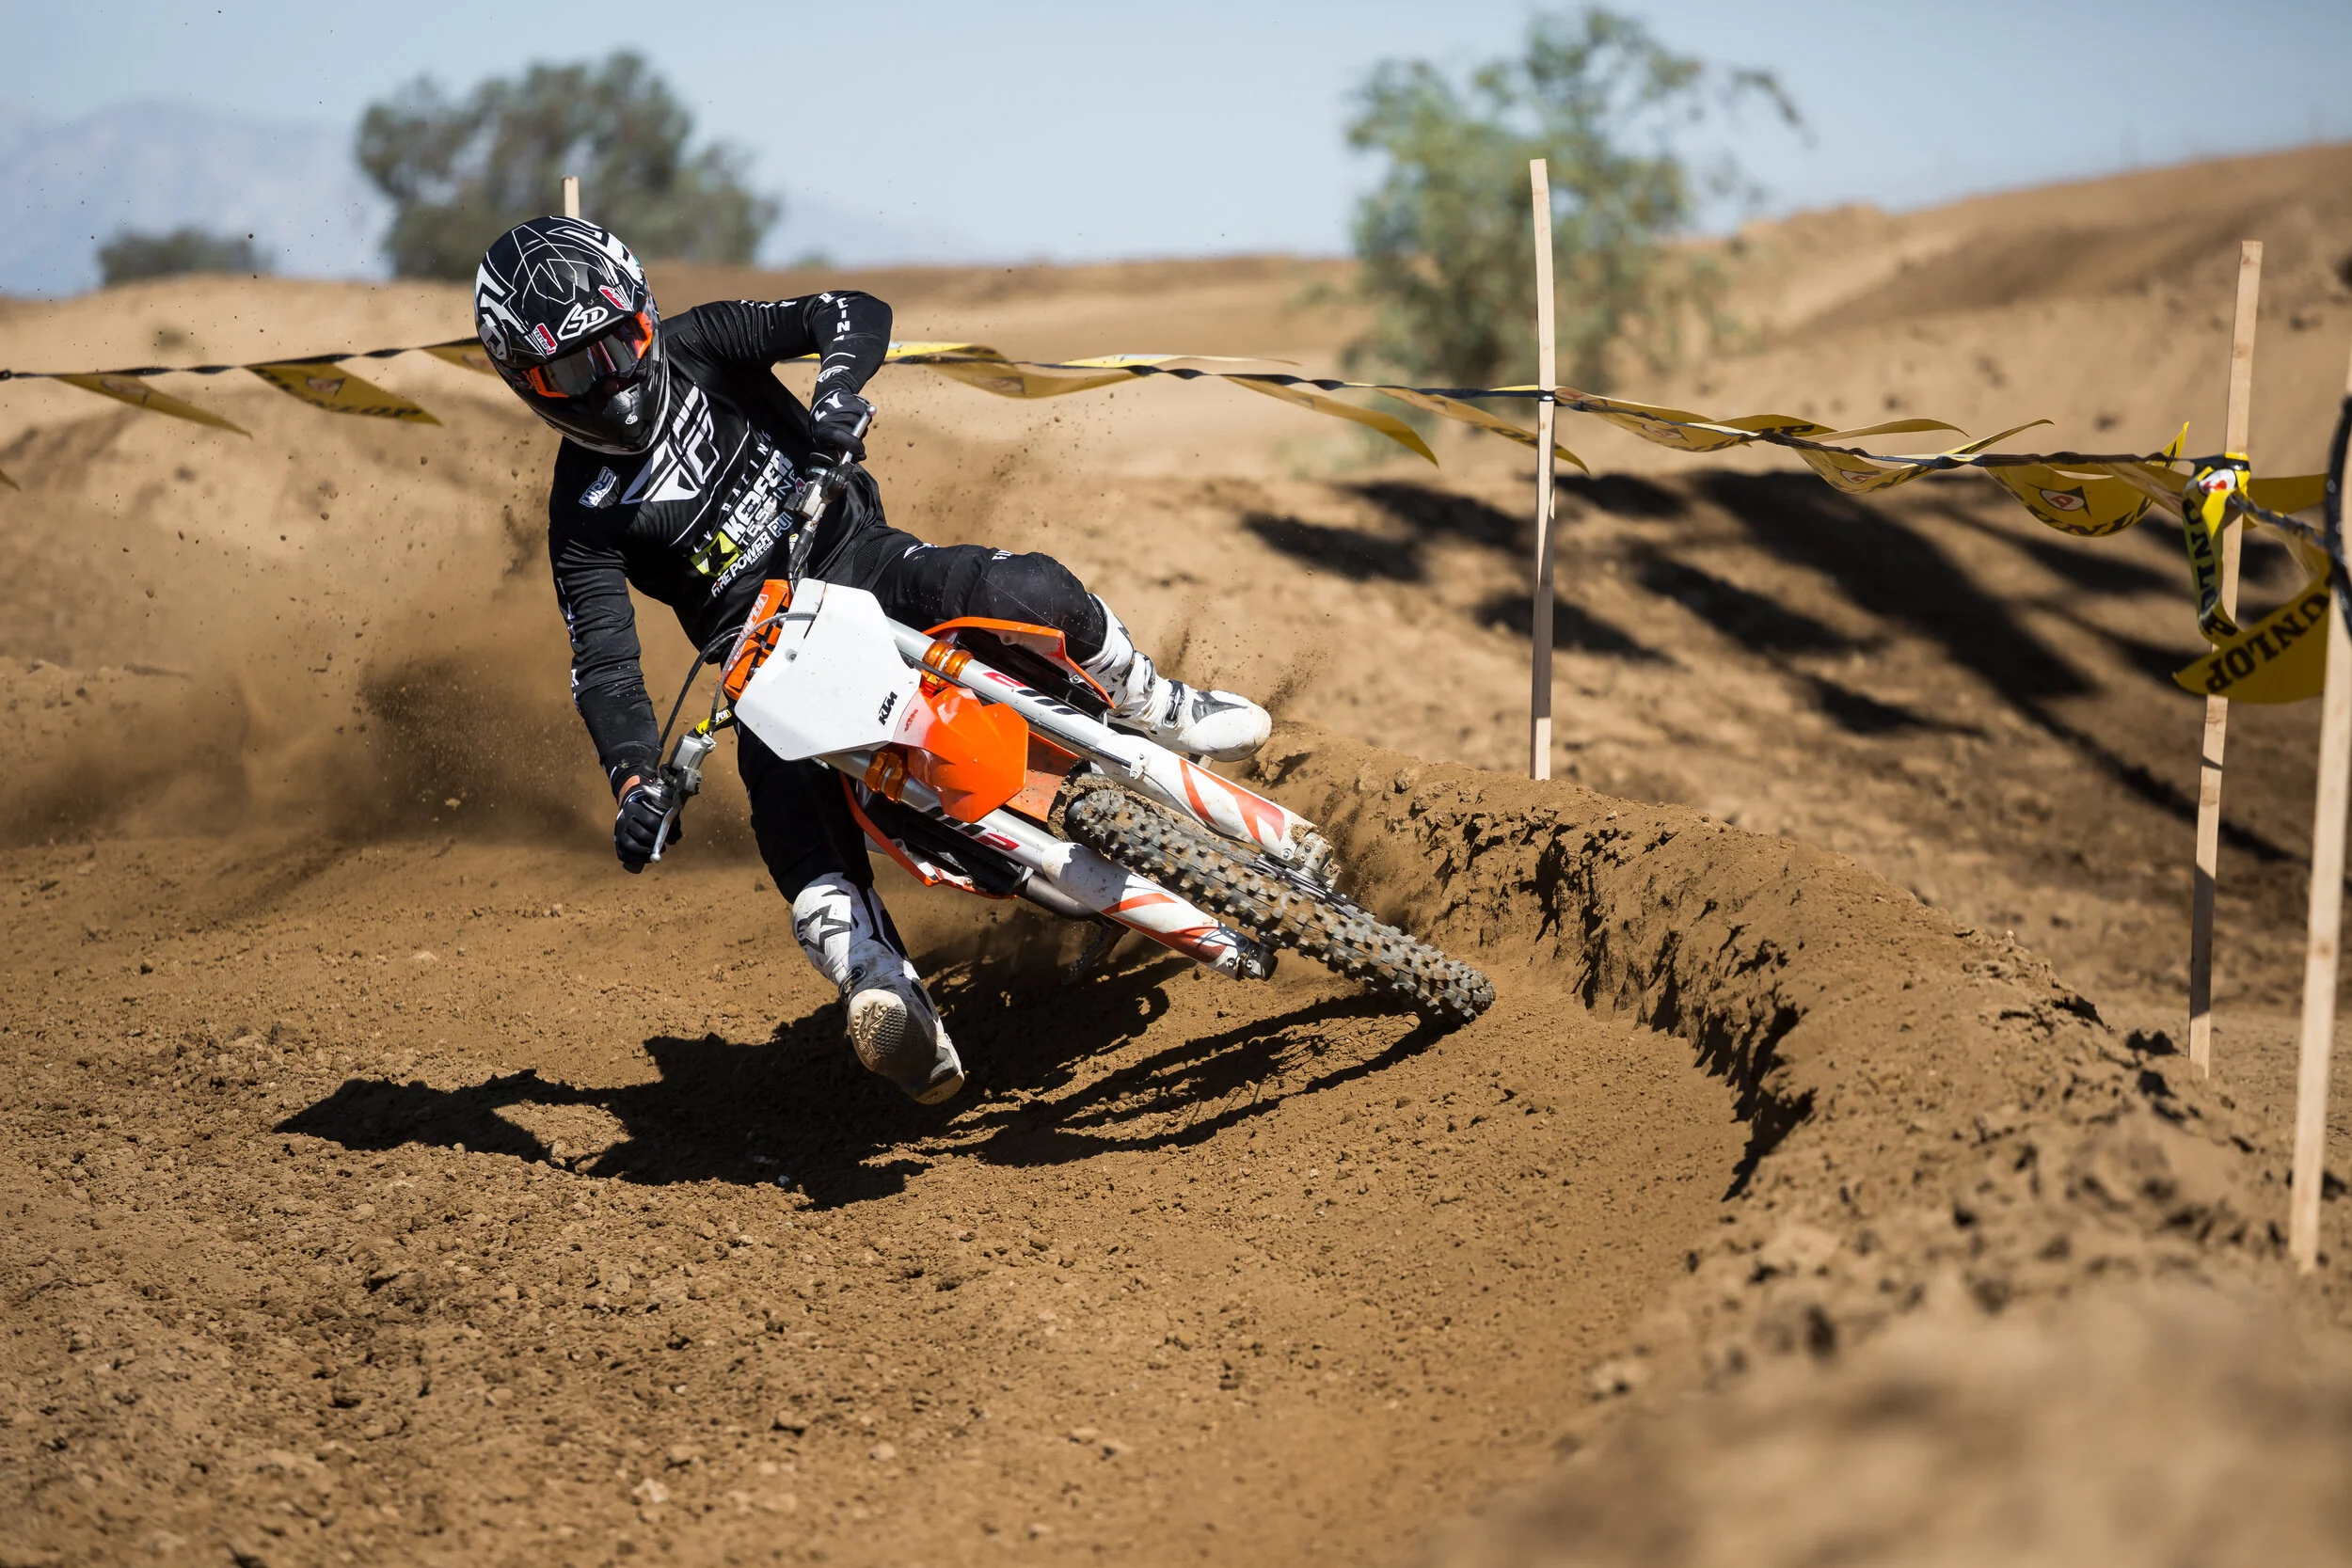
The Dunlop MX53 front tire impressed me on the first day of testing, but it wasn't until after day two (at Glen Helen) that I realized that I could actually like an intermediate to hard terrain front tire better than a soft terrain front. The MX53 front tire lean angle traction inspires confidence in terrain that is anywhere between soft-hard pack. In pure sand conditions the front end is a little loose feeling on entrance of corners, but if the track is still fresh in the morning with tilled up loam, the front tire tracks very well. I can predict where the side of the MX53 will break loose, how much I am able to lean through corners, and that feeling never waivers throughout the course of any day. Unlike the other MX33/52 compounds where they washed unexpectedly on initial lean, the MX53 bites and give the rider predictability. Another positive aspect to the MX53 is lack of front tire sliding when braking. Grabbing a handful of front brake (lean angle or straight line) into a corner leaves the rider with a sensation of a more contact patch feel that is wider than any other Dunlop I have tried to date (especially on lean angle braking).

Flat corners (while on throttle) or medium lean angle sweepers gives me a more secure/planted feel than a MX33 or MX52 and doesn't leave me with a feel of washing the front end out. As much as I love the MX3S front tire, even that tire isn't as good in this area of the track. The carcass of the front MX53 tire also has enough cushion to where it doesn't make your front end feel harsh on braking bumps like the MX33 can do at times on intermediate/hard pack tracks. For as much time as I have on the front tire the reliability also seems to be better than the MX3S, but I will continue to put more time on the tire to see where its “breaking” point is. The overall integrity/feel of the tire still remains intact with almost 10 hours on it. The only real negative I have found to this tire is the air pressure setting is crucial, so running a 13.5 air pressure setting is the number you will need to achieve. Going higher in air pressure will leave you with less lean angle grip on dry/wet slick surfaces and going lower will leave you with a carcass that is extremely soft feeling on braking bumps. 

dunlop mx53-7244.jpg

I am not as picky when it comes to a rear tire, but the MX53 rear tire has a narrower “terrain window” than the front tire. However, it’s still impressive on intermediate-hard terrain, it just doesn’t have much forward bite or tracking when the track has deep sand sections. If the track is softer in nature the rear tire doesn't bite into the ground as good as the front does, so if you're a rear end steering rider you may want to stick with a MX33 in softer stuff. The MX53 has a comfortable carcass feel on square edge and braking bumps, but just know 13.5 or even 14 psi is recommended. I tried Dunlop’s recommendation of 12.5, but found myself feeling the tire squish too much on the rim on acceleration bumps. When it comes to entering shallow hard pack ruts I have yet to feel anything better than a MX53 in this area of the track. The rear end tracks into the ruts superbly with a positive lean angle and lets you get on the gas earlier because the rear end of the bike feels planted sooner. Another area I gave the MX53 high marks was under braking. When braking into corners there was much less slide with the MX53 than the MX33 and that really helps when you’re asking your motorcycle for traction/bite when diving hard into a corner.

If you're a rear end steering rider, having a rear tire that slides a little more under braking might be better for you, so look into a MX33 if you’re that type of rider. Just like the front tire, being on the gas while under a medium lean angle suits the MX53 rear tire. The contact patch that the rear tire lays down for you is better than any other intermediate to hard pack terrain tire I have tried as well as allows for a more controlled scrub up faces of dry/hard pack jumps. The rear end will not want to wash as quickly up the faces of jump when leaning, which can allow for a lower trajectory. With almost 10 hours on the rear tire, its performance hasn't dwindled a huge amount and is consistent enough for me to continue to put time on it. 

On wet/slick track conditions (think hard pack with water on top) the MX53 front/rear tires fling sticky mud out from in between the knobs well enough for me to be fairly aggressive, but just note that I have yet to find a production tire that works extremely well in that type of condition. Overall, these Dunlop MX53 tires have changed my outlook on running an intermediate to hard terrain tire on a wide variety of tracks. Having a tire that is consistent enough to run in the early morning motos as well as the late afternoon motos is tough to do, but Dunlop has done a good job with providing us a tire that is capable of doing this. 


Forecasting Questions: Before my email inbox blows up with MX53 questions, let me answer some that may come through the pipeline. 

Kris, what do you like better? The MX3S or MX53? As of right now I can stand here and say for California tracks I would like to run the MX53 tires 9 months out of the year. If we get a lot of rain and the tracks are soft I will run a MX3S front and MX33 rear. If you’re an east coaster and ride soft conditions I would run a MX3S front and a MX11 rear. 

Kris, what about durability? Will these knobs chunk off? At the 10 hour mark these MX53 knobs haven't chunked off. The MX3S knobs have chunked on me around this time, but you have to know what type of tire buyer you are. Are you a performance or durability based tire purchaser? It is extremely difficult to get both of these into one tire. For me I would rather take a 10-12 hour tire that has excellent grip than a 20 hour tire that has low grip/high. However, not everyone is like me, so if you’re a weekend warrior and do not care about performance as much, but want more durability, then you might want to look into a cheaper tire manufacturer price bracket. 

Kris, what sizes do the MX53 tires come in? Dunlop offers the MX53 for all size bike ranging from 50cc-450cc including 18 inch sizes for you off-road guys. 


If you have any more questions about the Dunlop MX53 tires or even the MX3S front tire that is making its way back into production, please feel free to email at kris@keeferinctesting.com


X-Trig Rocs Pro Clamps (2019 Honda CRF450R)

I have been getting ready for the first two AMA outdoor nationals and knew that I was going to be running an aftermarket triple clamps and those clamps would be X-Trig. Since my practice bike was my test bike, I thought it would be beneficial to get a set of X-Trig clamps to ride/test with to make sure I could get the “feel” of an aftermarket triple clamp, since I am so used to riding with the stock clamps on the 2019 Honda CRF450R. Like I have spoken about before, it’s tough to find aftermarket triple clamps that perform better than stock these days. So much R&D is involved (at the OEM level) in making a triple clamp that flexes enough, but also has enough rigidity to aid the machine under load/through corners as well. With the triple clamp flex character so important to each specific chassis (on all motocross bikes) sometimes it’s tough to find anyone that can make a “comfortable” set of aftermarket triple clamps. Why do you need aftermarket triple clamps? Well sometimes it’s just for looks with some riders, but there are occasions where you might want another offset to help you get more stability or a sharper turning character out of your machine. In this case I was simply wanting to make sure that I wouldn't be trading comfort for stiffness on the Honda CRF450R somewhat finicky chassis setting.

IMG_6465.jpg

Enter X-trig’s ROCS Tech Triple Clamps and PHDS Mounts. “ROCS” stands for “Revolutionary Opposing Clamp System”. The ROCS clamp allows for precise alignment of the fork tube with opposing clamping surface patterns, the stiffness of the steering stem is specifically tuned to the respective motorcycle model, the steering-head bearing is already mounted on the shaft tube for convenience, a special fork slot and clamping area for precise fork operation, precise clamping with special screws for low torque specs, OEM attachments can be mounted without auxiliary material, and flexibility that is adapted to the fork with anodizing in the technical factory OEM look. The difference between the ROCS “Tech” and the ROCS “Pro” is the “Tech” uses a standard offset with a pressed shaft tube. The “Pro” has two offsets you can choose from by simply adjusting the shaft tube (or steering stem). I felt it would be beneficial to try another offset with the Honda CRF450R for testing purposes, so I went with the ROCS Pro clamps. 


The PHDS (Progressive Handlebar Dampening System) is a system supported by elastomers designed to absorb engine and chassis vibrations. The system also dampens the forces acting on the handlebar in a horizontal and vertical direction, maintaining steering precision. The handlebar can be adjusted in 12 different positions when the PHDS is mounted. The Honda vibrates more in the handlebar area than any other 450 aluminum framed motocross bike, so this is something that I feel the Honda needs, in my opinion. 


Installation of the ROCS clamp is fairly straight forward (with the pressed shaft tube). All you need to do is grease up the steering head bearing and slide the bottom clamp up in the head tube of the frame. All of the front fender mounting points and even the OEM hour meter bolts up the same way with the X-trig clamps. Super clean! Mounting up the PHDS bar mounts is a little tricky as the mounts themselves have a lot of moving parts, so make sure to read the instructions to ensure proper mounting. Technical Touch offers optional PHDS bar mount elastomers that come in soft or firm, but I chose to run the stock medium style elastomers, which seem to be just fine for motocross conditions. 

IMG_6471.jpg

I am super picky about bar positioning, shocking I know, so I went with the mounting hole closest to me (when sitting on bike) on the triple clamp with the PHDS mounts forward. This handlebar position gave me a +1 mm bar position (forward from stock), which I preferred as the stock Honda rider triangle is just fine for my 6’0 frame. The PHDS bar mount itself is the same height as the stock bar mount, which also was good for me and I mated the clamp/mount with a Pro Taper EVO SX RACE handlebar. Having so many positions available for the rider is definitely a huge positive for adjustability with these ROCS clamps. If you feel like you need a higher PHDS handlebar mount, X-trig also offers spacers to go under the PHDS mounting system. You can pick from 3mm, 5mm, and 10mm spacers.

IMG_6473.jpg

So what did the X-trig ROCS Tech Triple Clamp and PHDS handlebar mounts do on the track? My goal for this test was to not gain front end rigidity, get a more precise front end feel through corners, without getting deflection on hard pack/rough straights. Basically trying to NOT get a harsher ride on the Honda, tough to do right? The good news is that this is exactly what I found with the X-trig ROCS Tech/PHDS system, but there is some fine print that I want to fill you in on. The X-trig ROCS Tech clamp on the CRF450R provided enough flex and doesn’t feel like it negatively affected front end bump absorption, but was also stiff enough to give me a positive front wheel feel through flat corners. The ROCS Tech clamp is most noticeable when diving deep into a rut where there is a huge load put on the front end, forced by the rider. The chassis positivity through this area is better than the stock clamps. The stock clamps has a tendency to flex too much and give the rider a wiggle immediately off throttle (on deeply tilled tracks or soft dirt) or give the rider an unsettled (dive) when dropping into a long/deep rut (this sensation can only be felt mostly by faster or heavier riders). The X-trig ROCS Tech clamp gives the front end less wallow (firmer) and more cornering stability (without upsetting chassis balance). Straight line stability is as good as stock and front end bump absorption is only minimally stiffer feeling on braking bumps/square edge. 

Optional Setting: I have tried the ROCS “Tech” with the pressed steering stem shaft as well and that set up is a little firmer of a feel as well as provided a little more rigidity (I found out this when I went to ride my race bike, which has the “Tech” installed). The differences are small, but I did feel it nonetheless. Going to a 24mm offset on the ROCS “Pro” helped the Honda settle down on faster tracks. Running the fork up 4mm with a 24mm offset really helped calm this chassis down for 2:00PM motos (AKA ROUGH TRACKS). The 24mm offset did affect the Honda’s turn in capabilities and made it feel slightly heaver through corners. If you’re looking to slow the chassis down on faster tracks try going to the 24mm offset, 105mm’s of sag, and the fork up 4mm. 

The PHDS mounts do not vibrate nearly as much as the OEM rubber mounted bar mounts. The PHDS bar mounts flex as good as stock with the standard elastomers (up and down), but dampen vibration noticeably better around the track (especially at higher RPM’s). Slap down landings are improved slightly and front end positivity (entrance into corners) are as good as an OEM feel. Simply put, the vibration characteristics the PHDS mounts provide are well worth their weight in gold. I use “weight” because they are heavier than stock ones by quite a bit, but I will gladly take some extra ounces over vibration any day. 

The cost of the X-trig ROCS Tech Triple Clamps and PHDS handlebar mounts are $900.00. The cost is more expensive than other triple clamps out on the market by a couple hundred bucks. However, there are only two triple clamps that I have tested, that to me, are as good or better than stock. If you're looking to get a set of clamps for the temperamental Honda CRF450R “vibes” pick up some front end cornering stability, get an optional offset, and even improve the looks of your Honda, X-trig has some really nice clamps and handlebar mounts available for your red motocross machine. You can check out and purchase all of the X-trig products over at technicaltouchusa.com.   


If you have any questions about this test please feel free to email me at kris@keeferinctesting.com