Clutch

ARC RC-8 Clutch Assembly With Aluminum Black Smooth Lever

I will admit that I am usually a stock perch/lever or a Works Connection Elite Perch/Lever kind of rider and although I have tried many different perch/lever set ups those are the two that I normally gravitate towards or back to. I have tested a lot of combos and have come to the conclusion that it’s tougher to make a better than OEM lever feel, perch and engagement feel. Now enter the ARC RC-8 Clutch Assembly With Aluminum Black Smooth Lever and I have found another perch/lever combo that I am genuinely happy with. Other perch/lever set ups that I have tried have either screwed up clutch engagement points with their odd ratios (and messed my corners up) or the lever is simply doesn’t have the right shape for my size large hands (lever shape is a key component to feeling comfortable with your rider triangle). Designing/making a perch/clutch lever is harder than most people think obviously. If you don’t get the lever ratio correct, you will have a clutch feel that is on/off or an engagement that is too grabby or slow feeling. Not easy. 

IMG_1956.jpg

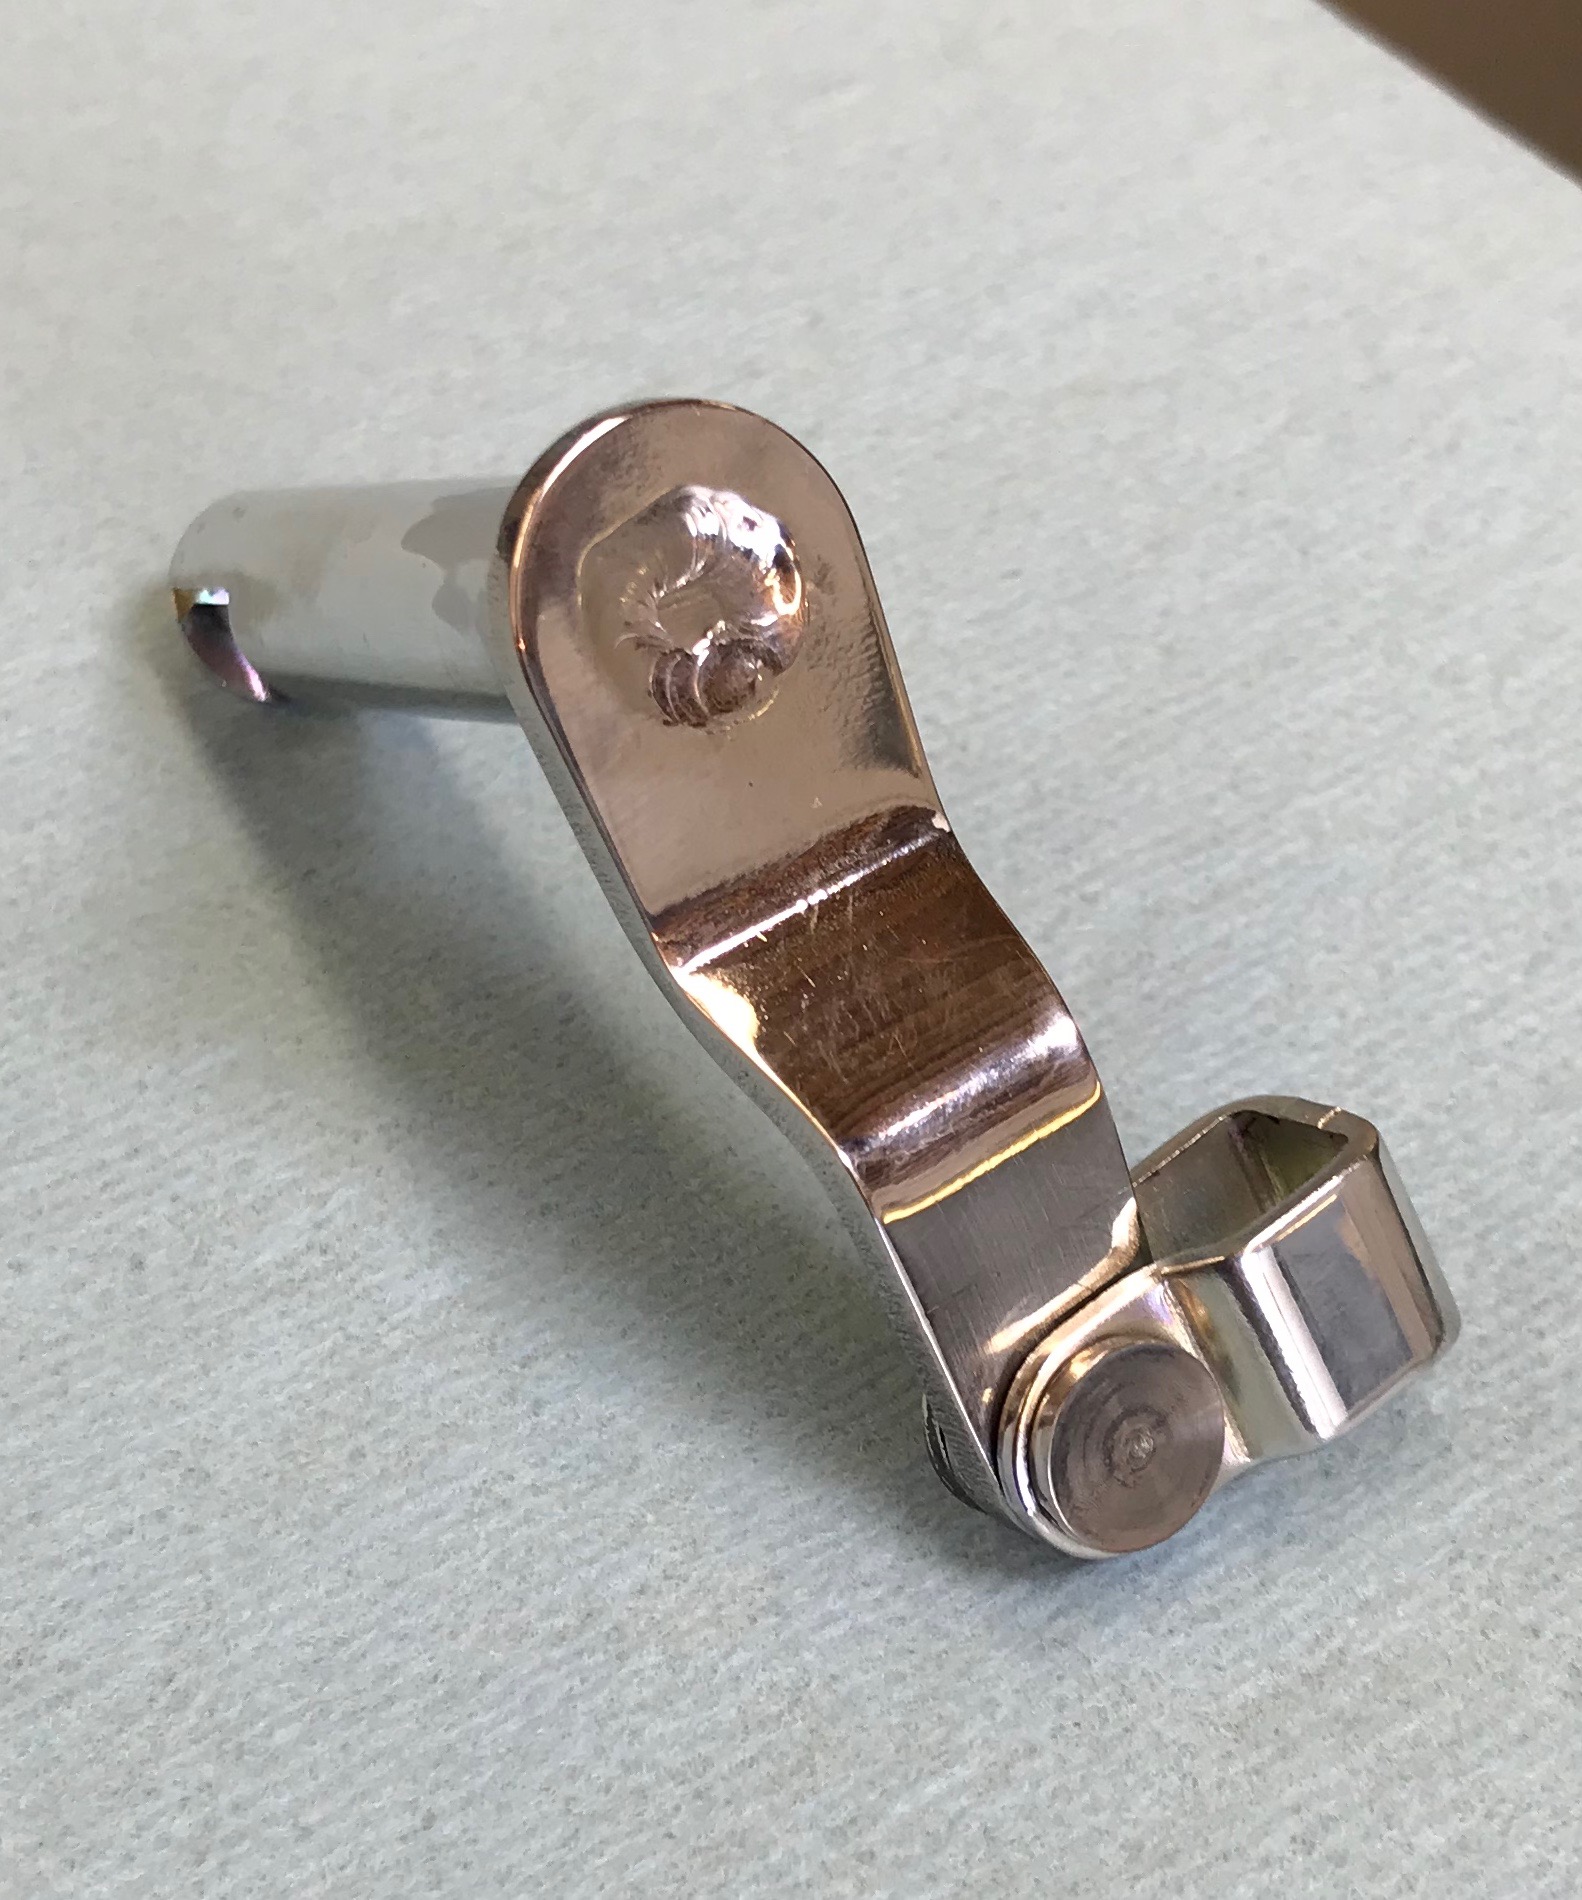
This ARC Billet Aluminum CNC-Machined lever assembly is the one that a lot of top teams run. If you haven’t met ARC Bob then you are really missing out. You might have heard me talk about him on some Racer X videos because the guy is a mad scientist of levers/perches. He will not rest until he’s created massive headaches for consumers due to the fact that he gives us so many damn options!  The features of this perch/lever combo start with the ARC aluminum smooth lever with a 27mm ratio, which I am a fan of. I am not a foldable lever kind of guy because I like a solid feel to my finger when I am pulling in the clutch. It just gives me a more positive feel and this lever seems to give me just that. Not to mention that the lever shape is one of only two shapes in the aftermarket lever business that I can get along with. There is a nylon sleeve that contacts the handlebar that allows for rotation in a crash, which is nice when you have a tendency to tip over in corners from time to time.

IMG_1960.jpg

The cable 1/8 turn quick adjust has a large diameter rubber wheel that is easy to reach for/adjust on the line or in the air. yes, even if you’re a novice rider, you will be able to adjust it in the air! One of the other highlights is the "external pivot". The pivot bolt screws into the lever and the bolt rotates in the perch on replaceable bushings. Whaaaat! This eliminates almost all up and down play in the lever and gives me the positive engagement feel that I look for. In the world of tighter tolerances, this is what you want from a big four stroke. When you have horsepower, you could possibly get more vibration and that can radiate towards the ends of your levers. When you have a tighter tolerance in your levers, you get less vibration feel and more positivity on each end of your bike. It may not seem like much, but it’s the little things that make a difference when it comes to “feeling factory”.  It’s also nice that the clutch pull gets a little easier on the bike that I installed the ARC perch/lever on (2021 YZ450F).

At a cost of $205.00 for the complete perch/lever it’s a sizable investment, but with the quality of Bob’s work at ARC, I am happy to pay for something that I know I am going to love as well as last! ARC gives you a lot of ratio and lever options, so go visit the mad scientist of levers website at www.arclevers.com


Hinson Momentum Steel Clutch Basket

Hinson makes steel clutch baskets that replace the aluminum standard baskets on Honda, Yamaha, Suzuki and Kawasaki MX machines. If you’re wondering what the benefits are, let me tell you how I stumbled across this basket years ago. I was looking to smooth out the hit of one of the first generation YZ450F’s and there weren’t any flywheel weights available, but Hinson was offering a heavier steel clutch basket. Fast forward to 2021 and I have found it tough to find a slightly heavier flywheel for the YZ450F so guess what? I thought I would revisit this and see how it works in my 2021 YZ450F test machine. First the steel adds durability and strength to a part that wears, often the aluminum of the basket’s fingers develop grooves where the drive plates press on them. Over time this makes the clutch action poor and increases slop in the drive of the bike. The end result is often broken baskets and even worse, broken cases as the clutch basket comes apart.

Secondly, the added weight adds rotational inertia inside the engine helping to keep the rear wheel from spinning and also smooth the pick-up of acceleration as you increase the throttle. Since the spinning ratio is reduced compared to the crank, the weight effect is slightly less pronounced than a flywheel weight, but still can offer benefits from what I have experienced on our 2021 YZ450F. 

IMG_0700.jpg

A flywheel weight on certain bikes can calm the power delivery. In some cases, heavy flywheels can smooth low end power and just replace the point of power that is now smoother, somewhere else in the power range. That is NOT always great! I am fairly picky about the engine delivery of a big 450, so as much as I love a Yamaha YZ450F, I wanted to smooth out the power coming out of area three of corners, in order for the rear wheel to hook up more. I have been having a problem wheeling the YZ450F when under the throttle hard as well as getting wheel spin out of corners when accelerating to clear jumps. I can’t seem to tune this out with the YZ Power Tuner, so here we are…  

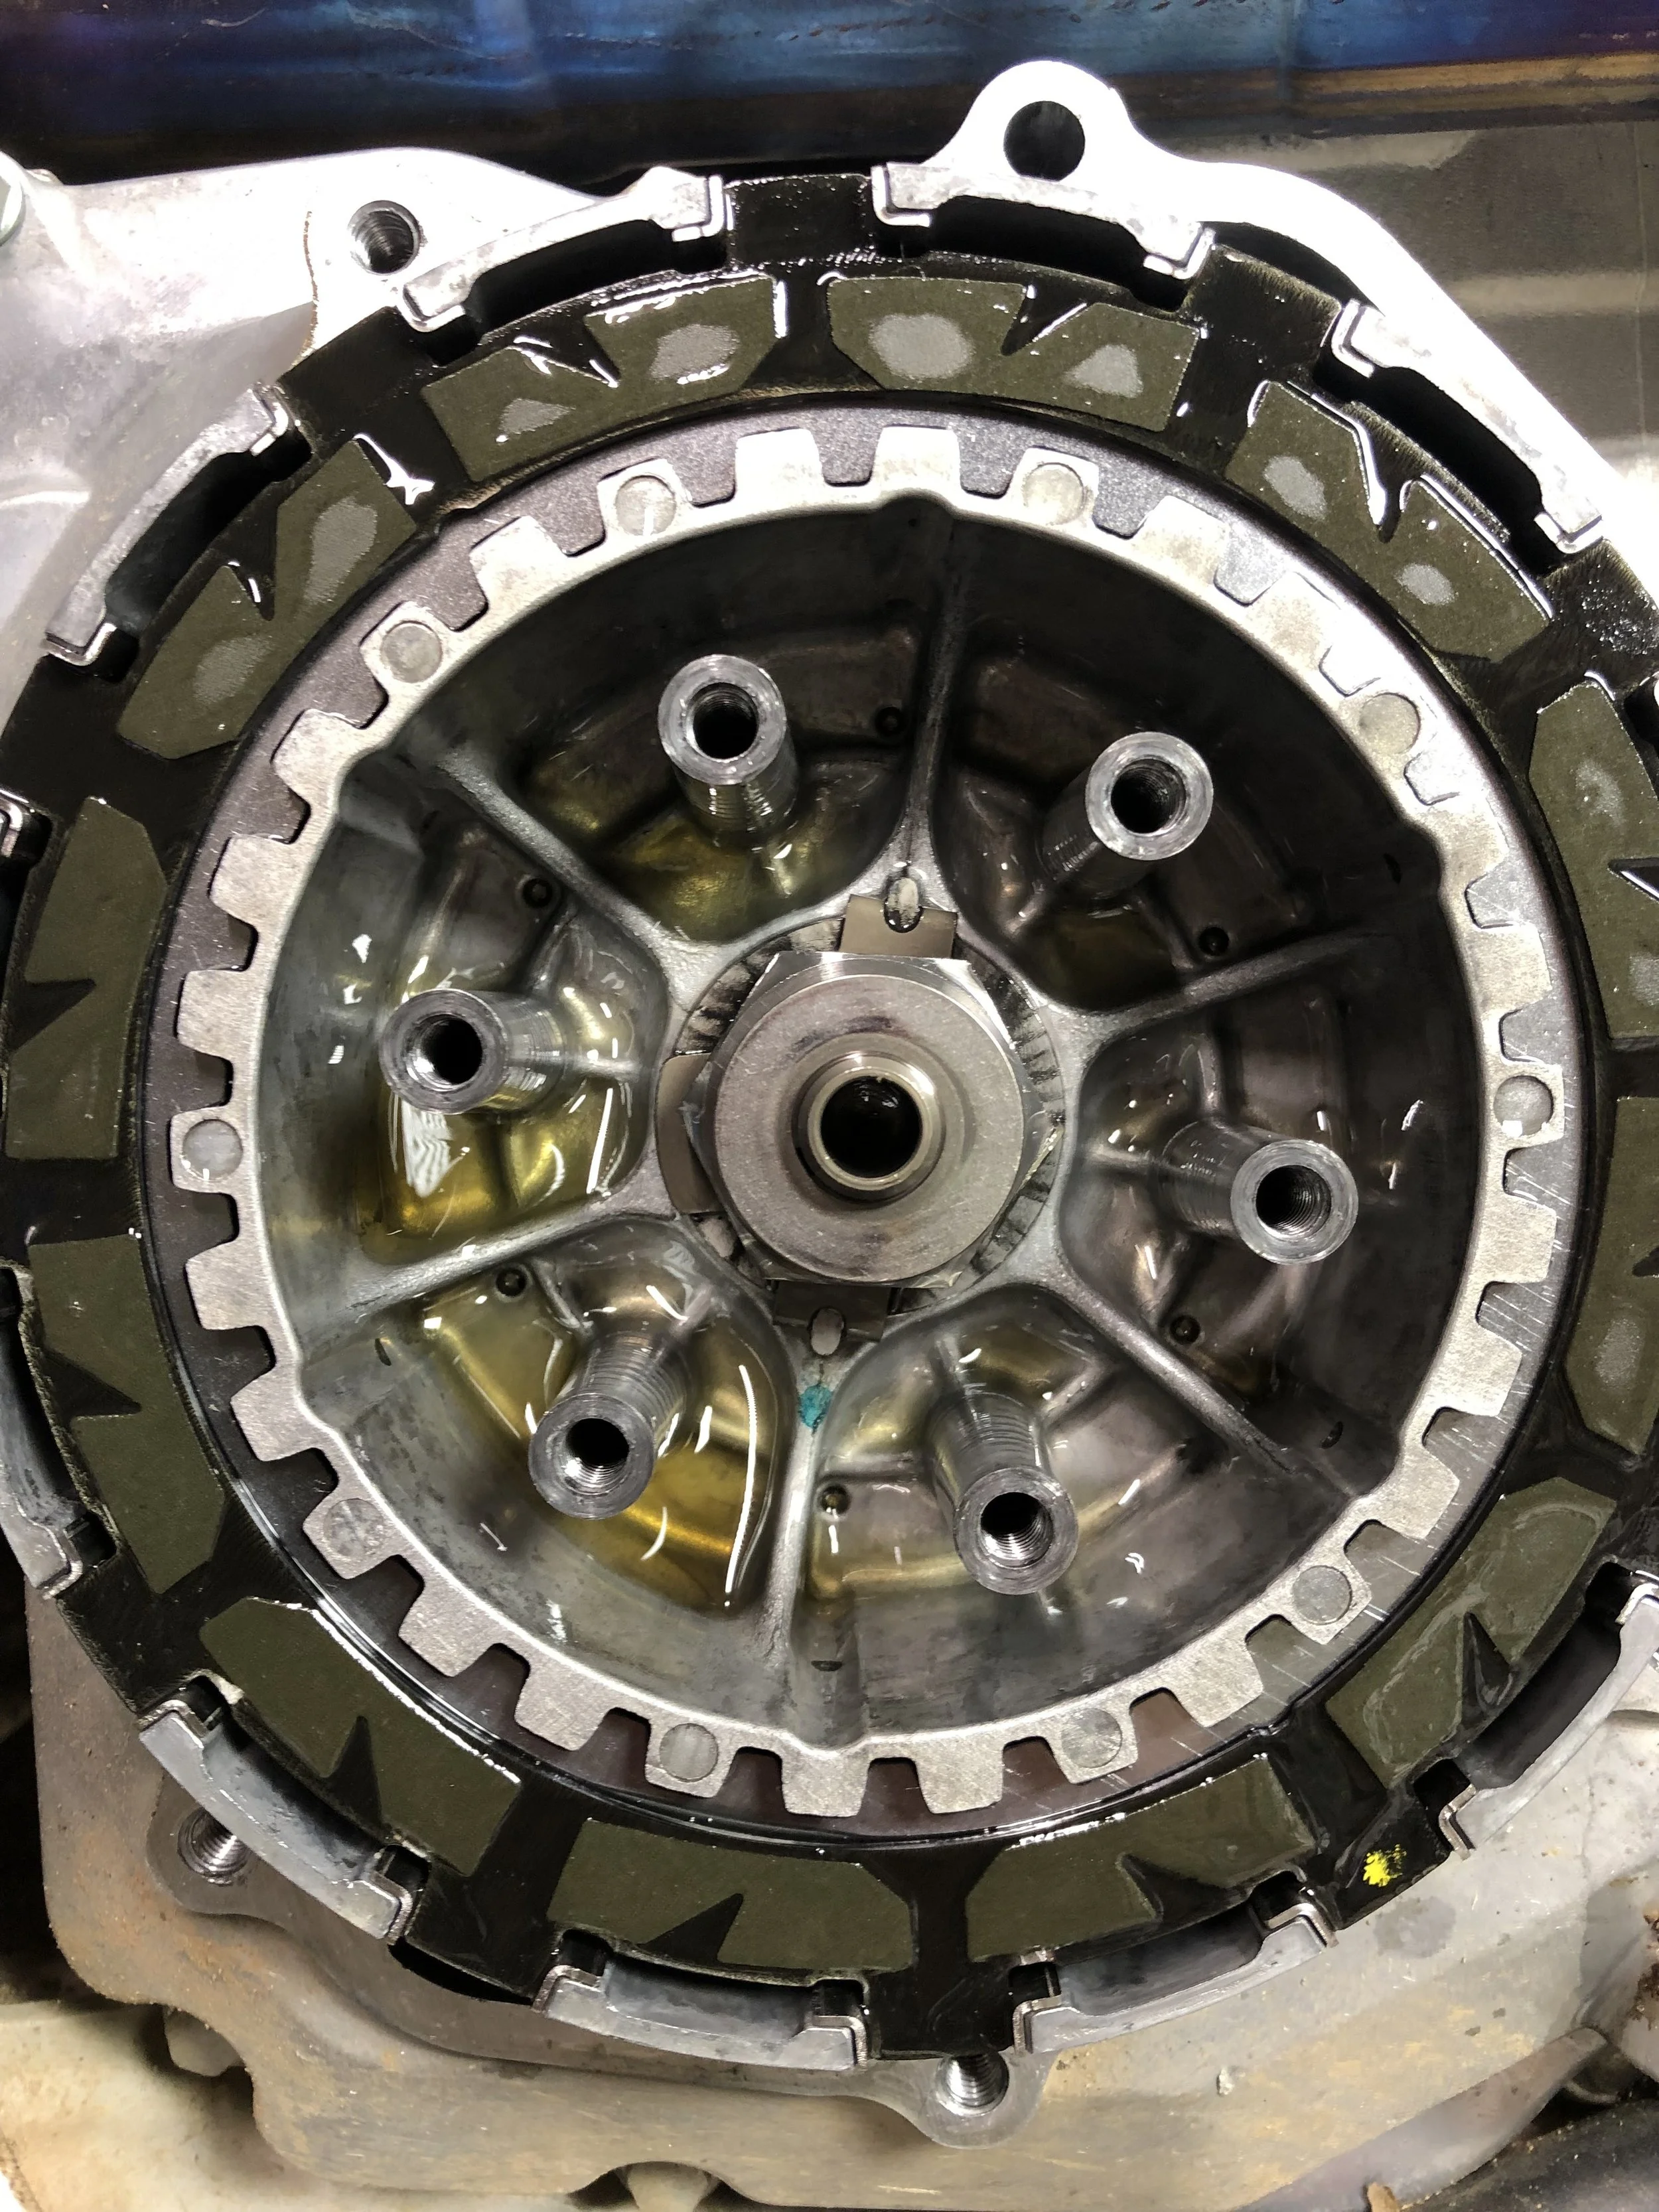
Enter the Hinson steel clutch basket. Depending on the application it can be up to two pounds heavier than the stock basket. Made from precision machined steel, it is impervious to wear on the ears, like the standard aluminum baskets can be. To install the Hinson steel basket you do have to remove your standard clutch basket, so just be forewarned this process can take a while. You then must drill out the rivets and replace the drive gear on from the back of the stock clutch and install it on the Hinson basket. (Some kits come with a new kickstarter gear and drive cushions as well.) Hinson recommends using their cushions (which come with the basket), especially if your bike has some time on it. This install process takes slightly above normal mechanical know-how and tools, but it isn’t much more than a 90 minute job with the included step-by-step instructions.

IMG_0701.jpg

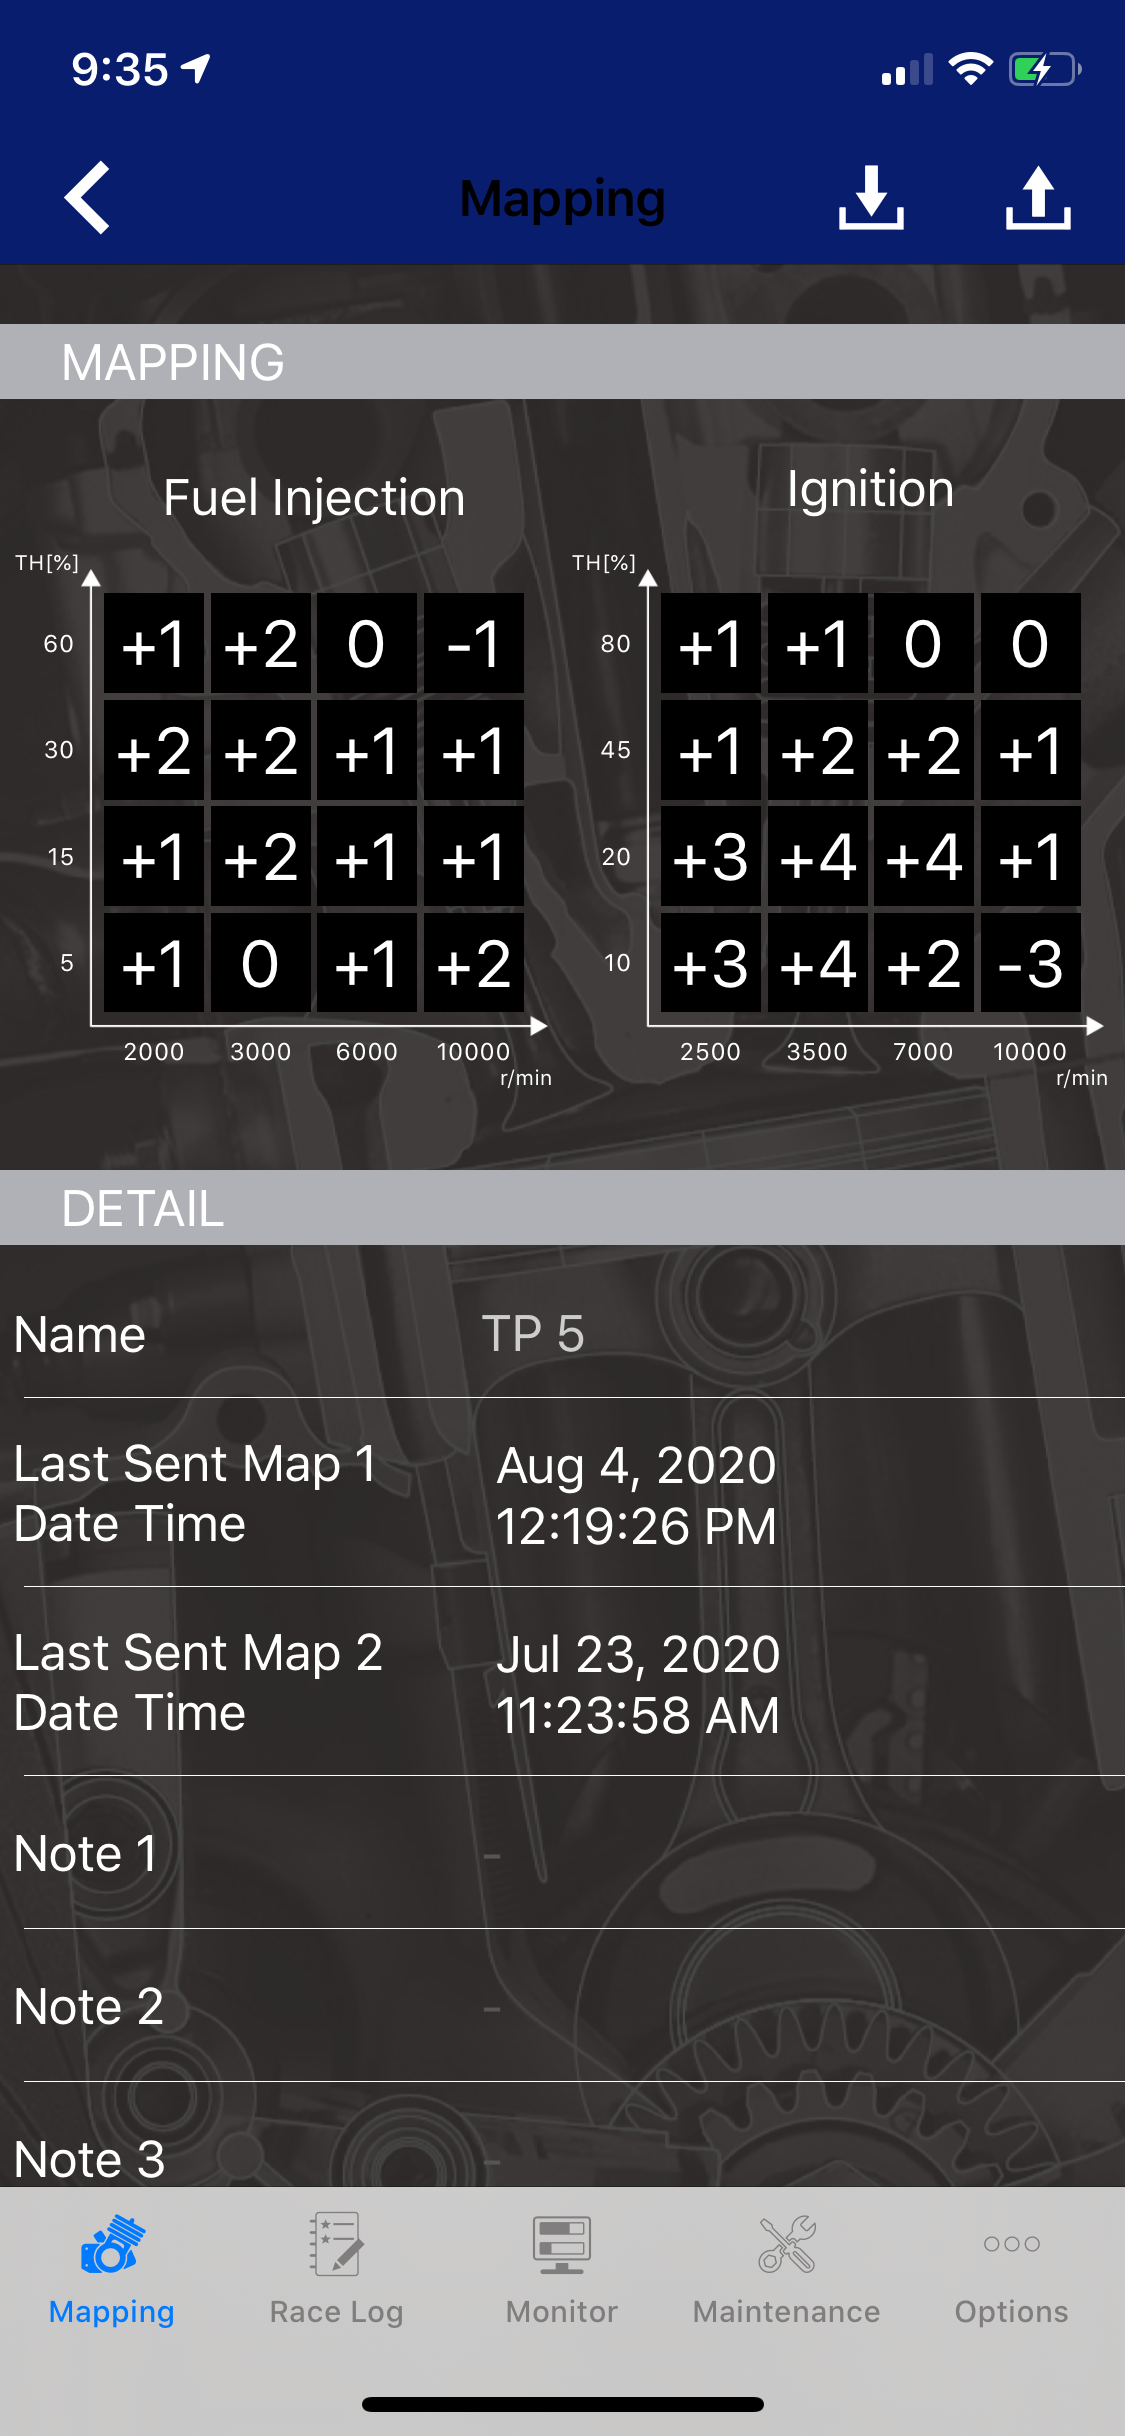
Right from the get go I am able to feel the Hinson steel basket’s effect on the engine character of the YZ450F. It doesn't seem to affect the throttle response much at all, but it does smooth the power out when accelerating out of rut. I don’t know if this mod is something that you east coast/soft dirt riders would necessarily need, but if you ride loamy to hard pack dirt this is something that can help forward rear wheel bite. The YZ450F has a stock engine character that spools up quicker than other 450’s in its class. With that being said, that kind of power can be really good for soft dirt, as it can make the bike feel light and get you out of soft ruts/corners quickly. Now for us west coasters that ride in loamy conditions in the morning and then hard pack in the afternoon, the YZ450F can be tricky to dial in. With the steel Hinson basket installed the YZ450F engine feel gets a calmer delivery to where you can accelerate sooner out of ruts/corners. The rear wheel spin that I got out of corners (under hard acceleration) with the stock basket is much less with the steel Hinson basket. Not only are you getting less rear wheel spin, but the chassis also feels slightly more planted of throttle. Installing this steel Hinson basket gives the rider slightly more front end traction off throttle on your initial lean. Yes, you will get a little more engine braking, but with the TP 5 map shown here, it does lessen the drag off throttle. 

IMG_9968-2.PNG

For $310.00, it’s worth the price, if you’re looking to smooth out your YZ450F a little in the areas I mentioned. The only negative to this part is that it does make a little more engine braking, but with the map attached here, it does help lessen that somewhat. I am very sensitive to engine braking, but when I asked my other test rider to ride his YZ450F and my test bike back to back, he didn’tt notice much engine braking at all. This is a part that maybe you don't know you need, until you try it. I am glad I remembered that Hinson offers the Momentum Steel Clutch Basket. You can check the momentum basket out right here: https://hinsonracing.com/p14400-momentum-clutch-basket-2020-yz450f

If you have any questions about this test, please feel free to email me at kris@keeferinctesting.com 


Wrench Rabbit Yamaha YZ125 Engine Rebuild Kit

By Michael Allen:

Although one of the main perks or being a part of Keefer Inc. Testing is getting to ride the latest and greatest bikes, there are times when you need to have your own bike. I needed my own bike because I was going to race the Los Ancianos Tecate Enduro that is run in Mexico and I needed to be able to show proof of registration. After a lot of looking around I found the perfect bike, a somewhat abused 2006 YZ 125. I raced it for two years in Mexico and would randomly ride it here and there when I wanted to feel like I was going fast. Here is where the embarrassing part comes in, this last winter we had an abnormal amount of rain in California, which was great, but I was admittedly a little lazy in the maintenance department.  I figured “it’s wet, how dirty could my air filter be getting”? Well after not checking my air filter for about three rides, my $1,800 Yamaha YZ125 decided to come to a quick stop in the middle of a snowy trail ride. As I was on the pipe climbing a sandy canyon the wheel locked up and I came to a skidding stop. I luckily was within pushing/coasting distance back to the truck, but when I got there and pulled the seat off, I immediately knew what happened and felt really stupid. You see when I got the bike I did the current plastic re-style kit from Polisport and when I re-installed the air box, apparently I didn’t do a good job with the hose clamp (that holds the air filter cage onto the air box). To my surprise my air filter and cage was just sitting in the bottom of the air box and I had been sucking dirt into the engine for who knows how long. Fail!  

IMG_6381.jpg

Needless to say when I tore the engine down there was grit everywhere from top to bottom. I knew if I wanted to do it right the whole engine would need to be rebuilt, but I also knew that replacing bearings, seals, gaskets, a top end, and crank with OEM parts would cost more than I purchased the bike for. After talking to Kris he mentioned that Wrench Rabbit sells complete engine rebuild kits and from what he remembered they weren’t all that expensive. After that conversation with Kris, I reached out to them and got the ball rolling on rebuilding my little 125. 

IMG_6730-2.jpg

The Wrench Rabbit kit (Part Number WR101-081) really does come with EVERY bearing, seal, and gasket you need to do a complete rebuild on your bike. To be completely honest I had done a bunch of top ends on previous two-strokes, but this was my first time splitting cases and doing my own rebuild. I took it slow and really tried to do good job of keeping everything organized when I took it apart. Upon disassembly it was then that I realized that it wasn’t as scary as I imagined it would be. When the engine was torn down I found that my issues were a scored piston (luckily the cylinder wasn’t bad enough that it needed to be re-plated or replaced), a blown out rod bearing, and main bearings that were ready to come apart at any time. The Wrench Rabbit kit comes with a brand new crank/rod from Hot Rods already assembled as well as new main bearings to go with it. In the past I had been scared to use aftermarket engine parts, but the quality of the Wrench Rabbit parts were very impressive and every part fit just as good as the factory parts that came out of the bike. 

IMG_7066.jpg

As I buttoned up the cases and slid the cylinder onto the new Vertex piston I was pretty excited to get my 125 running after looking at it sit in the garage for the past five months. I slapped the engine back into the frame at about 11pm and was so excited to get it running I ran to the gas station that night to mix some gas and wake up my neighbors. The child like smile on my 32 year old face said it all when it came to life on the third kick and I was able to take it down the street for an initial heat cycle a midnight. After a few more heat cycles I was able to moto down and I’m happy to report that my 125 runs better than ever. In fact, the rebuild is done just in time for me to head back down to Mexico in about a month for more trails, tacos, and beer. 

IMG_6739.jpg

I learned three main things from this whole process… The first lesson is to never be lazy about maintenance, no matter how well you think you know your bike. The second is to not be scared to do your own bike work, even if you have never done it before. With an OEM Owner’s Manual and a proper set off tools, you are more capable than you may think. I did go out and buy a Motion Pro case splitter (Part # 08-0605), a Motion Pro flywheel puller (Part # 08-0026), Motion Pro bearing driver set (Part # 08-0551), and some Yamabond Liquid Gasket (Part # ACC-BOND4-MC-00) to make the rebuild a little easier  The third and most important is to not shy away from quality aftermarket parts. After adding it up, I saved over $350.00 by using Wrench Rabbit parts. OEM parts are great, if you can afford it, but finding quality aftermarket parts are like riding a unicorn and by the looks and sound of my YZ125, I have found Pegasus. With all the parts supplied, the Wrench Rabbit kit only set me back $514.95. Reason #158 why I love two-strokes! So if you have either a worn out engine (no matter two or four stroke), or in my case are an idiot and blew your bike up because of negligence, give Wrench Rabbit a try, you won’t be disappointed. Also keep in mind that Wrench rabbit doesn’t just have kits for engines, in fact they offer replacement parts for all facets of rebuilding a motorcycle.  You can email me if you’re interested in ordering some parts and getting the Keefer Inc. discount. michael@keeferinctesting.com.

image1-4.jpeg

OR YOU CAN CLICK ON www.wrenchrabbit.com TO SEE WHAT PARTS YOU MAY NEED.


Yamaha YZ125 Wrenh Rabbit Kit Part Number WR101-081 ($514.95) includes-

  • Vertex piston kit (standard compression piston, rings, pin and clips).

    • Premium quality Vertex piston.

    • Complete set of nitride coated or chrome-plated piston rings.

    • Fully case-hardened wrist pin.

    • Circlips.

  • Hot Rods heavy-duty crank (stock stroke - includes wrist pin bearing for two strokes).

    • Factory assembled and trued to O.E.M. specifications, Hot Rods cranks will meet or surpass the O.E.M. in performance and durability.

  • Hot Rods main bearing / seal kit.

    • Like other Hot Rods products, these main bearing and seal kits are built to the highest quality standards that meet or exceed those of the O.E.M.

  • Hot Rods transmission bearing kit (includes transmission bearings, output shaft collar and sprocket lock washer).

    • A must-have for any new transmission or engine case installation or repair.

    • Includes trusted Hot Rods bearings for the primary and secondary shafts of the transmission.

    • Also includes the special needle bearing for the shift drum and the output shaft collar and washer (where applicable).

  • Hot Rods counter balancer bearing kit.

    • A must-have for any new counter balancer or engine case installation or repair.

    • Includes trusted Hot Rods bearings for the counter balancer shaft of most modern 4-stroke engines (where applicable).

  • Hot Rods water pump bearing and seal kit.

    • Hot Rods water pump repair kit includes water pump cover gasket or O-ring, water pump shaft bearing(s), and seal(s) to repair a leaking water pump seal and/or a failed bearing.

    • Precision micro-bearings provide O.E. quality and durability.

    • High pressure / temperature mechanical and rubber seals.

  • Hot Cams cam chain.

    • Replacement cam chain.

    • Meets or exceeds O.E.M. specifications.

  • Vertex complete gasket kit, including seals and O-ring kit (covers top and bottom).

Tools For The Job: 

  • Motion Pro Case splitter Part # 08-0605

  • Motion Pro Flywheel puller Part # 08-0026

  • Motion Pro Bearing driver kit Part # 08-0551

  • Yamabond gasket maker Part # ACC-BOND4-MC-00


2017-2020 Honda CRF450R Clutch Fixes


Do you have a 2017-2020 Honda CRF450R? If so, then you know that the clutch is not the best of the bunch. The clutch gets hot too quick then proceeds to drag/slip during your moto and you’re left with throttle to rear wheel connection loss (aka loss of power/traction). Or how about that clutch lever pull? How hard is this thing?! Not the lightest clutch lever pull in the game is it? I have a couple solutions that I came across while spending a lot of time on the Honda CRF450R this year that I thought was worth mentioning.

IMG_5397.JPG

Fix #1 XPR Motorsports Longer Clutch Arm:

Chad at XPR Motorsports has hand made his own special longer clutch arm that helps the engagement as well as the lever pull. When I was riding for Smartop/Bullfrog Spas/MotoConcepts Honda this year Chad asked me if I had a problem with the engagement/lever pull and I immediately said “yes, I do”. With Chad’s longer clutch arm the engagement point immediately became wider, which left me with a more linear feel when slipping the clutch out of corners or when performing starts. The longer/wider engagement gave me increased rear wheel traction and smoothed out the on/off feel of the stock clutch engagement. When feeding the clutch lever out I noticed that the Honda CRF450R wasn’t as jumpy or surged when rolling my corners. The next improvement was lever feel. With XPR’s longer clutch arm the clutch lever pull is twice as easy to pull in and actually lets me use one finger on the clutch. The stock pull on the CRF450R is atrocious and makes putting in longer motos hard on my left hand/arm. This longer clutch arm makes the lever pull easier as well as smoother.

IMG_5400.jpg

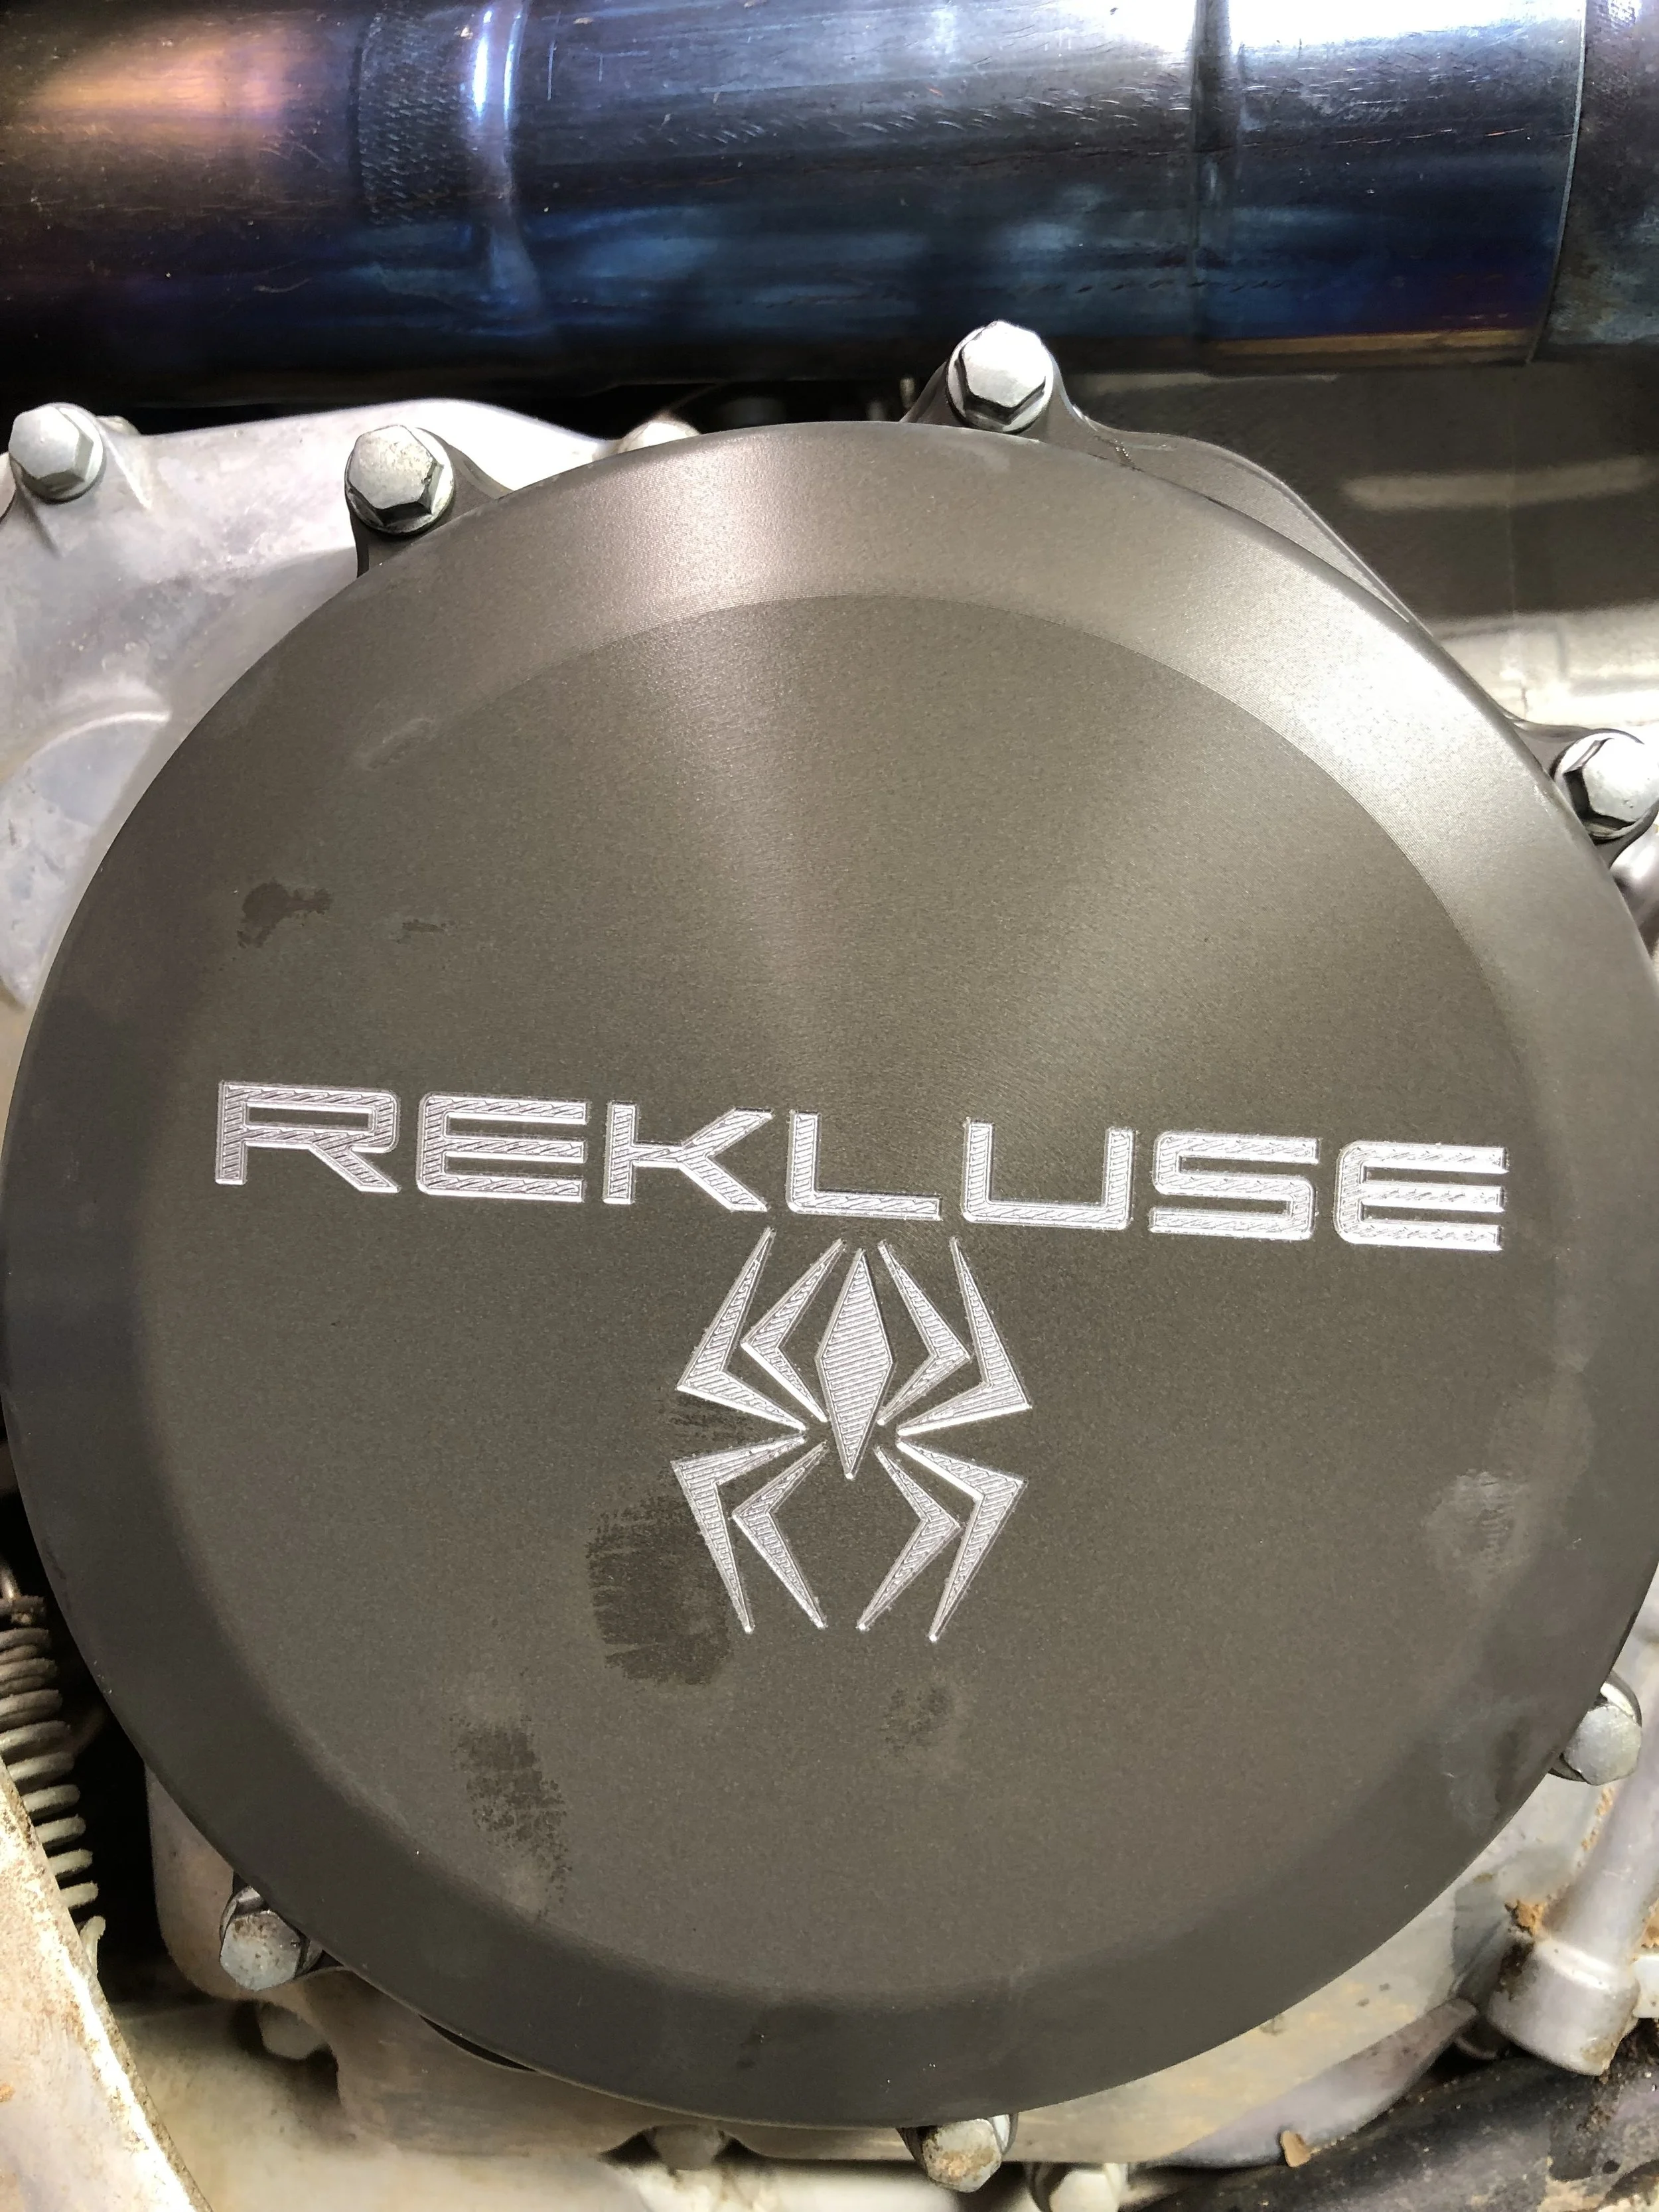
Fix #2 Rekluse Torque Drive Clutch Pack: Rekluse offers a clutch pack (fibers, steels, springs) that replaces your OEM clutch plates and adds additional discs to your existing OEM clutch basket. It’s as easy as swapping your clutch plates into your OEM components. The TorqDrive thin friction disk technology allows more disks to fit in your OEM clutch’s footprint, decreasing slip and unlocking the full power of that Honda CRF450R engine. Once I installed the Rekluse system the clutch life of the CRF450R went up as well as rear wheel control on hard pack surfaces. The combination of the XPR clutch arm as well as this Rekluse clutch pack allows the Honda hook up better and gives me added control where the Honda needed it most, accelerating out of rough/choppy corners.

These two modifications are simple and really improved the way the Honda behaves on the track. Honda is one of my favorite bikes to ride, but it can wear me out too quick when in stock form. These two mods don’t sound like much, but helps the control factor huge for me. Hopefully it can for you as well.

You can get the clutch arm by calling Chad at XPR Motorsports at 951-813-8873.

The Rekluse Torque Drive Clutch Pack is available over on www.rekluse.com


Rekluse Torque Drive Clutch Pack

I am hard on clutches. Why? Well…Instead of letting off the throttle when the front wheel starts to loft upward, I simply just slip/drag the clutch a little to modulate the power, so I can get to point A to point B in a faster manner, without letting off of the throttle. This way of riding puts a lot of strain on the clutch and the plates that are inside any given bike’s engine. I usually can get anywhere between 8-10 hours on a Yamaha YZ450F clutch and the boys at Yamaha are frankly sick of handing me clutch plates every other week. We have tested the Rekluse Torque Drive kit in our Honda CRF450R. However, if you do not want to spend that kind of money on your clutch, Rekluse offers a Torque Drive Clutch Pack that utilizes the OEM clutch parts that replace your stock fibers, steels, and springs with their thinner plates and basket sleeves. 

IMG_5184.JPEG

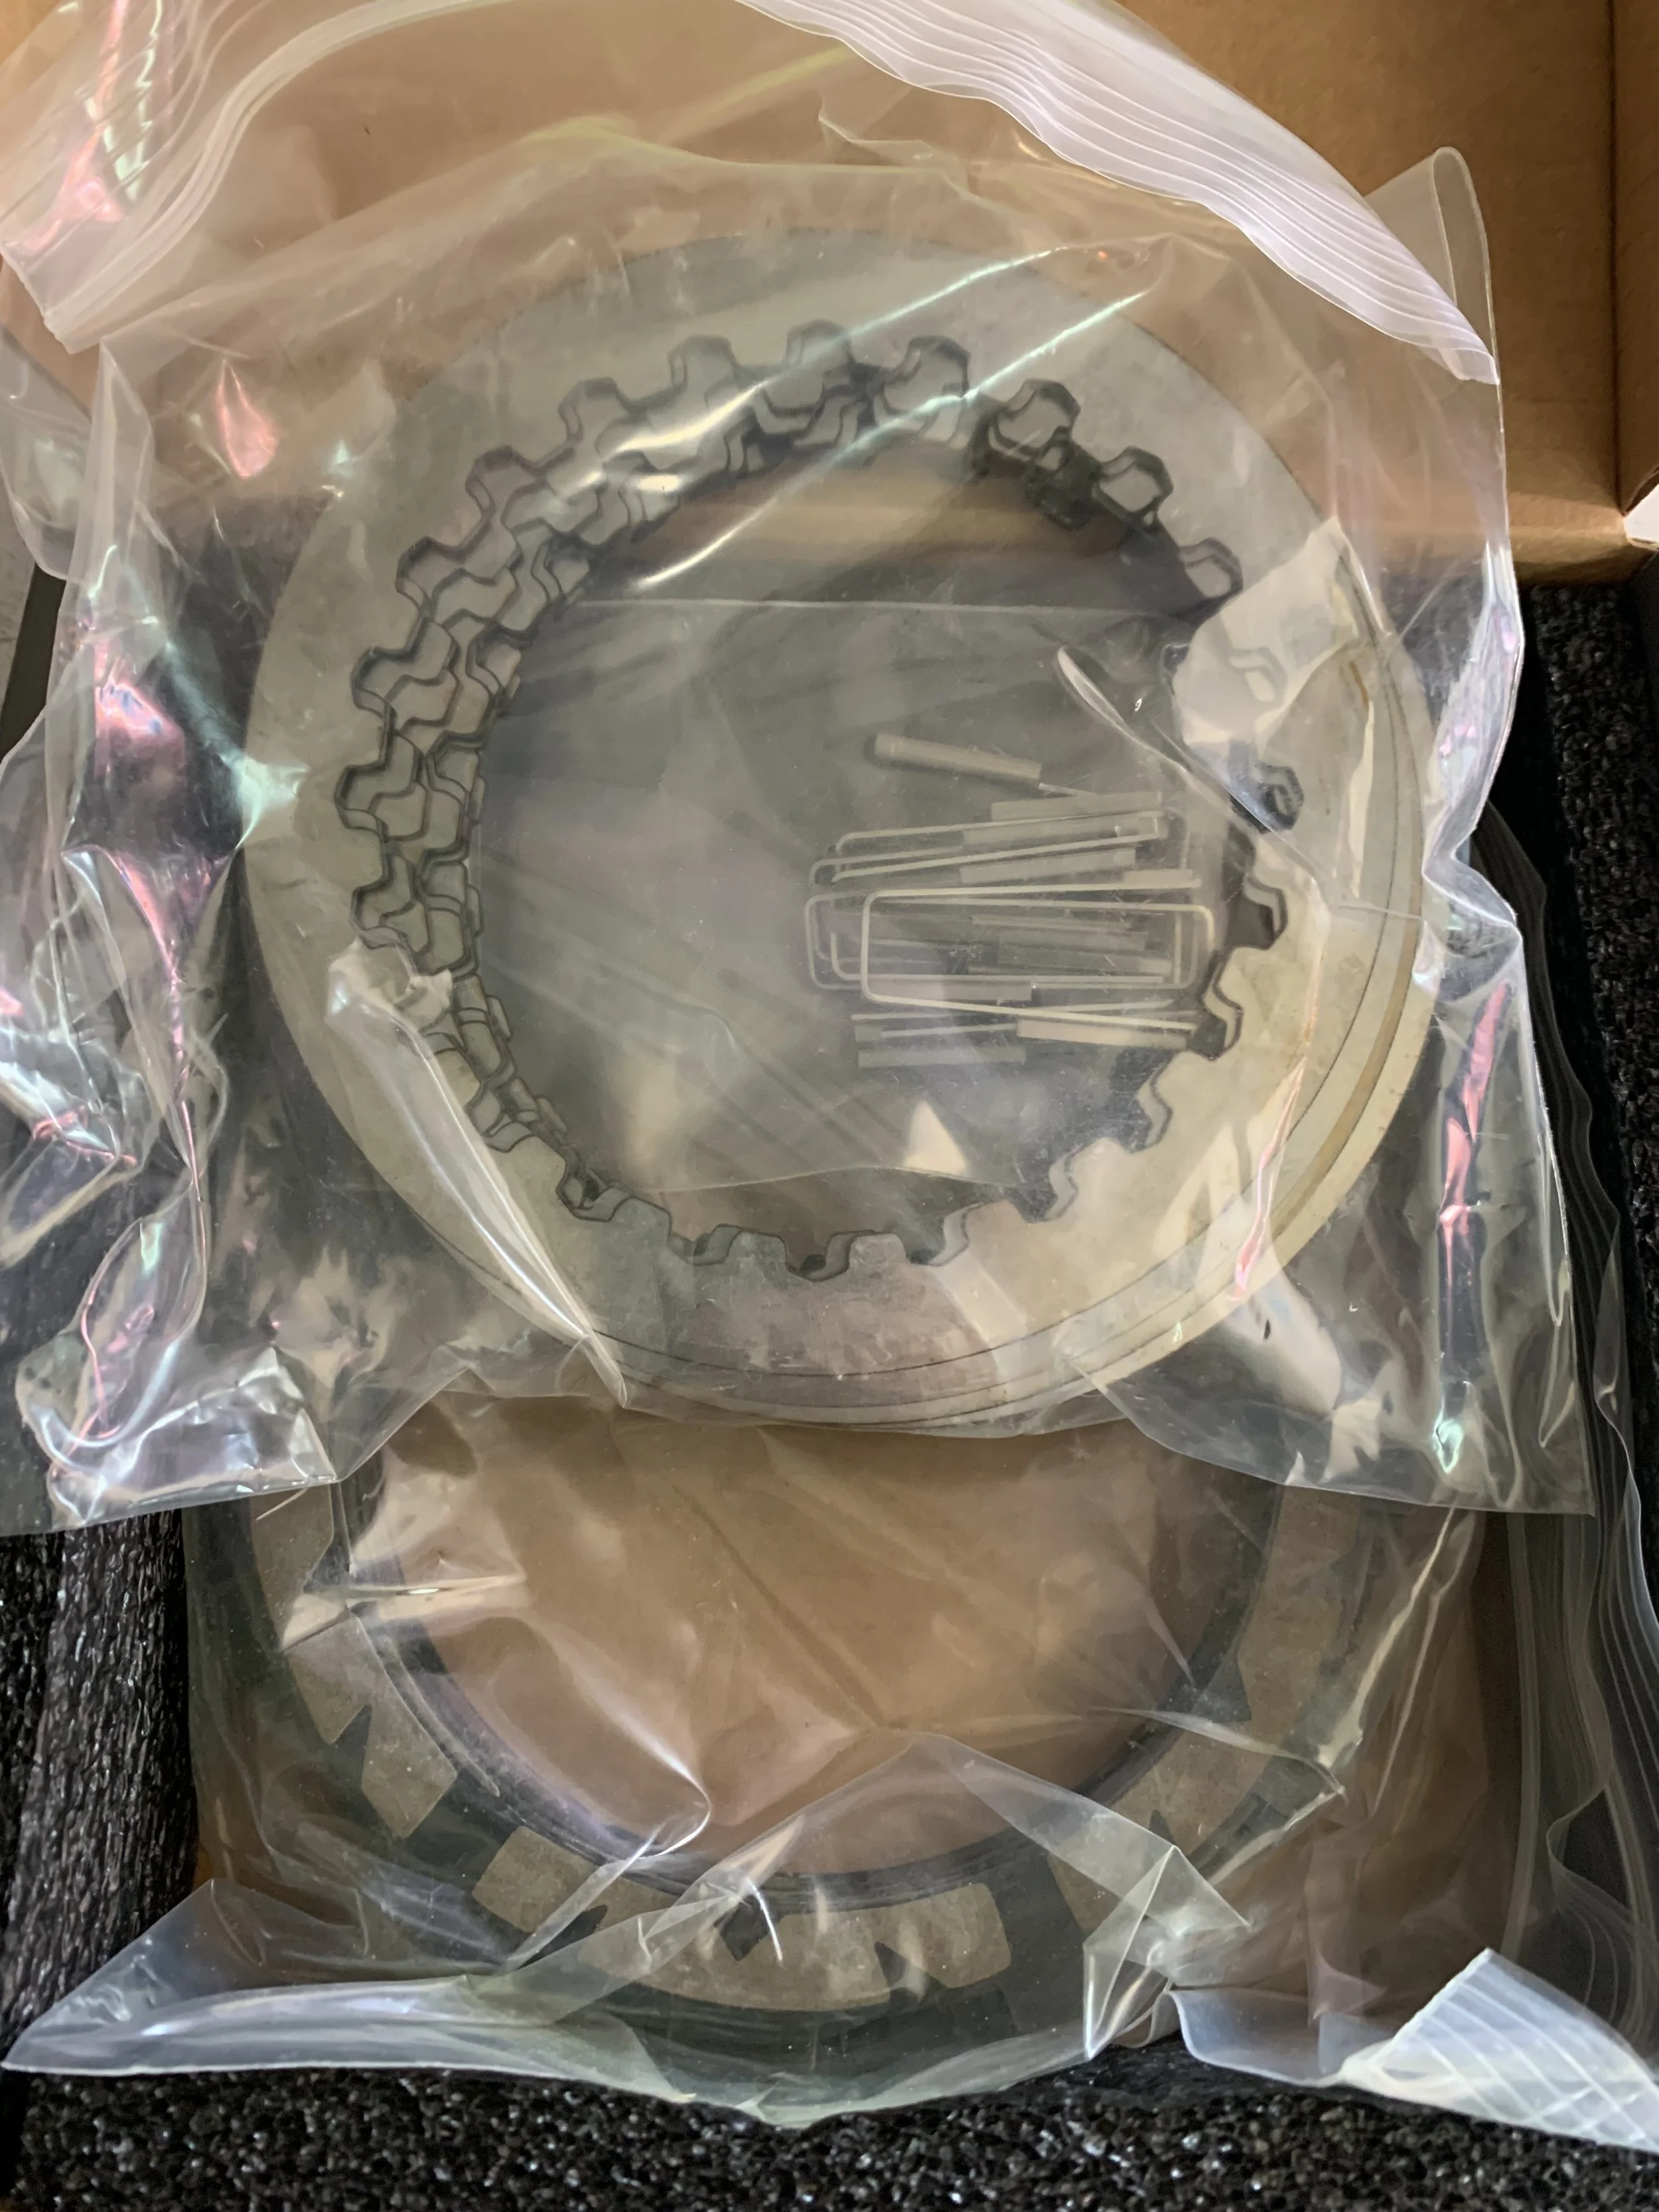
The Torque Drive Clutch pack on the Yamaha YZ450F utilizes 12 friction plates, 10 steel plates, six springs, and steel basket inserts to fit over every finger of your clutch basket. The idea behind Rekluse’s clutch pack is to use what they learned with their Torque Drive system and put it into an OEM platform. Rekluse is setting out to increase your OEM’s clutch capacity by increasing the number of plates, so you can get more of a positive connection at the rear wheel (AKA less slipping). 

I wanted to do this test and run the stock clutch and Rekluse clutch back to back, so I started the test with one moto on the stocker and one moto with the Rekluse. The clutch pack doesn't take much time to install, but be careful sliding the steel sleeves onto your basket as sometimes they can be slippery. You don't want to be fishing sleeves out of your engine/clutch basket all day. Once installed and out on the track (with the Rekluse) the first thing I noticed is a lighter clutch pull feel than the already fairly light feel of the Yamaha YZ450F. After doing my first 25 minute moto with the Rekluse I could tell that there were some improvements in performance. Coming out of corners I could roll on the throttle without modulating/covering my clutch because I had increased positivity to the rear wheel. With the Rekluse I also felt like I had a small increase in throttle response from 0-10% throttle opening. There wasn't much of a torque/pulling power increase, but I did notice (at crack of throttle) the Rekluse had more bite/snap. The good news about getting this extra response is that it didn't affect control or power delivery through deep ruts. 

IMG_5185.JPEG

The clutch engagement however was little more grabby on/off feel than the stock one, but wasn't so bad where I couldn't feed my clutch properly while doing starts. The real benefit to me was the lifespan of my clutch in two aspects. One aspect is the toughness this clutch pack has in longer motos (Testing Term: Track Toughness). Since it’s been raining a lot in Southern California I have been testing on sand tracks more than usual and the Rekluse Torque Drive Clutch Pack has provided me with less clutch drag when the engine heats up. I love to run third gear through corners, lug coming out, slip the clutch while exiting, and start to accelerate down the straight. Doing this puts a heavy load on my engine and the Rekluse Clutch Pack allows me to do this more without getting the plates too hot to where they start slipping during a moto. The second aspect that the Rekluse has sold me on was the overall lifespan that I am able to get out of the Rekluse. I have used the Rekluse Clutch Pack almost 14 engine hours and am just now starting to feel it slip/drag. I am getting a six hour increase in life, which is huge for me! 

The only downfall to the Rekluse Clutch Pack is that it is more expensive than buying an OEM clutch kit. At $349.00 it’s over a $120.00 more, but then again, you will be getting more life out of a Rekluse Torque Drive Clutch Pack than your OEM plates. The cool looking Rekluse cover (which you don't need with the kit) doesn't come with the kit, but if you want to bling out your steed, the cost for the cover is $159.00. If you're hard on your clutch or maybe you're a hard core racer that wants the benefit of a Torque Drive clutch without the cost, the Rekluse Torque Drive Clutch Pack is an excellent purchase.

Hinson Nine Plate And Rekluse Torque Drive Clutch Comparison

I originally wanted to do a Hinson versus Rekluse clutch test for the 2019 Honda CRF450R, but after going back and forth for a few weeks (testing these parts), I decided that both of these mods are such an improvement over the stock clutch system, that there shouldn't be a “winner”. Each clutch has a specific character/feel on the track, but both are equally as impressive and much better than the stock system. Since we had to purchase our own 2019 Honda CRF450R test bike this year, I wanted to really try/test quality upgrades, that this bike absolutely “needed”, since we would be having to sell this unit at the end of the year. The 2019 CRF450R “needed” a clutch upgrade and so this evaluation process was born. I let my resident mechanic/blue collar test guy Matt Sirevaag install and ride with each clutch system initially and then I tested each to get my impression. This article is based on what we thought collectively, but if you want to hear even more background/feedback about these parts, check out the Rocky Mountain ATV/MC Keefer Tested Podcast that will be up very shortly. -KK


 For years Hinson has been one of the go to clutch manufacturers for factory motocross and off-road race teams. In the last few years Rekluse has been making a name for itself as they are now on a ton of race teams in any given paddock as well. So when it was time to install a clutch in our 2019 Honda CRF450R test bike, it only seemed right to ring up Hinson and Rekluse to see what they had to offer for a bike that needed help in this department. Hinson sent us their complete nine plate clutch kit (part # HC989-1901 ) that adds two extra friction plates (to a total of nine), while the stock Honda CRF450R uses seven friction plates. The Hinson complete clutch kit comes with a new clutch basket, inner hub, pressure plate, fibers, steels, clutch springs and let’s not forget the icing on the cake, a billet proof clutch cover. This is a complete kit that replaces all of your stock clutch components. 

IMG_4216.jpg


Rekluse sent us their Core Manual Torq-Drive clutch kit (part # RMS-7101002). This kit goes a couple steps further using twelve friction plates. Yes, you read that right twelve plates! The Rekluse Torque Drive Kit comes with inner clutch hub, Torq-Drive friction plates, thin steels plates, pressure plate, core clutch springs, spring screws with screw sleeves, basket sleeves, new tab washer, and a beautiful Rekluse clutch cover.

IMG_4217.jpg

When it comes to the 2019 CRF450R there are a couple items that can be addressed to improve the clutch. It has been well known that Honda has not exactly led the 450cc class in clutch life and/or in the clutch lever pull department. These have been weak points on the Honda CRF450R for quite sometime and usually the bike gets ranked down in shootouts because of it. Honda has made progress from their old four spring clutch as the new CRF450’s have gone back to a six spring clutch. The stock 2019 CRF450R clutch has a very narrow window of engagement and is tough to really get a linear engagement/progressive actuation when attacking the track. This makes it very hard to modulate the power in corners as the clutch makes the power similar to a light switch that has an on or off type of feel. I am sure most of you Honda guys can relate as our email inbox has seen a flood of Honda clutch questions. The clutch pull takes He-Man type strength and can expedite arm pump in a moto, which sucks huge for us blue collar riders! With a narrow window of clutch engagement and a very hard clutch pull it really makes it difficult to manage the power (of the Honda), especially late in the moto as fatigue starts to set in. The stock Honda clutch also tends to fade as the moto’s get longer and if you're a clutch dragger like Keefer is, things can get ugly (or hot) in a hurry. This leads us to clutch life; I am not even close to what you call a clutch abuser (like Keefer), but I have always taken pride in the life I can get out of a stock clutch on other machines. With this Honda CRF450R I even showed signs of wear and slightly burnt clutch plates at less than twenty hours. This was a problem that needed to be addressed. 

Besides riding these dirt bikes, I love working in the garage and wrenching on them. When the Hinson package arrived I told the wife I would be eating dinner in the shop and I began to tear into the 2019 CRF450R’s clutch. Just be forewarned that this Hinson system is a more in-depth install then just changing out clutch fibers and steels. There are some special tools needed to help with install of the clutch basket. Besides your basic hand tools you will need a clutch hub holding tool to remove and Install the new clutch hub. Also needed is a drill or grinder to remove the primary drive gear from the stock hub, so that you can re-install it onto the new Hinson billet hub. Hinson provides great instructions with pictures, which are very helpful for you novice mechanics out there (cough, cough, Keefer). Lastly don’t forget to use your OEM Owners Manual to provide you with the correct torque specs. Hinson also states adding 300cc more oil than stock, so 1300cc without changing an oil filter and 1350cc with oil filter replacement is your new levels with the Hinson Kit.

IMG_3143.jpg

The first test of the Hinson clutch system was during the Dubya USA Vet Nationals at Glen Helen. Right off the bat I noticed that the clutch pull was slightly easier, which made me happy right away. The second positive aspect of the Hinson clutch that I noticed was that the engagement of the clutch was not nearly as narrow (or on/off) as the stock clutch. I feel this was the best part about the Hinson set up because it really helped open up my corners. I now had a clutch that I could easily modulate the power of the Honda’s engine character without shutting off the throttle. Most times with the stocker I would have an issue with the front tire jumping out of ruts or wheeling right out of a corner because I had trouble with the on/off engagement feel. However now I found myself rolling through corners with more speed and confidence knowing that I was hooking up better. The Hinson gives the sensation of added rear wheel traction and a more connected feel to the track. I didn’t notice any clutch slippage or jutter while abusing the clutch during motos and Keefer even mentioned that he could ride/slip the clutch (during his 30 minute motos) without the clutch fading.

The Rekluse Torque Drive clutch install is easier and at the same time harder to install than the Hinson. Why? Let us explain… It’s easier in a sense because you are using your stock outer clutch basket, which means there is no need for any grinders. It’s slightly more difficult because there are a lot more moving parts like the basket sleeves, which will test your patience, while installing the fibers and steels. Having said that the other important part to pay attention to is the Rekluse Torque Drive starts and ends with a steel plate, not a fiber. Another difference from most clutch kits is that Rekluse provides (in the kit) three different clutch springs to help tailor the clutch feel/delivery to the rider. Silver giving you the easiest clutch pull, gold, and then red being most aggressive with the hardest clutch pull/bottom end hit/delivery. You can run three silver and three gold or three gold and three red to really help get the clutch feel/power delivery that you prefer. I decided to go with three silver and three gold springs in hopes to help clutch pull feeling at the lever. Just note that the stiffer the clutch spring the harder it is on your transmission under heavy load (acceleration).

IMG_4215.jpg

As I rode to an undisclosed location (Keefer’s Test Track) with the Rekluse Torque Drive I immediately noticed a much better lever feel than stock and a slightly lighter pull than the Hinson. As I made my way around Keefer’s new test track or I should say turn track, I noticed that the Rekluse has a wider window of engagement than the stock clutch, yet very close to what the Hinson had to offer as well. This makes it a lot easier to modulate the power of the Honda just like I mentioned above. You can really slip the clutch and feed the power better to the rear wheel. This gave me a new found confidence as I was able to cover the clutch and keep the Hondas front tire from lifting out of corners (similar to the Hinson). If anyone knows Kris, you know that you’re always on the clock when you’re riding, which meant thirty minute moto’s to test the Rekluse’s durability. As it neared the end of each moto (which we did over the course of several weeks) the feel at the lever stayed consistent and never seemed to fade on either Kris or I very much at all. Messing with the lever play while riding was minimal and Keefer even mentioned that he barely had to adjust the free play during his sand motos. As with the Hinson, the Rekluse clutch definitely got the power to the ground and gave both of us a little more snap (bottom end response) out of corners. The Rekluse got the power to the rear wheel better than the stock unit and nearly as good as the Hinson. The only difference we both felt was that the Rekluse had a little more bite (or pop/excitement) out of corners than the Hinson. The Hinson had slightly less bottom end hit than the Rekluse, but had slightly better rear wheel traction. The Rekluse made the Honda feel more exciting and playful out of corners without sacrificing traction. Both clutch kits provided much better power delivery/traction than the stock system and have lasted much longer as well. Another positive attribute of the Rekluse Torque Drive is that it actually improved the recovery time of the engine when I found myself in the wrong gear (mostly third gear in tight corners). With just a flick of the clutch the Honda’s engine was right back in the RPM it was supposed to be in.

IMG_4218.jpg


This was a very educational test for me as I have never tested or used an aftermarket clutch in any of my bikes. Keefer thought it would be a great way for both of us to feel the differences between two companies that know a thing or two about clutches. The Hinson and/or Rekluse Torque Drive clutch systems are just what the Honda needs. They both improved performance as well as reliability, which to me is the most important piece to this test. I am a blue collar type of guy that works to put food on the table for my family, not pay for unwanted parts/bling for my dirt bike.

Hinson’s nine plate clutch kit retails for $1,184.99 and is not exactly what you call inexpensive, but to us, this Hinson Nine Plate set up could pay for itself if you’re hard on clutches like Keefer is. The Rekluse Core Manual Torq Drive retails for $899.00, but since you re-use your stock outer clutch basket, we can see why this costs less (than the Hinson). If I was to go purchase a clutch for my personal Honda, which this one kind of became, I would choose either one of these because they both fixed my two major gripes with the stock 2019 CRF450R clutch. Either one is a great choice, it’s just a matter of how much money is in the ol’ bank account. -Matt Sirevaag

If you have any questions or concerns about either of these products feel free to email kris@keeferinctesting.com and he can hopefully guide you into the right purchasing direction.