Performance

Husqvarna FC450 Triple Clamp Offset Test

The Husqvarna FC 450 Rockstar Edition comes standard with the Husqvarna Technical Accessories Adjustable Factory Triple Clamp. If you’re riding a standard FC450 these clamps adjustable clamps are available through your local Husqvarna dealer for $599.99. The adjustable clamp comes standard at a 22mm offset but can also be moved to a 20mm offset as well. The factory Rockstar Energy Husqvarna team is currently running these on their bikes and to me these factory clamps have a softer feel to them compared to the triple clamps that come on the standard 2020 FC450. There is less rigidity as well as more flex with the Husqvarna adjustable factory or X-Trig clamps compared to the standard/stock FC450 clamps. I have never really messed with the offset on the Husqvarna for motocross, so I thought I would experiment with each offset and even throw in an X-Trig 24mm offset for good measure. Below are some of the positives and negatives of each offset, as well which type of track each offset would benefit you the most.

IMG_7666.JPG

Criteria: I chose Glen Helen as my testing grounds. They have the national track, which is fast and very rough as well as the REM track, which has more turns and is slower speed. I gave each offset setting a try on both tracks to see what I would lean towards in hopes to give you a direction for your personal needs.  

Offset: The triple clamp-offset is the distance of the horizontal center line of both fork tubes to the center of the steering axis, about which the fork legs are offset from the steering axis (referred to as dimensionX). The offset set can be seen at a glance by the marking on the triple clamp.

20mm Offset Husqvarna Clamp: 

IMG_7659.jpg

+ Lean in is made easier on initial turn in

+ Front tire contact patch is improved on de-cel

+Lightweight feel improved (side to side movement)

- On throttle front end hunt/peck (deflection more apparent)

- Slight oversteer on long sweeping corners 

- Slight less comfort on initial bump impact 

Who is this setting best for? 

20mm offset is best for slower riders who have trouble with cornering or leaning into a rut. This setting makes it easier for the FC450 to fall into a rut and stay there. This setting was also much better for the tighter/slower track as there was less on throttle stability issues at the tighter track. 

Who is this setting not for? 

20mm offset is not for faster riders who want stability out of their machines on faster tracks. There is a lot of movement in the front end, on throttle, which leads to deflection in square edge. 

Best Overall Fork Setting With 20mm Offset:

Height: 1st line

Air Pressure: 11.0 bar

Comp: 11 out

Rebound: 16 out

22mm Offset Husqvarna Clamp:

IMG_7654.jpg

+ Stability improved over 20mm offset (on/off throttle)

+ Bump absorption has more comfort than 20mm offset

+ Cornering stability is improved 

- Slightly heavier feel than 20mm (side to side/lean in)

- On throttle rear end squatting more (feels low)

Who is this setting best for?

For me this is the best all around setting for flowy/faster/intermediate terrain motocross tracks with bigger bumps. It’s a blend of good stability and predictability. I can hit bumps harder with the 22mm offset without the chassis reacting too fast. 

Who is this setting not for? 

This setting is not for fast west coast GP style courses or the older vet rider that needs assistance with cornering. Sliding the fork up to the second line helps this, but if you’re having trouble sticking in a rut, the 20mm offset can be more helpful than the 22mm setting. 

Best Overall Fork Setting With 22mm Offset:

Height: 1st line

Air Pressure: 11.1 bar

Comp: 14 out

Rebound: 15 out

24mm Offset X-Trig Clamp:

IMG_7664.jpg

+ Very planted feeling chassis down choppy hills

+ Bump Absorption feel is better than 20/22mm offsets

+ Sweeping cornering stability/comfort/contact patch better than 20/22

+ Less vibration through bars with PDHS mounts

- Side to side movement feels lazy/heavy (initial lean)

- Vague front end feel while leaning in ruts (going up on fork height helps this)

- Bar pad doesn't fit because of PDHS mounts

Who is this setting best for?

The 24mm offset would be beneficial to any rider who wants more high speed front end stability. The 24mm offset helps with bump absorption on throttle and keep front tire straight. West coast GP or off-road riders would benefit from a 24mm offset.  

Who is this setting not for:

The 24mm wouldn't benefit most moto riders that are looking for a quick handling machine with a blend of straight line stability. The 24mm is more of a point and shoot type of offset. Come in straight and pivot/rear wheel steer out. 

Best Overall Fork Setting With 24mm Offset:

Height: 2nd line

Air Pressure: 11.0 bar

Comp: 10 out

Rebound: 14 out


Ride Engineering Performance Link (KTM 125SX)

My son loves riding his 2020 KTM 125SX, but comments all the time on how he feels like the KTM sits taller than his Yamaha YZ125. When I watch him ride I notice that the rear end of his 125SX kicks him in his ass when hitting braking bumps and when that happens, it makes the front end dive too much on corner entry. He only weighs in at around 115 pounds, so going down a spring rate on the shock was a must, but to me, the bike still looked unbalanced on de-cel.

IMG_7554.jpg

I called up Adrian at Ride Engineering and asked what he had for the KTM 125SX and we both agreed to try a rear link to see if that would help balance out the bike. This Ride Engineering link lowers the back of the KTM 125SX chassis by 7mm to try and improve the ride balance. I set the sag at 103mm with the Ride Engineering link versus the usual 105mm of sag that we were running on Aden’s KTM. Just know that you might have to adjust your air pressure setting on your AER fork to get the right front end feel, since you’re dropping the rear of the bike with the new link (more on that below).

For this test I had two KTM 125SX machines. One was set up for my son, with his softer shock spring and one was just a bone stock KTM 125SX with the sag set for me at 105mm. We started later in the day at a couple tracks on separate days to make sure the track was nice and broke in before we started to make our changes. Doing this ensures that the track doesn't change too much from each change we made to the orange machines. With the Ride Engineering link I noticed better tracking/acceleration coming out of choppy corners and slightly more stability off-throttle. I really liked that the link helped the ride attitude of the KTM when leaning, under throttle, on choppy terrain. I had more trust in the KTM when loading the chassis hard on throttle. I didn't get near as much kicking coming down rough hills and the overall cornering character didn’t suffer. I was worried that this Ride Engineering link would hurt turn in, but to my surprise it didn't affect the KTM’s easy natured turn in character. 

IMG_6841.JPG

Aden’s comments didn't exactly mimic mine, but one comment that actually made sense was he did like that he felt lower to the ground, when sitting, and that helped him with his starts. When watching him ride the bike was visibly less busy in the rear and didn't give him as much kicking on de-cel. The length of the Ride Engineering pull rods are 1.3mm’s longer than stock and come in at a 149.5mm overall length. Aden doesn't know enough about chassis testing to give me some great feedback, but some of his comments overlapped mine. I more or less watch the bike when he rides and then decide if it’s a good direction or not. We decided to leave the Ride Engineering link on his bike after we both came to an agreement that he looked/felt better on a rough track with it on.

If you do decide to get the Ride Engineering Performance Link just know that you may have to adjust your AER fork pressure, if you’re still on air forks. Now with the Ride Engineering pull rods installed the rear end will ride a little lower, so the front end might seem a little high. Dropping the air pressure anywhere between .2-.5 bar might be needed to get some added front end traction. We dropped Aden’s air pressure from 8.3 bar to 8.1 bar at some tracks and even down to 8 bar at others. Try running your normal AER pressure when you first put on the Ride pull rods and see how your front end feels though corners. If you feel like your front end is tall, your front end is pushing, or have a vague front end feel, just try to drop your air pressure slightly. This will help let the fork use more of its stroke and get that front tire to bite into the ground more. 

The Ride Engineering Performance Link comes complete with bearings and seals and is not that difficult to install. I literally changed the link out at the track on several days. If you’re looking to get a little more stability and rear wheel traction without sacrificing cornering, then you might want to try this link. MSRP is $219.95, but you can use the code Keefer-20 to save 20% if you want to order through ride-engineering.com

SKF Linkage Seals Part Numbers (KTM 450 SX-F/Husqvarna FC450)

The new 2020.5 KTM Factory Edition and Husqvarna Rockstar Edition come with updated SKF seals in the linkage for less friction and actually do make a little difference on the track. With the updated linkage seals the rear of these new 2020.5 bikes feel freer and give less harshness to the back of the bike on square edge acceleration bumps. The action of the shock feels smoother over bumps and when I rode a standard 2020 KTM back to back with the 2020.5 KTM, I experienced more of a forgiving feel, on throttle, over bumps, almost immediately. I didn’t notice a huge difference between the old seals and the new SKF seals on de-cel as most of the benefit was on throttle sensation only.

ktm factory edish -8514.jpg

If you’re not in the market for a new Husqvarna or KTM 450, but still want to upgrade your linkage on your older white or orange machine, we thought why not give you the part numbers to make it easier for you to order.

Part number: 79104082032

Description: Seal triangular

Quantity: 4


Part number: 79104082030

Description: Seal triangular

Quantity: 2

Yamaha YZ125 Pipe/Silencer Comparison (Pro Circuit Vs. FMF)

For over 10 years the YZ125 engine has remained the same. At one time it was the best 125cc engine around, but in recent years that award has gone to KTM/Husqvarna. KTM and Husqvarna’s latest 125cc engines have a wider powerband and is simply more exciting everywhere on the track. Compared to the KTM and Husqvarna the YZ125 lacks bottom to midrange. The rider has to fan the clutch more to remain in the meat of the power curve, which can make a rider more tired in race conditions. I know it’s a 125, but compared to the other two models, it’s just more work. However, once I put my 14 year old son on the YZ125 he mysteriously had faster lap times compared to his KTM 125 SX. How can this be? The reason is “I think” he can corner better because of the KYB suspension and the fact that the YZ125 isn't that “barky” off the bottom end helps him carry more speed. At least this is my theory. This is his first year on 125’s and he doesn't need a rocket ship quite yet because his arms look like spaghetti strings and his legs remind me of a long bird. There’s just not a lot there yet! He’s all D&R! 

AR3A8836.jpg

To allow him to compete with the other kids his age on the other two colors, he does need a little bit more down low, in order to get out of the gate better. One of the best performance upgrades you can buy for a YZ125 is a good-performing aftermarket pipe/silencer. Exhaust pipes are relatively inexpensive and they do not directly affect the durability of the machine. I tested the FMF Factory Fatty Pipe/Shorty silencer as well as the Pro Circuit Works Pipe/R-304 Silencer combos to see how they compared to one another. I then let Aden chime in on what he feels was better for him. Editors Note: (Aden’s opinion was given to me before this article was written)

IMG_6738.jpg

FMF Factory Fatty/Shorty Silencer (Kris’s Breakdown): The FMF pipe/silencer combo adds a little more pulling power out of corners over stock, while the mid range on the FMF pulls slightly longer than stock and climbs farther through the top end. The FMF set up doesn't provide more over-rev over stock, but you will notice a healthier second and third gear pull down the straights. The YZ125 runs much cleaner with the FMF pipe/silencer (compared to stock) and looks stealthy as the silencer is hidden behind the number plate. I like that the FMF pipe comes with o-rings already installed and is ready to put on. The faster the track, the more this combination shined.  

IMG_6736.jpg

Pro Circuit Works Pipe/R-304 Silencer (Kris’s Breakdown): The Pro Circuit Works Pipe and R-304 silencer has a deeper sound than the FMF/stock system and gives the YZ125 more bottom end than the FMF. The PC pipe/silencer has increased pulling power out of corners (mid-range) and just feels like it’s more torquey. When rolling the throttle on you’re able just to feel more meat as you’re able to shift the YZ125 a little sooner. The top end signs off a little earlier than the FMF, but the Pro Circuit allows the rider to have more freedom with his/her riding without having to cover the clutch as much. 

IMG_7242.jpg
IMG_7249.jpg

Aden’s Opinion: “In my opinion I think that the the Pro Circuit pipe works better for me because it’s more aggressive coming out of corners than the FMF pipe. Do not get me wrong, the FMF pipe is a really good pipe & silencer, but I like the Pro circuit pipe, because it fits my riding style better. For example, my dad tells me I’m more of a 4 stroke kinda guy, I guess because I lug the bike a lot and the Pro circuit pipe has more bottom end, when I fan the clutch coming out of corners. In my dad’s world he calls that “recovery time”, I know this because I hear him say it all the time on the phone. The FMF pipe & silencer takes a little longer for the aggressiveness to hit when I am coming out of corners. Both pipes are better than the ugly looking stock stuff, but to me I prefer the Pro Circuit by a nose”. -Aden Keefer 

IMG_6829.jpg

Conclusion: Both companies provide a better product than stock. I did raise the needle clip up to the second position (from third) before we started testing and that proved to be the best overall jetting from sea level to 3500ft. We think both companies have a purpose and have areas where their the strongest. If you are riding GP’s or faster type of tracks the FMF system works well because it allows the YZ125 to pull longer on top end. If you are riding tighter tracks or have a child coming off of an 85, the Pro Circuit system could help give him/her more recovery time when they make mistakes (and they will make mistakes).

If you have any questions about this test, feel free to email me at kris@keeferinctesting.com.

FMF 4.1 RCT Stainless Muffler System For 2020 YZ250F

Written/Tested By: Michael Allen

It’s no secret that the YZ250F is one of, if not the best 250F in the class for 2020. One of the things that makes the YZ stand out is the raw amount of torque it produces compared to the other bikes in the class. Some of the other bikes may put out comparable peak horsepower numbers, but when it comes to useable bottom end torque no one comes close. After the 20-hour mark we started to really notice the stock exhaust getting a raspy, hollow sound that was getting on our nerves, so we called FMF and ordered up their Factory 4.1 RCT Stainless full system with carbon end-cap. The 4.1 stainless system has a great look with the carbon cap and has a weight savings of just north of one pound over the stock system. We went with a stainless system for the durability of stainless over titanium. Stainless slip fit joints last longer than titanium and therefore will not get as loose over time.

IMG_6437-2.jpg

Installing the system was very straight forward and easy, as well as fit and finish being top notch. Something I really like about the FMF system is that you are still able to use the stock muffler heat shield on the left side of the bike. I can’t tell you how many Yamaha’s I have melted pants on when the left side of the bike doesn’t have a heat shield. Unlike the stock systems raspy sound, the FMF has a deeper tone that is throatier and far less annoying. Another plus of the 4.1 system is that it comes with a spark arrestor, which not only makes the bike legal to ride in places (that require spark arrestors), but it also helps quiet the bike down even more and even helps shape power delivery (more on that later).

IMG_6439.jpg

The first time I took the bike to the track with the new exhaust I left out the spark arrestor and I noticed a slightly freer feeling from the engine (note: I was using the “Keefer free feeling” map found here https://www.keeferinctesting.com/motocross-testing/2019/7/22/2020-yamaha-yz250f-on-track-facts-and-figures). This is due to the FMF muffler core being larger in diameter and having less back pressure than stock. This slightly took away from the torquey bottom end as well as a little of the mid range RPM response, but pulled a little further into the top end. After riding the bike for a while with the exhaust wide open, I decided to give the spark arrestor a try after talking to Kris. He explained that some bikes need more back pressure to make the engine preform at its best. Just like he said, after putting the spark arrestor/insert inside, it gave the Yamaha some more back pressure, which really helped the bottom end power out of corners. The bottom end pull was slightly better than stock and the mid range pull was slightly longer, but I felt that the over-rev went back to being as good as the stock exhaust. In my opinion the OEM’s have been very good at perfecting the stock exhaust systems as of late and it has made it harder for companies to make giant gains over the entire RPM range of the stock equipment. That being said FMF has done a great job squeezing every bit of power out of the 4.1 system. Having the removable spark arrestor makes it nice to not only be trail legal, but it gives you the option of creating slightly more torque (insert in) or slightly more over-rev power (insert out). FMF also works with Kris on settings as they will send some pieces for him to try to see what his feedback is. If you know Keefer, then you know he doesn't give a shit about a dyno chart, he wants real world “on track” testing and FMF has been doing this.   

IMG_6435.jpg

I have been running the 4.1 system for over 10 hours and it isn’t showing any signs of getting louder or raspy. For my personal preference I have been keeping the spark arrestor in because I prefer slightly more torque on my 250F’s. The insert is easy to take in and out using a pick or small screw driver and removing or installing the spiral snap ring. The only physical signs of wear the system has shown is the sticker on the end cap has started to melt and bubble. From my experience this is normal after multiple hours of being ridden hard, but you can purchase new stickers from FMF. It’s also to be noted that keeping your muffler packed with quality muffler packing is key to its performance on the track. We go as long as 20 hours on FMF muffler packing, but will not go much more than that because of performance loss. FMF doesn't have a re-furbing center, so doing it yourself is your only option. 

We will be putting this system up against the competitors soon in a small exhaust shootout so be on the lookout for that. If you have any questions about the FMF 4.1 on the Yamaha YZ250F, please email me at Michael@keeferinctesting.com and I can try to help out as much as I can. 


Twin Air Power Flow Filter Kit (Yamaha YZ450F)

 If you want to get rid of the somewhat janky stock air filter cage system of the 2018-2020 YZ450F, go with the Twin Air Power Flow Filter Kit. To me the Twin Air YZ450F PowerFlow kit is the best all-around filter system for the YZ450F airbox. Why? With this kit, Twin Air replaces the stock sealing ring with an anodized aluminum mounting plate, gets rid of the backfire screen for uninterrupted airflow, adds an internal filter cage (that supports a bigger air filter), and finishes it off with a CNC-machined aluminum knob to hold the filter in place. This design brings in more air volume, increased air velocity, better sealing around the edges and better throttle response/bottom end pulling power. Yes, that is right, you will notice more rpm response out of corners as well as better pulling power out of soft loamy berms. 

IMG_5898.jpg

The downside is that some dirt particles are more prone to fall into your air boot if you're not careful with removing a dirty filter. The reason why it’s more sucbseptble to dirt particles is because Twin Air doesn't incorporate the backfire screen and unless you have a super steady hand, a few pieces of dirt can get down inside your air boot. If you do find yourself in that situation simply get a shop vac (with a skinny end/attachment) and suck out any particles that have found its way inside the air boot. If you DO NOT open/twist your throttle after the particles have found its way inside the air boot, you will get nothing past the throttle body and you’re engine will not get any dirt inside of it. The Twin Air Power Flow Kit takes a little more patience when changing filters, but can add power to your YZ450F as well as create a better sealing surface.

IMG_6519.jpg

The cost of $259.95 is on the steep side, but if adding up dollars to the horsepower increase we witnessed on the dyno (as well as felt on the track), the price tag is worth the almost one horsepower you will be gaining. One horsepower may not seem like much, but just think that some muffler systems (with a price tag of $1000.00) can’t get you one full horsepower. You can check out the Power Flow Kit over at twinair.com

If you have any questions about this test please feel free to email me at kris@keeferinctesting.com

WP XACT Pro Components Real World Review

When deciding to spend a few thousand extra dollars on suspension for your ten thousand dollar KTM/Husqvarna, you want to know if it’s going to make a difference immediately. Is it going to make me a better rider? Will I be able to ride faster with it? Do the WP’s XACT Pro Components that much better than stock? These are a few of the questions I get when the consumer is trying to make a decision on getting a set of WP XACT Pro Components. I have pounded hundreds of laps and a ton of hours on the stock WP AER fork/shock as well as the XACT Pro Components (on the 2020 KTM 450 SX-F and Husqvarna FC450) to see if it’s worth the risk of your wife losing her mind when she sees the charge on the bank statement. 

GF vet-7.jpg

What Are WP XACT Pro Components and what are the differences between older WP Cone Valve/Trax components? 

WP's Pro Components line is aftermarket suspension designed for riders who want the highest quality components and are willing to pay a reasonable amount of money for them. Pro Components are manufactured to tight tolerances using high quality materials, fine surface finishes, and low-friction coatings. This reduces friction compared to WP’s OEM suspension components, and is perhaps their most significant advantage. In fact, to achieve a similar feeling of stiffness to the OEM suspension, all Pro Components required much stiffer damping. The additional stiction in the OEM components is all due to friction. Friction is perhaps the one thing in suspension where no compromise is involved: less friction is always better. When setup appropriately for the rider, Pro Components can deliver high confidence at high speeds.

The Xact Pro fork is the next evolution in "Cone Valve" technology. It retains the same Cone Valve technology and is available in three basic variants: closed cartridge with coil springs, closed cartridge with air spring, and open cartridge with coil springs. The Cone Valve itself is nothing too extraordinary as it's simply a shimless mid-valve. The cup-in-cone valve actuates via a coil spring, providing the variable orifice function that shims normally handle. The Cone Valve spring rate is linear, unlike shims which are more progressive. Also unlike shims, it does not have a maximum safe deflection distance. It can be setup stiffer and with less float than a shimmed valve without getting too much of a rigid handling ride.

The Xact Pro shock features an updated version of the Trax mechanism used in previous Trax shocks. WP’s Trax system is created to reduce rebound damping when the rear wheel is off the ground, helping get the tire back to traction as quickly as possible. The Trax system is now externally adjustable with a screwdriver, which makes the Trax function much easier to use and understand. The shock uses the same high-end construction as the Xact Pro fork and as a result, it sees a similar reduction in friction compared to OEM shock. It uses a nitrogen bladder instead of a piston separator, which has lower friction, but can require more frequent services compared to WP’s traditional piston separator setup. As with past Trax shocks, it separates high-speed compression and low-speed compression into two separate adjusters instead of one dual compression control (DCC) adjuster. The Trax shock shaft includes a rebound separator valve, which isolates compression and rebound adjustments, and increases low speed compression damping at the mid-valve (which can aid in pressure balance)

 WP’s XACT Pro Components are usually found on all of my KTM’s and Husqvarna’s I race with. Why? I get more consistency and performance out of the XACT Pro Components than that of the stock AER fork/stock WP shock. I tested the stock suspension settings on the 2020 KTM 450 SX-F back to back with the WP Pro Components and came away with this opinion: 

IMG_5973-2.JPG

On The Track:

The first thing I noticed when I go out onto any type of track with the XACT fork is that the KTM turns slightly slower than the AER fork on initial lean (into corners), which is exactly what out of the KTM. The KTM does have a slightly rigid feel to it and can be a handful when riding fast, choppy tracks. You can actually feel the extra weight right away (in the front end) compared to the stock AER fork, but it wasn't a bad feeling. I was just surprised I could feel it as much when entering corners. Usually I run the fork flush on previous Cone Valve forks, but with the slower turn in feel and a the longer length of the new style XACT fork I went with a 5mm height. Along with the extra weight feeling however I gained more front end traction through every corner (especially flat corners). The XACT fork leaves you with a more front tire contact patch sensation on lean angle and you can start your lean earlier in ruts without getting the high front end, vague feeling like you do with the AER fork. With the AER fork I get some pushing in the front end through the middle to end of corners, which made makes me roll off the throttle to try and compensate. With the XACT fork I can lean in the corner and the fork stays planted, which lets my front end settle and bite. The WP XACT fork also feels less active on braking bumps. I am able to jump in and out of bigger bumps that each track I tested at offered, without having the fork rebound too quick and be too active. If I wanted to pound through the bumps, the fork had better damping control feeling through the middle to end part of the stroke. 

IMG_5994.jpg

The most notable change was to my wrists when over jumping/flat landing with the XACT fork. I could get more aggressive with obstacles and have the bike settle into corners better in areas of the track I wasn't able to with the stock suspension. The downside to the XACT fork is that it can make the KTM feel like it has less flex up near the head tube area. This feeling is not as rigid as a Honda CRF450R, but it does give you a firmer feel through your hands on small bumps, compared to the AER fork. The key to the WP XACT fork is getting it set up for you. WP does a great job of getting you the XACT fork with a “ballpark” setting, but going through an authorized dealer that can set it up for your personal needs is the best way to ensure your investment works the best. I tested the XACT fork with their customer setting and although it was better than stock, I could have used a little more hold up on hard braking or when their was deeper braking bumps.

IMG_6017.jpg

The XACT shock holds up better than the stock shock for me on high speed compression and you are able to get more aggressive around the track. I can hit the faces of jumps harder and the KTM did not give me an empty/low feeling sensation that the stock shock sometimes gave me. In order to combat that feeling with the stock shock I would have to crank in the high speed compression so much that I would lose the comfort coming out of corners (and rear wheel traction). The XACT Pro shock provides you with more high-speed damping and you still get a decent amount of acceleration comfort on choppy corner exits. I also noticed a little more connectivity to the the rear wheel (when hard on the gas) on flat corners with the XACT Pro shock compared to the stock shock. The XACT Pro shock is firmer so there is less wallow in the rear end when accelerating, so the rear of the KTM 450 SX-F tracks straighter and doesn't upset the KTM’s chassis as much at speed. “Balanced” is a great word to describe both ends of the KTM, but I did notice the harder I pushed the more it rewarded me. If I tried to ride smoother/slower, the action of the shock wasn't quite as comfortable as the stock shock. This XACT Pro likes to be pushed and will reward the rider that is aggressive because of its much more consistent nature (compared to the stock shock). Again, going to a WP authorized dealer and having it set up for you is key. Thinking that you’re just going to go purchase A-Kit level suspension, slap it on, and then magically be in heaven on the track is completely foolish! Get it set up for your weight, riding ability, and the type of rider you are will ensure that your money is spent correctly. 

Conclusion:

Do you “need” these WP Pro Components on your machine? If you’re a casual rider, of course not. However if you’re a KTM/Husqvarna rider and race consistently, I think the WP Pro Components are worth the price. For around $3499.00 for the fork and $2199.00 for the shock it’s an investment that you should take seriously. If it was me, had one bike, was on either a KTM or Husqvarna, I would invest in a set of WP Pro Components because when I ride/race, I want the most consistent feel I can get. I also know that if you are the type of rider that gets a new KTM/Husqvarna every couple years, you’re able to roll these WP Pro Components over to your new bike. This is an investment that you can continue to roll over with each passing model year. I think it’s safe to say that KTM or Husqvarna will not change their motocross models until the year 2022, so your WP Pro Components will fit at least until then. Even if KTM/Husqvarna change their machines drastically, chances are these newer WP Pro Components will bolt on. 

IMG_6510.jpg

FAQ: 

“Keefer, have you tried a set of standard re-valved WP AER forks and shock”? The answer is yes and although the comfort was improved (over the standard/stock set of suspension), the consistency just wasn't as good as the WP Pro Components. I would say that a set of stock re-valved stuff will definitely be good for your local racer that simply can’t afford new Pro Components. Companies like Race Tech, Kreft, and Enzo all have very good re-valved stock suspension settings. 

E7734C7C-E581-4535-88DB-BE07658EB09E.JPG

“Keefer, is there something I can do about the rigidity I am gaining with the WP XACT Pro Component fork”? Yes, going to a WP/KTM Factory Triple Clamp will help with some of the rigidity that the stock clamps come with. Also, you can go to a bottom triple clamp torque spec of 9N/m. Both will help with comfort on braking bumps, slap downs, as well as get you less rigidity feel through your handlebars. 

If you have any questions about this test, feel free to email me at kris@keeferinctesting.com 


FMF Vs. Pro Circuit (2020 Yamaha YZ450F Muffler Comparison)

Yamaha did a great job with the stock muffler and I bet if you ask any aftermarket muffler manufacturer they would tell you the same thing. If you’ve seen my social media pictures while riding the Yamaha YZ450F, you will see that I run the stock system quite a bit. Why? Because it’s really good! However, I know some of you out there will not keep the stock system on your bike because you may want something lighter, more attractive, and hopefully get something with more power than the stock system right? That is why I went to work and really picked apart the FMF and Pro Circuit systems for the bLU cRU machine. I do know that FMF and Pro Circuit have been working really hard on continuing to improve/evolve their systems for the YZ450F and after riding a ton on each, here are some of my findings.    

Pro Circuit Ti-6 Pro Versus Stock: 

IMG_6438.jpg

Why The Ti-6 Pro? I chose the “pro” because of the smaller insert that it comes with to pass AMA/FIM sound because I have come to find out that the YZ450F loves back pressure and that smaller insert helps with throttle connection. The exhaust note on the Pro Circuit Ti-6 Pro is not near as loud or raspy sounding as the Ti-6 or T6 so that is another reason why I chose the “pro”. The exhaust note on the “pro” is deeper and slightly quieter, which I personally like more. The power delivery is slightly smoother than stock on very low RPM (4000-6000 RPM), but is only noticeable to very sensitive riders. At 10-15% throttle position there is a slightly softer RPM response, which I didn't mind on nasty, dry, choppy tracks in Southern California. If I needed more bottom on softer tracks, I simply ran a more aggressive map and that helped the “pop” I was looking for out of corners. I usually ran the TP 3.0 map with the Pro Circuit system and it made me happy with the amount of smooth roll on power I had. If you’re looking for more excitement down low and out of corners, try the “Exciting Power Character” map. (https://www.keeferinctesting.com/motocross-testing/2019/9/18/2020-yamaha-yz450f-start-upbaseline-settingstipstricks)

IMG_6440.jpg

The rear wheel definitely feels more connected to my throttle hand and in comparison the PC system has a more seamless power delivery when transitioning to its mid range pull. The mid-range is where I could stand to get a little more power and this is exactly where the PC system delivers. The meat of the Ti-6 Pro’s power while accelerating down the next straight is noticeably better than stock. I am able to use third gear with the PC system (compared to using second gear with the stock muffler) and even though the low RPM response is slightly softer than the stock system, the mid-range RPM response is much more instant. Mid-range rpm response is crisp and makes the Yamaha feel “lighter” when trying to hop over square edge choppy areas of the track when accelerating. 

I talk a lot about using third gear on a 450 and if the bike is able to pull that gear through corners. The stock YZ450F does this very good and I was worried that putting an aftermarket muffler on would hurt this feeling. The PC system only improves this as I noticed that have been able to use lower RPM’s around the track with lower lap times. I like that I feel that I can work the clutch/shifter less with the PC system. 

Top end pulling power is as good as stock, but the PC Ti-6 Pro doesn’t have the over-rev the stock system has. If you learn to short shift the PC more and let that newfound mid range meat pull you around the track you will appreciate the phrase “work smarter, not harder” a lot more. I was impressed how the Pro Circuit Ti-6 Pro delivered as well as spread out its power and to me, made the Yamaha even more fun to ride. If that’s possible? For you weight watchers out there, you will lose around 1.2 pounds from the stock system and the PC Ti-6 Pro Titanium System runs $1,118.21. You can go to procircuit.com to get yours. 


FMF 4.1 Versus Stock:

IMG_5491.JPG

The FMF 4.1 muffler system has a deeper more throaty sound to it (over stock) and has a louder pitch than the stock muffler system. On the track, the FMF 4.1 (on the YZ450F) makes almost as much bottom end power delivery as the stock system and keeps that peppy/exciting RPM response. The stock system has more pulling power immediately out of corners, but the FMF 4.1 allows for better traction while rolling the throttle on when the track gets slippery. Where the FMF 4.1 system really impressed me was mid range pulling power when exiting corners. The stock system is excellent in this area, but has a heavy mid range rev feel. The FMF makes the YZ450F’s engine feel free-er and gives the rider a snappier yet more powerful mid range pull with less engine braking.  

IMG_6449.jpg

I stuck with the “TP 3.0” and “Exciting Power Character” maps on the FMF 4.1 system and that let me choose what kind of power delivery I needed at any given time of the day. With those maps and the 4.1 system you can control the power a little more down low and allow the Yamaha to have a more linear feel in second and third gear. The FMF 4.1 system has a larger muffler opening when you un-box it so make sure not to throw away your insert/spark arrestor screen that FMF includes in the box. If you think you want a little more excitement (bottom end) back into your YZ450F, simply install the insert (with the screen) and the Yamaha will get more back pressure and some more connection/bottom end pull/low rpm response, but you will lose a little of that mid range free feel that you gained.  

Up on top end the FMF pulls harder than the stock system, but falls a little short when it comes to the over-rev department. The 4.1 accepts short shifting, so if you’re like me and love to get into third gear as soon as you can, the FMF does accept that third gear shift a little earlier than stock as well. I like that FMF keeps evolving their systems with each passing model year and to me the 2020 system has some added mid range pulling power that the 2019 didn’t. The FMF 4.1 Ti muffler system will save you 1.5 pounds over stock and the cost of the FMF 4.1 titanium system runs $1099.99. You can go to fmfracing.com to get yours.


Pro Circuit Vs. FMF: 

Let me start off by saying that these are two muffler systems (for this model) that will rival or surpass (in spots) the stock system’s performance. That’s not easy to do! Some muffler manufacturers have better performance or have come up with a better setting for certain models and Pro Circuit as well as FMF have done a great job with their 2020 YZ450F system. The Pro Circuit has a little more throttle to rear wheel connection down on low end, but the FMF pulls stronger through the mid range. Up on top end both seem on par with each other and of course both have less over-rev than the stock muffler. I can lug the YZ450F in third gear more with the Pro Circuit muffler, but the FMF has more of a free feeling to it when higher up in the rpm range. These muffler systems are close in comparison to one another and offer the rider a different power curve than stock that is actually beneficial to the Yamaha YZ450F rider. 

Results:

Bottom End Pull: Pro Circuit

Mid-Range Pull:  FMF

Top End Pull:      FMF/Pro Circuit

Over-Rev:   Stock

Bottom End RPM Response: Stock

Mid RPM Response: Pro Circuit

Top End RPM Response: FMF 

Best Looking: FMF

Stock Heat Shield Mounting: FMF, Yes/Pro Circuit, No

Fire Power Parts Review

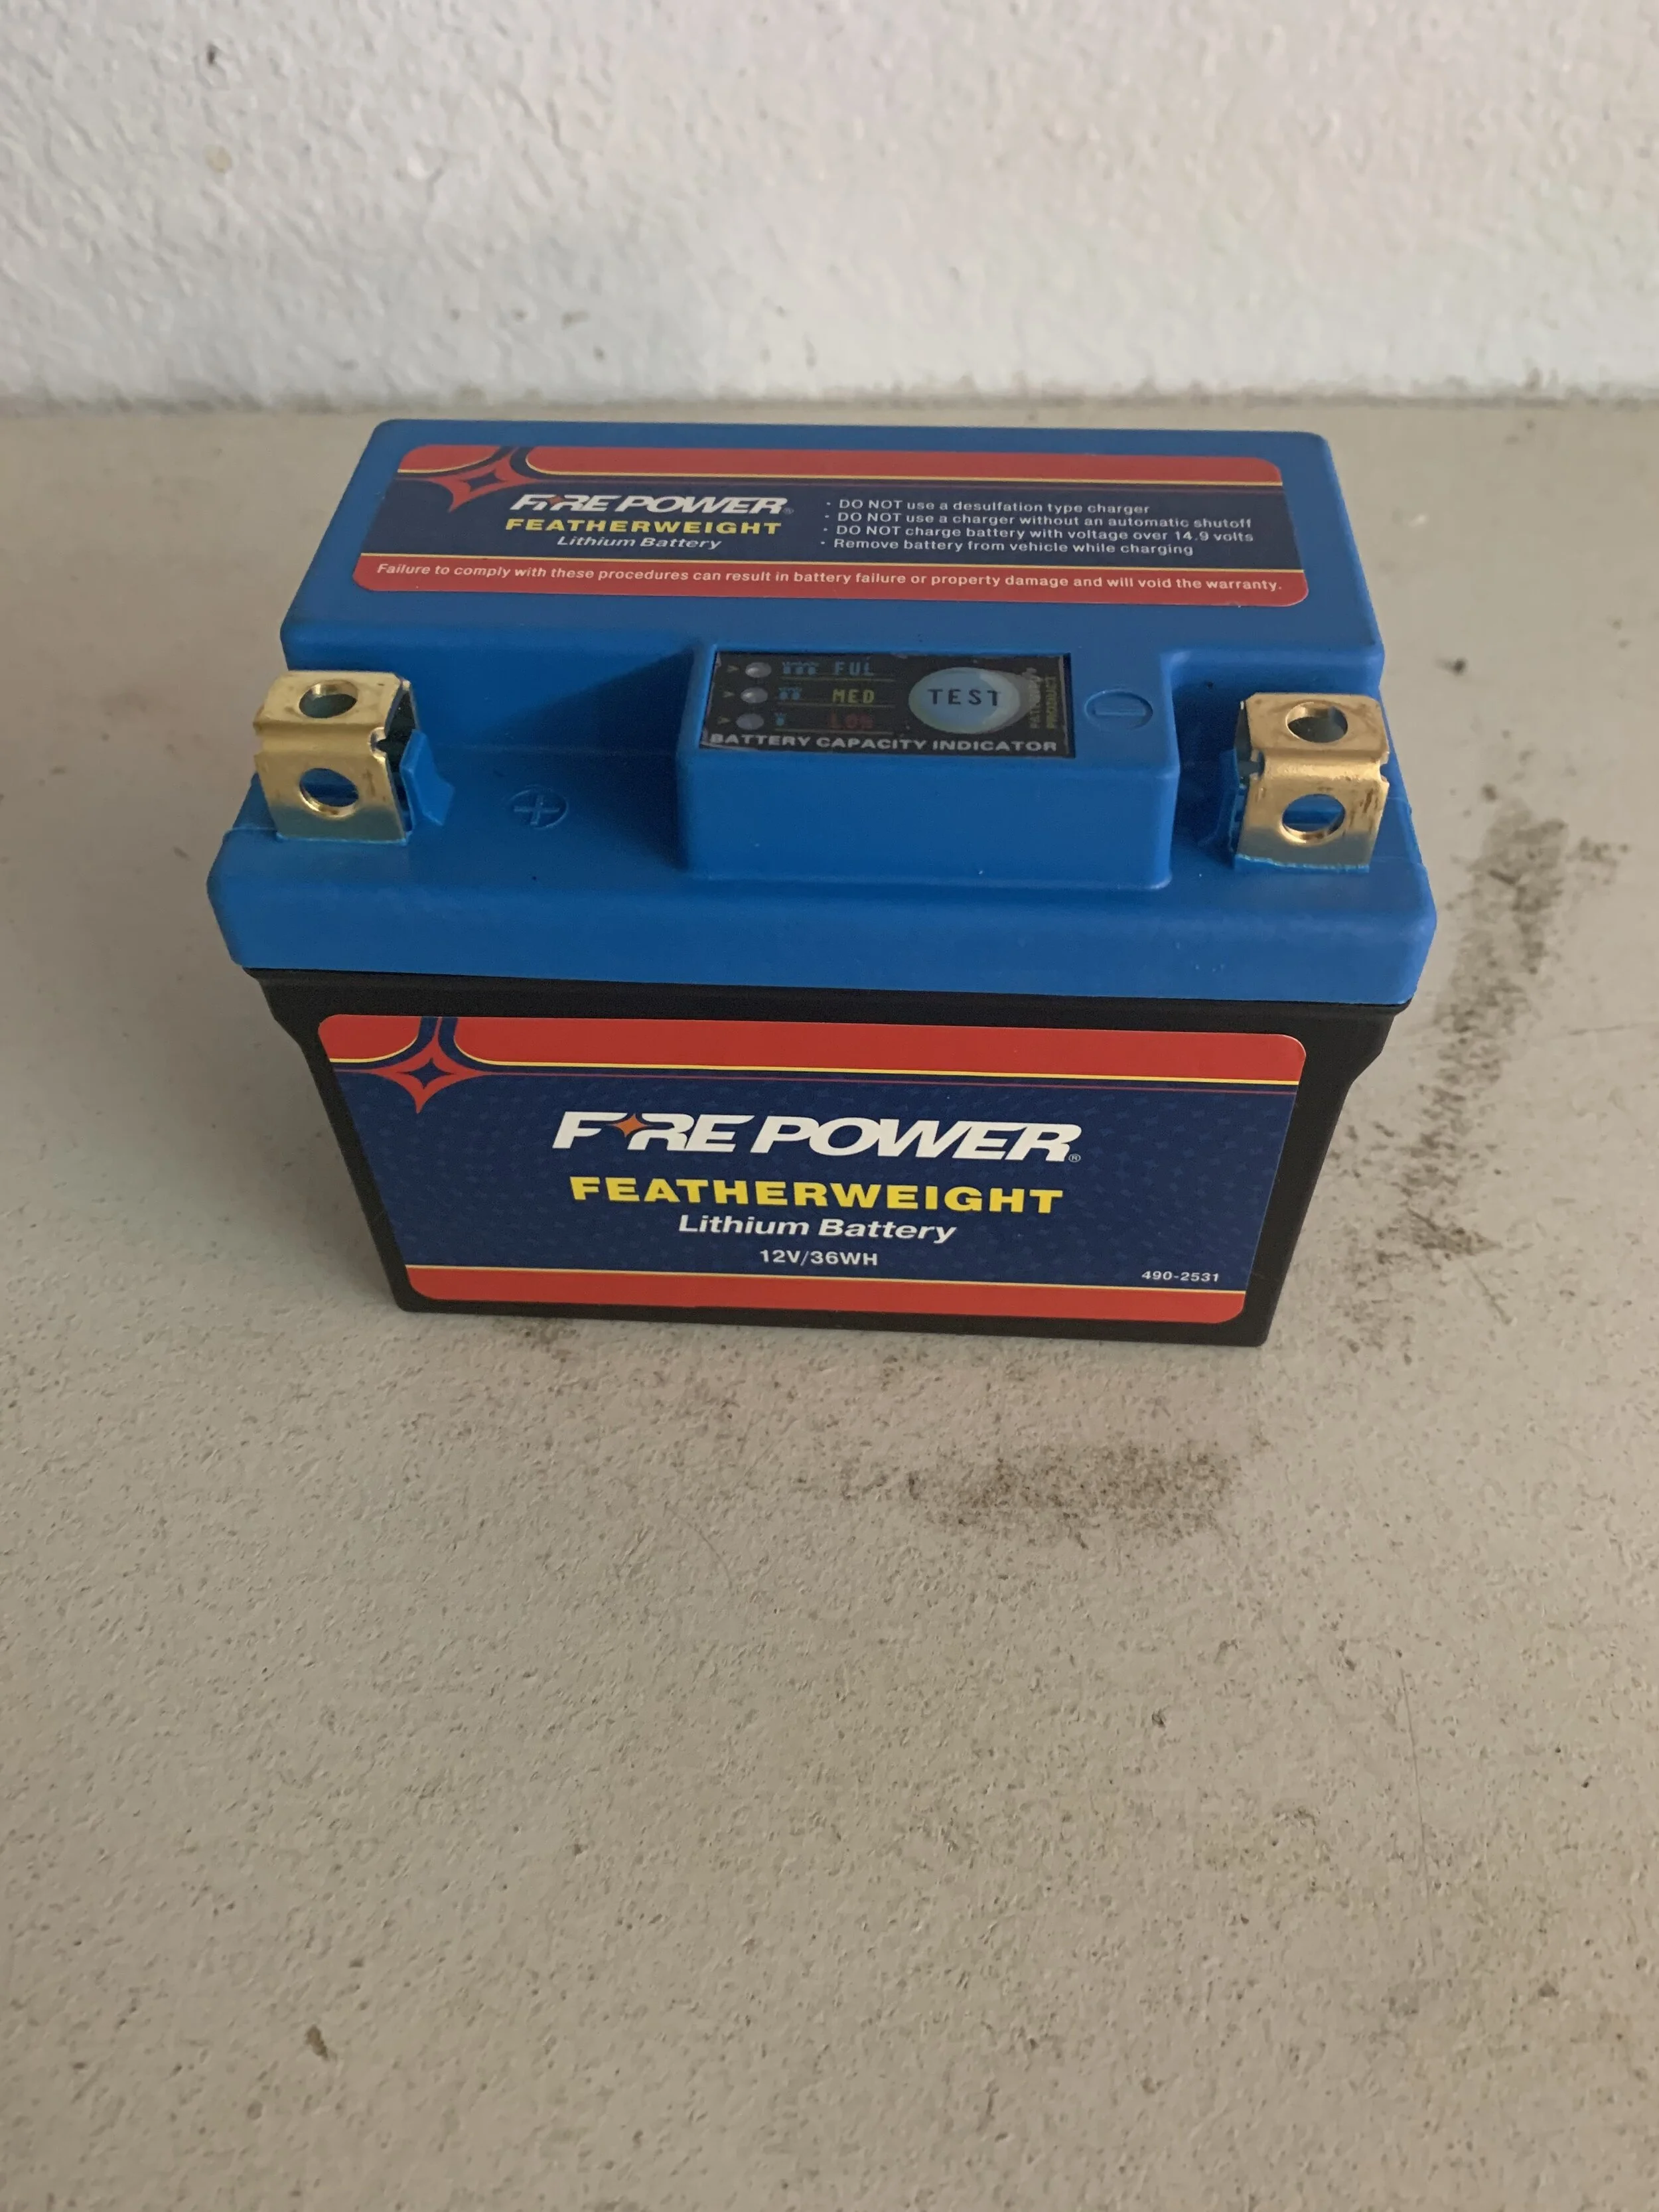
Fire Power Featherweight Lithium Ion Polymer Battery

IMG_6303.jpg

Fire Power lithium batteries are for use in Powersports vehicles only (motorcycle, scooter, ATV/UTV). Fire Power batteries are direct replacement batteries for your vehicles original battery. Fire Power batteries have Lithium Ion Polymer technology and all components are designed, manufactured, assembled and packed in one location assuring high quality and consistency. The Fire Power battery that has been in our Yamaha YZ250F is extremely lightweight at 1.06 pounds (stock is 1.5 pounds), has a built-in LED test gauge so you know when your battery is at full charge, half full, or has a low charge. I also noticed that the Fire Power battery has increased cranking amps over a lead acid battery that I tried in my dad’s older Honda. I have yet to recharge a Fire Power, but from what I was told (from my test rider Michael Allen) that the recharge time literally took him 7.5 minutes in order to get the battery up to 90% charge. Fire Power was claiming six minutes, but nonetheless that is a damn quick charge and not to mention that you can charge it with any 12 volt battery charger as long as it has automatic turn off capabilities. 

IMG_6302.jpg

The lifespan of the Fire Power has been much better than that of our stock 2019 Yamaha YZ250F battery, as we are still on the same FP from last winter. Just for the sake of testing I ordered a new Fire Power battery and have let it sit for almost one year and it still is holding a full charge. I will say that we haven't had too many cold nights here in Southern California, but after having two dead stock batteries in my Yamaha as well as my KTM/Husqvarna in that same span, the Fire Power is doing great in my book. Another aspect that I didn't know too much about, but is a cool feature is that the Fire Power can be mounted in any position, just in case you’re trying to modify or get more room out of your airbox like my good buddy Gary Sutherlin did with his Yamaha YZ450FX back in the day. The Fire Power has no hazardous acid or heavy metals, it’s non-explosive and non-combustible. It comes with a two year warranty and will only cost you around a $100.00.

Fire Power Heavy Duty Chain

IMG_6306.jpg

I go through chains a lot because most of the time I am a non o-ring type of moto rider. I also know that cheap chains are very unsafe and I have broken more than a couple in my time. NOT COOL!! There is nothing more scary than snapping a chain while you're taking off from a jump. I have been a huge DID ERT2 fan for as long as I can remember because I have had the best luck with those specific chains. Switching to a Fire Power chain was something that quite frankly I wasn’t too sure of… Until now… 

The Fire Power Heavy Duty chain is designed and manufactured in Japan, has an 8,000 pound tensile strength, comes in a 428/520 pitch, has hardened/shot peened components with solid rollers, comes pre-stretched, and all Fire Power chains are supplied with clip style master links. I usually just get a 120 link chain and cut to my desired length so that I can place my rear wheel where I like it. Once installed the Fire Power chain will initially stretch the first couple times out and then I literally didn't touch it for a solid 4-5 engine hours. I keep it lubed before every ride and it has treated me well. I have ridden with the Fire Power chain on my YZ450F, KX450, as well as the KTM 450 SX-F with the same results. Conditions have been from sand, mud, dry silt, and the occasional trail ride from the house.

Under those conditions I have gone anywhere between 10-18 hours on chains in the past and the Fire Power chain is on it’s 16th hour. Around the 16th hour I felt like it was loose enough to where I decided to retire it (per my judgement) and install a fresh one. To get a chain that I can trust in that amount of time for under $50.00 is almost unheard of. I would recommend the 520 Fire Power Heavy Duty Gold Chain to any weekend warrior looking to save some money and get a quality product.  

If you have any questions about the Fire Power products in this test, please feel free to email me at kris@keeferinctesting.com 


Akrapovic Evolution Muffler System (2020 Honda CRF450R)

This is embarrassing, but I am going to be completely honest here… I think about the Honda CRF450R a lot. More than other machines. I mean I will literally wake up in the middle of the night and think of things to test in order to try and make the Honda chassis calm down a little because I see so much potential in this bike, but I need it to be calmer. It turns incredible, has an insane amount of power, and has the best ergonomics of any bike, but it lacks some comfort and predictability to me at speed. This drives me crazy because I really like this damn bike a lot! 

IMG_6004.jpg

I stumbled across the Akrapovic Evolution muffler system as I was doing some ECU mapping with Chad at XPR Motorsports on the CRF450R. Chad does the engines for the MotoConcepts/Bullfrog Spas Honda team and I noticed that they have been running Akrapovic systems on their bikes, so I asked if I could borrow one to see how it worked. Akrapovic's Evolution line is their full titanium muffler system and includes more in the complete package than other system that I have unwrapped. The welds are beautiful and to me the quality of the complete system is second to none. Installing the Akrapovic takes a little bit of finagling, but with some patience it does line up and fit well, as long as you leave most of the bolts loose when installing. Also included in the system are some extra parts, such as a carbon fiber guard, which protects the headpipe and resonance chamber from side impact. There’s also the hardware needed for the guard, along with some extra pipe springs and rubber grommets/spacers for the exhaust cans, as well as a set of quiet/spark arrestor inserts. Keep those in (more on that later). 

IMG_6002.jpg

Once out on the track is when I realized that this Akrapovic muffler system could actually help this Honda chassis calm down. The Evolution system lets the Honda’s engine roll on smoother at low RPM’s and that smoother feel helps the rear wheel connection as well as provides less pitching (off throttle) than the stock system. AKA MORE COMFORT!!! The Honda CRF450R now builds a smoother roll delivery and a pulling power that is longer through the mid range than the stock system. This type of character can allow you to use second gear in corners more because the second gear hit is not as abrupt or quick and that doesn't upset your technique or the chassis. The Akrapovic also allows the rider to shift later out of the corner with its increased over-rev capabilities. Pulling power up top is increased slightly as your shifting points can be altered now because of the longer pull in each gear. The mid range recovery of the Akrapovic is not as good as the stock system, but honestly that is not a bad thing. The Honda has so much power to work with that a little less “hit” as well as “recovery” actually helps me roll my corners better and allows me to be more aggressive on the Honda. I want to be able to ride this red bike and not let it ride me after 15 minutes into a moto. The Akrapovic system relaxes the engine as well off throttle. There is not nearly as much engine braking with the Evolution system and that also helps your fork from feeling harsh on small de-cel bumps.  

IMG_6005.jpg

The pitch of the Akrapovic is ridiculously quiet when on the track and will almost give you that MXGP sound and feel. It still has that racey, crisp sound, but just not that raspy high pitch tone of the stock muffler. I preferred the quiet inserts left in because it created more back pressure and gave me more traction at the rear wheel (out of corners) in all three engine modes. I was normally a map two guy with the stock muffler, but with the Akrapovic installed I am now a map one guy all day long because of the added rear wheel/friendlier connection. 

At just over 8 pounds the system will save you almost 1.5 pounds over stock and will set you back a whopping $1547.00! Is the cost worth it? I wouldn't go that far, but it is one of the better muffler systems that I have tried on the Honda CRF450R. If I was a Honda owner I would rather invest in a Vortex ECU, have it mapped, and save a few hundred bucks, because the Vortex ECU can do more to help the power character/chassis feel than that of the Akrapovic sytem. However, if you do have a deep pocket book and are going to get a muffler system anyway, this Akrapovic would be a great choice. It’s a beautiful system and works very well on a wide variety of terrain/tracks. 

Go to akrapovic.com to locate your nearest dealer. 

Wrench Rabbit Yamaha YZ125 Engine Rebuild Kit

By Michael Allen:

Although one of the main perks or being a part of Keefer Inc. Testing is getting to ride the latest and greatest bikes, there are times when you need to have your own bike. I needed my own bike because I was going to race the Los Ancianos Tecate Enduro that is run in Mexico and I needed to be able to show proof of registration. After a lot of looking around I found the perfect bike, a somewhat abused 2006 YZ 125. I raced it for two years in Mexico and would randomly ride it here and there when I wanted to feel like I was going fast. Here is where the embarrassing part comes in, this last winter we had an abnormal amount of rain in California, which was great, but I was admittedly a little lazy in the maintenance department.  I figured “it’s wet, how dirty could my air filter be getting”? Well after not checking my air filter for about three rides, my $1,800 Yamaha YZ125 decided to come to a quick stop in the middle of a snowy trail ride. As I was on the pipe climbing a sandy canyon the wheel locked up and I came to a skidding stop. I luckily was within pushing/coasting distance back to the truck, but when I got there and pulled the seat off, I immediately knew what happened and felt really stupid. You see when I got the bike I did the current plastic re-style kit from Polisport and when I re-installed the air box, apparently I didn’t do a good job with the hose clamp (that holds the air filter cage onto the air box). To my surprise my air filter and cage was just sitting in the bottom of the air box and I had been sucking dirt into the engine for who knows how long. Fail!  

IMG_6381.jpg

Needless to say when I tore the engine down there was grit everywhere from top to bottom. I knew if I wanted to do it right the whole engine would need to be rebuilt, but I also knew that replacing bearings, seals, gaskets, a top end, and crank with OEM parts would cost more than I purchased the bike for. After talking to Kris he mentioned that Wrench Rabbit sells complete engine rebuild kits and from what he remembered they weren’t all that expensive. After that conversation with Kris, I reached out to them and got the ball rolling on rebuilding my little 125. 

IMG_6730-2.jpg

The Wrench Rabbit kit (Part Number WR101-081) really does come with EVERY bearing, seal, and gasket you need to do a complete rebuild on your bike. To be completely honest I had done a bunch of top ends on previous two-strokes, but this was my first time splitting cases and doing my own rebuild. I took it slow and really tried to do good job of keeping everything organized when I took it apart. Upon disassembly it was then that I realized that it wasn’t as scary as I imagined it would be. When the engine was torn down I found that my issues were a scored piston (luckily the cylinder wasn’t bad enough that it needed to be re-plated or replaced), a blown out rod bearing, and main bearings that were ready to come apart at any time. The Wrench Rabbit kit comes with a brand new crank/rod from Hot Rods already assembled as well as new main bearings to go with it. In the past I had been scared to use aftermarket engine parts, but the quality of the Wrench Rabbit parts were very impressive and every part fit just as good as the factory parts that came out of the bike. 

IMG_7066.jpg

As I buttoned up the cases and slid the cylinder onto the new Vertex piston I was pretty excited to get my 125 running after looking at it sit in the garage for the past five months. I slapped the engine back into the frame at about 11pm and was so excited to get it running I ran to the gas station that night to mix some gas and wake up my neighbors. The child like smile on my 32 year old face said it all when it came to life on the third kick and I was able to take it down the street for an initial heat cycle a midnight. After a few more heat cycles I was able to moto down and I’m happy to report that my 125 runs better than ever. In fact, the rebuild is done just in time for me to head back down to Mexico in about a month for more trails, tacos, and beer. 

IMG_6739.jpg

I learned three main things from this whole process… The first lesson is to never be lazy about maintenance, no matter how well you think you know your bike. The second is to not be scared to do your own bike work, even if you have never done it before. With an OEM Owner’s Manual and a proper set off tools, you are more capable than you may think. I did go out and buy a Motion Pro case splitter (Part # 08-0605), a Motion Pro flywheel puller (Part # 08-0026), Motion Pro bearing driver set (Part # 08-0551), and some Yamabond Liquid Gasket (Part # ACC-BOND4-MC-00) to make the rebuild a little easier  The third and most important is to not shy away from quality aftermarket parts. After adding it up, I saved over $350.00 by using Wrench Rabbit parts. OEM parts are great, if you can afford it, but finding quality aftermarket parts are like riding a unicorn and by the looks and sound of my YZ125, I have found Pegasus. With all the parts supplied, the Wrench Rabbit kit only set me back $514.95. Reason #158 why I love two-strokes! So if you have either a worn out engine (no matter two or four stroke), or in my case are an idiot and blew your bike up because of negligence, give Wrench Rabbit a try, you won’t be disappointed. Also keep in mind that Wrench rabbit doesn’t just have kits for engines, in fact they offer replacement parts for all facets of rebuilding a motorcycle.  You can email me if you’re interested in ordering some parts and getting the Keefer Inc. discount. michael@keeferinctesting.com.

image1-4.jpeg

OR YOU CAN CLICK ON www.wrenchrabbit.com TO SEE WHAT PARTS YOU MAY NEED.


Yamaha YZ125 Wrenh Rabbit Kit Part Number WR101-081 ($514.95) includes-

  • Vertex piston kit (standard compression piston, rings, pin and clips).

    • Premium quality Vertex piston.

    • Complete set of nitride coated or chrome-plated piston rings.

    • Fully case-hardened wrist pin.

    • Circlips.

  • Hot Rods heavy-duty crank (stock stroke - includes wrist pin bearing for two strokes).

    • Factory assembled and trued to O.E.M. specifications, Hot Rods cranks will meet or surpass the O.E.M. in performance and durability.

  • Hot Rods main bearing / seal kit.

    • Like other Hot Rods products, these main bearing and seal kits are built to the highest quality standards that meet or exceed those of the O.E.M.

  • Hot Rods transmission bearing kit (includes transmission bearings, output shaft collar and sprocket lock washer).

    • A must-have for any new transmission or engine case installation or repair.

    • Includes trusted Hot Rods bearings for the primary and secondary shafts of the transmission.

    • Also includes the special needle bearing for the shift drum and the output shaft collar and washer (where applicable).

  • Hot Rods counter balancer bearing kit.

    • A must-have for any new counter balancer or engine case installation or repair.

    • Includes trusted Hot Rods bearings for the counter balancer shaft of most modern 4-stroke engines (where applicable).

  • Hot Rods water pump bearing and seal kit.

    • Hot Rods water pump repair kit includes water pump cover gasket or O-ring, water pump shaft bearing(s), and seal(s) to repair a leaking water pump seal and/or a failed bearing.

    • Precision micro-bearings provide O.E. quality and durability.

    • High pressure / temperature mechanical and rubber seals.

  • Hot Cams cam chain.

    • Replacement cam chain.

    • Meets or exceeds O.E.M. specifications.

  • Vertex complete gasket kit, including seals and O-ring kit (covers top and bottom).

Tools For The Job: 

  • Motion Pro Case splitter Part # 08-0605

  • Motion Pro Flywheel puller Part # 08-0026

  • Motion Pro Bearing driver kit Part # 08-0551

  • Yamabond gasket maker Part # ACC-BOND4-MC-00


FMF Factory Fatty Pipe/Shorty Silencer (2020 KTM 125SX)

Since the delivery of our KTM 125 SX, my son Aden has been riding it non stop. He also has been barking in my ear about getting a pipe and silencer so it “sounds cool”. While I am usually reluctant to add parts to my kid’s bike for the sake of just doing it, I thought this could be a good way to test a pipe and silencer to see if it actually helps the Austrian two stroke power plant. After I discussed “the conditions” to my kid, I called upon Lil D and the boys at FMF to send me a Factory Fatty pipe and Shorty silencer to try. 

IMG_5492.JPG

What were Aden’s “conditions”? The conditions were that he had to install the FMF products and help me write this test. I took it upon myself to ride the 2020 KTM 125 SX in stock form as well as with the FMF Factory Fatty/Shorty combo at couple tracks. The installation was fairly painless for my 13 year old. He learned how to use a spring puller for the first time as well as how to push the rubber grommets through the silencer mounting points without stabbing himself with a flat blade screwdriver. Once he got the FMF pipe/silencer installed he of course had to start his bike and see how it sounded and I will have to admit, it sounds pretty bad ass. The pitch of the KTM 125 SX with the FMF pipe/silencer is more of a crisp/barking sound rather than a richer/raspy sound that the stock pipe/silencer comes with. Ok, now that we smoked out the garage and pissed mom off, we loaded up the bike and went riding! 

IMG_5706.jpg

I went back and forth with the stock set up as well as the FMF a couple times at a few different tracks and I will say that the FMF Factory Fatty pipe/Shorty silencer combo did help throttle response as well as low end grunt. Coming out of corners (with the FMF Fatty/Shorty) the KTM 125 SX has a little more acceleration pull on corner exits and could be shifted a little earlier without falling off. The mid range pull was also longer and overall crispness of the mid range seemed improved. The FMF Fatty/Shorty seemed to lean out the bottom to mid range (in a good way) and made the KTM feel more playful around the track. RPM response was improved throughout the power and the throttle felt more connected to the rear wheel. 

IMG_5708.jpg

The top end pulling power/over-rev was slightly shorter than the stock set up so I wanted to play with jetting to see if I could get some of that back. I went back and forth on a few different main jets as well as needle jets, but came back to this set up below: 


Jetting Specs:

Needle position: 3rd position from top

Jet needle: 6BFY43‑71 

Main Jet: 520 (500 Stock)

Idling Jet: 35 

Choke nozzle: 80

Needle Jet: S‑7

Idle Air Adjusting Screw: 1.5 turns out/open

With this jetting the KTM 125 SX pulled longer up top and gave Aden/I more over-rev in 2nd-3rd gears. To me these two gears are the most important for Aden as he learns how to improve his corner speed as well as technique. Sometimes Aden will leave it in second or third gear too long (instead of shifting) and having this jetting allows the KTM 125 SX to pull a little longer. This jetting was good for sea level up to 3500ft. Anything higher than 3500 feet elevation and I would go back up to the 2nd needle position. 

IMG_5710.jpg

Overall, there is some performance gains to be had with the FMF Factory Fatty/Shorty Silencer. Aden has put over 14 hours on the system and the silencer still sounds good and not blown out. He did manage to put a small ding in the bottom of his pipe and that made him mad, but he’s ok with it after he took some WD-40 and Scotch Brite to the thing! Proud dad moment! The Fatty is $249.99 and the Shorty costs $134.99. A lot les expensive than a four-stroke system! 

Below is Aden’s opinion of the FMF and stock pipe/silencer. I wanted to let him have free range on what to talk about, so he can try to get better at communicating his thoughts into a testing format. During the course of this test I never shared my thoughts about the FMF Fatty/Shorty for confidential purposes. His opinion is unedited, but I did clean up a few grammatical errors for the sake of reading. After reading his opinion, I couldn't help but write down my thoughts about his opinion. It seemed too good not to share with you all. Enjoy! 

Aden Keefer Opinion: 

The differences between the stock pipe vs the FMF Fatty/Shorty pipe is that the FMF pipe hits stronger coming out of corners, but on the other hand the stock pipe is a little bit more linear coming out of corners. The stock pipe takes a while for the power to kick in which was ok on hard pack desert tracks that I rode. I did like the FMF pipe more because it was aggressive and you can put the bike anywhere knowing that it’s gonna have the little extra power. The one reason I do like the stock pipe is that since it’s more of a longer silencer I can control it better when I get tired because it’s not so aggressive. Don't get me wrong though! I think the FMF pipe and silencer is one of the best pipes out there. Not does it only make your KTM 125 SX faster, it makes it look super cool and it sounds way better than the stock pipe. I also noticed when we put VP C12 in the stock pipe/silencer it made it run aggressive, but when we also tried out VP C12 with the FMF pipe/silencer it ran like a race bike. It made it so fast that I was pulling all the 450’s going up Mt.St.Helens at Glen Helen. I also think cleaning the FMF pipe/silencer is rewarding. My dad loves to vacuum because he said he can see his progress with his work. I like cleaning my FMF pipe and silencer because I can see my progress as I scrub it with an SOS pad. So to wrap this up, I think that the FMF pipe and silencer is the best pipe out there for any 125's out there.


Dad’s Thoughts About Aden’s Opinion: 

-I appreciate some of these testing comments and at least it shows that he is listening to me a little. So you’re saying there’s a chance! Hallelujah!  

-I like that he could feel that the FMF Fatty/Shorty had more bottom end. That shows me that any kid could install this product and feel the difference. 

-It’s funny that he recognizes how the KTM works on different terrain and can appreciate a smoother power at times. I am glad he’s not a balls out rider! Safety first!

-Pulling 450’s up MT. Saint Helens? Eaaaaaaasy there tiger!

-Of course when I was his age I also thought something that was aftermarket was way cooler! Why? Because it wasn't stock! Duh! After reading his opinion it seems that he’s into the styling of the “Raw Fatty look”. Me too, Aden, me too! 

-Here we go with the C12 talk again! That is all this kid was talking about for a few weeks! “Dad, let’s get some C-12”! “Dad, let’s get some C-12”! I broke down and got some. The C12 did make the KTM’s pulling power stronger, but also leaned it out enough to warrant the jetting change. However, the jetting change that worked with the VP C-12 also worked with pump gas too. Don’t be scared to run that jetting with either fuel. Aden wanted it because of the smell! Mom’s still mad because her kitchen smells of C12 and Maxima Formula K2. Sorry, babe! Not really, because our house smells like a race shop now! :)

-Aden coming in hot with the vacuum reference! Wow! My secret is out now. Great!

-Good job Aden. We have some work to do, but good job son! Love, Dad!      


2017-2020 Honda CRF450R Clutch Fixes


Do you have a 2017-2020 Honda CRF450R? If so, then you know that the clutch is not the best of the bunch. The clutch gets hot too quick then proceeds to drag/slip during your moto and you’re left with throttle to rear wheel connection loss (aka loss of power/traction). Or how about that clutch lever pull? How hard is this thing?! Not the lightest clutch lever pull in the game is it? I have a couple solutions that I came across while spending a lot of time on the Honda CRF450R this year that I thought was worth mentioning.

IMG_5397.JPG

Fix #1 XPR Motorsports Longer Clutch Arm:

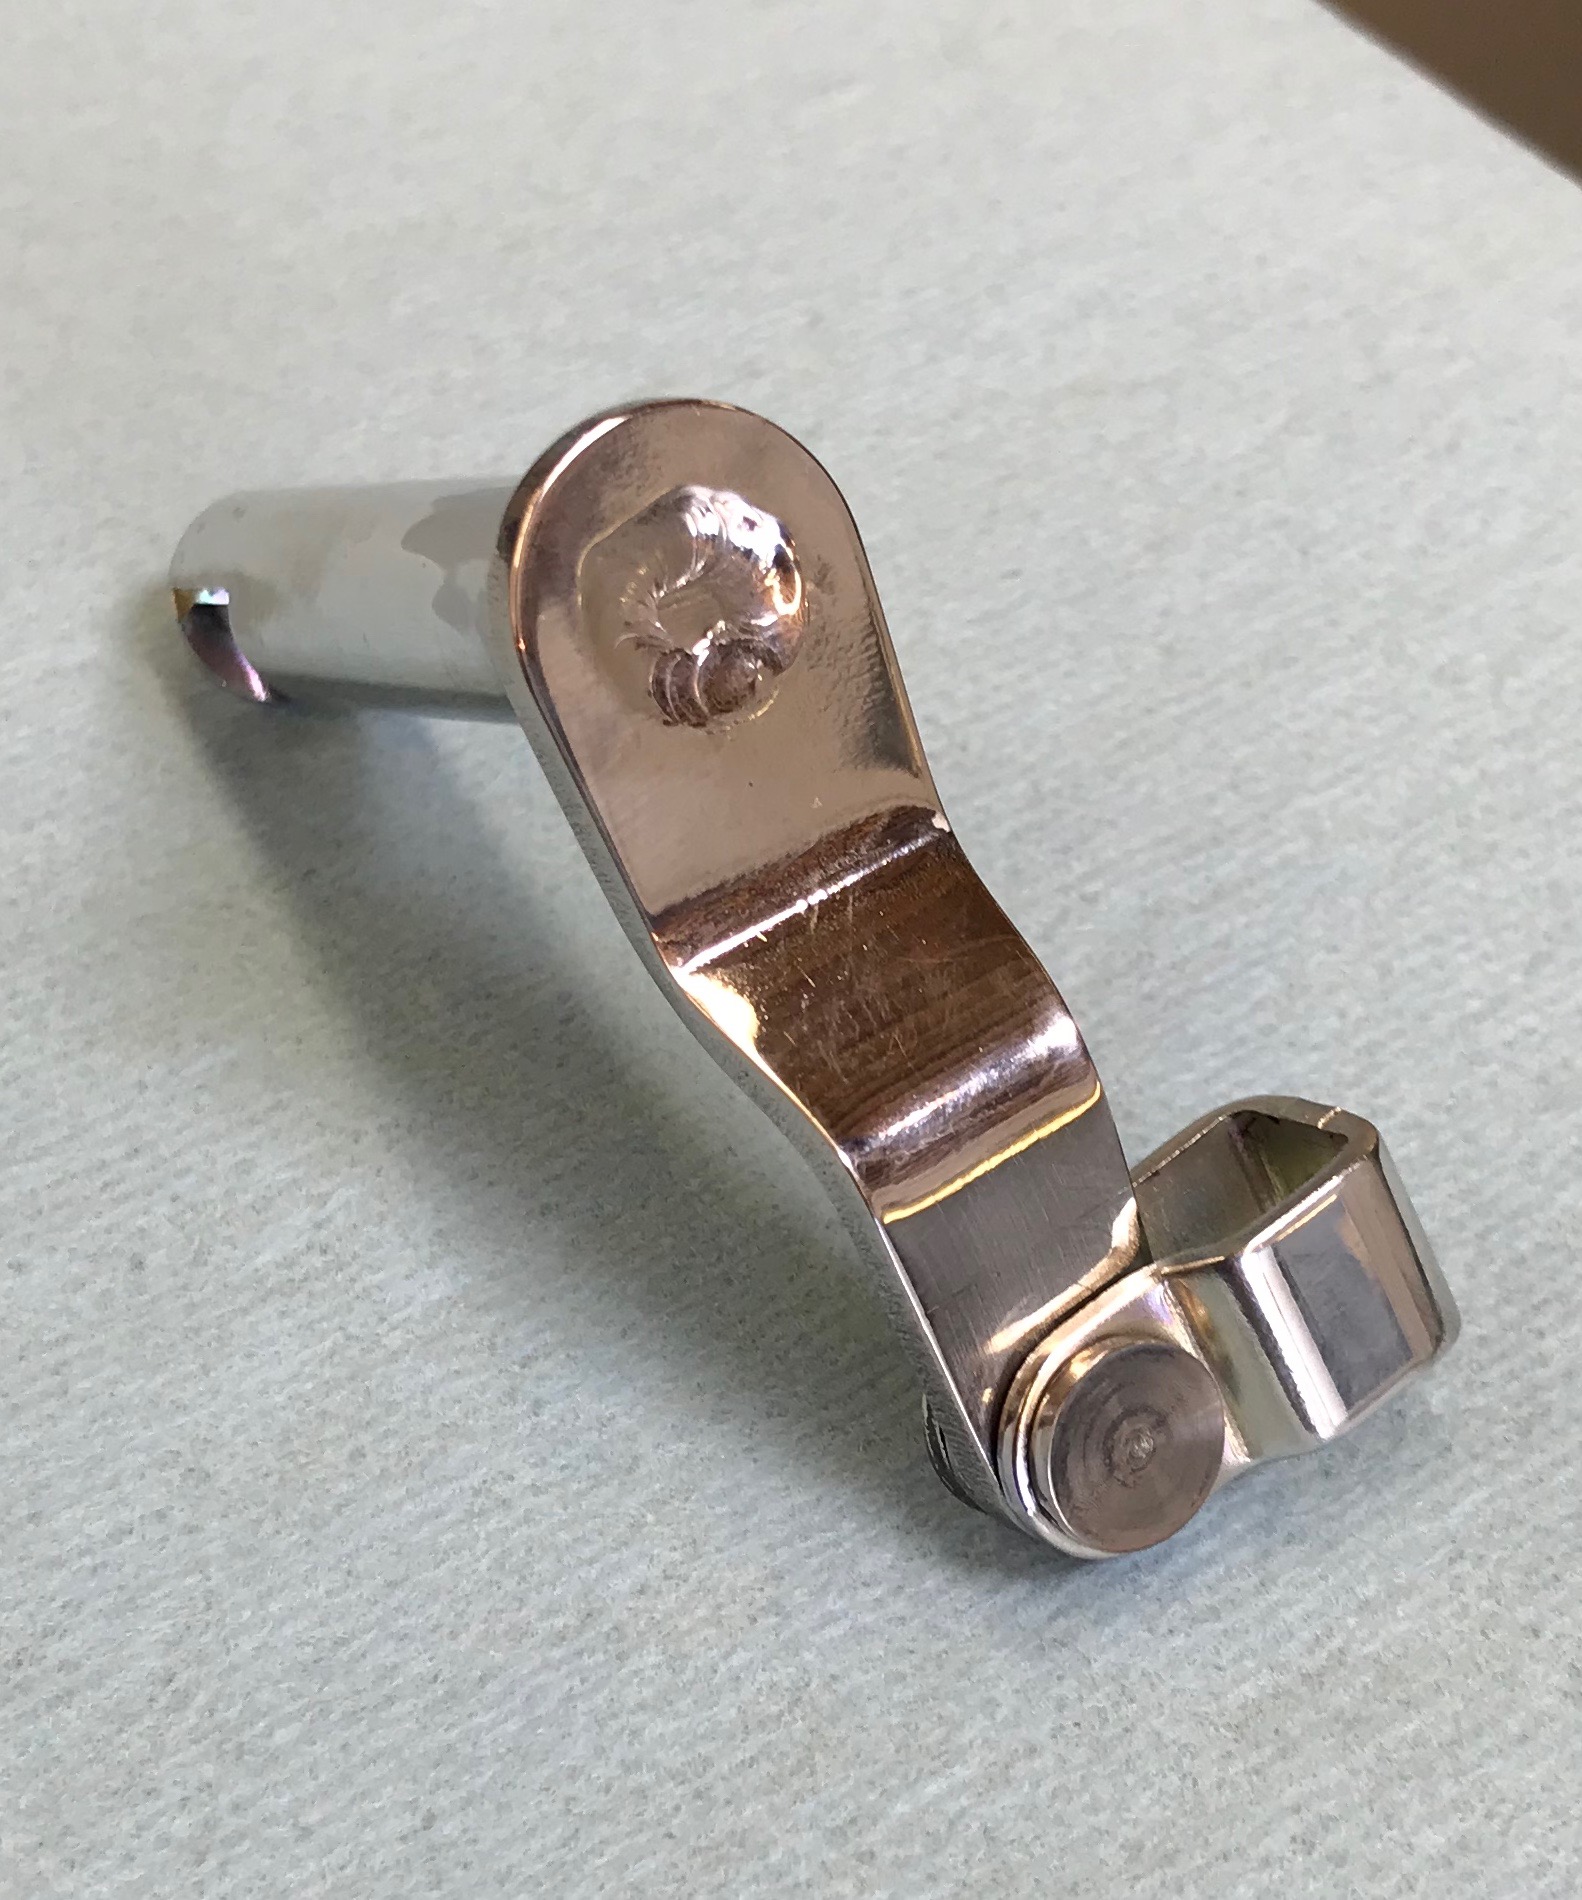
Chad at XPR Motorsports has hand made his own special longer clutch arm that helps the engagement as well as the lever pull. When I was riding for Smartop/Bullfrog Spas/MotoConcepts Honda this year Chad asked me if I had a problem with the engagement/lever pull and I immediately said “yes, I do”. With Chad’s longer clutch arm the engagement point immediately became wider, which left me with a more linear feel when slipping the clutch out of corners or when performing starts. The longer/wider engagement gave me increased rear wheel traction and smoothed out the on/off feel of the stock clutch engagement. When feeding the clutch lever out I noticed that the Honda CRF450R wasn’t as jumpy or surged when rolling my corners. The next improvement was lever feel. With XPR’s longer clutch arm the clutch lever pull is twice as easy to pull in and actually lets me use one finger on the clutch. The stock pull on the CRF450R is atrocious and makes putting in longer motos hard on my left hand/arm. This longer clutch arm makes the lever pull easier as well as smoother.

IMG_5400.jpg

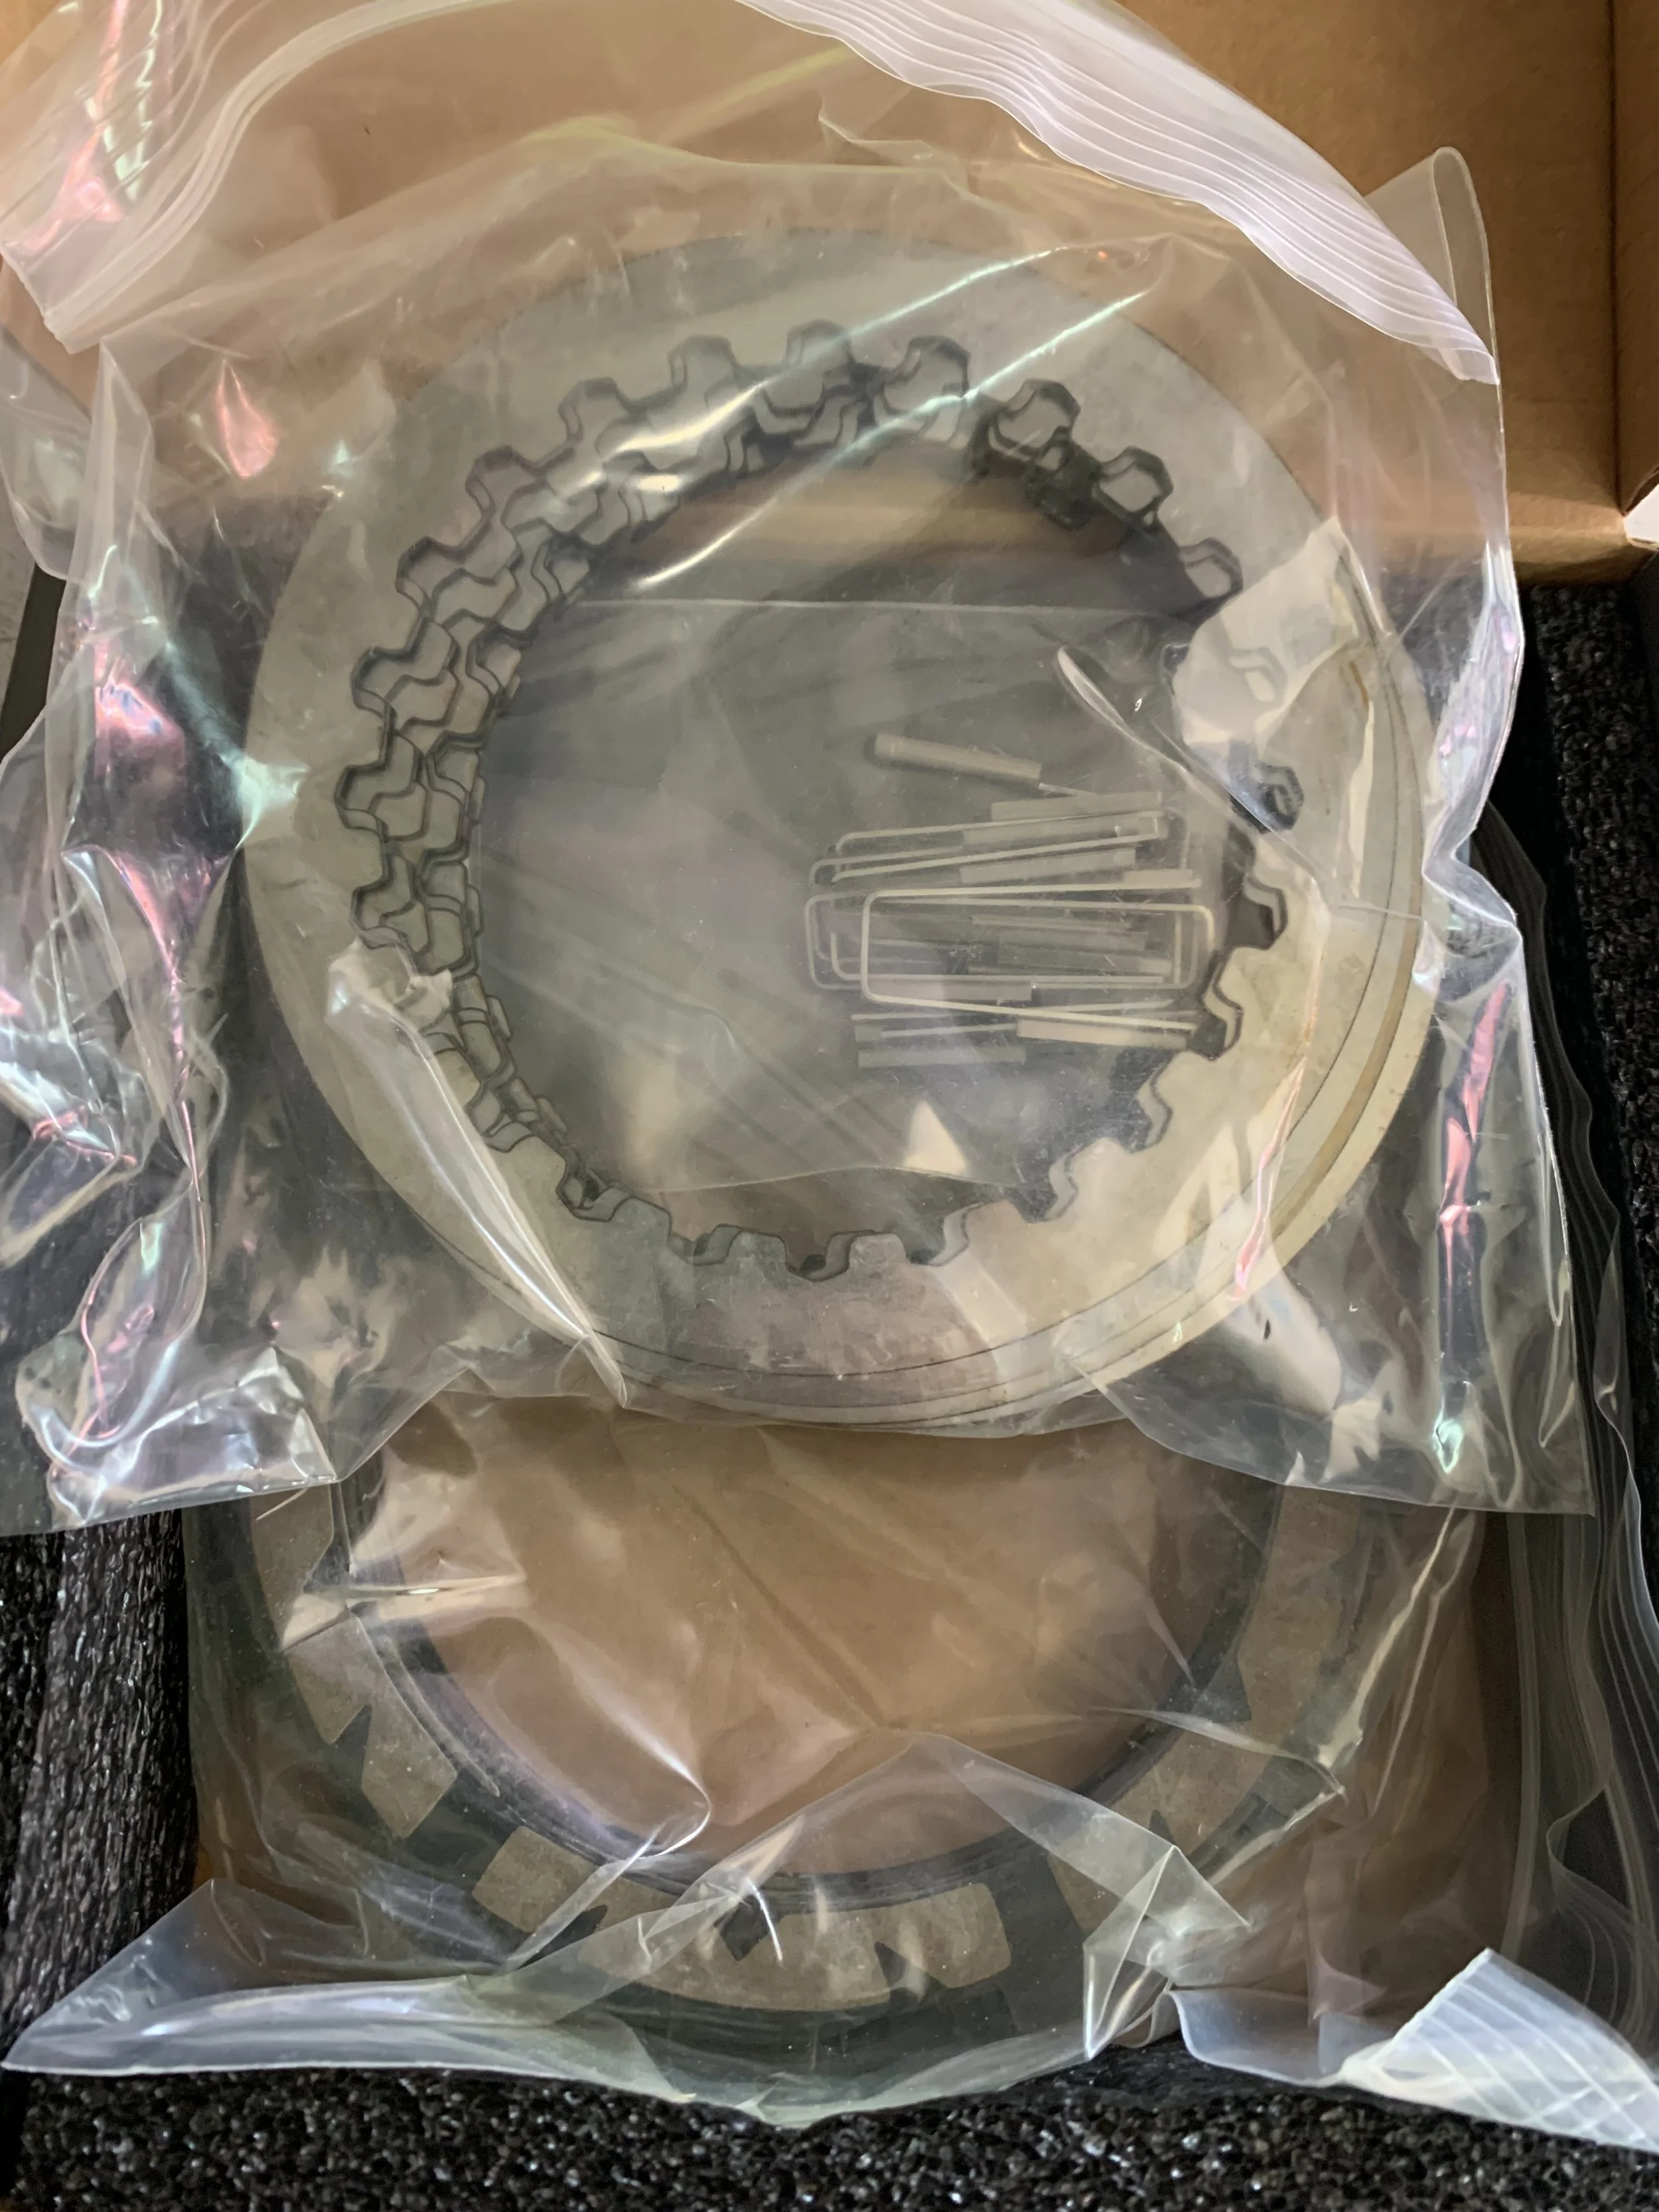
Fix #2 Rekluse Torque Drive Clutch Pack: Rekluse offers a clutch pack (fibers, steels, springs) that replaces your OEM clutch plates and adds additional discs to your existing OEM clutch basket. It’s as easy as swapping your clutch plates into your OEM components. The TorqDrive thin friction disk technology allows more disks to fit in your OEM clutch’s footprint, decreasing slip and unlocking the full power of that Honda CRF450R engine. Once I installed the Rekluse system the clutch life of the CRF450R went up as well as rear wheel control on hard pack surfaces. The combination of the XPR clutch arm as well as this Rekluse clutch pack allows the Honda hook up better and gives me added control where the Honda needed it most, accelerating out of rough/choppy corners.

These two modifications are simple and really improved the way the Honda behaves on the track. Honda is one of my favorite bikes to ride, but it can wear me out too quick when in stock form. These two mods don’t sound like much, but helps the control factor huge for me. Hopefully it can for you as well.

You can get the clutch arm by calling Chad at XPR Motorsports at 951-813-8873.

The Rekluse Torque Drive Clutch Pack is available over on www.rekluse.com


Dunlop MX53 Tire Review

Dunlop recently introduced their new MX53 intermediate to hard terrain tires last week to the media at Perris Raceway. I was excited about the new tire from Dunlop because quite frankly there hasn't been an intermediate to hard terrain tire that I have been over the moon about in a very long time. I usually am stuck with running a soft to intermediate tire at most tracks, but that always isn't the best decision once second motos roll around. I have been able to ride with the new Dunlop MX53 tires at more than five different tracks, with several types of soil, over the span of seven days. I have put almost 10 engine hours on the tires as well as experimented with air pressure settings. Here is what I know about the new Dunlop MX53 tires.

GEOMAX_MX53_FRONT_MED.png

Tread Pattern (From Dunlop):

Front Tire: Dunlop has introduced a horseshoe shaped cluster of knobs to the front tire of the MX53. This horseshoe pattern acts as a giant claw to dig into the ground in order to try and give the rider more traction on hard-packed terrain as well as maximize braking grip. This bold new pattern features hollowed out portions of the center of the tread. The hollow area of this horseshoe cluster results in less stiffness in the center of the tire, in order to give riders better feedback and more compliance. The MX53 also has a taller profile than the previous MX52, providing gentler handling, a higher lean angle and better maneuverability. Additionally, each of the blocks are 1 mm higher than the MX52. This extra height is crucial in allowing the MX53 to perform better in intermediate terrains than the MX52 ever did.

GEOMAX_MX53_REAR_TREAD_MED.png

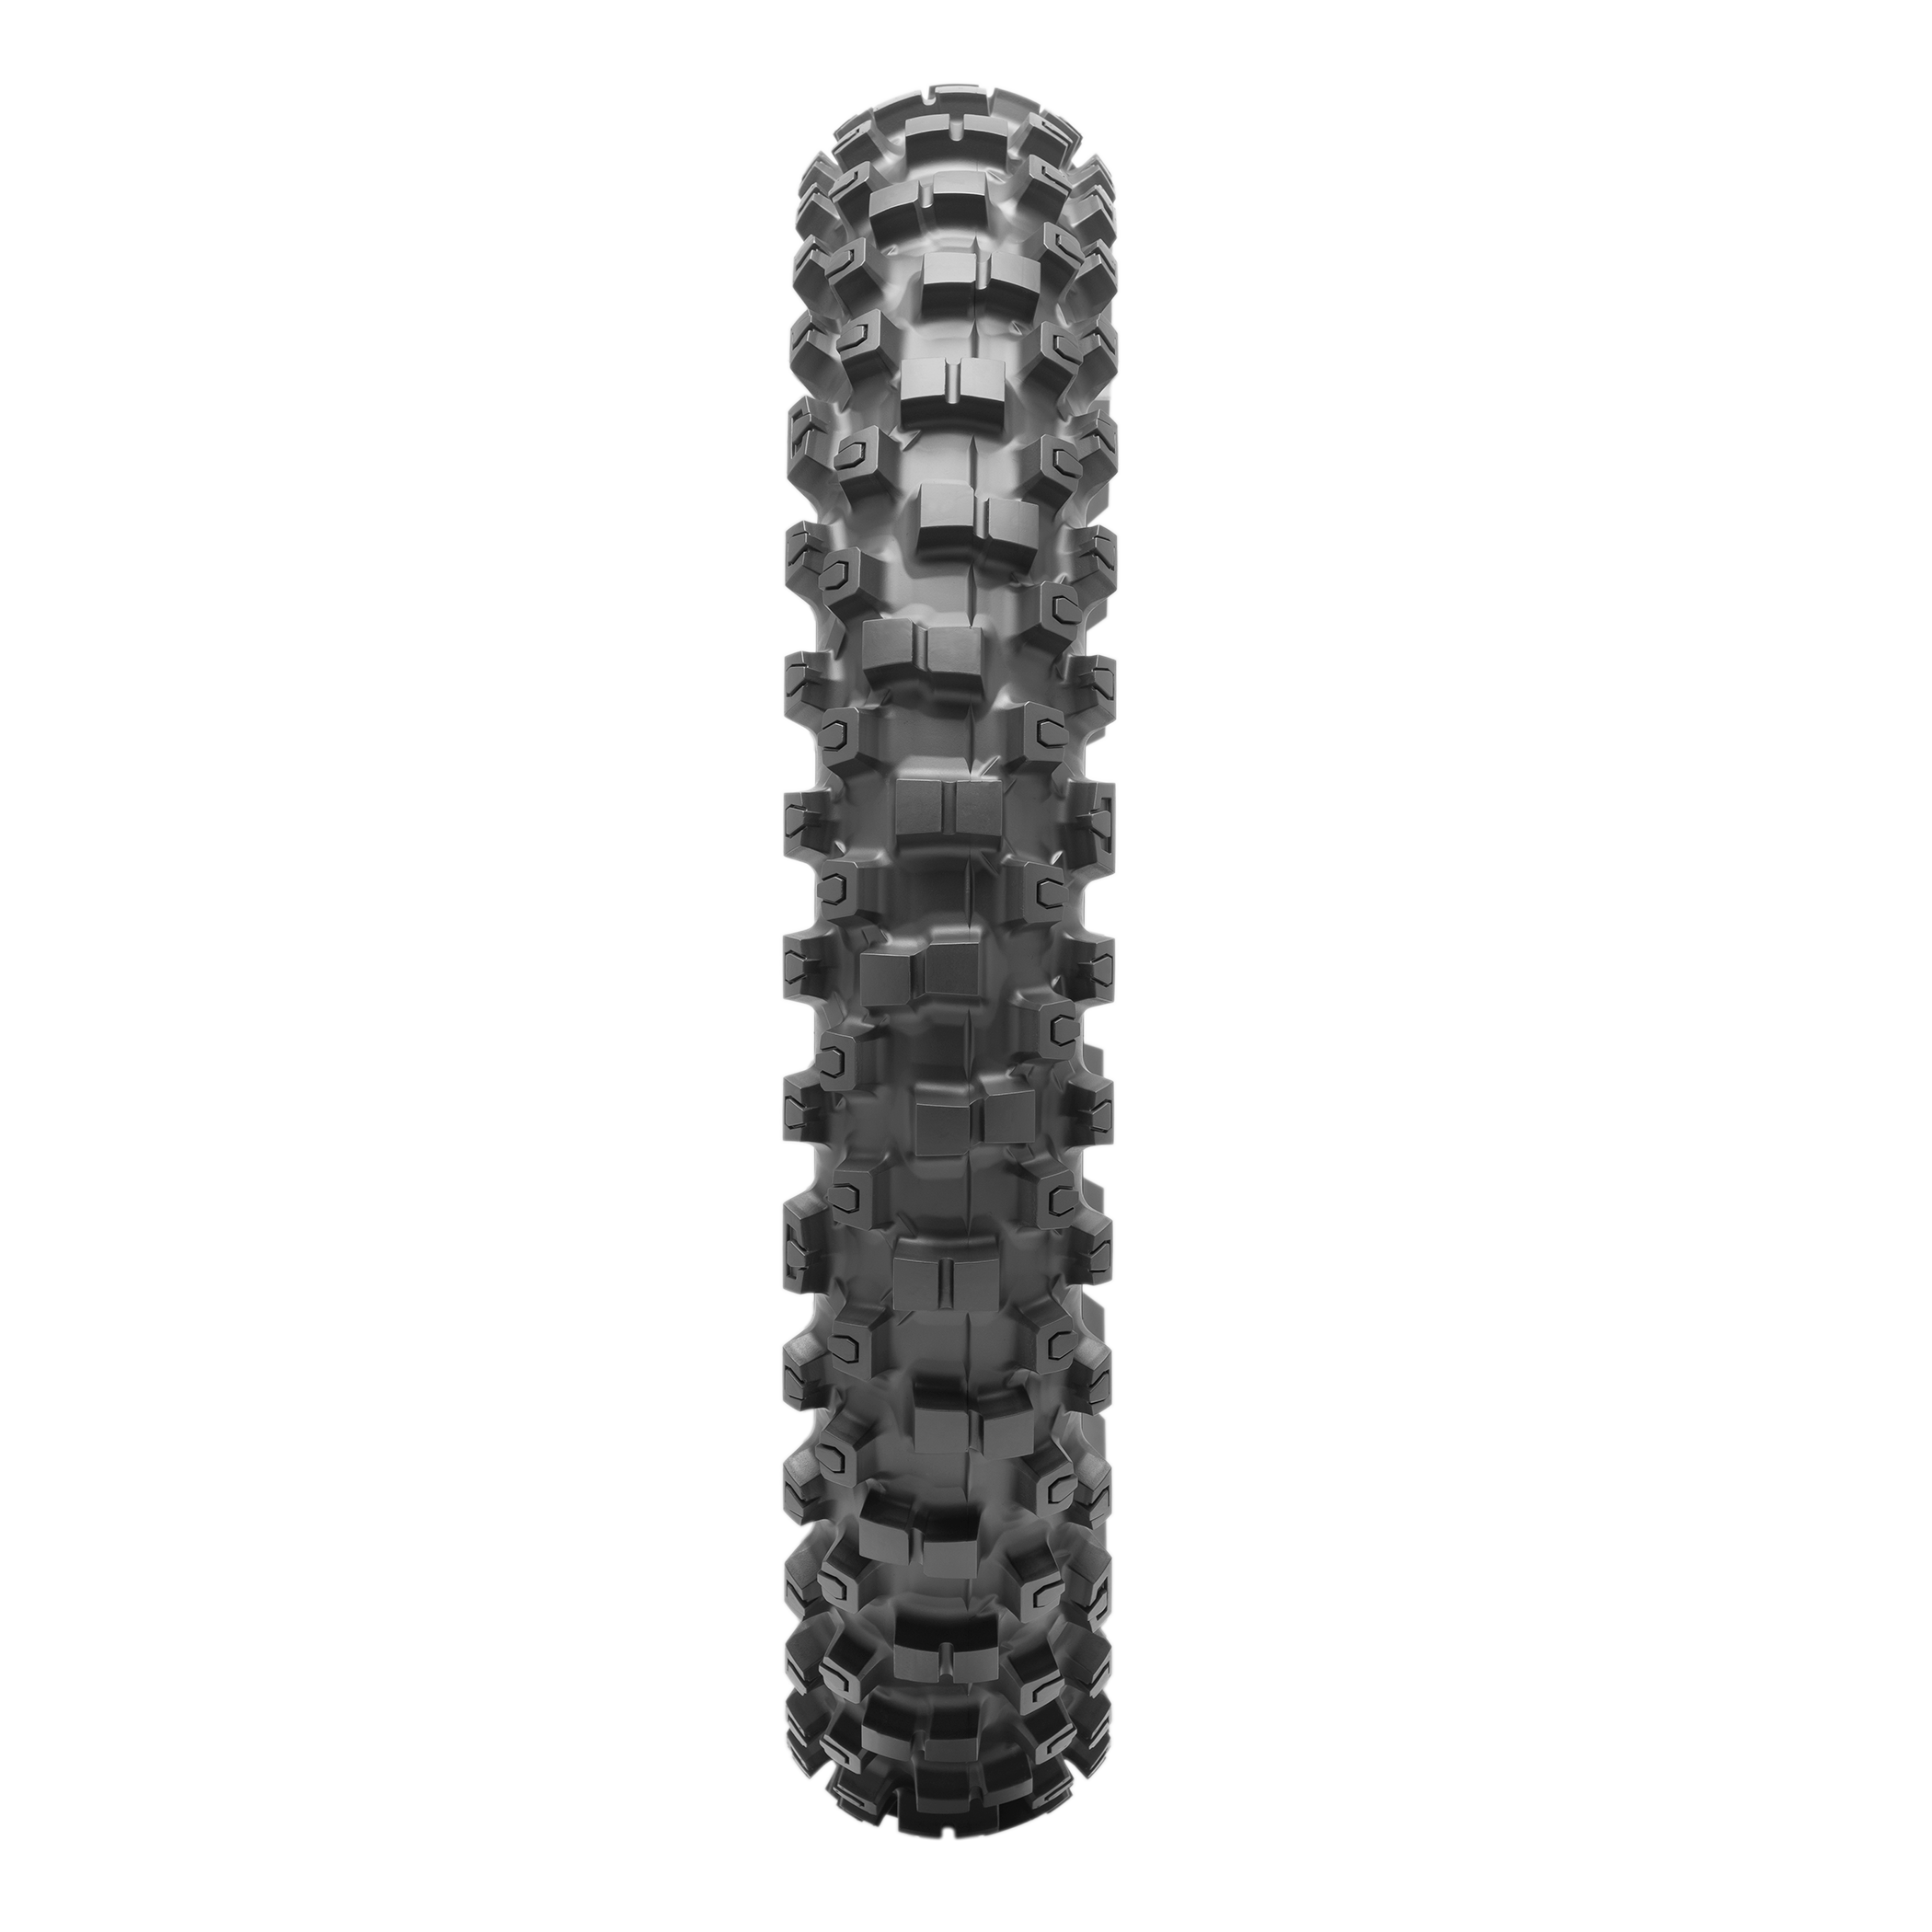
Rear Tire: The rear tire enhancements include a reemergence of Dunlop’s Tornado Wave block distribution. The staggered placement of the rear tire blocks provide a more linear land ratio for a better ride compliance. The consistent placement of knobs along the shoulder of the tire increases confidence at greater lean angles. However, the interior blocks have more separation, which allows loose soil from softer terrains to clear the spaces more easily, while also exposing more surface area of the knobs to the dirt when more traction is needed for harder surfaces 


Progressive Cornering Block Technology:

Dunlop’s patented Progressive Cornering Block Technology has become an industry standard. A smaller block within the traditional knob, commonly known as Block-In-A-Block, has been incorporated into Dunlop’s rear off-road tires for many generations of tire patterns. Dunlop continues to raise the bar by evolving this traditional block into altered shapes to increase durability and tire performance. 

Block-In-A-Block: The new Geomax MX53 now also features Dunlop’s patented Block-In-A-Block technology on the front tire, which allows enhanced flex on each knob resulting in ultimate grip and even more biting edges. The tie bars connecting the base of the knobs add heightened durability to enhance performance in harder terrains. The individual flex of each knob improves linear tracking and aids in steering, as the block can now flex around various terrain elements. 

The Block-In-A-Block technology in the rear tire incorporates the Diamond Block design that was introduced with great success on the MX33. The diamond shape of this altered knob increases the surface area of the block, enhancing stability and slide control. Two additional angles increase the number of biting edges to dig into the dirt. The updated Block-In-A-Block shape has also been added to the rear tire along the shoulder. This wider knob provides a steady base to maximize traction along the outer edge of the tire’s surface.The compound for the MX53 tires has a higher number of molecular polymer particles. This results in a higher fracture strength, meaning more durability. Dunlop has also added more fine carbon particles. The carbon par-ticles are responsible for grip.

Construction: In the construction process of the MX53, Dunlop has added Advanced Apex Design technology. This component of the tire’s construction is present in both the front and rear tire. The Apex of the tire previously consisted of a small strip of material wrapped around the apex of the bead. By extending this apex further into the tire’s natural construction, Dunlop is able to increase ride compliance by spreading the forces of weight on the tire across the breadth of the profile. Distributing the force in this manner increases bump absorption and allows more flex and better ride compliance. Incorporating this element strikes a perfect balance between a plush ride and a firm feel. 

IMG_5255.JPG

On The Track: I managed to ride five different types of tracks and I will be completely honest here; I came away with a more positive outlook on these tires than after the first day of testing, at Perris Raceway. As you may or may not know I am a front end steering type of rider and I am not a fan of the Dunlop MX33 or MX52 front tires at alI. I am a picky SOB when it comes to front tires!! I was forced to purchase any remaining MX3S front tires that were available and mix matched my way around Southern California with different front to back tread patterns. 

The Dunlop MX53 front tire impressed me on the first day of testing, but it wasn't until after day two (at Glen Helen) that I realized that I could actually like an intermediate to hard terrain front tire better than a soft terrain front. The MX53 front tire lean angle traction inspires confidence in terrain that is anywhere between soft-hard pack. In pure sand conditions the front end is a little loose feeling on entrance of corners, but if the track is still fresh in the morning with tilled up loam, the front tire tracks very well. I can predict where the side of the MX53 will break loose, how much I am able to lean through corners, and that feeling never waivers throughout the course of any day. Unlike the other MX33/52 compounds where they washed unexpectedly on initial lean, the MX53 bites and give the rider predictability. Another positive aspect to the MX53 is lack of front tire sliding when braking. Grabbing a handful of front brake (lean angle or straight line) into a corner leaves the rider with a sensation of a more contact patch feel that is wider than any other Dunlop I have tried to date (especially on lean angle braking).

Flat corners (while on throttle) or medium lean angle sweepers gives me a more secure/planted feel than a MX33 or MX52 and doesn't leave me with a feel of washing the front end out. As much as I love the MX3S front tire, even that tire isn't as good in this area of the track. The carcass of the front MX53 tire also has enough cushion to where it doesn't make your front end feel harsh on braking bumps like the MX33 can do at times on intermediate/hard pack tracks. For as much time as I have on the front tire the reliability also seems to be better than the MX3S, but I will continue to put more time on the tire to see where its “breaking” point is. The overall integrity/feel of the tire still remains intact with almost 10 hours on it. The only real negative I have found to this tire is the air pressure setting is crucial, so running a 13.5 air pressure setting is the number you will need to achieve. Going higher in air pressure will leave you with less lean angle grip on dry/wet slick surfaces and going lower will leave you with a carcass that is extremely soft feeling on braking bumps. 

dunlop mx53-7244.jpg

I am not as picky when it comes to a rear tire, but the MX53 rear tire has a narrower “terrain window” than the front tire. However, it’s still impressive on intermediate-hard terrain, it just doesn’t have much forward bite or tracking when the track has deep sand sections. If the track is softer in nature the rear tire doesn't bite into the ground as good as the front does, so if you're a rear end steering rider you may want to stick with a MX33 in softer stuff. The MX53 has a comfortable carcass feel on square edge and braking bumps, but just know 13.5 or even 14 psi is recommended. I tried Dunlop’s recommendation of 12.5, but found myself feeling the tire squish too much on the rim on acceleration bumps. When it comes to entering shallow hard pack ruts I have yet to feel anything better than a MX53 in this area of the track. The rear end tracks into the ruts superbly with a positive lean angle and lets you get on the gas earlier because the rear end of the bike feels planted sooner. Another area I gave the MX53 high marks was under braking. When braking into corners there was much less slide with the MX53 than the MX33 and that really helps when you’re asking your motorcycle for traction/bite when diving hard into a corner.

If you're a rear end steering rider, having a rear tire that slides a little more under braking might be better for you, so look into a MX33 if you’re that type of rider. Just like the front tire, being on the gas while under a medium lean angle suits the MX53 rear tire. The contact patch that the rear tire lays down for you is better than any other intermediate to hard pack terrain tire I have tried as well as allows for a more controlled scrub up faces of dry/hard pack jumps. The rear end will not want to wash as quickly up the faces of jump when leaning, which can allow for a lower trajectory. With almost 10 hours on the rear tire, its performance hasn't dwindled a huge amount and is consistent enough for me to continue to put time on it. 

On wet/slick track conditions (think hard pack with water on top) the MX53 front/rear tires fling sticky mud out from in between the knobs well enough for me to be fairly aggressive, but just note that I have yet to find a production tire that works extremely well in that type of condition. Overall, these Dunlop MX53 tires have changed my outlook on running an intermediate to hard terrain tire on a wide variety of tracks. Having a tire that is consistent enough to run in the early morning motos as well as the late afternoon motos is tough to do, but Dunlop has done a good job with providing us a tire that is capable of doing this. 


Forecasting Questions: Before my email inbox blows up with MX53 questions, let me answer some that may come through the pipeline. 

Kris, what do you like better? The MX3S or MX53? As of right now I can stand here and say for California tracks I would like to run the MX53 tires 9 months out of the year. If we get a lot of rain and the tracks are soft I will run a MX3S front and MX33 rear. If you’re an east coaster and ride soft conditions I would run a MX3S front and a MX11 rear. 

Kris, what about durability? Will these knobs chunk off? At the 10 hour mark these MX53 knobs haven't chunked off. The MX3S knobs have chunked on me around this time, but you have to know what type of tire buyer you are. Are you a performance or durability based tire purchaser? It is extremely difficult to get both of these into one tire. For me I would rather take a 10-12 hour tire that has excellent grip than a 20 hour tire that has low grip/high. However, not everyone is like me, so if you’re a weekend warrior and do not care about performance as much, but want more durability, then you might want to look into a cheaper tire manufacturer price bracket. 

Kris, what sizes do the MX53 tires come in? Dunlop offers the MX53 for all size bike ranging from 50cc-450cc including 18 inch sizes for you off-road guys. 


If you have any more questions about the Dunlop MX53 tires or even the MX3S front tire that is making its way back into production, please feel free to email at kris@keeferinctesting.com


FMF 4.1 RCT Muffler With SX Style Megabomb Headpipe (2020 KX450)

The Kawasaki KX450 was the most improved 450 machine of 2019 and with Kawasaki not changing anything on the 2020 KX450, I wanted to test some new aftermarket parts to see if I could improve on what I already knew from last year’s machine. I knew FMF had two headpipes available for the KX450, but until recently I wasn't able to try it. The SX Style headpipe comes down like a “lowboy” headpipe and increases the length in order to shift the power character around. So what exactly did the “SX Style” headpipe do to the KX450 and how is it compared to the MX Style headpipe? First let us tell you about the stock KX450’s power character. 

IMG_4840.jpg

The stock power curve of the 2020 KX450 engine has a snappy throttle response from 0-10% throttle opening (with a free feel to it) and at times can almost be too touchy through corners with the standard green coupler installed. Once rolling on the throttle and passed the corner, the power is not quite as strong as the Honda or Yamaha, but still creates an easy to ride power feel on the track. I didn't necessarily need more rpm response with the 2019 KX450, but I would be lying if I said I couldn't use more bottom and mid range puling power when coming out of corners. If you go back and read my review of the MX Style FMF Megabomb headpipe with 4.1 muffler from 2019 (https://www.keeferinctesting.com/offroad-testing/2018/8/14/fmf-41-rct-titanium-muffler-system-2019-kawasaki-kx450) you will read that the MX Style Megabomb smoothed out the low end power delivery more than the stock muffler system did, but had more mid range meat, which was noticeable immediately. In a perfect world, I would love to get more of that newfound mid-range “meat” (that the MX Style and FMF 4.1muffler system brings) and shift some of it towards the bottom end. This is why my curiosity lead me to this FMF “SX Style” headpipe.  

IMG_4921.jpg

As far as bolting on the complete system, it really is a painless install. The 2020 Kawasaki is the lightest Japanese bike in stock form, but when FMF sent me the full titanium system, I was surprised it dropped the Kawasaki’s weight by 2.4 pounds! Also this is just my opinion, but the titanium FMF 4.1 system is one of the most stunning aftermarket mufflers you can put on any bike. I love the blue anodized finish against the green plastic and it makes the whole bike pop more!


Comparing The FMF SX Style Headpipe To The MX Style FMF Megabomb Headpipe:


So how do the two headpipes with the FMF 4.1 RCT muffler compare to each other on the track? The SX Style headpipe, along with the 4.1 RCT muffler made the KX450 feel more playful out of corners than the MX style megabomb that I tried on the 2019. The low end RPM response (0-10% throttle opening) was slightly less with the SX Style headpipe (without the muffler insert), but now the KX450 had slightly more bottom end pulling power without sacrificing that extra mid-range that I liked so much from the MX Style Megabomb headpipe/4.1 muffler system. You will get slightly less pulling power on top end/length with the SX Style headpipe, but to me it was a minimal loss. Some less sensitive riders may not feel the loss of top end pull with the SX Style headpipe, but it’s something that should be noted. I prefer the SX Style headpipe on most motocross tracks simply because the KX450 pulls harder out of corners and I can shift to third gear sooner with the SX Style headpipe. 

Insert in…

Insert in…

You want to know a tip? Don’t throw out that insert that comes with your FMF 4.1 muffler system! Why? Because I actually liked the SX Style headpipe/4.1 muffler system better with the insert in. Why? Because it gave the muffler some added back pressure and gave me some added RPM response without sacrificing a lot of mid range pulling power. With the insert in the muffler, the KX450 now has increased (0-10% throttle opening) low RPM throttle response that I was missing through mid corner and had better corner exiting power. With the insert in you also will get more connection to the rear wheel and more traction when the track gets firmer. The sound of the 4.1 muffler with the insert in is also more pleasant and isn't as loud as the larger opening of the FMF 4.1. NOTE: Not all bikes respond to inserts/back pressure the same so just know that each bike is different. If you feel like you may need a little more low end throttle response from your FMF 4.1 muffler system, try the insert.  

22BC37C5-0CAB-4D3B-82DA-7CDA704BF255.JPG

 It’s tough to get more horsepower, added connectivity, as well as an overall better engine character than what a stock exhaust can give, but FMF did a good job with the 2020 Kawasaki KX450 SX Style headpipe/4.1 RCT muffler. It retained the stock system’s low end RPM response, while getting some added bottom end pulling power, as well as mid range meat coming out of corners. In order to get the SX Style headpipe when you order, you must order the SX Style headpipe separate and use the 4.1 RCT slip on. If you order the full factory 4.1 RCT system you will be getting the MX Style headpipe. The SX Style headpipe costs $349.99 and the 4.1 RCT slip on will run you $549.99. The FMF 4.1 RCT muffler also comes with a mounting bracket for the subframe tab to ensure that the tab will not break or crack. Overall, I think this is a good upgrade to your 2019-2020 K450. 

If you have any questions about this test please feel free to contact me at kris@keeferinctesting.com. I can guide you through any questions you may have. 


Ride Engineering Axle/Axle Block Kit For KTM/Husqvarna

KTM/Husqvarna uses an axle that resembles a bolt with a nut on one end. Although it’s nice not to have to mess with the left side axle block when putting in the axle through the swingarm, it’s not so friendly on the rear end of the bike while you're riding. Why? Because when you’re heavy on the throttle coming out of corners the rear end of your machine will squat under load putting force on the axle/axle blocks that sometimes can make the shock feel rigid and harsh. If the axle blocks can’t semi float (when hitting bumps under throttle) there will be some added rigidity put on the swingarm. Although crazy to think about little things like this can make a noticeable difference with the handling of your machine. 

KT-BAB00-GE.jpg

Ride Engineering makes a KTM/Husqvarna axle/axle block kit that eliminates the one-piece axle/axle block on the KTM/Husqvarna. Instead, it uses a Honda CRF450R rear axle combined with special CNC-machined axle blocks that slip into the KTM/Husqvarna swingarm. However, you will need the special axle blocks to properly space the borrowed Honda axle. The Ride Engineering axle blocks retail for $54.95, and they offer Honda rear axles for $44.95, but how do they work? 

MX-AXL25-KT.jpg

I am not going to sit here and blow smoke up your asses and say everyone that has a KTM/Husqvarna are going to feel this modification. Could I feel the difference when going back to back with the stock axle/Ride Engineering axle block kit? Yes, I could, but to me I only could feel it when coming out of corners with square edge as well as fast choppy conditions. After installing the Ride Engineering kit the rear of the bike felt more compliant and had less spike/harsh feel. I could feel more rear wheel traction immediately out of corners as the rear of the KTM/Husqvarna stayed straighter under throttle. I also felt like I could stiffen up my shock’s low speed compression because I had a free-er feel to the rear of the bike under load. To me a modification like this is worth it because I can actually feel more comfort. I had some of my less sensitive test riders help me with this test and one of them couldn't feel a thing, so installing the Ride Engineering Axle Block Kit should be based on how sensitive of a rider you are. 

IMG_1569.JPG

The Ride Engineering Axle/Axle Block Kit does not add weight to the machine and in fact weighs a couple grams less than the KTM/Husqvarna axle, just in case you’re on a diet and counting your grams. The Ride Engineering axle blocks themselves come in black or orange and have a unique design that allows easy chain alignment with tabs that have markings that can be easily seen and measured off the end of the swingarm. The blocks are also 2mm shorter than stock for more gearing options.  

If you’re a sensitive rider and can feel your way around a motorcycle fairly well this Ride Engineering axle/axle block kit is a great way to get more connection out of your orange or white ride. Head over to Ride-Engineering.com to check them out. 

MX V2 ODI Lock On Half Waffle Grips 


Lock on grips are all the rage right now. I mean I get it, they're fairly inexpensive, easy to install, and takes literally a minute to install fresh grips and immediately go ride. I have been kind of old school in my “grip ways”, but thought I would test the ODI V2 Lock On Grips to let you all in on how they perform, fit, feel, and last. 

IMG_4063.jpg

The V2 grip is designed with a low-profile pyramid pattern and a custom-designed half-waffle pattern that eliminates the inside corner where other grips may irritate your hands. Since you don’t need to glue or wire the grips in place, a lock-on grip can be installed in less than a minute (and riders who destroy their handlebars at the races can change to new bars without waiting for grip glue to dry). I do really like this feature of the lock-on grips, but at times I didn't like the rigid feel that the left side gave me (more on that later). I also liked that when you tip over, the grips didn’t rip nearly as easy, and it kept dirt from getting inside your handlebars.

Throttle cams are interchangeable on the V2 ODI Lock On Grips

Throttle cams are interchangeable on the V2 ODI Lock On Grips

Installing the clutch-side grip is simple. Slip the grip’s plastic tube onto the bar and tighten a single Allen bolt. Note: The clutch-side grip only has a pinch-bolt on the inside end. The benefit is that there is no hard aluminum clamp on the outer edge which leaves a cleaner look. I will say that if you're installing ODI Lock On’s onto new handlebars with knurling on the left side, you may have to sand down the knurling a little in order to be able to get the grip’s tube to slide over the handlebar.

IMG_4051.JPG

Don’t think of the ODI V2 throttle side as just a grip, because it’s actually a plastic throttle tube with a grip molded on. ODI makes a throttle tube that accepts a variety of interchangeable throttle-cable cams. ODI makes different cams for most two-stroke and four-stroke models and you’re able to interchange the throttle cams if necessary. 

Even thought these are lock on grips and they have the grip molded to the plastic, they don’t feel that big. I can’t stand large feeling grips because they make my arms pump up too quick. I like that each end feels the same and not larger than the other, like some glue on style grips do. I liked the design of the half waffle as well as the super-soft material that wasn’t hard on my hands. You will notice that these grips are slightly shorter than other grips, but it doesn't create an issue with my size 10 (large glove) hands.

The durability of the V2 ODI grips are superb as they will last as long as any other soft half waffle grip on the market that I have tried. My son Aden has had a pair on his KTM 85SX for several months and they are just now starting to show signs of wear from his nervous novice death grip. If you’re a sensitive grip kind of rider you will notice that lock on grips will feel slightly stiffer than regular glue on style grips on slap down landings, braking bumps, and acceleration chop. These are just some things that I feel, but again not everyone is as sensitive to grips like I am. Glue on style grips feel a little more cushy than the lock on’s in those areas. 

For $25.95 the V2 ODI Lock On Grips cost double the amount of money (from glue on grips), but you're getting an easier to install grip that lasts just as long as well as a new throttle tube with every set. KTM and Husqvarna come with V2 ODI Lock On’s and I have found myself replacing worn stock KTM/Husqvarna ODI’s with the same grip because I have grown to like the feel of ODI’s in my hands, on these two machines. 

Any questions about this test feel free to email me at kris@keeferinctesting.com


Works Connection Titan Skid Plate

Written/Tested By Michael Allen:

Any dirt bike (be it off-road or motocross) should come stock with a skid plate. Some people may say that for motocross it’s not necessary to have one because there aren’t big rocks and hazards, but I feel that having a skid plate is cheap insurance for the under carriage of your engine. I’ve had the 2019 YZ 250F for quite a few months now and have felt a little vulnerable at times on the trail and have been sick of pressure washing off baked mud from the bottom of the engine when riding moto. After doing some skid plate research, I reached out to Works Connection to get one of their Titan skid plates to see if it would help my psyche. One of the cool things about Works Connection is that they make three different styles of skid plates for most models. They make an aluminum glide plate, an extended coverage aluminum skid plate, and a composite (like a good plastic) Titan skid plate. Over the past few years I have come to really like composite skid plates because they seem to be quieter than aluminum when roost/rocks hit them and also glance off obstacles smoother than aluminum. When I received the Titan skid plate it came with all the necessary hardware to mount it to the front of the frame (a clamp and bolts) and a bolt to mount it to an existing hole towards the rear. 

IMG_5100.jpg

The rear bolt is very easy to install because the threaded hole is already in the frame, but make sure you do this first because it helps hold the skid plate in place while the front clamp is being installed. Once installed it was clear how much protection this skid plate offers, covering both side cases, the water pump and the lower radiator hose. There are a few drain/breather holes in the bottom of the skid plate so debris doesn’t get stuck between the engine and the skid plate. I have used the Titan skid plate for a couple months now and haven’t had any on track/trail problems; in fact it has come in quite handy on a couple trail rides (with my buddies) that turned into a dick measuring contest up rocky washes. The added coverage is a plus for protection and the fact that the mud doesn’t cake on the engine makes washing the bike that much easier. Work smarter not harder they say, right? Composite skid plates also have more flex than aluminum, which is good because it lets the chassis work as it should when hitting bumps/obstacles.

IMG_5096.jpg

There were only two slight negatives when it came to the Titan skid plate. The first being that the front clamp mount, even when tight, doesn’t hold the skid plate super snug. The bolts bottom out, but the distance between the clamp arms and the skid plate is still slightly too large and lets the skid plate float somewhat (the skid plate is still snug, just not super clamped down). Being that the bolts are tight and the skid plate has nowhere to go, this isn’t an issue with a possible failure, but it was just something I wanted to mention in case you were installing and noticed the same thing. The second small issue was that the top front corner of the skid plate touches the bottom of the right radiator. Once again this isn’t a performance issue, but it was just something I noticed. 

IMG_5097.jpg

With all this information factoring in I think that the Titan skid plate is a great option when it comes to protection. Some people are stuck in the old world of thinking that aluminum is the only option these days, but if I can evolve to composite so can you! With an MSRP of $99.95 the Titan skid plate is a great buy for the quality and the amount of protection it offers you on the track or trail. If you have any questions about the Works Connection Titan skid plate feel free to reach out to me at Michael@keeferinctesting.com.   


Tusk Impact Wheelset (2019 Yamaha YZ450F)

Mounting up some hubs/wheels is one of the first aftermarket modifications riders do to their ride. Do all dirt bikes need aftermarket wheels/hubs? No they don’t, but some can benefit from a beefier wheelset (like the Honda CRF250/450R and Yamaha YZ250/450F), so we decided to try the Tusk Impact wheelset and put some abuse on them to see if they really are a great purchase for your used or new steed. 

IMG_6602.jpg

Yes, this test took a while, but we have put numerous hours on these wheels to see how they would hold up, because quite frankly we don’t want to push something on you if it’s a P.O.S. Tusk’s aluminum hubs are forged from 6061 T-6 aluminum, not cast, and CNC-machined for a quality fit. The Tusk hubs come with high-quality bearings, seals and hard anodized wheel spacers. We have over power washed these areas to see how they have held up and we were surprised that we didn't encounter any issues while testing. The rims are anodized and made from 7075-T6 aluminum. They aren’t the more popular D.I.D. or Takasago rims, but come from a Tusk supplier. The spokes are 3024 stainless steel and are heavier than other spoke choices (more on that in a minute). Tusk wheels come completely assembled and will interchange with the stock OEM wheel components, which is very seamless and nice for the consumer. 

IMG_6603.jpg

Tusk’s Yamaha hubs are anodized blue, but aren't quite that “deep blue” we see on other hubs, which isn't a bad thing, but took sometime to get used to. The hub color is more of a light baby blue that offsets the black rims nicely. Tusk offers all of the colors of the manufacturer carousel so DO NOT worry they have every color for your ride. Yes, the Tusk wheelset is heavier than the standard OEM wheelset on the YZ450F, but if you’re reading this test I assume that weight isn't an issue for you. If you’re looking for a lower cost hub/rim than you shouldn't be looking at weight numbers, but we will give you the difference anyway. The Tusk front wheelset weighs in at 7 pounds 14 ounces and the stock OEM front wheelset weighs in at 7 pounds 11 ounces. NOT A HUGE DIFFERENCE! The Tusk rear wheelset weighs in at 11 pounds 9 ounces and the stock OEM rear wheelset comes in at 10 pounds 10 ounces. NOT THAT HUGE OF A DIFFERENCE. 

IMG_6604.jpg

So how do they work on the track? Installing aftermarket wheelsets can change a bike’s character on the track. Some wheelsets can make a bike feel rigid and stiff, especially on slap down landings and on braking bumps. I DO NOT use Excel A-60 rims/Talon hubs because of the rigidity on square edge and braking bumps. These hubs immediately change any bikes handing character. The Tusk hub/rims are only slightly more rigid feeling than that of the stock Yamaha hubs/rims and DO NOT give me that harsh feeling on the track. Yes, it’s slightly firmer than the OEM hub/rims, but they aren’t so stiff that I wanted to take them off ASAP. If you’re purchasing these, give yourself a couple rides to adjust to them, but I am sure you will get acquainted fairly quickly. If they do feel slightly harsher than your stock wheelset try speeding up your rebound on your fork and shock 1-2 clicks to see if that helps. Trust me, it helps in almost every condition with stiffer wheelsets. This allows the wheel to follow the ground better and absorb some of that new found firmness of the hub/rim. 

IMG_6599.jpg

Rear.

Front.

Front.

So how did they hold up? Look… You can count on two things… I am a hard ass when it comes to wheels and clutches. These Tusk hubs/wheels have held up surprisingly well for a lower price point wheelset. The spokes needed to be checked after every ride for the first couple weeks of riding, but after that I didn't have to fuss with them that much. You especially need to keep an eye on the spokes closest to the rim lock, so if you’re lazy (which some of you are) and you don’t want to go around the complete wheel, use the first few spokes as a guide to judge if the others might be loose. In other words if the ones closest to the rim lock are loose then check the whole damn wheel! After almost 30 hours the rim did get a couple whoops in them, but nothing that warranted me to get a new wheel laced up. You know that feeling (when you’re in the air) and your wheel is bouncing around because it has a couple good whacks to it? Yeah, that feeling never happened to me over the course of this test. Good news! The anodizing will fade over time so be forewarned that if you use harsh chemicals like Simple Green or 409 to wash your machine, the hubs will discolor somewhat. I usually use Bike Wash from Blud Lubricants or Slick Products because they are less harsh on our bikes. 

So is the Tusk Wheelset worst it? If you’re looking for another set of wheels that you can take to the track (in case of a flat) for a spare, want a set of practice wheels, or just looking to freshen up your older machine with some bling, the Tusk Wheelset is a great choice. Are these the wheels that I would take to a Supercross? Not necessarily, but for 98% of us they are plenty strong enough. For $549.99 a set, this Tusk wheelset is a really good choice for the working man that loves to go rip on the weekends, wants to look cool, or maybe just wants a back up set so he doesn't have to change a tube/tire at the track between motos. 


I also understand that some people on my social media page say they have had bad luck with these wheels. I understand there is an exception to every evaluation, but I have put in a ton of hard hours on these and have seen zero failures on my end. This doesn't mean that this product is 100% bulletproof, but I would have zero issues riding with these wheels and or recommending these to all of you. If you have any questions about this test or product please feel free to email me at kris@keeferinctesting.com. You can order the Tusk wheelset at rockymountainatvmc.com and choose from an array of sizes and colors

X-Trig Rocs Pro Clamps (2019 Honda CRF450R)

I have been getting ready for the first two AMA outdoor nationals and knew that I was going to be running an aftermarket triple clamps and those clamps would be X-Trig. Since my practice bike was my test bike, I thought it would be beneficial to get a set of X-Trig clamps to ride/test with to make sure I could get the “feel” of an aftermarket triple clamp, since I am so used to riding with the stock clamps on the 2019 Honda CRF450R. Like I have spoken about before, it’s tough to find aftermarket triple clamps that perform better than stock these days. So much R&D is involved (at the OEM level) in making a triple clamp that flexes enough, but also has enough rigidity to aid the machine under load/through corners as well. With the triple clamp flex character so important to each specific chassis (on all motocross bikes) sometimes it’s tough to find anyone that can make a “comfortable” set of aftermarket triple clamps. Why do you need aftermarket triple clamps? Well sometimes it’s just for looks with some riders, but there are occasions where you might want another offset to help you get more stability or a sharper turning character out of your machine. In this case I was simply wanting to make sure that I wouldn't be trading comfort for stiffness on the Honda CRF450R somewhat finicky chassis setting.

IMG_6465.jpg

Enter X-trig’s ROCS Tech Triple Clamps and PHDS Mounts. “ROCS” stands for “Revolutionary Opposing Clamp System”. The ROCS clamp allows for precise alignment of the fork tube with opposing clamping surface patterns, the stiffness of the steering stem is specifically tuned to the respective motorcycle model, the steering-head bearing is already mounted on the shaft tube for convenience, a special fork slot and clamping area for precise fork operation, precise clamping with special screws for low torque specs, OEM attachments can be mounted without auxiliary material, and flexibility that is adapted to the fork with anodizing in the technical factory OEM look. The difference between the ROCS “Tech” and the ROCS “Pro” is the “Tech” uses a standard offset with a pressed shaft tube. The “Pro” has two offsets you can choose from by simply adjusting the shaft tube (or steering stem). I felt it would be beneficial to try another offset with the Honda CRF450R for testing purposes, so I went with the ROCS Pro clamps. 


The PHDS (Progressive Handlebar Dampening System) is a system supported by elastomers designed to absorb engine and chassis vibrations. The system also dampens the forces acting on the handlebar in a horizontal and vertical direction, maintaining steering precision. The handlebar can be adjusted in 12 different positions when the PHDS is mounted. The Honda vibrates more in the handlebar area than any other 450 aluminum framed motocross bike, so this is something that I feel the Honda needs, in my opinion. 


Installation of the ROCS clamp is fairly straight forward (with the pressed shaft tube). All you need to do is grease up the steering head bearing and slide the bottom clamp up in the head tube of the frame. All of the front fender mounting points and even the OEM hour meter bolts up the same way with the X-trig clamps. Super clean! Mounting up the PHDS bar mounts is a little tricky as the mounts themselves have a lot of moving parts, so make sure to read the instructions to ensure proper mounting. Technical Touch offers optional PHDS bar mount elastomers that come in soft or firm, but I chose to run the stock medium style elastomers, which seem to be just fine for motocross conditions. 

IMG_6471.jpg

I am super picky about bar positioning, shocking I know, so I went with the mounting hole closest to me (when sitting on bike) on the triple clamp with the PHDS mounts forward. This handlebar position gave me a +1 mm bar position (forward from stock), which I preferred as the stock Honda rider triangle is just fine for my 6’0 frame. The PHDS bar mount itself is the same height as the stock bar mount, which also was good for me and I mated the clamp/mount with a Pro Taper EVO SX RACE handlebar. Having so many positions available for the rider is definitely a huge positive for adjustability with these ROCS clamps. If you feel like you need a higher PHDS handlebar mount, X-trig also offers spacers to go under the PHDS mounting system. You can pick from 3mm, 5mm, and 10mm spacers.

IMG_6473.jpg

So what did the X-trig ROCS Tech Triple Clamp and PHDS handlebar mounts do on the track? My goal for this test was to not gain front end rigidity, get a more precise front end feel through corners, without getting deflection on hard pack/rough straights. Basically trying to NOT get a harsher ride on the Honda, tough to do right? The good news is that this is exactly what I found with the X-trig ROCS Tech/PHDS system, but there is some fine print that I want to fill you in on. The X-trig ROCS Tech clamp on the CRF450R provided enough flex and doesn’t feel like it negatively affected front end bump absorption, but was also stiff enough to give me a positive front wheel feel through flat corners. The ROCS Tech clamp is most noticeable when diving deep into a rut where there is a huge load put on the front end, forced by the rider. The chassis positivity through this area is better than the stock clamps. The stock clamps has a tendency to flex too much and give the rider a wiggle immediately off throttle (on deeply tilled tracks or soft dirt) or give the rider an unsettled (dive) when dropping into a long/deep rut (this sensation can only be felt mostly by faster or heavier riders). The X-trig ROCS Tech clamp gives the front end less wallow (firmer) and more cornering stability (without upsetting chassis balance). Straight line stability is as good as stock and front end bump absorption is only minimally stiffer feeling on braking bumps/square edge. 

Optional Setting: I have tried the ROCS “Tech” with the pressed steering stem shaft as well and that set up is a little firmer of a feel as well as provided a little more rigidity (I found out this when I went to ride my race bike, which has the “Tech” installed). The differences are small, but I did feel it nonetheless. Going to a 24mm offset on the ROCS “Pro” helped the Honda settle down on faster tracks. Running the fork up 4mm with a 24mm offset really helped calm this chassis down for 2:00PM motos (AKA ROUGH TRACKS). The 24mm offset did affect the Honda’s turn in capabilities and made it feel slightly heaver through corners. If you’re looking to slow the chassis down on faster tracks try going to the 24mm offset, 105mm’s of sag, and the fork up 4mm. 

The PHDS mounts do not vibrate nearly as much as the OEM rubber mounted bar mounts. The PHDS bar mounts flex as good as stock with the standard elastomers (up and down), but dampen vibration noticeably better around the track (especially at higher RPM’s). Slap down landings are improved slightly and front end positivity (entrance into corners) are as good as an OEM feel. Simply put, the vibration characteristics the PHDS mounts provide are well worth their weight in gold. I use “weight” because they are heavier than stock ones by quite a bit, but I will gladly take some extra ounces over vibration any day. 

The cost of the X-trig ROCS Tech Triple Clamps and PHDS handlebar mounts are $900.00. The cost is more expensive than other triple clamps out on the market by a couple hundred bucks. However, there are only two triple clamps that I have tested, that to me, are as good or better than stock. If you're looking to get a set of clamps for the temperamental Honda CRF450R “vibes” pick up some front end cornering stability, get an optional offset, and even improve the looks of your Honda, X-trig has some really nice clamps and handlebar mounts available for your red motocross machine. You can check out and purchase all of the X-trig products over at technicaltouchusa.com.   


If you have any questions about this test please feel free to email me at kris@keeferinctesting.com