Bolt-Ons

Works Connection Pro Launch Device

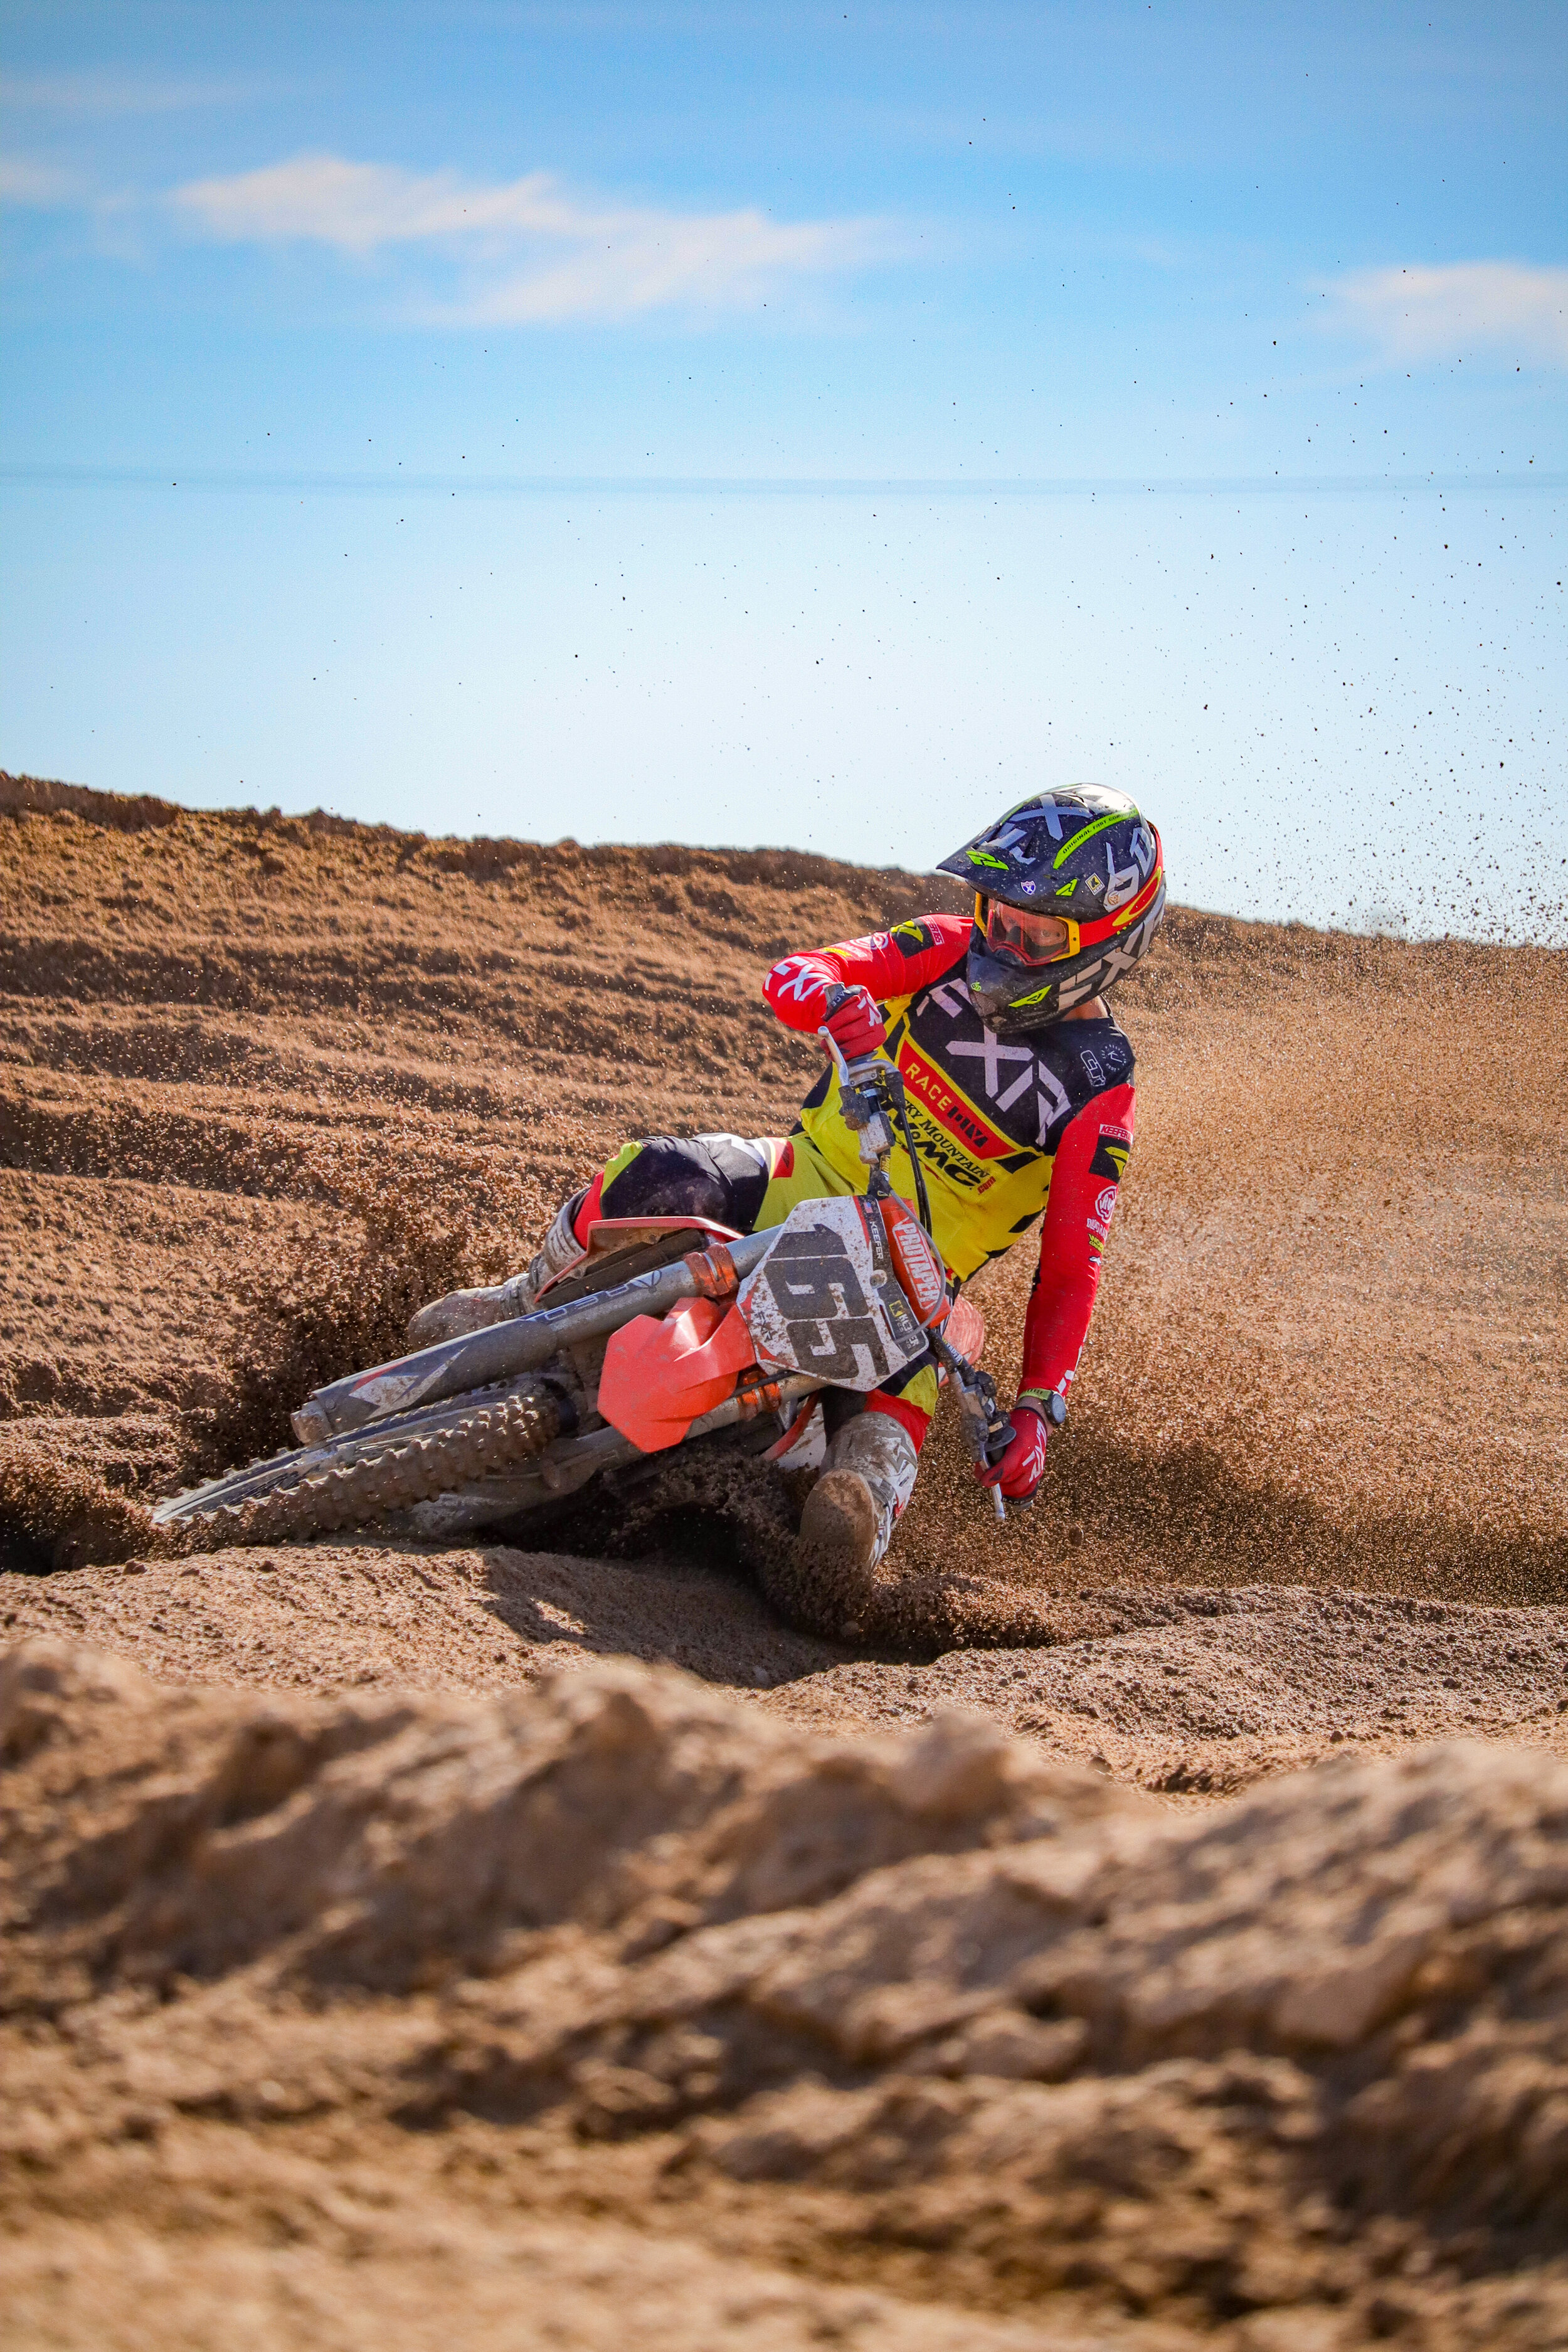
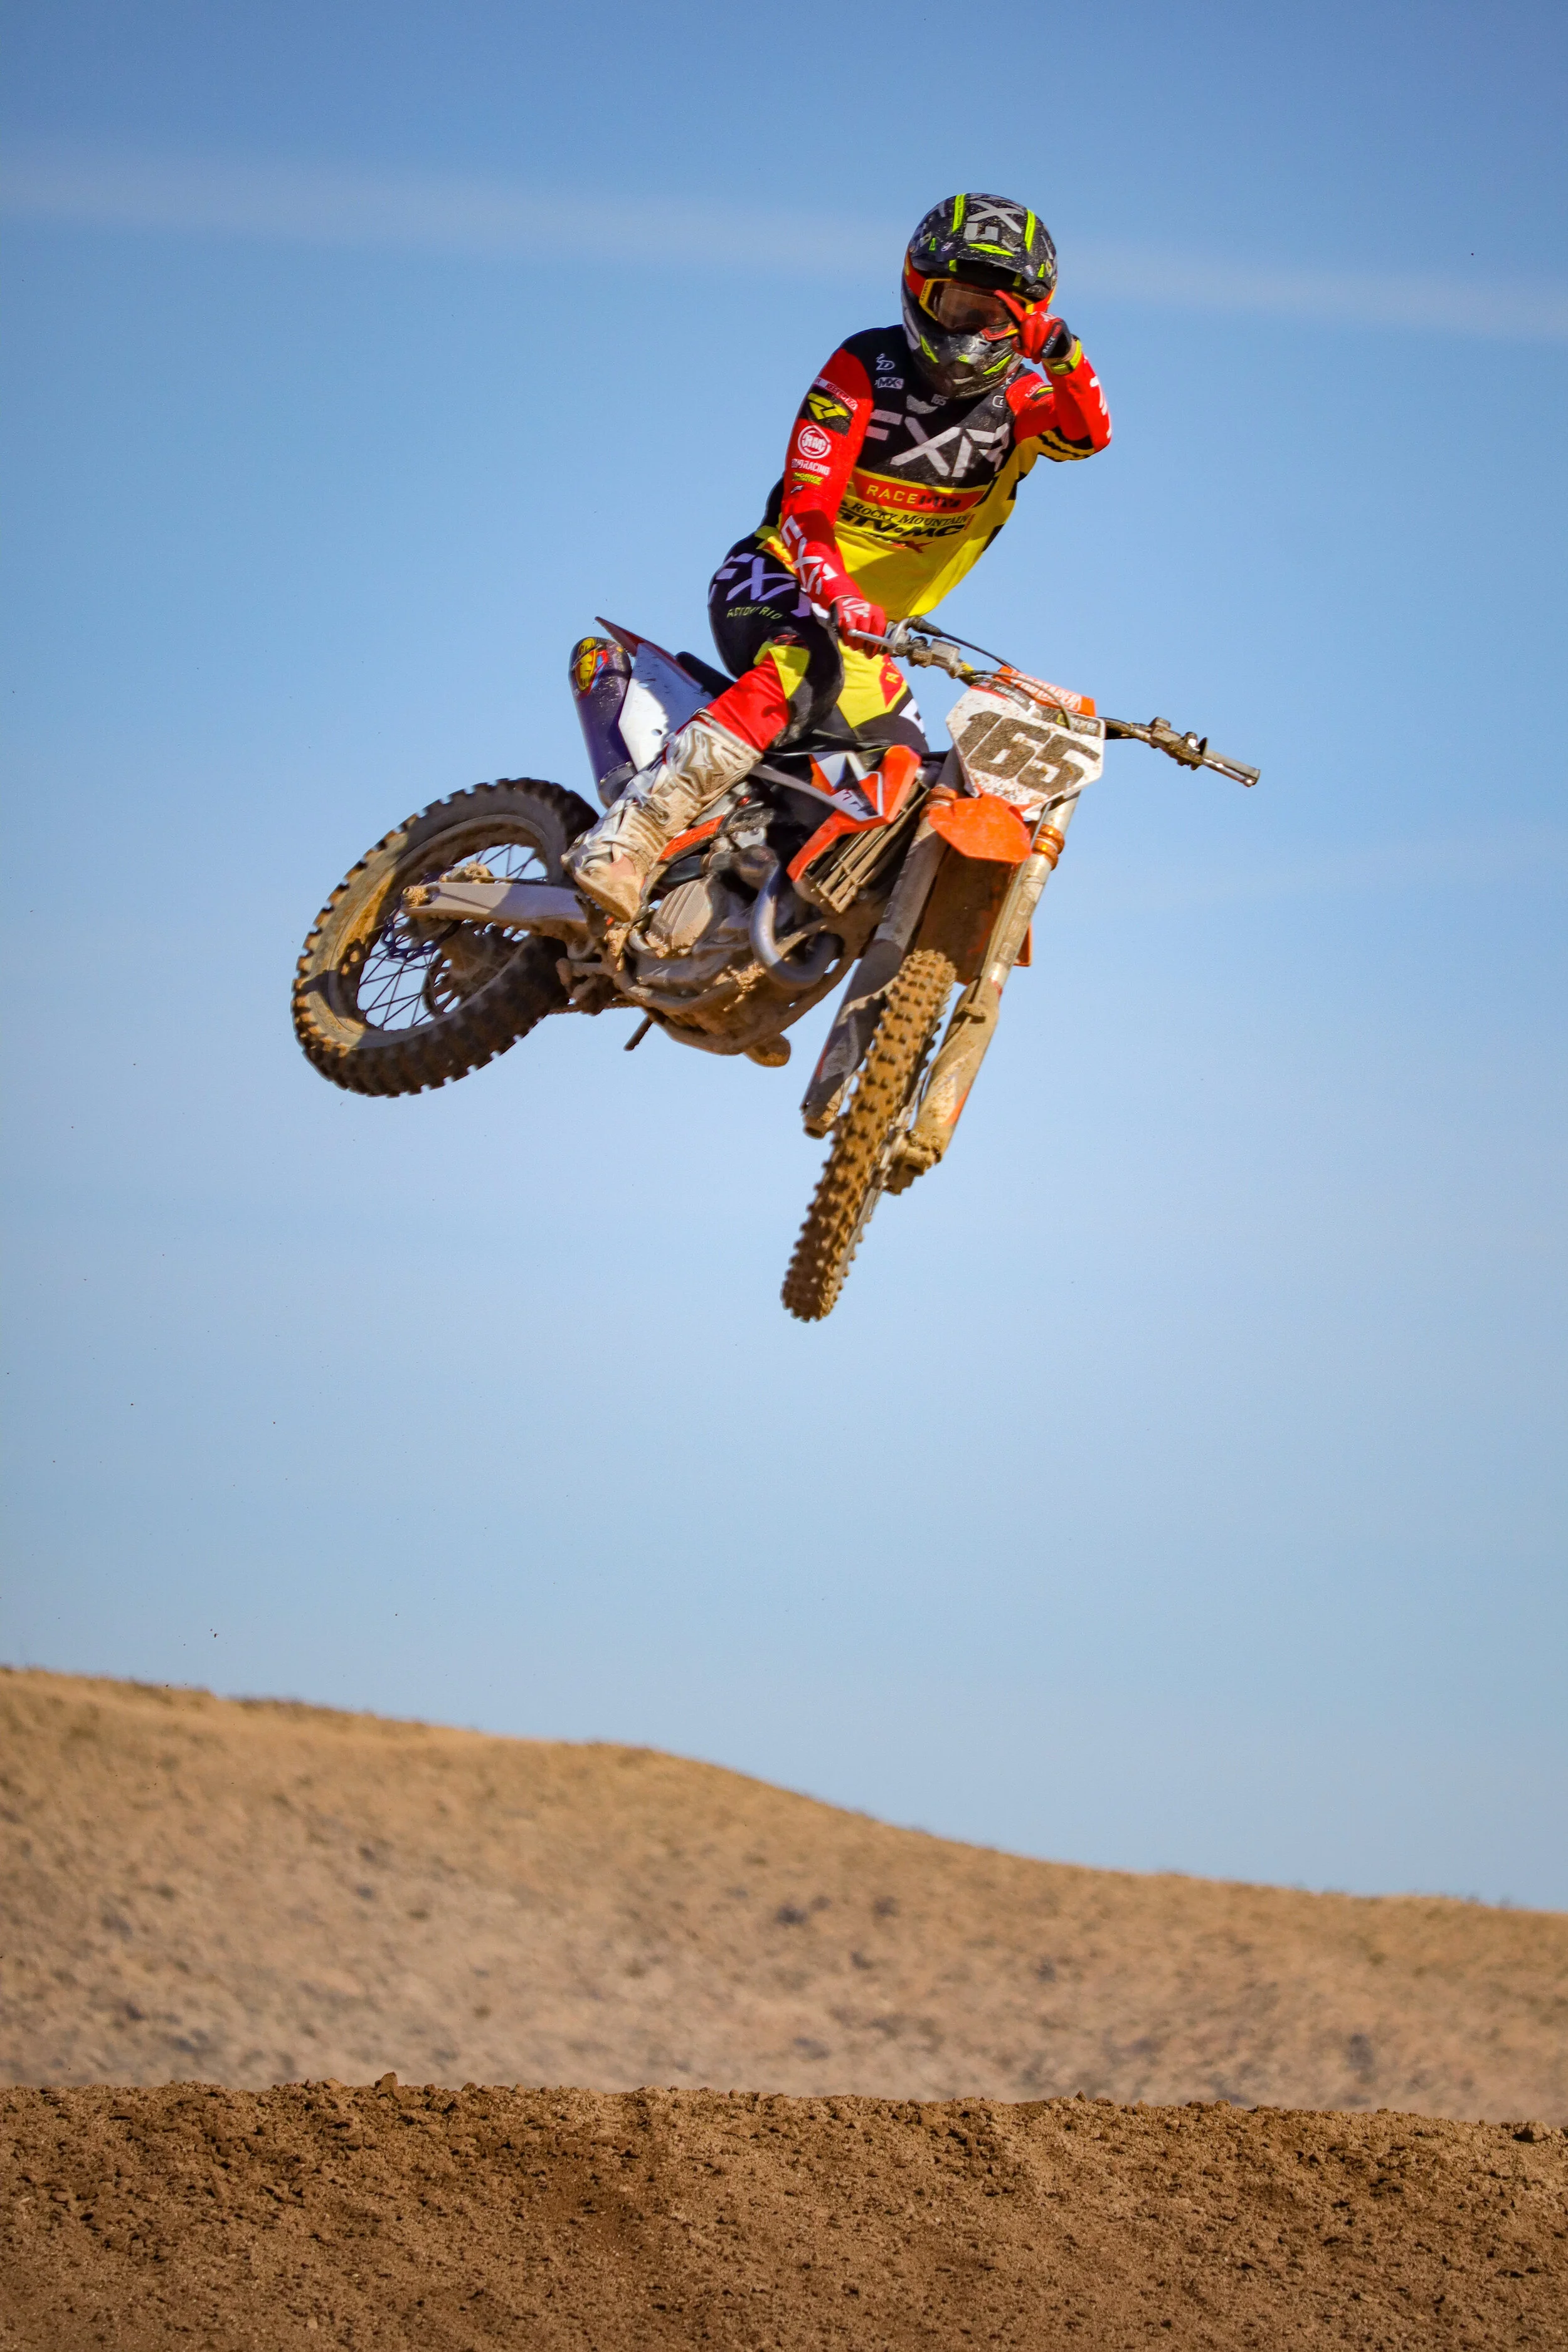
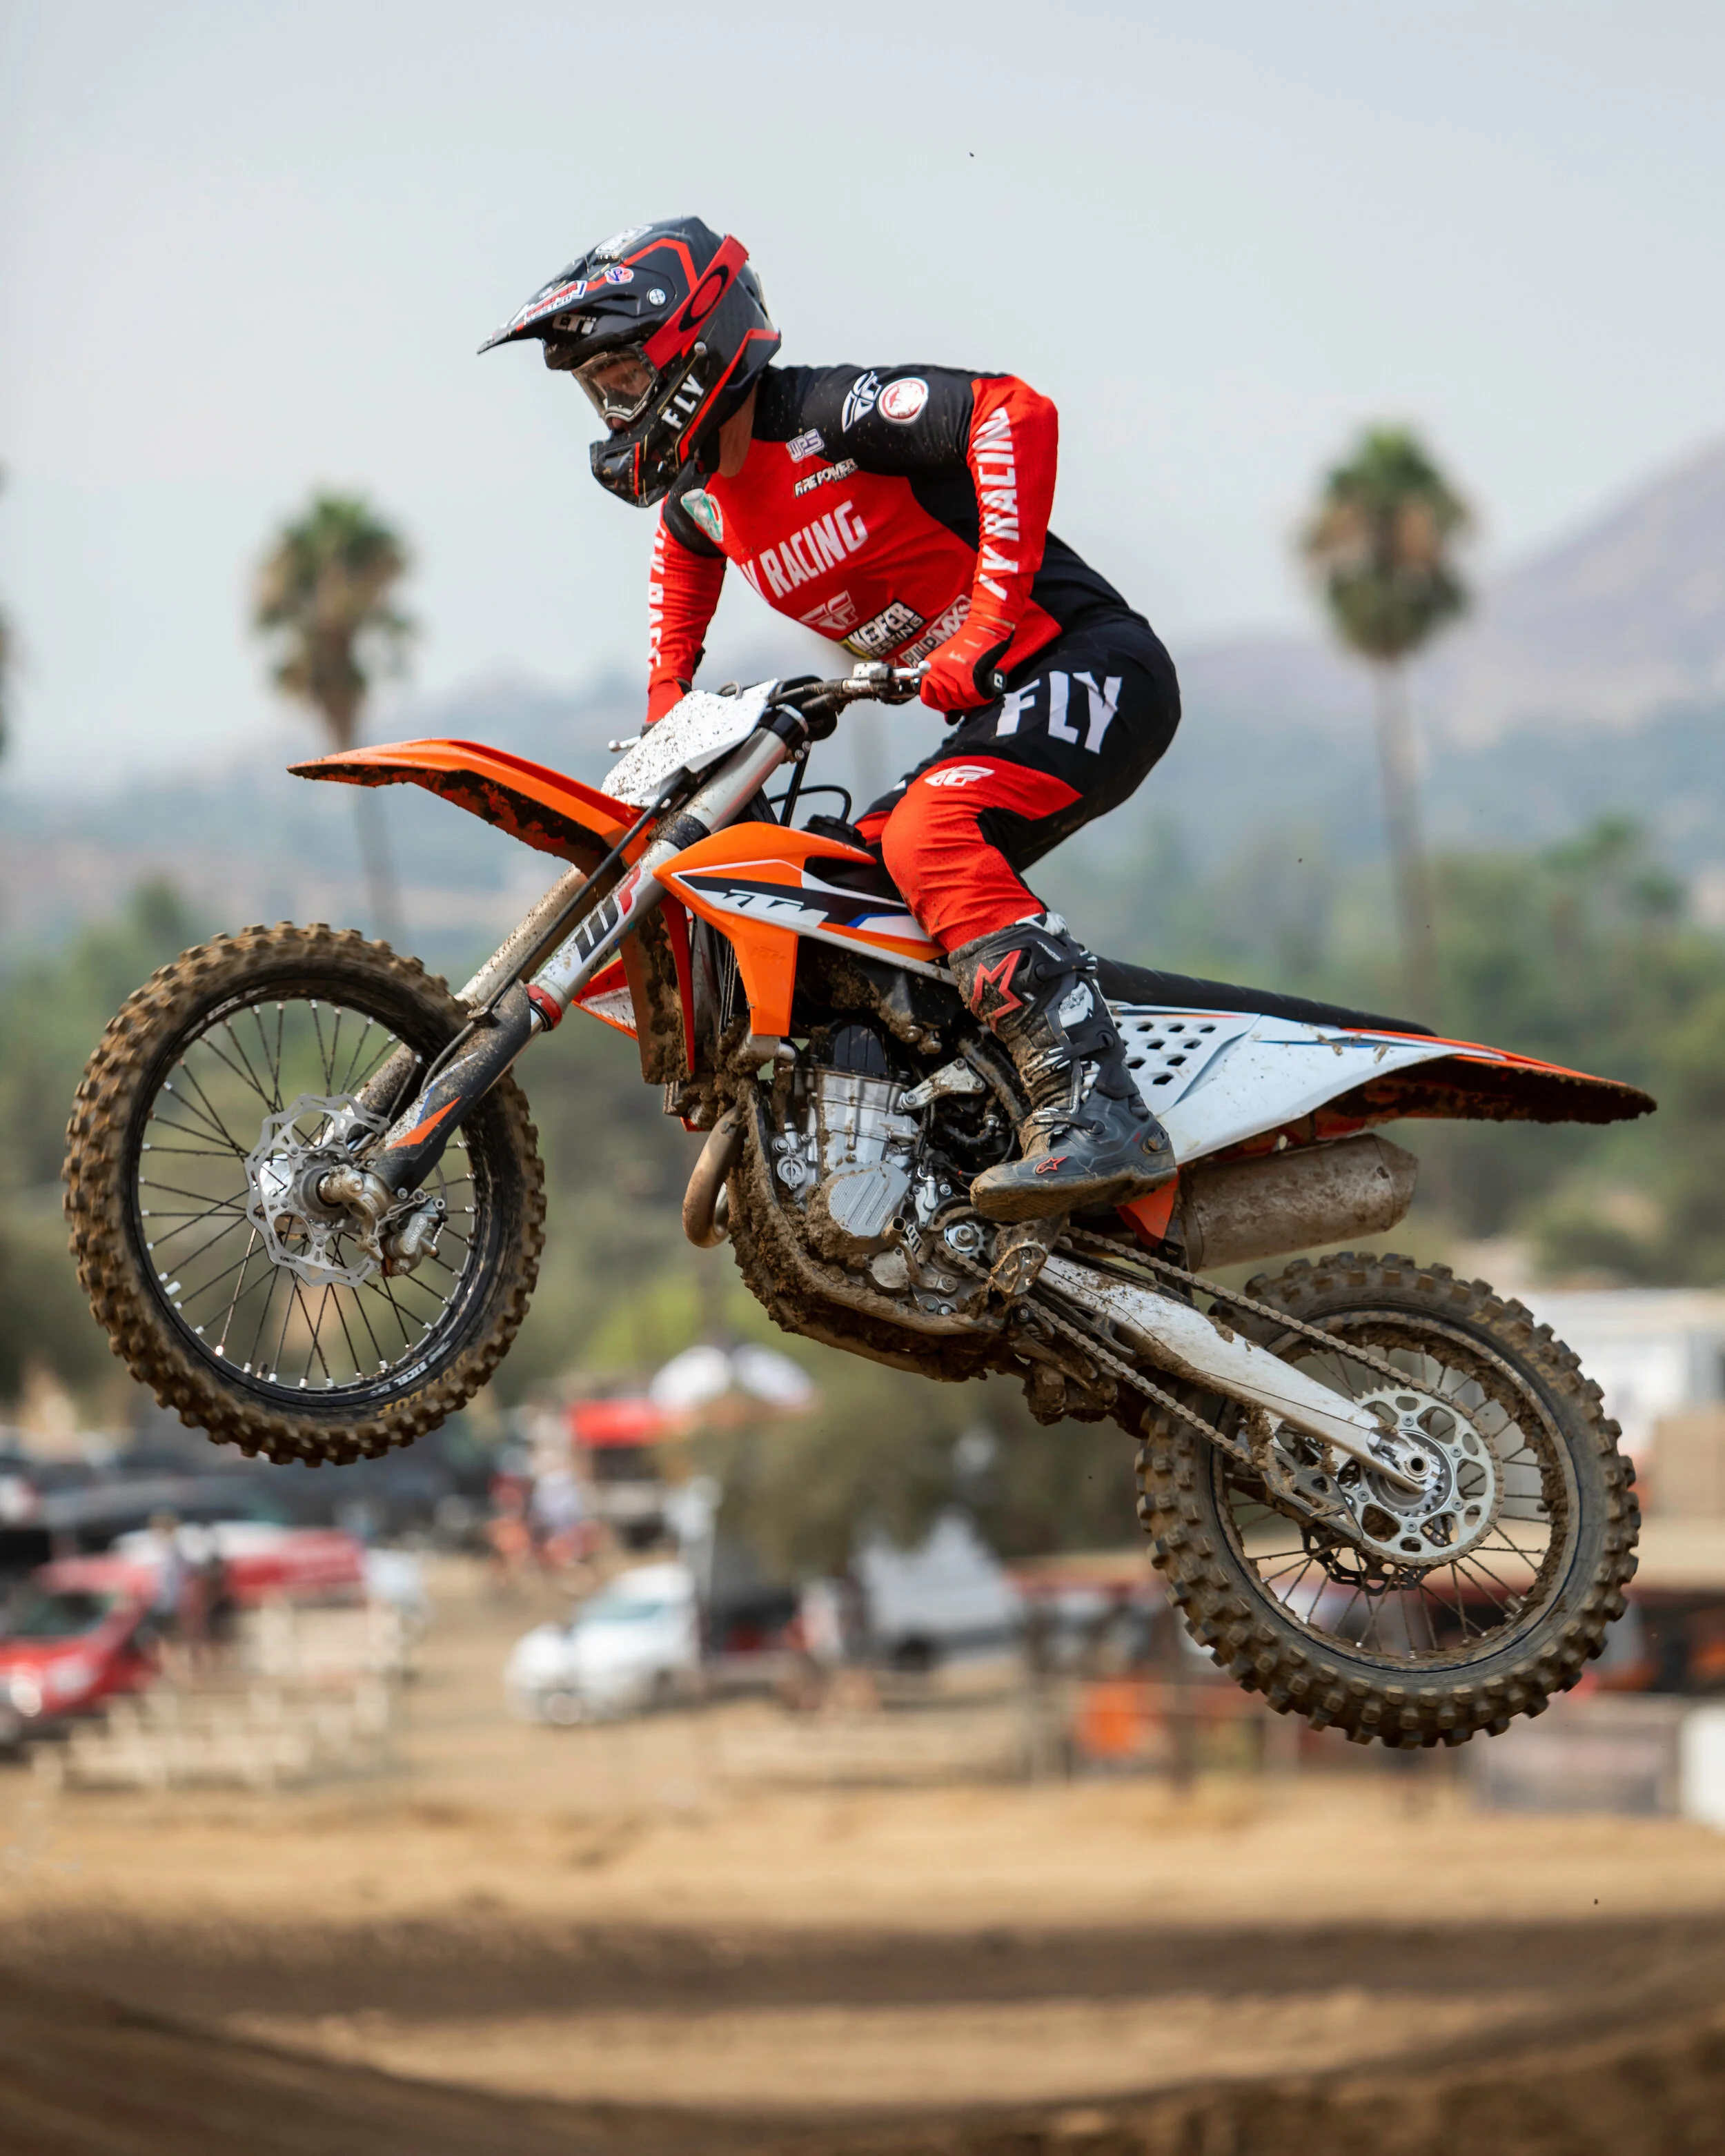
Works Connection had an older start device that used the old school spring and plunger design, but now have since gone to a magnetic locking system on the Pro Launch device. This has been in circulation for a few years now and is one of the most no fuss systems on the market. It’s so popular that Factory HRC Honda and Star Racing Yamaha is using this exact same system. Because of its lever-style mechanism and chamfered engagement point, the Pro Launch easily goes over the receiver on the way down and catches on the way up. So simple. that even Mrs. Keefer can manage to catch the engagement point relatively easy. It took her some time, but now she understand that you must hold the lever mechanism up once the ring passes by the mechanism. If you want to take out the mechanic/girlfriend/wife out of the equation you can simply do it yourself. I can either hit the front brake and lift up on the mechanism with my boot or stand in front of the bike and reach down with my right hand to lock the device! Boom! Tall riders can simply pull down the front fender (while pushing with their chest on the crossbar pad) when sitting in the saddle.

IMG_1908.jpg

Works Connection provides an aluminum template with pre-drilled holes, plus three different paper templates in the shape of each bike brand’s fork guard to align the aluminum template at 90mm, 100mm and 110mm. Once you choose the location of the device, tape the metal template and use the supplied drill bit to make the mounting hole. I usually run my Pro Launch devices at the 110 mm setting on 450s and 100mm on 250s. I even use the Pro Launch on metal grate starts as well. The durability of the PL is second to none and I have not  experienced one failure yet on a Pro Launch device that I’ve used for two full race seasons (over 20 races, that’s over 80 motos).

IMG_1907-2.jpg

Here is a little Q&A that Works Connection has put together, just in case you have more questions. If you are looking to purchase any Works Connection products you can use the code Keefer20 to save 20% off any WC product. Oh and if you’re on a WP Cone Valve fork WC offers a special ring for those forks, FYI! 

Q. What’s included with each Pro Launch? 

A. Every Pro Launch includes a fork ring, trigger assembly, drill guide, countersink and 

Any supplementary hardware required for specific models is included at no additional cost.

 Q. Why isn’t the Pro Launch made to be universal with one kit fitting all bikes?

A. We feel there are too many variables to produce a reliable ‘One size’ fits all Pro

Launch. 

Does a ‘one size’ pair of shoes sound like a good fit for everyone?

Our design team tailors each fork ring, trigger assembly and instruction templates for the specific year/make/model to ensure an exact fit that yields consistent, dependable, long term performance.

 Q. Why doesn’t the Pro Launch use a split/hinged fork ring?

A. While you might save a few minutes of installation time with a hinged fork ring, 

our design provides a lighter, yet stronger and more reliable fork ring that eliminates the potential failure of a split/hinged ring.

 Q. Who designed and who manufactures the Pro Launch?

A. Our in-house design team is responsible for the patented design and manufacturing, 

along with packaging, is done right here in Nor-Cal, USA!

 Q. What purpose do the fork guard straps serve and do they cost extra?

A. Some brands (e.g. Honda) use a softer fork guard material and the fork 

straps provide the necessary reinforcement. And for those applications the fork 

guard straps are included at no additional charge.

 Q. Can you set the Pro Launch by yourself?

A. Yes. While sitting on the bike, lean over the bars and pull up on the trigger with your 

right hand. Then grasp the front wheel with your left hand and pull the forks down far 

enough so the trigger and fork ring mate.

 Q. How does the trigger operate?

A. You simply lift the trigger while depressing the forks and the trigger and fork ring 

self-latch and mate smoothly. Once you get to the first turn and apply the front brake 

the trigger releases from the fork ring and retracts via strong magnets to its resting 

position. The resting position of the trigger makes it impervious to a rock strike 

accidentally engaging the mechanism.

 Q. Does the Pro Launch add weight to a bike?

A. The Pro Launch weighs in at 50 grams (1.76 ounces) making it the lightest on the 

market.

 Q. How long does it take to install the Pro Launch?

A. Typical installation time is about 30-40 minutes.

 Q. How do I know where to mount the trigger and fork ring?

A. Our step-by-step instructions include a bike specific paper template for the trigger

location and photographs to illustrate the fork ring location. These instructions are

included with every Pro Launch and are available to download from our website.

Q. Can you service the Pro Launch.

A. We assemble the Pro Launch onsite so we have every replacement item available.

 Q. Who uses Pro Launch?

A. Anyone looking for the advantage in getting off the start gate first. That includes 

amateur riders on minis all the way up to Factory Pro Teams.

Q. Where can I get a replacement paper template?

A. On our website navigate to your Make/Model/Year, select the Pro Launch page and

it’s available to download by clicking on ‘Instructions’.

 Q. What if my bike isn’t listed?

A. E-mail info@worksconnection and we’ll get you an answer.

 Q. Will the Pro Launch work with aftermarket fork guards.

A. The Pro Launch is designed for use on the stock, OEM fork guards.

IMG_1905-2.jpg

FMF 4.1 RCT Muffler System (2020-2021 Honda CRF250R)

The 2020-2021 Honda CRF250R chassis is one of the most fun to ride in the 250 class, with its easy to corner nature as well as a great suspension package. However, Honda focused a lot of their engine R&D on peak horsepower and not torque, which to me the CRF250R lacks the most of. When riding the Honda back to back with other models in its class, it’s obvious that the Honda needs a little help/pulling power out of corners. I went to FMF to see if they had what I needed in a muffler package and came away with these thoughts for you to digest. 

rx_keeferce8u6954.JPG

Let’s address the elephant in the room first. Can I even get one at this time? Sadly, most likely not. COVID has done a number on a bunch of stock with anything related to dirt bikes! This is not just with FMF, Pro Circuit, Yoshimura, etc., as this is happening with a lot of other key parts to our industry as well. The reasons go from not enough workers/employees to keep up with the demand to not enough material to build the product. This pandemic affects eery business and our industry is no different. This is a good thing and bad thing. Our industry seems to be booming, which is great, but us die hard moto dudes have to wait for months to get a damn muffler! That sucks and I get, but you need to breathe! FMF plans to have Honda mufflers back in stock in March, so if you have placed an order for one of these or any other Honda FMF muffler system for that matter, look towards the middle of March for delivery. Give these muffler companies some time and patience as we all are dealing with some sort of back log because of the pandemic. Plus I have heard that some people just simply don’t want to work at this time!

I like the fact that even though there are two headpipes and two mufflers it still didn’t take that long to install. The headpipes go on super easy and the mufflers slide into the slip fit joints with ease, yet are tight enough so the joints don’t wear out too soon. I have over 20 hours on the FMF 4.1 RCT mufflers and the slip fit joints are great, which is rare for titanium slip fit joints. Another added feature is that you will be losing close to two pounds off of your CRF250, which can also aid in helping the Honda’s chassis even more.

IMG_1404.JPG

So let’s start off with a couple things I didn’t like from the FMF 4.1 RCT system. The pitch/sound of the FMF 4.1 RCT mufflers are LOUD! The sound is deep and throaty but it is loud compared to other aftermarket mufflers! I didn’t run the quiet inserts, but I plan on trying these to see what it does to power and sound. Once I rode with the system for an hour or so the sound actually improved/dampened as the packing inside expanded. So don’t completely freak out when you first start it up. The second thing that you must pay attention to is that the headpipe springs can break and that could cause your headpipes to pop away from the exhaust ports of the cylinder head. I had this happen two times over the course of almost 22 hours so make sure you keep new springs on the headpipes. I learned if you keep new springs on, the headpipes remain on and don’t give you any issues. I would go no more than 8-10 hours on a set of pipe springs. 

Now with everything I did like about this muffler system: The power delivery is great and FMF made more power where the CRF250R needed it! The Honda needs bottom end and this is the only dual muffler system that has given me more grunt/low end out of corners! THANK YOU! The Honda CRF250R comes out of ruts/deep soil stronger and pulls harder through the mid range. Second and third gear recovery is improved as well as low-mid RPM response. The FMF 4.1 RCT muffler system makes the Honda feel more exciting and lighter around the track, which helped me improve my cornering. Top end/over-rev is as good as the stock mufflers and to me that is just fine because now I am able to short shift the CRF250R more than I could with the stock system. I am running a 13/49 gearing spec with the FMF 4.1 RCT system and that gives me more options with third gear through corners. With the stock muffler and 13/48 gearing, using third gear wasn’t even a thought in my head.

IMG_0639.jpg

The FMF system will set you back $1500.00 which is my last gripe of this article! Holy crap that is expensive, but at least I know if I have my mind made up on spending my money on an aftermarket muffler system, I know I am getting something out of it with the power increase.  You can visit rockymountainatvmc.com or fmfracing.com to get yourself on the list for the next production run. 

HGS Exhaust System For 2021 KTM 250 SX-F

Something that most riders (including me) may not see a lot of in the states is HGS exhaust systems. HGS is a Netherlands based company that has been making exhausts since the early 90s and are mostly popular among European club riders and of course many factory supported MXGP teams. I had the chance to try out an HGS exhaust with the Conical silencer on a 2021 KTM 250 SX-F supplied by Bud Racing (American porter for HGS) and wanted to get you all some feedback on a muffler system you may have never heard of.

IMG_1668.jpg

The stock engine character of the 2021 KTM 250 SX-F has a smooth roll on power delivery that comes on strong through the mid to top end range. The over-rev of the KTM 250 SX-F is down right impressive and allows the rider to stretch each gear farther than any other 250 MX machine out there. Other mufflers I have tested provided great mid-top end gains but it was very difficult to get more low end. I was looking to get some more low-mid range gains from the HGS and that is exactly what I got. First things first though, how was the HGS to put on? I am not going to lie, it wasn’t the easiest system to bolt on! The headpipe fitment to the cylinder head was very tight and took some coaxing to slide into the exhaust flange. Once I finally got that slipped over and fit up the rest of the system bolted on without issue. I am not going to look forward to taking this system off as I know that headpipe will be a tough one to get out even with the generous amounts of anti-seize I put on around the lip of the HP. 

The weight of the HGS is not one if it’s strong points as the complete stainless system weighs only 11 ounces less than the stock system so if you’re looking to lose more than a pound on your KTM 250 SX-F, you might want to look elsewhere. However, most consumers that purchase a stainless system expect to have some weight along with it and pick up durability instead right? In this case that is what I was looking for because this system was going to stay on my son’s practice bike for a while and get beat up.

IMG_1671.jpg

Like I mentioned above ,out on the track the HGS system has more bottom end pulling power and really pulls much harder than the stock exhaust through the mid range. Accelerating out of corners in second gear provides more recovery/pick up than the stock muffler and allows the rider to shift to third gear sooner than the stock system. I like that the HGS system gives the KTM a little more low end RPM response and makes the KTM feel even more playful in low speed/RPM situations. When the track is tilled deep the KTM 250 SX-F gets on top of the soft stuff better with the HGS system and each gear can be stretched out just as long as the stock system. You will not be getting any more top end/over-rev with the HGS, but for what my needs were for this bike, that didn’t matter. The overall look of the muffler isn't that appealing but I am the type of guy that is looking for function over fashion when it comes to my parts on my bike so I give this muffler a pass because it worked so damn good on the track.  

The exhaust note is pleasant and not too loud and has a similar stock sound to it. My B level son even mentioned how he liked how good the KTM 250 SX-F now felt coming out of corners and to my naked eye that was visible as well, as I was watching him. Now comes the tricky part… How do you get one? You will have to go to Bud Racing website www.Budracing-usa.com or call them at 951-245-2660. The cost of the HGS system with the Conical silencer is $849.99 and from what I have seen, they have them in stock! That’s right! IN STOCK! Something you may have not heard of since this pandemic hit.

Any questions about this system please email me at kris@keeferinctesting.com

The Makings Of A Great WP Pro Component Settings On The KTM 450 SX-F (With REP Suspension)

Let me preface this article with how much I like to ride the KTM 450 SX-F. But… Yes, of course there is always a “but”, right? I like a lot of things about the KTM 450 SX-F, but the stock suspension isn’t one of them. The AER fork is a slight headache for me as it’s stiff as hell when new, then once broke in, moves more in the stroke, yet still gives a harsh mid stroke feel on braking bumps. Not as much as in year’s past, but it still isn’t a spring feel. Raising the air pressure only makes the harshness worse and decreasing air pressure allows the fork to ride too low in the stroke for my taste. I am a front end steering rider and that means that I really like a spring fork feel. Now, I have tried some other companies spring conversions and although better than the AER fork with front end traction/feel, I just wasn’t sold on the performance it gave me on rough tracks. After doing some of these tests, I then resorted to a WP Cone Valve fork. Now I am not going to sit here and tell you that slapping on a set of WP Pro Components is the answer to your front end problems, as I did have to go through several setting changes in order to get a feel that I personally liked. I thought why not walk you through some of the process to create settings as well as tell you about the latest one I have on our 2021 KTM 450 SX-F test machine. 

IMG_1227.JPG

You know who helped me get to this blend of KTM comfort and performance promise land that I am in? Mark Johnson at REP Suspension. I am a serious pain in the ass when it comes to KTM suspension, probably because I love that damn Yamaha KYB/SSS fork so much (yes, I know there are KYB conversions and we are going to test one soon, don’t yell at me). Although Mark made my WP Pro Components better than my stock stuff the first time he did it, I felt like I wanted more comfort on rough tracks. I complained to Mark that my rear end always felt too low under acceleration and the front end still had a firm feel on slap down hits through my handlebars. I complained. He listened. That is what great suspension tuners do. They listen to the customer. There are several companies like this out there and REP is one of those companies. Mark emailed me one night about a setting he came up with, that he thought I might rather enjoy. I honestly thought what I had was decent, but as one old test rider once told me, “you’re only as good as what you try right” and I am in the business to try and relay that back to you all right? So I immediately got excited about another suspension test that could really be “THE ONE”! 

I met Mark at GH one Thursday and we literally stayed there all day. This is nothing new, but as a guy who has been doing this 20 or so years, I still love it! I wanted to make sure that I left GH near dark and when the sun decided to set behind the hills of Glen Helen, I wanted to make sure that I had comfort along with performance, before I gathered my things and left. This is the only way I can sit here and type to you all and say if it’s better or not. When you move from a stock WP AER fork to a WP Pro Component set up you will immediately feel a heavier turn in, yet will receive more front end traction. It’s a give and take and I will gladly take a heavier steer in (area 1 of the corner) for added traction. I don’t have near as much of a problem with the rear of the bike, but the stock shock, once hot, fades away into oblivion and gives no real damping character at the end of a longer/rough Moto. I wanted consistency, comfort and traction. Is that so much to ask from a bike? The Kawasaki gives it to me. The Yamaha gives it to me. I want the KTM to give to me as well with WP components on it! 

IMG_1464.JPG

As usual I make sure that each test is a blind test. I make damn sure I know nothing about what Mark and the REP crew do to each setting and that I am going strictly off of feel when riding. I make sure I hit the same lines on the track through out the day for consistency and that ensures proper feedback to the REP crew (as well as you the reader). When all was said and done, what REP gave me was the best setting I have ever felt from any KTM set of suspension I have tried. Oh and I have tried a lot. Is it the best suspension that I have ever met period? No, but it was the best KTM stuff I have tried, hands down. I was starting to consider that the WP Pro Components were just built for performance and not comfort, but Mark and the guys proved to me otherwise.

 The WP fork with the REP setting not only had hold up, but had comfort as well. Most of the time when you go to an A-Kit style fork, you will lose comfort and gain performance, but both of those categories went up equally for me. RARE! This has only happened twice in my time of testing! Using a 4.8 N/mm spring rate along with the parts listed below gave me great lean angle traction (off or on throttle). The downside to my previous CV fork setting was that if I loaded the front tire on lean (under throttle) the fork deflected and felt harsh. The new updated setting felt more supple initially and progressively had more damping feel as the fork went down. There was no unexpected stiff shelfs in the travel as the fork moved and in return, that gives the rider better feel to the front wheel/tire. AKA more tire contact patch! Boom! Gone is the harsh slap down feel to my hands and that increased my ability to be more confident in how hard I can push into/through jumps because I know that if I wanted to overjump a section (on purpose or maybe by mistake) I could do it without an issue. 

IMG_1466.JPG

The WP Pro Component shock has always been a struggle for me to set up. I always felt like my rear end was too low and when I managed to get the rear end up, it was god awful coming out of corners (harsh and wasn’t fun on my back). Although I gained consistent damping feel over a longer Moto with the Pro Component shock the comfort was difficult to find at times. To help this I ran REP’s knuckle without the longer rods, along with a sag setting of 98mm. I wanted to change the curve of the linkage ratio to help acceleration comfort, but try to keep that rear end up under throttle. This did get me slightly more comfort, but felt like it pushed on the front end too much once transitioning off the throttle. Mark suggested that I try a 1mm longer shock shaft and that really changed the character of this bike. Once I had the chance to ride with that, it altered my outlook on how the KTM’s ride attitude could handle rougher style tracks. The rear end stayed up higher in the stroke and for my 5’11 front end steering frame, this was a game changer. The KTM became more balanced on throttle and allowed me to accelerate harder/sooner out of choppy corners. I now could get my sag numbers back to normal range (103-105mm), which left me with a balanced feeling coming into corners (off throttle). Having this 1mm longer shock shaft also allowed me to run REP’s longer pull rods, which increased rear wheel traction and took some bite/harshness out of any initial braking bump hit. 

Now on to the question that I will get asked after this is published… Keefer, I just spent 11K on my KTM and now you are saying to purchase 5K on suspension  as well as put another 800.00 into those Pro Components? Holy shit! Yeah, I know, right? However, it’s crazy how many people actually do this. So to cater to those people as well as to others, I will also be doing a stock re-valve story just like this one coming in the next few weeks. So hold tight! Not everyone has the money for Pro Components and I am not blind to that fact. I really wanted to get this article up because I had my doubts about these WP Pro Components at times and get tons of emails about them. Mark and the REP crew worked their asses off to make me happy and it took me a while to get there, but hopefully with all of my testing that I have done, as well as REP’s work, you all will benefit from a one and done setting! 

IMG_1467.JPG

Below are the parts that REP incorporated into my WP Pro Components and what each part’s purpose really is: 

  Fork:

1. Cone Spring Perch System $349.99

Gives more bottoming resistance/progression allowing for a softer more plush setting to be utilized for better top of the stroke feel without losing bottoming. (The concept comes from KYB which I have played with a lot).

2. Low Speed Valves $120.00

Allows us to valve the flow of the needle and is fully tunable to each rider. Riders typically comment less front dip/more controlled front under braking.

3. 13 Degree cones $160.00

WP only makes 3 degree options 15, 11 and 8. Mark makes 13 as well for MX/Off-Road and 8 for SX. This helps bridge the gap between the degrees to get a specific damping the rider is looking for.

4. Low Friction O-Ring Kit $11.99

Lower cartridge friction compared to the standard o-rings that come in the fork.

Shock:

1. Trax LSV $250

Similar to the fork LSV, it gives REP another shim stack to play with, that normally is not in the shock. The shim stack controls the needle flow and is fully tunable. (This is the part that I felt gave firmness without taking away comfort). It also majorly decreases hysteresis, or pressure differentials, in the shock, which results in a more consistent feel and performance in the shock. 

2. Shock Spring Thrust Bearing $62.99

Springs naturally want to turn as they are compressed which causes binding. The bearing is fitted on top of the spring to allow it to turn and can be put on without the damper being disassembled.

3. RCU Spacer $21.99

REP has spacers made that go on both sides of the shim stack that are surfaced ground to be more flat than production. The spacer makes for a more consistent and predictable build as far as dyno and rider feel is concerned.

4. 1mm Longer Shock Setup $112.99

Helps balance of the bike for most riders, but also gains comfort as it puts the linkage into a softer part of the stroke.


Chassis:

1. REP MW1 Knuckle $299.99

Price jumped from up from the last write up I did because they now build them with OEM Bearings and seals.

2. 149mm Pull Rod $219.00

It’s longer compared to the standard 148.2mm for the flatter leverage curve Mark was looking for, also built with OEM bearings and seals.


Pro Circuit Linkage (2021 Kawasaki KX250)

The new Pro Circuit linkage system for the 2021 KX250 and 2019-2021 KX450 gives the KX’s handling performance an entirely different feel. I did this review on a 2021 KX250 because my son Aden was only 125 pounds and needed something plusher for his style of riding. Although I liked the stock KYB suspension, I felt that it was a little empty (soft feeling) on the end stroke. The OEM linkage system for the newer KX models tends to be a little harsh at the beginning of the stroke and gets softer as the rear wheel goes deeper into the stroke. With Aden being lighter, he had problems with the rear end being harsh on small bump absorption and I had problems with the rear end being too soft at the end stroke (or high speed compression situations). With the new Pro Circuit linkage system, it gives the linkage ratio curve what we both need. The Pro Circuit KX250/KX450 linkage system gives the shock a plusher feel at the beginning of its stroke and then stiffens up as the rear wheel goes deeper into its travel. This adjustment could mean that it lessens the need for stiffer high-speed valving, which can cause the rear to feel harsh and deflective. When talking to Pro Circuit, a considerable amount of research and testing for this new linkage system has resulted in a more true-to-weight spring rate, in order to reach the ultimate sweet spot in handling for your new KX250/KX450. 

IMG_1455.jpg

I wanted to test this linkage for Aden and I on the 2021 KX250 with stock valving as well as a re-valved set of suspension to see what this linkage system can give the rider in feel. With the stock setting and the PC linkage I immediately felt it was too soft for my liking out of corners (the rear end felt too low in the stroke at 103mm of sag), but I found out that Pro Circuit recommends a spring rate increase of 0.2 kg/mm so I wen from the stock 54 N/mm spring to a 56 N/mm with much better results. Now the rear end stayed up higher in the stroke on acceleration and felt plusher on small bump absorption. The stiffer spring and the linkage combined also gave me the end stroke feel that I was looking for. I am the type of rider that DOES NOT mind bottoming out a couple times a lap around the track, but it just can’t feel like I am hitting a ton of bricks when doing so. The PC linkage coupled with the spring rate change still allowed me to use all of the suspension but didn’t give me that harsh bottomed out feel. 

With Aden on the KX250 with the PC linkage, it was even more noticeable change for him because he could leave the stock spring on and the rear of the bike immediately got plusher feeling on small chop. He also mentioned that he could get on the gas sooner because he felt like the PC linkage gave him more rear wheel traction. Normally, being that Aden is only 125 pounds we usually have to go to a softer shock spring, but with the PC linkage requiring a stiffer spring rate, this ultimately balanced the bike out for a 125 pound B level type of rider.  

When tested with a fully re-valved set of Pro Circuit suspension the linkage only gave the rider more of a balanced feel with the sag at 103mm. Riding more aggressive was made slightly easier with the PC linkage as I could get on the gas sooner out of corners (under heavy choppy conditions) because the rear end seemed to stay straighter as well as had more rear wheel traction. For $445.00 this mod is a little expensive for my taste, but it does actually help with comfort and performance on the 2021 KX250. If you’re a lighter rider, this linkage could save you from a spring change and if you’re an aggressive rider, that is slightly heavier, it can help you from getting too low in the stroke under heavy loads without a re-valve. 

If there was one sentence that described this linkage it would be: “Ultimately, this new PC linkage creates a plusher feel while increasing rear wheel traction”. 

If you have any questions about this pinkeye please feel free to email me at kris@keeferinctesting.com 


DR.D Stainless Full Muffler System

By: Michael Allen And Kris Keefer

It’s no secret that Doug Dubach knows Yamahas. That being said, after years of testing for Yamaha Doug started Dubach Racing Development where he builds finely tuned exhaust systems for other major motocross models. However, this isn’t one of those “other” motorcycles and we wanted to take that atrocious sounding stock muffler and try something we haven’t tried.  I met Doug through Kris and have had the privilege of hearing some old testing stories, listening to him give Kris shit, giving me the basic inner workings of exhausts and testing in general explained to me. I really look up to Doug and Kris’s testing abilities both, so when they sent me a DR.D system to try on the 2021 YZ 250F, I was excited and nervous at the same time. Excited because if anyone knows how to make a Yamaha work well its Doug. Nervous because I knew the exhaust wasn’t the only thing being evaluated; Kris always expects me to go into any test with no pre conceived notions about the product and he’s always evaluating my ability to test which is a bit nerve racking.

IMG_1380.jpg

It’s no secret that the Yamaha YZ 250F has a damn good production engine. When the bike was redesigned in 2019, the power characteristics of the engine slightly changed from making the majority of its power lower in the RPM range, to slightly shifting the peak power up in the RPM range giving the bike a lighter, free revving feeling. While this more playful feeling is fun to use, there was still a part of me that missed the low-end grunt of the previous engine character. After Randy Richardson gave the bike a proper break-in at the Dubya USA World Vet Nationals, the stock muffler packing was extremely blown out, there was seemingly no packing left in the can. I love doing back to back testing because the difference in performance (good or bad) of a product will be far more obvious if the comparison is made the same day. So when at Glen Helen racing the Swap Moto Series I decided to race the first moto with the blown out stock muffler, and the second moto with the DR. D system. 

IMG_1381.jpg

Although some people may think that since the exhaust wraps around the engine it must be a pain to change it was very straight forward. There was only one step that I found I needed help with to make the process easier, which involved my wife, her butt and me asking for her to sit on it….. With the stock system removed, I simply needed my wife to sit on the bike so that the shock would compress and move back enough in order to get the head pipe between the frame, shock and engine. One other tip is to tighten the two exhaust stud bolts before installing the muffler because leaving the muffler off allows for more room for a wrench. Aside from that step, leave all the bolts finger tight until all the parts are installed, so that there is a little wiggle room. 

IMG_1383.jpg

After racing moto one I’m sure most of the spectators ears were pleased when I rolled up for the second moto with a fresh exhaust. The first thing I noticed was the change in the exhaust note, gone was the raspy clapped out tone that bellowed from the rear end of the 2021 machine. That raspyness had been replaced by a more throaty sound that obviously had more backpressure and sounded crisp. As the man in overalls ran back to the doghouse to drop the gate I focused solely on my technique and to my surprise when the gate fell I instantly felt far more connectivity from my throttle hand to the rear wheel. I got a great jump, and stayed right with the KTM 350 that was next to me until about half way through third gear. It doesn’t matter what exhaust you have, nothing is going to make up for 100ccs, not to mention all the 450 machines in my class. In addition to the improved connectivity, the power with the new system has been smoothed out. Don’t let that be confused with mellowed out; in fact the DR.D system has noticeably more mid to top end over stock, yet also gave me a little more low end that I wanted back from the Yamaha. Instead of just making noise and spinning, the bike is now able to put that power to the ground and drive forward. The DR.D system not only helps get the power to the ground, it helps clean up some of the FI setting near the low end range on slower corners. I felt like the NS-4 muffler brought some added mid range meat to third gear and allowed me to make my shifting points later than the stock system did. 

To be honest, most manufacturers in 2021 make very good stock exhaust systems that don’t leave much room for improvement. When it comes to performance gains over the blown out stock system, this DR.D full system surprised the hell out of me and I think an exhaust shootout may be in order soon. With a price tag of $659.95 this stainless and aluminum system is a great deal when compared to the price of other manufacturers and is still lighter than stock by over a pound. It may not be the lightest thing on the market, but let’s get real, you and I don’t need the weight loss on our machines. Maybe I need to lose a few before my machine. Once again Doug proved that during all those years helping develop Yamaha’s YZ’s he was taking notes on what works and what doesn’t. If you have any questions about the 2021 YZ 250F DR.D exhaust system, reach out to me at Michael@keeferinctesting.com.

You can get a DR.D muffler system over at www.dubachracing.com.


Keefer’s Notes: 

 I concur on what Michael has written and would like to add that to me the bottom end character is improved with the DR.D on. The bottom to mid RPM response is not only better but to me gives the rider more control around the track. Michael mentioned being more connected to the rear wheel and that right there is what I noticed the most. 

Zero Resistance Throttle

I am one to usually change my throttle tube out several times during the lifespan of my test machines. Plastic tubes wear out and it can get tough to pull the throttle after some use. I am not a huge fan of aluminum throttle tubes because they help throttle resistance minimally and usually give me a more rigid feeling through the right side of my bars. Yes, I am sensitive to rigidity and no not everyone will feel more rigidity when going to aluminum throttle tubes. I’ve had a ZRT Throttle in my possession for quite sometime, but have been hesitant to try it for a couple of reasons. Full disclosure, I dragged my ass on this test because you’re required to cut your handlebar down 1/2 inch on throttle side to compensate for the bearing and I am picky SOB when it comes to bars and like I mentioned previously it was an aluminum tube. I put my ego to the side and strapped on my clear minded testing brain and came away with these thoughts: 

IMG_2095.jpg

How does it work? Simply put, there are two radial ball bearings on each end of the tube. One located inside the throttle housing and one on the end of the handlebars. This gives the throttle assembly an ultra smooth action and a claimed longer lifespan. Unlike traditional plastic throttle tubes, the weight of the rider either pushing or pulling on the throttle will create some type of “friction”. The longer this goes on, the more the throttle and handle bars deteriorate and I have seen the right side of my bars look like slot car tracks in the past. Inserting two bearings within the throttle tube helps eliminate wear and friction, making your throttle assembly ultra smooth.

IMG_2097.jpg

So does it work? Yes, it does and sometimes too well! What I mean by “too well” is that it works so good that sometimes I get whiskey throttle when I get tired or have massive arm pump. This throttle is so smooth that it can be easy to grab a handful when sometimes you weren’t expecting to. However, once I got used to the buttery twist, my whiskey became less and less. This is by far the biggest difference I have felt from an aftermarket throttle tube. The fears I had of cutting my bars and getting a different feel quickly went away when I rode out on the track. The 1/2 inch of bar loss was made up by the ZRT and my 802mm of bar width remained the same. Oh and trust me, if it didn’t feel the same, I would have felt it. Now when I go back to other test bikes that don’t have the ZRT tube on, it feels stiffer and harder to pull. We have been running the ZRT tube on our Husqvarna FC450 machine for almost 30 hours and have done nothing to it. I like that it feels as good as when we put it on and we have done zero maintenance to it.  

Of course there is a downside and the downside is that it costs $179.95! Now to most this is outrageous right? But to some, this costly part is worth it. For example, I would want a ZRT if I owned a KTM/Husqvarna/Gas Gas. Why? I am not a lock on grip guy, so I would normally go straight to an aftermarket throttle tube and instead of purchasing a cheaper plastic tube or an aluminum throttle, I would spend the money to get the ZRT. If you plan on keeping your bike for a few years or even if you get a new bike every year (albeit the same brand) this throttle tube is worth the cost. You can order your Zero Resistance Throttle at zrtthrottle.com. Any questions email me at kris@keeferinctesting.com

Ride Engineering Split Triple Clamps (KTM/Husqvarna)

The stock KTM/Husqvarna clamps are too stiff for me! What about you? Well, if you’re here reading this, chances are they might be too rigid for you as well!  It’s odd because most other manufacturers OEM clamps are on the soft side, but the Austrians had something more rigid in mind when making these stock clamps. So in search of other options besides an X-Trig ROCS or a KTM Factory Edition clamp, I went out and tried Ride Engineering’s new split clamp. When Ride Engineering set out to build the KTM clamps, they’ve been designed with four goals in mind: 1) Optimize body position: (Bar position 3mm back from stock). Ride Engineering also offers optional offset for their bar mounts providing 4 bar positions as measured from the stem hole: 6mm forward, 9mm forward, 15mm forward & 18mm forward (using stock bar mounts your positions are either 7mm or 17mm forward); 2) Flex: this new split design made from 2024 aluminum is said to provide better comfort; 3) Improve the handling with a new gull wing design; 4) Place the upper pinch bolts in the front and allows for different aftermarket handguard mounts. Each set comes with a frame mounted hour meter relocation bracket so that you can retain your OEM hour meter. So how did they perform on the track? We break it down for you here. 

ride clamps.jpg

The stock KTM triple clamps are stiff natured and can make your orange bike feel rigid/harsh. My goal for this test was to find less front end vibration through the bars, more front end comfort, as well as try to get a more precise front end feel through corners, without getting added rigidity on hard pack/rough straights. Basically get a more compliant KTM 450 SX-F, but that is sometimes tough to do right? The good news is that this is exactly what I found with the Ride Engineering Split Clamps. The Ride Engineering clamp on the KTM 450 SX-F provided enough flex on small bumps, which gave me less of a stiff feel through the bars, yet was also stiff enough to give me a positive front wheel lean angle through flat corners. The Ride Engineering clamp is most noticeable when diving deep into a rut where there is a huge load put on the front end, forced by the rider. The chassis positivity through this area is much better than the stock clamps. The stock clamps have a tendency to give the rider a rigid feel when weighting the front end (although slightly more positive feeling), deflection on de-cel bumps and vibration that is not very friendly. The Ride Engineering clamp gives the front end more tire contact patch feel because it allows the front end to absorb more of what the track is offering the rider. Going firmer on the triple clamp can give a rider more positivity at times, when leaning into a corner, but in this case, I felt like I could get into a corner much easier with the Ride clamps. Straight line stability is improved because of the bump absorption character of the Ride clamp and vibration is also down which gives the bike a tighter, less clapped out feel. Also do yourself a favor and get rid of those stock Neken handlebars. Buy some Pro Taper EVO bars and thank me later!

ride clamps sl.jpg

Compared to a factory KTM clamp (that comes on the Factory Edition) the Ride Engineering clamp does have a little more flex to it than the KTM FE clamp. The two share the same split design, but offer different flex characters on the track. The KTM FE clamp does have a slightly firmer feel, which does help area 2 of corners when pushing your front tire/front end hard while banking off of ruts. The KTM FE clamp does give a little more positivity in that area, but in all other areas of the track the Ride Engineering split clamp just has more comfort.  I tried the Ride Engineering Split Clamps with the stock mounts and the rider triangle of the bar mount position on the clamp wasn’t an issue for my 6’0 frame. I also have tried the Ride Engineering bar mounts, so if you’re taller and looking for more room, you might want to look into a set of the two piece bar mounts from Ride as well.

A lot of back to back testing went down against the KTM Factory Edition clamps in order to figure out how much flex was too much or too little.

A lot of back to back testing went down against the KTM Factory Edition clamps in order to figure out how much flex was too much or too little.

Ride Engineering offers two offsets (22mm and 20.5mm), comes in four colors (black, orange, silver, LE blue) and redesigned with a 90mm span to accept the stock bar mounts and mounting hardware. The $689.90 price tag is also not as steep as some of the other clamps in its class and to me Ride Engineering is one of the few aftermarket chassis part companies that actually test their own products. To have an owner that rides his own parts, then makes an educated decision on if it’s better than stock, is pretty damn cool. You can check the Ride Engineering Split Clamps out at ride-engineering.com

If you have any questions about these clamps, or any others for that matter, or maybe want a discount code, hit me up at kris@keeferinctesting.com


Hinson Momentum Steel Clutch Basket

Hinson makes steel clutch baskets that replace the aluminum standard baskets on Honda, Yamaha, Suzuki and Kawasaki MX machines. If you’re wondering what the benefits are, let me tell you how I stumbled across this basket years ago. I was looking to smooth out the hit of one of the first generation YZ450F’s and there weren’t any flywheel weights available, but Hinson was offering a heavier steel clutch basket. Fast forward to 2021 and I have found it tough to find a slightly heavier flywheel for the YZ450F so guess what? I thought I would revisit this and see how it works in my 2021 YZ450F test machine. First the steel adds durability and strength to a part that wears, often the aluminum of the basket’s fingers develop grooves where the drive plates press on them. Over time this makes the clutch action poor and increases slop in the drive of the bike. The end result is often broken baskets and even worse, broken cases as the clutch basket comes apart.

Secondly, the added weight adds rotational inertia inside the engine helping to keep the rear wheel from spinning and also smooth the pick-up of acceleration as you increase the throttle. Since the spinning ratio is reduced compared to the crank, the weight effect is slightly less pronounced than a flywheel weight, but still can offer benefits from what I have experienced on our 2021 YZ450F. 

IMG_0700.jpg

A flywheel weight on certain bikes can calm the power delivery. In some cases, heavy flywheels can smooth low end power and just replace the point of power that is now smoother, somewhere else in the power range. That is NOT always great! I am fairly picky about the engine delivery of a big 450, so as much as I love a Yamaha YZ450F, I wanted to smooth out the power coming out of area three of corners, in order for the rear wheel to hook up more. I have been having a problem wheeling the YZ450F when under the throttle hard as well as getting wheel spin out of corners when accelerating to clear jumps. I can’t seem to tune this out with the YZ Power Tuner, so here we are…  

Enter the Hinson steel clutch basket. Depending on the application it can be up to two pounds heavier than the stock basket. Made from precision machined steel, it is impervious to wear on the ears, like the standard aluminum baskets can be. To install the Hinson steel basket you do have to remove your standard clutch basket, so just be forewarned this process can take a while. You then must drill out the rivets and replace the drive gear on from the back of the stock clutch and install it on the Hinson basket. (Some kits come with a new kickstarter gear and drive cushions as well.) Hinson recommends using their cushions (which come with the basket), especially if your bike has some time on it. This install process takes slightly above normal mechanical know-how and tools, but it isn’t much more than a 90 minute job with the included step-by-step instructions.

IMG_0701.jpg

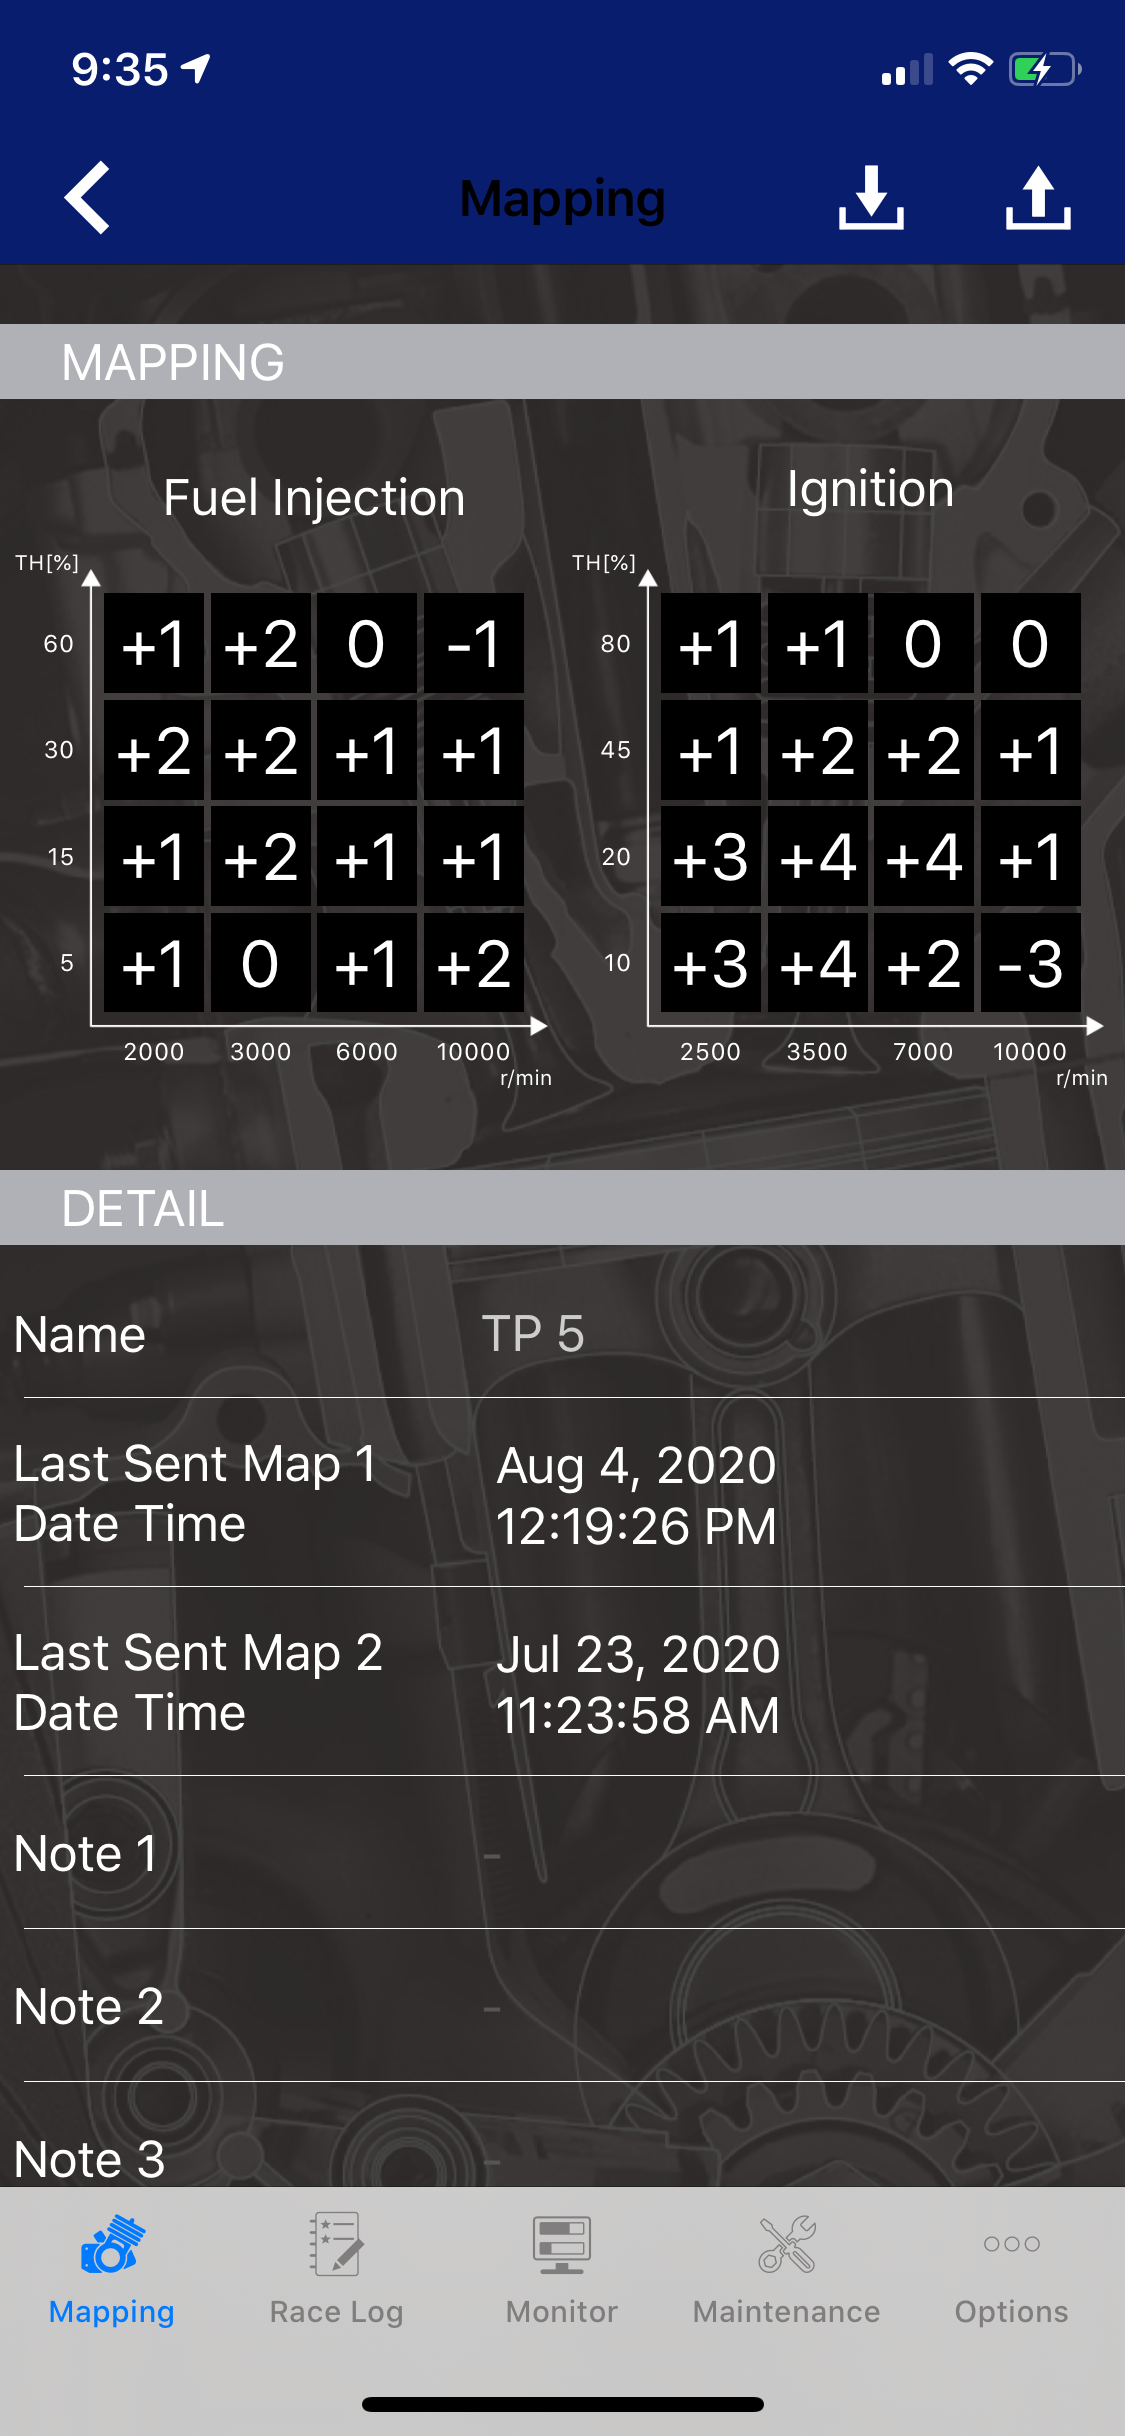
Right from the get go I am able to feel the Hinson steel basket’s effect on the engine character of the YZ450F. It doesn't seem to affect the throttle response much at all, but it does smooth the power out when accelerating out of rut. I don’t know if this mod is something that you east coast/soft dirt riders would necessarily need, but if you ride loamy to hard pack dirt this is something that can help forward rear wheel bite. The YZ450F has a stock engine character that spools up quicker than other 450’s in its class. With that being said, that kind of power can be really good for soft dirt, as it can make the bike feel light and get you out of soft ruts/corners quickly. Now for us west coasters that ride in loamy conditions in the morning and then hard pack in the afternoon, the YZ450F can be tricky to dial in. With the steel Hinson basket installed the YZ450F engine feel gets a calmer delivery to where you can accelerate sooner out of ruts/corners. The rear wheel spin that I got out of corners (under hard acceleration) with the stock basket is much less with the steel Hinson basket. Not only are you getting less rear wheel spin, but the chassis also feels slightly more planted of throttle. Installing this steel Hinson basket gives the rider slightly more front end traction off throttle on your initial lean. Yes, you will get a little more engine braking, but with the TP 5 map shown here, it does lessen the drag off throttle. 

IMG_9968-2.PNG

For $310.00, it’s worth the price, if you’re looking to smooth out your YZ450F a little in the areas I mentioned. The only negative to this part is that it does make a little more engine braking, but with the map attached here, it does help lessen that somewhat. I am very sensitive to engine braking, but when I asked my other test rider to ride his YZ450F and my test bike back to back, he didn’tt notice much engine braking at all. This is a part that maybe you don't know you need, until you try it. I am glad I remembered that Hinson offers the Momentum Steel Clutch Basket. You can check the momentum basket out right here: https://hinsonracing.com/p14400-momentum-clutch-basket-2020-yz450f

If you have any questions about this test, please feel free to email me at kris@keeferinctesting.com 


Twisted Development Performance Exhaust Flange

Looking for more throttle response as well as increased pulling power out of corners on your KTM 450SX-F? Although I love that smooth engine character on the KTM, I could stand to get a little more throttle response and excitement from the orange machine as well. Jamie from Twisted Development and I went through several of his performance exhaust flanges on our 2021 KTM 450 SX-F and found one size that really helped the low end response.

We weeded through three different versions of the flanges to see if any were better than stock.

We weeded through three different versions of the flanges to see if any were better than stock.

The Twisted Development exhaust flanges are shaped differently than the stock OEM flange, which can change the engine character of the KTM 450 SX-F. I went through several during testing and found out a size/shape that can actually enhance the low to mid range power character. Compared to the stock piece the TD Performance flange will give you better throttle response through area 2-3 (mid to exit) of corners. Another advantage to me is that the TD flange helps pulling power out of corners as well and helps third gear lugability. The TD flange just helps the RPM’s pick up quicker, which in turn makes the KTM feel lighter when the track gets bumpy. There is no need to remap your ECU and it takes minutes to install.  

The TD flange works with the stock headpipe/muffler system or any aftermarket system. I tried it on a stock muffler system as well as a full FMF system and with both, the TD flange helped in aforementioned areas. For $200.00 bucks, to me, it’s a great way to get a little more snap out of your KTM 450 SX-F. 

IMG_0122.JPG

Right now Twisted Development is only going to make a handful of these for the first run, so if you’re interested, you might want to call him at 951 698 7222. If you have any questions about this part you can email me at kris@keeferinctesting.com and I am happy to help.

Slater Skins Air Box Cover (Yamaha YZ250F/450F)

Remember Slater Skins? Yeah, the Blue Buffalo Supercross Team that had the complete signage/coverings across their bikes was John Slater’s brainchild, but most recently he has started to offer air box covers for late model YZ-F’s that increase airflow. We all know more air equals more power, but how does it relate to the track? I took one of Slater Skins air box lid covers out with me on a test day, to see how each performed on a 2020 YZ250F, as well as a 2021 YZ450F and found the results interesting. 

IMG_0474-2.jpg

Now you might be asking yourself, why the hell do I need more power on my YZ450F? You don’t if you’re a mere mortal like me! However, if you’re looking for slightly more midrange pulling power on softer tracks as well as faster tracks with hills, this Slater Skins cover will give you a little more in those areas. Where I really liked the Slater Skins cover was on the YZ250F. The Slater Skins cover not only has front vents (with screen coverings) for increased air flow, but also more volume to allow more air inside the air box. By doing this I can really feel more bottom end pulling power out of the YZ250F as well as better low end RPM response through corners. This Slater Skins air box cover can make your YZ250F have just a little more snap out of the hole along with a slightly snappier mid RPM punch in third gear. I notice most of the mid range RPM increase while accelerating out of a corner (in third gear on the YZ250F) when the track has nasty square edge or bumps. Trying to “hop” over some of those bumps with the stock cover makes the bike feel a little less reactive to your throttle hand and heavy. With the Slater Skins cover the YZ250F felt crisper and allowed me to “pop” over bumps with a lighter more exciting feel. The difference between the stock lid and the Slater Skins lid is NOT MIND BLOWING, but it is noticeable (albeit mostly on the YZ250F). If you look at a 2021 YZ250F air box cover you will notice Yamaha put holes on the back side of the air box lid so that tells you that even the in house Yamaha R&D team was looking for increased air flow in the stock cover. The difference is that Yamaha put their vents near the back of the lid and Slater Skins incorporates the front part of the lid for increased ventilation. 

IMG_0475.jpg

The next question is, what about the noise Keefer? Yes, it is a little louder, but to me it sounds very race bike-ish. The suction or increased noise you’re going to hear from your air box is not going to deafen you. However, I tested some other Slater Skins covers with larger vents and those were too loud and to me the power increase didn’t warrant the noise. If you’re coming off of another brand of motorcycle onto the YZ250F with the Slater Skins cover then it could be nuisance, but if you already ride a Yamaha, you should not notice a huge amount of noise. The suction noise/does get louder as you open your throttle. 

If I was needing a little more bottom end pull as well as RPM response the Slater Skins $80.00 air box lid offering is a good deal. The cover comes in white/black, but If you're looking for a blue cover, John has a blue sticker kit he can install on a black cover if need be. Blue will be available shortly. The cover comes with a washer clip for your stock dzus fastener and are available by reaching John over at slaterskins@gmail.com.   

Notes: I tested the Slater Skins cover with a stock air filter cage/screen. I have also tried it with a Twin Air Power Flow open cage/filter with even better results, but also a little louder. FYI…

Just note that your filter will/can get dirtier with the vents being up front of the lid. The screen that covers the holes doesn’t allow a ton of dirt through, but it can get much dirtier in sandier/silty conditions. FYI…

Pro Circuit Ti-6 Muffler System (2021 Kawasaki KX250)

Over 300 part number changes have been made on the 2021 Kawasaki KX250. After our first day on the new KX250 I was quite impressed with its ability to pull hard out of the corner and rev out longer than last year’s model. However, even though the Kawasaki has improved for 2021, the muffler still sounds a little too blown out for me in stock form (even when new). The tone of the muffler is not pleasant to the ear, so I crossed my fingers, called Pro Circuit and picked up a Ti-6 Muffler System to see if it enhances the current engine character of the KX250. Here’s what I came away with… 

IMG_0408.jpg

Immediately I weighed the both mufflers and took notice of how the Pro Circuit system cut just over 1.2 pounds off the green machine so we were starting off well. The next thing that made me happy was that the PC muffler goes on easy and literally took me 7 minutes to change out! Boom! So far so good! After installation I recruited my son to help me evaluate the system as he now has a new found love for the KX250 that didn’t exist last year. I made him write his notes down and I told him we would compare both of ours after we have tested this muffler at three different tracks. We tested the Ti-6 at Glen Helen, Perris and State Fair MX just so we knew exactly what we were getting out of the PC system. 

When you purchase your Ti-6 muffler it will come with a spark arrester screen already installed inside the muffler. DO NOT REMOVE THIS! This helps with back pressure and gives the KX250 the RPM response and bottom end that Aden (my son) and I both like. When we took it out the PC system lost some excitement down low and lost a little bottom end. You can however punch a small hole through the back of the screen and then reinstall it. Doing this actually helps give the PC system a little more bottom end and RPM response while still retaining that back pressure that is important for rear wheel connection. 

IMG_0406.jpg

Ok so now that we got the “tricks” out of the way, how does this PC system compare to stock?. Normally I DO NOT get more bottom end with a PC system (versus stock) on any brand of bike, but I was surprised that I got a little extra bottom end pulling power out of the PC system. RPM response is a little softer than the stock system, but when opening up the throttle out of corners the KX250 with the PC system pulls harder than the stocker. Mid range is where you will feel the meat of this power. When accelerating out of the corner and shifting to third, the KX250 doesn't have that “empty” feeling that the stock muffler has at times when the track is tilled deep. The PC system keeps pulling once the KX250 is shifted into third gear and continues to pull harder into the top end of the machine. Over-rev is as good as stock and I didn’t notice any loss of over-rev when swapping the two mufflers back and forth. 

The only real negative I have found from the PC system is I wish it would have a little more low end RPM response. Like I mentioned that stock muffler has a great initial touch of throttle which can make the bike feel a little lighter when hopping over bumps or popping out of blown out berms. The PC system pulls better out of corners, but is just a smoother initial touch (AKA, low end RPM response). If you want more low end RPM response and could stand to lose some pulling power then take the screen out of the Ti-6. Doing this will give you more low end RPM response, but will hurt some mid range.

IMG_0407.jpg

Overall Aden and I are pleased with the PC system for the 2021 KX250 and I guess we shouldn’t be surprised as they do have that Kawasaki race team and all. My son surprisingly felt most of the pulling power, but didn’t feel much increase anywhere else, so not bad for a 14 year old squirrel. Hey, Mitch! If you’re reading this, good job! Chanceability that he reads this? ZERO. POINT. ZERO! 

Extra Credit: If you want more pulling power as well as more top end install the “Chavez Map” with your Pro Circuit Ti-6 muffler and thank me later. See below for map..

IMG_0242.jpg
IMG_0245.jpg

How To Save Your Subframe On Your 2019-2021 Kawasaki KX450

By: Matt Sirevaag (AKA Vaaaaaaag)

You just took ownership of a new KX450 and you want to change the engine characteristic with a new exhaust. However when listening to Keefer rant on the Pulp MX Show about A-Ray giving away mufflers like he’s Oprah on a Christmas special has you hesitant. You may wonder why the aftermarket exhaust industry didn’t just do as Kawasaki did from the factory and use a rubber grommet to help with vibration and help yield breaking sub frames. Well for whatever reason most exhaust companies mufflers are solid mounted so sometimes consumers are breaking the tabs off the subframes thus mufflers are being laid all over local tracks like toys left on the floor by a three year old.

IMG_0401.JPG

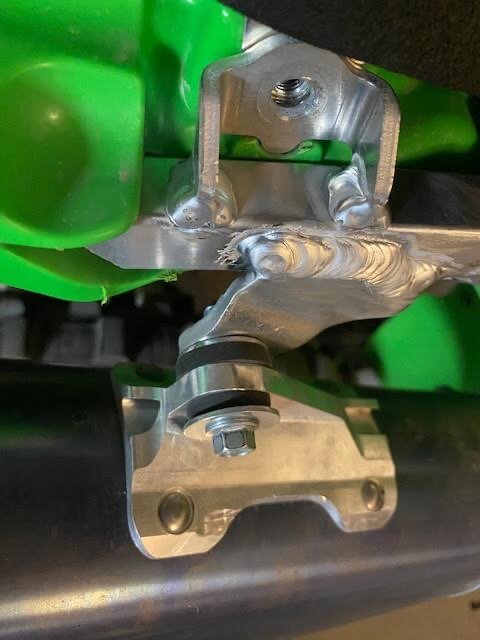
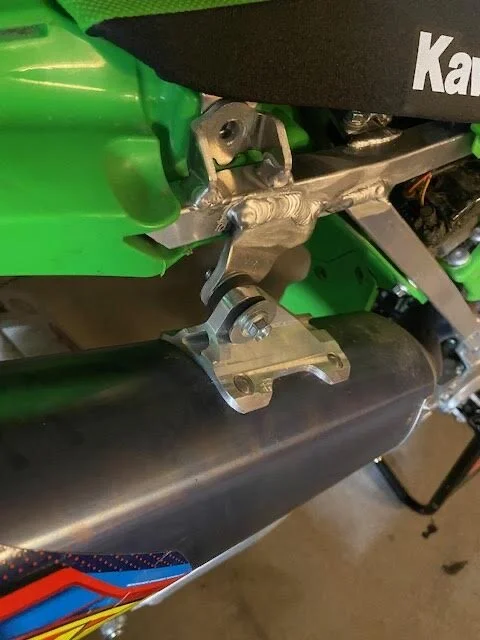
After breaking  our muffler bracket on our KX450 test bike, we decided to take the stock rubber and mounting hardware to install the new aftermarket FMF exhaust. This is a simple mod that even the most novice mechanic can do at home. Take your aftermarket muffler and stick it in a soft vise or have your wife hold your muffler. Drill/hog out the existing mounting hole with 5/8 drill bit or step bit. Next, install the rubber grommet and hardware from your stock exhaust into your new muffler. Boom! Now you have aftermarket exhaust mounted the way Kawasaki intended it to be. You will get a small amount of float out of the rear section of the muffler, but we have not noticed any unnecessary vibration or slop when riding.

IMG_0400.JPG

FLO Motorsports Lowering Footpegs (Yamaha YZ450F)

If there is one thing I can complain about on the Yamaha YZ450F, it would be that the ergos are a little weird compared to the other brands. When sitting, the Yamaha feels like the pegs are high and not far enough back for my 6’0 long legged frame. I scoured the land for a lower footpeg kit and came across the FLO Motorsports 3.0 lowering footpegs. The FLO pegs are 2mm lower and 10mm back on 2016 and newer 450F’s and are made out of lightweight 7075 T6 Aluminum alloy, come with rounded edges, loctite on cleats, has an extra wide 57mm wide/87mm long platform and have self cleaning mud grooves to keep them in the position they intended to be in.

IMG_0352.jpg

FLO advertises that the pegs are 12mm lower and 10mm back, but in reality since Yamaha went to the new style YZ450F those numbers have changed. According to Yamaha R&D the 2016 Yamaha YZ450F came with a 10mm lower peg (from the 2015 model), so if you have a 2016 or newer YZ450F you will only get a 2mm lower peg height than stock. I used the reference “new style YZ450F” because in 2018 the seat to footpeg height was changed as a lower subframe height setting was incorporated into the new style 450F. If you’re riding a two stroke Yamaha then the FLO pegs come as advertised. 

Installation was easy as the FLO pegs come with their own springs, but you will have to utilize the stock pins as well as re-use your old cotter pins or use fresh ones like we did. Once seated on the bike and out on the track, I could immediately notice my position on the bike was different. My gripe with the stock position is that my hips/lower body/feet always felt too far forward on the bike, which gave me the wrong body position when trying to stand through rough sections of the track. Now with the pegs moved back 10mm my feet were positioned correctly (on the balls, not arches) and my hips were slightly rotated more rearward. This allowed my upper body to relax a little when standing through long ruts. I didn’t notice the height difference as much as I noticed the position of my feet/hips. I do not like the stock bar mount position on the 2020-2021 YZ450F, so I am always reverting back to the rear hole and these pegs compliment that bar mount position nicely. 

IMG_0353.jpg

I also find that when putting my feet back on the pegs after a corner my feet fall into the correct position much easier than the stock pegs. With the stock pegs, I had to really focus on sliding my feet back to get them on the balls, but with these FLO pegs, they seem to naturally get there easier. I like the wide platform and I like that the cleats are sharp enough to help my Alpinestars Tech 10s to stick better than the dull stock peg. I will say that I am not a huge fan of thread on style cleats as I would rather have teeth, but the cleats FLO did use were a good height and sharp enough to prevent my boots from slipping off. 

This may not be a life changing ergonomic change, but for me it does help the rider triangle a little for taller dudes that find themselves looking for better foot placement. I would like to try an even lower height setting along with the 10m rearward position, so maybe we can get FLO to design an even lower peg for the newer style YZ250/450F’s. For $149.95 I think this is a good purchase for you bLU cRU riders out there that are in need of some rider triangle help. You can find/order these over at flomotorsports.com.  

Ride Engineering 22mm Triple Clamp and One Piece Bar Mount (Suzuki RM-Z450)

Ride Engineering’s 2020 Suzuki RM-Z450 22mm offset triple clamps (stock is 21.5mm) are anodized black, are 4.5 ounces lighter than stock and grip the fork 12mm higher up than the stock clamp. The one-piece bar mounts feature 12mm posts instead of 10mm for much-needed additional strength. The bar mounts retain the stock height and can be adjusted plus or minus 3–5mm and 5-10mm spacers are available for bar-height adjustment. Finally, soft poly cones isolate the bar post from the triple clamps, which provide additional plushness for your hands. The clamps come equipped with a steering stem and a tapered bearing pressed on, so they are ready to install once you unbox them.

AV BMX -9944.jpg

The Suzuki RM-Z450 doesn’t need much help through corners, but it does need a little help in between each corner. The stock RM-Z450 is a little rigid feeling, can get a little twitchy on de-cel bumps and give the rider some oversteer when trying to load the front end on flat corners. It needs a little more stability and less of a harsh feel around the track. This is where the 22mm Ride Engineering Triple Clamps and one-piece bar mounts come into play. The clamping zones where the Ride Engineering lower clamp grip the fork leg are 12mm higher than stock. What this does is provide a different fulcrum point that allows the fork to get some additional flex. What this does is translate the RM-Z450 into a slightly more forgiving ride without sacrificing the cornering characteristics.

AV BMX -9949.jpg

The 22mm offset helps settle the RM-Z450 into area 1 of corners for me as well as my test riders. With the fork set at 5mm up in the clamp the RM-Z450 now drops into a rut without that off throttle front end wiggle and the RM-Z450 now has an increase in cornering stability. Cornering stability comes into play when the rut is hammered and chopped out. The 22mm clamps provide more comfort in those conditions slightly more and allows the Suzuki to settle better. 

The adjustability of the bar mounts allows a wide range of riders the ability to dial in their cockpit area as well. For Ride Engineering weight savings and a more forgiving feel are always the goal and they seemed to accomplish this with this Suzuki set up. The Ride Engineering bar mount cones come in three durometers, which allow you to dial in the degree to which the bar mounts will give under loads. The softer the cone, the more movement you get, which increases comfort, but also can feel disconnected when you push into corners very hard. Naturally, some faster riders DO NOT like the bar mounts flexing and they prefer the stiffest of the bar mount cones, but I am more of a medium, more flex type of cone guy. 

AV BMX -9954.jpg

The Ride Engineering RM-Z450 triple clamps offer some real performance value ($549.99 clamps and $104.95 for the mounts) and are offered in a cool blue and black anodized look. An investment like this should offer some sort of performance advantage on the track, not just look pretty. The Ride Engineering clamps/mounts offer a change in the handling and to me it was mostly for the better. I say “mostly” because I did feel like the Ride Engineering clamps will fade if you leave your bike in the pits, under the sun too long. Make sure to cover up your front end with a towel so that the sun is not beating directly onto the clamps anodizing.

If you’re looking for more information on this product or have nay questions please email me at kris@keeferinctesting.com

2020 FMF Factory RCT 4.1 Stainless Full System (Suzuki RM-Z450)

FMF has helped us on many builds and you may be wondering why do we use them so much? Well… A couple reasons are because FMF is a great American made company, they are easily accessible to us dumb media people and they actually care about the results of their product. If for whatever reason they missed the mark on a muffler setting they are willing to make changes asap to make their product even better. There are only a few companies that are easy to work within this business and FMF is one of those. 

perris-8975.jpg

Suzuki hasn't won a shootout or for that matter won any professional races in quite sometime, but that doesn't mean it can’t be a great bike for the motocross enthusiast. One of my photographers/test riders Dallas Dunn purchased a RM-Z450 because this is what he could afford and he wanted to ride a dirt bike. Suzuki is selling their machines at a much cheaper price than other manufacturers and that is important to the growth of our sport. We need companies like Suzuki to stick around and help this sport grow. With that being said I wanted to try and get the heavy monstrosity that is the RM-Z450 muffler system off and get an FMF 4.1 system on in order to get you guys some feedback on what it can do to the RMaRMY’s power character. 

perris-8978.jpg

First thing’s first. We picked stainless steel because it costs less and is more durable than a titanium slip fit joint. The titanium joints are known to wear out a little faster and you’re not going to save a crap ton of weight going to titanium. If you’re the type of rider that wants lightweight and looks then titanium is your jam, but if you’re looking to just lose some weight over stock and get some durability there is nothing “not cool” about stainless. Speaking of weight the stainless FMF 4.1 system weighs in at 6 pounds 11 ounces which is almost a three pound weight loss from the stock piece. WOW! Bolting on the FMF 4.1 system is simple and takes almost not time at all. 

perris-8979.jpg

On the track the FMF’s muffler pitch has a deeper more throaty pitch to it and sounds clean (with stock or lean couplers installed). We will say that you will not get a noticeable amount of more bottom end with the FMF 4.1 system installed, but what you will get is a cleaner, more linear, longer pulling power than the stock system. Out of corners you will feel more connection to the rear wheel and an overall lighter revving feel. It’s tough to find more connection when getting a lighter revving feel, but for whatever reason this is how the Suzuki’s engine and FMF system blend itself together. Pulling second and third gears longer is made easier with the FMF installed, so if you want to be slightly lazier with your shifting after the corner (leave it in second gear longer), the FMF system can provide that for you. One thing you will not be getting is more third gear recovery, so if you’re looking to lug the RM-Z450 more with the FMF 4.1, it will not magically give you a ton more pick up in third gear. That area of the power remains similar to the stock muffler character. The over-rev of the 4.1 is noticeably better with the standard coupler, but if you’re using the white (lean) coupler you may want to give the stock coupler a try again to gain even more over-rev from the stock system. For $749.99 the FMF 4.1 stainless system is a good upgrade from your heavy, slightly lethargic feeling stock muffler engine delivery. Visit fmfracing.com to get yours or you can go to keeferinctesting.com and click on the RMATVMC banner to take you to their website to purchase. 

Weights:

Stock System 9.07 oz

FMF 4.1 Stainless System 6.11 oz

Yoshimura RS-9T Stainless Full System (2020 Honda CRF250R)

The 2020 Honda CRF250R is much better off the bottom end than the 2018-2019 versions, but we wanted to test the latest full stainless Yoshimura RS-9T to see if it helped the stock Honda’s engine character at all. We were specifically looking for a little more RPM response and pulling power because the Honda is still lacking some bottom to mid power when compared to the other competitors in the 250 class, more specifically the blue bike. Seeing as how my son and I have been logging a lot of hours on the machine as of late, I thought why not get a review up fairly quickly to give you the details. 

FullSizeRender-14.jpeg

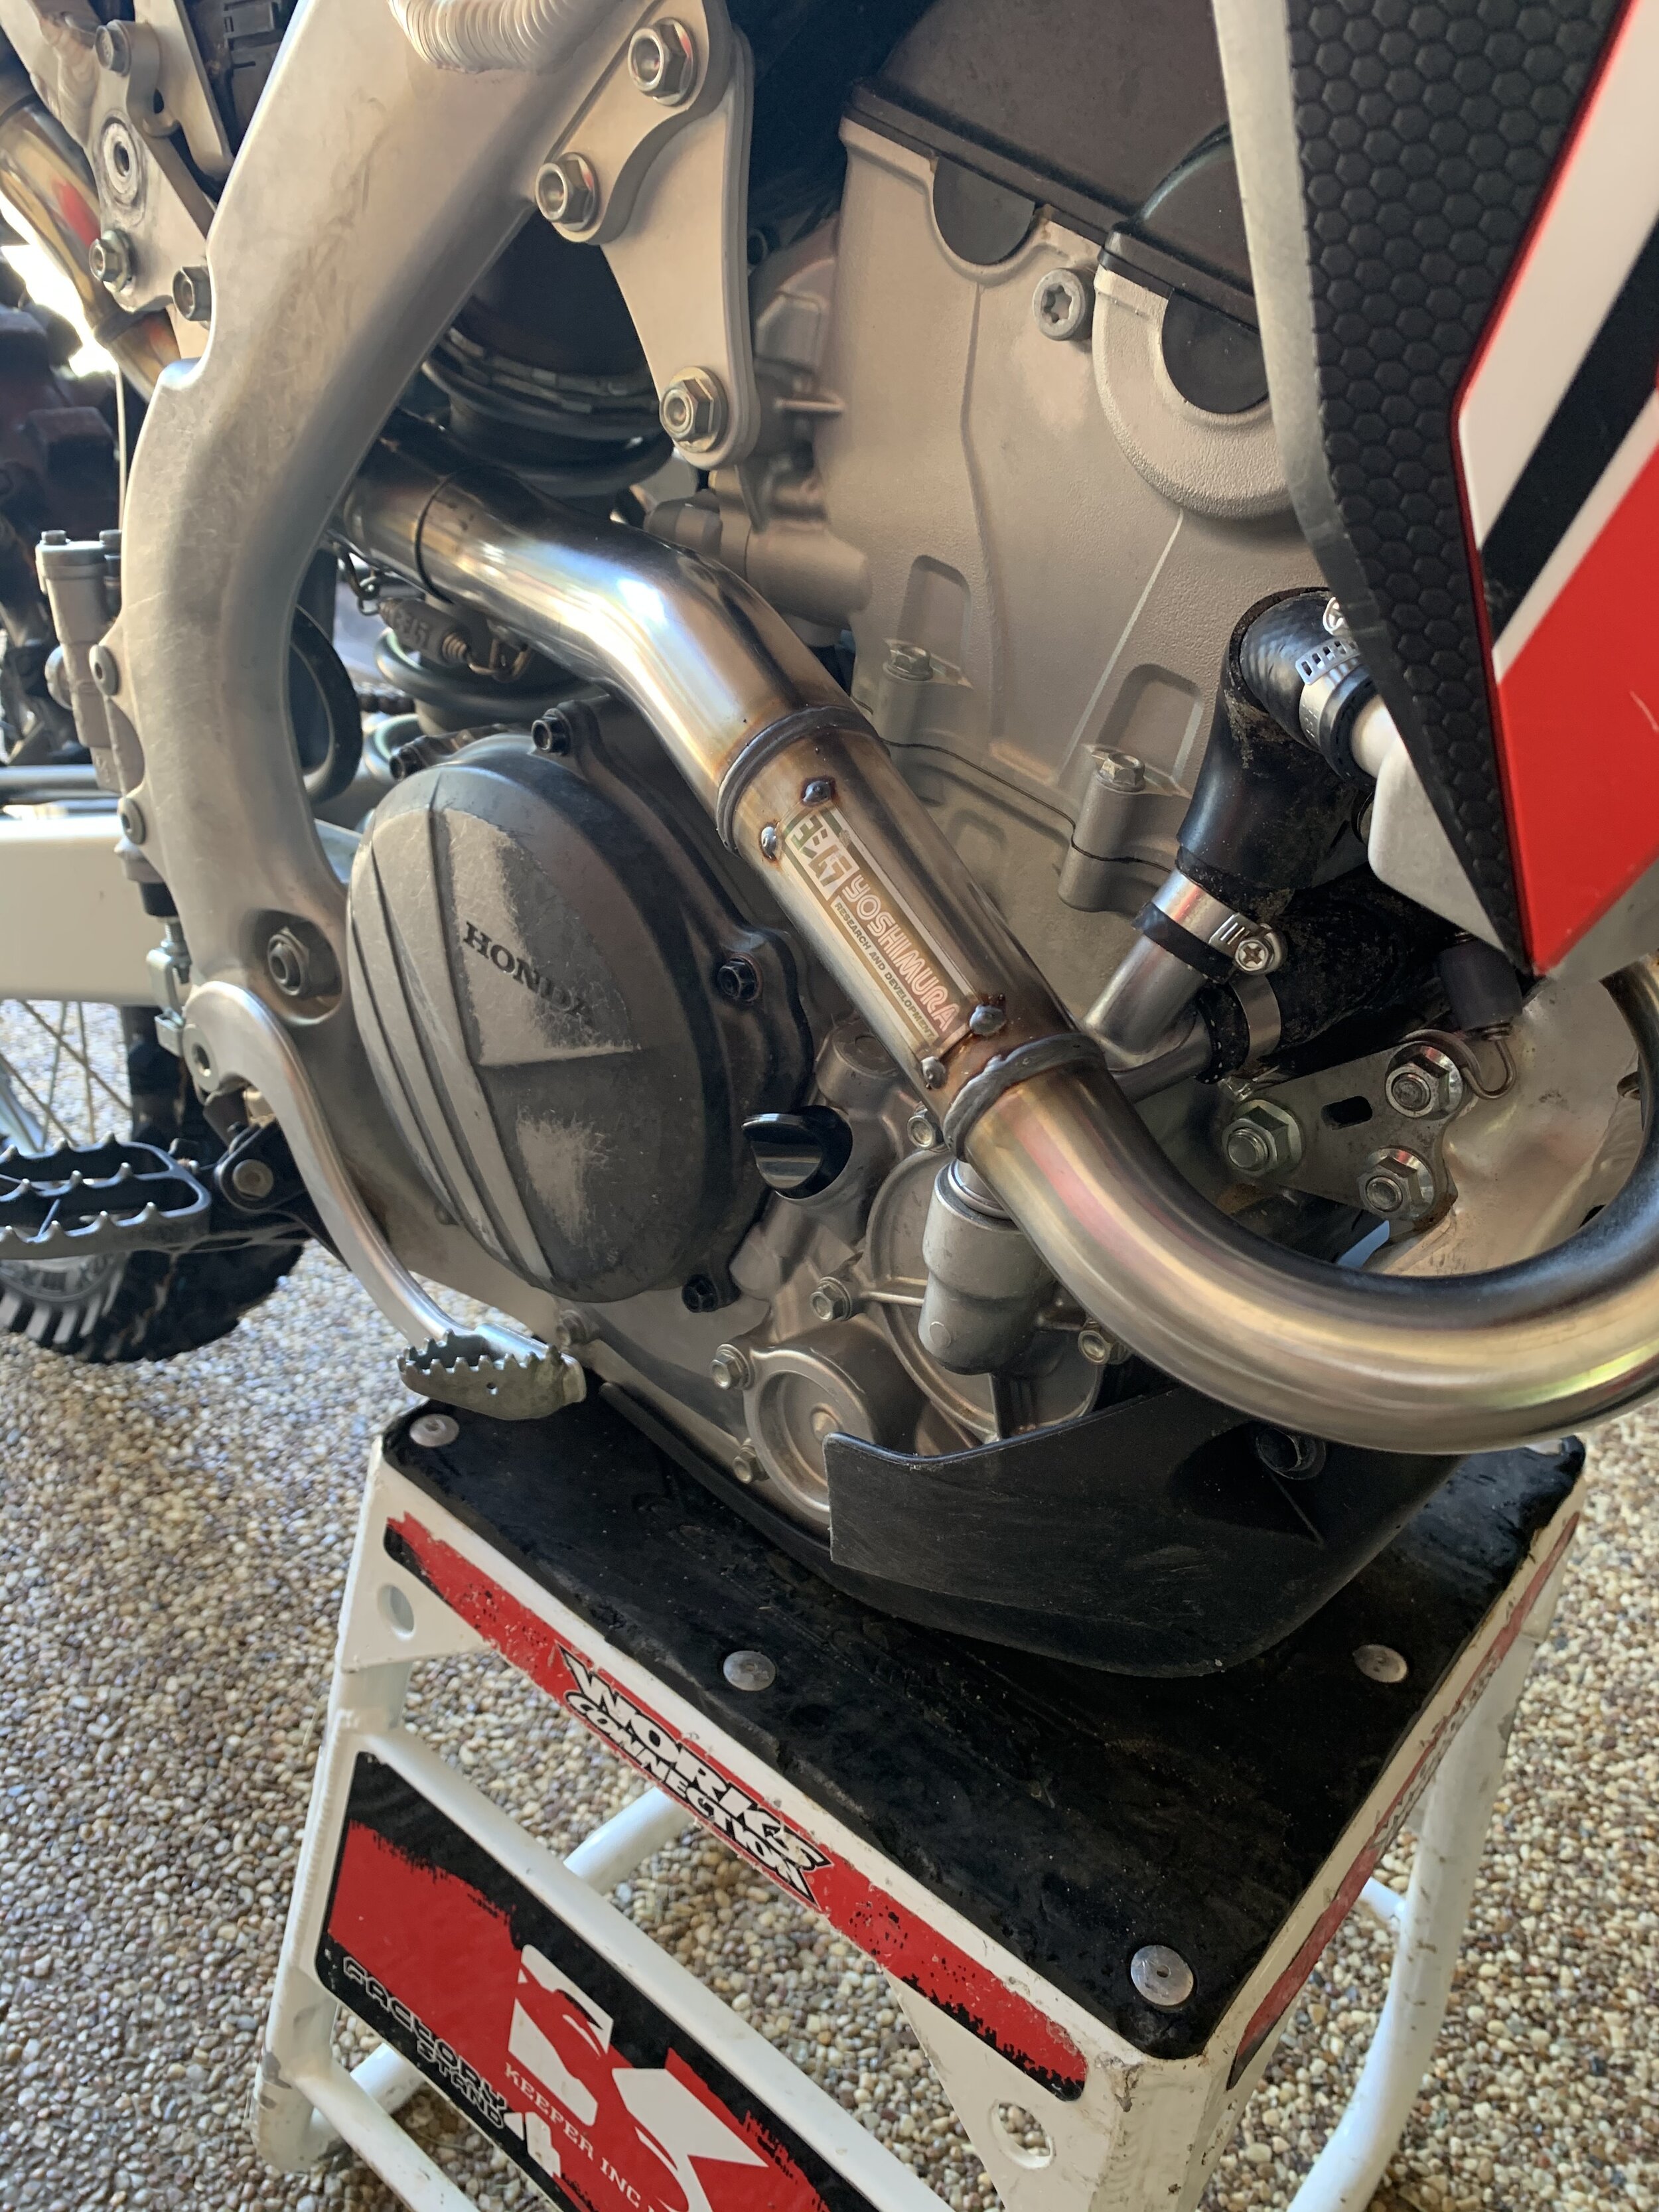
Installing the new full system took me less than 20 minutes and the instructions were very detailed. All of the parts that came inside the box fit perfectly and no swear words were thrown while installing the Yoshimura exhaust. In my opinion, Yoshimura is one of the highest quality exhaust manufacturers in the industry. I have been a part of a few R&D departments and I can tell you first hand that the quality, fit and finish of a Yoshimura exhaust is impressive. I wanted the stainless full system because it was less expensive ($909.00) and still knocks off almost a pound over the stock system!

IMG_9064-2.jpg

Now to the part that everyone wants to know...Does the Yoshimura help the little red screamer? The simple answer is yes, but who likes simple answers? Not us! With the stock system, the Honda pulled nicely from mid-range to the super high rev limiter that the Honda graces us with, but when exiting corners and trying to grunt up obstacles, the engine needed some help. The best way to explain the stock feeling CRF250R is that it’s just missing some meat. By saying that I don’t mean it’s slow, but I felt like I had to shift a little more with the Honda CRF250R. I had to ride a gear lower at times in corners (than other 250F machines), and if I didn’t, it took a bit of clutch feathering and more shifting to get the bike pulling hard again.

IMG_9076.jpg

As soon as I fired the bike up with the new exhaust it was clearly a bit louder, not obnoxious, but a nice, throaty sound that was deeper and less raspy. I tested the stock system back to back with the Yoshimura system on the same days, so it was cool to see the places on each track where the bike really felt different. The most noticeable place the bike felt better was out of tight inside ruts that exited up faces of jumps. With the stock system I had to slightly slip the clutch all the way up the lip (to be able to clear the jump). When I bolted on the Yoshimura system I could leave it in the same gear and just use the meat of the new found Yoshimura power to pull me up and over those types of jumps. Some areas of the track I had to be in second gear and then scream the bike on the exit of corners with the stock system. With the Yoshimura system I could now be a gear higher at times and use that extra meat to get me out of a loamy berm more efficiently. From mid to top end I didn’t notice any real added power gains, but I also didn’t feel like the top end suffered in order to get the added bottom end snap that I received with the Yosh. I will say that the mid rpm response is slightly crisper when in third gear as well as the recovery in third gear through deep corners. Bolting on the Yoshimura full system will not make your Honda as responsive as a Yamaha YZ250F, but it will get you a little added excitement that you could be looking for. Plus the Yoshimura mufflers look much cooler than the stock ones. 

If you have a 2020 Honda CRF250R and feel like you’d like a bit more bottom-mid range power, I’d definitely look into the RS-9T stainless system. Yoshimura offers three options, the slip on mufflers ($809.00), the full stainless system ($909.00), and the full titanium system ($1499.00). Admittedly none of these are super inexpensive options, but it’s one of the few things in today’s four-stroke world that can provide a true bolt on benefit. 

You can check out yoshimura-rd.com for more of you can contact me at kris@keeferinctesting.com if you have any questions. 

REP Knuckle For 2015.5-Up KTM Shock

As the hours keep ticking away on the 2020.5 KTM 450 SX-F Factory Edition test machine, I have been going through test parts like crazy. I have been testing the REP (Research Engineering Performance) re-valved WP XACT Pro Components and have good things to say about Mark’s work, but I wanted to get a little more comfort for the shock, so he offered up his knuckle and pull rods to me. I explained to him that I felt the KTM was low in the rear, so I would rather not use the pull rods, but I was willing to use the knuckle in corporation with the WP XACT Pro Component shock.

3_JPEG.jpeg

So what is the purpose of the REP knuckle? The reason for designing this linkage system was to help or eliminate a common issue Mark has witnessed with the KTM/Husqvarna. A rider comment that he has repeatedly heard is a lock out sensation in the shock resulting in harshness and unwanted weight transfer. Immediately REP started testing shock settings after shock setting, which helped, but did not fix the issue entirely. This is when REP’s investigation began into the leverage ratios to decipher if this was truly a shock character issue or if the chassis needed some changes. 

The linkage put into the Austrian production has a very "stiff" ratio when compared to other brands, which is why the bikes come with such a soft rear spring. REP feels this is the right direction for the beginning to mid stroke, but the progression at the end of the stroke was slightly too aggressive causing unwanted weight transfer and harshness from the rear of the bike

The REP linkage system makes a more linear progression for models 2015.5 to current. Many of the other companies producing linkages for these bikes result in a softer ratio all the way through the stroke, which is why they also require a stiffer rear spring. The REP system does not stray far from the production ratio for the majority of the shock stroke, but simply tapers off from mid to end. This change does not require a spring change because the ratio from full extension to rider sag point is very similar, but once active on the track the rider will see the digression in the ratio to be quite apparent.

The knuckle can be used with the standard pull rod (like what I did) or the longer REP version. If only the knuckle is used the rear seat height will be raised 1.9mm, but if the entire REP linkage package is used the rear will be lowered 2.1mm when compared to stock. Keep in mind if the entire package is used, it not only lowers the rear, but also exaggerates the flatter ratio that the knuckle is producing. REP recommends the knuckle to all his riders, but Mark decides if the customer needs the pull rod based on the rider's preference and comments.

IMG_8795.JPG

A couple positives to the knuckle that I noticed right away was comfort on acceleration through deep/choppy ruts and the KTM felt less active on de-cel bumps coming down hills. Without the REP knuckle the KTM kicked me in the butt more than other Japanese bikes do when braking hard on de-cel bumps, but with the REP knuckle the rear of the KTM stayed planted better and gave me a calmer feeling when pushing deeper into rough corners. I managed to get a bone stock 2020 KTM 450 SX-F, (without XACT Pro Components) installed the REP knuckle on the WP shock and it gave me the same feelings in those two areas of the track. I appreciate that I didn’t have to drop a spring rate and basically could just bolt this on and feel an improvement. For $249.95 for the knuckle (with bearings installed), I really like the way the KTM can be pushed harder later in the day when the track gets hammered. I used to shy away from the KTM in the afternoon hours, because it would beat me up a little. Now by adding this REP knuckle to our KTM Factory Edition, it has made this a more comfortable machine to ride when everyone else is packing up to go home. 

Note… Not all aftermarket knuckle/linkage systems work on every brand of motorcycle. Some manufacturer R&D teams get their linkage ratios correct for the masses upon production, but it’s refreshing to see Mark at REP sell a suspension piece for the KTM that actually is noticeably better when riding it back to back with the stock piece. 

FAQ: 

Kris, how do I know if I need a knuckle and not just a re-valve on my shock?  

If you are experiencing a firm feeling coming out of corners and seem to lose traction, this knuckle can help. If you are coming into braking bumps and notice that the KTM has a nice plush feel on the first bump, but then gives you a rear end kick when unloading upon the second touch, this knuckle can help that. These are the two areas that most weekend warrior riders would feel the REP knuckle is better. 

Kris, how do I know if I want the REP pull rods to go along with the knuckle? 

If you want your KTM to feel a little lower in the rear and want more rear steering, then you should look into the REP pull rods as well. I am a big front end steering rider so having the rear end a little higher for me fits my riding style. 

Attached is a graph from REP. The red line is the REP vs the black line Production.

REP Linkage.png


Pro Circuit Aluminum Throttle Tube

Have mostly been a plastic throttle tube type of guy, but I have appreciated the toughness of an aluminum throttle tube when I have some medium to large sized crashes. The one thing I usually don’t like is the firmness of the aluminum throttle tube when landing as well as how big they feel in my hand. I am very picky when it comes to handlebar set up and can be hypersensitive to any changes on or around the rider triangle area. I have tried a lot of throttle tubes and only ran across one or two that I actually like.

IMG_8862.jpg

Recently I stumbled across the Pro Circuit aluminum throttle tube while at the Husqvarna headquarters. Pro Circuit throttle tubes are CNC-machined out of aluminum and are Teflon coated on the inside to reduce friction which gives you a smoother twist of the throttle. As mentioned above the PC throttle tubes are much stronger than the OEM plastic units and are available for most Honda, Yamaha, Suzuki, Kawasaki and KTM two-stroke and four-stroke models.

A couple things that stood out to me with the Pro Circuit tube: One was that it felt smaller in my hand than other aluminum throttle tubes and it actually DID in fact feel smoother than the stock plastic ODI lock on tube (that comes stock on the KTM/Husqvarna). For me to have a grip/throttle tube that isn’t too big really helps prevents me from getting arm pump. If you’re getting abnormally more arm pump than usual, you might want to check the size of your throttle tube or grip. Even if you have big hands (size L-XL gloves) going to a slightly smaller throttle tube or grip could help alleviate some arm pump issues. Some companies swear that their aluminum throttle tubes are smoother feeling, but a lot that I have tried are worse than a plastic tube. PC’s aluminum tube is actually smoother than the stock plastic piece and tays that way for more than a few rides/washes.

I will say that having an aluminum throttle tube does feel slightly stiffer than the plastic lock on tube, but it’s not so bad where my wrist is begging for me to change it back out. Overall, I have come to like the Pro Circuit throttle tube and would recommend it for picky “rider triangle” riders like myself.

Seat Concepts OEM Race 2.0 Complete Seat

My standard 2020 KTM 450 SX-F Factory Edition seat didn't last long. The foam broke down, the cover ripped and my butt wasn't happy with me. I have pictures to prove it, but I'll spare all of you that nasty image. Enter Seat Concepts. After all of these years I have yet to experience any of their products until now. I wanted to get a complete seat so I had an extra one on hand and thought why not try something different. Seat Concepts offers covers, foams, complete seats and anything in between. I chose to try the standard OEM Race 2.0 seat and came away impressed. 

IMG_8628.jpg

The 2.0 seat is light, the cover is beautiful and the whole seat pan itself is well built. The standard foam was a little soft for my liking, so if you’re looking for a slightly firmer feel from your OEM foam, you may want to order a firmer density from the beginning. Seat Concepts does not offer custom seat shaping or custom covers. Seat Concepts foam material starts out as a liquid, so each different seat shape requires its own mold. They do not alter existing foam shapes. Due to their current production process, cover options are limited to those shown on each specific product page on their website. The Seat Concepts foam feels different than any other foam I have tried to date. The foam has a slightly more of a cushy feel in the middle of the seat than other foams I have tried, so comfort is always at an optimal level near the middle of the seat. The front as well as the rear of the seat has a slightly firmer feel to it, but I was mostly riding in the middle cushy part. I have noticed over the years that I just like firmer foams, especially when diving into deep ruts. On small chop the seat foam was extremely friendly to my butt and took a lot of the harsh impact out of some unexpected acceleration square edge.

IMG_8562.jpg

The Seat Concepts cover is ribbed and has plenty of traction to keep my shovel pan ass where it belongs, when on the gas hard out of corners. Did I mention that I love the way the blue color way ties in with my new graphic set up on the KTM? For $294.99 you’re getting a quality complete seat with a one year warranty and to me that seems like a fair price. If you’re as picky as me with your rider triangle, going to a Seat Concepts complete seat is a great way to better your riding experience. 

IMG_8637.JPG

Seat Concepts makes complete seats, covers and foams for most makes and models. Check them out over on seatconcepts.com.