Coppersmith Aero/Hybrid Fork

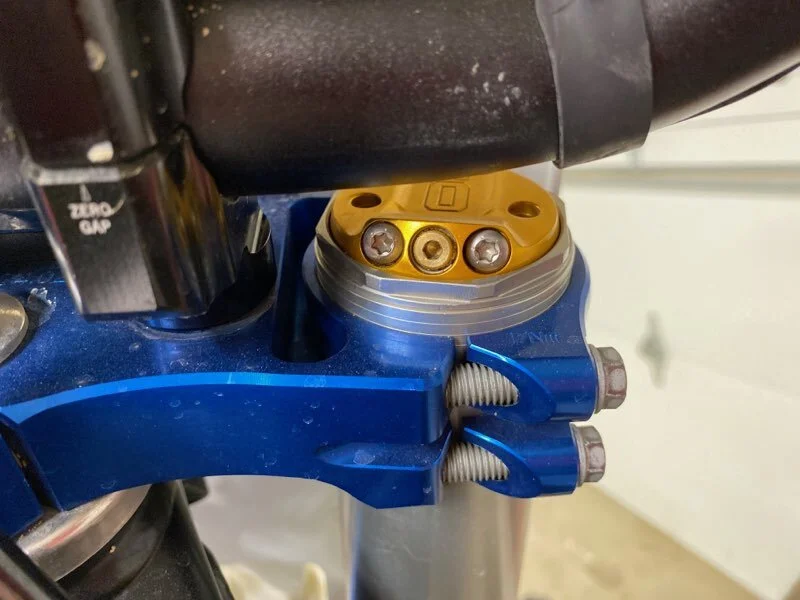
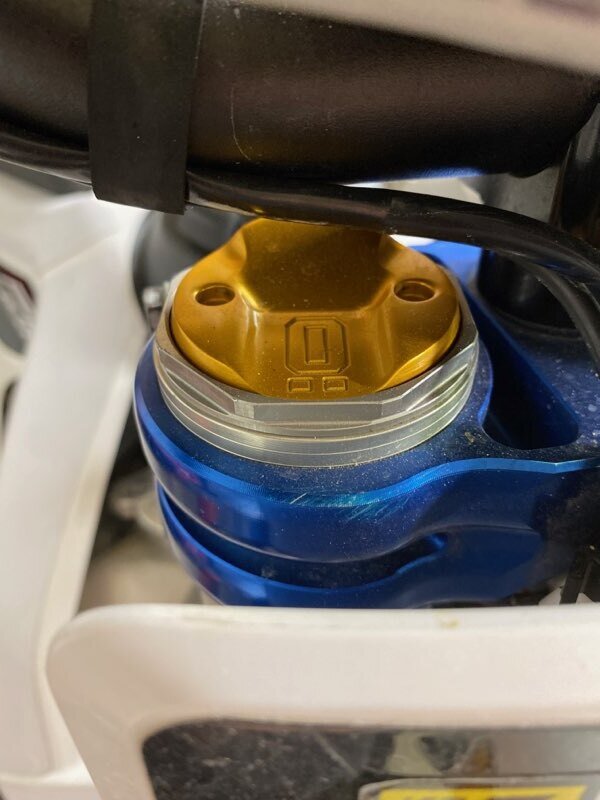
Coppersmith Racing Suspension has been around as long as I can remember and they have been mostly known for their Ohlins suspension set-ups. I stumbled across the Coppersmith Aero/Hybrid suspension kit for the WP AER air fork from the guys over at Racer X. If you’re on the fence about air vs. spring, the Coppersmith Aero/Hybrid fork kit gives you the best of both. It combines the old school feel of a spring fork with some of the tuneability of the WP AER fork. The Coppersmith Aero/Hybrid fork kit puts a modified Ohlins TTX22 spring cartridge in one WP fork leg for damping, with an OEM stock WP AER fork leg for adjustability. In essence, it is 50% Ohlins TTX22 (damping) and 50% WP AER (air spring). So how did it work on our Husqvarna FC450 test machine? Let me break it down for you here…

61404924326__3F5F9852-F6CC-4B09-8600-A8D644FA2E19.jpeg

I can already forecast the emails coming in asking how it compares to a KYB conversion and a WP Cone Valve fork, so let me get this out of the way. I will give you the simple answer of the Coppersmith doesn’t have quite the comfort of a KYB conversion on braking bumps, but does have more comfort than a Cone Valve fork on small bump absorption. The Coppersmith hybrid fork gives the rider superior bottoming resistance (similar to the AER fork feel) with the cushion of a spring fork on chatter as well as small to medium sized braking bumps. For the conditions we have out here on the west coast, it really is very surprising how much different it feels compared to the stock WP AER fork. 

Compared to the stock AER fork the Coppersmith Aero/Hybrid fork will give the rider more front end feel (traction) on lean angle and give you a more consistent fork action throughout the day. I was worried that going to one Ohlins TTX damping fork leg would almost give me that half ass sort of feel on the track, but there was only a small dose of an AER feel while riding. The only time I could notice that I still had anything resembling an air fork is when I slammed into a jump face or purposely overshot a jump to flat. The Coppersmith hybrid fork gave me that AER bottoming resistance, but without that harsh end stroke spring fork bottoming out type of feel.

61404939691__1356586D-5154-4189-8350-CFC28F2F1DEF.jpeg

I was trying to find a negative feel on the track (compared to the stock AER set up) in order to elaborate more for you guys, but to me, going to the Coppersmith hybrid fork seems all positive, when moving on from the AER set up. The stock WP AER fork isn’t the worst fork known to man, that title goes to the Showa SFF Air fork, but I just can’t stomach the inconsistency that it comes with during the course of a long moto day. I want the same feel throughout the day and I just can’t seem to get that with a full air fork set up. Maybe the only real negative that I experienced is that you still have to adjust the air pressure on the WP AER side of the hybrid. But Keefer, aren’t you still working with an air spring? 

Yes, we are, but the left side AER fork will now be ran at a very low pressure (6 bar) to accommodate the Ohlins TTX 22 cartridge. Running a lower air pressure eliminates almost all of the inconsistency of a higher pressure fork setting. Yes, the air will still fluctuate during a longer moto, but to me the feeling I get on the bike during the course of the day remains much more consistent than when running higher air pressures. A lower .45 spring rate is used in the Ohlins cartridge side and running the clickers at 13 clicks of compression and 14 clicks of rebound seemed to be the best setting between a 170 and 200 pound rider.

What about the weight bias between the right/left fork legs while riding? 

Yes, I could feel a slight weight difference on initial lean on right hand corners with the hybrid system, but it was minimal and I am a very hypersensitive test rider. When letting my other test rider try the Coppersmith hybrid fork he mentioned nothing of weight bias feel (left to right) and could NOT tell a difference. 

61404942681__5FAC8A86-7ADD-457B-9017-9EE18B1D5F69.jpeg

Although we didn’t install the Ohlins TTX22 cartridge in the fork, Coppersmith offers the installation to the customer. Just ship them your right fork leg and let Coppersmith handle it for you. Coppersmith also offers DLC and titanium Carbon/nitride coating as an upgrade if you’re feeling factory. Another benefit to installing the Coppersmith Aero/hybrid kit in only one fork leg is that it saves weight over a traditional coil spring fork plus cuts down on shipping cost and retails for $995 (installed). For more information call Coppersmith at (234) 229-9059.

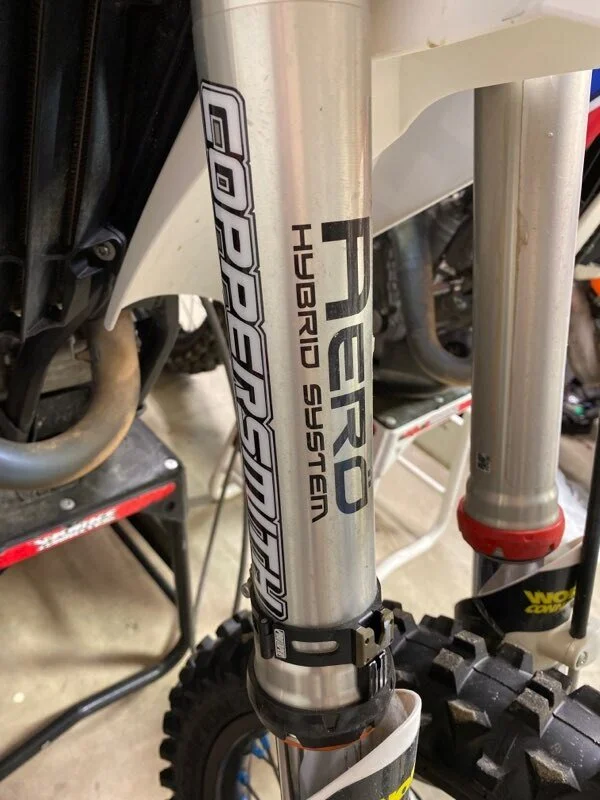
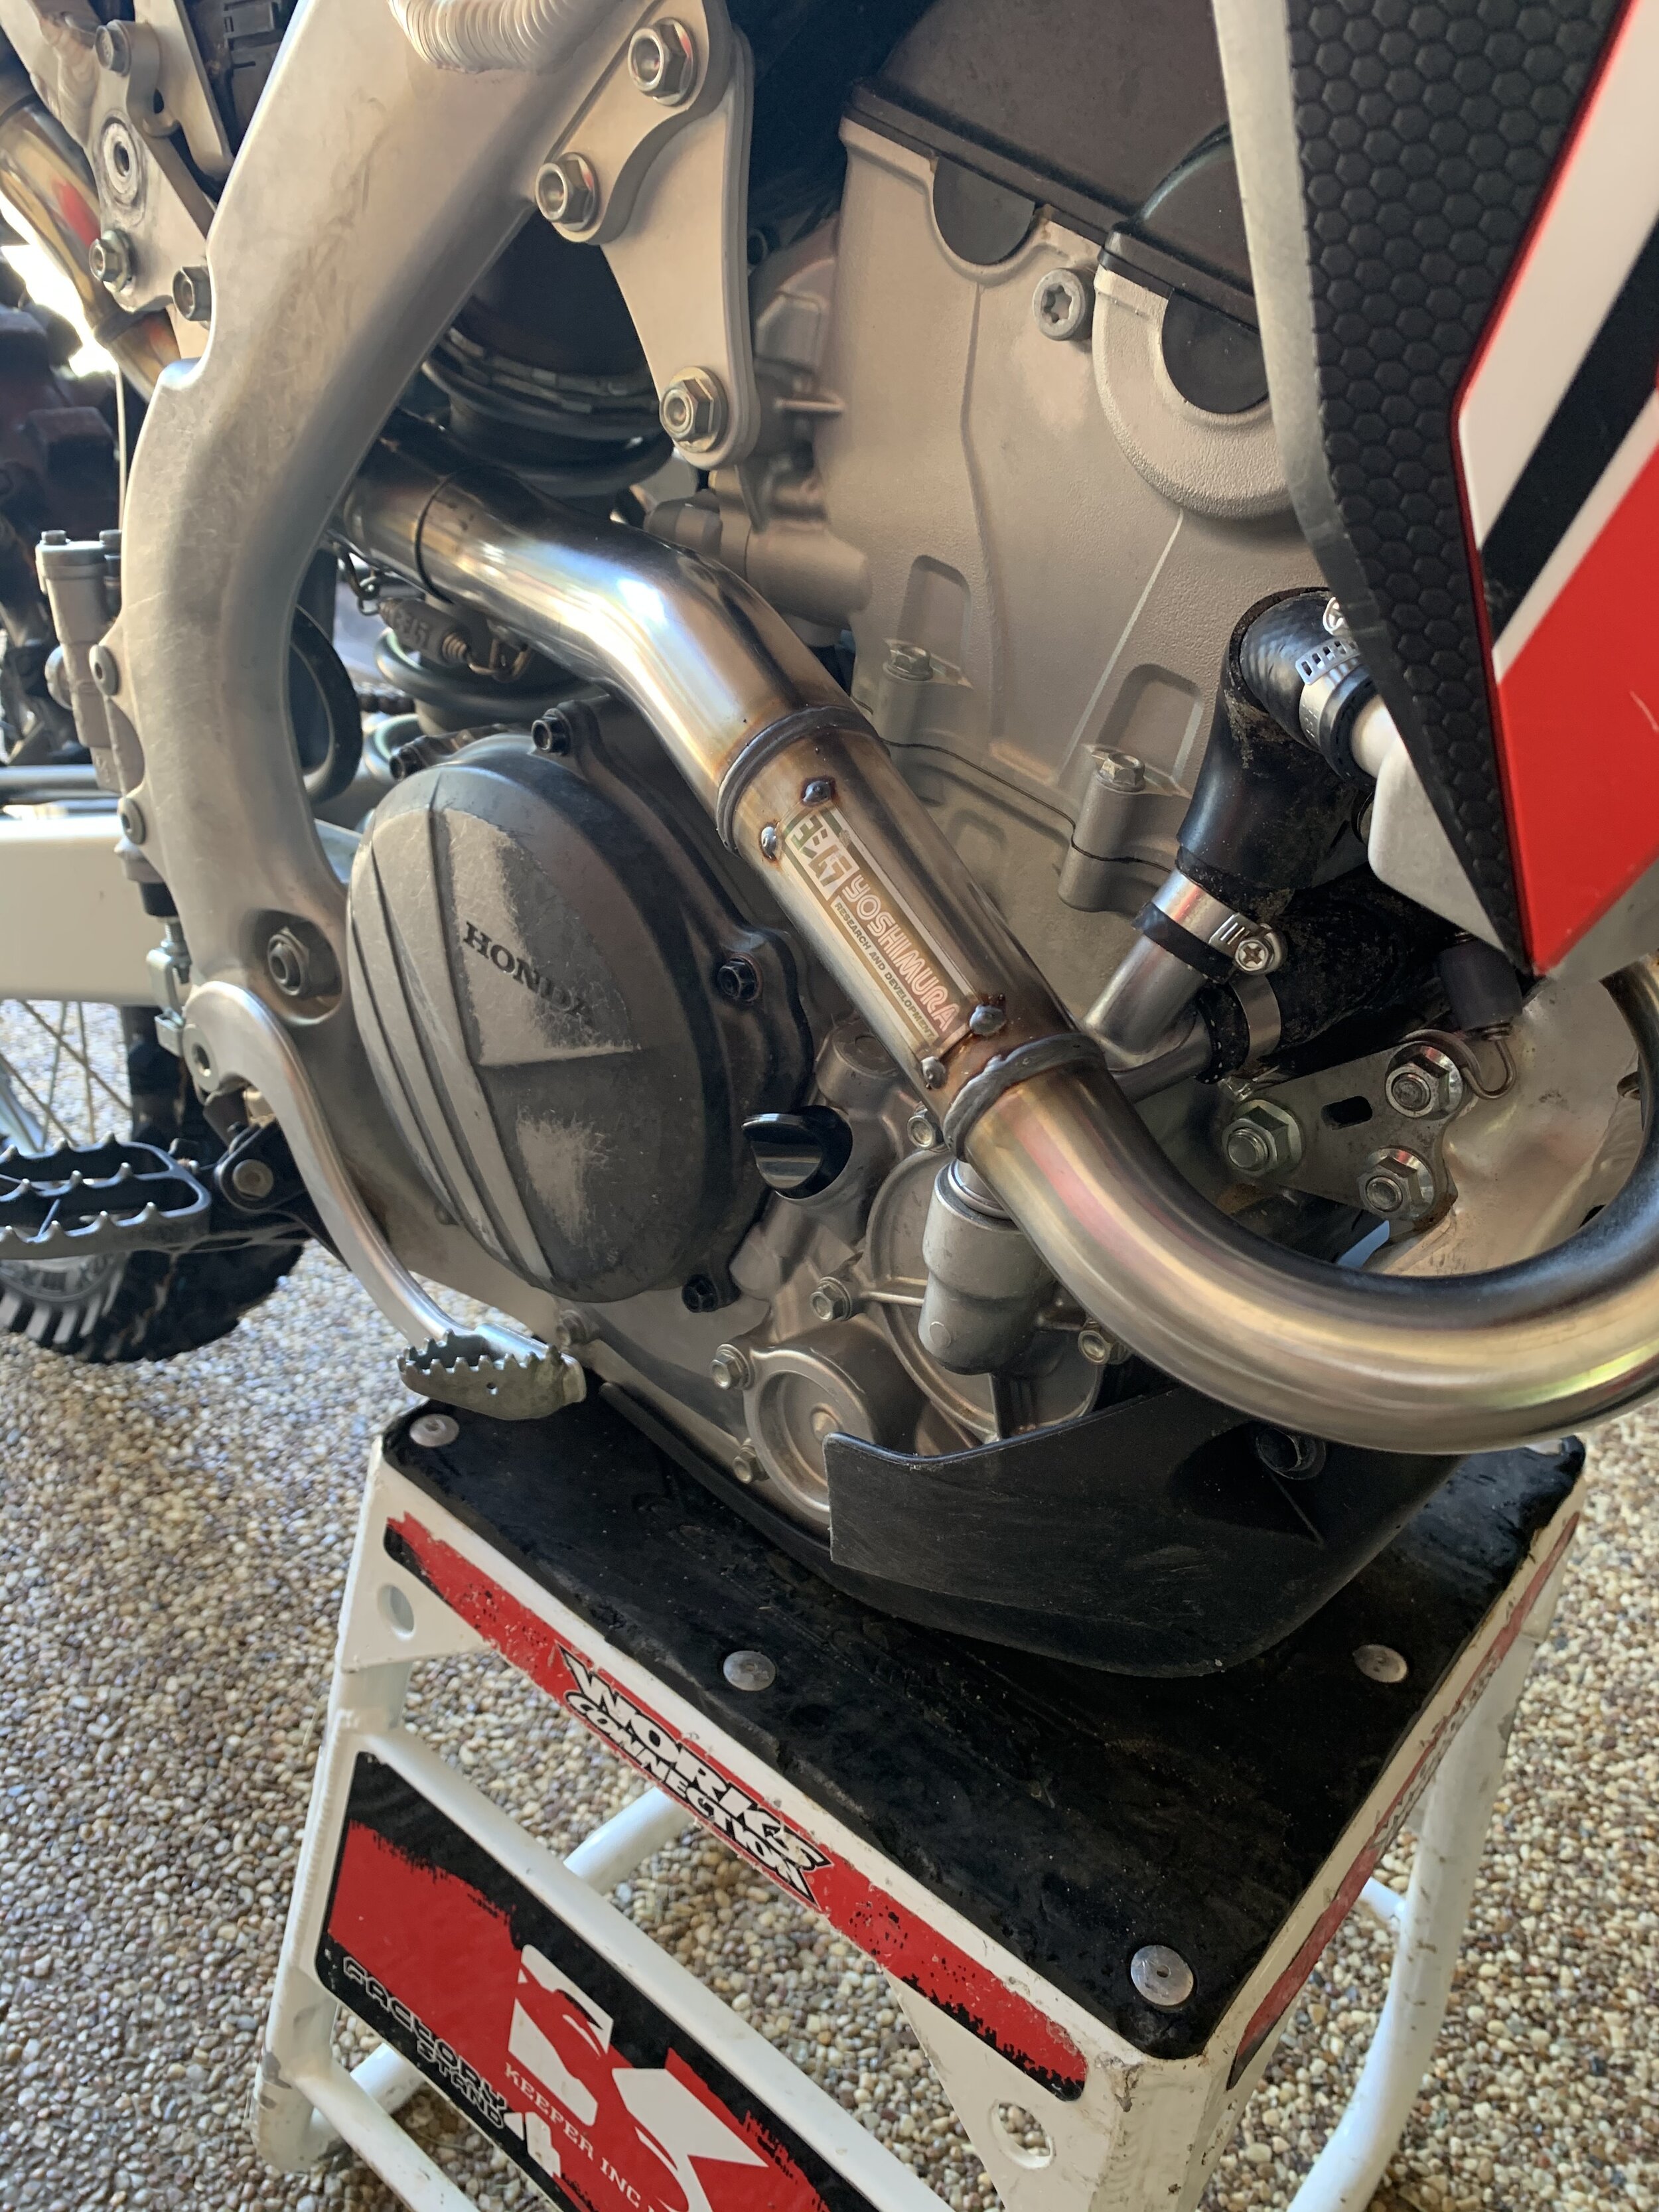
Yoshimura RS-9T Stainless Full System (2020 Honda CRF250R)

The 2020 Honda CRF250R is much better off the bottom end than the 2018-2019 versions, but we wanted to test the latest full stainless Yoshimura RS-9T to see if it helped the stock Honda’s engine character at all. We were specifically looking for a little more RPM response and pulling power because the Honda is still lacking some bottom to mid power when compared to the other competitors in the 250 class, more specifically the blue bike. Seeing as how my son and I have been logging a lot of hours on the machine as of late, I thought why not get a review up fairly quickly to give you the details. 

FullSizeRender-14.jpeg

Installing the new full system took me less than 20 minutes and the instructions were very detailed. All of the parts that came inside the box fit perfectly and no swear words were thrown while installing the Yoshimura exhaust. In my opinion, Yoshimura is one of the highest quality exhaust manufacturers in the industry. I have been a part of a few R&D departments and I can tell you first hand that the quality, fit and finish of a Yoshimura exhaust is impressive. I wanted the stainless full system because it was less expensive ($909.00) and still knocks off almost a pound over the stock system!

IMG_9064-2.jpg

Now to the part that everyone wants to know...Does the Yoshimura help the little red screamer? The simple answer is yes, but who likes simple answers? Not us! With the stock system, the Honda pulled nicely from mid-range to the super high rev limiter that the Honda graces us with, but when exiting corners and trying to grunt up obstacles, the engine needed some help. The best way to explain the stock feeling CRF250R is that it’s just missing some meat. By saying that I don’t mean it’s slow, but I felt like I had to shift a little more with the Honda CRF250R. I had to ride a gear lower at times in corners (than other 250F machines), and if I didn’t, it took a bit of clutch feathering and more shifting to get the bike pulling hard again.

IMG_9076.jpg

As soon as I fired the bike up with the new exhaust it was clearly a bit louder, not obnoxious, but a nice, throaty sound that was deeper and less raspy. I tested the stock system back to back with the Yoshimura system on the same days, so it was cool to see the places on each track where the bike really felt different. The most noticeable place the bike felt better was out of tight inside ruts that exited up faces of jumps. With the stock system I had to slightly slip the clutch all the way up the lip (to be able to clear the jump). When I bolted on the Yoshimura system I could leave it in the same gear and just use the meat of the new found Yoshimura power to pull me up and over those types of jumps. Some areas of the track I had to be in second gear and then scream the bike on the exit of corners with the stock system. With the Yoshimura system I could now be a gear higher at times and use that extra meat to get me out of a loamy berm more efficiently. From mid to top end I didn’t notice any real added power gains, but I also didn’t feel like the top end suffered in order to get the added bottom end snap that I received with the Yosh. I will say that the mid rpm response is slightly crisper when in third gear as well as the recovery in third gear through deep corners. Bolting on the Yoshimura full system will not make your Honda as responsive as a Yamaha YZ250F, but it will get you a little added excitement that you could be looking for. Plus the Yoshimura mufflers look much cooler than the stock ones. 

If you have a 2020 Honda CRF250R and feel like you’d like a bit more bottom-mid range power, I’d definitely look into the RS-9T stainless system. Yoshimura offers three options, the slip on mufflers ($809.00), the full stainless system ($909.00), and the full titanium system ($1499.00). Admittedly none of these are super inexpensive options, but it’s one of the few things in today’s four-stroke world that can provide a true bolt on benefit. 

You can check out yoshimura-rd.com for more of you can contact me at kris@keeferinctesting.com if you have any questions. 

REP Knuckle For 2015.5-Up KTM Shock

As the hours keep ticking away on the 2020.5 KTM 450 SX-F Factory Edition test machine, I have been going through test parts like crazy. I have been testing the REP (Research Engineering Performance) re-valved WP XACT Pro Components and have good things to say about Mark’s work, but I wanted to get a little more comfort for the shock, so he offered up his knuckle and pull rods to me. I explained to him that I felt the KTM was low in the rear, so I would rather not use the pull rods, but I was willing to use the knuckle in corporation with the WP XACT Pro Component shock.

3_JPEG.jpeg

So what is the purpose of the REP knuckle? The reason for designing this linkage system was to help or eliminate a common issue Mark has witnessed with the KTM/Husqvarna. A rider comment that he has repeatedly heard is a lock out sensation in the shock resulting in harshness and unwanted weight transfer. Immediately REP started testing shock settings after shock setting, which helped, but did not fix the issue entirely. This is when REP’s investigation began into the leverage ratios to decipher if this was truly a shock character issue or if the chassis needed some changes. 

The linkage put into the Austrian production has a very "stiff" ratio when compared to other brands, which is why the bikes come with such a soft rear spring. REP feels this is the right direction for the beginning to mid stroke, but the progression at the end of the stroke was slightly too aggressive causing unwanted weight transfer and harshness from the rear of the bike

The REP linkage system makes a more linear progression for models 2015.5 to current. Many of the other companies producing linkages for these bikes result in a softer ratio all the way through the stroke, which is why they also require a stiffer rear spring. The REP system does not stray far from the production ratio for the majority of the shock stroke, but simply tapers off from mid to end. This change does not require a spring change because the ratio from full extension to rider sag point is very similar, but once active on the track the rider will see the digression in the ratio to be quite apparent.

The knuckle can be used with the standard pull rod (like what I did) or the longer REP version. If only the knuckle is used the rear seat height will be raised 1.9mm, but if the entire REP linkage package is used the rear will be lowered 2.1mm when compared to stock. Keep in mind if the entire package is used, it not only lowers the rear, but also exaggerates the flatter ratio that the knuckle is producing. REP recommends the knuckle to all his riders, but Mark decides if the customer needs the pull rod based on the rider's preference and comments.

IMG_8795.JPG

A couple positives to the knuckle that I noticed right away was comfort on acceleration through deep/choppy ruts and the KTM felt less active on de-cel bumps coming down hills. Without the REP knuckle the KTM kicked me in the butt more than other Japanese bikes do when braking hard on de-cel bumps, but with the REP knuckle the rear of the KTM stayed planted better and gave me a calmer feeling when pushing deeper into rough corners. I managed to get a bone stock 2020 KTM 450 SX-F, (without XACT Pro Components) installed the REP knuckle on the WP shock and it gave me the same feelings in those two areas of the track. I appreciate that I didn’t have to drop a spring rate and basically could just bolt this on and feel an improvement. For $249.95 for the knuckle (with bearings installed), I really like the way the KTM can be pushed harder later in the day when the track gets hammered. I used to shy away from the KTM in the afternoon hours, because it would beat me up a little. Now by adding this REP knuckle to our KTM Factory Edition, it has made this a more comfortable machine to ride when everyone else is packing up to go home. 

Note… Not all aftermarket knuckle/linkage systems work on every brand of motorcycle. Some manufacturer R&D teams get their linkage ratios correct for the masses upon production, but it’s refreshing to see Mark at REP sell a suspension piece for the KTM that actually is noticeably better when riding it back to back with the stock piece. 

FAQ: 

Kris, how do I know if I need a knuckle and not just a re-valve on my shock?  

If you are experiencing a firm feeling coming out of corners and seem to lose traction, this knuckle can help. If you are coming into braking bumps and notice that the KTM has a nice plush feel on the first bump, but then gives you a rear end kick when unloading upon the second touch, this knuckle can help that. These are the two areas that most weekend warrior riders would feel the REP knuckle is better. 

Kris, how do I know if I want the REP pull rods to go along with the knuckle? 

If you want your KTM to feel a little lower in the rear and want more rear steering, then you should look into the REP pull rods as well. I am a big front end steering rider so having the rear end a little higher for me fits my riding style. 

Attached is a graph from REP. The red line is the REP vs the black line Production.

REP Linkage.png


Kreft Suspension Review (Husqvarna TE300i)

Written By: Michael Allen

Let’s be honest, as riders we have all probably uttered these words to a suspension tuner, “I want it plush, but stiff”. I would imagine that every suspension guy has heard that phrase and grits his teeth every time he hears it. That is where Kreft comes in with their revolutionary design of being able to “revalve” the fork with just the turn of a dial instead of taking the fork apart and actually putting different shims in the fork itself. Admittedly when it comes to the internals of how a fork works I am no specialist, but when Matt from Kreft broke it down and explained it to me in dumb dirt bike rider terms, it was very interesting and made a lot of sense. 

I have worked with many suspension companies over the years and for the most part they work the same in terms of pick up and drop off. This is the first thing that stood out to me when I started working with Kreft: The first step of the process is an initial phone consultation where you actually build somewhat of a relationship with the representative. You go over the basics, like what bike you’re riding and your measurements, but you also get into what you want to feel out on the trail. Along with that you get a crash course on what makes Kreft different and how their system works. From there they send you an empty box with prefect (I really mean perfect) cutouts for your specific fork and shock. They are so detail oriented they even send you bleeder screws, so just in case you have button bleeders they can be replaced so that your forks don’t leak and ruin the box in transit. The professionalism is second to none while still being personable as well as very helpful and explanatory.

IMG_0450-2.jpg

Aside from the obvious spring rate change and re-valve, the fork gets Kreft’s “Re-valve Control”. The way it was explained to me was that on a standard fork the shim stack nut is tightened down on the top of the shims and in that case, the valving is whatever the tuner’s spec is. The valving itself cannot be changed without fully dissembling the fork and changing the actual shims. The only adjustability on a standard fork is compression and rebound clickers. What Kreft does is use a spring that can have more or less pressure put on it with the adjustment of the re-valve Control knob on top of the left fork. What that spring pressure does is put more or less pressure on the shim stack itself. This gives the rider the ability to make “valving changes” on the fly to adapt to a wide range of terrain and disciplines of off-road riding. With the Kreft fork you now have the standard compression and rebound clickers as well as the re-valve control. In doing all these changes Kreft has also changed the damping forces in the left and right fork tubes. The XPlor fork has unbalanced forces in stock form, making the left tube do the majority of the work. What this does is give the left fork more of a chance of having oil cavitation, resulting in poor damping performance. The final thing that was done to the forks was the Microfinish which is said to work better than DLC coating (and is far cheaper) to reduce friction creating less drag and seal stiction than the stock finish.

To compliment the fork changes, Kreft internally changes the shock components to get the greatest potential and best balance of the low and high speed tuning circuits. If the circuits aren’t balanced and one is doing far more than the other there is a greater chance for cavitation which results in poor performance. Once the circuits are balanced and cavitation is no longer occurring, the changes that are made to the clickers have a much larger adjustment range and are far more effective. Along with the spring change on the shock, Kreft also installed the X-Trig preload adjuster which I had never used, but holy shit that thing is awesome!

IMG_9976.jpg

Now that I have explained all the technical info (to the best of my dumb dirt bike test rider ability) let’s get down to how it all works out in the real world. As I said in my initial test of the TE 300i, any type of riding other than very tech slow trails meant that the TE was going to feel out of place. The fork was extremely divvy when on the brakes or even just when transitioning off throttle. This unbalanced pitching feeling caused the bike to be unpredictable when cornering. In addition to that, anything that resembled a g-out made the bike bottom and rebound too quickly, which doesn’t necessarily give the rider very much confidence, especially in a racing situation. The one race that I did in stock form made it clear that I was having to check up for obstacles that normally wouldn’t phase me, so I knew something had to be done. 

After getting the stuff back from Kreft I bolted it on and read through their extensive welcome packet, which was super informative. I set my sag (which they had very close already) and headed out to my favorite trails, which have a plethora of different types of terrain. The first thing I noticed was that the unbalanced feel was no longer an issue. Now when I enter coroners the bike stays further up in the stroke and is much more predictable. My biggest concern was that after telling Kreft that I mostly ride faster paced desert terrain, I was worried that they would make it too stiff and I would no longer have the compliance in the tight technical terrain. Like I said in the beginning of this story, I basically told them that I want it firm, but soft and to my surprise, Kreft gave me my cake and let me eat it too. After becoming more confident and being able to pick up the pace, I found myself going into g-outs as well as slamming into bigger whoops with more speed. Initially the fork had a slight quick feel that would cause the front tire to lose traction, but after slowing down the rebound three clicks, the bike stayed planted much better following hard landings.

The only other issue I had with the front end was that I felt I still needed more bottoming resistance. I tried going in on the re-valve control, but that wasn’t necessarily the feeling I was looking for. While going in on the re-valve control helped my issue, it took away a little of the initial plushness that I liked. After talking with Kreft, they recommended I simply get a syringe and add 15ml of oil to both forks. After doing this I was able to keep the initial settings on the re-valve control while still getting the bottom resistance I was looking for. When it came to the shock, Kreft was really close on the setting I loved out of the box. I had a slight kick in the rear on de-cel bumps, but it was only off-throttle. To combat this Kreft recommended that I open up the high speed compression all the out. After doing this the kick was eliminated, but I felt the bike was bottoming too frequently, so I followed their recommendation and worked the high speed adjuster in by ¼ turn at a time until I found the balance that I desired. One misconception that I think a lot riders have (I used to as well) is that if your bike is bottoming it’s too soft. It’s perfectly ok for your bike to bottom if the bump or landing warrants it. Bottoming out from time to time means you are using all of your suspension travel. This is what you want! Use all the travel, but still have a comfort/performance blend for your type of riding.

IMG_0454.jpg

Kreft prides themselves on having great customer service, provide a high end product and also a product that has a very wide range of adjustability. When they told me that I could ride technical single track with the same bike that I rode at the moto track, I was skeptical. My last test before writing this article was doing just that, I went to the moto track. Before riding I looked at their recommended setting for moto, adjusted it and started moto’ing. Now was it just as good as a moto setting would be if the suspension was built for moto? Not entirely, but the adjustments for moto made the bike comfortable enough on the track that I was jumping every obstacle without blowing through the travel as well as cornering with confidence. I didn’t feel like the suspension was holding me back by any means and I wasn’t out of my element on this bike. The mere fact that one bike can be capable of such different disciplines with small adjustments is super impressive. I think that Kreft is really on to something and will only be getting more recognition as time goes on.

IMG_0452.jpg

The price breakdown is as follows: Xplor Re-valve Control and Re-valved shock is $1,200 (including seals and fluid), the addition of springs (if needed), Microfinish and X-Trig spring adjuster brings the total to $1,800. Like I said before, Kreft prides themselves on being very high end and in my opinion you get what you pay for. Every part of dealing with Kreft was top notch, from their box, customer service, quality of parts, and performance of the suspension was very impressive. If you are in the market to fix your 4CS, AER, or Xplor suspension, I would highly recommend giving Kreft a call. If you have any questions about the performance of the Kreft setup on the TE 300i feel free to reach out to me at Michael@keeferinctesting.com. That being said, if you have any technical questions about the parts itself reach out to them because I’m just a test dummy and won’t be able to answer your questions. Kreft’s contact is 541-797-0700 or email them at Info@Kreftmoto.com

Pro Circuit Aluminum Throttle Tube

Have mostly been a plastic throttle tube type of guy, but I have appreciated the toughness of an aluminum throttle tube when I have some medium to large sized crashes. The one thing I usually don’t like is the firmness of the aluminum throttle tube when landing as well as how big they feel in my hand. I am very picky when it comes to handlebar set up and can be hypersensitive to any changes on or around the rider triangle area. I have tried a lot of throttle tubes and only ran across one or two that I actually like.

IMG_8862.jpg

Recently I stumbled across the Pro Circuit aluminum throttle tube while at the Husqvarna headquarters. Pro Circuit throttle tubes are CNC-machined out of aluminum and are Teflon coated on the inside to reduce friction which gives you a smoother twist of the throttle. As mentioned above the PC throttle tubes are much stronger than the OEM plastic units and are available for most Honda, Yamaha, Suzuki, Kawasaki and KTM two-stroke and four-stroke models.

A couple things that stood out to me with the Pro Circuit tube: One was that it felt smaller in my hand than other aluminum throttle tubes and it actually DID in fact feel smoother than the stock plastic ODI lock on tube (that comes stock on the KTM/Husqvarna). For me to have a grip/throttle tube that isn’t too big really helps prevents me from getting arm pump. If you’re getting abnormally more arm pump than usual, you might want to check the size of your throttle tube or grip. Even if you have big hands (size L-XL gloves) going to a slightly smaller throttle tube or grip could help alleviate some arm pump issues. Some companies swear that their aluminum throttle tubes are smoother feeling, but a lot that I have tried are worse than a plastic tube. PC’s aluminum tube is actually smoother than the stock plastic piece and tays that way for more than a few rides/washes.

I will say that having an aluminum throttle tube does feel slightly stiffer than the plastic lock on tube, but it’s not so bad where my wrist is begging for me to change it back out. Overall, I have come to like the Pro Circuit throttle tube and would recommend it for picky “rider triangle” riders like myself.

Seat Concepts OEM Race 2.0 Complete Seat

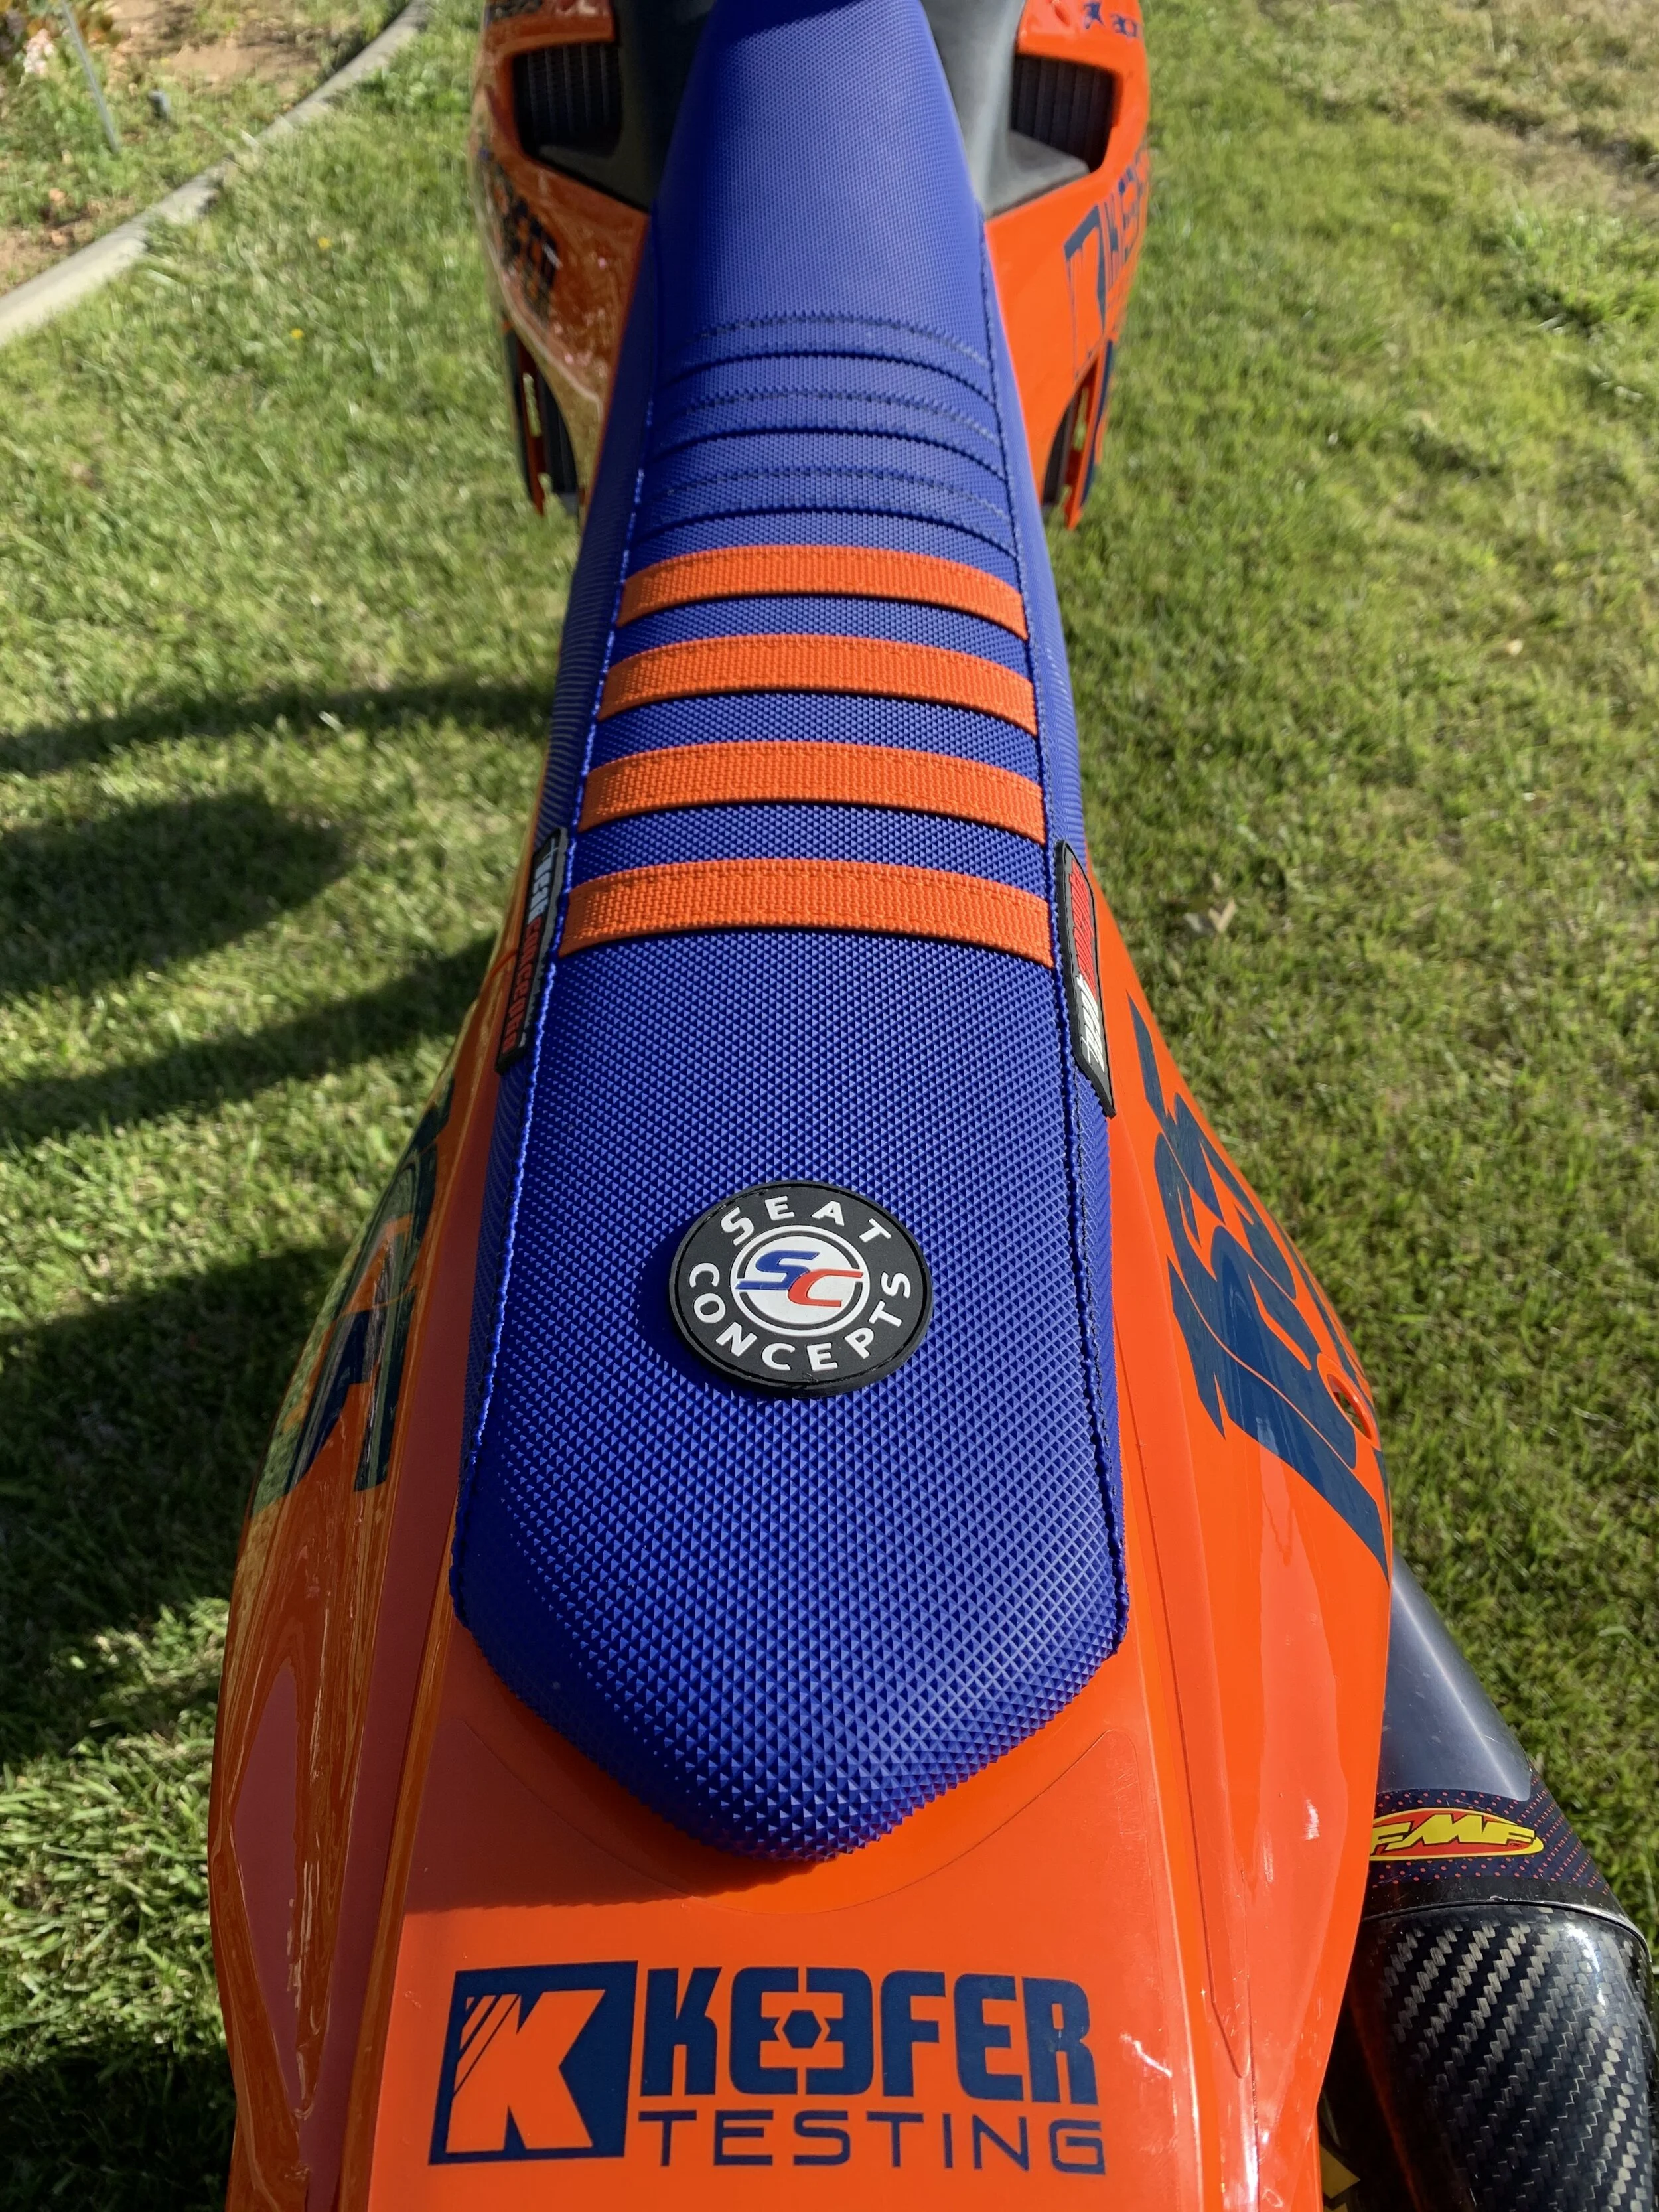
My standard 2020 KTM 450 SX-F Factory Edition seat didn't last long. The foam broke down, the cover ripped and my butt wasn't happy with me. I have pictures to prove it, but I'll spare all of you that nasty image. Enter Seat Concepts. After all of these years I have yet to experience any of their products until now. I wanted to get a complete seat so I had an extra one on hand and thought why not try something different. Seat Concepts offers covers, foams, complete seats and anything in between. I chose to try the standard OEM Race 2.0 seat and came away impressed. 

IMG_8628.jpg

The 2.0 seat is light, the cover is beautiful and the whole seat pan itself is well built. The standard foam was a little soft for my liking, so if you’re looking for a slightly firmer feel from your OEM foam, you may want to order a firmer density from the beginning. Seat Concepts does not offer custom seat shaping or custom covers. Seat Concepts foam material starts out as a liquid, so each different seat shape requires its own mold. They do not alter existing foam shapes. Due to their current production process, cover options are limited to those shown on each specific product page on their website. The Seat Concepts foam feels different than any other foam I have tried to date. The foam has a slightly more of a cushy feel in the middle of the seat than other foams I have tried, so comfort is always at an optimal level near the middle of the seat. The front as well as the rear of the seat has a slightly firmer feel to it, but I was mostly riding in the middle cushy part. I have noticed over the years that I just like firmer foams, especially when diving into deep ruts. On small chop the seat foam was extremely friendly to my butt and took a lot of the harsh impact out of some unexpected acceleration square edge.

IMG_8562.jpg

The Seat Concepts cover is ribbed and has plenty of traction to keep my shovel pan ass where it belongs, when on the gas hard out of corners. Did I mention that I love the way the blue color way ties in with my new graphic set up on the KTM? For $294.99 you’re getting a quality complete seat with a one year warranty and to me that seems like a fair price. If you’re as picky as me with your rider triangle, going to a Seat Concepts complete seat is a great way to better your riding experience. 

IMG_8637.JPG

Seat Concepts makes complete seats, covers and foams for most makes and models. Check them out over on seatconcepts.com.   

Recommended Handlebar Specs For 2020 MX Machines

When it comes to handlebars I am a pain in the ass. The height, width, rise, and position is very important to me between each bike that I test. I find that you can’t run the same handlebar bend on every bike, even though I like a bend on one bike, sometimes it doesn’t feel as good on another. Every bike has a different rider triangle so you must adapt to different bar bends if you change motorcycle brands. As the years progress, dirt bikes evolve as well as their dimensions so don’t be that rider who sticks with a Honda High bend that you ran back in 1997. As you may have heard in my “Handlebar 101” podcast (show #70), if the bar feels too low (height), you should try to get the bar height from your bar mounts and not the handlebar itself. Getting the height from your bar mounts allows you to keep proper technique (position) through corners (where most of the time is made up on a track). This article was a big hit last year and by the shear number of emails I get about handlebars, I wanted to update some bends for 2020. Here are some of my favorite bar bends right here for 2020 as well as a recommendation on bar/bar mount heights for different sized riders.  

As you will notice most of these handlebars on this list are Pro Taper and Renthal. This doesn’t mean that I am trying to sell you on these handlebar brands. This is just what I personally like myself and should be taken as such. If you like another bar brand, that is fine, simply look at the dimension of the preferred handlebar and try to mimic that dimension to your favorite handlebar company. There are tons of handlebar companies out there, but for me, Renthal and Pro Taper are the bars that I prefer. Again as always for testing purposes, I tried a wide range of handlebars in my shootout so go give that podcast a listen when you can (Show #70). There are some great options out there. Again….This doesn’t mean other handlebars are crap. For transparency reasons, I am letting you know that these are the companies I prefer. I receive ZERO dollars from Renthal or Pro Taper.

• We are using 2020 models for reference, but if you have an older model and are concerned on which handlebar to run please feel free to email me at kris@keeferinctesting.com. 

• All Dimensions are in (MM). 

2020 HONDA CRF 450R/250R:

IMG_8707.JPG

Notes: The stock bar bend on the 2019/2020 Honda CRF 450R/250R has finally been updated to a bend that is lower and flatter than previous years. This bend is actually quite good and we usually leave the stock Renthal handlebar on the Honda. If you think you would like more flex you can try the optional bar bend below.  

Preferred: Stock Renthal 839 FatBar (W)802 (H)91 (R)52 (S)51 

Optional For More Flex: Pro Taper EVO SX Race (W)800 (H)87 (R)54.5 (S)54

Optional For 6’0-6’2: Factory Suzuki (W) 800 (H)92 (R)62 (S)47

Bar Mount Height: Stock 

2020 YAMAHA YZ450F/250F:

IMG_8289.JPG

Notes: Yamaha also did a good job on creating a bar that is fairly neutral for different sized riders, it’s just too bad their seat and footage height is all screwed up for taller riders. It’s lower height seems to fit a wide variety of riders (5’8-6’0), but taller riders may want to put the bar mounts in forward hole/back position.  

Preferred: Pro Taper EVO SX Race (W)800 (H)87 (R)54.5 (S)54

Optional 6’0-6’2: Renthal Fatbar 602 bend (W)801 (H)89 (R)59 (S)56

Bar Mount Height: Stock 

2020 KAWASAKI KX450/250: 

imagejpeg_0-4.jpg

Notes: 7/8 lives on! Kawasaki managed to keep the good ol’ 971 Renthal 7/8 bars, which are pretty damn good! I like a 7/8 bar and I actually stick with the 7/8 theme if I can. The 7/8 bar does bend a little easier, but you get a lot of flex when the track gets rough. If you’re an aggressive rider who likes a little more positive steering than go to a 1-1/8 handlebar for increased stiffness. 

Preferred: Renthal 7/8 983 bend (Villopoto/Stewart) (W)808 (H)95 (R)58 (S)55

Oversize Crossbar Option: Pro Taper Fuzion Henry/Reed (W)800 (H)92 (R)66 (R)40 (S)55

Optional For 6’0-6’2: Pro Taper EVO Factory Suzuki (W) 800 (H)92 (R)62 (S)47

Bar Mount Height: Stock

2020 SUZUKI RM-Z450/250:

FullSizeRender-13.jpeg

Notes: The stock Suzuki bend has some sweep to it, which makes the bike feel small at times. I prefer to open the cockpit up a little. 

Preferred: Pro Taper EVO SX Race bend (W)800 (H)87 (R)54.5 (S)54

Optional: ODI Podium Flight CountryBoy bend (W)803 (H)92 (R)56 (S)52

Optional For 6’0-6’2: Pro Taper EVO Factory Suzuki (W) 800 (H)92 (R)62 (S)47

Bar Mount Height: Stock

2020 HUSQVARNA FC450/250:

clean keefer inc -0206.jpg

Notes: Husqvarna comes with a very low bend and that fits the ergos of this bike, but the width of the bar is too long. I actually like the stock handlebar bend on the Husqvarna, however I cut the handlebar down to 803mm, which really helps the character of the Husqvarna when leaning into corners. 

Preferred: Stock Pro Taper EVO handlebar cut to 803mm (W)811 (H)80 (R)39.5 (S)51

Optional: Pro Taper EVO Carmichael bend (W)800 (H)77 (R)40 (S)55

Optional For 6’0-6’2: Pro Taper EVO Factory Suzuki (W) 800 (H)92 (R)62 (S)47

Bar Mount Height: Plus 5mm 

2020 KTM 450SX-F/250SX-F:

IMG_8778.JPG

Notes: The stock bar bend shape on the orange brigade is also decent, but it’s too stiff and long. If you don’t think it is too stiff, you can simply cut the bar to 803mm and run it! 

Preferred: Renthal 821 bend cut to 803mm (W)813 (H)78 (R)42 (S)54

Optional: Pro Taper EVO Husqvarna Stock cut to 803mm (W) 811 (H)77 (R)40 (S)55

Optional For 6’0-6’2: Pro Taper EVO Factory Suzuki (W) 800 (H)92 (R)62 (S)47

Bar Mount Height: Plus 5mm


Fastway Air EXT Foot Pegs

Fastway Air EXT pegs are on a mission to reduce ankle injuries, or at least limit the severity when an impact goes wrong. The basic idea is a wide but fairly conventional 2024 billet aluminum footpeg with a teardrop-shaped sort of heel peg welded to the rear of the normal peg. The teardrop ankle-saving portion isn’t welded at the same level as the footpeg however. The contact point is lower than the surface of the peg, but the patented height, traction, and camber (tilt) adjustability, is fully customizable. The idea being that you never feel the Air EXT pegs until you suffer an extreme landing that puts excessive loads on your feet and/or ankles. The Universal Collar System (UCS) lets you customize your mount in either the stock or lowered positions on most bikes – simply by reversing the collar. Fastway’s patented replaceable traction cleat system allows you to customize the shape and traction level of your foot bed as well.

IMG_0792.jpg

The reality is that you do feel the Air EXT’s rear portion fairly often on the track, but I only felt it in positive ways. No question, when you land short or long, your feet, ankles and even knees would be smiling if they had lips. Impacts that clank the suspension hard enough to hurt your ears don’t bother my 42 year old ankles. The Air EXT’s look like they will would limit the kickstarter, if you still have one of those, but they didn’t on our Suzuki RM-Z250 when we tried them on that machine. Perhaps if you were sloppy with foot placement, your boot heel could contact them and that would be annoying, but we didn’t have a problem. In whoop sections and while approaching jumps while standing up, you can even incorporate your heels to load the suspension to get increase height, similar to a seat-bounce. The bigger your feet, the more likely you are to feel the rear portion of the peg and that means in a positive way-absorbing abuse-and just being aware that it’s there. I wear a size 11, and I’d probably like the teardrop portion better with the teeth slightly dulled a little, but then again after about a couple hours on the pegs I was getting more used to them. I have never really feared landings, but I can appreciate what these pegs offer riders with Achilles and ankle injuries. Or maybe you’re learning how to ride on the balls of your feet, the Air EXT’s give the rider confidence when placing their feet back, when getting to the correct attack position. Ask Ryno how important riding on the balls of your feet are! #TwoChickens

IMG_0794.jpg

While riding through deep ruts, these pegs can help allow large footed riders place their feet on the balls to keep their toes safe. I have had a couple of our bigger testers try the Air EXT’s and they comment they have less ankle/knee fatigue at the end of a long day of moto’ing. The Air EXT’s are like virtual floorboards for your dirt bike. The thing you have to remember when riding with these pegs is that the space to the rear brake pedal or shifter is greater. You will have to cover more ground and remember that when trying to make a shift or use the rear brake, when riding on the back of the Air EXT’s. 

I ended up going with the smallest cleat option on the pegs as those provided enough traction without feeling too tall on the bike. If you’re on the shorter side you could definitely benefit from the replaceable cleat height design and the difference it can make with your rider triangle. I didn’t however try the Universal Collar System (UCS) yet, which allows you to lower the footpegs from the stock position, but plan to with a couple test machines soon. 

At $255.95 for the Air EXT pegs and $19.99 for the fit kit, it’s not a cheap aftermarket footpeg purchase, but this is still a less expensive option than some other titanium offerings out on the market. Check these pegs out at Fastway.zone.com.

Specs:

•Weight: .85 pounds per set

•2024 billet aluminum

•Unique universal footpeg

•Precision engineered, manufactured, and assembled in the U.S.A.

•All footpegs ship with 2 sets of F3 threaded cleats– short 10mm, and tall 12mm cleats

•Requires Fastway Footpeg Fit Kit 

ETS US MX 18 K2 Racing Fuel

Not everyone has the money to go purchase race fuel for their dirt bike. High end race fuel is something that maybe only a few serious racers really want. I can relate and understand this. That shouldn’t deter other media testing outlets away from testing such fuels, but it seems like you can’t find that much real world testing info about such things. This test may not be for everyone, but I feel like I wanted to really see how much of an improvement (on the track) race fuel can make in a machine when properly mapped for modern four-strokes. With most high end fuel, simply dumping it into your bike and riding is not going to benefit you in any way, so stop wasting your money if your bike/ECU isn't tuned for it. There are some other direct pump replacement fuels that DO NOT need re-mapping, but for this test I wanted to try and get the most out of what I am pouring in. I mean it’s $26.00 a gallon, so we have to be “ALL IN” when going this route right? More on that price later… ETS Racing fuels are based out of France and have been around for 12 years, but maybe you’re not too familiar with the company, so here is a breakdown of the ETS US MX 18 K2 racing fuel.

IMG_8539 2.jpg

About The Machine I Tested The Fuel With: I chose the 2020 KTM 450 SX-F Factory Edition to test the ETS Racing Fuel because it’s one of the 450’s that I feel that can benefit from quality race fuel the most. The KTM 450 SX-F has a smoother power delivery with a stock ECU setting that is slightly rich/lethargic feeling. I also have been doing some “other” modifications along they way with this model and have seen very solid improvements. Each modification that I have done to the orange brigade has made this machine better with each chunk of money that I have thrown at it. That is what you expect when you put money into your bike right? Well, that is not always the case because sometimes putting your money into your bike doesn’t mean it gets better. Putting the money into the right modifications is key and that is what we have done to this 2020 KTM 450 SX-F Factory Edition. Our 450SX-F has a XPR Performance Vortex ignition that is mapped for ETS US MX K2, VP MR Pro 6, and regular super unleaded pump fuel. The beauty of the Vortex ignition is that you have 10 preset maps that you can go back and forth from so it makes it simple to adjust when your pocketbook does. The simple fact that the ignition is super consistent and hasn’t given me any problems is just one reason why I went this route. The engine is completely stock (minus the FMF 4.1 Muffler System) and I wanted to keep it this way for durability reasons. I ride the crap out of the Factory Edition and I DO NOT need to be rebuilding it every 20 hours.  

IMG_7507.JPG

What Sparked My Interest To Test The ETS Racing Fuel: Number 1….Not a lot of people know about ETS Racing Fuel and who’s using it. Factory Red Bull KTM and Rockstar Husqvarna race teams use and endorse the fuel. In fact, ETS doesn’t “give” those teams fuel, because in reality both teams “purchase” the fuel. This sparked my interest because it’s not everyday that teams are “spending” money on pieces to their factory bike puzzle. Most of the time factory teams test parts and said companies provide them with that product for free (or even pay them to run their product)! Number 2…We have a ton of ethanol based super unleaded pump fuels around California and this has caused a couple fuel pump failures for me in the past on other machines. Number 3…Once Chad at XPR Performance put on the Vortex ignition he told me there was a map preset for VP MR Pro 6 and ETS US MX 18 K2 racing fuel, so I went ahead and got some of each. Number 4…I tested with the VP MR Pro 6 for a while and noticed a nice gain in pulling power (compared to pump fuel), but it boiled on warmer days in California. I really liked the power gains I felt, but after 16-18 minutes of hard riding the KTM began to run noticeably slower, had a dirty low end feel and ran inconsistent. This really sparked my interest to see if another competing race fuel could give me the same power gains, but more consistency over the course of longer motos. 

So How Did the ETS US MX 18 K2 Stack Up Against VP’s MR Pro 6 On The Track?: First thing’s first. This seems unimportant, but If you’re a die hard moto guy you will really love the smell of the ETS US MX 18 K2 racing fuel. It’s a sweet smell and if you have walked around the pits of an AMA Supercross, I am sure you have picked up the scent. However, other people may not appreciate the smell (like the wife), so you may want to store the fuel somewhere far away from the living room or kitchen area of your home (just in case your garage is close to these parts). Once the KTM fuel tank was emptied and the ETS was poured in, I headed out on the track to do a longer minute moto. I made sure to test all three fuels (VP, ETS, Pump) on the same day (over the course of a few days) in 90 degree temps for an apples to apples comparison. The first thing that I noticed with the ETS US MX 18 K2 racing fuel is that the KTM 450 SX-F had better throttle response (than that of the VP). Throttle response was slightly more crisp and instant with a better bottom end pulling power out of corners. You can just feel a little more “meat” when rolling on the throttle. Mid range was also improved slightly, especially when I was rolling sweeping corners in third gear. The KTM just seemed to pull better and have increased mid range RPM response. The VP and ETS fuels feel very similar up on top end as I didn’t notice any real difference there. To me the biggest selling point (besides increased power feeling) was the consistency the fuel had over the course of a 30 minute moto. With the VP MR Pro 6 I had a clean running engine feel up until 18 minutes and then it started to boil (on very warm days), but with the ETS fuel the KTM ran crisp and clean throughout the entire moto. This was huge for me! There were no remnants of fuel puking out the vent house and I could do a full day of motos with zero boiling issues. 

So How Did the ETS US MX 18 K2 Stack Up Against VP’s MR Pro 6 HT On The Track? Yes, VP makes a “high temp” MR Pro 6, but I noticed that I lose a little more pulling power with the HT versus the standard Pro 6. With the ETS MX 18 K2, the KTM not only doesn't boil, it simply outperforms the VP Racing Fuel “HT” in torque feel as well as excitement (throttle response).  

Cost And Where To Purchase: You may want to sit down for this. Ok, you ready? Are you sure? The cost of the ETS US MX 18 K2 racing fuel is $26.00 a gallon and comes in 15 gallon drums. Again, like I mentioned before, this is an expensive investment that is not for everyone, but if you’re serious about performance and getting that little extra, this is a great alternative race fuel that is CONSISTENT! The VP MR Pro 6 fuel is slightly more expensive compared to the ETS US MX 18 K2 fuel so if you’re already purchasing high end fuel, this will not be a big shock to you. You DO NOT need an aftermarket ECU to run this fuel, but you will need to get your stock ECU re-mapped (if available to you) to reap all the benefits of this fuel. The ETS fuel usually makes your machine run a little richer than that of the VP MR Pro 6, so leaning out your bike a little is a good way to go. There are plenty of engine builders who are familiar with mapping ECU’s to this fuel so please feel free to email me and I can give you some recommendations. If you are looking to get a drum of this fuel you can go to etsracingfuels.com and order through their website directly. They offer free shipping on orders over 40 gallons so it’s nice to have fuel delivered to your door. Any questions about this test please feel free to email them to kris@keeferinctesting.com 

TYPE | UNLEADED GASOLINE
RON | 102MON | 86OXYGEN | 3.9 %OCTANE | 94DENSITY | 762 KG/M3
REGULATION | AMA

Vortex Ignition For 2020 YZ450F

The Yamaha YZ450F comes with the Yamaha Power Tuner App that allows you to change the parameters of the bLU cRU’s ECU settings. It allows the consumer to customize their YZ450F power delivery, so that they can enjoy a more friendly power character or a more aggressive type of delivery. While this system works very well for the average consumer what about the rest of us that may want to tune their YZ450F even further? What about having an ECU that has wider parameters and an ECU that can give you more horsepower, but make it rideable as well? Can we make our YZ450F even better with an aftermarket ECU? Is there a big enough difference in power delivery that it warrants spending an extra grand on an electrical part? I wanted to find these questions out, so I called upon Chad at XPR Motorsports to see if he could map a Vortex ignition for my 2020 YZ450F in order to see if it wold actually make it that much better. 

IMG_8422.jpg

Unlike a KTM 450 SX-F it is very difficult to improve upon the Yamaha’s engine character. The YZ450F is the best production motocross machine made at this moment, so the gains are tougher to get through the aftermarket unlike the orange model. With a KTM I can slap on a Vortex ECU and immediately notice a huge difference in power as well as traction. However, I have been playing with the Vortex ECU on the Yamaha YZ450F for almost a year now and found out that it’s not that easy to make the Yamaha’s engine “better”. Chad at XPR Motorsports is one of only two people in Southern California that I would trust to help me with ECU testing (the other being Jamie at Twisted Development). I told Chad that I don’t necessarily want “more power” from the YZ450F, but I wanted more rear wheel traction with a broader, longer power (similar to a KTM 450 SX-F power spread). I can roll my corners really well on a KTM because it is so damn smooth off the bottom and I wanted to see if we could get some of that character on ol blue here.  

I am not going to sit here and tell you that getting a map that actually made me happy was easy because I think I gave Chad a headache more than once while doing this test. However once we honed in on what I was looking for, it was something that the stock Yamaha Power Tuner simply couldn’t do. With the help of XPR’s mapping and the desired power that I was looking for, I now had an easier to corner Yamaha YZ450F, with more traction out of area 3 (end of corner), as well as a broader/longer overall top end/over-rev. 

I wanted to keep the third gear lugability, but also make second gear more usable so I could make shifts later once exiting corners. This wasn't easy to achieve as Chad and I quickly found out. I got a longer second gear, but was losing some of that easy to ride third gear lugability because the engine was much freer feeling with the Vortex ECU. With a lighter engine feel you get less de-cel pitching, which is great because the chassis stays calmer, feels more exciting, has better recovery, but you also get less chugability when lugging your engine. Chad went went back to the drawing board and gave me another map that split the difference for me and made me really happy. I now had most of that third gear roll on lugging power, but still retained that free feeling engine feel that I loved when the track got rough. Having less engine braking on the YZ450F really helps this chassis stay calm when diving deep into corners with large bumps. 

IMG_8290-3.JPG

I like that the Yamaha YZ450F is easier to start as well as fires up sooner with the Vortex on, so having this ECU on could really benefit a dead engine type of off road rider. With the XPR mapped Vortex, the mapping seems crisper/cleaner and never had a de-cel pop that I sometimes experienced with the TP 3.0 map. We mapped the Yamaha to a Pro Circuit exhaust and originally started with VP Pro 6 fuel, but that was simply too much power down low for me, so creating a map for VP T4/pump fuel made the Yamaha engine much more manageable in hard pack situations. 

The bad news about going to the Vortex ECU is that you lose all of your Power Tuner functions like the maintenance schedule, running time, etc. The Vortex comes with 10 pre-programmed maps as well as three fuel trim knobs that can help with your “Lo”, “Mid” and “High” rpm ranges. This is not an inexpensive mod, but it can help broaden the Yamaha’s power, make the hit more seamless down low as well as help the chassis when pushing the machine when the track gets rough. 

Is the stock ECU good? Yes! If you feel like the stock ECU/Power Tuner App has enough parameters and you’re happy, you DO NOT need an aftermarket ECU like this. 

Do I feel as though the Vortex ECU makes as big of a difference on the Yamaha like it does on the KTM 450 SX-F?  No, I don’t. The Vortex ECU on the Yamaha helps make it easier to ride, but Yamaha R&D did such a great job with their mapping that it may be hard for less picky riders really notice. KTM’s stock ECU mapping is not nearly as good off the show room floor, so the difference from going to a stock ECU to a Vortex on a KTM is noticeable by a wider range of riders.  

Who is this Vortex ECU for? This specific ECU on the Yamaha is for riders who love the stock engine character, but want a little more control off the bottom and more pulling power from second and third gears. Oh and how could I forget that this is not a cheap mod (at around a $1000.00), so you might have some coin saved up in your bank. 

Would I purchase this mod myself? Yes, but I am the type of guy who still likes to be competitive at the ripe old age of 42, likes to have a linear, longer power delivery and loves to tinker with stuff. If you’re like me this mod will make you smile. 

Conclusion: Overall I am happier with the Vortex ECU on the 2020 YZ450F because the bike has more controlled power and it makes it less work for me to ride harder. The downside is coming up with the 1K to purchase it! Guess I will be impatiently waiting on my stimulus.

Contact: Chad @ XPR Performance (951) 813 8873


Ride Engineering Full Performance Linkage (Husqvarna FC450)

Getting that comfortable feel as well as increased track toughness can be somewhat hard to find on the Husqvarna FC450. At least for me anyway. I can go to tracks that are soft and tighter and be completely happy with the Husqvarna and then go to a fast/choppy track that has more flowing corners and be confused on why this bike feels so different. I know a couple companies have been making different linkage ratios for the Husqvarna and KTM’s, but I wanted to try Ride Engineering’s performance linkage system on the FC450 to see if it actually improves upon the ride comfort on choppy tracks. 

 You might be saying to yourself, well what about the KTM Keefer? I do similar negative feelings on the KTM that I do on the white bike, but the Husqvarna does seem like it’s slightly more forgiving at times on rougher tracks. As you may already know this link also can work on the KTM, so if you’re on an orange bike, this test could also apply to you. I will be doing a full review on a couple different linkage systems (Ride Engineering/REP) on the KTM in the coming weeks, just to see if I can feel a difference between each. 

IMG_0365.jpg

So what exactly am I looking for here? Why is there a need for a different linkage ratio on this machine? Why didn't the R&D team at KTM/Husqvarna choose the ratio that Ride Engineering came up with in the first place? I will give you some insider knowledge on the R&D process a little before we dive into this test. Sometimes when OEM R&D teams test suspension, often there is a few linkages that the test riders have to weed through to see which one works best for a wide range of riders on said bike. Setting up a bike for the masses is not easy to do and most of the time the OEM’s choose a setting that is more of a “comfort setting” than a performance setting to offset the stiffness of the chassis. Comfort is needed on any new production motocross bike and getting a suspension spec that coincides with the correct linkage ratio as well as frame stiffness can be tricky. Not every bike benefits from an aftermarket linkage ratio, so don’t think you need a linkage on every bike on the dealer floor. If you’re happy with the feeling that you get when you ride your machine then try not to overthink it. JUST GO RIDE! If you feel what we are describing in this test then possibly a linkage could benefit you. If you DO NOT feel the things we are explaining in this test, you can simply disregard it and move on to something else you want to add to your FC450.   

What I Want Out Of The Rear Of The Husqvarna 2020 FC450?

The rear of the Husqvarna FC450 feels somewhat rigid on acceleration chop and I can feel like my rear end is dancing around when hard on the throttle out of rough corners. I spent some days searching for some added traction/comfort by changing sag settings, spring rates and clickers, but came up empty handed. I also tried a WP Pro Component shock and that just exacerbated my problem a little more on acceleration, creating a firmer feel out of corners. Even though I had more hold up and less fade with the Pro Component shock, I wasn't happy with my acceleration feel. 

343A3707.jpg

What Did I Get Out Of The Ride Engineering Performance Linkage? 

Ride Engineering recommends that you go up a spring rate with their linkage, but I wanted to try it with the stock 45 N/m spring rate as well as a 48 N/m. The Ride Engineering pull rods are 1.3mm longer than the stock rods and the knuckle is more progressive, so it ramps up different than the stock knuckle. Once installed and the sag was set to 104mm, I immediately felt slightly more comfort out of the rear of the bike on acceleration, but also noticed it being a little low for my liking in that area. On steeper jump faces or flat landings I felt like the shock bottomed and felt empty on high speed compression. After increasing the high speed compression, it helped a little on jump faces as well as helped the empty feel on slap down landings, but it hurt acceleration traction. I installed the heavier 48 N/m spring on, reset my sag, jumped back out on the track and was quickly greeted with a firmer feel, but the firm feel didn't translate into a harsher rear end like the stock linkage/spring had. 

The rear of the Husqvarna stayed up in the stroke more out of corners, but also had a freer feeling to it, which increased my rear end traction. Another positive to the heavier rear spring/Ride Engineering linkage combo was that the control of the Husqvarna was better when hitting de-cel bumps at speed. At times with the stock shock/link, the Husqvarna would ride too low and have a sudden kick to the rear end that left me with a sensation of less control leading into corners. With the heavier rear spring and Ride link the initial braking bump feel was firmer, yet the FC450 moved less when getting to the fifth, sixth, and seventh braking bump into corners. I could hold on the throttle a little longer because I had more control as well as better action of the rear end. If there was a negative to the heavier spring/Ride Engineering link, I would have to say that it can make the Husqvarna a slightly slower cornering bike on initial lean, but to me I didn't mind the slight slower turn in feel. I know some of you may not like that, but if you find that this is bothering you then simply run your sag at 103mm and this can help initial turn in. 

IMG_0221.jpg

Like I mentioned above, I tried the WP Pro Component shock with the Ride Link set up and it gave me a similar feeling that the stock shock/Ride link set up did, but with even more hold up when ridden aggressively (of course that has something to do with the valving as well). I liked that with the Ride Engineering knuckle/rod set up of the FC450 felt less firm on acceleration and yet still had more control on de-cel bumps. 

This Ride Engineering Performance Link is $449.90 and is available over at ride-engineering.com and fits current Husqvarna/KTM models. 

If you’re a KTM owner and looking for a little comparison, stay tuned for a REP/Ride Engineering Performance Link comparison as both companies make a different knuckle ratio for the white and orange machines. Will I be able to feel the difference? Find out soon! 

2020 Honda CRF450R Three Way Muffler System Comparison

The 2020 Honda CRF450R is a popular machine. After all of my years with Dirt Rider Magazine as well as doing my own thing over here at Keefer Inc. Testing there has been one thing that hasn't changed… The amount of page views and questions that I get about the Honda are always more than any other color! As a test rider, I like the Honda CRF450R because it’s one of the most difficult bikes to set up for a wide variety of tracks, so that keeps me trying different products and thinking of ways to try and make it better. As a consumer or a local racer, the 2020 Honda CRF450R can drive you nuts at times right? It’s super fun to ride, but sometimes can be a handful at certain types of tracks.

In this article I am going to test the Yoshimura RS-9T, FMF 4.1 RCT, Akrapovic Evolution titanium muffler systems for the 2020 Honda CRF450R and give you some feedback on each one’s engine delivery character. I picked these three muffler systems because they have been one of the best three that I have tried on this particular machine. This isn't a shootout as much as what each system can bring to the table. These three muffler systems have similar characters in some areas of the powerband, but also have enough differences in which you can make a decision based on what type of power you want from your Honda.

Fun Fact: I tested these mufflers on the 2020 Honda CRF450R as well as the 2020 Honda CRF450RWE just to see if the ported head, that the RWE comes with, would change the way each muffler delivered its power. After going back and forth on each machine, the character of each muffler system was the same on the stock cylinder head as it was on the hand ported Works Edition head. The description/results below is accurate for both machines.

IMG_0280.jpg

FMF 4.1 RCT Muffler System:

The FMF 4.1 muffler system has more bottom end and throttle response than the other two muffler systems in this class. The Honda doesn't necessarily need more bottom end, but the way the FMF system delivers its power can give the rider some added freedom when trying to ride third gear through corners. The bottom end comes on strong and the Honda keeps its exciting, crisp RPM response feeling, but lets you run third gear through corners more than the stock, Yoshimura and Akrapovic muffler systems can. Using second with the FMF system almost makes the Honda a little too much too handle (on roll on) through very tight corners. When going to the FMF 4.1 system I reverted back to map 2 (mellow map) instead of map 1 (standard map) and ran 14/52 gearing. By using map one and going to this gearing ratio, it helped calm the Honda’s chassis down in second gear a little, but still kept its fun natured, snappy engine character. Mid range is broader and pulls farther than the stock muffler, but isn't as good as the Yoshimura system in this area. Up on top end the FMF system almost mimics the Yosh in pulling power feeling on the track with maybe slightly less over-rev than the Yosh system. What I like about the FMF muffler system is that it allows the rider to ride a gear higher in some areas of the track and rewards riders that like to lug their bikes more. The Honda in stock form is not the best lugging machine, but with the FMF system it gives the red bike more of a lazy man’s type of feel by allowing me to use third gear more. The FMF system is louder than the Yoshimura or Akrapovic systems by quite a bit even with the inserts in, but keeps that racey deeper sound. 

The good news is that the muffler packing has lasted longer than I expected. We are over the 12 hour mark on the 4.1’s and they still sound good. I used to get only 8-10 hours on other single FMF muffler systems, but these duals have proved to be more durable. 

IMG_7808.jpg

Yoshimura RS-9 Muffler System With Works Edition Headpipe: 

Once installed and on the track the Honda’s exhaust note turned from high pitch 250F’esq to a deep throaty more traditional 450 factory race bike sound. The crack of the throttle (or RPM response) is slightly smoother and less crisp than the stock or FMF systems, but to me this is a good thing for the Honda chassis. Rolling out of corners, while in second gear, the Honda feels like it has more traction than the FMF and was more controllable while accelerating out of hard pack corners. The slightly smoother RPM response takes away the Honda’s excitement feel ever so slightly, but helps you gain a little more control coming out of corners. The mid range pull is healthier than stock, but with the Yoshimura system you will not be able to pull third gear through tight corners as well as you can with the FMF system. The Yoshimura system is very controlled and has more mid range torque than any other muffler in this test. Even though the Yoshimura system doesn't have that bottom end throttle response like the FMF system the recovery is still very good. With just the flick of the clutch lever (in third gear) the Honda will be in the meat of the power once again and you will be down the straight in a hurry. I noticed top end and over-rev was as good as stock (which is great), but not as good as the Akrapovic. To me the Yoshimura system is like the YZ450F of the muffler world. It does everything “pretty well” and gives you more rear wheel consistency that the Honda needs. You could tell Yoshimura was focused on smoothing out the bottom to mid-range pulling power when they designed this muffler system and they succeeded in doing so. It is also impressive that they didn’t lose any top end/over-rev in the process and gain a little more control.

The muffler packing that the Yoshimura RS-9 mufflers come with is superb and will last you longer than any other packing in this group. Yoshimura also offers the customer refurbishing, just in case you don’t want to DIY. The stickers on the mufflers themselves also last longer and will not turn color as fast as the others in this group.  

IMG_7428-2.JPG

Akrapovic Evolution Muffler System:

Once I swapped to the Akrapovic Evolution muffler system, I could immediately tell this system helped the Honda chassis calm down the most. The Evolution system lets the Honda’s engine roll on smoother at low RPM’s and that smoother feel helps the rear wheel connection as well as provides less pitching (off throttle) than any other system in this test. AKA MORE COMFORT!!! The Honda CRF450R now builds a smoother roll delivery and a pulling power that is longer through the mid range than the FMF or Yoshimura. This type of character can allow you to use second gear in corners more because that second gear hit is not as abrupt or quick, so that doesn't upset your technique or the chassis. The Akrapovic also allows the rider to shift later out of corners and that means second gear is more usable with its increased over-rev capabilities . Pulling power up top is increased slightly as your shifting points can be altered now because of the longer pull in each gear. I ran the 14/52 gearing with this muffler system but decided on going back to the stock 13/49 gearing in order t get some mid range recovery back. The Akrapovic doesn't have the the bottom or mid range throttle response like the FMF or Yoshimura systems so this can give the Honda a slightly heavier feel on tighter tracks. The Honda has so much power to work with that a little less “hit” as well as “recovery” can actually help on faster/flowier tracks, but can also make it slightly heavier feeling than the other two mufflers when moving the Honda side to side. I really like that the Akrapovic system relaxes the engine as well off throttle and provides the CRF450R with less engine braking. This really comes into play on tracks with hard pack chop and small de-cel bumps.

The sound/pitch of the Akrapovic is ridiculously quiet when on the track and will almost give you that MXGP sound and feel. It still has that racey, crisp sound on higher rpm’s, but just not that raspy high pitch tone of the stock muffler. I preferred the quiet inserts left in because it created more back pressure and gave me more traction at the rear wheel (out of corners) in all three engine modes. I was normally a map two guy with the stock muffler, but with the Akrapovic installed I am now a map one guy all day long because of the added rear wheel/friendlier connection. The muffler packing has proved to be durable but the stickers on the mufflers turn color quickly and get blown off.

Overall: I always let people know if you have no problems with your stock muffler system and like the way your Honda runs then by all accounts you can disregard this test. Just because I test something here doesn’t mean you absolutely 100% NEED it! If you’re in the market for a muffler system, have some extra money and want to know which direction to go then study up! If you want to alter or change your Honda’s engine character slightly, this test can help you decide on which direction you want to go. To me all of these systems in this test are better than the stock system because it helps the Honda’s chassis in one way or the other and offer spark arrestor inserts for the off-road guy. The Honda doesn't need more power as much as it needs a broader more forgiving connection to the rear wheel. These systems help the Honda in this area. 

Breaking The Systems Down:

Bottom End: FMF

Mid Range: Yoshimura 

Top End: Akrapovic

Over-Rev: Akrapovic

Low RPM Response: FMF

Mid RPM Response: FMF

Top RPM Response: Yoshimura

Controllability/Connection: Akrapovic

Weight: 

FMF: 8.5 lbs.

Yoshimura: 8.4 lbs.

Akrapovic: 8.4 lbs.

Sound/DB:

FMF: 121.1 DB

Yoshimura: 116.8 DB

Akrapovic: 116.1 DB

Pricing: 

FMF: $1499.99 www.fmfracing.com 

Yoshimura: $1499.99 www.yoshimura-rd.com 

Akrapovic: $1549.99 www.akrapovic.com 

If you have any questions about this test, please feel free to email me at kris@keeferinctesting.com. I am here to help if needed!


RIDE ENGINEERING 2018-2020 Suzuki RM-Z 450 Performance Link

By Dallas Dunn:

I’ve been helping out Keefer with photography content for some time now, but I’ve been wanting to get more into the testing side of things so Kris has gave me the opportunity to ride the 2020 Suzuki RM-Z450 test bike for the year, so the first mod for this bike was going to be the Ride Engineering 1mm longer lowering link. I wanted to give you a normal everyday blue collar perspective. I am by no means a professional test rider, in fact I am a heavy equipment operator that likes to ride his dirt bike. So if you can relate to that and have a RM-Z450, maybe you can relate to this test as well.

48949733217_574a3c15cc_o.jpg

Simply installing the Ride Engineering link helped balance the RM-Z out on de-cel. If you’re running the stock suspension (valving/springs) this simple mod will help the RM-Z from wanting to transfer its weight towards the front end. The RM-Z450’s BFRC shock is known for unloading on de-cel (or riding high off throttle) and that can cause oversteer (knifing) on entrances of corners. Once you install the longer Ride Engineering link arms on the Suzuki it will settle down on de-cel and not pitch towards the front end as much. I noticed right away the bike felt more predictable and compliant coming into choppy braking bumps while keeping the rear end planted with less diving on de-cel. It gave me more sense of predictability and control when entering corners compared to the stock setup. Having comfort and predictability are things I look for when trying to improve my speed and technique. Running the sag at 107mm (fork height 4-5mm) with the link arm will alleviate some of your balance issues on the #RMaRMy. 

victorville--2.jpg

This Ride Engineering link Retails for $219.99 at www.ride-engineering.com.

You can use the code Keefer-20 to save some dough as well.


FMF 4.1 Full System Vs. Akrapovic Evolution Full System Vs. Akrapovic Slip On

We recently received the 2020.5 KTM 450 SX-F Factory Edition and after dissecting it for a few weeks, we thought we would test a couple different muffler systems on it. We wanted to see if we could improve upon the KTM Factory Edition’s delivery. The KTM comes with an Akrapovic slip on we thought since we have never tried one of their full systems, we would give that a go as well as an FMF 4.1 RCT full system to see how each compares to the standard Factory Edition set up. Just in case you were wondering, we also compared each muffler to one other and give you a breakdown of each category below. 

FMF 4.1 RCT Full System ($1049.00):

With the FMF system installed you will not be getting increased bottom end pull on the KTM, but you will be getting a little more bottom and mid-range RPM response (or throttle crack for you newbies). I noticed the added RPM response more out of corners (versus the Akrapovic) and the FMF system makes the KTM engine character slightly more free-feeling and exciting. I also appreciate that I am not getting any added de-cel popping (or lean sensation) with the FMF system. The KTM ran just as clean with the FMF system on then it did with the stock muffler. Where you will notice the most improvement with the FMF system is through the mid-range. The mid-range “meat” you will get out of the FMF 4.1 system is downright impressive. Rolling the throttle on out of corners and accelerating you will notice an increased pulling power that wasn't there with the stock muffler. 

IMG_7703.jpg

Whether you're coming out of a corner in second or third gear, you will notice some extra torque feel getting to the next obstacle. With the added mid-range meat of the FMF system it really helped some of the gearing issues I had on tighter, less flowy tracks I tested at. Gaining some mid-range let me use third gear in some corners that I wasn’t able to with the stock system. With the stock system I would roll into these corners in second gear and have the right amount of "pop" to get me out quick, but I had to shift early once exited, to keep the rear wheel from spinning. Third gear was too tall of a gear to get me out of the corner quick, but provided less wheel spin on the exit. It was always a struggle for me to decide on which gear to use when being pressured from behind, by another rider. 

IMG_7705.jpg

With the FMF installed I could easily use third gear and have enough "pop" to get me out of the corner in a hurry, yet it kept the wheel spin to a minimum by being able to use a taller gear. The FMF’s 4.1 system made me think less and twist the throttle harder, something I like doing. I didn't get any more top-end with the FMF installed, yet it didn't take any away from the orange machine. I did notice slightly less over-rev with the FMF system (from stock) when I got lazy.

Akrapovic Evolution Full Muffler System ($1299.99):

The Akrapovic Evolution full muffler system has a similar character to the slip on version that comes with the Factory Edition, but with added bottom end roll on and mid range. If you’re expecting a ton of added RPM response (excitement) from your full system compared to your standard slip on, you will be disappointed. You simply will not be getting that much added rpm response with the Akrapovic full system. Instead of a smooth roll on that the FE comes with it now has a little more pulling power in second and third gears and pulls those gears much longer.

IMG_7662.jpg

Mid range pulling power is increased and the muffler pitch is so quiet you never really feel like you’re “on the gas”. The mid range pull is much more linear and longer than the standard slip on and being able to shift a little earlier with the full system makes it easier to ride in softer conditions. I had a hard time with the KTM 450 SX-F Factory Edition at softer tracks not recovering, if I shifted early out of a corner. With the full system at the same track I was able to shift into third and not have to worry about covering the clutch as much. 

IMG_7661.jpg

Top end and over-rev is where this Akrapovic Evolution system shines. Adding top end and over-rev to the already very capable Factory Edition only makes this machine more fun to ride. Again, I can’t stress on how deceiving this system is because of it’s quiet nature. I really had to focus in and feel how quick I was going from point A to point B on the track because the pitch of the muffler never sounds “racey”. However even with its quiet note, the Akrapovic full system lets the KTM pull so much farther that it almost feels like a swapped to an aftermarket ignition. The connection to the rear wheel with the full system is unmatched and even though it may seem like it’s not very responsive, the KTM with the Akrapovic full system allows the rider to get on the gas sooner through corners.

If you’re reading this and wondering why you can’t simply purchase an Akrapovic headpipe for your Akrapovic slip on, the answer is they will not mate up. The Akrapovic slip on has a smaller diameter OD, (where it meets the stock headpipe), so purchasing just the headpipe will not work.

Akrapovic Vs. FMF:

Below are your typical engine categories and which muffler is best in what area. 

Bottom End: FMF

Mid-Range: FMF

Top End: Akrapovic

Over-Rev: Akrapovic 

RPM Response: FMF

Rear Wheel Connection: Akrapovic

Weight: (Akrapovic 6.2 lbs.) (FMF 6.9 lbs.) (Standard FE 8.1 lbs.)

IMG_0033-2.jpg

Which One Should You Purchase?

If you’re looking for more bottom end excitement or rpm response look towards the FMF system. If you’re looking for the lightest muffler available and want more top end/over-rev you will love the Akrapovic. Cost is also a factor to me, so if I am looking at the most bang for my buck, the FMF is less money and I’m getting a good performance gain compared to the standard Akrapovic slip on that comes on the FE. The FMF muffler stands up to more abuse as the Akrapovic can look hammered quicker. That being said I was super impressed with the connection that the Akrapovic had on dry/slick tracks, so depending on what conditions you ride could be a factor in your purchasing decision as well.


Pro Circuit Link Arm (2020 Yamaha YZ450F)

I have tried links in the past on previous generation YZ450F’s with less than stellar results, but since Yamaha changed the frame on the 2020 machine, I thought I would revisit a link to see if it helps improves the Yamaha’s feel around the track. 

Pro Circuit's linkage arms are CNC-machined from billet aluminum and are designed to stiffen up the initial linkage curve in order to try and improve the geometry of the YZ450F’s chassis, in order to try and make the bike more stable in certain areas of the track. The linkage arms includes all of the required bearings and seals and is ready to bolt up. I wanted to see how it worked with the stock YZ450F suspension valving, so since Pro Circuit is backordered on them for a while, I purchased the Pro Circuit linkage arm at rockymountainatvmc.com for $189.95 . Once I received the PC link, I went to a few tracks to try the it and the stock link, back to back , to see if the Pro Circuit link is a benefit to the average rider. 

IMG_7685.jpg

One thing that I want from the stock 2020 Yamaha YZ450F is less movement from the rear end under acceleration. With the stock link, the rear end can squat  too much at times (under throttle) and give me the feeling of less connection to the rear wheel under load. I do think the new 2020 frame and suspension valving has helped de-cel pitching, but once the fork is broke in, it can dive a little too much under hard braking. 

After I installed the PC link I re-checked my sag numbers to make sure they were in the spec I desired. I ran 105mm of sag with the stock link and am currently at 105mm of sag with the PC link. With the PC 143.5mm link installed (142.0mm is stock) the Yamaha has a noticeably different feel to it on the track. I immediately noticed that my rear end felt firmer under acceleration, but that feeling wasn't such a positive change. I went back to the van and turned my high speed compression (on the shock) out a quarter turn to help soften up the feeling on acceleration chop. Once I adjusted the high speed compression, I could start to feel the benefits of the Pro Circuit pull rods. 

Off throttle (de-cel) the Yamaha YZ450F felt flatter and less front end heavy, which gave me a YZ450F that now had more control on braking bumps. Corner entry wasn't improved, but I could feel how the Yamaha could lean over better through the middle to end of each corner. With the Pro Circuit link It took slightly less effort for me to continue my lean on the Yamaha, which usually isn't its strong point. Out of the corner (with the softer high speed compression setting) the Yamaha had more rear wheel traction and followed the ground better on acceleration bumps. The rear of the bike was higher in its stroke with the PC rods and gave me more of a plush feel than the stock link. I am able to run a softer high speed compression setting as well as low speed to get more comfort on choppy ruts. 

IMG_7636.JPG

The overall feeling of the YZ450F with the PC link is a slightly calmer chassis off throttle with a better mid to exit cornering feel. If I had to point out a negative about the PC link it would have to be that once you’re off throttle the Yamaha has a firmer rear end feel. Even though I am gaining control on braking bumps, the YZ450F will feel firmer if the rider isn’t aggressive or pushing the bike. I feel the Pro Circuit linkage arms reward a more aggressive rider, so if you’re the average weekend warrior that likes to cruise his Yamaha YZ450F and is comfortable with your set up, these Pro Circuit linkage arms may not be the best purchasing decision. However, if you’re looking for more control on braking bumps, with a firmer feel and an easier area 2 to 3 (see testing term explanation below)  through corners, then the Pro Circuit linkage arms make a positive difference. 

Cornering Testing Terminology: 

Area 1: Beginning of corner (initial lean, tip in)

Area 2: Middle of corner (weight feel, traction, cornering stability)

Area 3: Exit of corner (rear wheel traction/connection, comfort)


Husqvarna FC450 Triple Clamp Offset Test

The Husqvarna FC 450 Rockstar Edition comes standard with the Husqvarna Technical Accessories Adjustable Factory Triple Clamp. If you’re riding a standard FC450 these clamps adjustable clamps are available through your local Husqvarna dealer for $599.99. The adjustable clamp comes standard at a 22mm offset but can also be moved to a 20mm offset as well. The factory Rockstar Energy Husqvarna team is currently running these on their bikes and to me these factory clamps have a softer feel to them compared to the triple clamps that come on the standard 2020 FC450. There is less rigidity as well as more flex with the Husqvarna adjustable factory or X-Trig clamps compared to the standard/stock FC450 clamps. I have never really messed with the offset on the Husqvarna for motocross, so I thought I would experiment with each offset and even throw in an X-Trig 24mm offset for good measure. Below are some of the positives and negatives of each offset, as well which type of track each offset would benefit you the most.

IMG_7666.JPG

Criteria: I chose Glen Helen as my testing grounds. They have the national track, which is fast and very rough as well as the REM track, which has more turns and is slower speed. I gave each offset setting a try on both tracks to see what I would lean towards in hopes to give you a direction for your personal needs.  

Offset: The triple clamp-offset is the distance of the horizontal center line of both fork tubes to the center of the steering axis, about which the fork legs are offset from the steering axis (referred to as dimensionX). The offset set can be seen at a glance by the marking on the triple clamp.

20mm Offset Husqvarna Clamp: 

IMG_7659.jpg

+ Lean in is made easier on initial turn in

+ Front tire contact patch is improved on de-cel

+Lightweight feel improved (side to side movement)

- On throttle front end hunt/peck (deflection more apparent)

- Slight oversteer on long sweeping corners 

- Slight less comfort on initial bump impact 

Who is this setting best for? 

20mm offset is best for slower riders who have trouble with cornering or leaning into a rut. This setting makes it easier for the FC450 to fall into a rut and stay there. This setting was also much better for the tighter/slower track as there was less on throttle stability issues at the tighter track. 

Who is this setting not for? 

20mm offset is not for faster riders who want stability out of their machines on faster tracks. There is a lot of movement in the front end, on throttle, which leads to deflection in square edge. 

Best Overall Fork Setting With 20mm Offset:

Height: 1st line

Air Pressure: 11.0 bar

Comp: 11 out

Rebound: 16 out

22mm Offset Husqvarna Clamp:

IMG_7654.jpg

+ Stability improved over 20mm offset (on/off throttle)

+ Bump absorption has more comfort than 20mm offset

+ Cornering stability is improved 

- Slightly heavier feel than 20mm (side to side/lean in)

- On throttle rear end squatting more (feels low)

Who is this setting best for?

For me this is the best all around setting for flowy/faster/intermediate terrain motocross tracks with bigger bumps. It’s a blend of good stability and predictability. I can hit bumps harder with the 22mm offset without the chassis reacting too fast. 

Who is this setting not for? 

This setting is not for fast west coast GP style courses or the older vet rider that needs assistance with cornering. Sliding the fork up to the second line helps this, but if you’re having trouble sticking in a rut, the 20mm offset can be more helpful than the 22mm setting. 

Best Overall Fork Setting With 22mm Offset:

Height: 1st line

Air Pressure: 11.1 bar

Comp: 14 out

Rebound: 15 out

24mm Offset X-Trig Clamp:

IMG_7664.jpg

+ Very planted feeling chassis down choppy hills

+ Bump Absorption feel is better than 20/22mm offsets

+ Sweeping cornering stability/comfort/contact patch better than 20/22

+ Less vibration through bars with PDHS mounts

- Side to side movement feels lazy/heavy (initial lean)

- Vague front end feel while leaning in ruts (going up on fork height helps this)

- Bar pad doesn't fit because of PDHS mounts

Who is this setting best for?

The 24mm offset would be beneficial to any rider who wants more high speed front end stability. The 24mm offset helps with bump absorption on throttle and keep front tire straight. West coast GP or off-road riders would benefit from a 24mm offset.  

Who is this setting not for:

The 24mm wouldn't benefit most moto riders that are looking for a quick handling machine with a blend of straight line stability. The 24mm is more of a point and shoot type of offset. Come in straight and pivot/rear wheel steer out. 

Best Overall Fork Setting With 24mm Offset:

Height: 2nd line

Air Pressure: 11.0 bar

Comp: 10 out

Rebound: 14 out


Sunstar Works Triplestar Sprocket

Sunstar is the largest OEM supplier of motorcycle and all terrain vehicle (ATV) sprockets and brake discs in the world. In fact, if you’re on a Japanese machine most likely it came from the factory with Sunstar. Sunstar offers the Works Triplestar combination that is lightweight, looks good, and from what I found out recently, is pretty damn durable for an aluminum sprocket. Since Sunstar sprockets came stock on our YZ450F and I’ve had great luck with them, I thought why not try out their Triplestar sprockets, to see how long they last.

IMG_7605.jpg

The one problem about aluminum sprockets is they simply don’t last long right? I have tested Renthal aluminum sprockets in the past that have broke teeth within 4 engine hours. That’s not acceptable! I am also a firm believer of when your sprockets get worn out and its time to change them, it’s also time for a fresh chain, so make sure to try and always change the whole drivetrain at the same time. This test isn't a big elaborate techy kind of test, but more of a testimonial of what I thought of the Sunstar sprockets. It’s not easy to talk about a sprocket, so let me just tell you how long it lasted and give you some other food for thought. 

IMG_7604.jpg

I am lucky to get ten engine hours on an aluminum sprocket out here on the west coast so changing out my drivetrain every couple weeks is the norm. Yes, I can ride up to ten engine hours every 7-10 days. Shockingly, I have just over 16 engine hours on this Sunstar Triplestar sprocket and it looks like this (see above). Not bad right? The Sunstar quality has been superb and when I told the guys over at Sunstar that I was shocked on how good the sprockets were, they acted surprised that I was so shocked. I know Sunstar comes on a lot of production machines, but in the racing world they’re not as prevalent in my mind for whatever reason. I kept the standard 13/49 gearing on the YZ450F and haven't had an issue with the Sunstar Triplestar sprockets breaking teeth yet. I am very impressed on the quality and durability of the brand. 

 Now I know most of you are asking yourself “why doesn't he use steel sprockets or at least a Twinring”? I like to keep aluminum on my test bikes because every time I’ve had a chain failure, it has been with a steel rear sprocket. Rear steels are hard on chains, especially if you’re a moto guy, so for my peace of mind, I stick with aluminum. I have ran steel sprockets in the past and although they last a long time, I have snapped more chains running steel sprockets than aluminum, so I choose to stick with the lighter rear sprocket. Mix matching a steel countershaft sprocket with an aluminum rear is not uncommon for me and when doing that steel/aluminum combo, I have experienced zero chain failures. If I was running an o-ring chain on my test bikes, I can run steel rear sprockets with better results. If you’re a off-road guy that rides a ton of mud, this sprocket test may have nothing to do with you. Steel sprockets, o-ring chains, and GNCC type racing is the norm, but for moto what I described above is what I felt.

If you’re looking for an aluminum rear sprocket that has a great lifespan look no further than this Sunstar Triplestar.  

Ride Engineering Performance Link (KTM 125SX)

My son loves riding his 2020 KTM 125SX, but comments all the time on how he feels like the KTM sits taller than his Yamaha YZ125. When I watch him ride I notice that the rear end of his 125SX kicks him in his ass when hitting braking bumps and when that happens, it makes the front end dive too much on corner entry. He only weighs in at around 115 pounds, so going down a spring rate on the shock was a must, but to me, the bike still looked unbalanced on de-cel.

IMG_7554.jpg

I called up Adrian at Ride Engineering and asked what he had for the KTM 125SX and we both agreed to try a rear link to see if that would help balance out the bike. This Ride Engineering link lowers the back of the KTM 125SX chassis by 7mm to try and improve the ride balance. I set the sag at 103mm with the Ride Engineering link versus the usual 105mm of sag that we were running on Aden’s KTM. Just know that you might have to adjust your air pressure setting on your AER fork to get the right front end feel, since you’re dropping the rear of the bike with the new link (more on that below).

For this test I had two KTM 125SX machines. One was set up for my son, with his softer shock spring and one was just a bone stock KTM 125SX with the sag set for me at 105mm. We started later in the day at a couple tracks on separate days to make sure the track was nice and broke in before we started to make our changes. Doing this ensures that the track doesn't change too much from each change we made to the orange machines. With the Ride Engineering link I noticed better tracking/acceleration coming out of choppy corners and slightly more stability off-throttle. I really liked that the link helped the ride attitude of the KTM when leaning, under throttle, on choppy terrain. I had more trust in the KTM when loading the chassis hard on throttle. I didn't get near as much kicking coming down rough hills and the overall cornering character didn’t suffer. I was worried that this Ride Engineering link would hurt turn in, but to my surprise it didn't affect the KTM’s easy natured turn in character. 

IMG_6841.JPG

Aden’s comments didn't exactly mimic mine, but one comment that actually made sense was he did like that he felt lower to the ground, when sitting, and that helped him with his starts. When watching him ride the bike was visibly less busy in the rear and didn't give him as much kicking on de-cel. The length of the Ride Engineering pull rods are 1.3mm’s longer than stock and come in at a 149.5mm overall length. Aden doesn't know enough about chassis testing to give me some great feedback, but some of his comments overlapped mine. I more or less watch the bike when he rides and then decide if it’s a good direction or not. We decided to leave the Ride Engineering link on his bike after we both came to an agreement that he looked/felt better on a rough track with it on.

If you do decide to get the Ride Engineering Performance Link just know that you may have to adjust your AER fork pressure, if you’re still on air forks. Now with the Ride Engineering pull rods installed the rear end will ride a little lower, so the front end might seem a little high. Dropping the air pressure anywhere between .2-.5 bar might be needed to get some added front end traction. We dropped Aden’s air pressure from 8.3 bar to 8.1 bar at some tracks and even down to 8 bar at others. Try running your normal AER pressure when you first put on the Ride pull rods and see how your front end feels though corners. If you feel like your front end is tall, your front end is pushing, or have a vague front end feel, just try to drop your air pressure slightly. This will help let the fork use more of its stroke and get that front tire to bite into the ground more. 

The Ride Engineering Performance Link comes complete with bearings and seals and is not that difficult to install. I literally changed the link out at the track on several days. If you’re looking to get a little more stability and rear wheel traction without sacrificing cornering, then you might want to try this link. MSRP is $219.95, but you can use the code Keefer-20 to save 20% if you want to order through ride-engineering.com

SKF Linkage Seals Part Numbers (KTM 450 SX-F/Husqvarna FC450)

The new 2020.5 KTM Factory Edition and Husqvarna Rockstar Edition come with updated SKF seals in the linkage for less friction and actually do make a little difference on the track. With the updated linkage seals the rear of these new 2020.5 bikes feel freer and give less harshness to the back of the bike on square edge acceleration bumps. The action of the shock feels smoother over bumps and when I rode a standard 2020 KTM back to back with the 2020.5 KTM, I experienced more of a forgiving feel, on throttle, over bumps, almost immediately. I didn’t notice a huge difference between the old seals and the new SKF seals on de-cel as most of the benefit was on throttle sensation only.

ktm factory edish -8514.jpg

If you’re not in the market for a new Husqvarna or KTM 450, but still want to upgrade your linkage on your older white or orange machine, we thought why not give you the part numbers to make it easier for you to order.

Part number: 79104082032

Description: Seal triangular

Quantity: 4


Part number: 79104082030

Description: Seal triangular

Quantity: 2

Pirelli MX32 Mid-Soft Re-Visit

Pirelli may not be the most popular tire in the AMA Supercross/Motocross paddock, but one look around the MXGP circuit and you will see more Pirelli tires than any other brand. I tested the Pirelli MX32 MId-Soft back in early 2018, but since then, the MX32 Mid-Soft tires are said to have an improved spec, so I grabbed a couple to test for a few weeks. While I don’t have much information on what was improved or why, I did get confirmation that all of the old MX32 Mid-Soft spec tires have been out of circulation for a while. This was a concern to me as I thought some may still be floating around, but I was reassured that if a consumer purchases any Pirelli MX32 Mid-Soft tires, you will in fact be getting the updated versions. Pirelli also noted that they have dropped their pricing down on all their motocross tires $5.00-$15.00. They even have a “MX Extra” tire that has a price reduction of $50.00 a set.

IMG_7322.jpg

Once out on the track I quickly found out that one of the first things that impressed me the most was that the Pirelli Scorpion MX32 Mid Soft’s carcass gives the rider a blend of comfort and control on choppy/square edge terrain. I am usually on Dunlops around these Southern California test track, so I am very familiar on what these test bikes feel like when they get rough. When the track does get rougher, the Pirelli MX 32 Mid-Soft rear tire (120/80-19) gives more cushion than the Dunlop I have been riding on lately. The Pirelli carcass acts like another piece of your bike’s suspension and can really help a rigid feeling chassis become slightly better on choppy terrain. It impressed me so much that I tried it on a 2020 Honda CRF450R and it gave me less of a harsh feel. To me that was impressive on this machine, because the Honda needs more comfort and the MX32’s carcass did just that.

IMG_8100-2.JPG

Pirelli also offers a 120/90-19 size rear tire as well that was even better on square edge cushion feel, but the 120/90-19 also puts more weight on the front end of the machine, which increases front-end steering, but negatively affects the ride height. If you do decide to go with the 120/90-19 and feel like your rear end is too high after installation, I do recommend dropping your sag 1-2mm to prevent a high feeling rear end on de-cel (stink bug). 

The Pirelli MX32 Mid-Soft rear tire offers great traction on soft/intermediate terrain through ruts and coming out of soft corners. The MX32 works well under lean angle and that lean angle traction is one of Pirelli’s rear tire strong suits, as the rider is able to get on the throttle sooner (while leaning) without washing out. The contact patch that I get with a Pirelli at Glen Helen is unmatched. I feel like my lean angle is more controlled and that sudden line changes are easier with the Pirelli. When riding you want the largest “feeling” contact patchiest you can find from a tire and Pirelli has done this well with the MX 32 Mid-Soft.

Not only do you have a more controlled lean angle, but you are also able to start your lean sooner (compared to a MX33). Braking predictability gives the rider confidence to pivot and throttle out of flat corners without much hesitation. If you’re a predominately front end steering rider the Scorpion MX32 rear tire will provide you with less sliding ability and let you steer with the front tire more than the rear. If you're a rear end steering rider that likes to drift the back end around, this tire may not suit you as much as a Dunlop MX33/53. The only complaint I had is when the track surface was on the harder side, I could feel the side of the tire carcass roll when accelerating from flat corners. This gives me a pushing or loose feeling rear end that caused me to be more less aggressive with my throttle hand. To combat some of this it’s very important to run the correct air pressure (between 13.5-14.5 psi) for the Pirelli’s softer style carcass. I noticed that when the Pirelli tire gets half worn, the performance isn't as good if you don't pay attention to the tire pressure. When the tire gets worn, going to 14.5-15 psi helps the structure of the carcass stay firmer on its sidewall when under lean angle. I ran 13.5 on a half worn rear Pirelli and it felt very “washy” or vague so going up to 14 psi helped this roll sensation. Chunking wasn't an issue with the set of Pirelli’s I had, as I got well over 10 hours on a rear tire. You will also have to understand that Southern California conditions are much harder than east coast conditions, so lifespan would dramatically be better in softer east coast based dirt.  

IMG_7323.jpg

Attention! I am a picky son of a bitch when it comes to front tires! The Pirelli MX32 front tire is great for front-end feel and lean angle traction especially in heavy dirt. The softer the dirt the more responsive this front tire is. I prefer a tire that really digs into the dirt and lets you carve underneath blown out berms or ruts (happens a lot here in Southern California). The Scorpion MX32 Mid-Soft front tire actually makes the steering feel heavy at times because the tire is at maximum grip under initial lean in corners. Like I mentioned above, the MX32 is tailor made for a front wheel steering rider and can be leaned into corners earlier than you would come to expect. It took me a couple rides to fully trust this tire, but it has treated me well once I began trust it more. The only other front tire that has as much front end lean angle traction is a Hoosier MX25. This Pirelli front tire does suffer from predictability when the track is freshly watered while broken in/slick on top (think 1PM at your local track). The MX32 would give the front end a vague/push feel as the bike would have a tendency to slide unexpectedly through flat corners. Again, adjusting the air pressure can remedy some of this, so going up to 14 psi helps the tire not to roll so much. 

To me this is a pure soft natured front tire and if the conditions are soft to loamy this tire works great, but if the track gets hard pack, you will get some uncertainty when pushing the front tire’s limits with 13.5 psi. The wear of the MX32 front tire is superb and unlike most soft terrain tires, the Pirelli will NOT chunk. I typically get 10-12 hours on a MX32 front tire before I start to see some of the performance life start to dissipate. This is a performance based tire and should be purchased knowing this. 14 psi is a good baseline for this tire, but be sure to check the pressure after a couple motos. Tire pressure will rise with heat so make sure to have a good tire pressure gauge handy in the tool box. 

The updated Pirelli Scorpion MX32 Mid Soft is one of my favorite sets of tires to put on for Southern California tracks. The Pirelli tires will require more attention during the course of the day with your tire pressure gauge, but if you stay on top of the air pressure, you will be rewarded with a tire that rivals spec tire cushion feel. Look for a small tire shootout soon as we will take the top MX tires and put them to the test under a 10 hour evaluation soon!

If you have any questions about these tires please feel free to email me at kris@keeferinctesting.com.