Bolt-Ons

Keefer's Handlebar Dimension Recommendations


When it comes to handlebars I am a very picky person. The height, width, rise, and position is very important to me. I find that you can’t run the same handlebar bend on every bike, even though I like a bend on one bike, sometimes it doesn’t feel as good on another. Every bike has a different rider triangle so you must adapt to different bar bends as you change motorcycles. As the years progress, dirt bikes evolve and so do their dimensions. As you may have heard in my “Handlebar 101” podcast (show #70), if the bar feels too low (height), you should try to get the bar height from your bar mount and not the handlebar itself. Getting the height from your bar mount allows you to keep proper technique (position) through corners (where most of the time is made up on a track). I wanted to break down some of my favorite bar bends right here (for each new motocross machine) and give you a recommendation on bar mount height for different sized riders.

AZ7Y0201.jpg

As you will notice most of these handlebars on this list are Pro Taper and Renthal. This doesn’t mean that I am trying to sell you these handlebar brands. This is just what I personally like myself and should be taken as such. If you like another bar brand, that is fine, simply look at the dimension of the preferred handlebar and try to mimic that dimension to your favorite handlebar company. There are tons of handlebar companies out there, but for me, Renthal and Pro Taper are the bars that I prefer. For testing purposes, I tried a wide range of handlebars in my shootout so go give that podcast a listen when you can (Show #70). There are some great options out there. Again….This doesn’t mean other handlebars are crap. For transparency reasons, I am letting you know that these are the companies I prefer. I receive ZERO dollars from Renthal or Pro Taper.

  • We are using 2019 models for reference, but if you have an older model and are concerned on which handlebar to run please feel free to email me at kris@keeferinctesting.com.

  • All Dimensions are in (MM).

FullSizeRender-4.jpeg

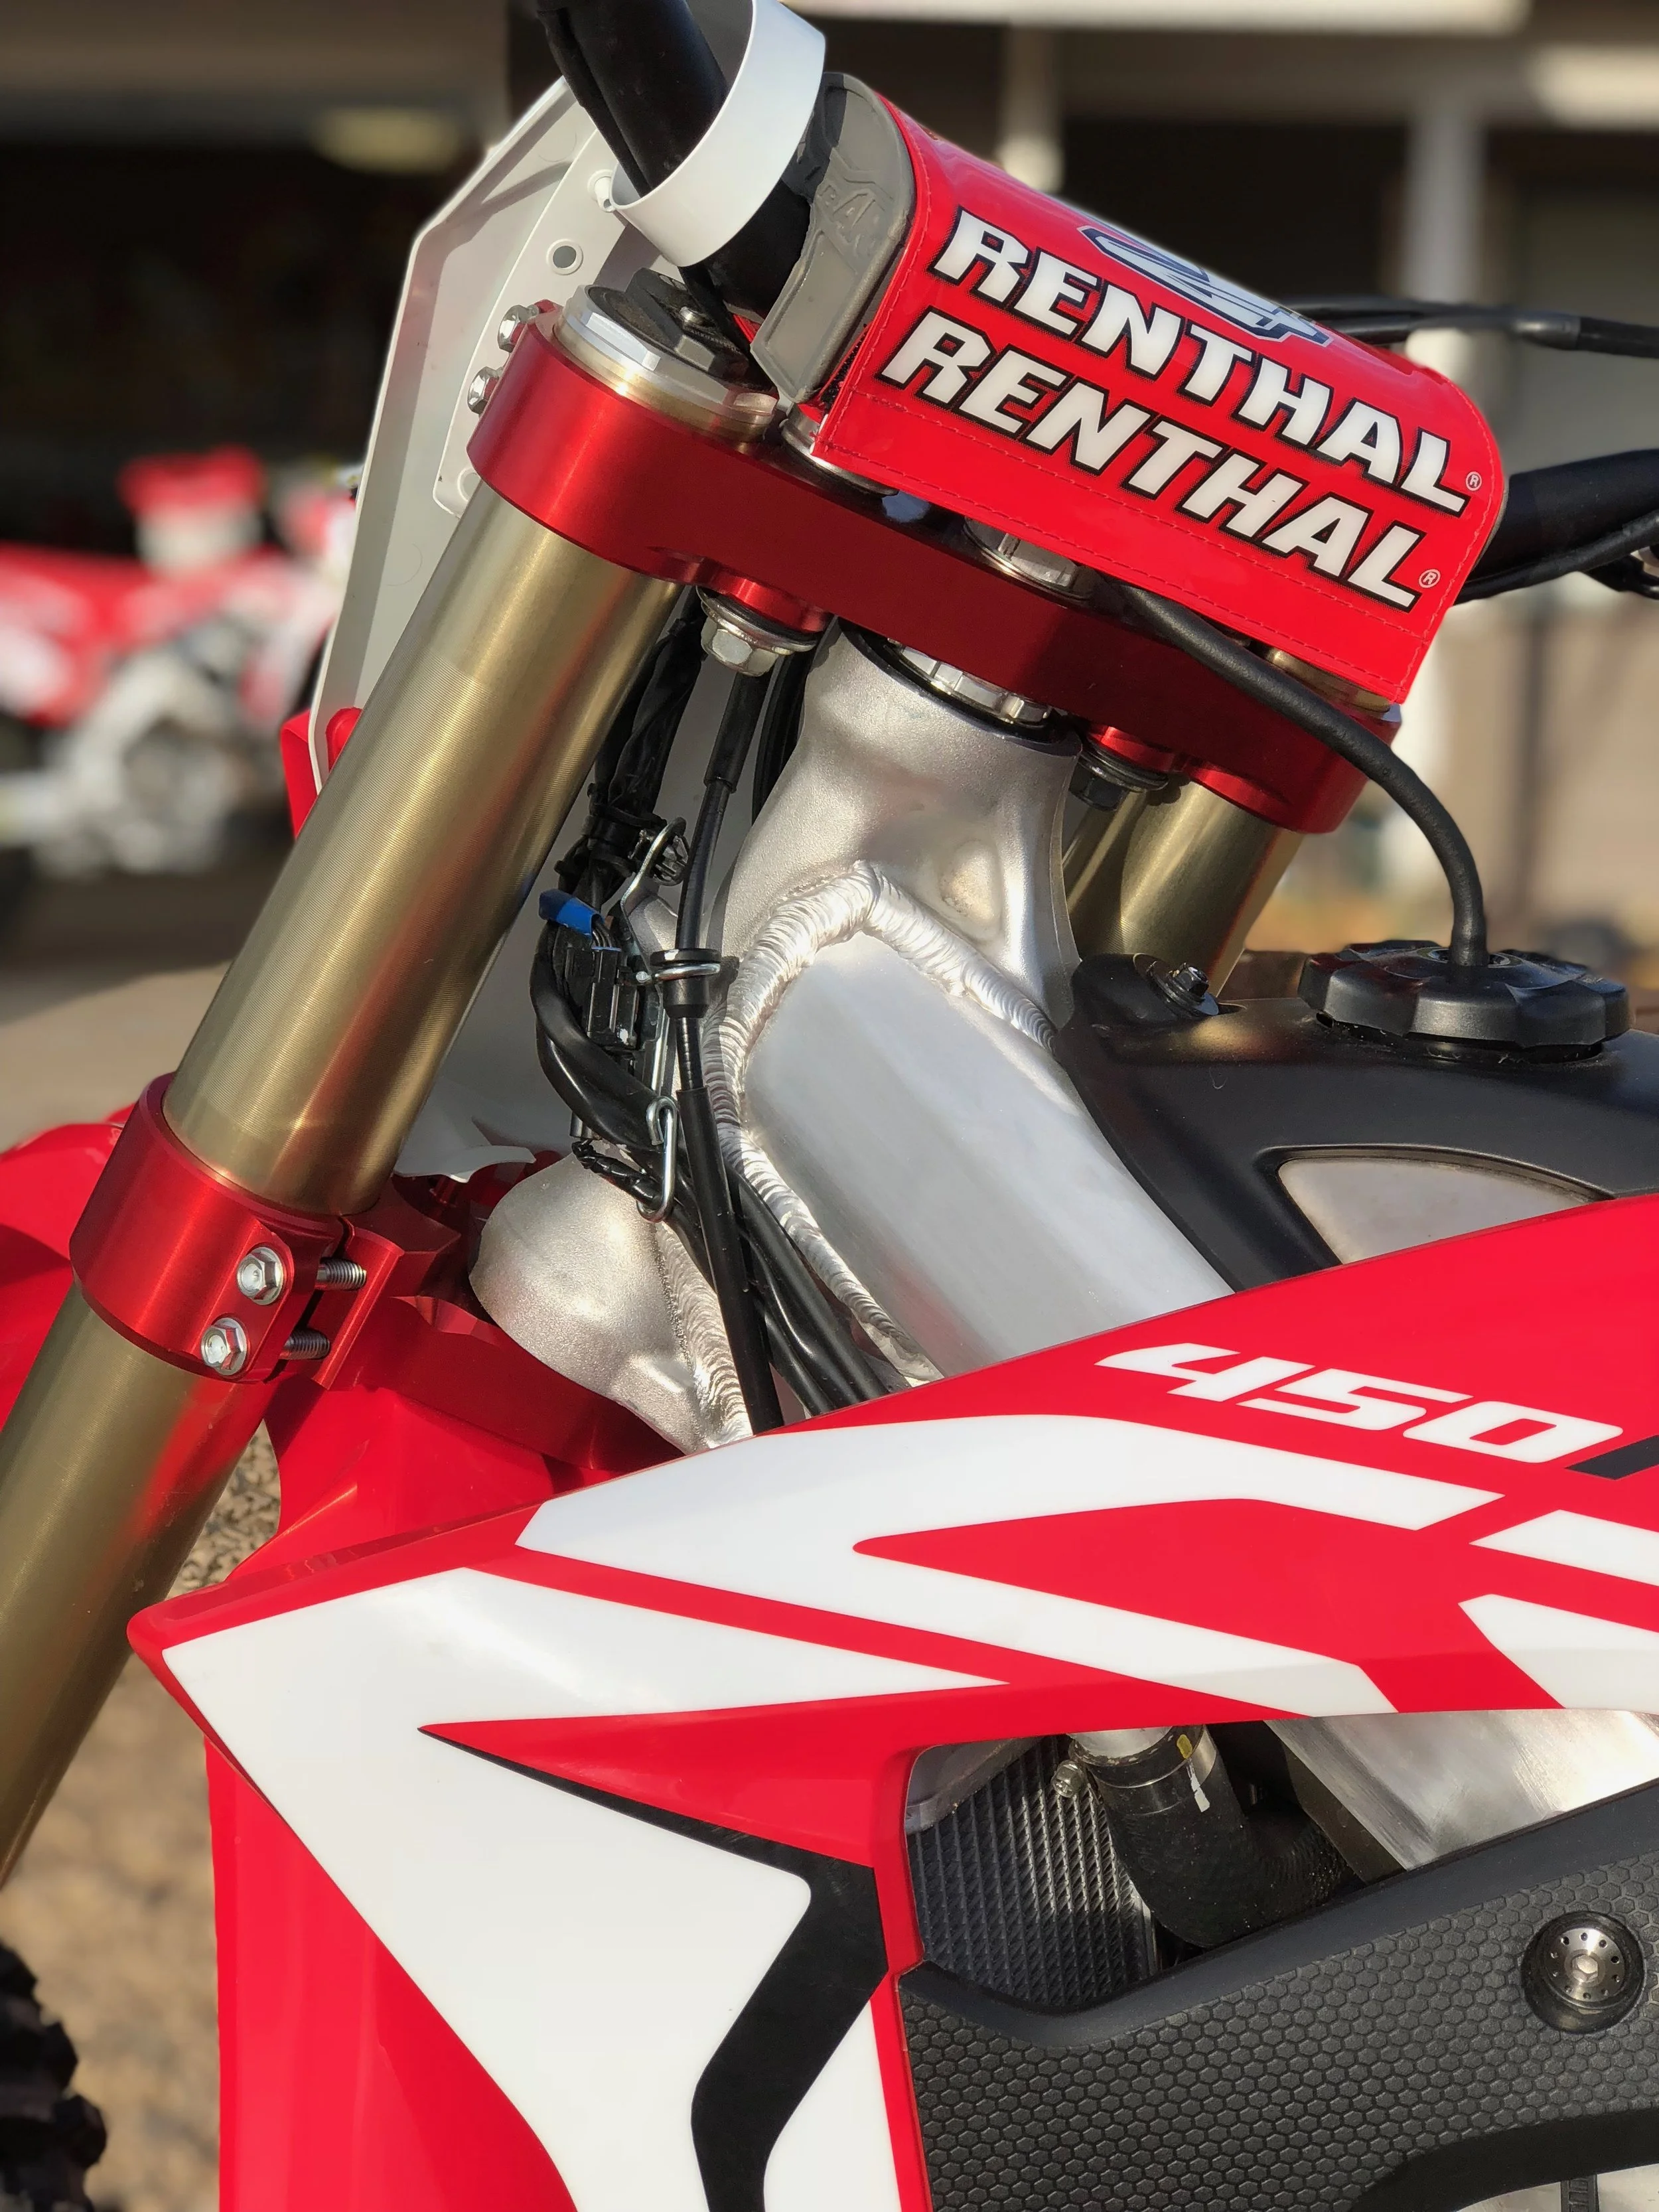
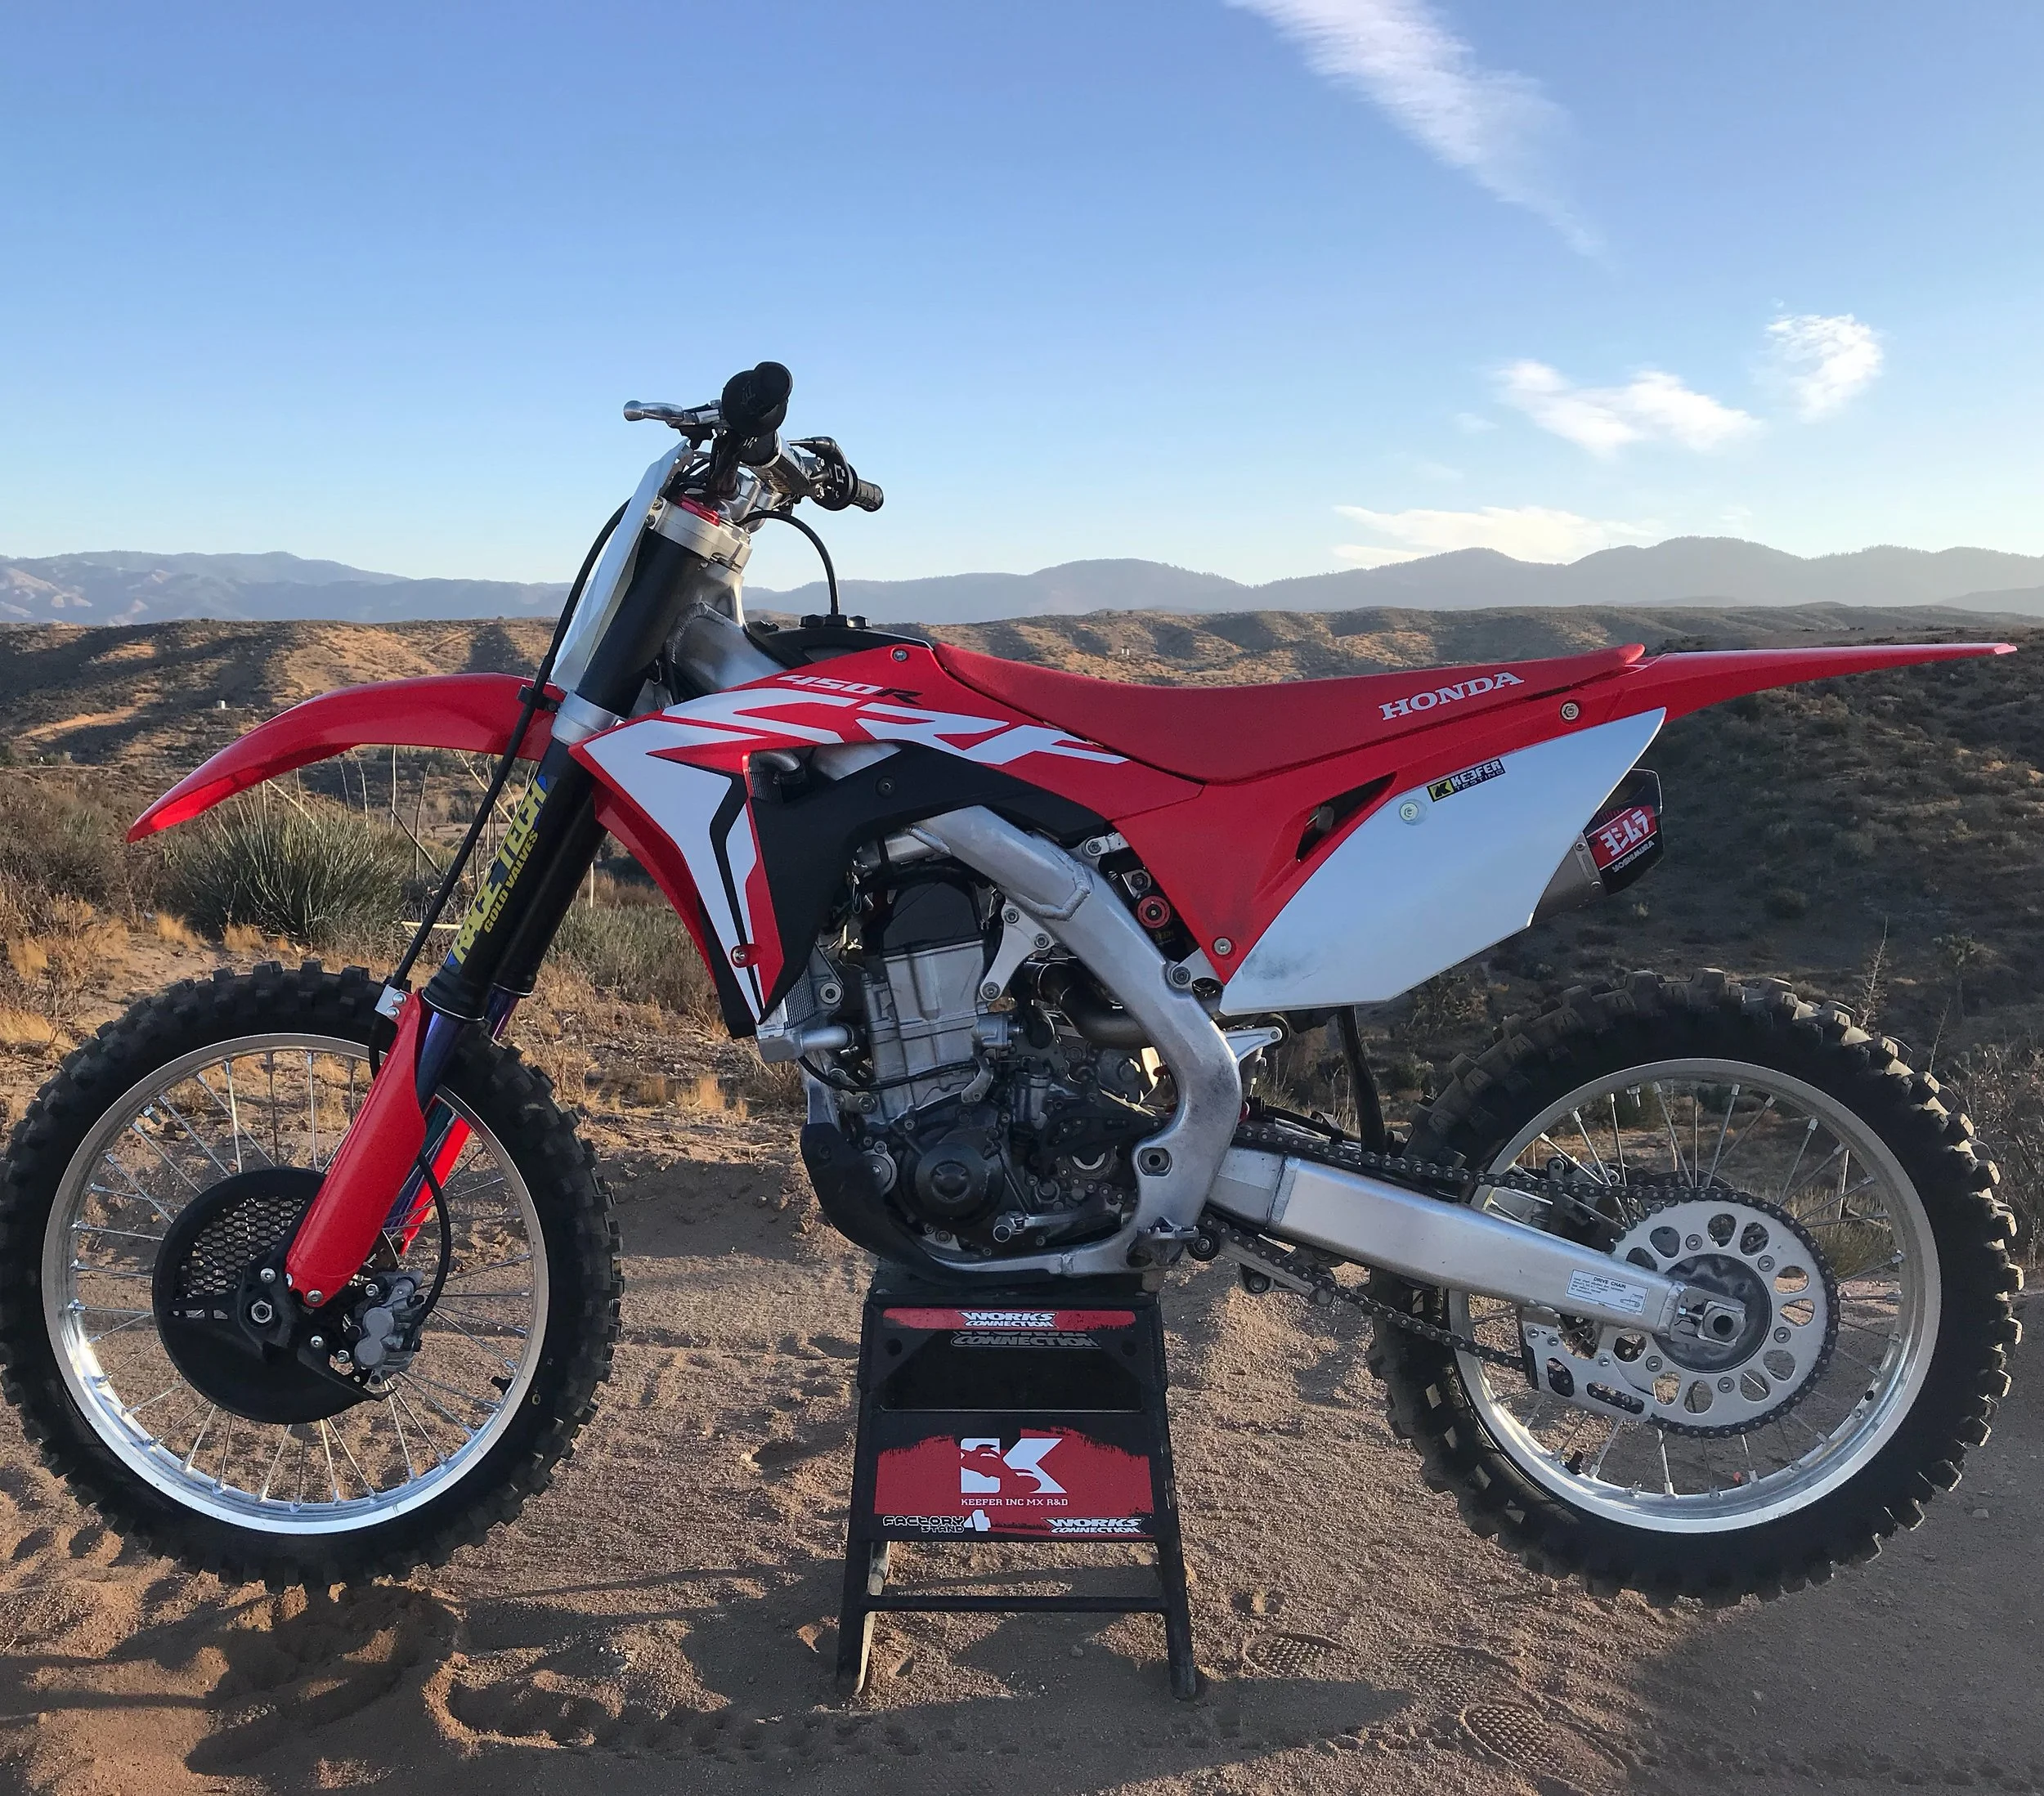
2019 Honda CRF 450R/250R:

Notes: The stock bar bend on the 2019 Honda CRF 450R/250R has finally been updated to a bend that is lower and flatter than previous years. This bend is actually quite good and we usually leave the stock Renthal handlebar on the Honda. If you think you would like more flex you can try the optional bar bend below.

Preferred:

Stock Renthal 839 FatBar (W)802 (H)91 (R)52 (S)51

Optional:

Pro Taper EVO SX Race (W)800 (H)87 (R)54.5 (S)54

Bar Mount Height: Stock 

DL4_0226.jpg

2019 Yamaha YZ450F/250F:

Notes: Yamaha also did a good job on creating a bar that is fairly neutral for different sized riders. It’s lower height seems to fit a wide variety of riders (5’8-6’2), but taller riders may want to put bar mount in forward hole/back position.

Preferred:

Pro Taper EVO SX Race (W)800 (H)87 (R)54.5 (S)54

Optional:

Renthal Fatbar 602 bend (W)801 (H)89 (R)59 (S)56

Bar Mount Height: Stock

9X1A5071.jpg

2019 Kawasaki KX450/250:

Notes: 7/8 lives on! Kawasaki managed to keep the good ol’ 971 Renthal 7/8 bars, which are pretty damn good! I like a 7/8 bar and I actually stick with the 7/8 theme if I can. The 7/8 bar does bend a little easier, but you get a lot of flex when the track gets rough. If you’re an aggressive rider who likes a little more positive steering than go to a 1-1/8 handlebar for increased stiffness.

Preferred: Renthal 7/8 983 bend (Villopoto/Stewart) (W)808 (H)95 (R)58 (S)55

Oversize Option: Pro Taper Fuzion Henry/Reed (W)800 (H)92 (R)66 (R)40 (S)55

Bar Mount Height: Stock

Keefer Shootout Day 1-33.jpg

2019 Suzuki RM-Z450/250:

Notes: The stock Suzuki bend has some sweep to it, which makes the bike feel small at times. I prefer to open the cockpit up a little.

Preferred: Pro Taper EVO SX Race bend (W)800 (H)87 (R)54.5 (S)54

Optional: ODI Podium Flight CountryBoy bend (W)803 (H)92 (R)56 (S)57

Bar Mount Height: Stock

IMG_7171.JPG

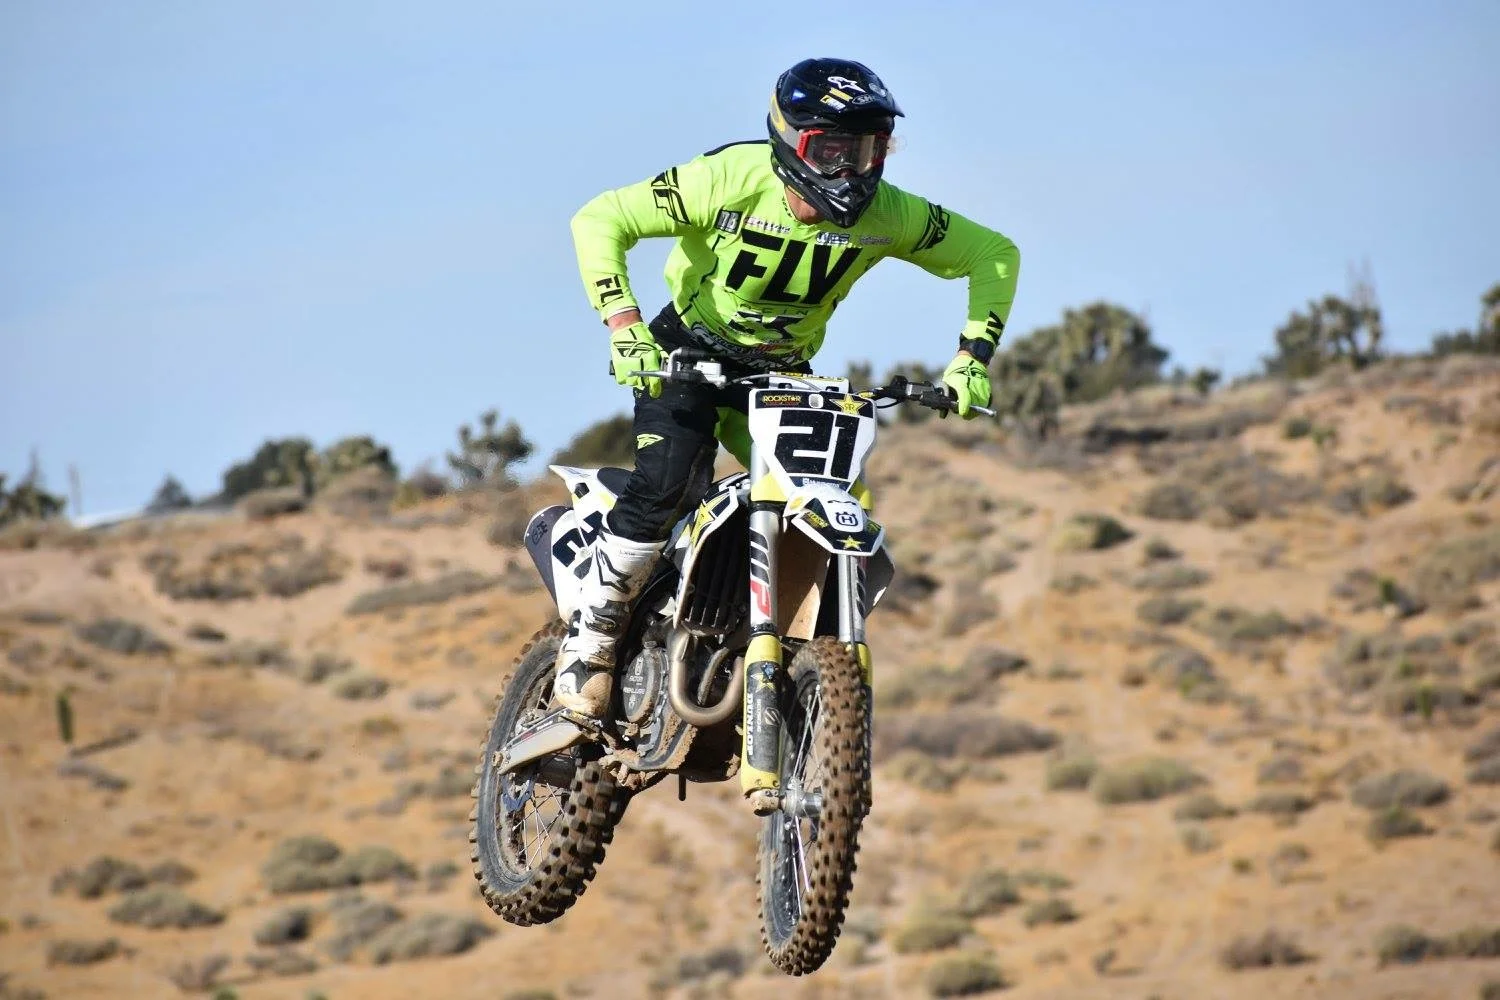
2019 Husqvarna FC450/250:

Notes: Husqvarna comes with a very low bend and that fits the ergos of this bike, but the width of the bar is too long. I actually like the stock handlebar bend on the Husqvarna, however I cut the handlebar down to 803mm, which really helps the character of the Husqvarna when leaning into corners.

Preferred: Stock Pro Taper EVO handlebar cut to 803mm (W)811 (H)80 (R)39.5 (S)51

Optional: Pro Taper EVO Carmichael bend (W)800 (H)77 (R)40 (S)55

Bar Mount Height: Plus 5mm

IMG_4644.jpeg

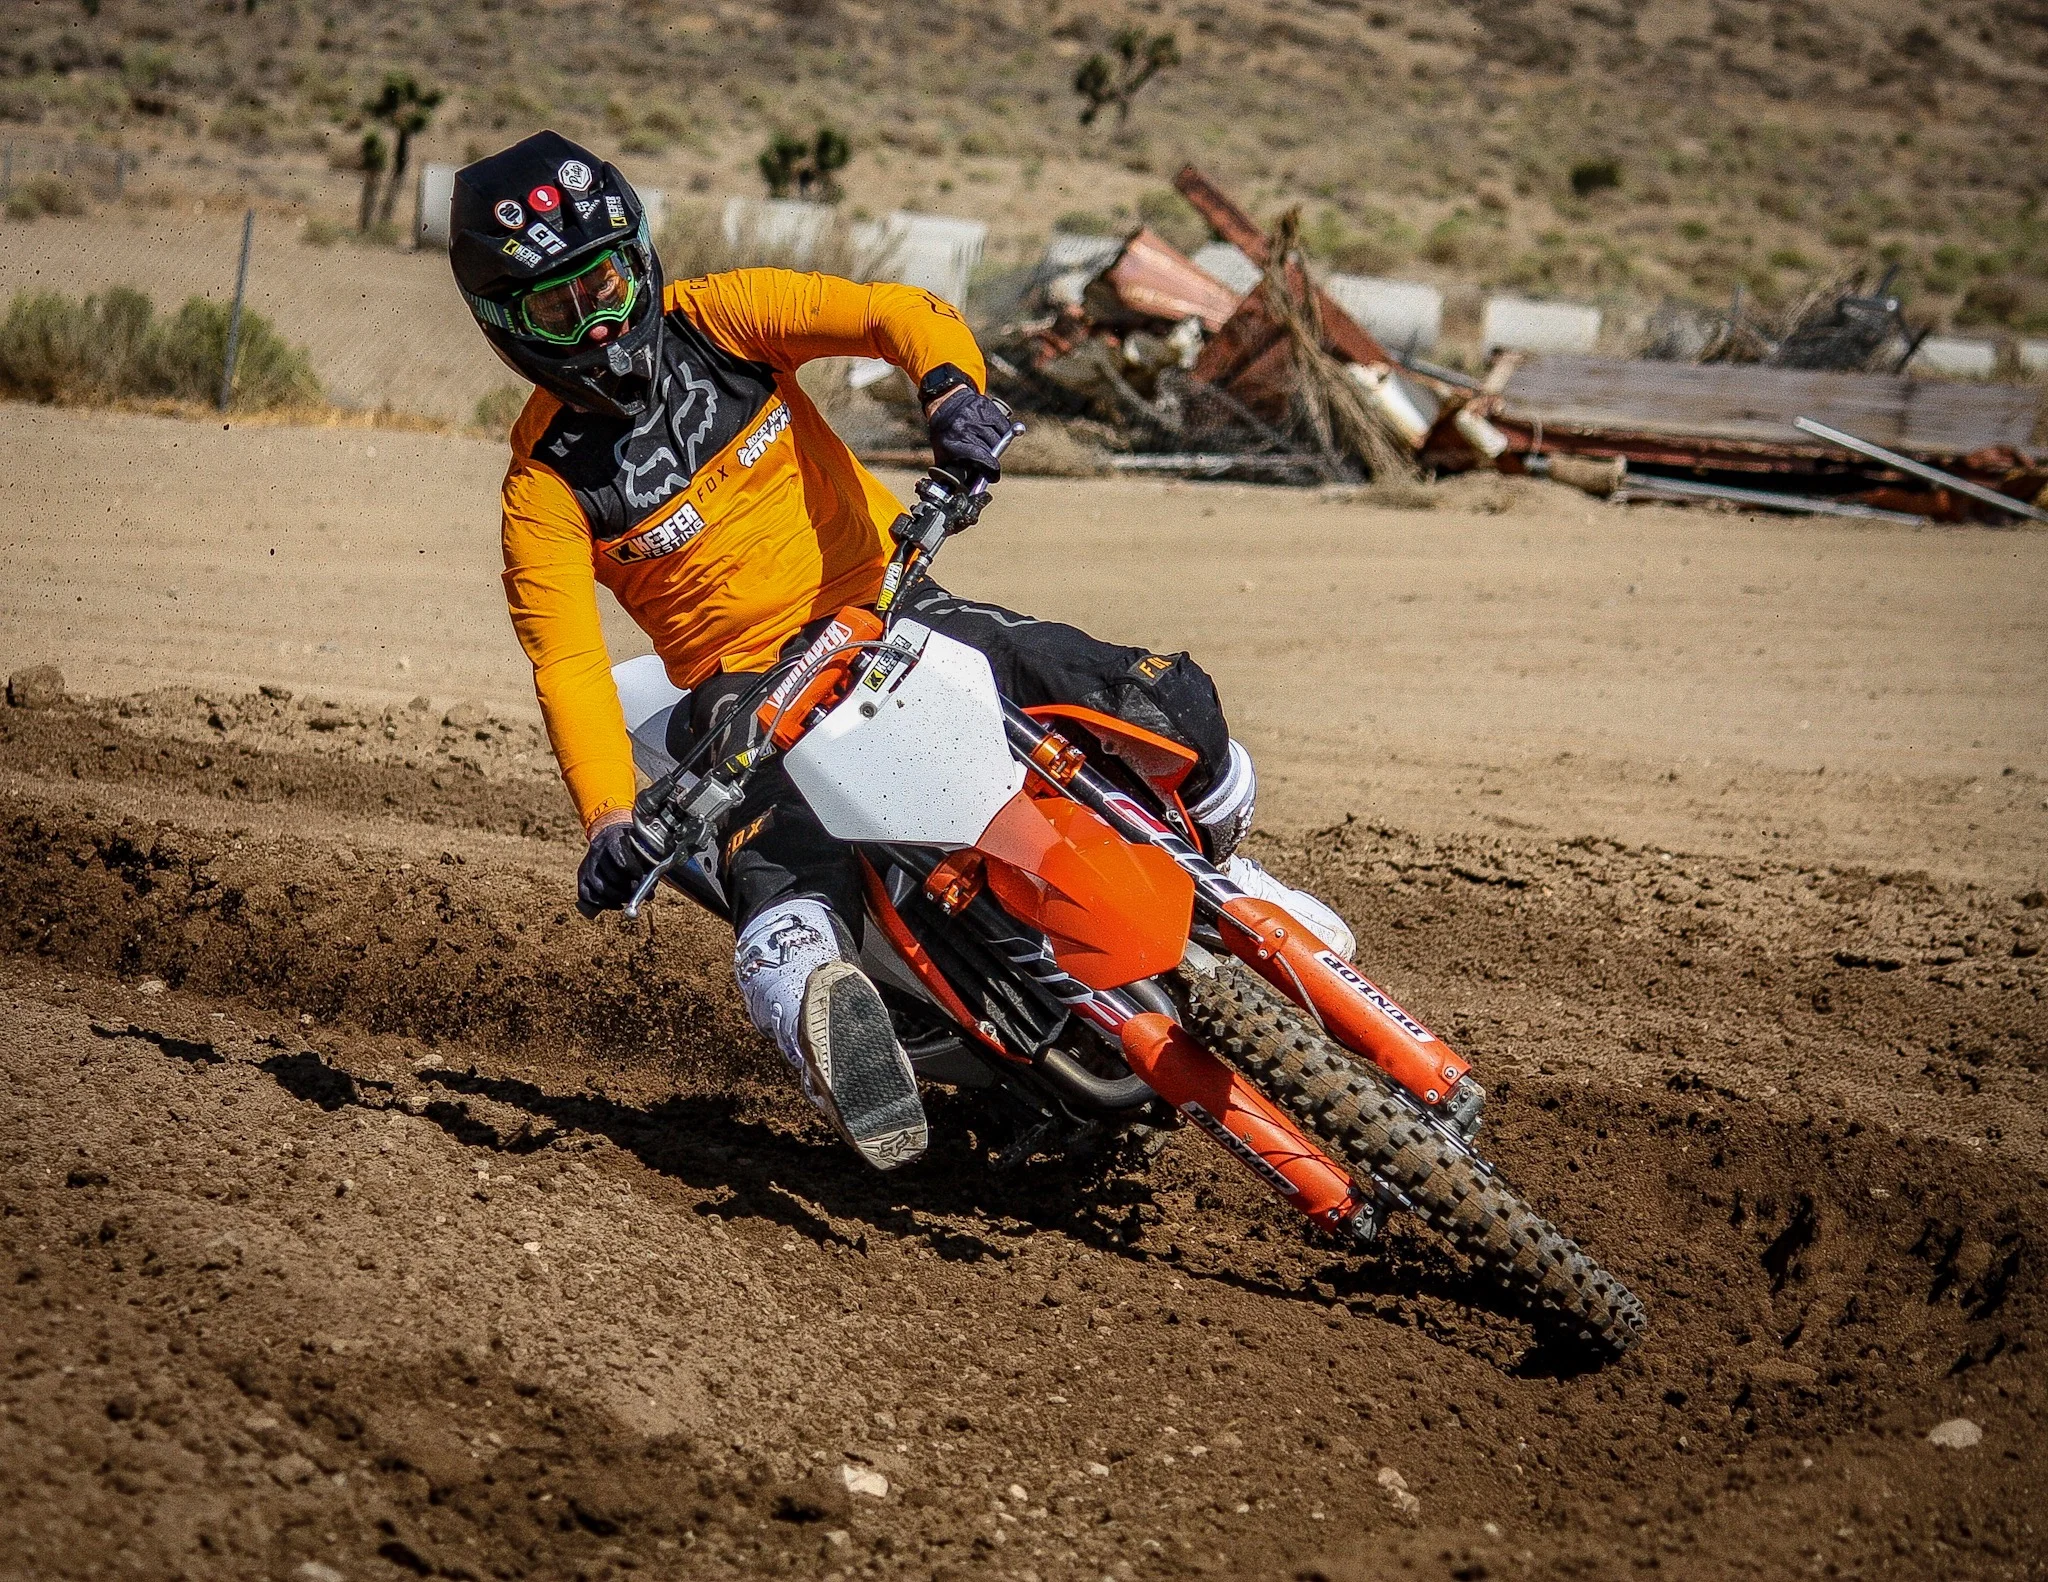
2019 KTM 450SX-F/250SX-F:

Notes: The stock bar bend shape on the orange brigade is also decent, but it is too stiff and long. If you don’t think it is too stiff, you can simply cut the bar to 803mm and run it!

Preferred: Renthal 821 bend cut to 803mm (W)813 (H)78 (R)42 (S)54

Optional: Pro Taper EVO Husqvarna Stock cut to 803mm (W) 811 (H)77 (R)40 (S)55

Bar Mount Height: Plus 5mm

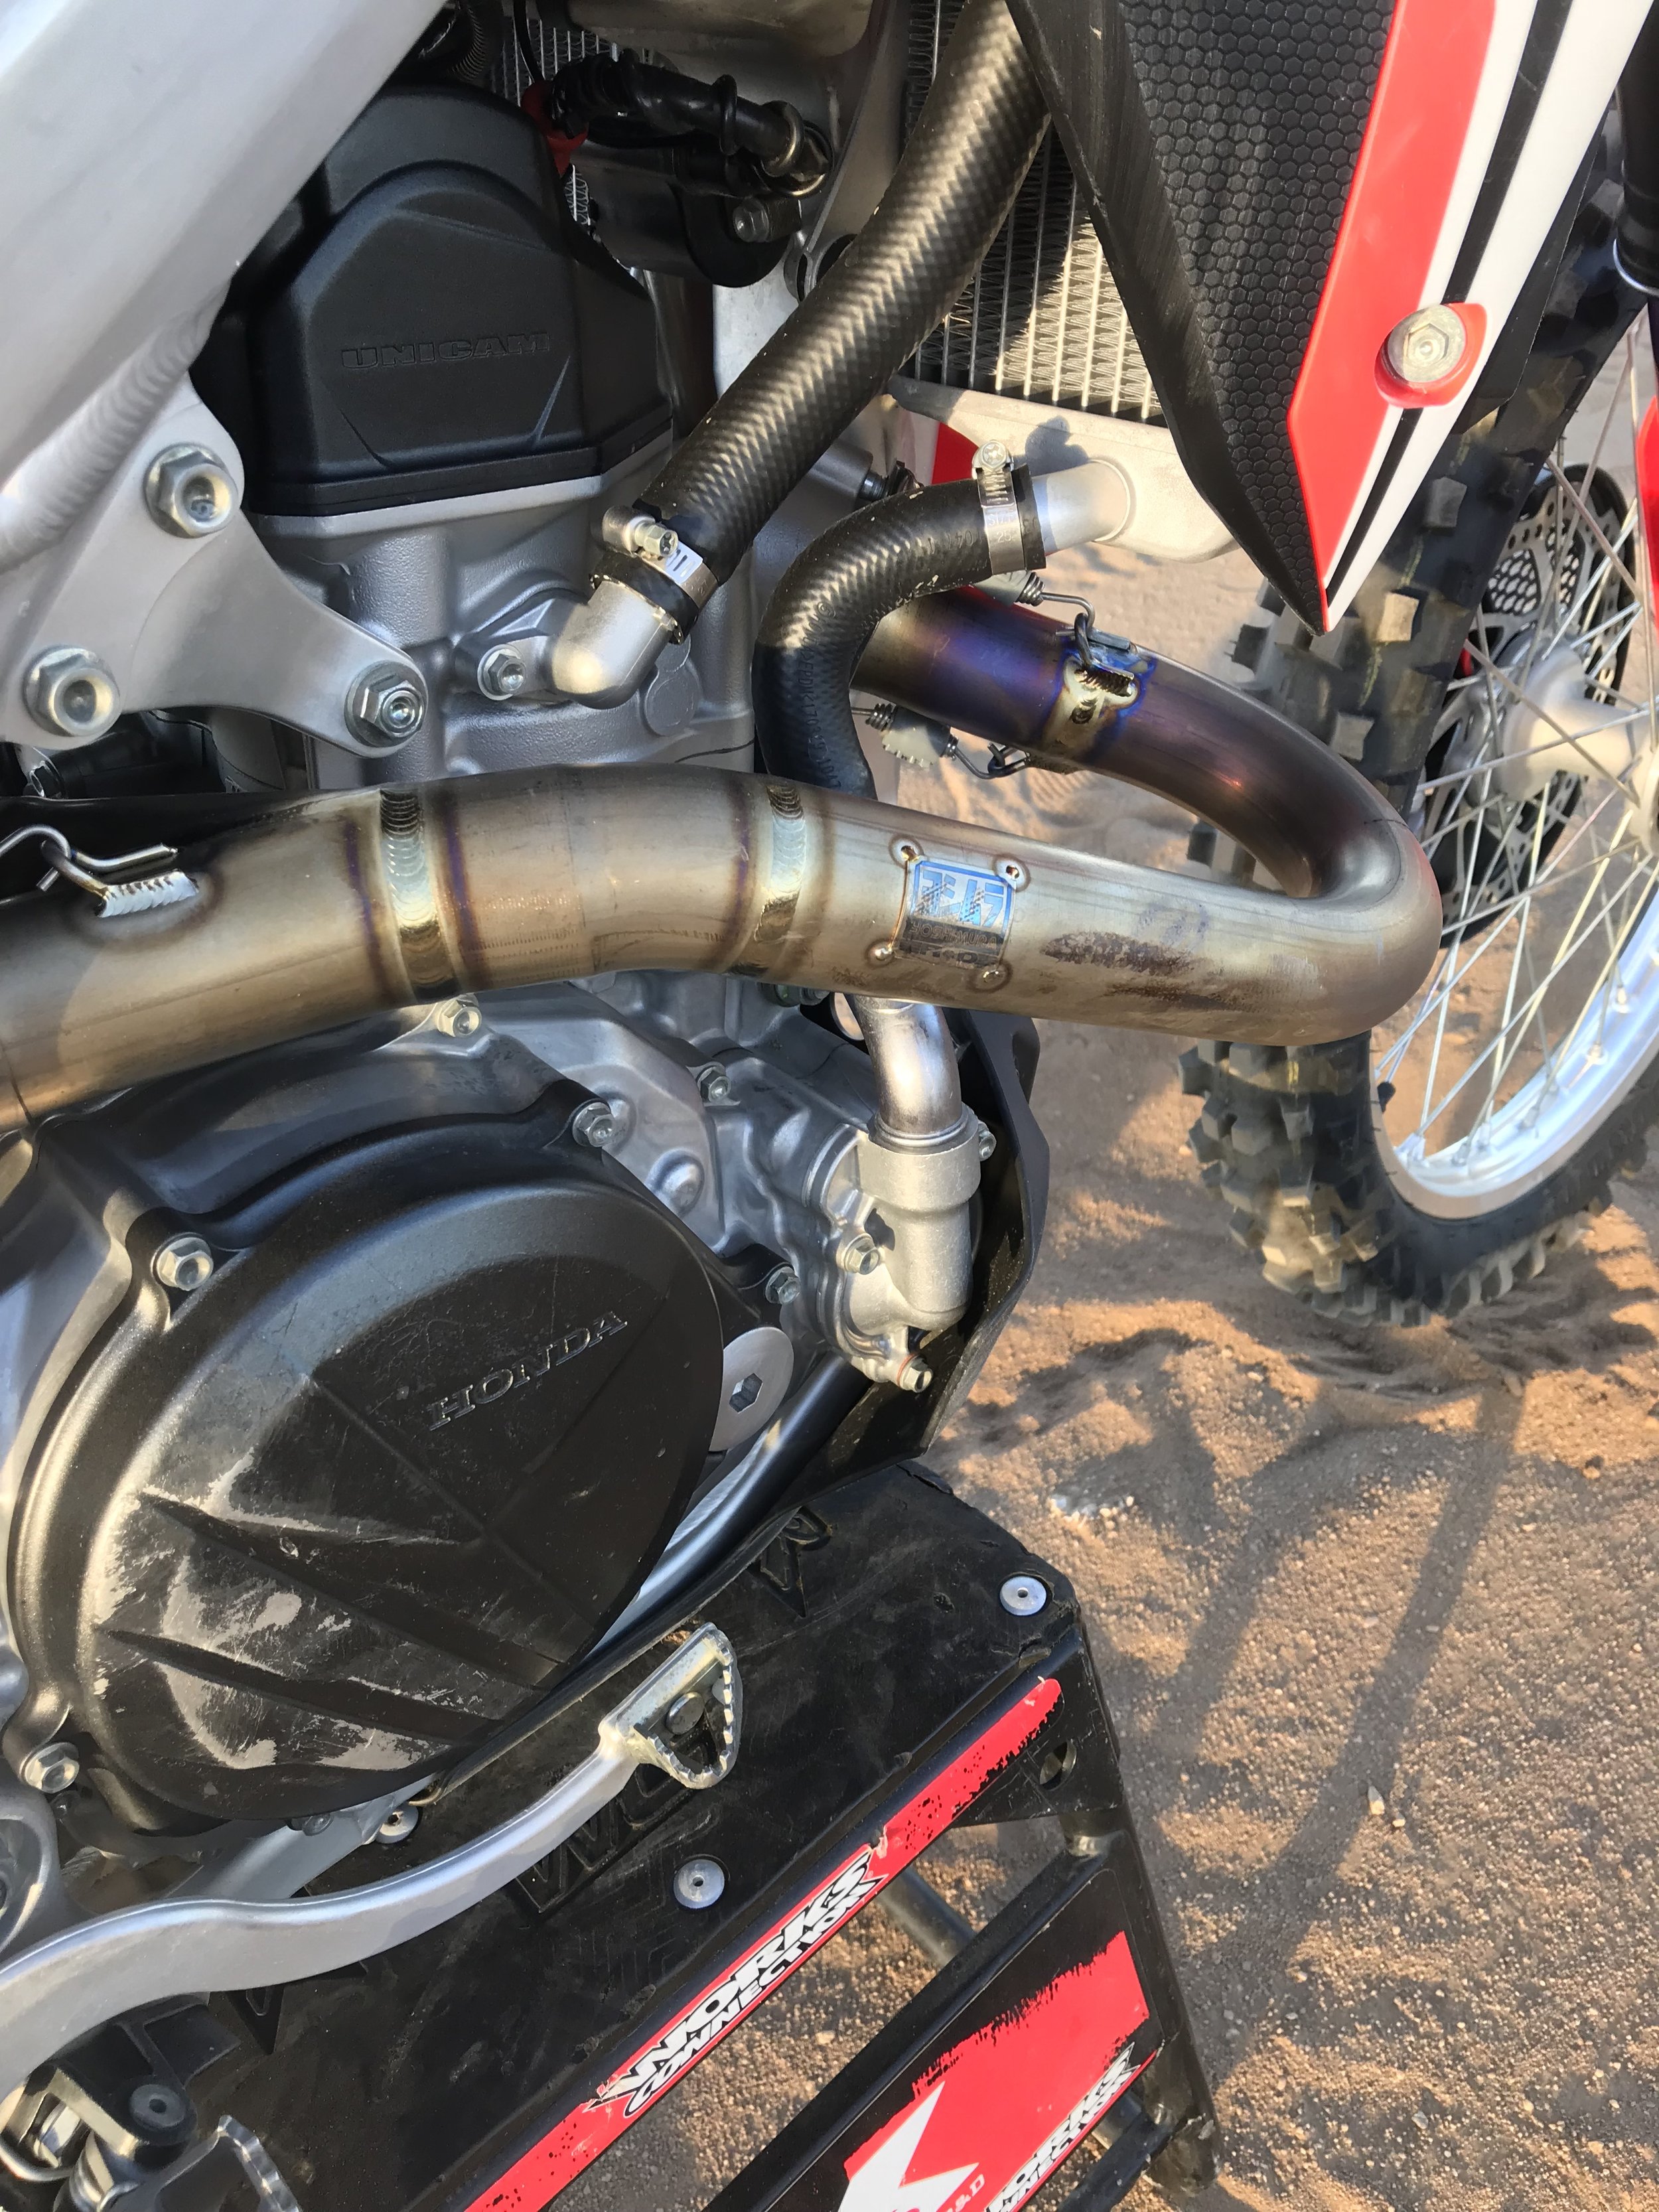
Yoshimura RS-9T Titanium Signature Muffler System For The 2019 Honda CRF450R

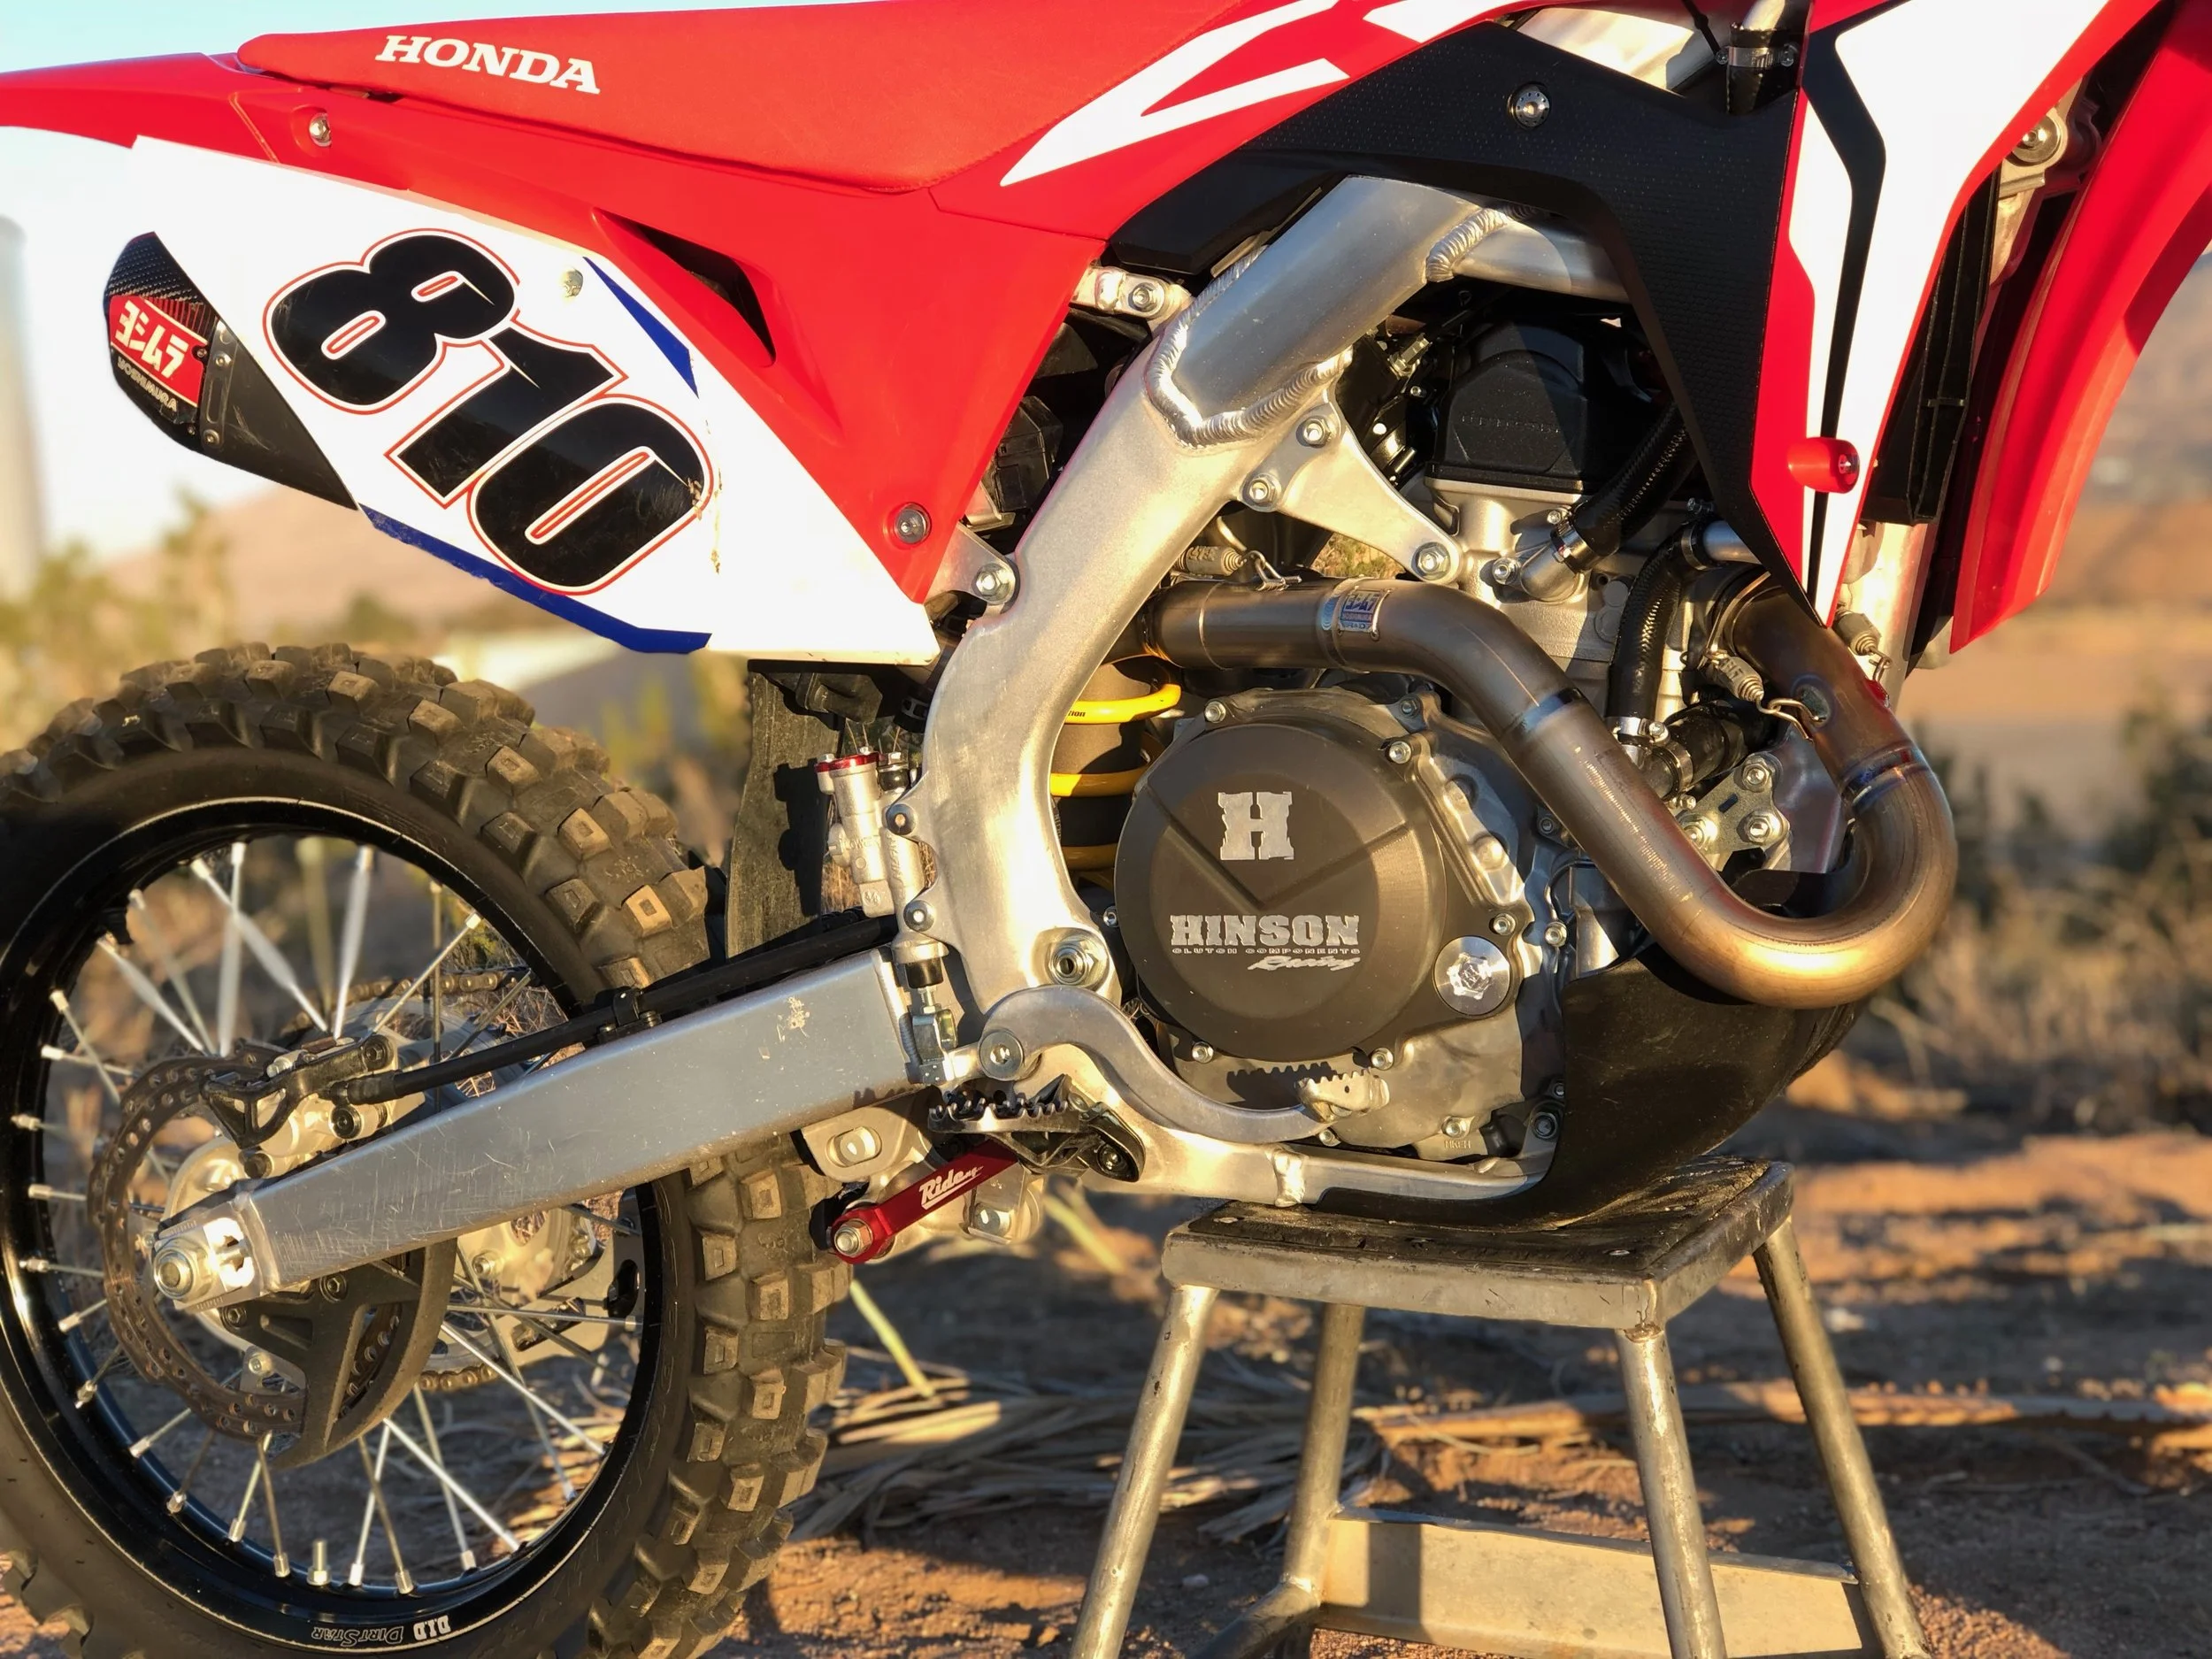
If there is one 2019 450 motocross machine that I think has the fastest overall engine character, it would have to be the Honda CRF450R. This engine is basically a race engine out of the crate. If you want to get to point A to point B in a quick manner, this Honda is the engine for you. So why on earth would you need more power? To me you wouldn’t need MORE, but maybe you can massage that power and move it around so that the engine delivery is slightly more controllable. This is where the KTM and Yamaha engines are better than the red machine. Both have more controlled power when the track gets rough or slippery. Controlled power is crucial in today’s 450cc world and a good muffler system can give you exactly this, if it’s a good system. Key word here people is “IF” it’s a good system. It is not as simple as reading dyno charts and slapping it on your bike. It requires real world track testing to feel the power character as well. We wanted to install/test a muffler system on our 2019 Honda CRF450R (that we purchased ourselves) to see if we could improve on a power plant that was already pretty damn impressive. We chose the Yoshimura RS-9 full titanium muffler system to try back to back with the stock system to see if it was in fact, what we were looking for.

FullSizeRender-6.jpeg

 When we originally tested the 2017-2018 CRF450R Yoshimura RS-9 system, we thought it was a pretty damn good system that was better than stock. However, the 2019 CRF450R stock exhaust changed for the better, so Yoshimura went to work on a new headpipe design to try and achieve even more power (than the stock 2019 exhaust system). Yoshimura also wanted to tuck in the new headpipe design, so it was less susceptible to crashes.

 Once installed and on the track the Honda’s exhaust note turned from the high pitch semi raspy stock sound to a deep throaty, more traditional 450 factory race bike sound. The crack of the throttle (or RPM response) is slightly smoother and less crisp than that of the stock system, but bottom end pulling power is increased over stock. Rolling out of corners, in second or third gear lets the rear wheel find increased traction over stock and was more controllable while accelerating out of hard pack corners. The slightly smoother RPM response takes away the Honda’s exciting feel slightly, but helps you gain a little more control coming out of corners. This is what I was looking for in a Honda CRF450R muffler! The mid range pull is healthier, with more meat, than stock and while the stock system had a tough time pulling third gear in tight/slower corners (without a gearing change), the Yoshimura system will give you an easier time rolling third gear in those tighter corners. With just the flick of the clutch lever (in third gear) the Honda will be in the meat of the power once again and have you down the straight in a hurry. We noticed top end and over-rev was better than stock, as the Yoshimura system helps the Honda carry second and third gears longer. It pulls amazingly well on deeply tilled dirt in second and third gear and there wasn’t a time where I thought to myself  “I need more top end pulling power”. You could tell Yoshimura was focused on controlling, yet increasing, the bottom to mid-range pulling power when they designed this 2019 CRF450R muffler system and they succeeded in doing so. It’s also impressive that they didn’t lose any top end and over-rev in the process, in fact they got some extra!

Craftsmanship is second to none with the Yoshimura RS-9 titanium mufflers.

Craftsmanship is second to none with the Yoshimura RS-9 titanium mufflers.

After weighing both the stock and Yoshimura RS-9T systems you will be saving almost two full pounds, which is great since the Honda is on the heavier side (on paper) for a 450cc motocross motorcycle. This is a significant weight loss but for $1,499.00 it is a very pricey bolt on modification. If you are looking to save a little money, Yoshimura offers the stainless steel/carbon version for $980.00, but you will not be saving much weight (only half a pound). 

IMG_3545.jpg

Again you can’t say enough about the craftsmanship that goes into a Yoshimura system. The welds are flawless and the mufflers tuck up inside the side number plates for a stealthy, compact look. If you’re looking for a little added pulling power, with more control/connection on the track, and not to mention sexiness out your new 2019 Honda CRF450R, the Yoshimura RS-9T system will help you do all of those things very well. You will have to decide if you want to dip into your checking account to pay for these added features, but if you're in the market for a 2019 Honda CRF450R muffler, there is not a better system out there for this model. The Yoshimura system has held up great over my years of testing them and you can even send your system back for Yoshimura to re-furbish if you choose (for a fee of course). You can head over to Yoshimura-rd.com to get yours or call them at 800-634-9166.

2019 Honda CRF-450R Dyno.png


GUTS Racing Firm Seat Foam And Gripper GR1 Seat Cover 


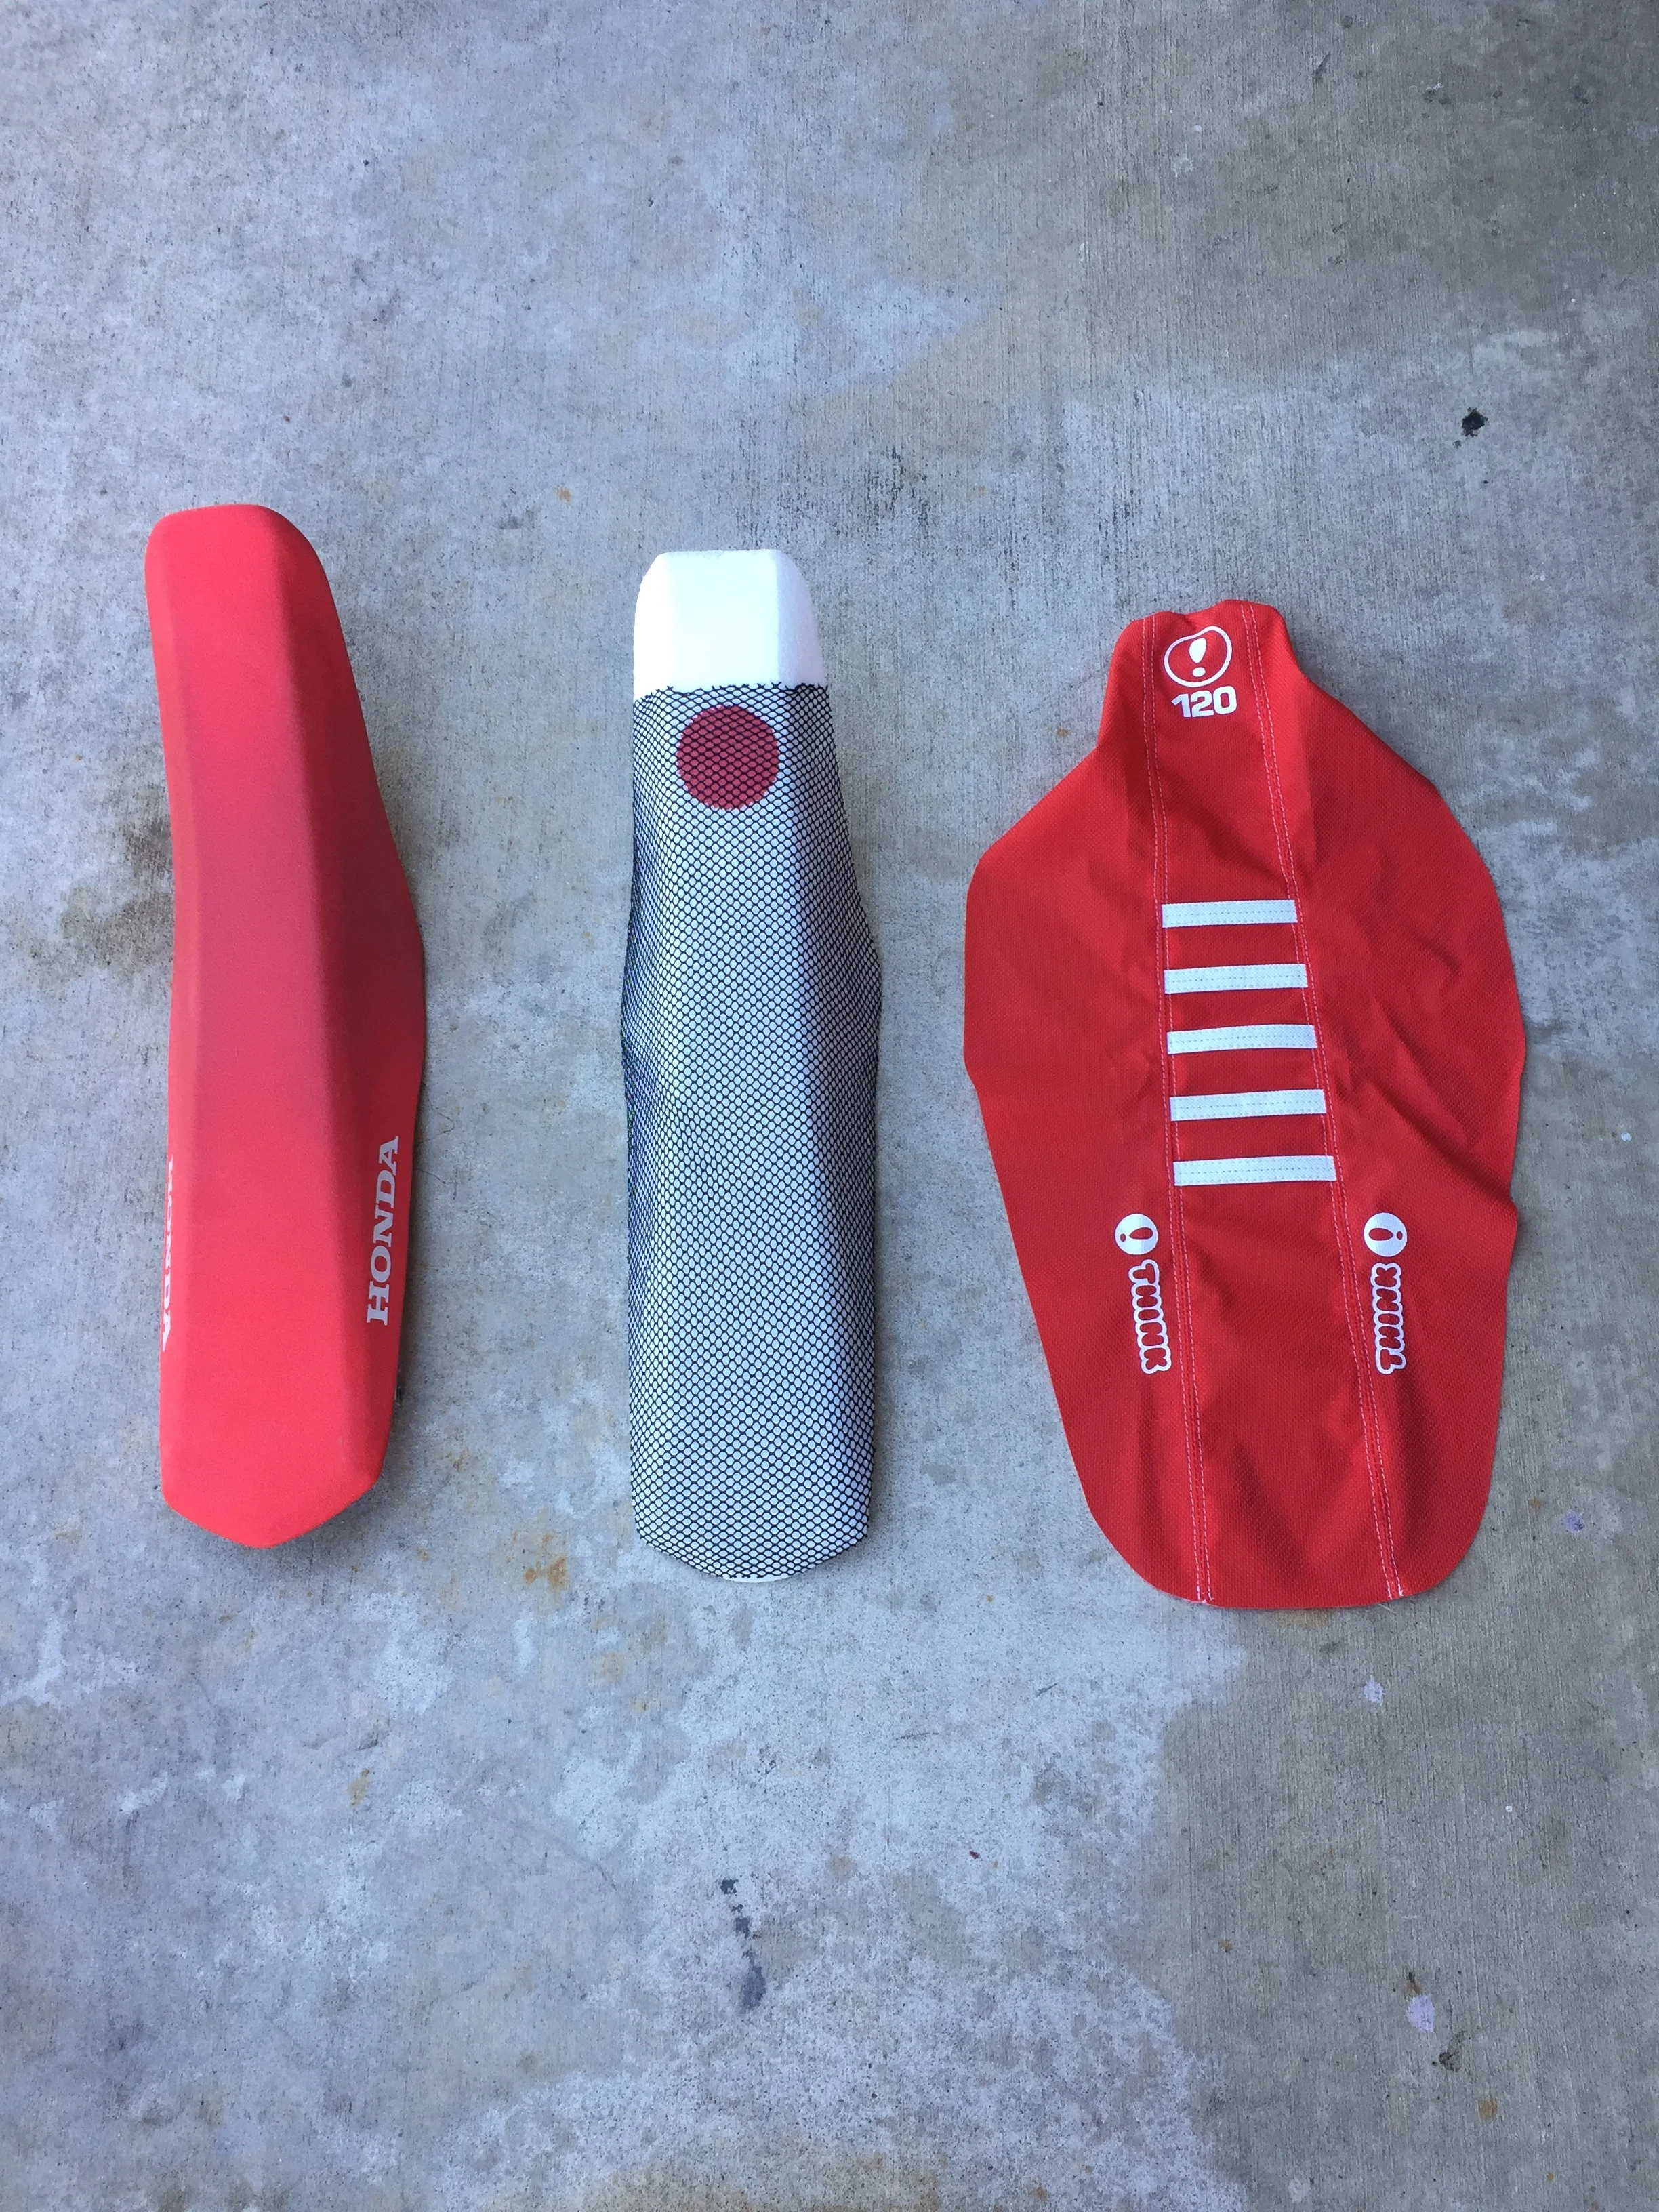
If there is one area that the 2018-2019 Yamaha YZ250F/450F is lacking in, it would have to be the seat foam/seat cover area. Yamaha firmed up the seat foam for 2019, but to me it just wasn't enough for my skinny ass. If you have a Kardashian butt it might be ok, but for us skinnier riders we need a foam that doesn't sink into the fuel tank when slamming into corners. While I was searching for a firmer foam, I thought why not get a seat cover that has some ribs on it, in order to keep my but in place when coming out of corners as well! 

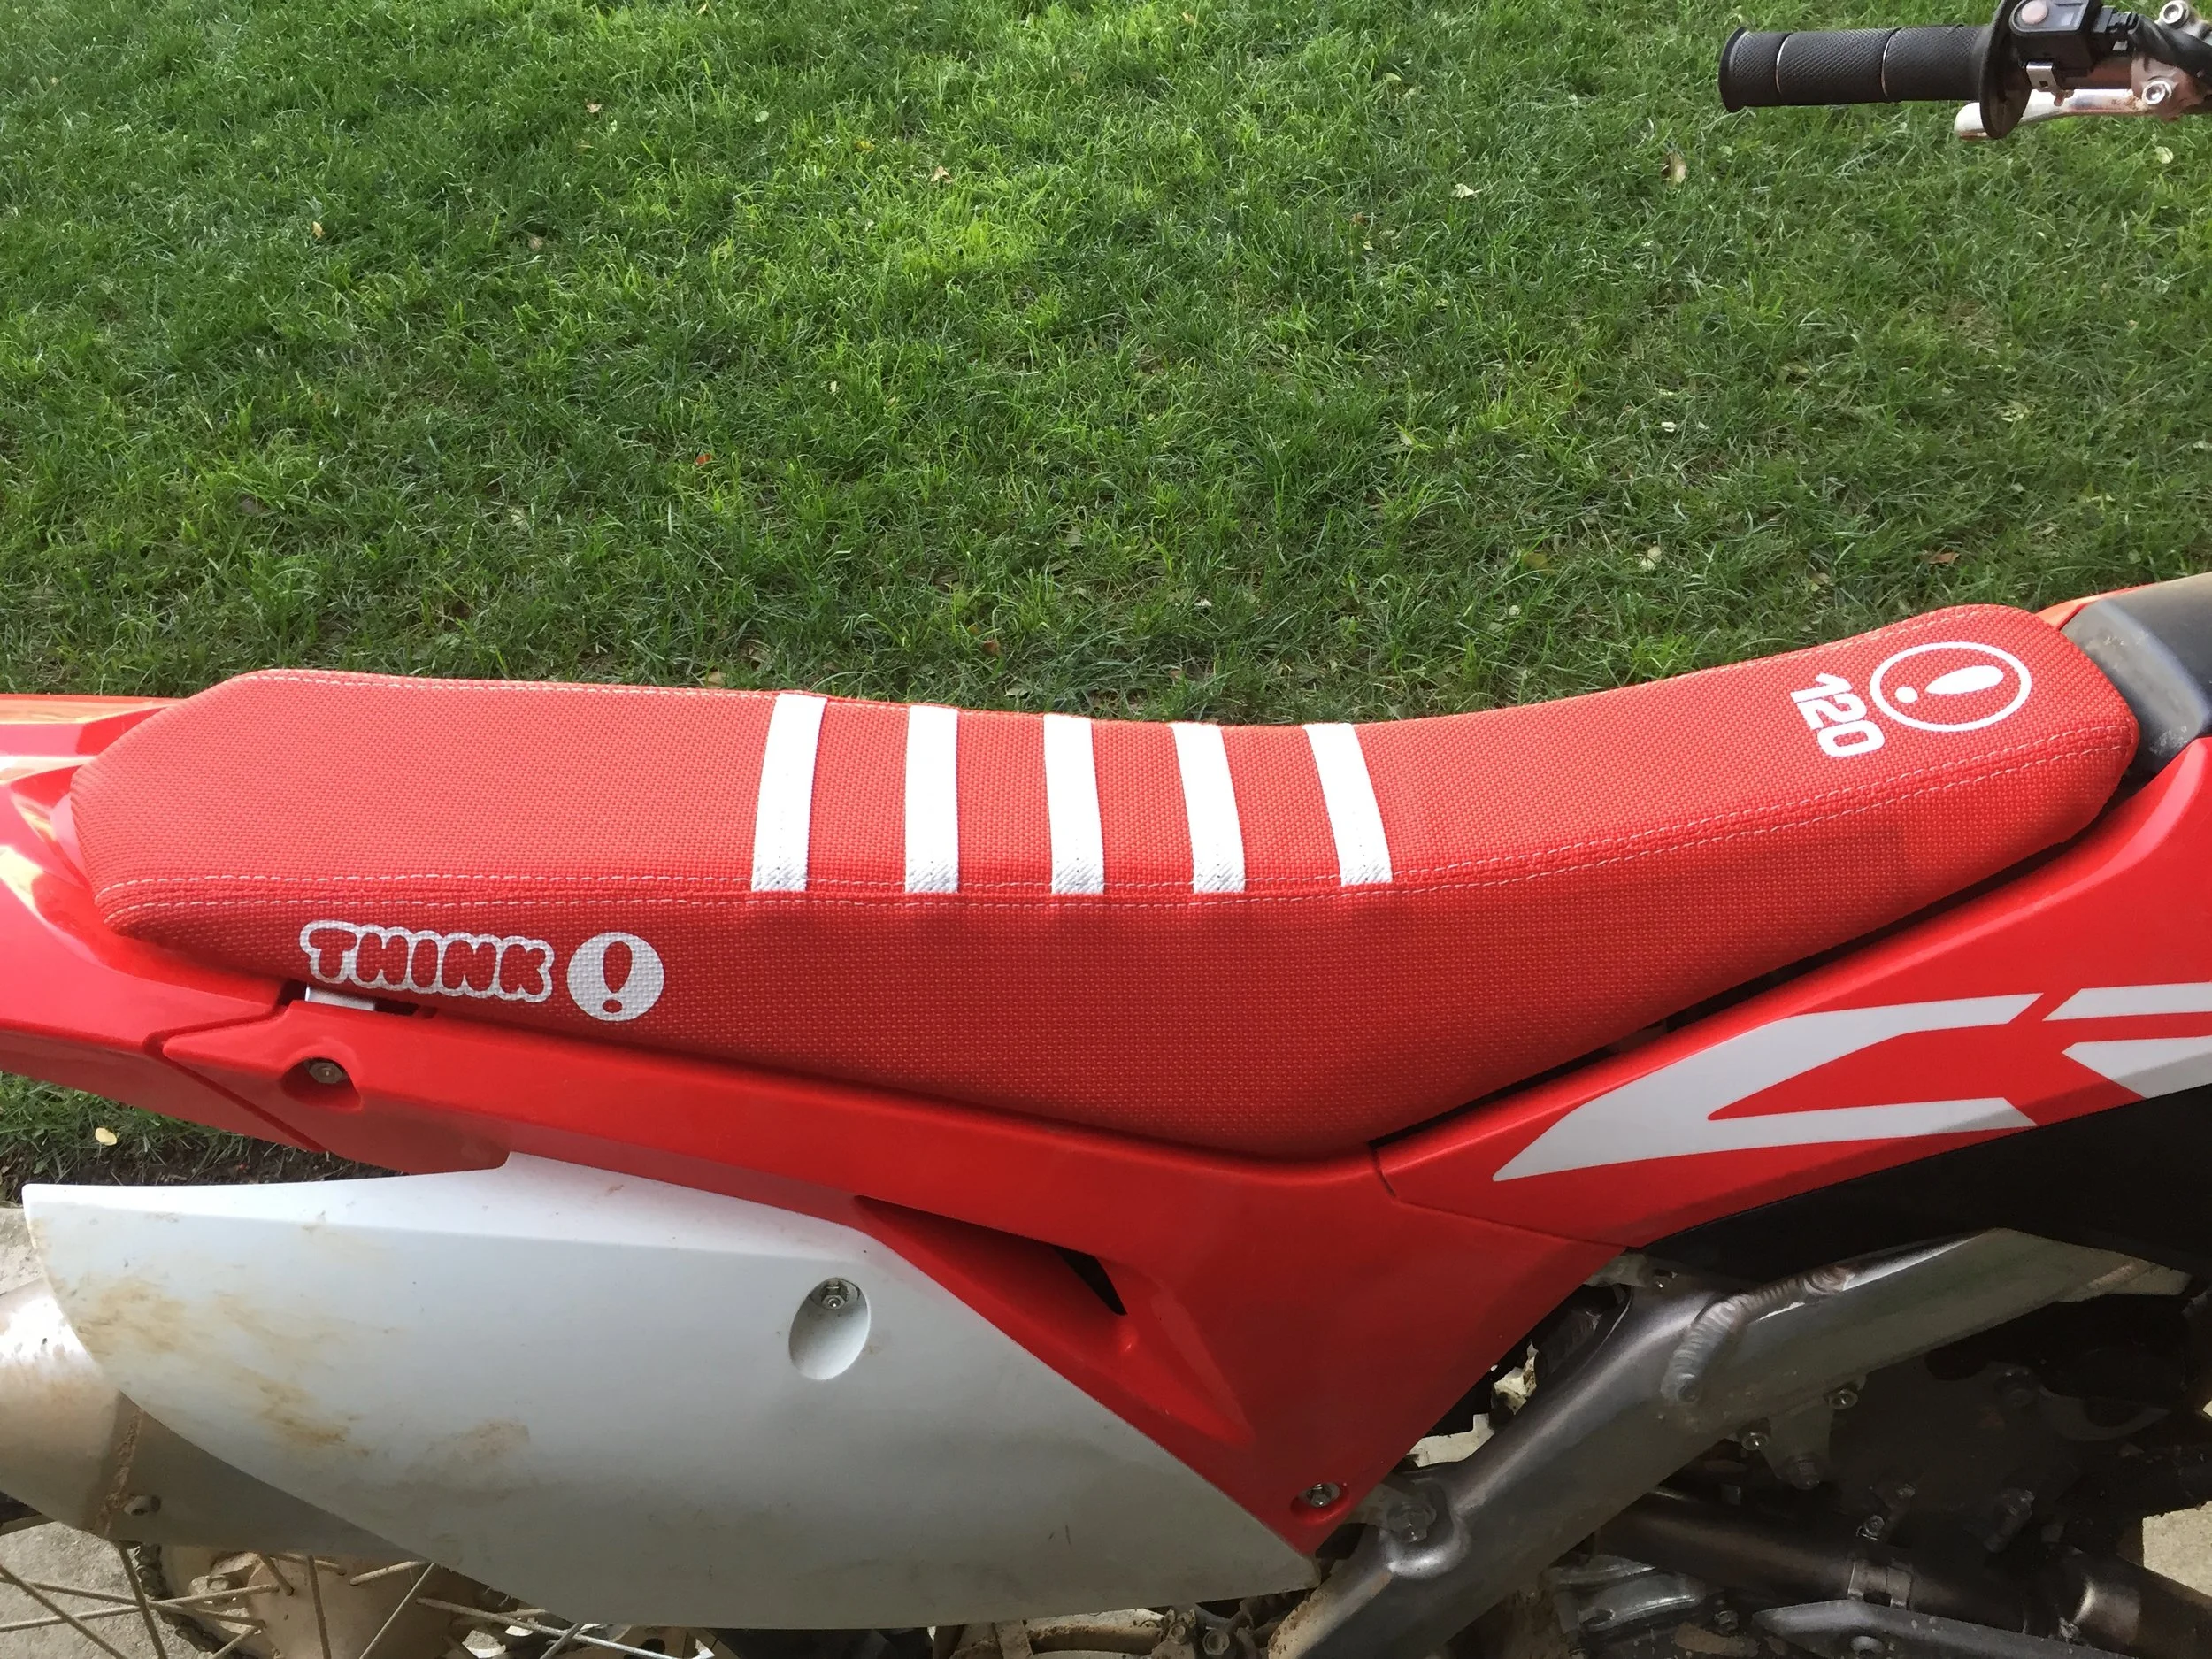
So I called up Andy over at GUTS Racing and he sent me their standard firm foam (not Phantom foam) and GR1 ribbed seat cover with extra padding sewn into the sides of the seat cover. Guts offers many different styles of covers and foam densities so make sure to check out gutsracing.com for all of their offerings. Swapping out seat foam isn’t that hard, it just takes patience and some trial and error to get the new cover on the seat. The foam shape is pretty much identical to the stock foam and went on the seat base without issue. The seat cover went on without much of a fuss either, but there might be a little extra material that you may have to trim once all of the staples are in.

IMG_0706.jpg

So when you think of the words “hard” or “firm” you may think of uncomfortable right? Well in this case you would be wrong. The “firm” GUTS foam is just what the doctor ordered, especially when I am slamming into corners. The stock 2019 YZ450F foam is a little better (than the 2018 foam), but lacks density on the sides where my butt is forcing the foam down. With the GUTS firm foam the density is harder in the middle of the foam, but also on the sides of the foam where you need it (especially when riding aggressively). Your butt is not always placed directly in the middle of the seat when you're riding, so why just make the middle part of the foam firm? GUTS thought of this because all of us riders need to have a firm feel on each side of the foam as well. The GUTS Racing foam provides the correct amount of density so I am not pushing my tushy through the foam and into the plastic of the fuel cell. My butt bone thanks you GUTS Racing! 

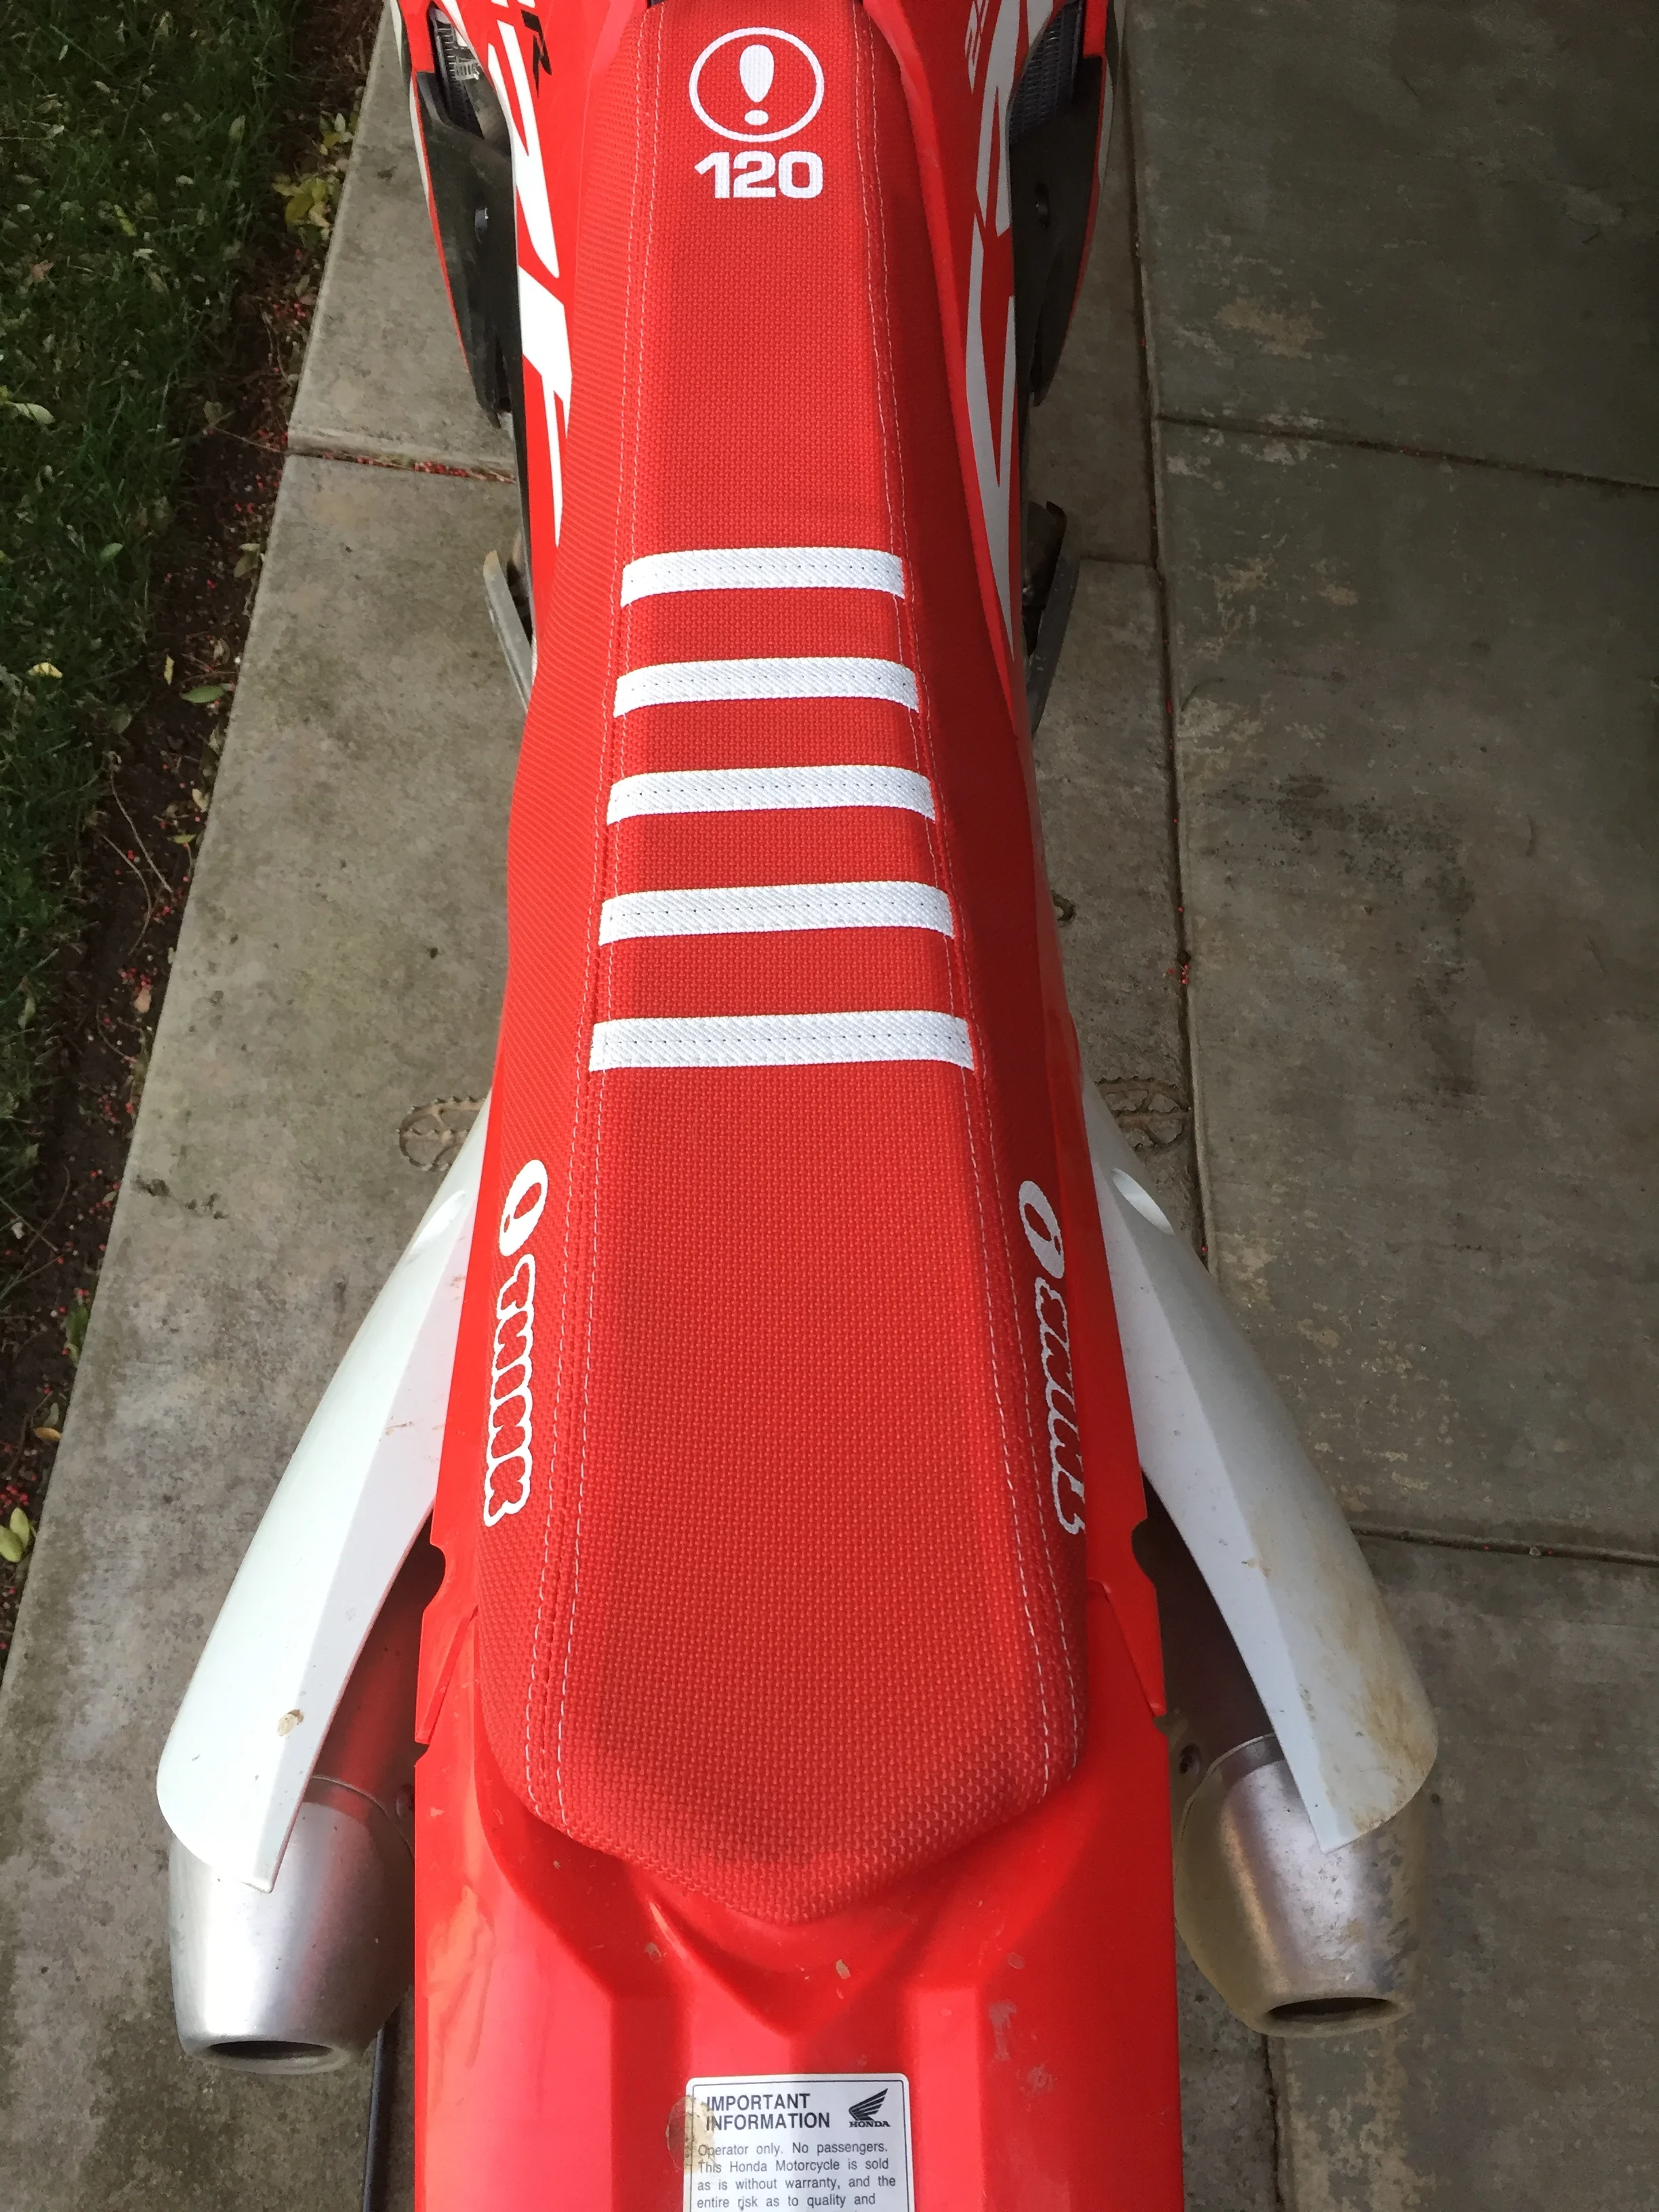
The GR1 GUTS Ribbed Seat Cover is unique because of the extra padding that is sewn into the cover on each side. Since the Yamaha seat is designed so thin near the middle portion and on the sides, I felt like I could use a little extra padding when working the sides of the seat through flat corners. Not only did I feel like the extra foam on the sides helped me through flat corners with the slightly wider nature of the seat cover (due to the foam inserts), but it helped me grip the Yamaha better with my legs. Not to go full Ryno on you, but using your legs is crucial to going fast on a motorcycle. Gripping the machine with your legs is sometimes overlooked to an amateur rider, so with these extra foam inserts inputted into the seat cover, it really helps me grip the side of the Yamaha when I am getting tired. It may not be the most attractive looking cover (due to its width), but it sure does do what its supposed to do. The ribbed portion of the seat cover also keeps me in place, but the gripper material isn't so gnarly that it is chaffing my ass on long test days. Some gripper materials out there are so aggressive that you can only ride one full day on it before you have to have your wife rub chamois cream on your ass. 

IMG_0708 2.jpg


If you own  2018-2019 Yamaha YZ250F/450F do yourself a favor and get a GUTS Racing firm seat foam and ribbed GR1 cover. Your ass can thank me later. The GUTS Racing standard height/firm seat foam will run you $89.90 and the ribbed GR1 seat cover with foam inserts on each side will cost you $149.90.     

X-trig ROCS Tech Triple Clamps And PHDS Mounts 


Photos By: Jeremy Doerksen

It’s hard to find aftermarket triple clamps that are better than stock these days. So much is involved in making a triple clamp that flexes enough, but also has enough rigidity to aid the machine in corners as well. With the triple clamp flex character so important to chassis handling (on all motocross bikes) sometimes it’s tough to find anyone that can make a “comfortable” set of aftermarket triple clamps. Why do you need aftermarket triple clamps? Well sometimes it’s just for looks with some riders, but there are occasions where you might want another offset to help you get more stability or a sharper turning character out of your machine. In this case I was looking for the standard offset for a 2019 KTM 450 SX-F, but felt like the stock KTM triple clamps were a little on the rigid side when the track got hard pack and rough.  

IMG_0427.JPG


Enter X-trig’s ROCS Tech Triple Clamps and PHDS Mounts. “ROCS” stands for “Revolutionary Opposing Clamp System”. The ROCS clamp allows for precise alignment of the fork tube with opposing clamping surface patterns, the stiffness of the steering stem is specifically tuned to the respective motorcycle model, the steering-head bearing is already mounted on the shaft tube for convenience, a special fork slot and clamping area for precise fork operation, precise clamping with special screws for low torque specs, OEM attachments can be mounted without auxiliary material, and flexibility that is adapted to the fork with anodizing in the technical factory OEM look. The difference between the ROCS “Tech” and the ROCS “Pro” is the “Tech” uses a standard offset with a pressed shaft tube. The “Pro” has two offsets you can choose from by simply adjusting the shaft tube (or steering stem). I didn't feel like the KTM needed an offset change as the KTM is predictable on straight line and corners well, so I stuck with the “Tech” clamps. 

Revolutionary Opposing Clamp System

Revolutionary Opposing Clamp System

The PHDS (Progressive Handlebar Dampening System) is a system supported by elastomers designed to absorb engine and chassis vibrations. The system also dampens the forces acting on the handlebar in a horizontal and vertical direction, maintaining steering precision. The handlebar can be adjusted in 12 different positions when the PHDS is mounted. The KTM vibrates more in the handlebar area than any other 450 motocross bike, so this is something that I feel the KTM needs, in my opinion. 

PDHS “Progressive Dampening Handlebar System”

PDHS “Progressive Dampening Handlebar System”

Installation of the ROCS clamp is fairly straight forward (with the pressed shaft tube). All you need to do is grease up the steering head bearing and slide the bottom clamp up in the head tube of the frame. All of the front fender mounting points and even the OEM hour meter bolts up the same way with the X-trig clamps. Super clean! Mounting up the PHDS bar mounts is a little tricky as the mounts themselves have a lot of moving parts, so make sure to read the instructions to ensure proper mounting. Technical Touch offers optional PHDS bar mount elastomers that come in soft or firm, but I chose to run the stock medium style elastomers, which seem to be just fine for motocross conditions. 


IMG_0437.jpg

I am super picky about bar positioning, shocking I know, so I went with the mounting hole closest to me (when sitting on bike) on the triple clamp with the PHDS mounts forward. This handlebar position gave me a +3mm bar position (forward from stock), which I preferred as the stock positioning is a little cramped for my 6’0 frame. The PHDS bar mount itself is the same height as the stock bar mount, which I was just fine with as I am using a Husqvarna Pro Taper EVO handlebar on the 2019 KTM 450 SX-F. Having so many positions available for the rider is definitely a huge positive for adjustability with these ROCS clamps. If you feel like you need a higher PHDS handlebar mount, X-trig also offers spacers to go under the PHDS mounting system. You can pick from 3mm, 5mm, and 10mm spacers.

IMG_4640.jpeg


So what did the X-trig ROCS Tech Triple Clamp and PHDS handlebar mounts do on the track? My goal for this test was to find less front end vibration, try to get a more precise front end feel through corners, without getting added rigidity on hard pack/rough straights. Basically get a more compliant KTM 450 SX-F, tough to do right? The good news is that this is exactly what I found with the X-trig ROCS Tech/PHDS system. (Full Disclosure: I have found on other machines that I tested the X-trig ROCS clamps on weren’t as favorable as this KTM test) The X-trig ROCS Tech clamp on the KTM 450 SX-F provided enough flex and doesn’t feel like it negatively affected front end bump absorption, but was also stiff enough to give me a positive front wheel feel through flat corners. The ROCS Tech clamp is most noticeable when diving deep into a rut where there is a huge load put on the front end, forced by the rider. The chassis positivity through this area is much better than the stock clamps. The stock clamps has a tendency to flex too much and give the rider a wiggle on de-cel (on deeply tilled tracks or soft dirt) or give the rider an unsettled (dive) when dropping into a long/deep rut (this sensation can only be felt mostly by faster or heavier riders). The X-trig ROCS Tech clamp gives the front end less wallow (firmer) and more cornering stability (without upsetting chassis balance). Straight line stability is as good as stock and front end bump absorption is only minimally stiffer feeling on braking bumps/square edge. 

IMG_4644.jpeg

The PHDS mounts do not vibrate nearly as much as the OEM rubber mounted bar mounts. The PHDS bar mounts flex as good as stock with the standard elastomers (up and down), but dampen vibration noticeably better around the track (especially at higher RPM’s). Slap down landings are improved slightly and front end positivity (entrance into corners) are as good as an OEM feel. Simply put the vibration characteristics the PHDS mounts provide are well worth their weight in gold. I use “weight” because they are heavier than stock ones by quite a bit, but I will gladly take some extra ounces over vibration any day. 

The cost of the X-trig ROCS Tech Triple Clamps and PHDS handlebar mounts are $800.00. The cost is more expensive than other triple clamps out on the market by a couple hundred bucks. However, there are only two triple clamps that I have tested, that to me, are as good or better than stock. If you're looking to get some of those KTM “vibes” dampened a little, pick up some front end cornering stability, and improve the looks of your KTM, X-trig has some really nice clamps and handlebar mounts available for your motocross machine. You can check out and purchase all of the X-trig products over at technicaltouchusa.com.   

If you have any questions about this test please feel free to email me at kris@keeferinctesting.com

Ride Engineering's 2019 Honda CRF450RWE Triple Clamp 


Matt Sirevaag is your average dirt bike fanatic. He works overtime just so he can purchase extra “goodies” for his 2019 Honda CRF450R. He is only “allowed” (you married guys out there know what I am saying) to buy stuff for his bike if he makes extr…

Matt Sirevaag is your average dirt bike fanatic. He works overtime just so he can purchase extra “goodies” for his 2019 Honda CRF450R. He is only “allowed” (you married guys out there know what I am saying) to buy stuff for his bike if he makes extra cash. Matt works side jobs and puts in OT just so he can get his bike just the way he likes it. To me this is a real world test because of the test rider that has written it. -KK


I am just the average nine to fiver and weekend warrior. I get up at 4AM, go to work, and think about dirt bikes (probably like most other riders out there). I walk through the race pits, drool over the factory machines, and wish I could just have one piece of eye candy that graces the factory riders machines. This is where Ride Engineering decided to give their CRF450R clamp that factory Honda like touch. They took their CRF450R clamp, moved the logos, and anodized them cherry red just like Ken Roczen’s factory machine. The Ride Engineering factory 450RWE triple clamp retains the stock 22mm offset that comes on 17-19 CRF450’s and can be used in conjunction with the stock bar mounts or Ride Engineering’s one piece bar mount.

Ride Engineering worked to try and make this Honda triple clamp retain the stock clamp characteristics (flex/rigidity balance). They also used 2024 aluminum, which is the same alloy aluminum that a lot of the factory teams use for their clamps. Just to add to the factory flare we put the new clamp on the scale and it weighed in at 7.9oz. lighter than the OEM clamp! The 450WE clamp fits both the previous 48mm and the new 49mm Showa forks. It also fits 2013-2019 Honda CRF450R, 2017-2019 CRF450RX, 2014-2019 CRF250R and let’s not forget the 2019 CRF450RWE. This is not Ride Engineering’s first rodeo as they have been building triple clamps with different offsets to help change the character of motocross machines for years. 

FullSizeRender-5.jpeg

Installation was a breeze as any novice mechanic can handle this job with a little time in the garage. I would suggest using the owner’s manual as torque specs are always crucial when it comes to suspension components. The torque spec on Keefer’s 2019 CRF450R test bike is: (upper pinch bolt 16 lb-ft, lower pinch bolts 15 lb-ft, and steering stem nut 80 lb-ft). As I hit Sunrise MX on my usual Saturday track day, I was not only excited to ride after a long work week, but I was hoping one of my favorite aspects of the new Honda (front end feel) was not gone. To my delight it was really hard to pick apart any huge differences between the two clamps on the track. As I put down my 30+2 lap moto (Thank you Kris Keefer! Yes, that is sarcasm) the Honda retained that front end feel that I loved with the stock clamp, but I did notice two small differences after I put more time on them. The Ride Engineering clamp does make the front end “turn in” slightly easier and also gives me a little firmer front end feel on hard pack square edge. This wasn't a drastic difference, but it is something I noticed after a few hours on the clamps. I am a heavier guy at over 200 pounds so a little firmer feel wasn't a deal breaker for me. I am the type of rider that is very sensitive to vibration or any unwanted feed back through the bars so I was pleased that I didn't get any increased vibration. Ride-Engineering utilizes the stock rubber’s for their bar mounts and this helps retain that OEM comfort while adding cushion over some other solid mounted bar mounts I tried last time. If you’re a vet rider and are looking for more comfort, make sure your bar mounts are rubber mounted! The Honda’s cornering manners were kept in tact, but with just a little more positive lean in, I did notice that the bar position was slightly more comfortable which I discovered most on deeply tilled up tracks/soil. The Ride Engineering clamp only has one location to mount the bars, but I did notice that the bar position was slightly more comfortable. The mounting position on the Ride Engineering clamps locates the bars three millimeters forward over the OEM mounting location. If you don’t like this bar location you can always turn around the stock bar mounts to pull the bars back.

FullSizeRender-4.jpeg


As you can tell the Ride Engineering CRF450RWE triple clamp is more of a factory look than a clamp that gives more performance. Having said that Ride Engineering does offer different offset triple clamps for the Honda CRF450R that come in 20mm, 21mm, and stock 22mm offsets. They also come in a black or red colorway. These other offset sizes are not the “450RWE” clamps and will have a Ride Engineering logo on the side. On a side note; try to keep the Ride Engineering colored triple clamps covered up from the bright sun. Too much sun (like sitting in the pits for an extended period of time) will fade the color a little. I simply put a towel over my bars to help shade the triple clamps as much as I can. The CRF450RWE clamp includes the top clamp, bottom clamp, pressed in stem, and lower bearing and it retails for $549.90. You can check out all of Ride’s accessories over at Ride-Engineering.com and take a look at what they have to offer for your trusty steed.

Matthew Sirevaag 205lb Novice

Full Time Electrician/Husband/Father/Dirt Bike Fanatic


Pro Taper Clamp-On Grips


There are certain things on motorcycles that are easy to improve on (seats, handlebars, foot pegs etc). Then there are grips, which for the most part are just rubber pieces on the ends of your handlebars that help keep you connect to the machine. However, for being just "rubber pieces" most riders are particular about which ones they use. Most riders have their favorite sets of grips and usually stick to those as long as they're riding. As of late there are a few companies out there who have decided that the grip needed a revamp and could be made better. Pro Taper is probably the largest handlebar company to jump into the clamp-on grip market and I was happy to get my hands on a set (pun intended). I wanted to see for myself if the days of safety wire and glue were a thing of the past. Instead of just molding rubber over plastic like some other companies have done, Pro Taper took a deeper look at the clamp-on grip to see how they could be made better. They windowed the clutch side plastic housing so there’s more cushion for the rider’s palm and fingertips. In addition to the windows in the housing they also made the overall diameter of the left side grip slightly smaller. 


IMG_1901.jpg


 I got the PT grips (I got ½ waffle, but they offer 3 grip patterns) for the 2019 YZ 250F test bike and figured the neon blue/black (they have a magnitude of colorways) would look decent so I started the install process. The clutch side is as easy as it sounds, cut off the old grip, make sure the bar is clean, slide the new clamp-on grip on and tighten the pinch bolt once the waffle is oriented the desired way. For the throttle side Pro Taper gives you a selection of throttle cams that lock onto the throttle tube. In the instructions they give you a list of the cams they provide and what bike they go to. You just have to match the number with your bike, index the gears on the cam and throttle in the orientation you want the waffle. Next you need to remove the stock throttle tube and replace it with the new Pro Taper Clamp-On Grip/Tube combo. This is where it can be slightly annoying because once I got the throttle side reassembled, I realized the teeth were off by one so I had to take the whole throttle assembly back apart to re-index it (I’m anal with how my grips and levers are oriented). Once back together the grips are 100% locked on and they haven’t moved on me since the install.


IMG_1903.jpg


 The first thing I noticed when I rode the bike was the smaller clutch side grip. I was personally not a fan of the smaller diameter because of my large hands (I wear an XL glove), but some other testers with smaller hands have mentioned they like the smaller size. I’ve ridden with other brands of clamp-on grips and noticed a definite increase in vibration to my hands over traditional style grips, but this wasn’t totally the case with the Pro Taper Clamp-On Grips. Although the vibration is much less than other “Clamp-On” brands, I still notice a slight increase in vibration over the stock Yamaha grips on both sides. They never twisted after riding in mud or after being washed, nor did the clamp ever come loose. All that being said let’s get to the point; although a good idea, I don’t think clamp-on grips are for me for the following reasons. I don’t like the slight vibration felt through the grips. I don’t like the smaller clutch side grip (could just be my large hands). I don’t like having to take the throttle assembly apart to change grips. Lastly, are “we” that lazy that “we” can’t put on some glue and slap on a grip? If the reasons I just listed don’t apply to you then these grips just may be for you. Maybe you don’t like safety wiring on grips? Maybe you hate grip glue or maybe you just don’t like having to slide on new grips and would rather clamp them on. For me however, I think I’ll just stick to the old school rubber things on the ends of my handlebars. -Michael Allen


IMG_1905.jpg


Second Opinion: I also have put some time on the Pro Taper Clamp-On Grips…I am much like Michael where I prefer glue on/old school grips. I get what companies like Pro Taper are trying to do here though, I am not oblivious. They are making it easier for the customer to install new grips and giving them more choices. I believe this is a great business model for the weekend warrior and to me there is no real negative to the Pro Taper Clamp-On Grips…Except getting a slightly firmer feel than my glue on style 1/2 waffle soft grips. The Pro Taper Clamp-On Grips are not as rigid feeling as the ones that come on the KTM’s so that's a plus. Just like Michael said, if you’re a “Clamp-On” type of rider then you will be impressed by these grips. I prefer a glue feel, but I am super annoying and picky. -Kris Keefer

FCP Racing Titanium Engine Mounts (2018-2019 YZ450F)


Out of all of the aftermarket parts I test, on any machine, it is the easiest to dissect what is good and what is bad on the Yamaha YZ450F. Why? Probably because it’s one bike (out of three) that I like to ride the most, so I am hypersensitive to any slight changes to any of those three machines. When I get to “choose” which bike I want to ride when I don’t have to “work”, a blue bike is usually one of those machines. 

I tested the FCP Racing engine mounts on the 2018 Honda CRF450R a while back and was impressed with the positive changes that it made on the red bikes chassis balance. When I was presented with some titanium engine mounts for the 2018-2019 Yamaha YZ450F, I of course jumped at the chance to see if it made one of my favorite bikes even better. FCP offers titanium front mounts in soft, medium and stiff for the 2018-2019 YZ450F and I tried all three over the course of several months. Not only did I test at the typical tracks here in Southern California, I even spent time with all the mounts in soft, farm-fresh, deep dirt in Colorado. All you east coasters out there, I got you covered on this one ok! I understand that in most cases what works here for us in California might not work there for you on the east coast. This is why I made sure that I tested these mounts in very deep conditions to really get a full coverage evaluation.  


IMG_0035.jpg


For my weight and ability I can rule out the soft titanium mounts as it makes the bike flex too much (especially on soft dirt) coming into corners (on de-cel) and left me with a vague feeling front end. Maybe if you are a super lightweight rider (under 140 pounds) and wanted some added straight line stability (on-throttle) this could be good, but for what I was looking for this wasn't a good setting. 


IMG_0033.jpg


My favorite set of mounts were the medium titanium mounts as they improved lean in coming into corners and gave me increased front wheel traction. If you are still feeling a vague feel on the 2018-2019 YZ450F through corners these mounts can get you some added front wheel traction. I also noticed an increased tracking ability when landing off jumps when immediately having to turn the bike. Imagine a jump that is immediately followed by a sharp 180 degree corner (with ruts). You must land and immediately find a rut to get into and make the corner. Sometimes this can be tough with the stock mounts of the YZ450F, but this is where the medium titanium mounts improve tracking because it makes the YZ450F feel even more planted in these types of conditions. This allows the rider to get on the throttle sooner (after landing) and lets you lean the YZ450F over through the corner easier.  Another improvement was though flat corners with no rut or berm to bank off of. The 2019 YZ450F is slightly improved in this area (over the 2018), but if you have a 2018 and are looking for increased front end bite through flat corners, these medium titanium mounts can help you with added traction. If there is one negative to these medium titanium FCP mounts it’s that I noticed a slightly stiffer feel (near head tube) when the track gets hard pack and square edge. This isn't a huge difference, but I do want to note that I did feel a slight change. That slight stiffer feel that I experienced gave me a little more deflection (on-throttle) in the front-end (fork). I am going to experiment with some fork settings (updated valving) to see if I can tune this out. I consider these titanium medium mounts an improvement over the stock pieces and if the stock mounts were a baseline 3 the titanium medium mounts were a 3.25. 


IMG_0036.jpg


The stiff titanium mounts only increased that stiff head tube area feel and the YZ450F lost some of that comfort that makes it so appealing to ride. I feel like these mounts are geared towards a bigger sized rider (over 220 pounds) or someone that is racing Supercross. The stiff mounts did increase lightweight cornering feel and also helped side to side movement (“flop” or “tip in”), but for the average consumer I feel like this is too much in the wrong direction. 


After spending a couple months riding back to back with the stock mounts and the FCP Racing titanium mounts, I have come to the conclusion that this is a great option to make your 2018-2019 Yamaha YZ450F react quicker and increase tracking into ruts. For $199.00 plus shipping, it’s not so expensive where you're breaking the bank or pissing off your wife by making the purchase. The bad news is that FCP Racing only has an Instagram (@fcpracing) and Facebook (FCP Racing) page which can make it difficult for old school fellas to purchase. Contact them through direct message and they are usually pretty good about getting back to you ASAP.  


If you have any questions about this product please feel free to email me at kris@keeferinctesting.com or if you see me at the track, come up and ask away! 

FMF 4.1 RCT Titanium Muffler System (2019 Kawasaki KX450)

The 2019 Kawasaki KX450 is the most improved machine of the new year, hands down! It has a very responsive engine character, comfortable suspension, a lightweight feel and cornering that is very neutral. I will be the first one to admit that I get nervous about sticking on any type of aftermarket muffler system when I really like the stock power curve of any machine. Sometimes aftermarket mufflers are just smoke and mirrors. They are lighter, titanium, look cool, but in the end they are no better than your heavy, ugly, big stock muffler. While I was testing the 2019 KX 450 earlier this year I could hear this little voice inside my head say “it’s going to be tough to make a muffler that is better than this stock one”. Fast forward to a few weeks ago and a shiny new FMF 4.1 RCT titanium exhaust shows up at my door, to be evaluated on the green machine. I sat on it for a week knowing that this new, shiny, lightweight piece of FMF artwork might not be better than the current monstrosity that is on the 2019 KX450. Nonetheless I installed the FMF system (which was easy I may add) and headed to the track to give it a go. 


IMG_9952.jpg


The stock power curve of the 2019 KX450 engine has a snappy throttle response (with a free feel to it) and at times can almost be too much through corners with the standard green coupler installed. Once rolling on the throttle and passed the corner, the power is not quite as strong as the Honda or Yamaha, but still creates a easy to ride power feel on the track. I didn't necessarily need more rpm response with the 2019 KX450, but I wouldn’t mind some more meat through the mid to top end range. Bolting on the KX450 FMF Factory 4.1 RCT system is by far the easiest system I have installed on any 2019 machine. Installation literally took me through two full songs on the “Classic Rock” station on Pandora. Not bad! The 2019 Kawasaki is a light bike stock, but FMF sent me the full titanium system, which dropped the Kawasaki’s weight by 2.9 pounds from the stock system! To me the titanium FMF 4.1 system is one of the most stunning aftermarket mufflers you can put on any bike. I love the blue anodized finish as it looks good on almost every make and model machine there is.


FMF builds great looking mufflers! 

FMF builds great looking mufflers! 


On the track the FMF 4.1 makes a slightly smoother bottom end power delivery, but keeps that exciting RPM response. Where most of you will feel your hard earned money is in the mid range pulling power when exiting corners. The stock system feels empty in this area, but the FMF fills in the power through the mid-range. What I mean by “fill in the power” is that the FMF system actually feels like it is shooting forward, as soon as you shift into third gear, unlike the stock Kawasaki’s power where it lacks some “meat” through the mid-range. The FMF 4.1 increases that mid range area and gives the rider some more freedom to be lazier in third gear. That is great news for all you vet riders out there, trust me! Top end is also increased slightly and you get increased pulling power near the end of each straight with the FMF. Over-rev is slightly increased as well with the 4.1 (over the stock muffler) as I could leave the KX450 in second and third gear slightly longer. The one downside to me is that it is loud sounding (compared to the stock system). It has more of a deeper/throatier pitch to it, which makes it sound louder than the stocker. 


I tested couplers along with mapping with the Kawasaki R&D guys and came up with a couple options for you (see attached maps). The white coupler map is better for bottom-mid range power, but the black coupler map is slightly better from mid to top end (the black coupler map is what I am running now). The good news is, unlike last year, the 2019 KX450 FMF 4.1 system will not have that de-cel popping with either coupler (along with these installed maps), which is a huge plus when it comes to a clean ignition/fuel mapping power feel.


Black Coupler Fuel Map 

Black Coupler Fuel Map 

Black Coupler Ignition Map 

Black Coupler Ignition Map 

White Coupler Fuel Map 

White Coupler Fuel Map 

White Coupler Ignition Map

White Coupler Ignition Map


At the end of the day the FMF 4.1 RCT full titanium muffler system delivers a smoother roll on bottom end delivery with a mid to top end puling powerl that is better than stock (along with improved mid-top end RPM response). I will say this again….Being able to achieve a power delivery that is better than what an OEM muffler system can give you is very hard to do. FMF has achieved this with their 4.1 system on the 2019 KX450. Not only does it make power, but it also takes off some weight and looks better than the stock bazooka. I wanted some added control down low and more mid range (on the 2019 KX450) so with this FMF system I got what I was looking for. I am not going to sit here and tell you guys that every FMF system, for every machine is better than stock, but with this one they knocked it out of the park. Don't be scared to try the maps that are attached above, because with today's four-stroke technology, getting the correct mapping for a certain muffler can really make a difference. 


IMG_9967.jpg


Attention mechanically inclined riders!!!!! Please note that re-packing of the FMF muffler is important for the can’s lifespan. The muffler portion (or can) will start to leave hot spots/scarring when the packing starts to burn away from inside. Once you start seeing these “hot spot/scars/markings” on the muffler, remove and re-pack it ASAP. FMF offers re-packing kits and taking the can apart to re-pack is not that hard to do. I get around 12 hard engine hours before I see these markings and have to re-pack. If you run it past the recommended time, you run the chance of hurting performance and damaging the core (or perf) inside the muffler. Don’t be a dummy and waste your money, re-pack your muff! 


If you have any questions about this test please email me at kris@keeferinctesting.com

Brake Tech Cobra MX 270mm Front Rotor Product Review


It seems like a lot of guys purchase aftermarket front brake rotors for their new bikes, so I decided to throw my hat into the ring and see what all the fuss is about. I asked Keefer if I could try out an oversize brake rotor to test, just to see if I was able to feel a difference. I am just your typical blue collar electrician that loves to ride, but could use some more braking power on my 2018 Honda CRF450R. He graciously handed me the Brake Tech CobraMX 270mm front brake rotor to evaluate and the task began.

Brake Tech has been around for a while, but maybe you're not familiar with the brand? They have years of R&D in brake rotors and brake pads with most of their effort being on the street racing scene. Having great success with street bike rotors, Brake Tech turned their focus to the dirt. Their newest product being the Cobra MX front brake rotor and it shares a lot of similarities with their already established AXIS road race rotors. The AXIS road race rotor is a full-floating front rotor where the Cobra MX rotor is what Brake Tech calls a semi-floating front rotor. When it comes to rotors there are a couple different avenues you can pursue; a fixed rotor, which is a one piece rotor, a full-floating rotor, which is a two piece rotor mated together with ground down shims, which allows the outer rotor to flex. Semi-floating rotor’s like the Cobra MX use ground down shims and spring washers. This allows you to have more stability under braking like a fixed rotor yet have the benefits of a full-floating rotor. Being made of two metals is said to aid in warping under high heat as well as a lighter weight. The Brake Tech rotor is cryogenically treated along with being fully re-buildable. Also a nice bling feature is that you get your color choice on the bobbin rings as they come in color choices of red, blue, black and KTM orange.


IMG_0109.jpg


Just like a lot of you blue-collar guys out there I get super excited with any new part for my dirt bike, so as soon as I got the box, right to the garage I went to install the nice looking piece. Installation was very easy and if you can change a wheel on your bike, you can easily install this rotor. Just like “if you can dodge a wrench, you can dodge a ball” (Dodgeball The Movie quote in case you didn't know). You will use the stock bolts and other hardware to mount the new rotor and caliper bracket. You can use your stock brake pads, but Brake Tech does recommend using a set of Brake Tech’s Ferdo brake pads. As I set out for my first laps I immediately noticed that the lever had a firmer feel over the stock rotor. At first this was a feeling I was not too fond of as the stock set up is very grabby and makes it hard to modulate the braking power through corners. As I did my motos I began to feel more benefits of the new Brake Tech rotor (even with the firmer feel) as it was not quite as grabby when you first apply pressure to the lever. Where I really felt like the Brake Tech rotor shined was under heavy braking. As I ride my motos I tend to get a little excited from time to time and come in a tad too hot into some corners. Where the stock rotor would lack a little stopping power the Brake Tech unit had great stopping power at high speed. You didn’t have to pull the lever in quite as much to get the Honda stopped in a hurry. This gave me a little more confidence and did allow me to charge harder into corners. With the Brake Tech rotor (under heavy braking) I would give it a “3.5” on the “Keefer Testing Scale”over a baseline “3”


IMG_0111.jpg


I give Brake Tech kudos on the Cobra MX front brake rotor and give it a solid 3.5 on the Keefer scale (If you don’t know what the Keefer testing scale is head over to the “Keefer Tested Podcast” and listen to his “How to Test” episode in the archives). As a hard working laborer I like that the Brake Tech Cobra MX rotor is durable as well as re-buildable. This is money saver in the long run for us 9 to 5’ers because we actually have to save up our money for every upgrade to our trusty steeds. If you damage a part of your rotor send it to Brake Tech and they will rebuild your rotor (labor free) and you will only be forking out the money for the damaged parts that were replaced.


We tried the Brake Tech rotor in conjunction with the Ride Engineering Brake Caliper as well and found the front brake lever to be slightly less firm, but even more powerful under heavy braking. The front brake lever had more of a progressive pull t…

We tried the Brake Tech rotor in conjunction with the Ride Engineering Brake Caliper as well and found the front brake lever to be slightly less firm, but even more powerful under heavy braking. The front brake lever had more of a progressive pull to it with the RE Brake Caliper installed. Without the RE Brake Caliper installed the lever has a firmer feel to it as Matt Sirevaag explains in this test. Either one of these products (by themselves) will help braking power on your machine. You will just have decide on how much stopping power you need.  


The Brake Tech Cobra MX rotor kit retails for $339.95 and the brake pads for $59.95. This price is on par with most oversized rotors on the market as I did some research before typing out this article. Brake Tech is another great option if you are in the market for more braking power. Head over to BrakeTech.com and check out their selection of brake rotors and pads. -Matt Sirevaag 205 Pound Novice (Full Time Electrician/Husband/Father/Dirt Bike Lover)

If you have any questions about this test please feel free to email kris@keeferinctesting.com 


2019 Kawasaki KX450 Clutch Mod

Do you have a 2019 Kawasaki KX450? If so, we are here to give you a little inside knowledge. The new 2019 KX450 is one great machine, but the doesn't mean it is perfect right? On our test bike we have experienced with some clutch drag and clutch lever movement when riding. Under heavy load (or acceleration on deeper tilled tracks) the clutch on the 2019 can drag and or the clutch lever can move. This is not something we liked, so we went to work with Kawasaki to remedy this problem. 


IMG_9801.jpg


If you are reading this and you haven't felt any of these sensations while riding then DO NOT WORRY ABOUT IT. If you do notice a drag or lever movement, simply take the judder springs and narrow fiber plate out of your clutch and replace it with a standard fiber plate (as shown). That's it! Once this mod has been installed, the lever was much more consistent and the drag we felt out of corners was gone. Not only was the drag gone, but we also noticed that rear wheel traction was increased a little as well. It's a cheap fix and relatively easy to do. Enjoy your green machine!  


IMG_9802.jpg

Ride Engineering Billet Front Brake Caliper


I feel one aspect of a bike’s performance that is often over looked is the brake system. Most of us including myself have over looked this area more times than not. Some of us typically will go buy a new or used bike, drop money on an exhaust, wheels, graphics and maybe even race fuel. After all when you spend almost ten grand on a new bike you think the brakes are top notch off the showroom floor right? Or in my case, feel that you are not fast enough to notice the benefits of an aftermarket brake system. When Ride Engineering sent us there Billet Front Brake Caliper and steel braided brake line I was excited to give it a go. I was anxious as I felt this was my chance to see if this would be money well spent, even for the average blue collar, nine to fiver like myself. Keefer was nice enough to let me test this part and I gave it a go to see if this is something I would want to spend my own hard earned money on. Maybe more importantly, would I even notice a difference? 


IMG_0111-2.jpg


 The Ride Engineering Billet Front Brake Caliper is born from billet aluminum. Being made from billet aluminum instead of cast as most stock/production calipers are made, gives the Ride Engineering unit a stronger, less flexible body. This helps with a more precise feel at the lever while riding. It also has larger pistons than the Nissin units (that comes stock on most Japanese bikes). The Ride Engineering Billet Front Brake Caliper also incorporates large fins to help dissipate heat and aid in cooling when hard on the brakes. It comes in black or a polished aluminum finish, utilizes the stock brake pads and hardware for your bike. Ride Engineering offers this caliper for most bikes that use Nissin units like Honda, Kawasaki, Yamaha and Suzuki. 

We tested the Ride Engineering billet front caliper on our 2018 Honda CRF450R test bike, which just so happens to be the same bike I own as well. Booya!!!!! When it arrived I was so excited that even after a long day at work, I rushed home and went right to the garage to install. Yes, I still get excited about new parts for my dirt bike even in my mid thirties. The Ride Engineering Caliper takes a little time to install as you need to attach your old brake line or you can purchase a steel braided line from Ride Engineering like we did. Bleeding is not as much of a hassle if you own a vacuum bleeder, but in my case, I don't have one, it’s a little more difficult because I have to call on the wife or kids to help me bleed, old school style.


IMG_0109.jpg


 My first test with the Ride Engineering Caliper and Steel Braided Brake Line was at a local moto track that I am very comfortable with. When hitting the track it took a couple laps to get the hang of the new found feeling at the lever. Upon my first on track assessment I honestly thought I had a slight mushy feel at the lever, but as I started to pick up the pace I was mistaken. The feel at the lever was not mushy or soft but a far more progressive feel. This made it a lot easier to modulate the braking power coming into corners. The stock set up has a very firm feel and at times the braking can feel very grabby. This always made me feel uneasy, scared to cover the front brake (while in a corner) and especially in any sort of deep rut. I felt like I would almost lock up the front brake if there were any rocks, bumps or any inconsistency within the rut. The Billet Front Brake Caliper and its progressive feel at the lever gave me much more confidence everywhere on the track. Now I was able to modulate the braking as well as keep my finger on the lever throughout the whole corner without it being to grabby. This helped keep the Honda’s front tire from lifting out of ruts, which happens often with me. Don’t for one second think that there is not a lot of stopping power to go along with this progressive feel. I never felt as if I was lacking braking power or wanted more front brake. The harder you pull in the lever the quicker you stop and you are able to tell that you have more braking power available over the stock caliper within a lap or two. I also noticed a more consistent lever pressure no matter how long my moto was. I had some fading with my stock front brake, but fading wasn't as apparent with the Ride unit. 


IMG_0112-2.jpg


As you can see even the everyday nine to fiver can benefit from some better braking. I was quite surprised at what I have learned in testing this product. This is definitely at the top of my “to buy” list behind hand guards (Sorry Keefer) when I save up my pennies to buy my next bike, which is soon! Shhhhhhhh. Don’t tell the wife! The Ride Engineering Billet Caliper retails for $399.95 and the steel braided brake line is $69.95. Add that up and that is less than an aftermarket exhaust, but yet actually lowered my lap times, increased my corner speed and added that cool factory look to my bike. It was a Win.Win. -Matthew Sirevaag, 200 lbs. Moto Novice, Full Time Electrician And Full Time Dirt Bike Lover

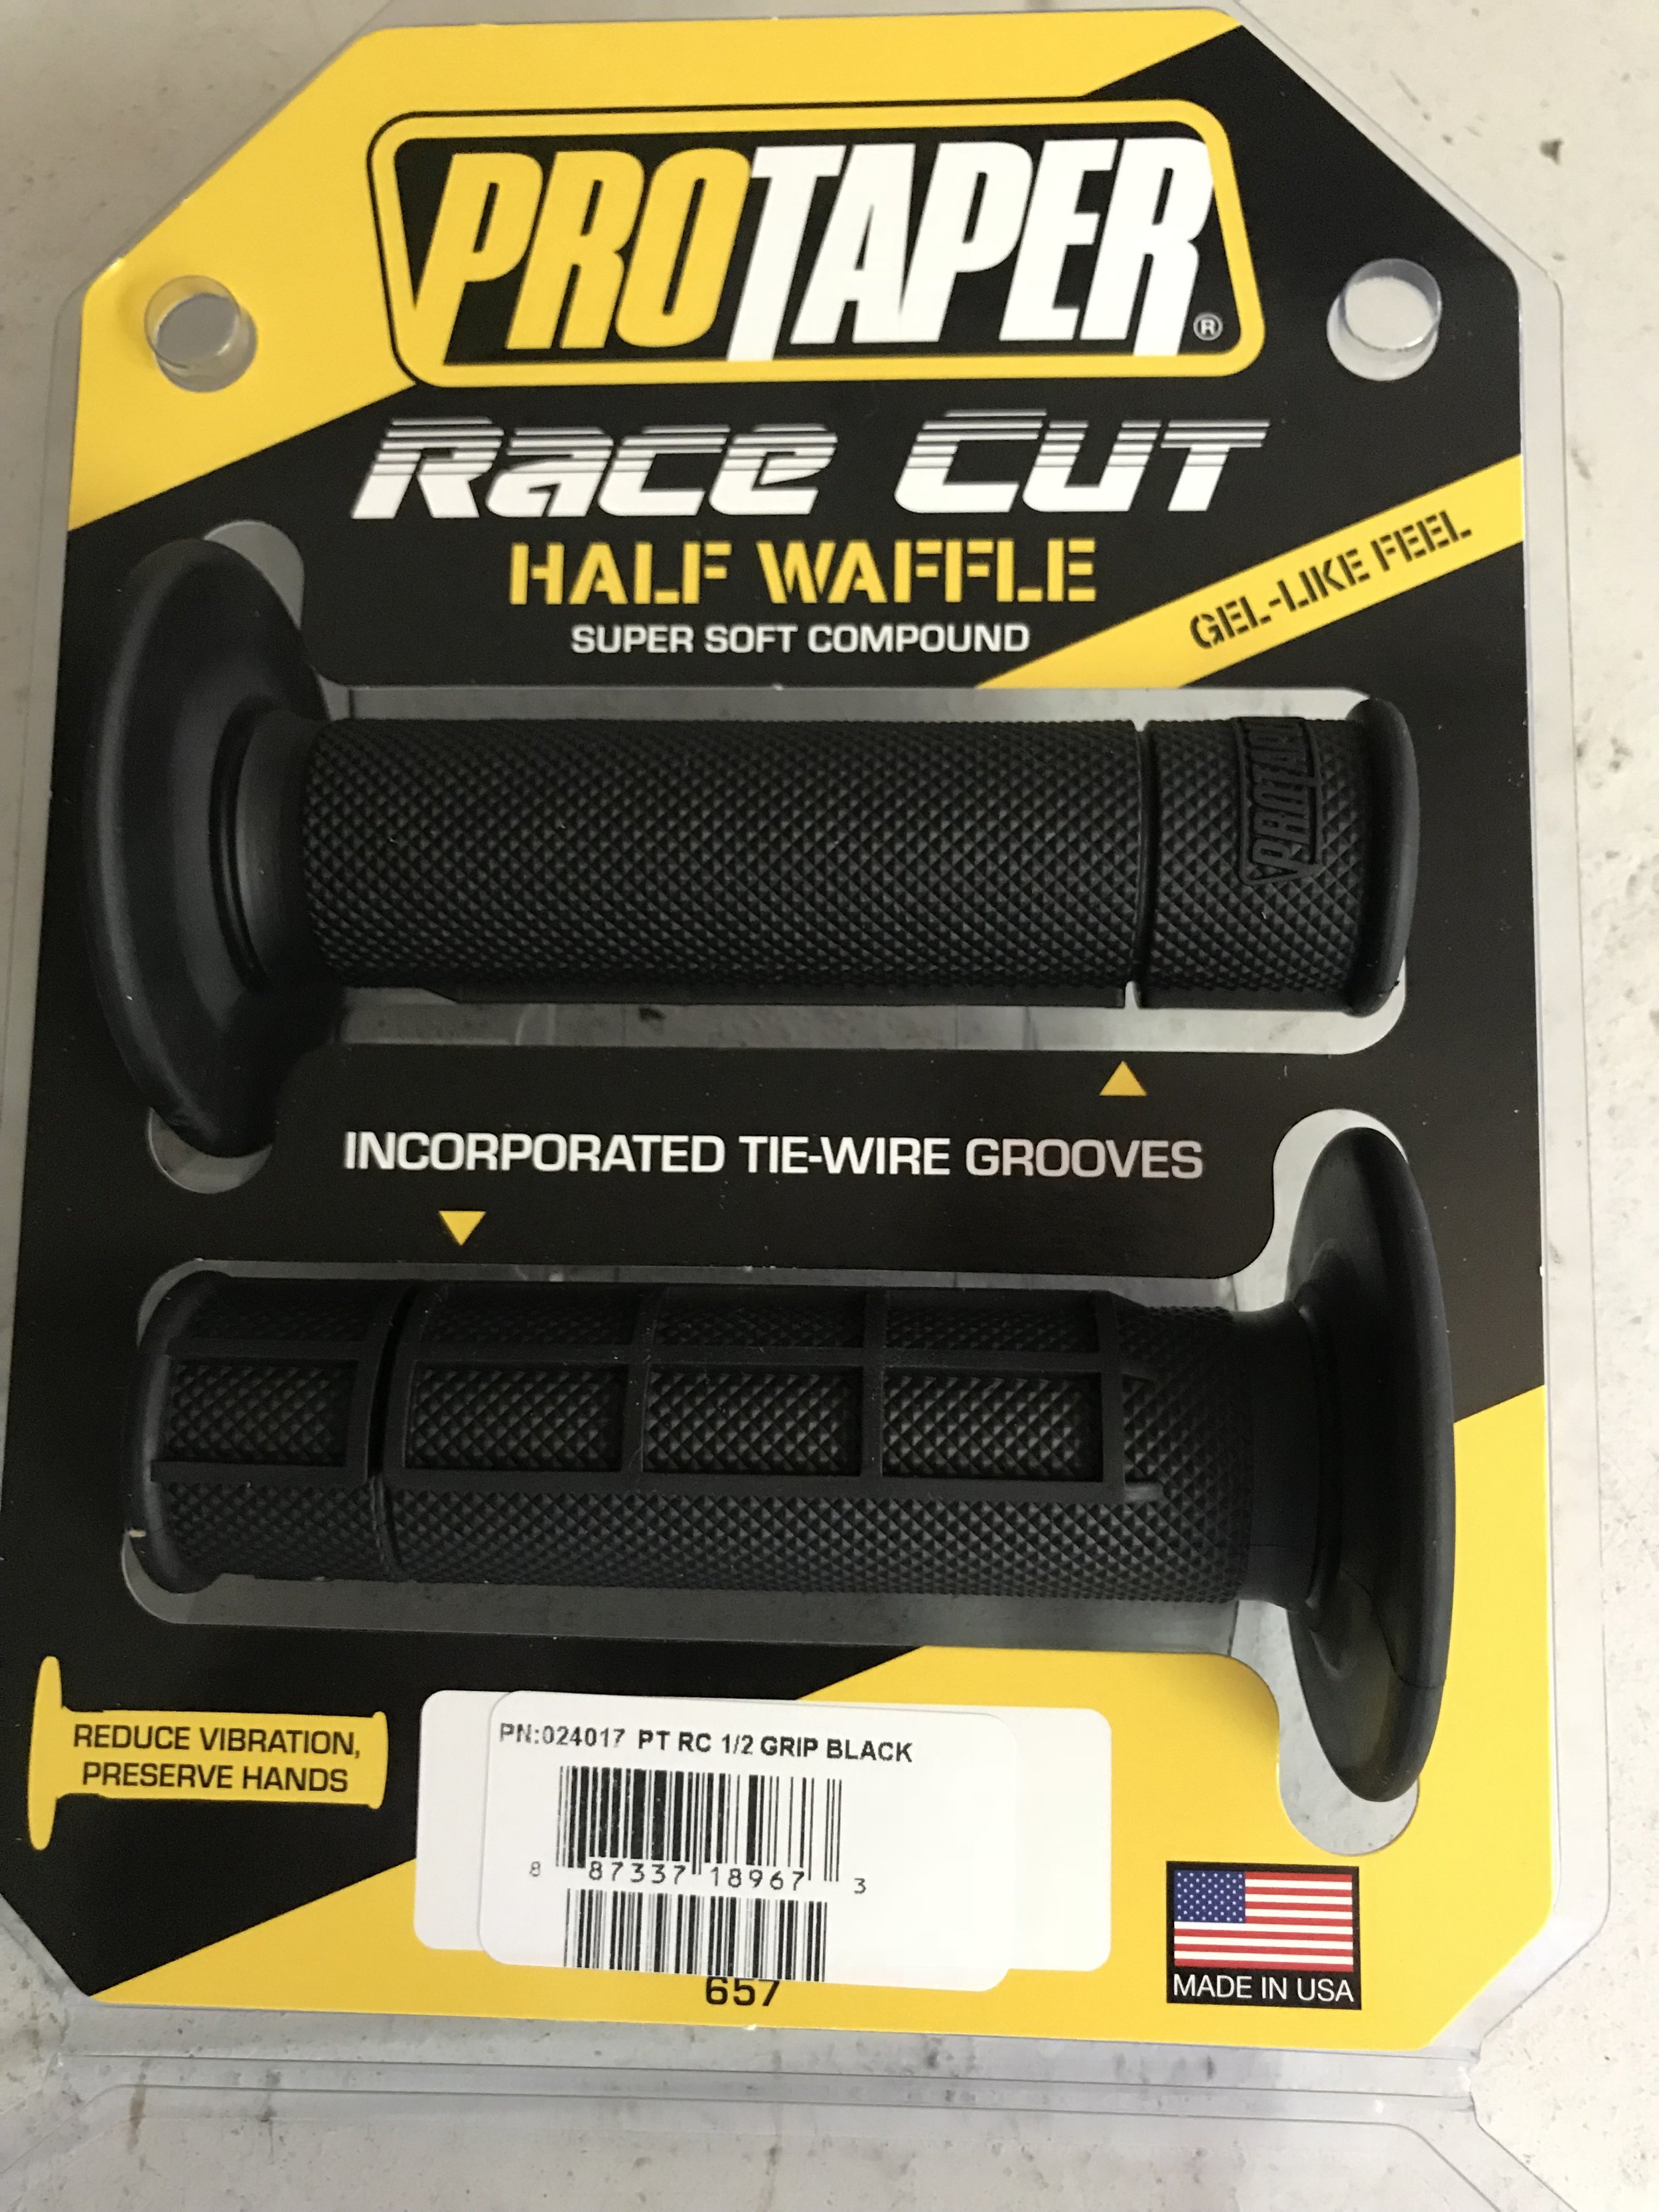
Pro Taper Race Cut Half-Waffle Grips

“It’s just grips, who cares”? Uhhhhhh…..No sir, it’s not just grips, it’s where your hands live while you’re riding, so that is pretty damn important to me. A pair of grips can be like an old pair of shoes you love and want to wear every day. Changing from your favorite pair of grips to a different set is not always a great experience, as the fit and feel is a very important aspect in motocross and off-road riding. I will be completely honest with you guys, I have been a Renthal half-waffle soft guy forever, but felt I needed to branch out and see what else is out there (I have another analogy to go along with this, but I will keep it PG rated with this test). I purchased a set of Pro Taper’s Race Cut Half-Waffle grips to replace the Renthal’s that have graced my machines for years and went riding. 

IMG_8606.jpg


The Pro Taper Race Cut was designed with its soft waffle pattern that incorporates wire tie grooves and an extra-supple layer of rubber. Installing the grips is simple and using the contact cleaner/super glue slide-on method didn't tear or eat away at the grip. Some other super soft compound style grips will actually tear and get eaten away from some types of grip glues, but the PT Race Cuts came out fine. 


I wear a large glove and the feel of the grip in my hand felt adequate and is not too large when riding. I hate large feeling grips because I usually suffer from arm pump when the grip is too big. The feel is also very soft and plush while riding with the PT’s. I could feel the extra cushion in my palm when I landed from jumps and the grip took some of the bike’s vibration away from my hands (compared to a stock lock-on Husqvarna Rockstar Edition grip). Durability of the grip is what impressed me the most. I will normally wear down a set of grips near the flange very quickly, but the PT’s lasted 20 engine hours until I began to notice a wear mark in the grip (where your thumb rests). 

IMG_8609.jpg


The occasional crash that occurred didn't tear the Pro Taper Half-Waffle Race Cut Grips all to hell and they also did great over several pressure washer sessions. I am impressed with the Pro Taper Race Cut Grips and for $9.99 a pair they are not expensive like some other grips on the market. You can check them out over at protaper.com and if you have any questions about this test please feel free to email me at kris@keeferinctesting.com.

Akrapovic Evolution Titanium Muffler System (2018 Yamaha YZ450F)


You’ve heard me talk a lot about how stock muffler systems are pretty damn good right? Usually I say something like, “the stock 2018 Yamaha YZ450F muffler system is hard to beat”, but that quote doesn't stop me from trying to see if there is something better out there. I am a fan of MXGP’s and seeing the Akrapovic mufflers on the Yamaha’s of Romain Febvre and Jeremy Van Horebeek got me thinking I wanted to try one of these beautiful looking systems. After some scouring, I found a US connection and got one delivered to give it a test ride. 


IMG_8290.jpg

First off the Akrapovic Evolution muffler system is one of the most beautiful looking systems made today, is well built and has quality welds all the way around it. Once hot, the titanium color of the headpipe is the most dynamic blue you will ever see from any muffler manufacturer. The Akrapovic Evolution titanium muffler system is 1.5 pounds lighter than the stock system and tucks under the right side panel very nicely. When putting on the system make sure to leave the headpipe loose and then connect the mid pipe, so that the slip fit joint slides in easily. Once those two pieces are connected, tighten the headpipe bolts and mid pipe bolt just snug. The Akrapovic uses your existing stock heat shields or you can purchase carbon heat shields separately. The Akrapovic muffler uses an aluminum spacer in the rear hole to give the muffler enough clearance (from the brake caliper) once the suspension is full collapsed. I did notice that there is a small screen deep inside the core of the muffler, however I was told that this isn't a spark arrestor, but a noise insert. Note: Leave the insert in, as the muffler performs better with insert in and is much pleasant to the ear. Once rear section (muffler) was installed, I went around and tightened up the remaining bolts. Doing it this way ensures there is absolutely no binding going on between each slip fit joint. 


IMG_8285.jpg

Out on the track the Akrapovic Evolution muffler has a deeper sound and is slightly quieter than the stock system. I started the test with the “TP map” installed inside the 2018 YZ450F (if you don’t know what the TP map is, email me at kris@keeferinctesting.com). Roll on power delivery was smoother out of corners with the Akrapovic and “TP 1.0 map” installed compared to the stock system and “TP 1.0 map”. I didn’t really like the smoother delivery and I wanted to get some bottom end delivery back, so I went to the TP 2.0 map. Doing this helped me get some of the RPM response and bottom pull that I wanted back from the Yamaha out of corners. If you feel like you want a smoother delivery or ride hard pack you may want to leave the “TP map 1.0” installed with the Akrapovic. The Akrapovic system really comes alive once out of the corner as the Yamaha starts pulling harder and longer than the stock system down straights. Second and third gears can be stretched longer by the rider and once the TP 2.0 map is installed back in the bike (with the Akrapovic) rolling third gear in corners is slightly easier on the rider as well (with 49 tooth rear sprocket). Over-rev is slightly better through each gear with the Akrapovic and the overall engine feels like it revs a little quicker. The Akrapovic also gave the Yamaha YZ450F a free-er feel and takes away a little engine braking sensation on de-cel. 


IMG_8287.jpg

In conclusion, I feel the Akrapovic Evolution muffler system is an excellent system once going back to the TP 2.0 Yamaha Power Tuner setting. You will not be getting more bottom end than a stock system, but the gains through the mid-top end are a noticeable difference. It will be up to you if that difference is worth the $1300.00 you will spend on the Evolution titanium system.  Akropvic’s website is a very informative, clean, and one of the best aftermarket muffler websites to browse around on if you got the time. There are dyno charts, a sound tool that lets you compare the stock system to Akrapovic’s muffler sound, documents of replaceable parts, and technical data about the system itself. You can head over to akrapovic.com and punch in what bike you want to geek out on. I did, for about an hour! 


The Akrapovic accepts the use of Yamaha's stock heat shields.

The Akrapovic accepts the use of Yamaha's stock heat shields.

If you have any questions about this test please feel free to email me at kris@keeferinctesting.com


Giant Loop One-Gallon Gas Bag Fuel Safe Bladder

A Safe And Collapsible Way To Carry Extra Fuel

By Seiji Ishii


P4252645.jpg

Carrying extra fuel during adventure and dual-sport rides in remote areas has historically been inconvenient and sketchy. The tried and true repurposed Gatorade bottle works fine, as long as the full bottle isn’t put under any pressure, which can make the lid leak…on to your clothes, your food, your sleeping bag, etc. Purpose-made fuel containers, like the Rotopax, do the job, but when empty, they take up valuable storage space and often require mounting hardware. Enter the Giant Loop Gas Bag Fuel Safe Bladders; they are collapsible and made in collaboration with Fuel Safe, a neighboring business that specializes in fuel storage and transport, both for motorsports and utility. We tested the one-gallon version (MSRP $150), and they are also available in 2, 3, and 5-gallon sizes. 

I have deployed various fuel storing and transporting strategies while out in remote areas like Baja. Sure, water bottles and such have worked in a pinch, but I had to be careful of how they were packed, and I made sure to empty them as soon as possible to limit the chances of disaster. Failure of these ad hoc containers when completion of the route requires extra fuel could be devastating. I have used systems designed for the job, like Rotopax, and they do perform their tasks admirably, but when empty they still take up space. These fuel specific containers are often awkward to carry on the bike, many requiring special mounting hardware that again, takes up valuable space when unused. 

Giant Loop’s Gas Bag Fuel Safe Bladders offer a practical solution to the fuel storage and transport problem. These collapsible and light gas bags utilize a fuel-proof welded film bladder sewn into a ballistic nylon sleeve. Webbing daisy-chain anchor points and handles adorn this protective cover. The claimed weight for the one-gallon size is 11.5 ounces and rolls up into a tight little 4” roll when empty, saving precious storage space in the bags. 

Filling the Giant Loop Gas Bag Fuel Safe Bladder requires some care; holding the bladder upright while dispensing fuel, without squeezing it, of course, is harder than dispensing into a container standing on the ground. There is a fill line marked on the sleeve to indicate the maximum level that will allow you to remove the lid without spillage (this mark began to wear off quickly, presumably from fuel spilling). Pouring fuel into the bike’s tank also requires purposeful actions and care; tipping a flexible bladder while aiming the bladder’s neck opening can be tricky. The sleeve isn’t attached to the bladder at the fill neck, so care must also be exercised to not pour fuel into the space between the fabric sleeve and the bladder. Doing so means storing the empty bladder on the outside of the luggage to prevent contaminating other gear. The bladder neck is the standard size for fuel canisters, so spouts can be purchased to ease filling the bike, and a funnel would also be a huge help. I didn’t use either, choosing to be careful when dispensing fuel over carrying more gear. Leaving the gas bag out in the rain causes another consideration; water can collect in the space between the sleeve and bladder. Draining collected water is prudent before dispensing fuel into the bike’s tank. I found out the hard way, contaminating my fuel with water and suffering lousy engine performance afterward. 

The welded film bladder has proven durable and reliable; storing the fuel-filled bladder in my luggage raises no concerns, and the only odors come from accidental splashing of fuel on the exterior. The Giant Loop Gas Bag Fuel Safe Bladder has survived extremely jarring travel both inside bags and lashed to panniers via the daisy chains. It has also survived intense heat and below freezing conditions over the last six months, with no adverse effects. There have been zero fuel breaches either through the bladder film or cap. 

If you are in search of a more space saving, light weight, durable, and reliable on-bike fuel storage and transport, the Gas Bag Fuel Safe Bladder is worth investigating. It performs a critical task and doesn’t cramp limited storage space when not required, nor does it need any mounting hardware. I was skeptical at first of a bladder being durable, fuel-proof, and reliable, but the 1-Gallon Giant Loop Gas Bag Fuel Safe Bladder has proven itself and will remain a part of my remote trip kit. 

Giantloopmoto.com


FMF 4.1 RCT Titanium Muffler With Mega Bomb Plus Headpipe


If you have kept up on my social media channels (@kkeefer120, @keeferinctesting) you will know that I have been riding the crap out of the 2018.5 Husqvarna FC450 Rockstar Edition and 2018.5 KTM 450 SX-F Factory Edition machines. I enjoy riding these two machines because they are easy to ride, well balanced and feel extremely lightweight when cornering. I do however wish they had some more RPM response and low-end excitement. Since the new Husqvarna RE’s and KTM FE’s are not coming with an aftermarket muffler this year I wanted to get my hands on FMF’s version as soon as possible to give you all some feedback, just in case you wanted to add some more bling and possible horsepower to your new machines.

IMG_7820.jpg


The new FMF 4.1 RCT Full Titanium Muffler System that you see here will fit on either your 2018.5 KTM Factory Edition or your Husqvarna Rockstar Edition. The FMF 4.1 system went on easy on both bikes and took only a few minutes to install. Thank you to Husqvarna and KTM for making the new bike much easier to change a muffler. Gone are the days of dropping the shock and cursing in the garage just so you could get your new muffler system on. I tested the FMF 4.1 muffler system at several tracks on both bikes and had similar results at each track I tested at. In stock form the KTM Factory Edition has a little more throttle response and bottom end pull than the Husqvarna Rockstar Edition, but the RE pulls slightly longer up top. 


IMG_7898.jpg

With the FMF system installed you will not be getting increased bottom end pull on either machine (compared to stock), but you will be getting a little more bottom and mid-range RPM response (or throttle crack for you not testing type readers). I noticed the added RPM response more on the Husqvarna, especially on low RPM, out of corners. The FMF system makes each machine’s engine character slightly more free-feeling and exciting. I also appreciate that I am not getting any added de-cel popping (or lean sensation) with the FMF system and both bikes ran just as clean with the FMF system on than it did with the stock muffler. Where you will notice the most improvement with the FMF system is through the mid-range. The mid-range “meat” you will get out of the FMF 4.1 system is downright impressive. Rolling the throttle on out of corners and accelerating you will notice an increased pulling power that wasn't there with the stock muffler on either machine. Whether you're coming out of a corner in second or third gear you will notice some extra horsepower getting to the next obstacle. With the added mid-range meat of the FMF system it really helped some of the gearing issues I had at tighter, less flowy tracks I tested at. Gaining some mid-range let me use third gear in some corners that was tough for me to decipher which gear was better. With the stock system I would roll into these corners in second gear and have the right amount of "pop" to get me out quick, but I had to shift early once exited, to keep the rear wheel from spinning. Third gear was too tall of a gear to get me out of the corner quick, but provided less wheel spin on the exit, so it was always a struggle for me to decide on which gear to use when being pressured from behind by another rider. With the FMF installed I could easily use third gear and have enough "pop" to get me out of the corner in a hurry, yet it kept the wheel spin to a minimum by being able to use a taller gear. So basically what I am saying is that FMF’s 4.1 system made me think less and twist the throttle harder, something I like doing. I didn't get any more top-end with the FMF installed, yet it didn't take any away from either machine. I did notice slightly less over-rev with the FMF system (from stock) when I got lazy and tried to wring each machine’s neck out in second and third gear. I don't mind not gaining anymore top- end and losing a touch of over-rev with these two models, because they are one of the most powerful engines in these ranges. I am not looking to own a top fuel dragster here. 


IMG_7818.jpg

You have heard me say it time and time again that it's tough to beat a stock muffler system these days. You see more and more after market companies taking the time to release their new model systems because it’s not that simple to make a muffler system better than stock. FMF made their new 4.1 RCT titanium muffler with Mega Bomb Plus headpipe not only better through the mid-range, but a full pound lighter on the scales as well. If you just purchased your $10,000 plus Husqvarna RE or KTM FE and still have $1099.99 burning a hole in your pocket, I approve of this new system Lil D and the boys over at FMF developed. Head over to fmfracing.com or give them a call at (310) 631-4363 to see when this system will be available. 


IMG_7900.jpg


2017-2018 Honda CRF450R And CRF450RX Engine Mounts


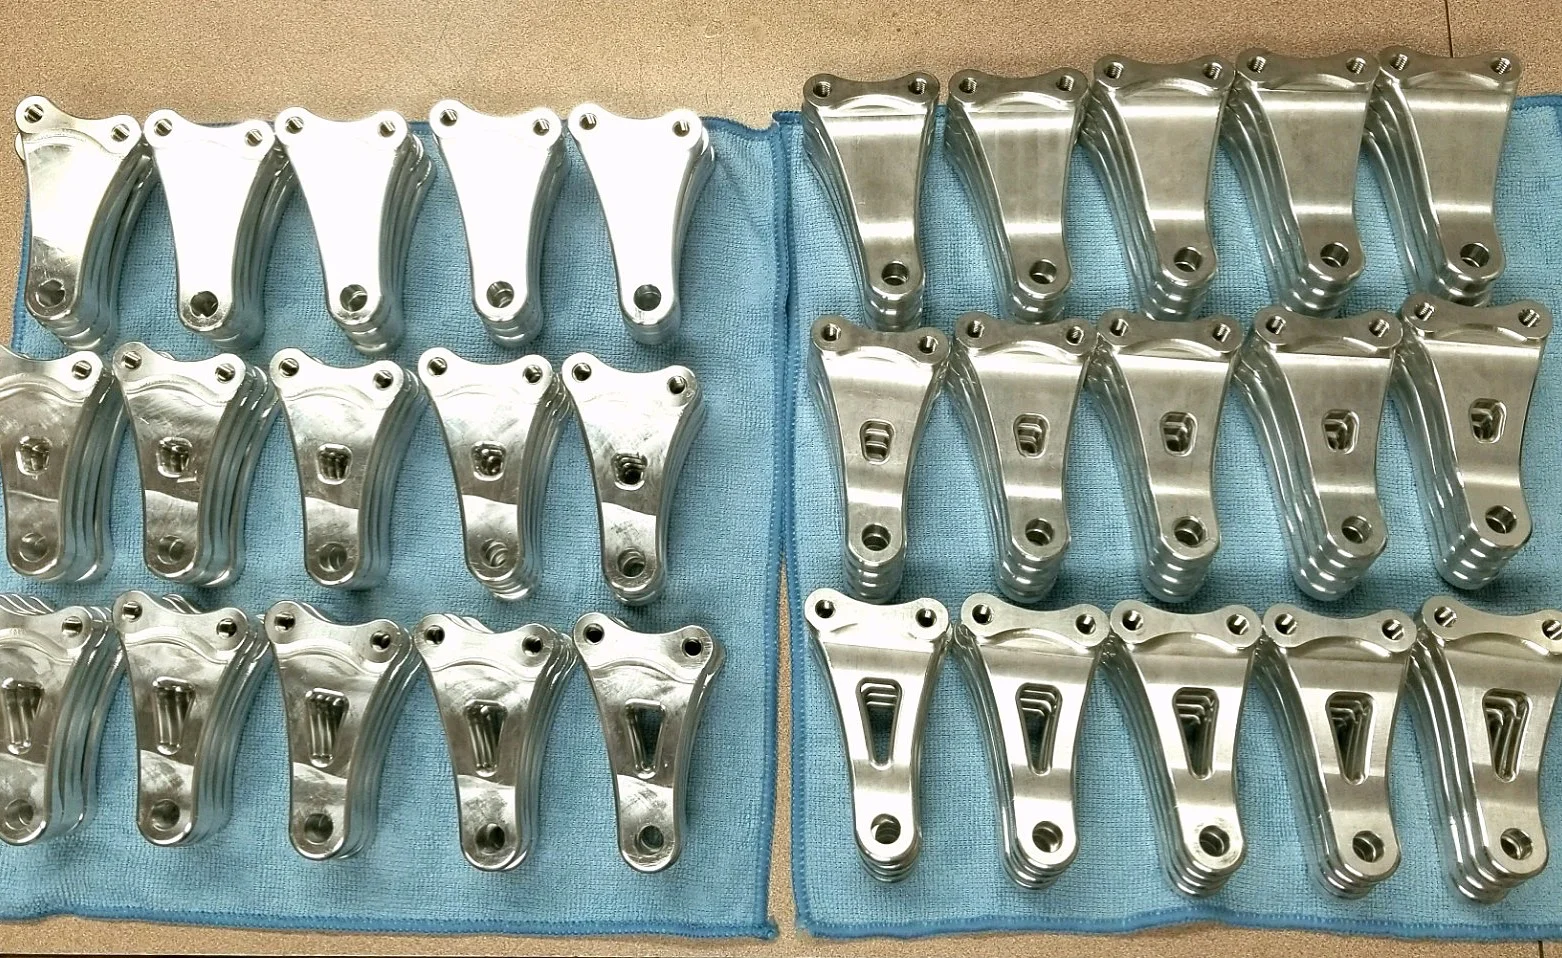
For 2018 Honda went slightly softer on the top engine mounts of the CR450R. This was to give the bike a little more compliancy (straight line stability) on square edge and choppy terrain. However, if you have listened to my podcasts you will know that the 2018 Honda CRF450R can still feel a little rigid when the track gets hard packed and choppy. When the track is soft the Honda performs at its best, but since we are on the west coast and our dirt isn't as soft as east coast dirt, I wanted to get some more bump absorption out of the Honda chassis. The 2018 Honda CRF450R is a reactive, easy to maneuver machine and that is just a couple of its strong points, but after saying that it also can be a couple of it’s weakest points as well (when it comes to faster type tracks). You get what I am throwing down to you? If you don't, let me explain: If you're a vet, heavier guy or novice type rider that has a hard time cornering, the 2018 Honda CRF450R is a dream. If you're a faster, lighter type of rider, the Honda can be a hand full to ride when you start to push the boundaries a little. Yes, it won the 2018 Keefer Inc. Testing  450 MX Shootout because it has a great engine, is easy to corner and has a set of fairly good stock suspension. What it does lack is some straight line stability and consistency when you start to really push it on rough tracks. You may not know who Kris Palm is, hell I don’t know much about him either, but when someone presents a part for me to test, I am usually not one to shy away from trying things that I think may help a certain bike. When Mr. Palm asked me if I wanted the option to try a bunch of his engine hangers for the Honda CRF450R, I was more than willing to try. Knowledge is power right? 


IMG_7812.JPG

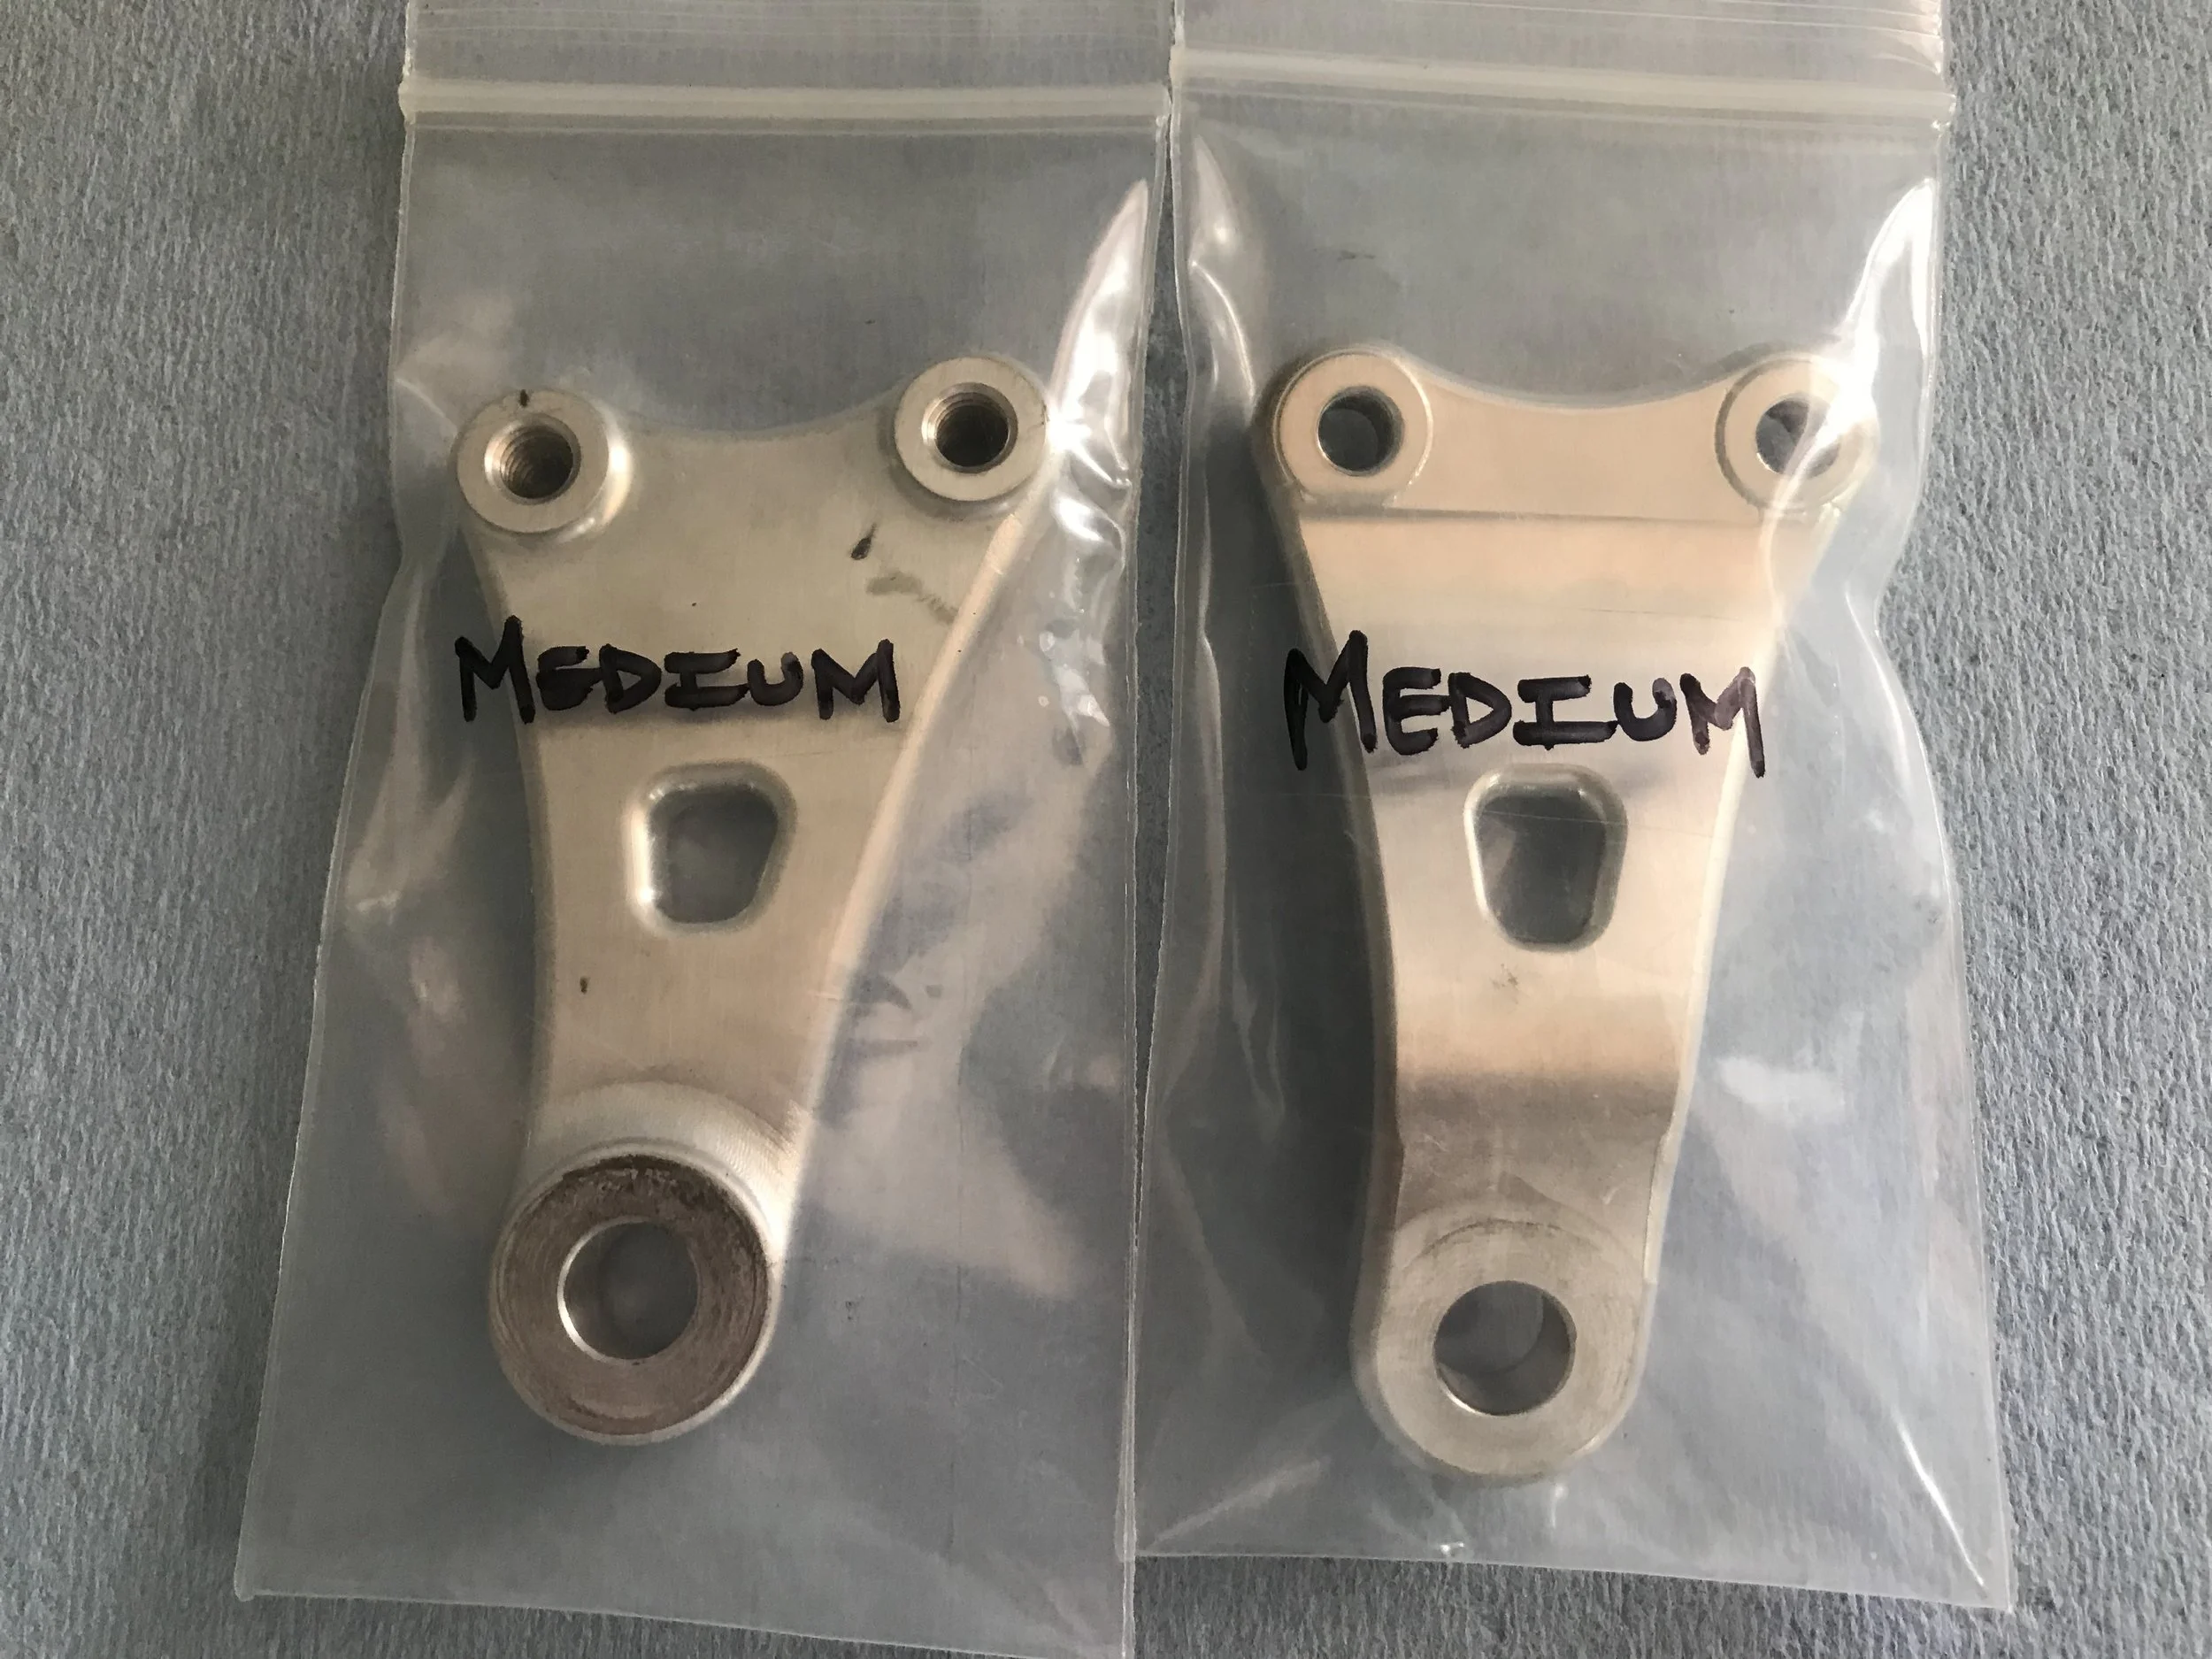
Now….. I am not going to type about every single combination I tried because I will be here all day typing and not riding/testing. The ones that I felt didn't work as good as stock aren't worth mentioning, but rest assured I went through several variations of these engine mounts to find the best setting that I think will be best for you Honda CRF450 owners. I don’t know which engine mounts Kris Palm will offer, but what I had to work with was the top aluminum engine mounts in soft, medium and stiff as well as front engine mounts (made out of titanium) that come in a 4.0 thick/4.0 hole, 4.5 thick/4.0 hole and 4.5 thick/7.0 hole. I also tried the engine mounts on the 2018 CRF450RX for you off-road guys and incorporated which combo worked best with that machine. Just like in professional racing, changing the engine mounts and the affect it has on the bike is a rider preference thing. It may not be needed for every type of rider, so if you feel like you like the way your Honda rides than don’t worry about this test. However, one smart test rider told me back in the day “you are only as good as what you try”. Some riders like a feel of a certain engine mount and stick with that year round, where others will change their mounts for track conditions. Below are a couple of engine mounts combos that I think may be worth taking a look into.  


Medium Top Mount With Stock Front Mount

Tracks Tested: Glen Helen, Sunrise, Deep Sand Dez Track And Milestone

Best For: CRF450R and CRF450RX All Conditions


IMG_7858.jpg

For better bump absorption and a slightly more forgiving feel on square edge, this was the best set up by far. This setting had more positives at each track I tested at and had a minimal negative affect on chassis balance. The medium top mount increased my rear wheel traction and gave me more front end feel on flat, hard packed corners. The Honda CRF450R kept its great cornering ability in tacky and soft dirt, but increased its cornering capability on hard pack with this medium top mount installed. Straight line stability was also a noticeable positive change as the Honda’s chassis felt less reactive (or more planted) on throttle which let me roll the throttle on sooner coming out of corners. Off throttle the CRF450R didn't have as much of a wiggle as it did with the stock mounts installed. The only negative for me was a slightly slower feeling on lean in (into corners). Again, the Honda with the medium top engine mounts installed wasn't as reactive, so it took slightly more work from the rider to get into ruts. To me that is ok as I can sacrifice a little “tip in” character for some added stability and rear wheel traction. Unlike what some other magazines will tell you, having a slower reacting machine doesn't mean it will corner bad. To me you will be able to get into the corner better now because the Honda has a more of a planted feel once you chop the throttle to set up for corner.  


Medium Top Mount With 4.5 Thick/4.0 Hole Front Mount

Tracks Tested: Glen Helen, Sunrise, Deep Sand Dez Track And Milestone

Best For: CRF450R In Soft/Sandy Conditions  


IMG_7860.jpg

The stock front engine mount has a thickness of 4mm and is made of aluminum, but the bottom engine mounts Kris Palm offers are titanium. This means no matter if the dimensions are the same the flex character will obviously be different (because of the material difference). when going back and forth to different tracks I found out that the medium top mount and the 4.5 thick/4.0 front mount hole combination works best in sand and soft dirt. I felt the medium top engine mounts were better on compliancy, but it did suffer a little side to side flickability. With the titanium 4.5 thick/4.0 hole front mount and medium top mount it brought back that lightweight feel in corners and helped tip in. I didn't like this combination as much in hard pack situations because it brought back some of the harshness on small chatter bumps and square edge. If your track is soft with bumps that break away, this is a great combination that gives the rider some added soft dirt bump compliancy on straight line and gives the Honda more quickness (lightweight feel) in cornering situations. 


Stiff Top Mount With 4.0 Thickness/4.0 Hole Front Mount

Tracks Tested: Glen Helen, Sunrise, Deep Sand Dez Track, Milestone

Best For: CRF450R In Tight, Rutty, Jumpy Conditions


IMG_7868.jpg

I went back and forth with this setting a couple times (on the same day) just to be sure I was feeling what I thought I was feeling on the track. Usually when I see “stiff” I shy away from it pretty easily when it comes to the Honda CRF450R, but this set up worked great for tighter tracks with medium to large sized jumps. With the stiff top engine mount, 4.0/4.0 front mount the Honda had a solid (less wallow) feeling to it when landing and kept great front end traction through long, deeper style ruts. This is not something that is particularly great on rough tracks, but if the track serves up some acceleration chop, long ruts, jumps with shallow landings and has good traction this combination was worth mentioning. It made the Honda slightly more flickable in the air and sudden direction changes (cutting down early from a berm or blown out rut) were better than stock engine mount setting. When I tried the medium top mount and 4.0/4.0 front mount the CRF450R flexed too much and become wallowy in the rear. Now I am just speculating here (because we don't have much arenacoss type tracks in California), but I feel like this could be a great setting for you east coast winter riding guys that have those indoor facilities to moto inside.  


9X1A8460.jpg

Now here comes the tricky part. Kris Palm doesn't have a website set up yet because he really hasn't started pushing these engine mounts that hard. So if you're interested in getting a hold of him, maybe to get a set, you will have to reach out to him via a Direct Message on Instagram @kris_palm. If you don't know what a DM is, try Facebook. If you don't have any of that email me and I will try to get you in contact with him. I told you it was tricky! It’s almost like the movie Fight Club, where the first rule of Fight Club is you don't talk about Fight Club. The top engine mounts will run you $169.95 and the front engine mounts are $89.95. How can you pay? Get a hold of Mr. Palm and he can fill you in. Like I said, it's like an underground club that you must know the password to get into.  


If you have any reasonable questions about this underground Fight Club type test please feel free to email me at kris@keeferinctesting.com.  


Yoshimura RS-9T Full Titanium/Carbon Muffler System


The 2018 Honda CRF450R is a refined version of the 2017, albeit a better one I may add. If you listened to the muffler shootout podcast you would know that this is a great muffler to add to your new Honda CR450R. If you haven't listened do yourself a favor and click on the podcast tab and look for the "Honda CRF450R Muffler Shootout Podcast". Once I got my hands on one and I took it through the ringer of the shootout process, I knew Yosh had put some R&D time into this system. We know Yoshimura works closely with the Factory Honda team here in the states and have seen the RS-9T muffler on Cole Seely and Ken Roczen’s new bikes so it's no surprise that they work pretty damn well. The Yoshimura RS-9T system only comes in a dual can set up (no single mufflers are available from Yoshimura) and is a three-piece slip fit design. Installation of the system was painless and took 15 minutes to install, which was nice to do when at the track swapping mufflers.

IMG_6912.JPG

Once installed and on the track the Honda’s exhaust note turned from high pitch 250F’esq to a deep throaty more traditional 450 factory race bike sound. The crack of the throttle (or RPM response) is slightly smoother and less crisp, but bottom end pulling power is increased over the stock muffler. Rolling out of corners, in second gear, feels like the rear wheel has even more traction than stock and was more controllable while accelerating out of hard pack corners. The slightly smoother RPM response takes away the Honda’s excitement feel ever so slightly, but helps you gain a little more control coming out of corners. The mid range pull is healthier than stock and while the stock system had a tough time pulling third gear in tighter corners (without a gearing change), the Yoshimura system will give you an easier time rolling third gear corners. With just the flick of the clutch lever (in third gear) the Honda will be in the meat of the power once again and have you down the straight in a hurry. We noticed top end and over-rev was as good as stock (which is great). It pulls adequately down the straights in second and third gear and there wasn’t a time where I thought to myself  “I need more top end pulling power”. Ehhhhhh. No. You could tell Yoshimura was focused on bottom to mid-range pulling power when they designed this muffler system and they succeeded in doing so. It is also impressive that they didn’t lose any top end and over-rev in the process.

IMG_6906.jpg

After weighing both the stock and Yoshimura RS-9T systems you will be saving 1.9 pounds, which is a nice chunk off of a already heavy (on paper) motorcycle. This is a significant weight loss but for $1,499.00 it is a very pricey bolt on modification. If you are looking to save a little money Yoshimura offers the stainless steel/carbon version for $977.00, but you will not be saving much weight (only half a pound). I really like the craftsmanship that went into the Yoshimura system. The welds are flawless and the mufflers tuck up inside the side number plates for a stealthy, compact look. If you’re looking for al little added giddy up and bling from your new 2018 CRF450R, the Yoshimura RS-9T system will help you on the track, but your wallet will be not as fat. This is the price we pay for getting some extra HP and a better-looking muffler right? This is one of my favorite systems for the 2018 Honda CRF450R and it has held up great over time (over 20 engine hours). You can head over to Yoshimura-rd.com to get yours or call them at 800-634-9166.

IMG_6902.jpg


If you have any questions about this test please feel free to email me at kris@keeferinctesting.com 

2018 Yamaha YZ450F Dubach Racing Engine Relocation Kit


The new 2018 Yamaha YZ450F corners much better than in previous years, but still can feel like it has some front tire pushing when there is nothing to bank off of. This is not as drastic a feeling as it was in 2017, but some riders want more front end bite out of the blue machine, so we thought we would try Dubach Racing’s engine relocation kit. Doug has had this engine relocation kit out for quite sometime and they have worked well on older model YZ450F’s. I personally didn't think the engine needed to be tilted more forward than it already has for 2018, but I can’t keep well enough alone, so I decided to give it a go. Dubach’s kit only consists of two small bushings that tilt the 2018 engine 1.5mm forward and only takes around 30-40 minutes to install. If you want to understand better on how to put the kit in you can go here: https://www.youtube.com/watch?v=5NLRyQr4Iss and check out Doug’s instructional video he did. This video is dated, but most of what he is doing to this older YZ450F applies to what you will do to the 2018 version (without the new engine mounts of course). The 2018 kit only comes with two collars/bushings as you will use all your stock/existing engine mounts.

IMG_7227.jpg


Before you go purchasing Dubach’s Engine Relocation Kit make sure you have tried doing some things to your 2018 YZ450F, like raising your fork up 5mm (flush is stock) in the clamps and be sure your sag is set at 104-105mm (100-102mm is standard). I don't recommend going higher up (with the fork) than 5mm to get more front end bite, as going up any higher will dramatically hurt your straight line stability. 


So what exactly did I feel on the track once the Dubach Racing Engine Relocation Kit was installed? A lot actually! “Keefer, it’s 1.5mm, how much difference can it be”? Well once I got out on the track, I immediately noticed how reactive the front wheel was to my steering. I have a ton of hours on the stock 2018 YZ450F and I know how it reacts once I turn the handlebars. The Yamaha with the DR.D Relocation Kit on was almost Honda-like and gave me the feeling of having the front tire tucked in more towards the engine. It took me around two laps to realize that I needed to drop the fork back down in the clamp and re-check my sag to get it to where it wasn't as reactive to handlebar movement. I dropped the fork back down to 2mm up in the clamp, set my sag at 105mm and did a couple motos. The 2018 Yamaha YZ450F has better tip now in coming into corners and I can feel the front knobbies biting down a lot more through flat corners. This was all for the better, however I noticed a little less straight-line stability and slightly less rear wheel traction coming out of hard pack corners. I adjusted my fuel/ignition map on my Yamaha Power Tuner App to help mellow out the low-end delivery and that rear wheel traction returned! The straight line stability loss that I experienced was very slight, but was mostly noticed while on-throttle, off-throttle stability improved slightly. When chopping the throttle the little wiggle I used to get in the chassis has now settled down some. On throttle side to side movement fro the rear end has slightly increased. I wouldn’t say that the DR.D kit makes the 2018 Yamaha YZ450F twitchy, but it will make it very reactive to any slight steering movements you make. If you are looking to make the Yamaha a more reactive machine and slightly more agile, this kit will do just that! 


At the end of the day, I prefer the stock tilt for the way I ride. Let me explain this…. I don’t mind a slightly slower turning machine as I can corner fairly good. I do need front tire traction as I am a front end steering rider, but having a little less reactive machine makes me feel stable and I am able to push harder (hence more stability). Now, if you’re a rider that needs every ounce of lean, front-end bite and cornering capability, this is a great option for you. I have several riding buddies that prefer the Honda CR450R over the YZ450F because they want their machines to corner with ease and with more front wheel bite. Having this DR.D Engine Relocation Kit installed made those friends happy with the 2018 YZ450F now. The DR.D Engine Relocation is available now and will set you back $89.95. 


If you have any questions about this test please feel free to email me at kris@keeferinctesting.com

Think Technology Lite Seat Foam and Lite Seat Cover 

 There is a saying in racing that goes something like this “worry about the ounces and the pounds take care of themselves”, and Think Technology seems to live by this saying in everything they do. Think sent us replacement “lite” seat foam as well as a “lite” seat cover to go with the long term 2018 Honda CRF250R that I have had for some time now and I thought they forgot to put the foam in the box when UPS dropped it off (I’m not kidding, it’s that damn light!). I never really thought about seat foam and covers being a factor when it comes to the overall weight of a 200+ pound motorcycle, but when I felt compared foams, side by side, I was rather impressed. I honestly didn’t weigh them side by side since the scales I have don’t register that low, but I can tell you that the feeling in your hand is impressive and the claimed difference Think Technology says is close to one pound! I believe it, because it actually feels more than a pound on my human hand scale. 

Stock seat with Think foam and cover not installed yet.JPG

When I took off the original seat cover and foam I initially noticed the stock foam was still slightly wet from the recent washing a couple days before. The second thing I realized was that the stock foam not only goes on top of the seat pan, but the side overlaps and slightly goes around and under the stock seat pan. After all the stock parts were removed and I went to put the new foam on I realized that the foam no longer wrapped around the side and under the seat pan, which didn’t seem like a big deal at the time. The foam fit nicely on top of the pan and the new cover wrapped around the foam nice and tight with plenty of material left over on the bottom to staple. 

hink installed right side.JPG

The new cover has a cool look to it with the custom “120” Think put on the front of the cover making it custom for Kris (I’m not fast enough to have my own number). Installing the seat on the bike was almost easier than the stock one, but there is a reason for that. Remember how I said the new foam didn’t wrap around the bottom of the seat pan? Well, that now created a small gap all the way around the seat between the seat and the plastics, so much so that you can see daylight between the seat and the gas tank. This gap also left the seat pan a little loose on the side of the gas tank and lets the seat rattle slightly more than stock. However, where the seat hooks to the tank isn’t wedged tight, you really don’t notice it when riding, you notice more in the pits riding out to the track. That being said, those are the only negative things about the performance of the Think Technology seat foam. On the track those couple negatives go away when you feel the nice firm seat foam, not hard, but firm which never broke down at all, as well as the grippers sewn into the cover that really keep you in place on the seat. In addition to customizing the seat with your number (if you’re fast enough to have a number) Think Technology will also put a seat bump in your specified location for an extra $40. 

Think 120.JPG

After putting many hours on the Think foam and cover I’m impressed with the holdup of the product, the cover has only slightly lost its bright red look due to all the dirt and the foam hasn’t broken down or got water logged after further inspection. I did not notice a weight difference on the track, but maybe Kris can feel that kind of stuff more than me. The other cool feature of the Think foam is that it’s a closed cell foam (which comes from the aerospace industry), this means during washes it won’t absorb or retain water, which is good for two reasons; one it will not retain the water which makes it heavy, and two it will not stay water logged and ruin the foam like stock seat foam can do. Now to the part that will scare a lot of you away, the price of the Think foam is $299.99 (plus $40.00 if you want a bump) and the cover is $59.99. I know this is a lot of money (anything related to aerospace isn’t going to be cheap), but if you are into saving every ounce (as some of you crazy weight biased people are) as well as not having to sit on a water logged seat ever again, I’d definitely look into Think Technology. -Michael Allen

There is more of a gap between the Think Seat and fuel tank compared to stock. This is common with aftermarket foams and we may have pulled this seat cover on too tight up near the front. Check back to keeferinctesting.com for an update as we instal…

There is more of a gap between the Think Seat and fuel tank compared to stock. This is common with aftermarket foams and we may have pulled this seat cover on too tight up near the front. Check back to keeferinctesting.com for an update as we install another cover on to check gap. 

Stock seat and cover comparison. 

Stock seat and cover comparison. 


Second Opinion: 

I have used the Think Technology foam on other machines like a Yamaha YZ450F and have come to the same conclusion as Michael. I like the firmness of the seat and the fact it hasn't got heavier over repeated washes (over the course of a year). As you know I ride a lot, so I wash my bike a crap ton as well and it hasn't broken down. I have heard through some grumblings that the foam shrinks up over time, but I haven't seen this happen yet. Like I said, I have had mine on the Yamaha over a year now and all is well. This is a niche product, but I like testing these niche pieces because its not the norm. It’s expensive, yes, but it’s up to you to decide if it’s worth the money. It’s a good product, but to me gives you no real advantage on the track. The advantage is the lifespan and weight consistency of the foam. -Kris Keefer

Pro Taper Fuzion Handlebars

The Pro Taper Fuzion handlebar has been around for a while now and was a totally new concept to the off-road world (for crossbar lovers) when it was released a few years ago. The flex locking system allows riders to choose between a stiffer, more controlled handlebar feel or a softer more shock absorbing feel depending on terrain and rider preference. Changing the bar from “Locked” to “Unlocked” takes only seconds by simply turning a knob. The Fuzion utilizes Pro Taper’s exclusive aluminum alloy, 4mm wall design for lightweight, strength and comes in six different bar bends.


IMG_2398.JPG

Depending on what type of bike I am riding depends on if I like running a crossbar type handlebar or not. For example when I am riding a Honda I like to have a crossbar because they come standard with one. When I ride a Yamaha I go to a handlebar without a crossbar. Why? You guessed it, because they come stock with that style. I usually can tell the difference in stiffness when I go back and forth between each type of bar so this made me want to really test this Fuzion bar. 

The 1-1/8 Fuzion handlebar weighs in at 1lb, 15oz. and was put on several of my test bikes. The easy-to-adjust locking system can be adjusted by simply taking the bar pad off and turning the knob in the middle of the crossbar. If you’re used to running a 7/8 bar with a crossbar on your bike, but want some added strength, the Fuzion is a great option. The downside to using a standard oversize bar with a crossbar is getting added rigidity through the bars that could be hard on the arms/wrists. Setting the Pro Taper Fuzion to the “unlock” position was most noticeable on the 2018 Honda CRF450R due to it being a more rigid feeling chassis. In stock form the Honda comes with a 7/8 handlebar and putting the Fuzion bar on gave me only minimal gains in stiffness through my arms. On braking bumps and hard slap down landings the bar flexed as if I didn’t have a cross bar on. Does it flex more than an oversize crossbar-less handlebar? After spending more time on both types of bars I would say it is very close.


IMG_6237.jpg

I am very picky when it comes to handlebars and I felt that the Fuzion handlebar (when in the “locked” position) is slightly more precise (than on the unlocked position) when trying to corner on hard pack slick surfaces. Also, only a little more rigidity was felt on braking bumps and on flat landings when “locked”. The smoother the track surfaces the better the Fuzion worked in the locked position. However, 90% of the time I felt the Fuzion felt best when “unlocked”. Especially for the hacked out, choppy, desert tracks I test on.  A few tip overs and one big get off left me praising the Fuzion’s durability. This happened on the CRF450R and the handlebar got twisted in the bar mounts, but the handlebar itself wasn’t bent.


So at the end of the day why not just use an oversize non-crossbar handlebar you ask? The Fuzion handlebar eliminates having “crossbar lovers” cut his/her oversized crossbar handlebars (and avoiding potential handlebar failure to achieve desired flex when he/she demands a crossbar). I like that ProTaper addressed the need for this niche and picky people like myself. Especially for riders that need to see a crossbar yet have flex when he or she rides. Yes, it is more expensive than your average 7/8 handlebar, but it also will last longer in case you are a crasher like these dudes on MX Fails.