Performance

Pirelli Scorpion MX32 Mid-Soft Tires  


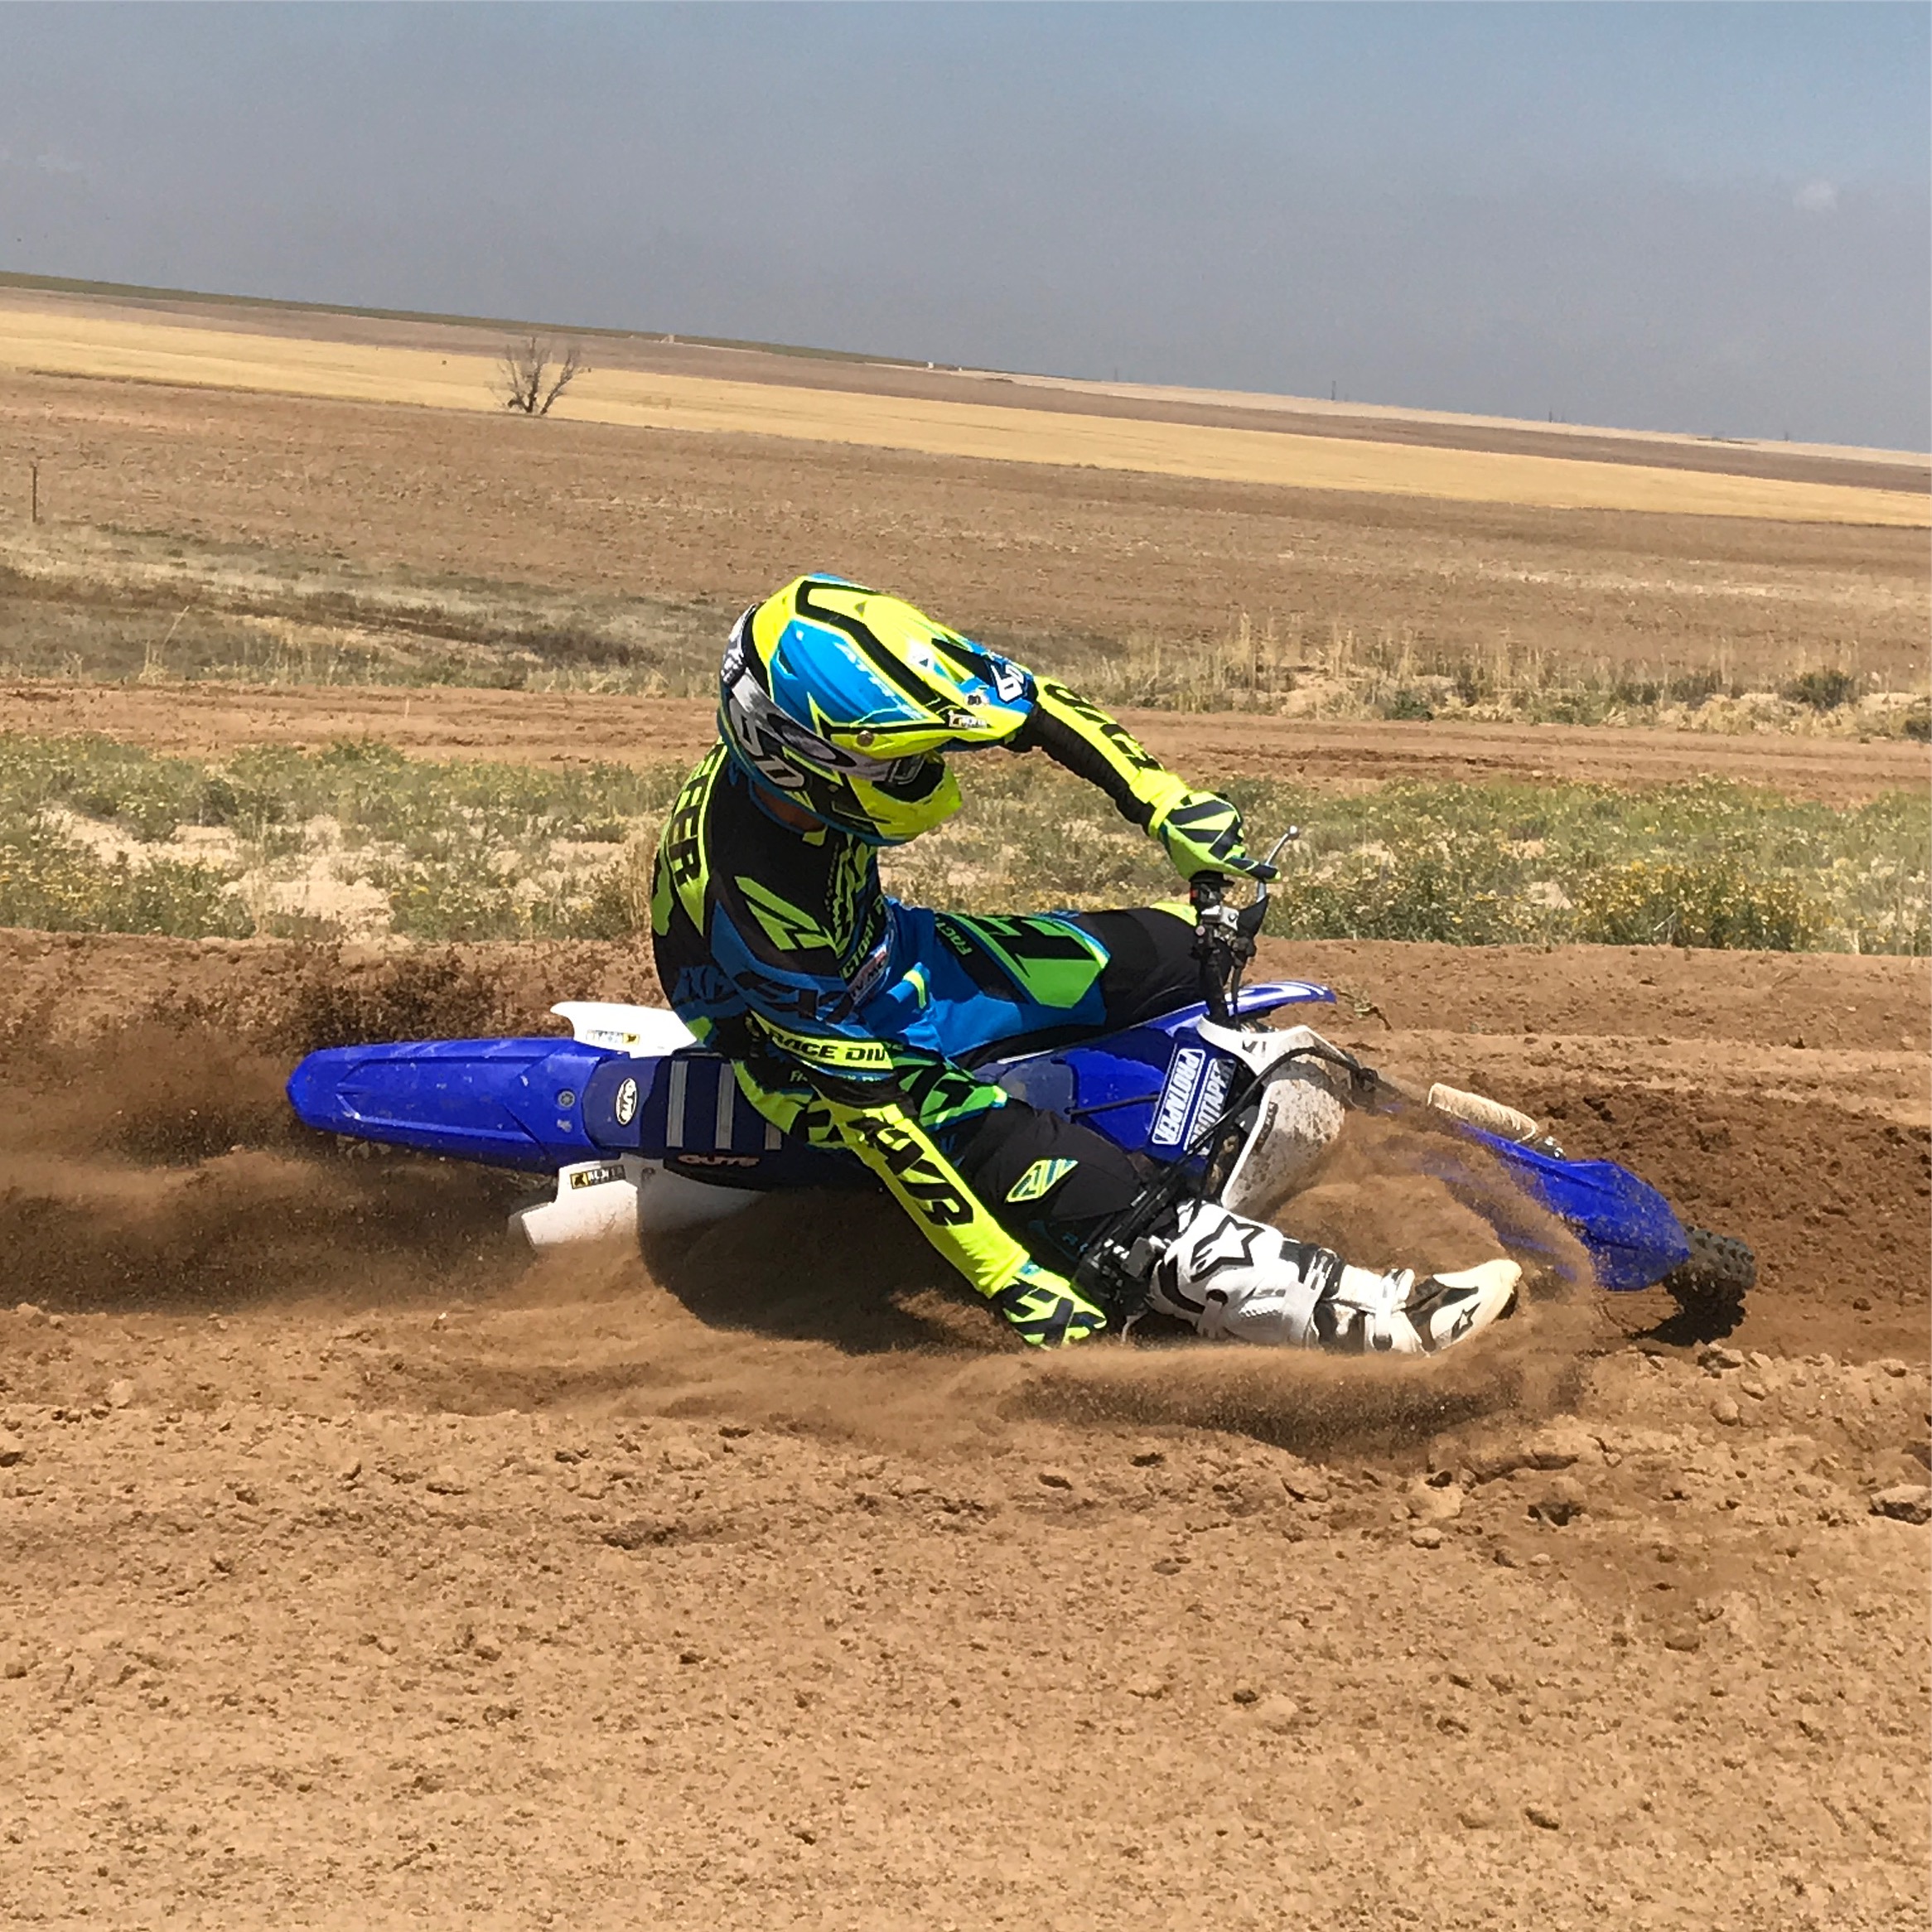
I have been on a Pirelli Scorpion MX32 Mid-Soft testing bender while riding my 2019 Yamaha YZ450F test machine for a few months now. I have ridden plenty of Southern California tracks along with some of the softest dirt I have ever ridden out on a Colorado farm field. If you haven't listened to my podcast on “Tires 101” do yourself a favor and go listen. In the meantime while you're here you might as well read about what Pirelli's soft motocross tire offering is all about. 


IMG_8100.JPG


I found out quickly that one of the first things that impressed me the most was that the Pirelli Scorpion MX32 Mid Soft’s carcass gives the rider a ton of comfort on choppy/square edge terrain. When the track gets rougher the rear tire (120/80-19) gives more cushion than any other tire that I have tested lately. This carcass feel acts like another piece of your bike’s suspension and can really help a rigid feeling chassis become slightly better on choppy terrain. It impressed me so much that I tried it on a 2018 Honda CRF450R and it gave me slightly less of a harsh feeling that the chassis puts out on choppy/square edge tracks. Pirelli also offers a 120/90-19 size rear tire as well that I have tested, that was even better on square edge cushion feel. The 120/90-19 also puts more weight on the front end of the machine to help increase front-end steering. If you do decide to go with the 120/90-19 and feel like your rear end is too high after installation, I do recommend lowering your fork in the clamp by 1-2mm to prevent a high feeling rear end (stink bug). The Pirelli MX32 Mid-Soft rear tire offers great traction on soft/intermediate terrain through ruts and coming out of soft corners. The MX32 works well under lean angle and that lean angle traction is one of Pirelli’s rear tire strong suits, as the rider is able to get on the throttle sooner (while leaning) without washing out. You are also able to start your lean sooner (compared to a MX3S) coming into a corner and the Scorpion remains planted to the ground. Braking predictability gives the rider confidence to pivot and throttle out of flat corners without much hesitation. If you’re a predominately a front end steering rider the Scorpion MX32 rear tire will provide you with less sliding ability and let you steer with the front tire more. If you're a rear end steering rider that likes to drift the back end around this tire may not suit you as much as a Bridgestone X20. The only complaint I had is when the track surface was on the harder side, I could feel the side of the tire carcass roll when accelerating from flat corners. This gives me a pushing or loose feeling rear end that caused me to be more ginger with my throttle hand. To combat some of this it’s very important to run the correct air pressure (between 13-14 psi) for the Pirelli’s soft carcass. I do notice that when the Pirelli tire gets half worn the performance also doesn’t suffer as much as with a Dunlop MX3S rear tire. Chunking wasn't an issue with the set of Pirelli’s I had as I got well over 10 hours on a rear tire. You will also have to understand that Southern California conditions are much harder than east coast conditions so lifespan would dramatically go up in softer east coast based dirt.  


Farm Dirt Bros.

Farm Dirt Bros.


The Pirelli MX32 front tire is great for front-end feel and lean angle traction especially in heavy dirt. The softer the dirt the more responsive this front tire is. However, it can at times be almost too grabby, but for me, I prefer a tire that really digs into the dirt and lets you carve underneath blown out berms or ruts. The Scorpion MX32 Mid-Soft front tire actually makes the steering feel heavy at times because the tire is at maximum grip under initial lean in corners. Like I mentioned above, the MX32 is tailor made for a front wheel steering rider and can be leaned into corners earlier than you would come to expect. The only other front tire that has as much front end lean angle traction is a Michelin Starcross 5 Soft. This Pirelli front tire does suffer from predictability when the track is freshly watered and was broken in/slick on top. The MX32 would give the front end a vague feel (un-predictable) as the bike would have a tendency to push unexpectedly through flat corners. To me this is a pure soft natured front tire and if the conditions are soft to loamy this tire works great, but if the track gets hard pack, you will get some uncertainty when pushing the front tire’s limits. The wear of the MX32 front tire is superb and unlike most soft terrain tires the Pirelli will NOT chunk. I typically get 10-12 hours on a MX32 front tire before I start to see some of the performance life start to dissipate. This is a performance based tire and should be purchased knowing this. 13 psi is a good baseline for this tire, but be sure to check the pressure after a couple motos. Tire pressure will rise with heat so make sure to have a good tire pressure gauge handy in the tool box. 


Farm Dirt Bros.

Farm Dirt Bros.


The Pirelli Scorpion MX32 Mid Soft has quickly become one of my favorite sets of tires when I am going to a softer type of track. Just be forewarned that the MX32 front tire is more finicky in hard pack conditions than the rear, so I typically have a MX32 Mid-Hard front tire with me handy for late afternoon sessions. Pirelli is quoted by saying “we race what we sell” and although I am not completely buying in on that saying, I will say that the MX 32 Mid-Soft tires are one of the best at getting performance and durability/longevity weaved in together. 

FCP Racing Titanium Engine Mounts (2018-2019 YZ450F)


Out of all of the aftermarket parts I test, on any machine, it is the easiest to dissect what is good and what is bad on the Yamaha YZ450F. Why? Probably because it’s one bike (out of three) that I like to ride the most, so I am hypersensitive to any slight changes to any of those three machines. When I get to “choose” which bike I want to ride when I don’t have to “work”, a blue bike is usually one of those machines. 

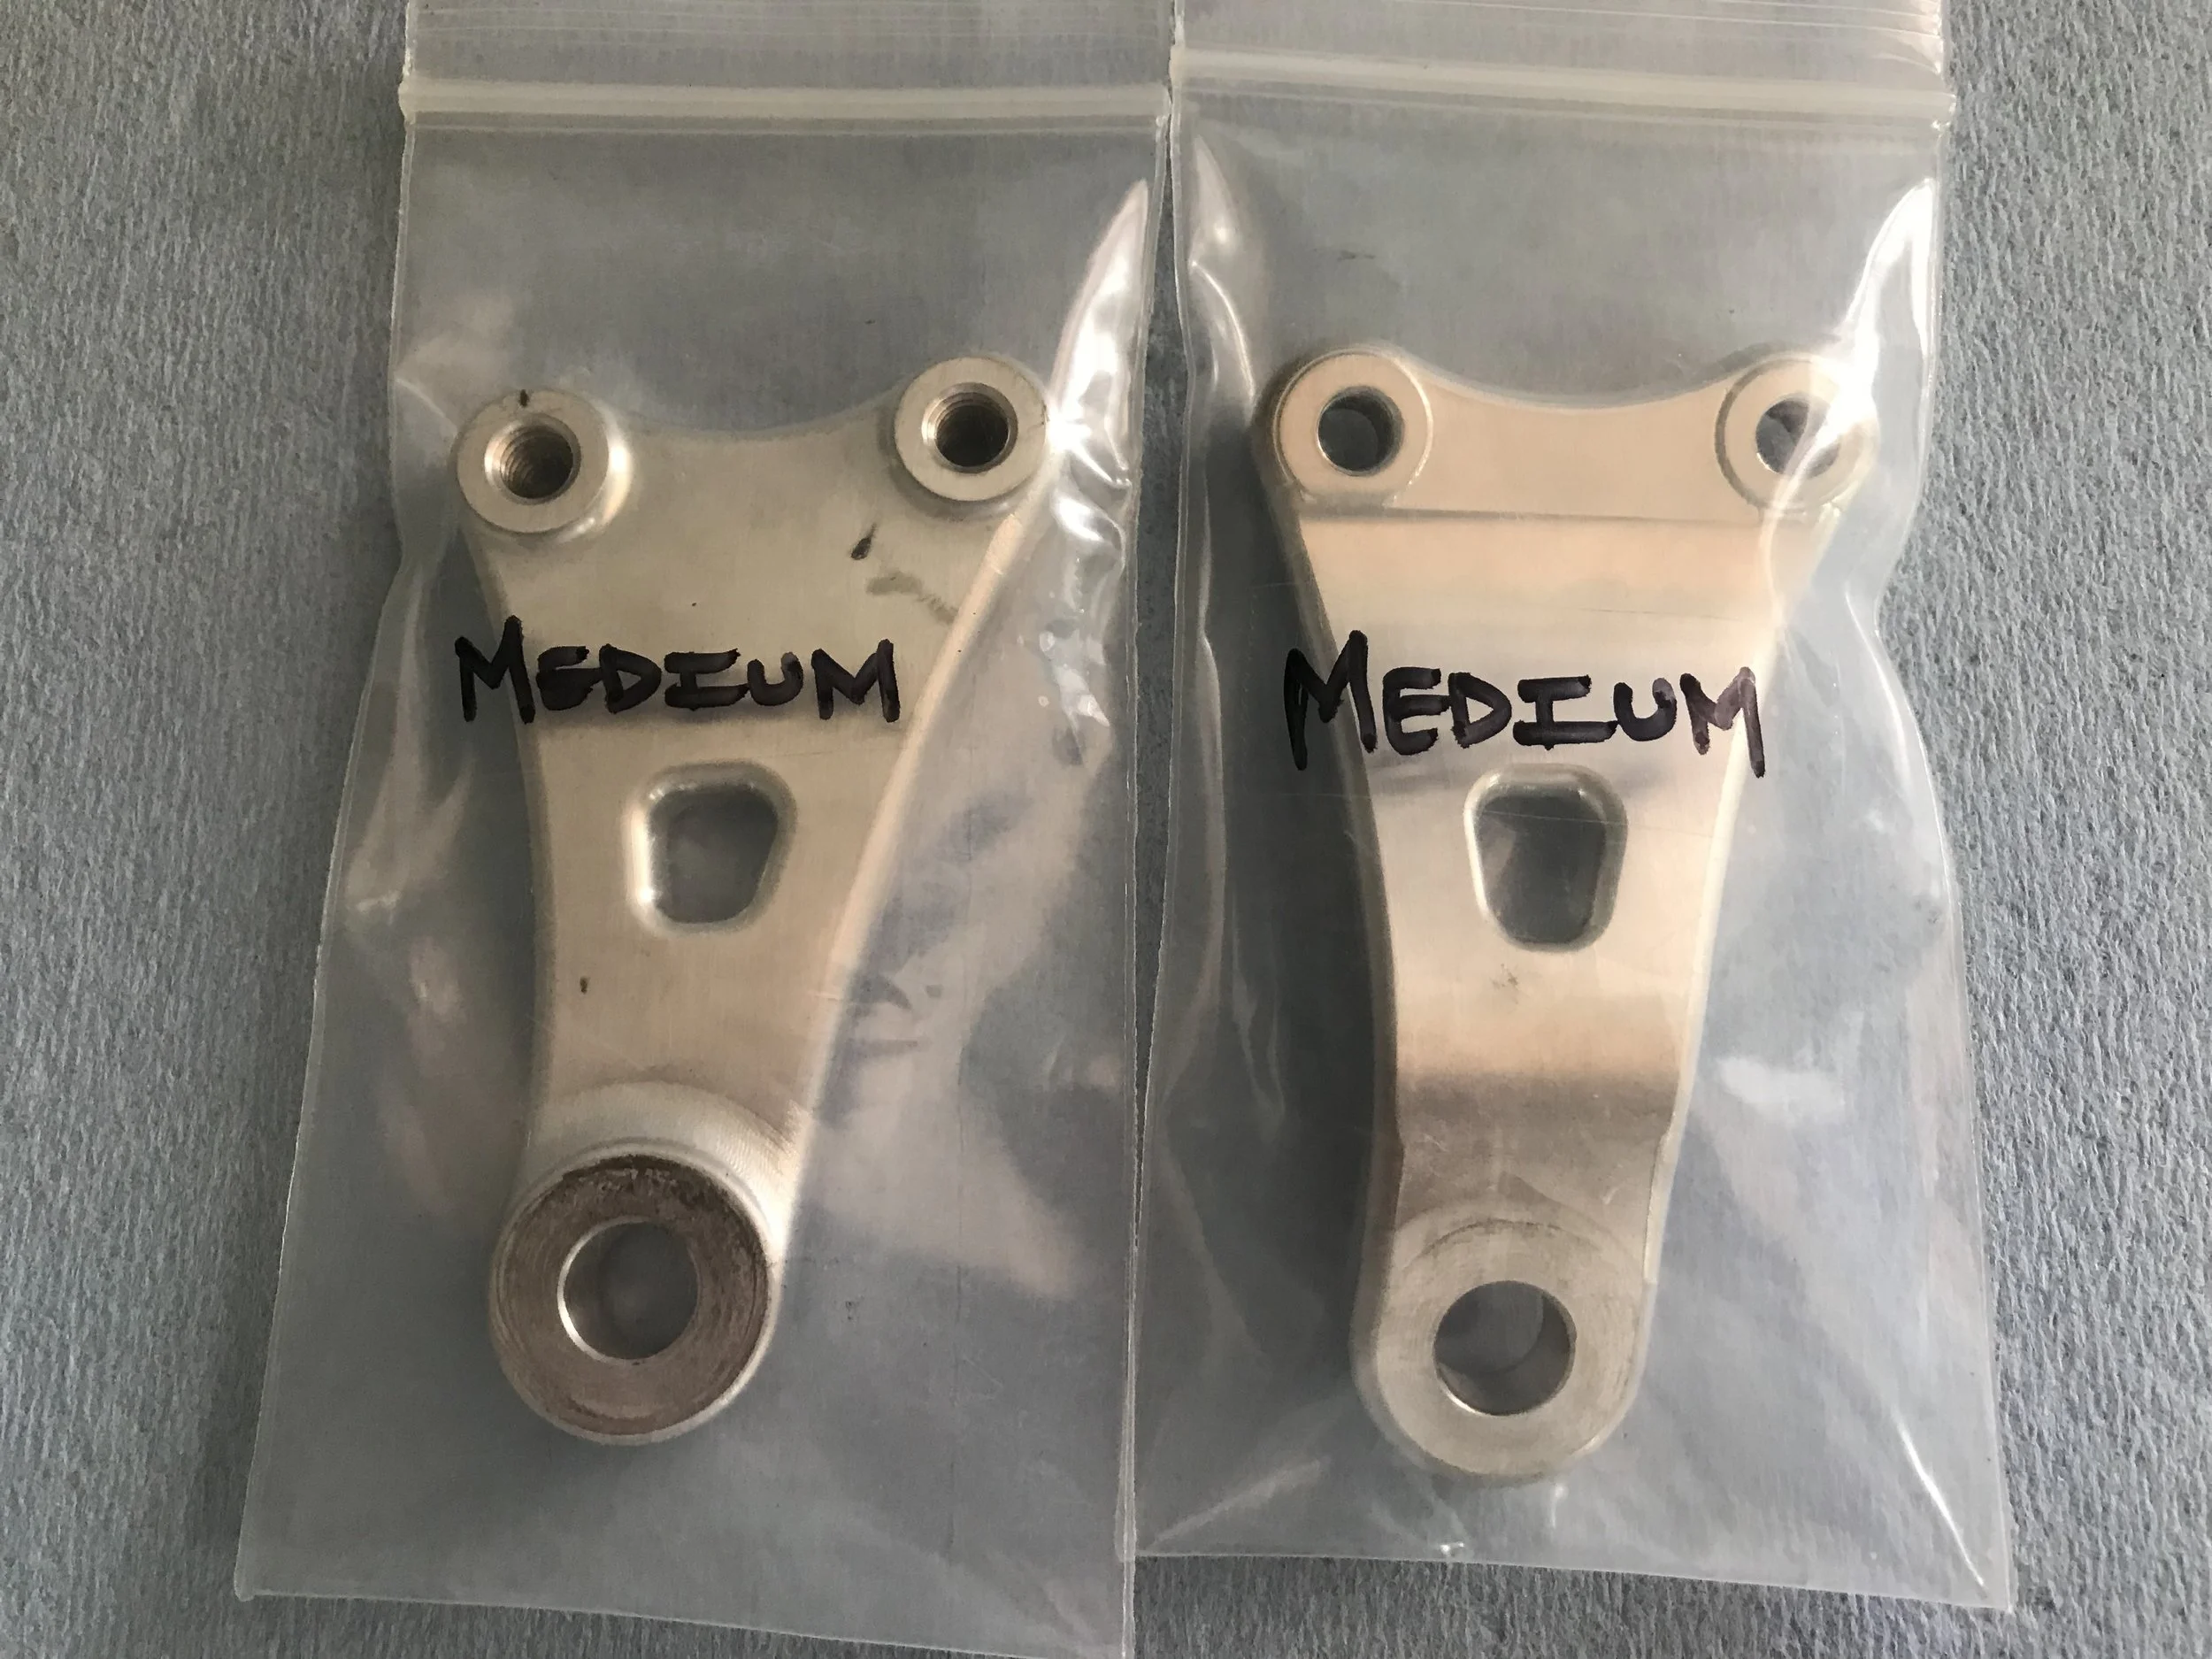
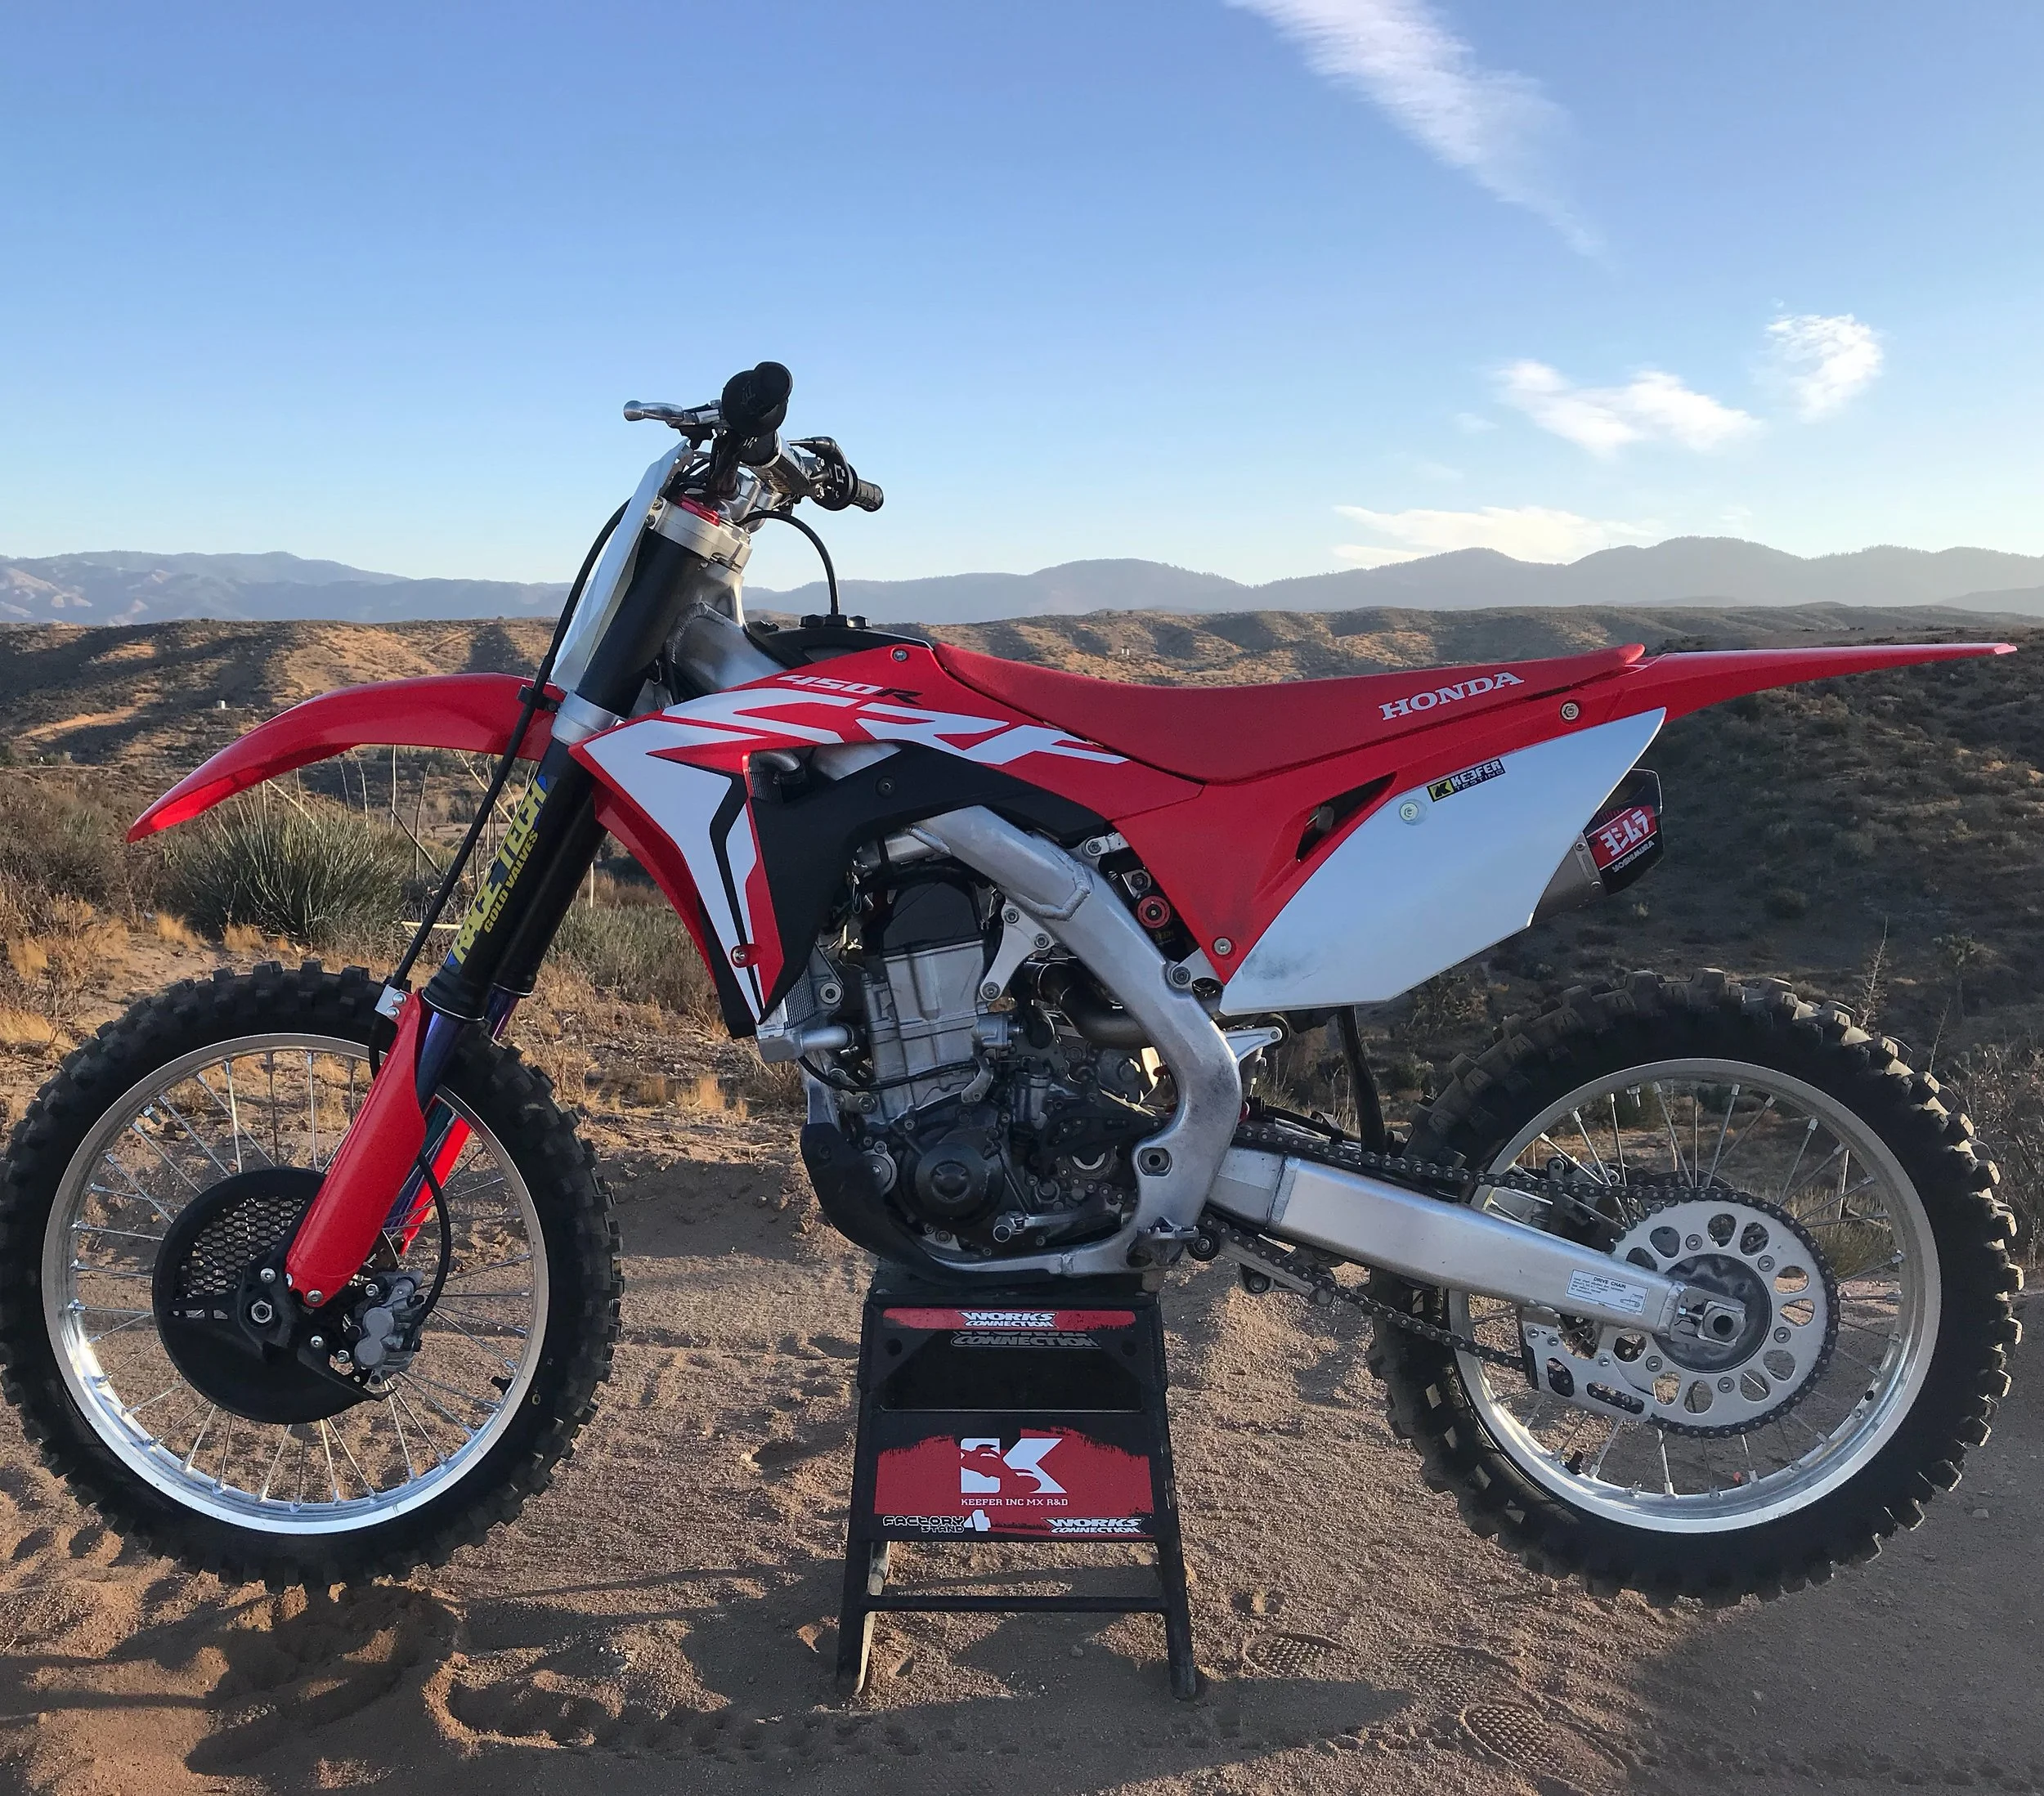
I tested the FCP Racing engine mounts on the 2018 Honda CRF450R a while back and was impressed with the positive changes that it made on the red bikes chassis balance. When I was presented with some titanium engine mounts for the 2018-2019 Yamaha YZ450F, I of course jumped at the chance to see if it made one of my favorite bikes even better. FCP offers titanium front mounts in soft, medium and stiff for the 2018-2019 YZ450F and I tried all three over the course of several months. Not only did I test at the typical tracks here in Southern California, I even spent time with all the mounts in soft, farm-fresh, deep dirt in Colorado. All you east coasters out there, I got you covered on this one ok! I understand that in most cases what works here for us in California might not work there for you on the east coast. This is why I made sure that I tested these mounts in very deep conditions to really get a full coverage evaluation.  


IMG_0035.jpg


For my weight and ability I can rule out the soft titanium mounts as it makes the bike flex too much (especially on soft dirt) coming into corners (on de-cel) and left me with a vague feeling front end. Maybe if you are a super lightweight rider (under 140 pounds) and wanted some added straight line stability (on-throttle) this could be good, but for what I was looking for this wasn't a good setting. 


IMG_0033.jpg


My favorite set of mounts were the medium titanium mounts as they improved lean in coming into corners and gave me increased front wheel traction. If you are still feeling a vague feel on the 2018-2019 YZ450F through corners these mounts can get you some added front wheel traction. I also noticed an increased tracking ability when landing off jumps when immediately having to turn the bike. Imagine a jump that is immediately followed by a sharp 180 degree corner (with ruts). You must land and immediately find a rut to get into and make the corner. Sometimes this can be tough with the stock mounts of the YZ450F, but this is where the medium titanium mounts improve tracking because it makes the YZ450F feel even more planted in these types of conditions. This allows the rider to get on the throttle sooner (after landing) and lets you lean the YZ450F over through the corner easier.  Another improvement was though flat corners with no rut or berm to bank off of. The 2019 YZ450F is slightly improved in this area (over the 2018), but if you have a 2018 and are looking for increased front end bite through flat corners, these medium titanium mounts can help you with added traction. If there is one negative to these medium titanium FCP mounts it’s that I noticed a slightly stiffer feel (near head tube) when the track gets hard pack and square edge. This isn't a huge difference, but I do want to note that I did feel a slight change. That slight stiffer feel that I experienced gave me a little more deflection (on-throttle) in the front-end (fork). I am going to experiment with some fork settings (updated valving) to see if I can tune this out. I consider these titanium medium mounts an improvement over the stock pieces and if the stock mounts were a baseline 3 the titanium medium mounts were a 3.25. 


IMG_0036.jpg


The stiff titanium mounts only increased that stiff head tube area feel and the YZ450F lost some of that comfort that makes it so appealing to ride. I feel like these mounts are geared towards a bigger sized rider (over 220 pounds) or someone that is racing Supercross. The stiff mounts did increase lightweight cornering feel and also helped side to side movement (“flop” or “tip in”), but for the average consumer I feel like this is too much in the wrong direction. 


After spending a couple months riding back to back with the stock mounts and the FCP Racing titanium mounts, I have come to the conclusion that this is a great option to make your 2018-2019 Yamaha YZ450F react quicker and increase tracking into ruts. For $199.00 plus shipping, it’s not so expensive where you're breaking the bank or pissing off your wife by making the purchase. The bad news is that FCP Racing only has an Instagram (@fcpracing) and Facebook (FCP Racing) page which can make it difficult for old school fellas to purchase. Contact them through direct message and they are usually pretty good about getting back to you ASAP.  


If you have any questions about this product please feel free to email me at kris@keeferinctesting.com or if you see me at the track, come up and ask away! 

FMF 4.1 RCT Titanium Muffler System (2019 Kawasaki KX450)

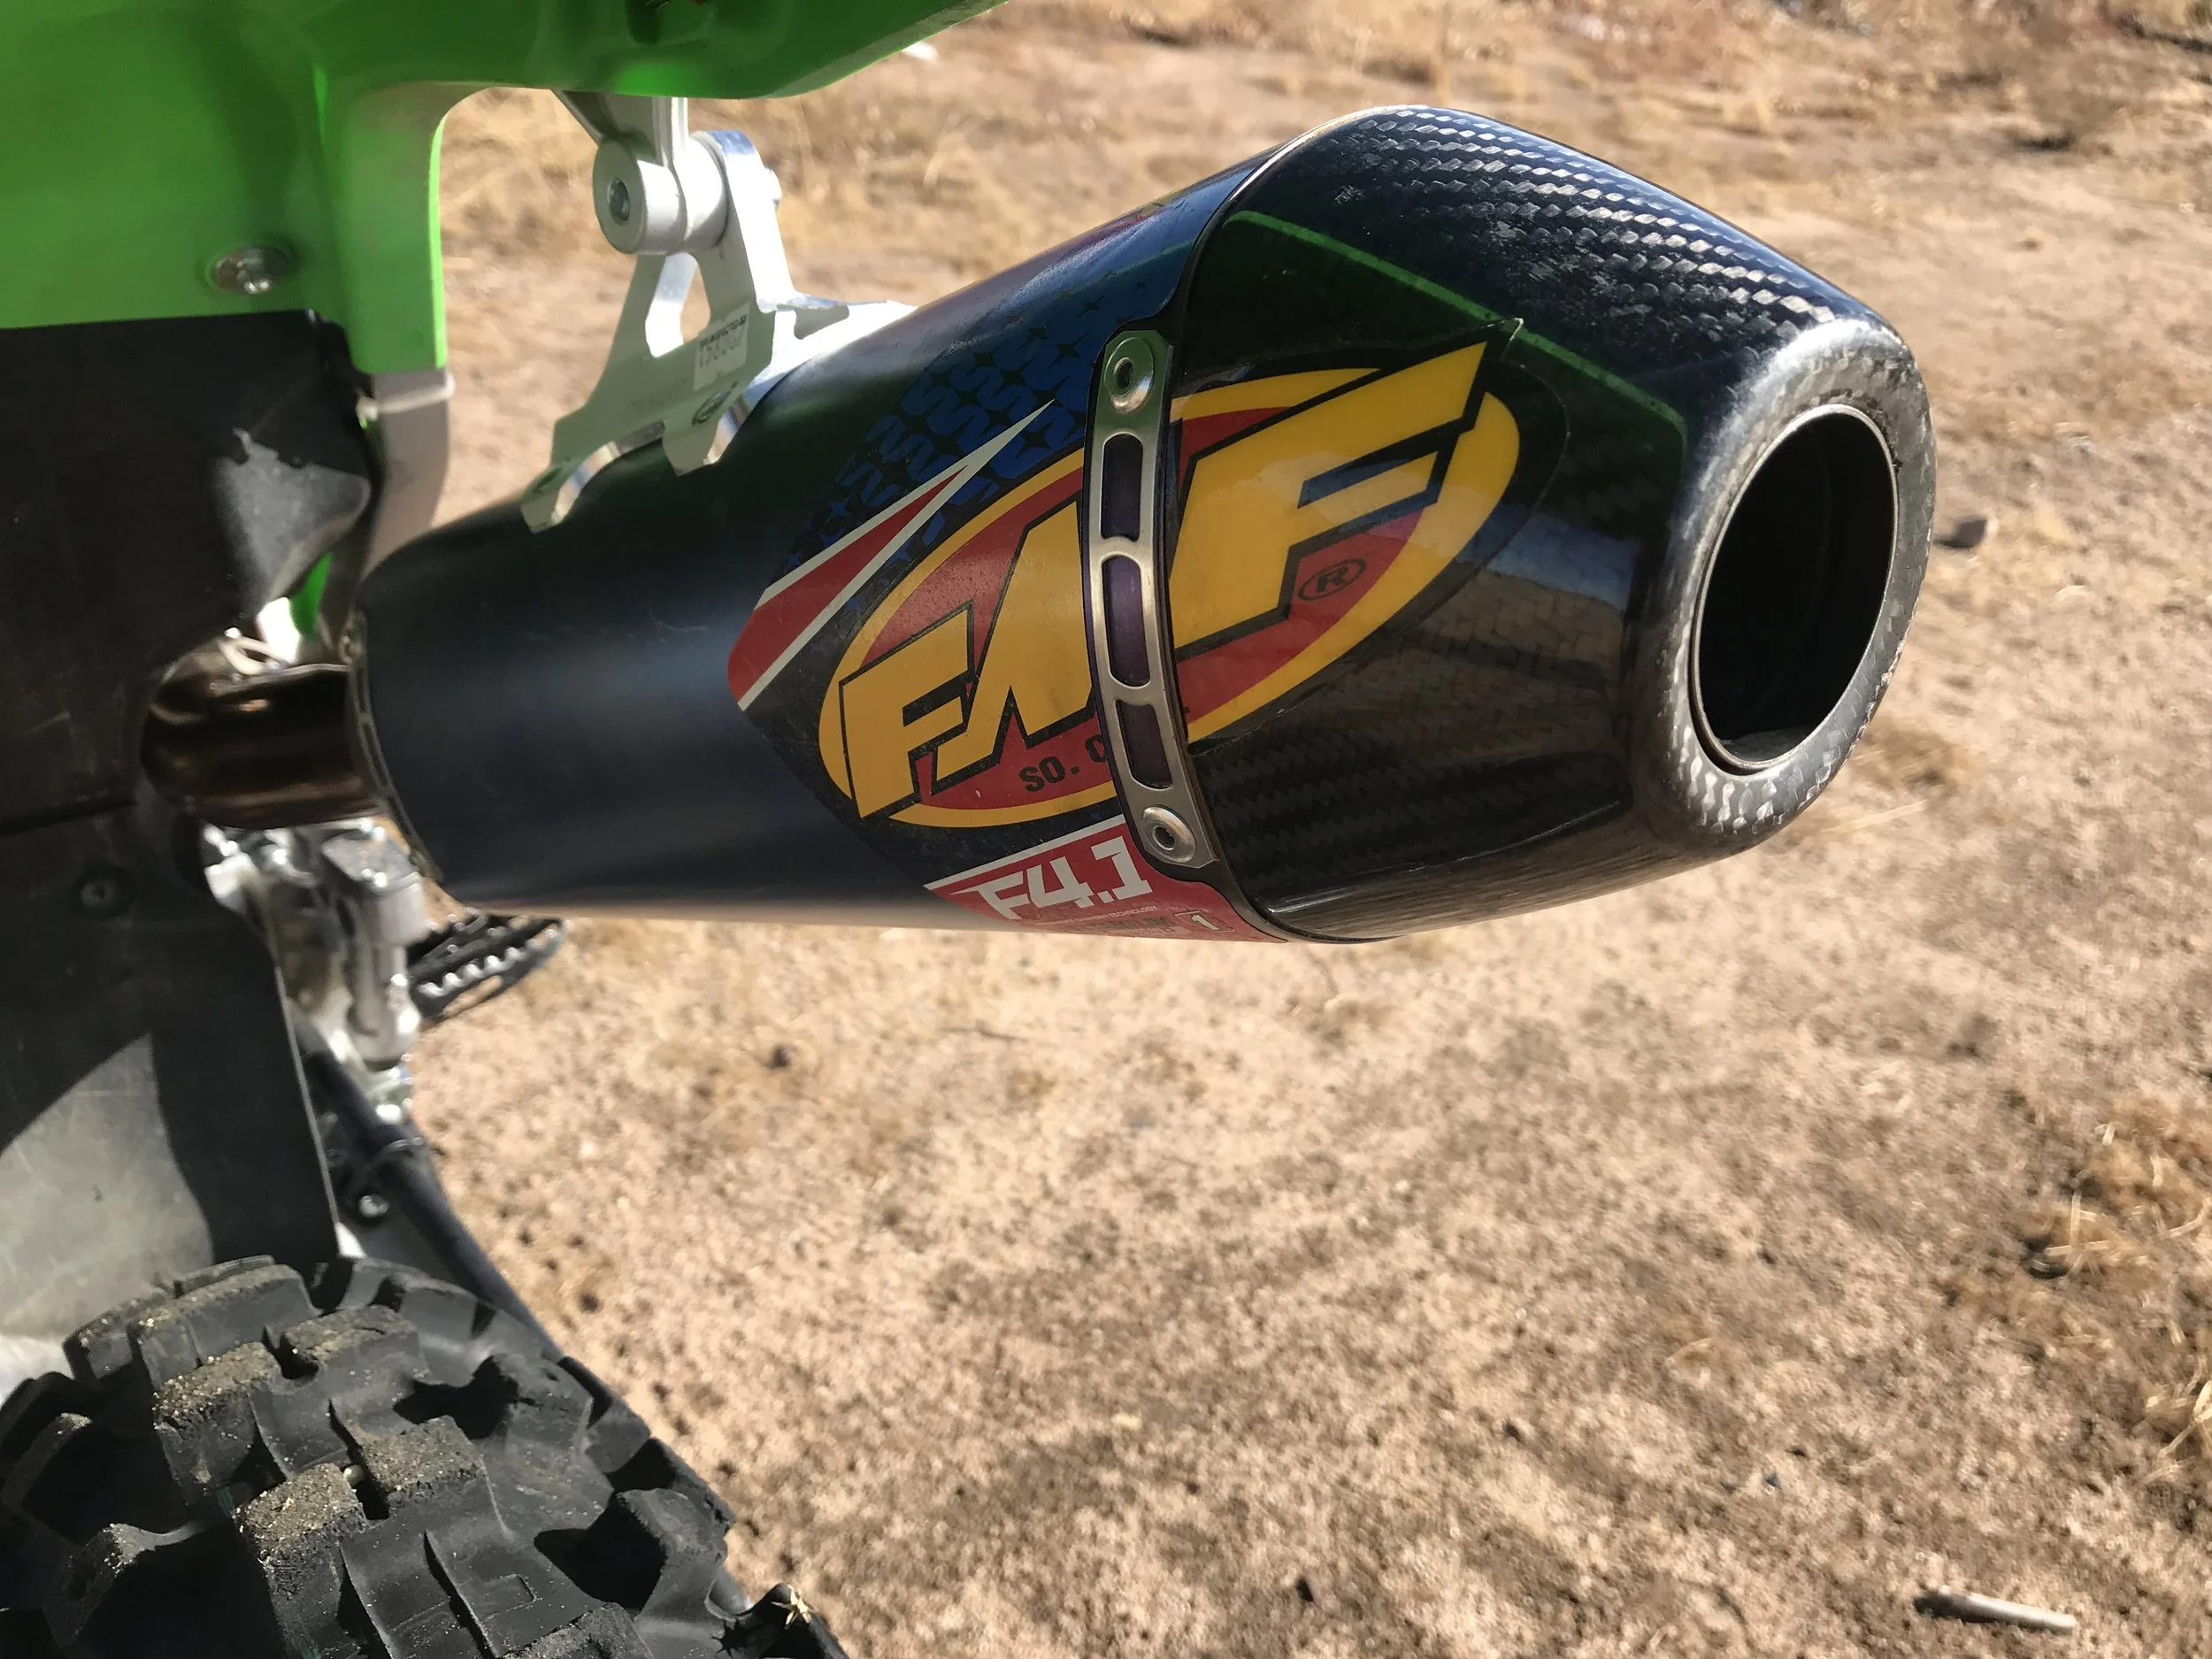
The 2019 Kawasaki KX450 is the most improved machine of the new year, hands down! It has a very responsive engine character, comfortable suspension, a lightweight feel and cornering that is very neutral. I will be the first one to admit that I get nervous about sticking on any type of aftermarket muffler system when I really like the stock power curve of any machine. Sometimes aftermarket mufflers are just smoke and mirrors. They are lighter, titanium, look cool, but in the end they are no better than your heavy, ugly, big stock muffler. While I was testing the 2019 KX 450 earlier this year I could hear this little voice inside my head say “it’s going to be tough to make a muffler that is better than this stock one”. Fast forward to a few weeks ago and a shiny new FMF 4.1 RCT titanium exhaust shows up at my door, to be evaluated on the green machine. I sat on it for a week knowing that this new, shiny, lightweight piece of FMF artwork might not be better than the current monstrosity that is on the 2019 KX450. Nonetheless I installed the FMF system (which was easy I may add) and headed to the track to give it a go. 


IMG_9952.jpg


The stock power curve of the 2019 KX450 engine has a snappy throttle response (with a free feel to it) and at times can almost be too much through corners with the standard green coupler installed. Once rolling on the throttle and passed the corner, the power is not quite as strong as the Honda or Yamaha, but still creates a easy to ride power feel on the track. I didn't necessarily need more rpm response with the 2019 KX450, but I wouldn’t mind some more meat through the mid to top end range. Bolting on the KX450 FMF Factory 4.1 RCT system is by far the easiest system I have installed on any 2019 machine. Installation literally took me through two full songs on the “Classic Rock” station on Pandora. Not bad! The 2019 Kawasaki is a light bike stock, but FMF sent me the full titanium system, which dropped the Kawasaki’s weight by 2.9 pounds from the stock system! To me the titanium FMF 4.1 system is one of the most stunning aftermarket mufflers you can put on any bike. I love the blue anodized finish as it looks good on almost every make and model machine there is.


FMF builds great looking mufflers! 

FMF builds great looking mufflers! 


On the track the FMF 4.1 makes a slightly smoother bottom end power delivery, but keeps that exciting RPM response. Where most of you will feel your hard earned money is in the mid range pulling power when exiting corners. The stock system feels empty in this area, but the FMF fills in the power through the mid-range. What I mean by “fill in the power” is that the FMF system actually feels like it is shooting forward, as soon as you shift into third gear, unlike the stock Kawasaki’s power where it lacks some “meat” through the mid-range. The FMF 4.1 increases that mid range area and gives the rider some more freedom to be lazier in third gear. That is great news for all you vet riders out there, trust me! Top end is also increased slightly and you get increased pulling power near the end of each straight with the FMF. Over-rev is slightly increased as well with the 4.1 (over the stock muffler) as I could leave the KX450 in second and third gear slightly longer. The one downside to me is that it is loud sounding (compared to the stock system). It has more of a deeper/throatier pitch to it, which makes it sound louder than the stocker. 


I tested couplers along with mapping with the Kawasaki R&D guys and came up with a couple options for you (see attached maps). The white coupler map is better for bottom-mid range power, but the black coupler map is slightly better from mid to top end (the black coupler map is what I am running now). The good news is, unlike last year, the 2019 KX450 FMF 4.1 system will not have that de-cel popping with either coupler (along with these installed maps), which is a huge plus when it comes to a clean ignition/fuel mapping power feel.


Black Coupler Fuel Map 

Black Coupler Fuel Map 

Black Coupler Ignition Map 

Black Coupler Ignition Map 

White Coupler Fuel Map 

White Coupler Fuel Map 

White Coupler Ignition Map

White Coupler Ignition Map


At the end of the day the FMF 4.1 RCT full titanium muffler system delivers a smoother roll on bottom end delivery with a mid to top end puling powerl that is better than stock (along with improved mid-top end RPM response). I will say this again….Being able to achieve a power delivery that is better than what an OEM muffler system can give you is very hard to do. FMF has achieved this with their 4.1 system on the 2019 KX450. Not only does it make power, but it also takes off some weight and looks better than the stock bazooka. I wanted some added control down low and more mid range (on the 2019 KX450) so with this FMF system I got what I was looking for. I am not going to sit here and tell you guys that every FMF system, for every machine is better than stock, but with this one they knocked it out of the park. Don't be scared to try the maps that are attached above, because with today's four-stroke technology, getting the correct mapping for a certain muffler can really make a difference. 


IMG_9967.jpg


Attention mechanically inclined riders!!!!! Please note that re-packing of the FMF muffler is important for the can’s lifespan. The muffler portion (or can) will start to leave hot spots/scarring when the packing starts to burn away from inside. Once you start seeing these “hot spot/scars/markings” on the muffler, remove and re-pack it ASAP. FMF offers re-packing kits and taking the can apart to re-pack is not that hard to do. I get around 12 hard engine hours before I see these markings and have to re-pack. If you run it past the recommended time, you run the chance of hurting performance and damaging the core (or perf) inside the muffler. Don’t be a dummy and waste your money, re-pack your muff! 


If you have any questions about this test please email me at kris@keeferinctesting.com

Brake Tech Cobra MX 270mm Front Rotor Product Review


It seems like a lot of guys purchase aftermarket front brake rotors for their new bikes, so I decided to throw my hat into the ring and see what all the fuss is about. I asked Keefer if I could try out an oversize brake rotor to test, just to see if I was able to feel a difference. I am just your typical blue collar electrician that loves to ride, but could use some more braking power on my 2018 Honda CRF450R. He graciously handed me the Brake Tech CobraMX 270mm front brake rotor to evaluate and the task began.

Brake Tech has been around for a while, but maybe you're not familiar with the brand? They have years of R&D in brake rotors and brake pads with most of their effort being on the street racing scene. Having great success with street bike rotors, Brake Tech turned their focus to the dirt. Their newest product being the Cobra MX front brake rotor and it shares a lot of similarities with their already established AXIS road race rotors. The AXIS road race rotor is a full-floating front rotor where the Cobra MX rotor is what Brake Tech calls a semi-floating front rotor. When it comes to rotors there are a couple different avenues you can pursue; a fixed rotor, which is a one piece rotor, a full-floating rotor, which is a two piece rotor mated together with ground down shims, which allows the outer rotor to flex. Semi-floating rotor’s like the Cobra MX use ground down shims and spring washers. This allows you to have more stability under braking like a fixed rotor yet have the benefits of a full-floating rotor. Being made of two metals is said to aid in warping under high heat as well as a lighter weight. The Brake Tech rotor is cryogenically treated along with being fully re-buildable. Also a nice bling feature is that you get your color choice on the bobbin rings as they come in color choices of red, blue, black and KTM orange.


IMG_0109.jpg


Just like a lot of you blue-collar guys out there I get super excited with any new part for my dirt bike, so as soon as I got the box, right to the garage I went to install the nice looking piece. Installation was very easy and if you can change a wheel on your bike, you can easily install this rotor. Just like “if you can dodge a wrench, you can dodge a ball” (Dodgeball The Movie quote in case you didn't know). You will use the stock bolts and other hardware to mount the new rotor and caliper bracket. You can use your stock brake pads, but Brake Tech does recommend using a set of Brake Tech’s Ferdo brake pads. As I set out for my first laps I immediately noticed that the lever had a firmer feel over the stock rotor. At first this was a feeling I was not too fond of as the stock set up is very grabby and makes it hard to modulate the braking power through corners. As I did my motos I began to feel more benefits of the new Brake Tech rotor (even with the firmer feel) as it was not quite as grabby when you first apply pressure to the lever. Where I really felt like the Brake Tech rotor shined was under heavy braking. As I ride my motos I tend to get a little excited from time to time and come in a tad too hot into some corners. Where the stock rotor would lack a little stopping power the Brake Tech unit had great stopping power at high speed. You didn’t have to pull the lever in quite as much to get the Honda stopped in a hurry. This gave me a little more confidence and did allow me to charge harder into corners. With the Brake Tech rotor (under heavy braking) I would give it a “3.5” on the “Keefer Testing Scale”over a baseline “3”


IMG_0111.jpg


I give Brake Tech kudos on the Cobra MX front brake rotor and give it a solid 3.5 on the Keefer scale (If you don’t know what the Keefer testing scale is head over to the “Keefer Tested Podcast” and listen to his “How to Test” episode in the archives). As a hard working laborer I like that the Brake Tech Cobra MX rotor is durable as well as re-buildable. This is money saver in the long run for us 9 to 5’ers because we actually have to save up our money for every upgrade to our trusty steeds. If you damage a part of your rotor send it to Brake Tech and they will rebuild your rotor (labor free) and you will only be forking out the money for the damaged parts that were replaced.


We tried the Brake Tech rotor in conjunction with the Ride Engineering Brake Caliper as well and found the front brake lever to be slightly less firm, but even more powerful under heavy braking. The front brake lever had more of a progressive pull t…

We tried the Brake Tech rotor in conjunction with the Ride Engineering Brake Caliper as well and found the front brake lever to be slightly less firm, but even more powerful under heavy braking. The front brake lever had more of a progressive pull to it with the RE Brake Caliper installed. Without the RE Brake Caliper installed the lever has a firmer feel to it as Matt Sirevaag explains in this test. Either one of these products (by themselves) will help braking power on your machine. You will just have decide on how much stopping power you need.  


The Brake Tech Cobra MX rotor kit retails for $339.95 and the brake pads for $59.95. This price is on par with most oversized rotors on the market as I did some research before typing out this article. Brake Tech is another great option if you are in the market for more braking power. Head over to BrakeTech.com and check out their selection of brake rotors and pads. -Matt Sirevaag 205 Pound Novice (Full Time Electrician/Husband/Father/Dirt Bike Lover)

If you have any questions about this test please feel free to email kris@keeferinctesting.com 


2019 Kawasaki KX450 Clutch Mod

Do you have a 2019 Kawasaki KX450? If so, we are here to give you a little inside knowledge. The new 2019 KX450 is one great machine, but the doesn't mean it is perfect right? On our test bike we have experienced with some clutch drag and clutch lever movement when riding. Under heavy load (or acceleration on deeper tilled tracks) the clutch on the 2019 can drag and or the clutch lever can move. This is not something we liked, so we went to work with Kawasaki to remedy this problem. 


IMG_9801.jpg


If you are reading this and you haven't felt any of these sensations while riding then DO NOT WORRY ABOUT IT. If you do notice a drag or lever movement, simply take the judder springs and narrow fiber plate out of your clutch and replace it with a standard fiber plate (as shown). That's it! Once this mod has been installed, the lever was much more consistent and the drag we felt out of corners was gone. Not only was the drag gone, but we also noticed that rear wheel traction was increased a little as well. It's a cheap fix and relatively easy to do. Enjoy your green machine!  


IMG_9802.jpg

Ride Engineering Billet Front Brake Caliper


I feel one aspect of a bike’s performance that is often over looked is the brake system. Most of us including myself have over looked this area more times than not. Some of us typically will go buy a new or used bike, drop money on an exhaust, wheels, graphics and maybe even race fuel. After all when you spend almost ten grand on a new bike you think the brakes are top notch off the showroom floor right? Or in my case, feel that you are not fast enough to notice the benefits of an aftermarket brake system. When Ride Engineering sent us there Billet Front Brake Caliper and steel braided brake line I was excited to give it a go. I was anxious as I felt this was my chance to see if this would be money well spent, even for the average blue collar, nine to fiver like myself. Keefer was nice enough to let me test this part and I gave it a go to see if this is something I would want to spend my own hard earned money on. Maybe more importantly, would I even notice a difference? 


IMG_0111-2.jpg


 The Ride Engineering Billet Front Brake Caliper is born from billet aluminum. Being made from billet aluminum instead of cast as most stock/production calipers are made, gives the Ride Engineering unit a stronger, less flexible body. This helps with a more precise feel at the lever while riding. It also has larger pistons than the Nissin units (that comes stock on most Japanese bikes). The Ride Engineering Billet Front Brake Caliper also incorporates large fins to help dissipate heat and aid in cooling when hard on the brakes. It comes in black or a polished aluminum finish, utilizes the stock brake pads and hardware for your bike. Ride Engineering offers this caliper for most bikes that use Nissin units like Honda, Kawasaki, Yamaha and Suzuki. 

We tested the Ride Engineering billet front caliper on our 2018 Honda CRF450R test bike, which just so happens to be the same bike I own as well. Booya!!!!! When it arrived I was so excited that even after a long day at work, I rushed home and went right to the garage to install. Yes, I still get excited about new parts for my dirt bike even in my mid thirties. The Ride Engineering Caliper takes a little time to install as you need to attach your old brake line or you can purchase a steel braided line from Ride Engineering like we did. Bleeding is not as much of a hassle if you own a vacuum bleeder, but in my case, I don't have one, it’s a little more difficult because I have to call on the wife or kids to help me bleed, old school style.


IMG_0109.jpg


 My first test with the Ride Engineering Caliper and Steel Braided Brake Line was at a local moto track that I am very comfortable with. When hitting the track it took a couple laps to get the hang of the new found feeling at the lever. Upon my first on track assessment I honestly thought I had a slight mushy feel at the lever, but as I started to pick up the pace I was mistaken. The feel at the lever was not mushy or soft but a far more progressive feel. This made it a lot easier to modulate the braking power coming into corners. The stock set up has a very firm feel and at times the braking can feel very grabby. This always made me feel uneasy, scared to cover the front brake (while in a corner) and especially in any sort of deep rut. I felt like I would almost lock up the front brake if there were any rocks, bumps or any inconsistency within the rut. The Billet Front Brake Caliper and its progressive feel at the lever gave me much more confidence everywhere on the track. Now I was able to modulate the braking as well as keep my finger on the lever throughout the whole corner without it being to grabby. This helped keep the Honda’s front tire from lifting out of ruts, which happens often with me. Don’t for one second think that there is not a lot of stopping power to go along with this progressive feel. I never felt as if I was lacking braking power or wanted more front brake. The harder you pull in the lever the quicker you stop and you are able to tell that you have more braking power available over the stock caliper within a lap or two. I also noticed a more consistent lever pressure no matter how long my moto was. I had some fading with my stock front brake, but fading wasn't as apparent with the Ride unit. 


IMG_0112-2.jpg


As you can see even the everyday nine to fiver can benefit from some better braking. I was quite surprised at what I have learned in testing this product. This is definitely at the top of my “to buy” list behind hand guards (Sorry Keefer) when I save up my pennies to buy my next bike, which is soon! Shhhhhhhh. Don’t tell the wife! The Ride Engineering Billet Caliper retails for $399.95 and the steel braided brake line is $69.95. Add that up and that is less than an aftermarket exhaust, but yet actually lowered my lap times, increased my corner speed and added that cool factory look to my bike. It was a Win.Win. -Matthew Sirevaag, 200 lbs. Moto Novice, Full Time Electrician And Full Time Dirt Bike Lover

WP Cone Valve Fork And Trax Shock For The 2018.5 Husqvarna FC450 Rockstar Edition


I have been riding the 2018.5 Husqvarna FC 450 Rockstar Edition A LOT. Over the course of only a few months I have over 50 hours on the test unit I have. I am in love with how well it works on the track, how easy it is to ride and how light it feels through corners. Yes, that’s right even with the WP 48mm AER fork it is still pretty damn good. However, I can’t leave well enough alone and must tinker with things to see if I could get the white edissssshhhh even better than where it’s at currently. I called the guys at WP to see about getting a set of their Cone Valve Fork’s and Trax Shock to see if this sucker can improve even more. The Cone Valve fork and Trax shock is basically WP’s A-kit option for us average dudes out there. Yes, it is expensive, but if you are in the market for close-to-factory level suspension, it is considerably less money than the Showa A-kit sets that are for sale. The Cone Valve fork and Trax sock can be purchased at any authorized WP dealer. Your dealer then can get you your own valving set up, but for this test WP valved my stuff for me directly. WP even offers the Cone Valve and Trax suspension for the Honda, Kawasaki, Husqvarna, KTM, and Suzuki models. So is it worth the money? I rode the stock suspension and Cone Valve/Trax set ups at several different tracks and here is what I came away with:

IMG_8714.JPG


Fork: 

IMG_8879.jpg


We are dealing with two totally different types of fork’s here, so the feel on the track is going to be completely different. The stock AER fork is the best air fork on the market, but still doesn't have that predictability over the course of a full day of racing/riding. I will find a good setting with the AER fork and it changes slightly throughout the day. The first thing I noticed when I when out on the track with the Cone Valve fork was that the Husqvarna turned slightly slower on initial lean (into corners). You can actually feel the extra weight right away in the front end, but it wasn't a bad feeling, I was just surprised I could feel it this much when entering corners. I started out with a fork height of 3mm up in the fork, but went with a 5mm height setting after I felt the slower front end lean feel. Along with the extra weight feeling however I gained more front end traction through every corner (especially flat corners). The Cone Valve fork leaves you with a more front end tire contact patch sensation and you can lean over more in ruts without getting the high front end, vague feeling like I did with the AER fork. With the AER fork I get some pushing in the front end through the middle to end of the corner, which made me roll off the throttle to try and compensate. With the Cone Valve fork I can lean in the corner and the fork stayed planted, which let my front end settle and bite. The CV fork also felt less active on braking bumps. I am able to jump in and out of bigger bumps without having the fork rebound too quick. If I wanted to pound through the bumps, the fork had a better damping control feeling through the middle to end part of the stroke. The most notable change was to my wrists when over jumping or flat landing with the Cone Valve fork. The AER fork holds up well, but I feel like it stops at the end of its stroke leaving me with a spike feeling that jolts up through my hands. With the Cone Valve fork, it’s a smoother action feel and I have less harshness at the end of the stroke than I do with the AER fork. You are getting more comfort and performance with the spring CV fork than you are with the AER. The only downside I can see from going to the CV fork is the weight (which didn't bother me after a few laps) and spending the money to switch over to spring. It’s costly! The guys over at WP have great settings that can get shared with authorized dealers if need be to get you comfortable in a hurry. It only took me got me two settings to get to where I was happy with my fork setting. 


Shock:

IMG_8878.jpg


The Trax shock gave the rear of the Rockstar 450 machine a firmer feeling than the standard shock, but it wasn’t so firm that it beat you up around the track. Unlike the CV fork, you will lose a little comfort on small bump absorption, but gain performance on bigger bumps on the track. Where the stock shock will blow through at the end of the stroke (high speed compression) the Trax shock holds up better and you are able to get more aggressive around the track. I can hit the faces of jumps harder and the Husqvarna will not give you an empty, low feeling sensation that the stock shock sometimes gave me. In order to combat that feeling with the stock shock I would have to crank up the high speed compression so much that I lost the comfort coming out of corners (and rear wheel traction). The Trax shock provides you with more high-speed damping and you still get a decent amount of acceleration comfort. I also noticed a little more connectivity to the the rear wheel (when hard on the gas) on flat corners with the Trax shock. The Trax shock is firmer so there is less wallow in the rear end when accelerating, so the rear of the FC450 tracks straighter and doesn't upset the chassis. “Balanced” is a great word to describe both ends of the Husqvarna Rockstar Edition now (with the cone valve fork and Trax shock). I have the Trax system turned “off” for my setting as I felt like it had more of a dead feeling (which is a feeling that I like). A “dead feeling” is where the bike can be pushed hard into braking bumps or square edge chop and will not move or react as quickly. With the Trax “on” the rear wheel followed the ground slightly better out of choppy ruts/corners, but reacted too quickly when coming into large braking bumps when entering corners. I would think the Trax system would benefit an off-road rider that needs his rear end to move and follow the ground more at higher speeds (think west coast off-road). I ran the sag a little higher at 103mm (rather than the standard 105mm) and this seemed to be the happy spot where the Husqvarna felt less rear end low. The Trax shock is very finicky to adjustments so make sure you only do very small 1 click increments as you will be able to feel each change you make.


If I were a Husqvarna Rockstar Edition owner (which I might be in the near future) and I was looking for that next level performance, this WP set up would be a great choice. I have always felt more of an upside going from stock to WP A-Kit level suspension on a Husqvarna/KTM than I have with a KYB or Showa A-Kit level on a Yamaha or Honda. While it is expensive to obtain these bump sticks it is slightly cheaper than other “Kit” level suspension. Remember when WP wasn’t the best set of suspension you could get on a bike? All of that is long gone now as WP has come a long way with their suspension and now one of the leaders in suspension performance and comfort. I know Matthes is sick of hearing about this bike, but I can’t wait to keep riding the crap out of this thing. The WP CV fork and Trax shock is huge reason why my Husqvarna FC450 Rockstar Edition test bike works so damn good!

Pro Taper Race Cut Half-Waffle Grips

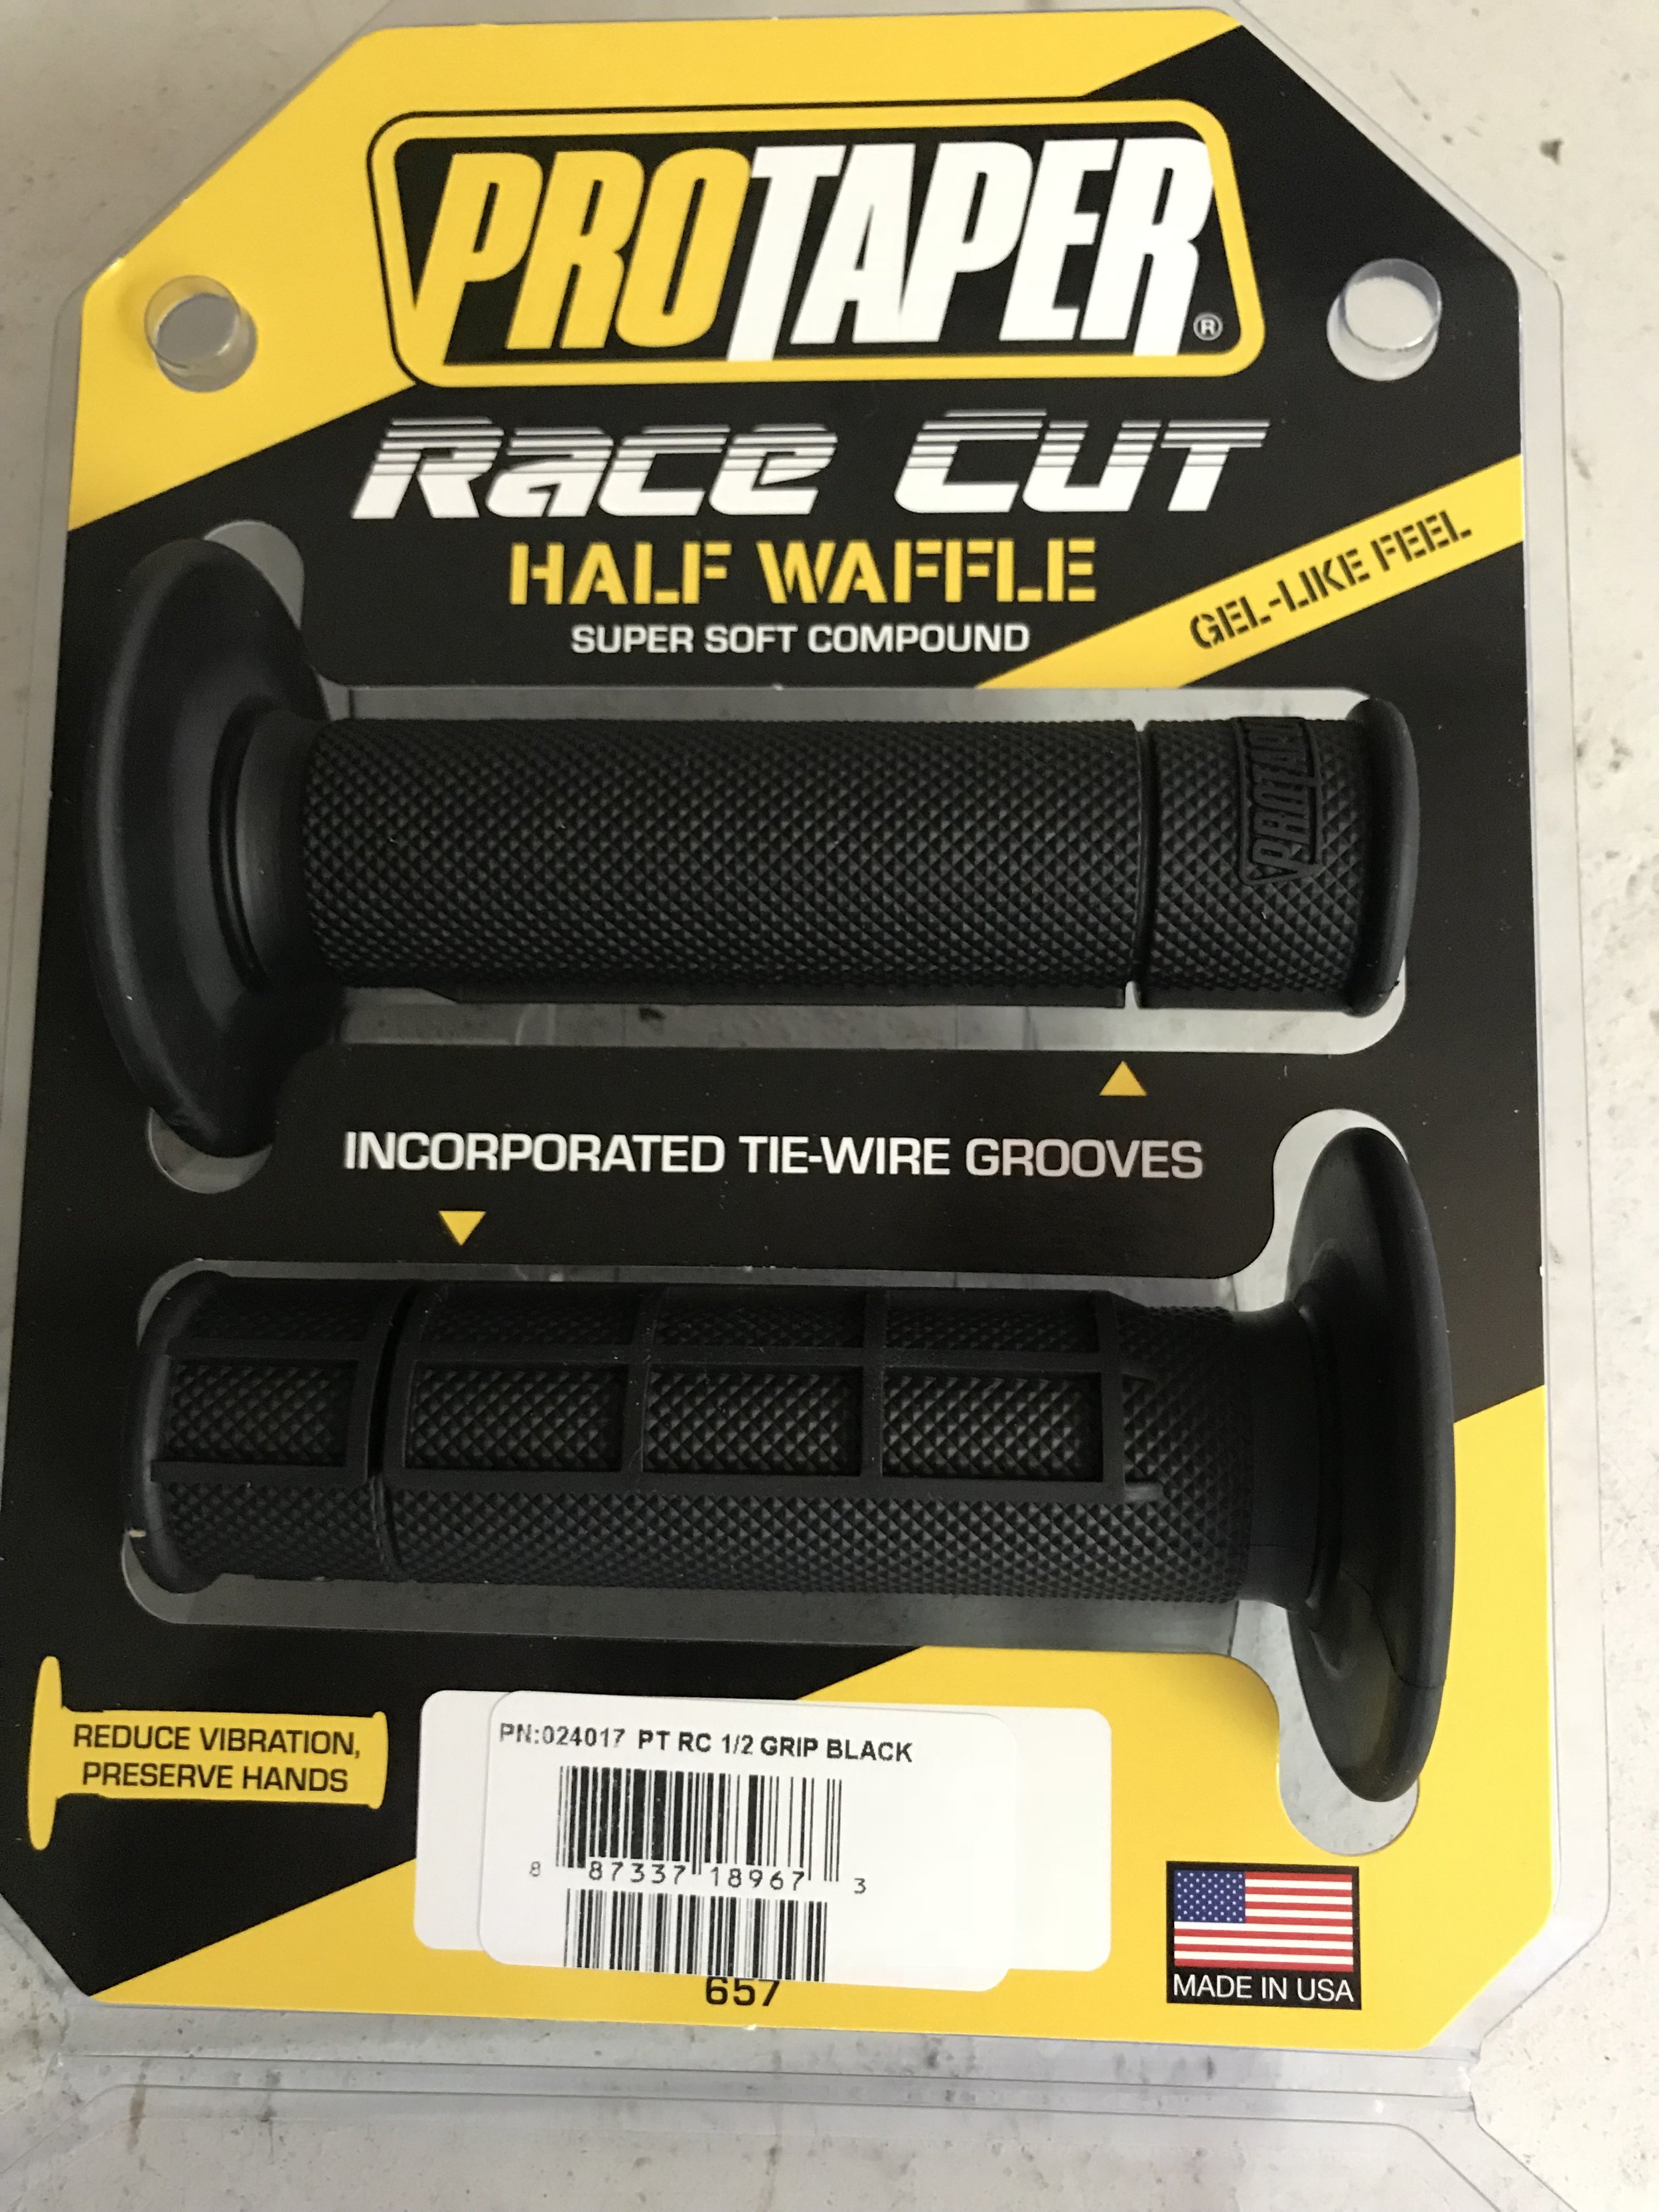
“It’s just grips, who cares”? Uhhhhhh…..No sir, it’s not just grips, it’s where your hands live while you’re riding, so that is pretty damn important to me. A pair of grips can be like an old pair of shoes you love and want to wear every day. Changing from your favorite pair of grips to a different set is not always a great experience, as the fit and feel is a very important aspect in motocross and off-road riding. I will be completely honest with you guys, I have been a Renthal half-waffle soft guy forever, but felt I needed to branch out and see what else is out there (I have another analogy to go along with this, but I will keep it PG rated with this test). I purchased a set of Pro Taper’s Race Cut Half-Waffle grips to replace the Renthal’s that have graced my machines for years and went riding. 

IMG_8606.jpg


The Pro Taper Race Cut was designed with its soft waffle pattern that incorporates wire tie grooves and an extra-supple layer of rubber. Installing the grips is simple and using the contact cleaner/super glue slide-on method didn't tear or eat away at the grip. Some other super soft compound style grips will actually tear and get eaten away from some types of grip glues, but the PT Race Cuts came out fine. 


I wear a large glove and the feel of the grip in my hand felt adequate and is not too large when riding. I hate large feeling grips because I usually suffer from arm pump when the grip is too big. The feel is also very soft and plush while riding with the PT’s. I could feel the extra cushion in my palm when I landed from jumps and the grip took some of the bike’s vibration away from my hands (compared to a stock lock-on Husqvarna Rockstar Edition grip). Durability of the grip is what impressed me the most. I will normally wear down a set of grips near the flange very quickly, but the PT’s lasted 20 engine hours until I began to notice a wear mark in the grip (where your thumb rests). 

IMG_8609.jpg


The occasional crash that occurred didn't tear the Pro Taper Half-Waffle Race Cut Grips all to hell and they also did great over several pressure washer sessions. I am impressed with the Pro Taper Race Cut Grips and for $9.99 a pair they are not expensive like some other grips on the market. You can check them out over at protaper.com and if you have any questions about this test please feel free to email me at kris@keeferinctesting.com.

Dunlop MX33 First Impression


I have been through many tire tests in my day and I am aware of how much work goes into bringing a new tire design to market. Dunlop introduced their new MX33 yesterday at Zaca Station and I had the chance to test the MX3S and the new MX33 back to back. I wanted to see first hand if there were any performance advantages to the new MX33, compared to the 3S that I run on a lot on my test bikes. Now this isn't a durability review (we will do that at a later time), but this test is simply to give you some initial information before you may want to purchase a set of these come Monday when they arrive in North American dealers. Before we get to the findings on the track, let’s give you some information on the tire directly from Dunlop themselves: 

MX33_Front_Fit_LR.jpg


Multiple Block Distribution

In addition to creating an aggressive look, new Multiple Block Distribution technology increases the number of knobs on the shoulders and center of the tires, and also varies the height and angles of the knobs within the tread pattern. This translates to more biting edges and more traction, creating superior grip and increased handling performance.’


Block-In-A-Block Technology

After the great success of Dunlop’s patented Block-In-A-Block technology on the MX3S rear tire, Dunlop has improved this technology by altering the shape of the interior block. This new diamond-shaped block is larger, adding more surface area and two additional angles to improve traction.


Dunlop has also added Block-In-A-Block technology to the front tire for the first time, creating a new industry standard for handling and grip.


Advanced Apex Design

Not only does the Geomax MX33 look remarkably different than its predecessor, but the MX33 also has many new components under the tread. The new construction of the front and rear tire features a taller, thinner apex. Known as Advanced Apex Design, the same sidewall material used in the MX3S is now distributed in a slimmer, but taller apex. Without adding weight, this technology delivers superior shock absorption, uniform rigidity in the sidewall, and a smoother ride and firmer feel. (Applies to 18”, 19” and 21” sizes.)


Carcass Tension Control System

In this new design, Dunlop optimizes the distribution of tension of the components so the tire absorbs more shock, but flexes when necessary to smooth out ride characteristics, which allows the bike to track in a straighter line.


All-New Compound

The MX33 also incorporates a new rubber compound with a higher molecular weight polymer to improve durability and a carbon micro-particle to increase grip.


On The Track (Rear Tire 120/80-19):

MX_33_Rear_beauty_LR.jpg


Now for those of you asking, you will be able to get the MX3S for a little while longer, but just know that the MX33 is replacing the MX3S

Zaca Station’s soil is a mix of loose sand on top with a hard slippery base underneath. It's one of those tracks that looks like you can just hold it wide open and run it in deep, but in reality you have to be cautious about throttle delivery on lean angle at times or Zaca can bite you real quick (trust me, it’s bit me a time or two). The first positive that stood out to me was the MX33 rear tire’s ability to grip on lean angle. Usually I am a very sensitive front end feeling rider, but the MX33 rear tire was so much better than the 3S on lean angle, under acceleration, that it was easy for me to dissect rather quickly. Rolling out of corners while under throttle the MX33 bites and doesn't slide as much as the 3S when the the soil is slippery/wet. I was able to get on the throttle sooner out of slippery corners with the MX33 versus the 3S because of the positive connected feeling that I got from the 33. The MX33 rear tire also has a firmer feeling carcass than the 3S on square edge, which gave me slightly less comfort through choppy ruts and acceleration bumps. This was a very subtle feeling and some of you may or may not be sensitive to this, but this is something that I felt towards the end of our test day. Tire cushion is important when it comes to suspension feel and the 33 doesn't have as much plushness as the 3S does. Straight line traction was better on the MX33 as there is less side to side movement from the rear end under acceleration. Braking is something most do not talk about when comparing tires, but it’s a very important aspect when designing a tire for the public. The MX33 doesn't have as much ability as the 3S to drift (or slide) when brake sliding or pivoting around a corner. The 3S slides slightly better when on the rear brake and the rider is able to pivot the machine more quickly than the MX33. “Now is that a good thing or a bad thing Keefer”? The answer lies in your riding style…If you’re a rear end steering guy you may want that drifting/sliding ability in your rear tire tread design/compound, but if you’re a front end steering guy like me, then having the rear tire not slide as much is more up my alley. 


On The Track (Front Tire 80/100-21): 

MX33_Front_3-4_LR.jpg


I am super picky when it comes to front tires and noticed a few things from the new MX33 that differs from the MX3S. The MX33 has more lean angle bite (off-throttle) when starting your lean for corners. As soon as you get off the throttle to enter a rut or berm, you will notice the tire pulls down the front end more while biting the ground (very grabby). This may take some time for you all to get used to, but I like the fact that it doesn’t have that vague initial feeling like the 3S. Once the 3S gets into the corners its side knobs work well in soft-intermediate terrain, but I have always had a problem with that quick sudden “turn-in” with the 3S. The MX33 front tire lets you cut down from a blown out berm or make sudden line choices (with your front-end) easier due to some extra lean angle grip. Where I felt the MX33 could be lacking is on-throttle maneuverability. When finishing your corner and you start to roll the throttle on, the front MX33 has a slight “Hunt And Peck” feel to it. “What is hunt and peck Keefer”? “Hunt And Peck” to me is when the front tire has a slight wandering sensation and doesn't feel like the knobbies are dug into the terrafirma. I want to clarify that this feeling was only felt right out of a corner while under throttle. The MX3S never really feels like it has that “Hunt And Peck” feel to it under acceleration. Braking traction feel has improved on the MX33 over the 3S, as the tire doesn't slide as much as the MX3S does when the track is freshly watered or greasy on top. This is a nice feature because the MX3S front tire sometimes was a handful when tracks received some water in the middle of the day. The MX33 front tire is also more consistent when scrubbing up faces of jumps and will not slide away from you as easy as the 3S. When the track is nice and broke in and all of that good dirt has been pushed away, the MX33 was noticeably better than the 3S. The MX33 was more consistent in all “off-throttle” situations and provided more bite, especially on lean angle when the track gets hard pack.  


Conclusion/Sizing:  


The Dunlop MX33 is available in 10,12,14,16,17,18,19 and 21 inch sizing. A new 90/100-19 sizing is offered by Dunlop in the MX33 as well. My first impression of the MX33 was a good one, but I really want to dissect these tires some more at different tracks next week. It should be noted that the MX33 worked best at 13PSI instead of the normal 13.5 PSI of the MX3S. I will also be testing the durability of the 33, to see if the carcass is better (than the 3S), like Dunlop says it is when it comes to knob chunking. The MX33 should be available at your local dealer by Monday May 14th. 

Akrapovic Evolution Titanium Muffler System (2018 Yamaha YZ450F)


You’ve heard me talk a lot about how stock muffler systems are pretty damn good right? Usually I say something like, “the stock 2018 Yamaha YZ450F muffler system is hard to beat”, but that quote doesn't stop me from trying to see if there is something better out there. I am a fan of MXGP’s and seeing the Akrapovic mufflers on the Yamaha’s of Romain Febvre and Jeremy Van Horebeek got me thinking I wanted to try one of these beautiful looking systems. After some scouring, I found a US connection and got one delivered to give it a test ride. 


IMG_8290.jpg

First off the Akrapovic Evolution muffler system is one of the most beautiful looking systems made today, is well built and has quality welds all the way around it. Once hot, the titanium color of the headpipe is the most dynamic blue you will ever see from any muffler manufacturer. The Akrapovic Evolution titanium muffler system is 1.5 pounds lighter than the stock system and tucks under the right side panel very nicely. When putting on the system make sure to leave the headpipe loose and then connect the mid pipe, so that the slip fit joint slides in easily. Once those two pieces are connected, tighten the headpipe bolts and mid pipe bolt just snug. The Akrapovic uses your existing stock heat shields or you can purchase carbon heat shields separately. The Akrapovic muffler uses an aluminum spacer in the rear hole to give the muffler enough clearance (from the brake caliper) once the suspension is full collapsed. I did notice that there is a small screen deep inside the core of the muffler, however I was told that this isn't a spark arrestor, but a noise insert. Note: Leave the insert in, as the muffler performs better with insert in and is much pleasant to the ear. Once rear section (muffler) was installed, I went around and tightened up the remaining bolts. Doing it this way ensures there is absolutely no binding going on between each slip fit joint. 


IMG_8285.jpg

Out on the track the Akrapovic Evolution muffler has a deeper sound and is slightly quieter than the stock system. I started the test with the “TP map” installed inside the 2018 YZ450F (if you don’t know what the TP map is, email me at kris@keeferinctesting.com). Roll on power delivery was smoother out of corners with the Akrapovic and “TP 1.0 map” installed compared to the stock system and “TP 1.0 map”. I didn’t really like the smoother delivery and I wanted to get some bottom end delivery back, so I went to the TP 2.0 map. Doing this helped me get some of the RPM response and bottom pull that I wanted back from the Yamaha out of corners. If you feel like you want a smoother delivery or ride hard pack you may want to leave the “TP map 1.0” installed with the Akrapovic. The Akrapovic system really comes alive once out of the corner as the Yamaha starts pulling harder and longer than the stock system down straights. Second and third gears can be stretched longer by the rider and once the TP 2.0 map is installed back in the bike (with the Akrapovic) rolling third gear in corners is slightly easier on the rider as well (with 49 tooth rear sprocket). Over-rev is slightly better through each gear with the Akrapovic and the overall engine feels like it revs a little quicker. The Akrapovic also gave the Yamaha YZ450F a free-er feel and takes away a little engine braking sensation on de-cel. 


IMG_8287.jpg

In conclusion, I feel the Akrapovic Evolution muffler system is an excellent system once going back to the TP 2.0 Yamaha Power Tuner setting. You will not be getting more bottom end than a stock system, but the gains through the mid-top end are a noticeable difference. It will be up to you if that difference is worth the $1300.00 you will spend on the Evolution titanium system.  Akropvic’s website is a very informative, clean, and one of the best aftermarket muffler websites to browse around on if you got the time. There are dyno charts, a sound tool that lets you compare the stock system to Akrapovic’s muffler sound, documents of replaceable parts, and technical data about the system itself. You can head over to akrapovic.com and punch in what bike you want to geek out on. I did, for about an hour! 


The Akrapovic accepts the use of Yamaha's stock heat shields.

The Akrapovic accepts the use of Yamaha's stock heat shields.

If you have any questions about this test please feel free to email me at kris@keeferinctesting.com


Giant Loop One-Gallon Gas Bag Fuel Safe Bladder

A Safe And Collapsible Way To Carry Extra Fuel

By Seiji Ishii


P4252645.jpg

Carrying extra fuel during adventure and dual-sport rides in remote areas has historically been inconvenient and sketchy. The tried and true repurposed Gatorade bottle works fine, as long as the full bottle isn’t put under any pressure, which can make the lid leak…on to your clothes, your food, your sleeping bag, etc. Purpose-made fuel containers, like the Rotopax, do the job, but when empty, they take up valuable storage space and often require mounting hardware. Enter the Giant Loop Gas Bag Fuel Safe Bladders; they are collapsible and made in collaboration with Fuel Safe, a neighboring business that specializes in fuel storage and transport, both for motorsports and utility. We tested the one-gallon version (MSRP $150), and they are also available in 2, 3, and 5-gallon sizes. 

I have deployed various fuel storing and transporting strategies while out in remote areas like Baja. Sure, water bottles and such have worked in a pinch, but I had to be careful of how they were packed, and I made sure to empty them as soon as possible to limit the chances of disaster. Failure of these ad hoc containers when completion of the route requires extra fuel could be devastating. I have used systems designed for the job, like Rotopax, and they do perform their tasks admirably, but when empty they still take up space. These fuel specific containers are often awkward to carry on the bike, many requiring special mounting hardware that again, takes up valuable space when unused. 

Giant Loop’s Gas Bag Fuel Safe Bladders offer a practical solution to the fuel storage and transport problem. These collapsible and light gas bags utilize a fuel-proof welded film bladder sewn into a ballistic nylon sleeve. Webbing daisy-chain anchor points and handles adorn this protective cover. The claimed weight for the one-gallon size is 11.5 ounces and rolls up into a tight little 4” roll when empty, saving precious storage space in the bags. 

Filling the Giant Loop Gas Bag Fuel Safe Bladder requires some care; holding the bladder upright while dispensing fuel, without squeezing it, of course, is harder than dispensing into a container standing on the ground. There is a fill line marked on the sleeve to indicate the maximum level that will allow you to remove the lid without spillage (this mark began to wear off quickly, presumably from fuel spilling). Pouring fuel into the bike’s tank also requires purposeful actions and care; tipping a flexible bladder while aiming the bladder’s neck opening can be tricky. The sleeve isn’t attached to the bladder at the fill neck, so care must also be exercised to not pour fuel into the space between the fabric sleeve and the bladder. Doing so means storing the empty bladder on the outside of the luggage to prevent contaminating other gear. The bladder neck is the standard size for fuel canisters, so spouts can be purchased to ease filling the bike, and a funnel would also be a huge help. I didn’t use either, choosing to be careful when dispensing fuel over carrying more gear. Leaving the gas bag out in the rain causes another consideration; water can collect in the space between the sleeve and bladder. Draining collected water is prudent before dispensing fuel into the bike’s tank. I found out the hard way, contaminating my fuel with water and suffering lousy engine performance afterward. 

The welded film bladder has proven durable and reliable; storing the fuel-filled bladder in my luggage raises no concerns, and the only odors come from accidental splashing of fuel on the exterior. The Giant Loop Gas Bag Fuel Safe Bladder has survived extremely jarring travel both inside bags and lashed to panniers via the daisy chains. It has also survived intense heat and below freezing conditions over the last six months, with no adverse effects. There have been zero fuel breaches either through the bladder film or cap. 

If you are in search of a more space saving, light weight, durable, and reliable on-bike fuel storage and transport, the Gas Bag Fuel Safe Bladder is worth investigating. It performs a critical task and doesn’t cramp limited storage space when not required, nor does it need any mounting hardware. I was skeptical at first of a bladder being durable, fuel-proof, and reliable, but the 1-Gallon Giant Loop Gas Bag Fuel Safe Bladder has proven itself and will remain a part of my remote trip kit. 

Giantloopmoto.com


2018 Kawasaki KX450F Race Tech Suspension

The 2018 Kawasaki KX450F has a lot of potential to be a great machine, but the Showa SFF-Air TAC fork holds this machine back some. In stock trim the fork can be somewhat difficult to set up and get a comfortable setting. When you soften it up to get comfort, it bottoms and rides too low in the stroke. When you stiffen it up to add hold up, it becomes harsh on square edge and small acceleration chop. If I had a Kawasaki, I would put a spring conversion in it immediately, but I understand that everyone is not like me and will go to a spring fork or a spring conversion kit. I wanted to see if we could make this seem of suspension better on the KX450F, so I handed the fork and shock off to Race Tech, to see if they could get my non air fork having ass somewhat happy and comfortable on the SFF-Air TAC. 

IMG_8217.jpg


First off let me give you a brief explanation of the SFF-Air TAC fork. SFF means Separate Function Fork because each fork leg performs a separate function. The left leg contains the damping cartridge and the right fork leg contains the pneumatic air spring. TAC means Triple Air Chamber. The right fork leg houses three pneumatic air chambers to tune the air spring side of the fork. The advantages that Kawasaki and Showa seen when developing this fork was the adjustability, weight, and minimal effect on total pressure, if the fork leg and seal are damaged. The air spring allows riders of different sizes to be able to set up their bikes at the track without any disassembly or costly fork springs. Additionally, air pressure can be altered quickly when track conditions change with mud, hard pack, rocks and loamy soil. The Showa SFF-Air TAC fork weighs just over two pounds less than Showa’s current spring fork that currently comes on the Honda’s. All sounds good on paper right? Well, when this fork was introduced it quickly became apparent that it wasn't as good on the track as Showa made it sound. 


Once Race Tech did their work, I installed the suspension back on the bike and was off testing. I went to more than a few types of tracks to really dissect if this Race Tech stuff was better than the stock suspension. I went as far as getting another stock 2018 Kawasaki KX450F to ride back to back with the Race Tech suspended set. The first thing I noticed was that the fork didn't have that sticky feel to it on the top of the fork’s stroke. When accelerating out of corners with the stock suspension the fork always seemed to be hard and deflect, but with the Race Tech fork it moved more freely in the stroke and gave me increased front end feel. Mid stroke comfort was still hard to find however and that proved to be my toughest challenge over the course of this test. I played with the inner and balance air pressures a lot before I came up with a setting that I was good with. I did notice with the Race Tech fork that the movement of the fork over square edge and braking bumps was plusher than the standard fork. Basically in Layman's terms; you feel less of the track up front. Bottoming resistance was still great and when I did decide to soften the fork up a little (to get some added compliance in hard pack conditions) it didn't blow through. With the Race Tech valving I felt like each adjustment I made (in air pressure) didn't negatively affect another area (of the fork’s action) too much. To me the biggest difference between the Race Tech fork and the stock fork is “entrance of corners”. I could come into corners harder without the fork diving or getting to low in the stroke and it kept better front tire contact to the ground than the stock fork. Does this mean I feel like this Race Tech SFF-Air TAC fork is better than a spring fork now? No, it doesn’t, but at least now I can get more consistency with the front end of this Kawasaki. Spring forks still add another level of comfort  and consistency through rough conditions that this Showa air fork can’t (even with the Race Tech Gold Valves). The question I will now get asked is…. Is this fork now good enough that I could live with it on my bike? My answer to you is “yes”! Unless you’re riding very rough, dry hard pack conditions (or long off-road races) the Race Tech fork is worth the price of admission. 

IMG_8214.jpg


Going into this test I wasn't thinking that there would be that much difference in feeling on the track between the stock shock and the Race Tech shock, but I was wrong. I experienced with shock sag settings and always came back to 106 mm as that is what made the Kawasaki feel the most balanced. The most noticeable improvement that I felt was rear wheel traction (especially on acceleration). Coming out of choppy corners (with the Race Tech shock) the rear end of the Kawasaki felt more planted, stuck to the ground better and gave me more forward bite. De-cel comfort (or braking bumps) feel was also improved as the rear wheel stayed on the ground better and gave me more of a planted feel. With the stock shock the Kawasaki rear end stayed straight, but sometimes would have a noticeable kick when hitting the first big braking bump coming into a corner (which sometimes would un-settle the chassis). The Race Tech shock soaked up the first few de-cel bumps before it would want to react and when it did react, it was more of a dead feel on de-cel. The only complaint I had was that it was maybe a little too soft on g-outs or sharp transitions (high-speed compression). I stiffened the high speed up a little and that helped some, but I think I would want to try and go a touch stiffer internally with the valving. 


IMG_8216.jpg

At the end of this test I was happy to figure out that there is some hope for riders that want to keep their Showa SFF-Air TAC fork and maybe don’t want to necessarily go to a spring conversion kit. Like I said in the 2018 450 MX Shootout, “I feel like the green machine has the best overall frame feel and just needed some suspension help”. Race Tech did a great job with providing some added comfort to the 2018 Kawasaki KX450F. Below is my best suspension setting with the Race Tech valved suspension. If you have any questions about this test please feel free to email me at kris@keeferinctesting.com and I can try to help as much as I can. 


IMG_8210.jpg


Fork: 

Inner: 155 psi.

Outer: 16 psi

Balance: 170-172 psi

Fork Height: 5mm

Compression: 8 out

Rebound: 10 out


Shock: 

Sag: 106 mm

Low Speed Compression: 8 out

High Speed Compression: 2 out

Rebound: 11 out


Dunlop Geomax MX3S Tires

The Dunlop Geomax MX3S tires have been around for a while now, but I still seem to get quite a few questions about these tires in my email inbox. The MX3S tire is the most popular off-road tire Dunlop offers, so I wanted to break down what I thought of the soft to intermediate terrain offering. There will be a new Dunlop MX33 tire that is coming later this summer, which means be on the look out for a full review right here on keeferinctesting.com in May.  

The Dunlop Geomax MX3S Tires. 

The Dunlop Geomax MX3S Tires. 


 I found that the first thing that impressed me was that the Dunlop Geomax MX3S rear tire offers great forward bite (traction) in intermediate/soft terrain through ruts and coming out of corners. The “block within a block” side knob design works well under lean angle and traction is one of the MX3S rear tire strong suits, as the rider is able to get on the throttle sooner (while leaning) without washing out. You are also able to start your lean sooner (than most other brands of tires) coming into a corner and the MX3S remains planted to the ground. Braking predictability gives the rider confidence to pivot and throttle out of flat corners without much hesitation. Sometimes other rear tires can step out (or wash out) on you once you completed your braking and back on the throttle, but the MX3S lets you pivot/lean under throttle through flat corners nicely. The only complaint I had is that when the track surface was blue grooved, I could feel the side of the tire carcass roll when accelerating from flat corners. This gives the rider a pushing or loose feeling rear end. The key here is to run the correct air pressure at 13.5 psi for the Dunlop's soft carcass. The soft nature of the MX3S carcass flexes and absorbs bigger type bumps and square edge (similar to suspension), which actually gives added comfort when the track turns rough. When you get a hard carcass feeling tire you will notice your machine will deflect and feel harsh on braking bumps and acceleration chop. Lowering your air pressure will sometimes help this sensation, but with the casing that Dunlop provides with their MX3S line, the bump absorption is superb. I do notice that when the tire gets half worn the performance goes away sooner than a Michelin Starcross 5 Medium or Bridgestone 404. The MX3S rear tire loses its “predictability” when worn on lean angle (coming into corners), which causes the rear end to wash out or slip under load. It is not uncommon for the side knobs to chunk off when worn down as well. I can usually get close to 10 engine hours on a MX3S rear tire on intermediate terrain. If you are using the MX3S rear tire on pure sand, the lifespan of the tire goes up exponentially. The Dunlop MX3S is a pure performance tire and is one of the best available for maximum traction when fresh.  


Dunlop's Block Within A Block Technology. 

Dunlop's Block Within A Block Technology. 


The MX3S directional front tire is great for front-end feel and lean angle traction, especially over the older MX31 and MX51 versions in all conditions. The MX3S front tire actually makes the steering feel “heavy” at times because the tire is at maximum grip under initial lean in corners. It can be somewhat grabby if you're not used to it and can cause some oversteer, but once used to the lean angle feel the MX3S becomes magical in soft to loamy conditions. The MX3S is tailor made for a front wheel steering rider and can be leaned into corners earlier than most other tires very easily. The only other front tire that has as much, if not more front end lean angle traction is a Michelin Starcross 5 Soft. I did have a problem with the MX3S when the track had just been freshly watered and was slick on top (think of the second moto at a Glen Helen-type track). This would give the front end a vague feel (un-predictable) as the bike would have a tendency to push the front-end through flat corners (the MX52 is better in these types of conditions). The wear of the MX3S front tire is not as friendly in hard pack terrain as you can feel the side knobs roll on the hard pack surfaces. The vague/pushing sensation is common once on hard pack so you may want to stick with more of an intermediate to hard terrain tire if your local track has a hard base. Again, like the rear tire, the side knobs can chunk off rather quickly if you’re riding on intermediate terrain often. I typically get 10-12 hours on a MX3S front tire before I start to see chunking of the side knobs. This is a performance based tire and should be looked at accordingly.

Watch for chunking on the side knobs of the MX3S front tire. 

Watch for chunking on the side knobs of the MX3S front tire. 


“Hey Kris of course you’ll take the performance based tire because you don’t have to pay for them”. That is a statement I hear very often. My rebuttal is "No, I don’t always get tires for free so I spend my money on tires just like you". Yes, tires are expensive, but I am more performance based than a durability based kind of tire guy. That means I accept the fact that I may get 10-12 engine hours on these tires before I have to go purchase another set. I understand that some of you reading this can't do that. However, you have to consider riding conditions, how hard you ride and how often you ride. My 12 hour lifespan could mean 3-4 months of riding for you. Maybe longer? 

Are you looking for performance or durability/lifespan from your motocross tires? You will have to decide for yourself on that because it is tough for a tire manufacturer to give you both at a very high level. I ride hard and often, so I am constantly pushing the knobbies of a tire. Dunlop has created a great tire, but saying it is the most durable tire on the market would be comical. However, I know what I am getting when I purchase a Dunlop MX3S and I like that it is a predictable tire for the conditions we have in Southern California. Will a Bridgestone 403/404 last longer? Yes, and it is a pretty damn good tire, but I get more lean angle traction with a Dunlop, so I choose to run a tire that I am able to push on. Look for a Keefer Tested podcast on tires very soon as we will break down performance and durability.    


Notes:

Again.... Running 13.5 psi in the MX3S front and rear tires is crucial. As the soft carcass of the tire breaks down it tends to lead to pinch flats with 11-12 psi (even with heavy duty tubes). Not to mention the tires will roll on your rims more with 11-12 psi. 

I tested and installed both of these types of tires on a 250F (80/100-21 and 100/90-19) and a 450F (80/100-21 front and 120/80-19). Installation of both sets of tires didn’t feel any different as any other older style Dunlop's, but I will have to say that the Michelin Starcross 5 Soft tires are easier to put on. 

The Geomax MX3S front tire is available in the aforementioned 80/100-21 size for $127.51. For 19-inch rear wheels, MSRP ranges from $134.04-$149.25.

FMF 4.1 RCT Titanium Muffler With Mega Bomb Plus Headpipe


If you have kept up on my social media channels (@kkeefer120, @keeferinctesting) you will know that I have been riding the crap out of the 2018.5 Husqvarna FC450 Rockstar Edition and 2018.5 KTM 450 SX-F Factory Edition machines. I enjoy riding these two machines because they are easy to ride, well balanced and feel extremely lightweight when cornering. I do however wish they had some more RPM response and low-end excitement. Since the new Husqvarna RE’s and KTM FE’s are not coming with an aftermarket muffler this year I wanted to get my hands on FMF’s version as soon as possible to give you all some feedback, just in case you wanted to add some more bling and possible horsepower to your new machines.

IMG_7820.jpg


The new FMF 4.1 RCT Full Titanium Muffler System that you see here will fit on either your 2018.5 KTM Factory Edition or your Husqvarna Rockstar Edition. The FMF 4.1 system went on easy on both bikes and took only a few minutes to install. Thank you to Husqvarna and KTM for making the new bike much easier to change a muffler. Gone are the days of dropping the shock and cursing in the garage just so you could get your new muffler system on. I tested the FMF 4.1 muffler system at several tracks on both bikes and had similar results at each track I tested at. In stock form the KTM Factory Edition has a little more throttle response and bottom end pull than the Husqvarna Rockstar Edition, but the RE pulls slightly longer up top. 


IMG_7898.jpg

With the FMF system installed you will not be getting increased bottom end pull on either machine (compared to stock), but you will be getting a little more bottom and mid-range RPM response (or throttle crack for you not testing type readers). I noticed the added RPM response more on the Husqvarna, especially on low RPM, out of corners. The FMF system makes each machine’s engine character slightly more free-feeling and exciting. I also appreciate that I am not getting any added de-cel popping (or lean sensation) with the FMF system and both bikes ran just as clean with the FMF system on than it did with the stock muffler. Where you will notice the most improvement with the FMF system is through the mid-range. The mid-range “meat” you will get out of the FMF 4.1 system is downright impressive. Rolling the throttle on out of corners and accelerating you will notice an increased pulling power that wasn't there with the stock muffler on either machine. Whether you're coming out of a corner in second or third gear you will notice some extra horsepower getting to the next obstacle. With the added mid-range meat of the FMF system it really helped some of the gearing issues I had at tighter, less flowy tracks I tested at. Gaining some mid-range let me use third gear in some corners that was tough for me to decipher which gear was better. With the stock system I would roll into these corners in second gear and have the right amount of "pop" to get me out quick, but I had to shift early once exited, to keep the rear wheel from spinning. Third gear was too tall of a gear to get me out of the corner quick, but provided less wheel spin on the exit, so it was always a struggle for me to decide on which gear to use when being pressured from behind by another rider. With the FMF installed I could easily use third gear and have enough "pop" to get me out of the corner in a hurry, yet it kept the wheel spin to a minimum by being able to use a taller gear. So basically what I am saying is that FMF’s 4.1 system made me think less and twist the throttle harder, something I like doing. I didn't get any more top-end with the FMF installed, yet it didn't take any away from either machine. I did notice slightly less over-rev with the FMF system (from stock) when I got lazy and tried to wring each machine’s neck out in second and third gear. I don't mind not gaining anymore top- end and losing a touch of over-rev with these two models, because they are one of the most powerful engines in these ranges. I am not looking to own a top fuel dragster here. 


IMG_7818.jpg

You have heard me say it time and time again that it's tough to beat a stock muffler system these days. You see more and more after market companies taking the time to release their new model systems because it’s not that simple to make a muffler system better than stock. FMF made their new 4.1 RCT titanium muffler with Mega Bomb Plus headpipe not only better through the mid-range, but a full pound lighter on the scales as well. If you just purchased your $10,000 plus Husqvarna RE or KTM FE and still have $1099.99 burning a hole in your pocket, I approve of this new system Lil D and the boys over at FMF developed. Head over to fmfracing.com or give them a call at (310) 631-4363 to see when this system will be available. 


IMG_7900.jpg


2017-2018 Honda CRF450R And CRF450RX Engine Mounts


For 2018 Honda went slightly softer on the top engine mounts of the CR450R. This was to give the bike a little more compliancy (straight line stability) on square edge and choppy terrain. However, if you have listened to my podcasts you will know that the 2018 Honda CRF450R can still feel a little rigid when the track gets hard packed and choppy. When the track is soft the Honda performs at its best, but since we are on the west coast and our dirt isn't as soft as east coast dirt, I wanted to get some more bump absorption out of the Honda chassis. The 2018 Honda CRF450R is a reactive, easy to maneuver machine and that is just a couple of its strong points, but after saying that it also can be a couple of it’s weakest points as well (when it comes to faster type tracks). You get what I am throwing down to you? If you don't, let me explain: If you're a vet, heavier guy or novice type rider that has a hard time cornering, the 2018 Honda CRF450R is a dream. If you're a faster, lighter type of rider, the Honda can be a hand full to ride when you start to push the boundaries a little. Yes, it won the 2018 Keefer Inc. Testing  450 MX Shootout because it has a great engine, is easy to corner and has a set of fairly good stock suspension. What it does lack is some straight line stability and consistency when you start to really push it on rough tracks. You may not know who Kris Palm is, hell I don’t know much about him either, but when someone presents a part for me to test, I am usually not one to shy away from trying things that I think may help a certain bike. When Mr. Palm asked me if I wanted the option to try a bunch of his engine hangers for the Honda CRF450R, I was more than willing to try. Knowledge is power right? 


IMG_7812.JPG

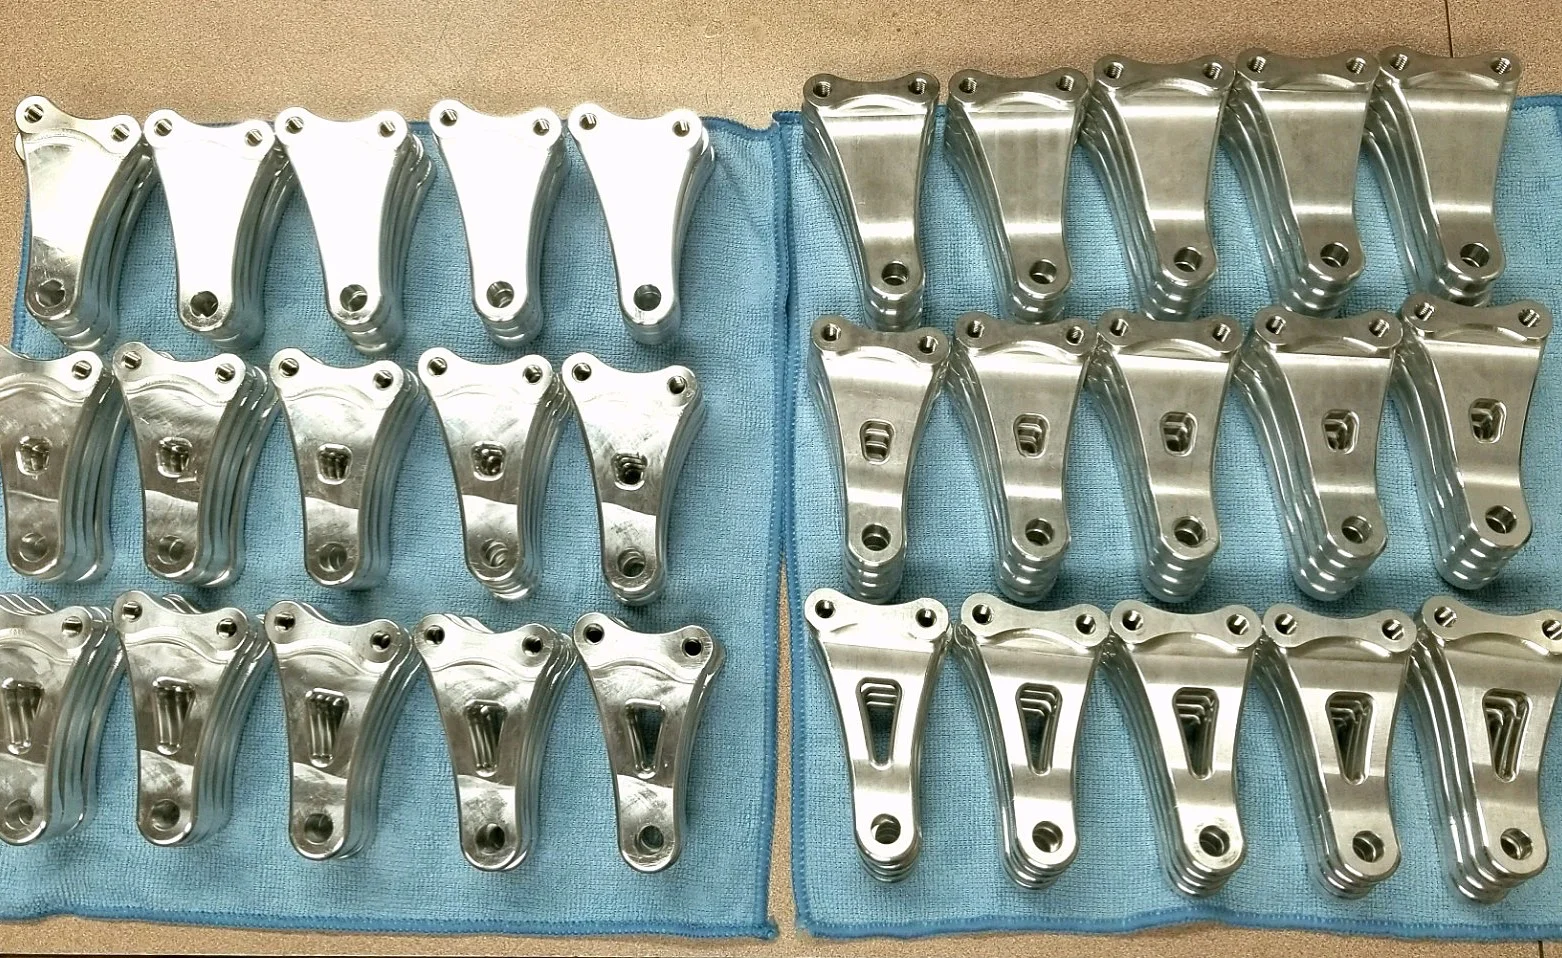
Now….. I am not going to type about every single combination I tried because I will be here all day typing and not riding/testing. The ones that I felt didn't work as good as stock aren't worth mentioning, but rest assured I went through several variations of these engine mounts to find the best setting that I think will be best for you Honda CRF450 owners. I don’t know which engine mounts Kris Palm will offer, but what I had to work with was the top aluminum engine mounts in soft, medium and stiff as well as front engine mounts (made out of titanium) that come in a 4.0 thick/4.0 hole, 4.5 thick/4.0 hole and 4.5 thick/7.0 hole. I also tried the engine mounts on the 2018 CRF450RX for you off-road guys and incorporated which combo worked best with that machine. Just like in professional racing, changing the engine mounts and the affect it has on the bike is a rider preference thing. It may not be needed for every type of rider, so if you feel like you like the way your Honda rides than don’t worry about this test. However, one smart test rider told me back in the day “you are only as good as what you try”. Some riders like a feel of a certain engine mount and stick with that year round, where others will change their mounts for track conditions. Below are a couple of engine mounts combos that I think may be worth taking a look into.  


Medium Top Mount With Stock Front Mount

Tracks Tested: Glen Helen, Sunrise, Deep Sand Dez Track And Milestone

Best For: CRF450R and CRF450RX All Conditions


IMG_7858.jpg

For better bump absorption and a slightly more forgiving feel on square edge, this was the best set up by far. This setting had more positives at each track I tested at and had a minimal negative affect on chassis balance. The medium top mount increased my rear wheel traction and gave me more front end feel on flat, hard packed corners. The Honda CRF450R kept its great cornering ability in tacky and soft dirt, but increased its cornering capability on hard pack with this medium top mount installed. Straight line stability was also a noticeable positive change as the Honda’s chassis felt less reactive (or more planted) on throttle which let me roll the throttle on sooner coming out of corners. Off throttle the CRF450R didn't have as much of a wiggle as it did with the stock mounts installed. The only negative for me was a slightly slower feeling on lean in (into corners). Again, the Honda with the medium top engine mounts installed wasn't as reactive, so it took slightly more work from the rider to get into ruts. To me that is ok as I can sacrifice a little “tip in” character for some added stability and rear wheel traction. Unlike what some other magazines will tell you, having a slower reacting machine doesn't mean it will corner bad. To me you will be able to get into the corner better now because the Honda has a more of a planted feel once you chop the throttle to set up for corner.  


Medium Top Mount With 4.5 Thick/4.0 Hole Front Mount

Tracks Tested: Glen Helen, Sunrise, Deep Sand Dez Track And Milestone

Best For: CRF450R In Soft/Sandy Conditions  


IMG_7860.jpg

The stock front engine mount has a thickness of 4mm and is made of aluminum, but the bottom engine mounts Kris Palm offers are titanium. This means no matter if the dimensions are the same the flex character will obviously be different (because of the material difference). when going back and forth to different tracks I found out that the medium top mount and the 4.5 thick/4.0 front mount hole combination works best in sand and soft dirt. I felt the medium top engine mounts were better on compliancy, but it did suffer a little side to side flickability. With the titanium 4.5 thick/4.0 hole front mount and medium top mount it brought back that lightweight feel in corners and helped tip in. I didn't like this combination as much in hard pack situations because it brought back some of the harshness on small chatter bumps and square edge. If your track is soft with bumps that break away, this is a great combination that gives the rider some added soft dirt bump compliancy on straight line and gives the Honda more quickness (lightweight feel) in cornering situations. 


Stiff Top Mount With 4.0 Thickness/4.0 Hole Front Mount

Tracks Tested: Glen Helen, Sunrise, Deep Sand Dez Track, Milestone

Best For: CRF450R In Tight, Rutty, Jumpy Conditions


IMG_7868.jpg

I went back and forth with this setting a couple times (on the same day) just to be sure I was feeling what I thought I was feeling on the track. Usually when I see “stiff” I shy away from it pretty easily when it comes to the Honda CRF450R, but this set up worked great for tighter tracks with medium to large sized jumps. With the stiff top engine mount, 4.0/4.0 front mount the Honda had a solid (less wallow) feeling to it when landing and kept great front end traction through long, deeper style ruts. This is not something that is particularly great on rough tracks, but if the track serves up some acceleration chop, long ruts, jumps with shallow landings and has good traction this combination was worth mentioning. It made the Honda slightly more flickable in the air and sudden direction changes (cutting down early from a berm or blown out rut) were better than stock engine mount setting. When I tried the medium top mount and 4.0/4.0 front mount the CRF450R flexed too much and become wallowy in the rear. Now I am just speculating here (because we don't have much arenacoss type tracks in California), but I feel like this could be a great setting for you east coast winter riding guys that have those indoor facilities to moto inside.  


9X1A8460.jpg

Now here comes the tricky part. Kris Palm doesn't have a website set up yet because he really hasn't started pushing these engine mounts that hard. So if you're interested in getting a hold of him, maybe to get a set, you will have to reach out to him via a Direct Message on Instagram @kris_palm. If you don't know what a DM is, try Facebook. If you don't have any of that email me and I will try to get you in contact with him. I told you it was tricky! It’s almost like the movie Fight Club, where the first rule of Fight Club is you don't talk about Fight Club. The top engine mounts will run you $169.95 and the front engine mounts are $89.95. How can you pay? Get a hold of Mr. Palm and he can fill you in. Like I said, it's like an underground club that you must know the password to get into.  


If you have any reasonable questions about this underground Fight Club type test please feel free to email me at kris@keeferinctesting.com.  


Yoshimura RS-9T Full Titanium/Carbon Muffler System


The 2018 Honda CRF450R is a refined version of the 2017, albeit a better one I may add. If you listened to the muffler shootout podcast you would know that this is a great muffler to add to your new Honda CR450R. If you haven't listened do yourself a favor and click on the podcast tab and look for the "Honda CRF450R Muffler Shootout Podcast". Once I got my hands on one and I took it through the ringer of the shootout process, I knew Yosh had put some R&D time into this system. We know Yoshimura works closely with the Factory Honda team here in the states and have seen the RS-9T muffler on Cole Seely and Ken Roczen’s new bikes so it's no surprise that they work pretty damn well. The Yoshimura RS-9T system only comes in a dual can set up (no single mufflers are available from Yoshimura) and is a three-piece slip fit design. Installation of the system was painless and took 15 minutes to install, which was nice to do when at the track swapping mufflers.

IMG_6912.JPG

Once installed and on the track the Honda’s exhaust note turned from high pitch 250F’esq to a deep throaty more traditional 450 factory race bike sound. The crack of the throttle (or RPM response) is slightly smoother and less crisp, but bottom end pulling power is increased over the stock muffler. Rolling out of corners, in second gear, feels like the rear wheel has even more traction than stock and was more controllable while accelerating out of hard pack corners. The slightly smoother RPM response takes away the Honda’s excitement feel ever so slightly, but helps you gain a little more control coming out of corners. The mid range pull is healthier than stock and while the stock system had a tough time pulling third gear in tighter corners (without a gearing change), the Yoshimura system will give you an easier time rolling third gear corners. With just the flick of the clutch lever (in third gear) the Honda will be in the meat of the power once again and have you down the straight in a hurry. We noticed top end and over-rev was as good as stock (which is great). It pulls adequately down the straights in second and third gear and there wasn’t a time where I thought to myself  “I need more top end pulling power”. Ehhhhhh. No. You could tell Yoshimura was focused on bottom to mid-range pulling power when they designed this muffler system and they succeeded in doing so. It is also impressive that they didn’t lose any top end and over-rev in the process.

IMG_6906.jpg

After weighing both the stock and Yoshimura RS-9T systems you will be saving 1.9 pounds, which is a nice chunk off of a already heavy (on paper) motorcycle. This is a significant weight loss but for $1,499.00 it is a very pricey bolt on modification. If you are looking to save a little money Yoshimura offers the stainless steel/carbon version for $977.00, but you will not be saving much weight (only half a pound). I really like the craftsmanship that went into the Yoshimura system. The welds are flawless and the mufflers tuck up inside the side number plates for a stealthy, compact look. If you’re looking for al little added giddy up and bling from your new 2018 CRF450R, the Yoshimura RS-9T system will help you on the track, but your wallet will be not as fat. This is the price we pay for getting some extra HP and a better-looking muffler right? This is one of my favorite systems for the 2018 Honda CRF450R and it has held up great over time (over 20 engine hours). You can head over to Yoshimura-rd.com to get yours or call them at 800-634-9166.

IMG_6902.jpg


If you have any questions about this test please feel free to email me at kris@keeferinctesting.com 

Dubach Racing (DR.D) 2018 Yamaha YZ450F Slip-On Muffler

Before I start this review I am going to go on a little rant here, so bare with me. Mufflers are always a hot topic when it comes to horsepower, especially when you get a new bike. I know a lot of riders out there get a muffler system before they even ride their new bikes! Ride your new bike and break it in before purchasing any muffler please! See what you're working with and purchasing, so you know if its better than stock. Because if it’s not better than stock, what is the reason you purchased it in the first place? To look cool. To drop some weight. Those two statements would be the only answers that are acceptable when someone asks you why you have a new muffler on that bike that has an hour meter that reads 0.1 hours. Ok moving on…….. 


IMG_6046.JPG

When it comes to Yamaha motorcycles, Doug Dubach is a name that comes to mind immediately right? Doug has been a Yamaha test rider for 87 years and is almost that old, but don't tell him I said that. Seriously, Doug knows the ins and outs of the 2018 YZ450F like the back of his hand, so I was anxious to try his slip-on muffler when I reached out to him. However, instead of trying a full system I wanted to do something different and just try a slip on muffler system. A slip on system is only the rear section that keeps the stock headpipe and mid-pipe intact. I installed the DR.D stainless muffler system (that saves just over one pound compared to stock) in only 3.5 minutes. 


I am very picky when it comes to mufflers and how they deliver the power to each bike I evaluate. The DR.D slip on keeps the stock feeling YZ450F bottom end pull intact, but maybe softens the low end RPM response just a tad. This is only noticeable on super loamy style tracks, but helped rear end traction feeling on hard pack style tracks. Losing a little RPM response and gaining some rear wheel traction is not a bad thing on this beast of an engine. I want to note how hard it is to build a muffler system that keeps the low end pulling power feeling of a stock 2018 YZ450F as I have tested several full muffler systems that had less bottom-end than stock. Where most of you will feel the difference between the stock muffler and the DR.D is mid range pulling power. The mid-range meat that the DR.D system delivers is impressive and gives you a better pull in second gear and helps the third gear transition when shifting. With the stock Yamaha system (with stock gearing) it was hard at times to carry third gear through corners, so shifting to third immediately after the corner was a must. With the DR.D system I have the freedom to leave the Yamaha in second through the corner and shift early without the blue machine falling off the power much. Or if you choose to run third gear in corners it picks up the power slightly earlier and helps lazier/lug heavy riders get out of the corner quicker with more rear wheel traction. Top end is also slightly increased over the stock muffler as you are able to hold each gear (well, to be honest the only gears I used was first through fourth) slightly longer. If you're looking for more over-rev this isn't the muffler you are looking for because the DR.D system keeps all of the stock feeling over-rev on the track and doesn't gain anything extra. This isn't a bad thing as the standard YZ450F power character revs out just fine. 


IMG_6049.JPG

The DR.D slip on stainless system is the best slip on system that I have tried on the 2018 Yamaha YZ450F and will only set you back $395.00. Not to mention that you’re not losing any horsepower and gaining some mid-top end, while getting some added rear wheel traction. The DR.D muffler system comes with quality packing, has a nice sound to it without it being obnoxiously loud, is easy to re-pack on your own and doesn't blow out quickly. If it comes time to re-pack and you don't want to do it yourself, Dubach has an exhaust packing service where you can send in your muffler and he will re-furbish it for you for a small fee. If you're wife is having a conniption fit about you spending more money on your new bike you can tell her you're saving around $600.00 by not going to a full system. You’re actually compromising and doing her a favor! You're welcome fellas! You can check out all of the mufflers that DR.D makes over at dubachracing.com


If you have any questions about this test, please free to contact me at kris@keeferinctesting.com 


2018 Yamaha YZ450F Dubach Racing Engine Relocation Kit


The new 2018 Yamaha YZ450F corners much better than in previous years, but still can feel like it has some front tire pushing when there is nothing to bank off of. This is not as drastic a feeling as it was in 2017, but some riders want more front end bite out of the blue machine, so we thought we would try Dubach Racing’s engine relocation kit. Doug has had this engine relocation kit out for quite sometime and they have worked well on older model YZ450F’s. I personally didn't think the engine needed to be tilted more forward than it already has for 2018, but I can’t keep well enough alone, so I decided to give it a go. Dubach’s kit only consists of two small bushings that tilt the 2018 engine 1.5mm forward and only takes around 30-40 minutes to install. If you want to understand better on how to put the kit in you can go here: https://www.youtube.com/watch?v=5NLRyQr4Iss and check out Doug’s instructional video he did. This video is dated, but most of what he is doing to this older YZ450F applies to what you will do to the 2018 version (without the new engine mounts of course). The 2018 kit only comes with two collars/bushings as you will use all your stock/existing engine mounts.

IMG_7227.jpg


Before you go purchasing Dubach’s Engine Relocation Kit make sure you have tried doing some things to your 2018 YZ450F, like raising your fork up 5mm (flush is stock) in the clamps and be sure your sag is set at 104-105mm (100-102mm is standard). I don't recommend going higher up (with the fork) than 5mm to get more front end bite, as going up any higher will dramatically hurt your straight line stability. 


So what exactly did I feel on the track once the Dubach Racing Engine Relocation Kit was installed? A lot actually! “Keefer, it’s 1.5mm, how much difference can it be”? Well once I got out on the track, I immediately noticed how reactive the front wheel was to my steering. I have a ton of hours on the stock 2018 YZ450F and I know how it reacts once I turn the handlebars. The Yamaha with the DR.D Relocation Kit on was almost Honda-like and gave me the feeling of having the front tire tucked in more towards the engine. It took me around two laps to realize that I needed to drop the fork back down in the clamp and re-check my sag to get it to where it wasn't as reactive to handlebar movement. I dropped the fork back down to 2mm up in the clamp, set my sag at 105mm and did a couple motos. The 2018 Yamaha YZ450F has better tip now in coming into corners and I can feel the front knobbies biting down a lot more through flat corners. This was all for the better, however I noticed a little less straight-line stability and slightly less rear wheel traction coming out of hard pack corners. I adjusted my fuel/ignition map on my Yamaha Power Tuner App to help mellow out the low-end delivery and that rear wheel traction returned! The straight line stability loss that I experienced was very slight, but was mostly noticed while on-throttle, off-throttle stability improved slightly. When chopping the throttle the little wiggle I used to get in the chassis has now settled down some. On throttle side to side movement fro the rear end has slightly increased. I wouldn’t say that the DR.D kit makes the 2018 Yamaha YZ450F twitchy, but it will make it very reactive to any slight steering movements you make. If you are looking to make the Yamaha a more reactive machine and slightly more agile, this kit will do just that! 


At the end of the day, I prefer the stock tilt for the way I ride. Let me explain this…. I don’t mind a slightly slower turning machine as I can corner fairly good. I do need front tire traction as I am a front end steering rider, but having a little less reactive machine makes me feel stable and I am able to push harder (hence more stability). Now, if you’re a rider that needs every ounce of lean, front-end bite and cornering capability, this is a great option for you. I have several riding buddies that prefer the Honda CR450R over the YZ450F because they want their machines to corner with ease and with more front wheel bite. Having this DR.D Engine Relocation Kit installed made those friends happy with the 2018 YZ450F now. The DR.D Engine Relocation is available now and will set you back $89.95. 


If you have any questions about this test please feel free to email me at kris@keeferinctesting.com

Enzo Racing Spring Perch And Sub-Tank System For 2018 YZ450F KYB SSS Fork Product Review 

The 2018 Yamaha YZ450F is the best suspended motocross bike that is available, but that doesn't mean I’m going to leave it alone. When I got the call from Enzo Racing’s Ross Maeda to see if I wanted to test a couple fork parts, I was more than happy to see if we can make the KYB SSS fork even dreamier. 

IMG_6627.jpg


We didn't go with a fork re-valve as we wanted to see if the parts provided made a noticeable change to the existing stock 2018 valving. I personally like this approach because if you're currently happy with your valving and just needed to fine tune this was a great test to see if the Enzo parts provided could make a difference. I am 170 pounds and a front end steering rider, but I felt the stock fork setting (once broken in) was a little soft on de-cel and jump faces/transitions. Ross installed a 5.1 fork spring (5.0 is stock) and sent me out on the track to see if I liked that change, which I did. It provided a little more hold up and I could ride over the front more while being more aggressive. It did give me slightly less front end traction on lean in (coming into corners), but the trade off for me was well worth it. I did however need a little more comfort on the top part of the fork’s stroke (acceleration, light bump absorption).


enzo_technica_spring_perchMX.jpg

Next up, Ross installed the Enzo Technica fork spring perch. This perch flows more oil and is a machined aluminum piece that Ross at Enzo makes for several different models. Once the spring perch was installed, they sent me back out on the track and I immediately noticed a difference on lean angle traction. The front end traction that I lost with the 5.1 front fork spring I gained back and then some. With the spring perched installed I immediately felt more front end bite coming into corners, especially on flat corners. Where the front tire felt like it was riding more on top of the dirt now I could feel the knobs digging into the terrafirma more when I went to cut down into a rut. Another part of the fork’s action that was improved was on braking bumps. The stock Yamaha fork isn't harsh by any means, so I guess the best way to describe what I felt was more of a plush feel when hitting bumps (on or off throttle). Let me try and describe what I am feeling to you all while you are sitting there reading this: Let’s say the stock fork is a basketball that you drop 10 feet up in the air, to the ground. The Enzo fork with their spring perch installed is like dropping the same basketball to the ground, but now from only from 5 feet up in the air. This is the sensation that I get when riding that is most describable to you all. It cuts the KYB fork’s hit to each bump (or sensation to your arms) in half. I was so amazed that I had to go back to the stock spring perches just to be sure what I was feeling was in fact that much better. If you listen to my podcast, you know how I rate each test as it’s off of a numeral system. On my sheet the numeral system would look something like this: Stock fork = 3 baseline. Enzo Fork with spring perches installed = 3.5. A noticeable, positive change! 


IMG_7317.jpg

For the last test Ross installed the Enzo Sub-Tank System that was so popular several years ago. However, this is not the same system that was around back then, this is more like a 2.0 version of the Sub-Tank System. The Enzo Racing Sub-Tank system is adjustable by bleed setting screws on the side. This adjustment is tunable using a small flat blade screwdriver. The standard setting is 4 complete turns out (counterclockwise) from maximum (all the way tight clockwise). This adjustment setting creates a restriction in the tanks which will control the air compression volume depending upon the speed that the fork is compressing. In simpler terms, the tighter the adjustment, the sooner the firmness of the fork will occur. If you are experiencing bottoming, you should turn the adjuster clockwise IN 1 turn at a time. If the action feels too stiff, turn the adjuster counterclockwise OUT 1 turn. I left it on the stock setting for this test, just to get a feel for what it does. What I can tell you is that the fork still has that plushness and front end bite it had with the Enzo Spring Perches, but I can feel more of a damping feeling near the end of the fork’s stroke now with the Sub-Tanks installed. This wasn't a huge improvement, but I could hit faces of jumps harder and flat land singles further. Basically this system works great if I was racing and getting aggressive while trying to make the pass on a rider. I like how putting these Enzo Sub-Tanks on did nothing to my newfound front wheel traction that the Enzo spring perches gave me. 

IMG_7329.jpg


At the end of the day I got an even better (more comfortable) feeling front end and didn't have to re-valve my fork. I will be trying a full Enzo re-valve in the future, but I thought for keeping the stock Yamaha’s valving in and only adding a few pieces to the fork, it really helped the fork’s action and ride attitude of the bike around the track for the better. The spring perches and sub-tank system are available now. You can call Enzo at (714) 541-5218 for pricing or visit www.enzoracing.com 

For any questions about this test or any other burning questions please feel free to email me at kris@keeferinctestingcom.   


FMF Factory 4.1 RCT Full Muffler System Product Review

It’s hard sometimes to get more power out of newer four-stroke models nowadays with aftermarket mufflers systems. To be honest with you most stock systems are pretty damn good and aftermarket muffler companies like FMF work really hard to try and give you that little extra bit out of a system. I can sit here and tell you that FMF is one company (of only a couple in existence) that will take the time to listen to the proper feedback (either from me or other media testing outlets) and make the necessary changes to alter a new four-stroke machines power in the right direction. The key word here is “alter” and maybe not “gain”. Yes, in this article you will hear me talk about “gaining” a little pulling power, but to me the configuration of the 2018 Kawasaki KX450F FMF 4.1 RCT Muffler System power delivery is more “altered” from stock than anything. 

IMG_7283.jpg


The stock power of the Kawasaki is unchanged for 2018, but that doesn't mean it’s not a great bike. The engine has a snappy throttle response with a free feeling, on de-cel, without much engine braking. Once rolling on the throttle, the power is not as strong as the Honda or Yamaha, but still creates a lightweight feeling on the track. I didn't necessarily need more rpm response with the KX450F, but would like more meat through the mid to top end range. Bolting on the KX450F FMF Factory 4.1 system is bar far the easiest system I have bolted on for 2018. It took me literally two full songs on the Metallica Pandora station to change the muffler. The Kawasaki is a light bike stock, but I chose to go with the full titanium system that let me drop 1.8 pounds from the stock system! Visually the titanium FMF system is one of the most stunning aftermarket mufflers you can put on a bike. I love the blue anodized finish as it looks good on almost every make and model machine. 


IMG_7286.jpg

On the track the FMF 4.1 on the KX450F makes as much bottom end power delivery as stock and keeps that peppy/exciting RPM response. Where the FMF 4.1 system really impressed me was mid range pulling power when exiting corners. The stock system feels empty in this area, but the FMF fills the power-feeling in through the mid-range. What I mean by “fill the power in” is that the FMF system actually feels like it pulls as soon as you shift into third gear unlike the Kawasaki’s power where it feels like it lacks some pull through the mid-range. There is a dip in the Kawasaki’s mid to top end power and the FMF brings back some meat through that area, which in this case “fills in” that area. Top end is also increased slightly and you get increased pulling power near the end of each straight with the FMF. 


I did go back and forth with the couplers on the KX450F and came to the conclusion that although the lean coupler is better for bottom-mid range power, the standard coupler is slightly better from mid to top end. I will have to say when you do go to the lean coupler that the KX450F will pop more on de-cel with the FMF system than the stock muffler. With the standard coupler de-cel pop is minimal and not as noticeable with either system. 


IMG_7288.jpg

At the end of the day the FMF 4.1 RCT full muffler system is better than stock and that is not easy to do these days. It takes off some weight and looks better than the stock monstrosity. To me there is no negative with the FMF system and that is rare in an aftermarket muffler. I have tried other FMF mufflers, on some other models with some negatives, but the KX450F muffler is a good buy. Please note that re-packing of the FMF muffler is important for the can’s lifespan. The muffler portion (or can) will start to leave hot spots/scarring when the packing starts to burn out inside. Once you start seeing these “hot spot scars or markings” on the muffler, remove and re-pack is recommended. FMF sells re-packing kits and taking the can apart to re-pack is not that hard to do. I get around 10 hard engine hours (these are pro type hours) before I see these markings and have to re-pack. If you run it past the recommended time, you run the chance of hurting performance and damaging the core (or perf) inside the muffler. Kudos to FMF for building a good KX450F system and moving the power around slightly and gaining a little as well. If you have any questions about this test please email me at kris@keeferinctesting.com 


Bonus: If you listen to my Keefer Tested podcast you know that I rate some parts and motorcycles by a numeral system. I wanted to break down the FMF system to the stock system for you all below. If you don’t know what these numbers mean, please go listen to show #3 “How To Test” and you will understand better what these numbers mean. 


Stock/FMF:

Bottom End: 3/3

Mid-Range:  3/3.5

Top End:      3/3+

Over-Rev:    3/3+

Bottom End RPM Response:  3/3

Mid RPM Response:               3/3.5

Top End RPM Response:       3/3+