Protection

Fox Instinct Boots

Just in case you haven't listened to episode 7 of the Rocky Mountain ATV/MC Keefer Tested Podcast (Boot Comparison) I will now go over the Fox Instinct boot and how it performs//protects/feels/lasts. When the designers and engineers at Fox set out to design a new high end boot, they didn't just shoot for "almost perfect", nor did they accept that a finished product had to be flawed. They spent a huge amount of time designing, developing, as well as race testing various components, and after several years of gathering feedback from the top riders in our sport, they came up with a design that was ready to go into production for all us mere mortals. The Instinct boot design has been in production almost 10 years and in my opinion is one of the most comfortable boots to wear. Let me explain how they did this:

IMG_5685.jpg

The key goals in developing the Instinct boot were to combine freedom of movement with the highest level of protection possible; in other words, safety and comfort were a must for the Fox engineers. This starts in the guts of the boot where five key components have been utilized to create the perfect fit: An athletic insole provides running shoe-like cushioning, a steel shank supports the arch, a polyurethane midsole offers energy absorption, a TPU support is in place for impact protection and stability, and Fox's exclusive rubber Duratac outsole provides grip on the peg and is backed by lifetime durability guarantees.

IMG_5607.JPG

The rest of the boot is just as highly developed as the inside. A patented floating ball-and-socket buckle makes for easy operation with gloves on. Flexion is provided by a stabilizing hinge, which also ensures that the ankle cannot hyperextend past the predetermined lockout points. A host of other technical materials grace the boot to help create a solid weld between ankle and bike, and the overall build makes for one of the lightest boots on the market. Fox truly left nothing on the table when developing these suckers.

Over the course of the Instinct’s production lifespan, the sizing has been improved. I have noticed a true-to-size fit since early 2019, so if you have a 2018 Instinct and notice you went up a size from your normal sizing, the new 2019-2020 sizing is much improved. If you decide to purchase a new pair (and have an older Instinct model) you may have to go back down to your normal size. The toe-box is a little narrower than a Tech 10, but not as tight as a Sidi Crossfire 3, and the buckles are so much easier to operate than those found on some of the biggest brands in the sport. The first positive aspect/experience of the boot you will notice is the lightweight feel to the Instinct. My legs certainly do feel less fatigue when riding tracks that force you to ride leg high through ruts/corners. To me these are the lightest feeling boots that I have ridden with to date. The feature that I was most surprised with was the inner comfort of the boot. I am so used to have having an inner bootie for ankle support, I thought I would feel naked without it, but it literally took me only a few minutes until I appreciated how much comfort my feet/ankles had. I don’t have bad ankles, but I do ride a lot and my ankles can get sore from riding all day long. The Instinct boots do have more movement in the ankle area than a Tech 10, but I also don’t feel like my ankles are being overworked or stretched. The sole also has more grip than I was expecting, which provides excellent absorption/cushion to my ankles when slamming into jump faces or when I really screw up and case the crap out of something. Here’s a tip: After break in (which isn't very long at all) I will tighten up my buckles tighter than normal, so that I get a more secure lock around my ankle (this is important with the middle two buckles). The inner potion of the boots have excellent grip against the frame and this is an important feature to me because I grip with my legs a lot! Some boots use a rubber like material that simply doesn't grip well when squeezing, but the Instinct boot comes “stock” with great gripping material on the inside of each boot.  

IMG_5687.jpg

Like a good running shoe, the insole has enough cushioning and support without feeling too rigid or bulky. Off-road riders will love this boot based on the fact that it truly can be worn all day, but Fox also offers the Instinct in an off-road version as well with a more aggressive sole. The protection level certainly feels sufficient for the usual battery of rut-snags and rock-hits that I encounter on any given day of testing. However, to me, the Instinct is built for performance and comfort, but the integrity/support of the boot can break down a little quicker than other boots out there today. This is the only boot that I can wear straight out of the box and feel my pegs as well as my shifter/brake pedal without any issues. I can’t pull a set of Tech 10’s out of the box and feel “good” right away, but I am able to do this with the Instinct’s. The Fox Instinct boots DO NOT hardly need any break in period. They are ready to rock! 

The flip-side/bad news is when the Instincts get some time under them, they can get somewhat flimsy in the ankle area to me and I can feel my ankles flex too much when landing hard off of jumps. I usually keep boots for a fair amount of time (around 60-80 engine hours), but the Fox Instincts felt looser in my ankle area around 42 hours of engine time. This is where you will need to keep up pn your middle to buckles. I constantly adjust my middle two buckles to ensure I get a tighter fit around my ankle. I can’t stress enough how huge this is with this boot! Think of these middle two buckles as your daily routine of bike/gear maintenance. Just because the middle two buckles were good yesterday doesn't mean that they are correct for the another day. Tighten them accordingly and your ankles will thank you. Other pieces to the boot like the outsole, buckles, insole, and hinges never broke or failed, but I just feel the boot to be super soft (in ankle area) after some time of usage without adjusting the middle two buckles. Fox Instincts have lasted me over 40 engine hours, but have only seen stock pegs and not super sharp titanium oversize pegs, so your sharp peg riders keep an eye on your outsoles.

Send Them In!

Send Them In!

The Fox Racing Instinct Sole Warranty: Something that you may not know is that Fox offers Instinct buyers a free outsole replacement if your Instincts meet their requirements. Do yourself a favor and make sure to keep an eye out on your soles, so they don’t get ate up past the red indicator strip/marker. If they are worn and aren’t past the red indicator strip/marker, send your boots into Fox Racing and they can install original Fox Duratac inserts in for you at no charge! Here is the link: https://nushoe.com/fox-head.html

IMG_5605.JPG

Overall, the Instinct features an impressive level of performance and comfort that definitely lives up to Fox's claims. Coming in at $459.95, the Fox Instinct is less expensive than the Tech 10 or a Gaerne SG-12, so the decision to purchase shouldn't be about price. In my opinion, the Fox Instinct boot is the most comfortable boot out of the there, but will need more attention/adjustments to the middle two buckles, if you want them to protect your ankles, like Fox intended after some time of use. I look at the Fox Instinct boot like a factory spec tire that is available to us non factory guys. It provides maximum comfort and performance on the track, but just doesn't last quite as long structurally. Head over to https://www.foxracing.com/moto/mens/boots/ to get yours as well as view all the styles and colors.

If you have any questions about this test please feel free to email me at kris@keeferinctesting.com and I am here to help!   

Fox FlexAir Pant And Jersey

When it comes to riding gear there are only a few sets of gear that I really look forward to wearing day in and day out. I ride anywhere between 5-6 days a week and the gear that I wear must hold up over several hours of riding time, have enough stretch materials so I am able to move around on the bike freely, gives me enough ventilation that I am not getting over heated, have a comfortable fit, and of course make me look like I am the fastest on the track, even though I’m not. Fox Racing has been one of those companies that has been making sets of gear for the past few years that have checked all of those boxes. 

IMG_4916.PNG

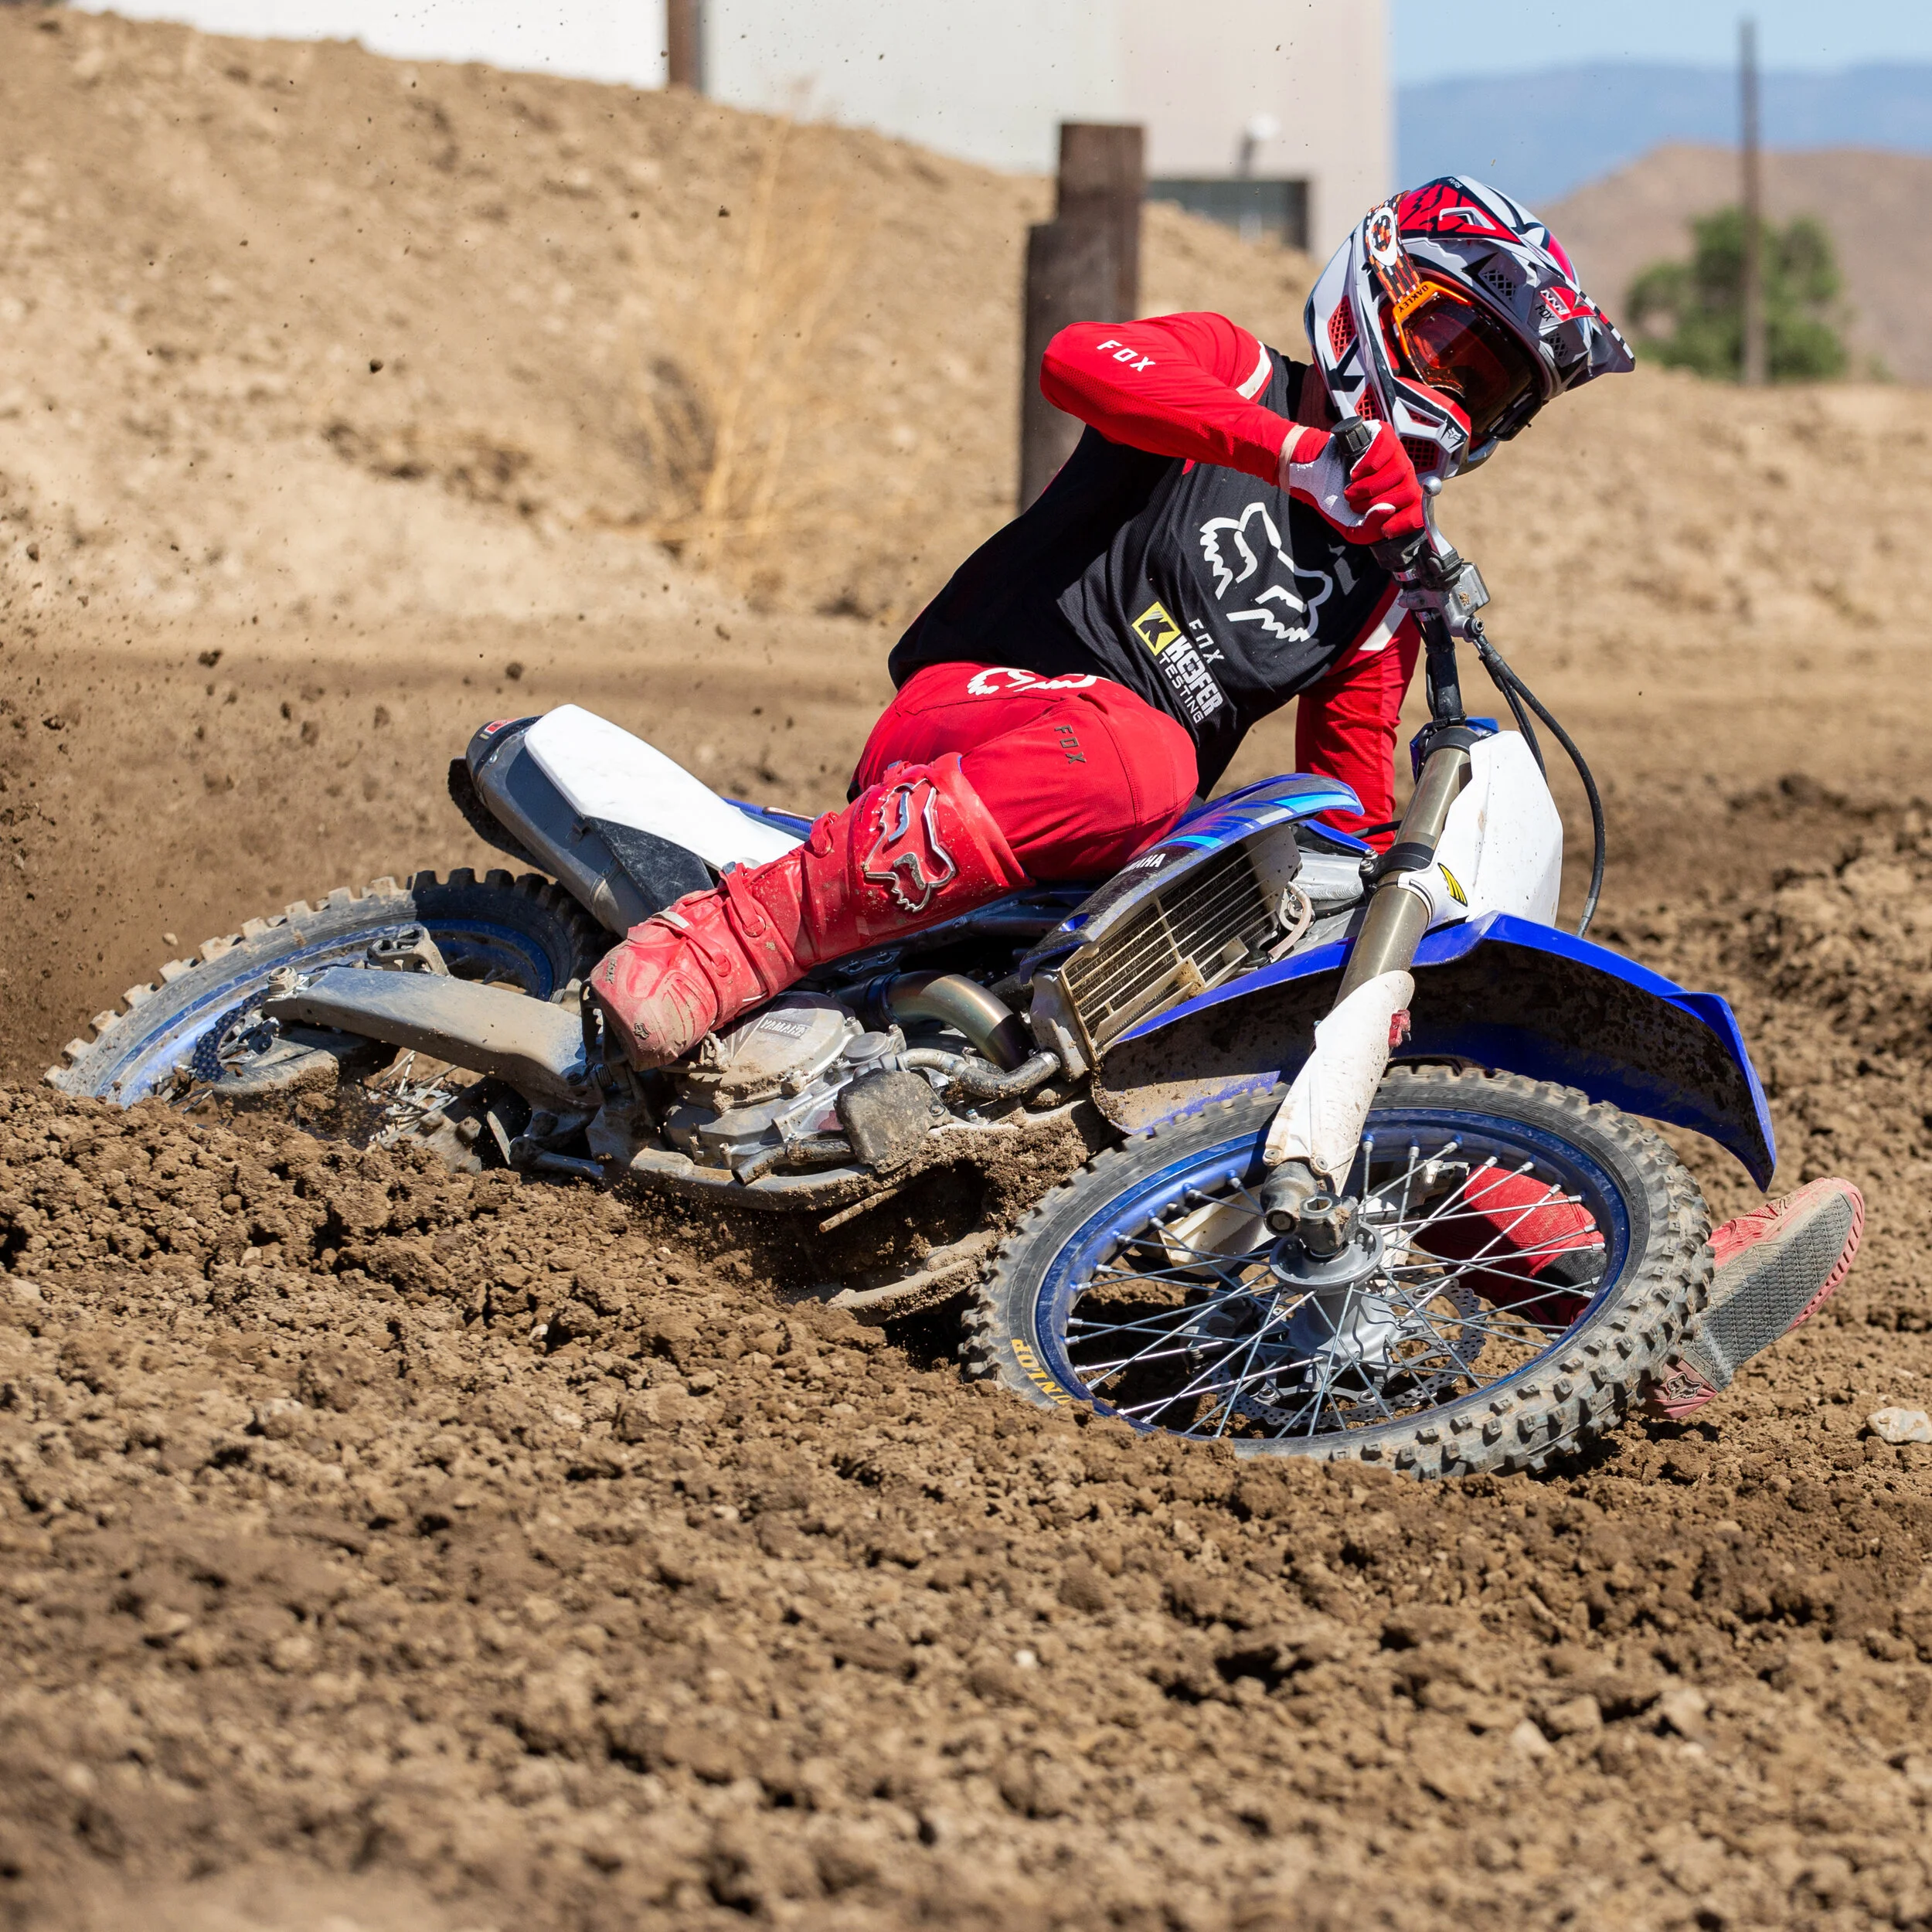
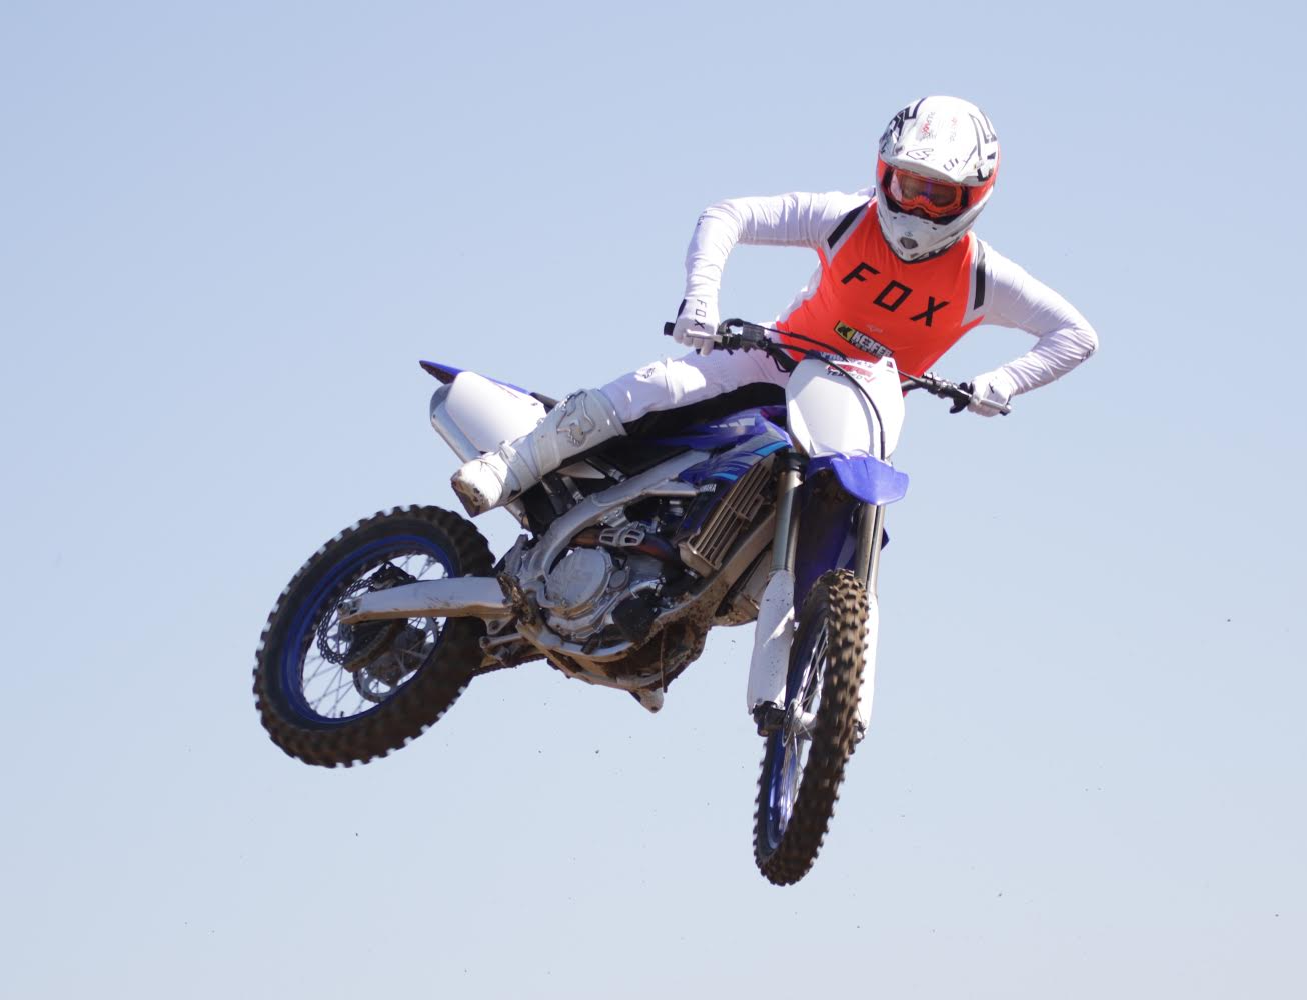
Fox changed some of the features to their top of the line FlexAir pant and jersey for 2020, which grabbed my attention enough for me to re-test and get some information back to you all. The FlexAir jersey has been refined to maximize breathability and increase mobility. The active-fit sleeves with laser perforated venting are changed for increased breathability and airflow. The pant’s chassis has been redesigned to increase mobility and comfort. Fox updated the waistband to improve fit, refined the rear yoke to increase flexibility, and redesigned the internal liner to reduce chafing (something that I thought was needed on last year’s FlexAir pant). If you want to red all the features to Fox’s pant and jersey you can simply click on this link: https://www.foxracing.com/moto/mens/gear-sets/. For this article I wanted to give you all the straight scoop on what it’s like ride with this gear on the track. As you all know, I may or may not be a gear freak. 

IMG_5393.jpg

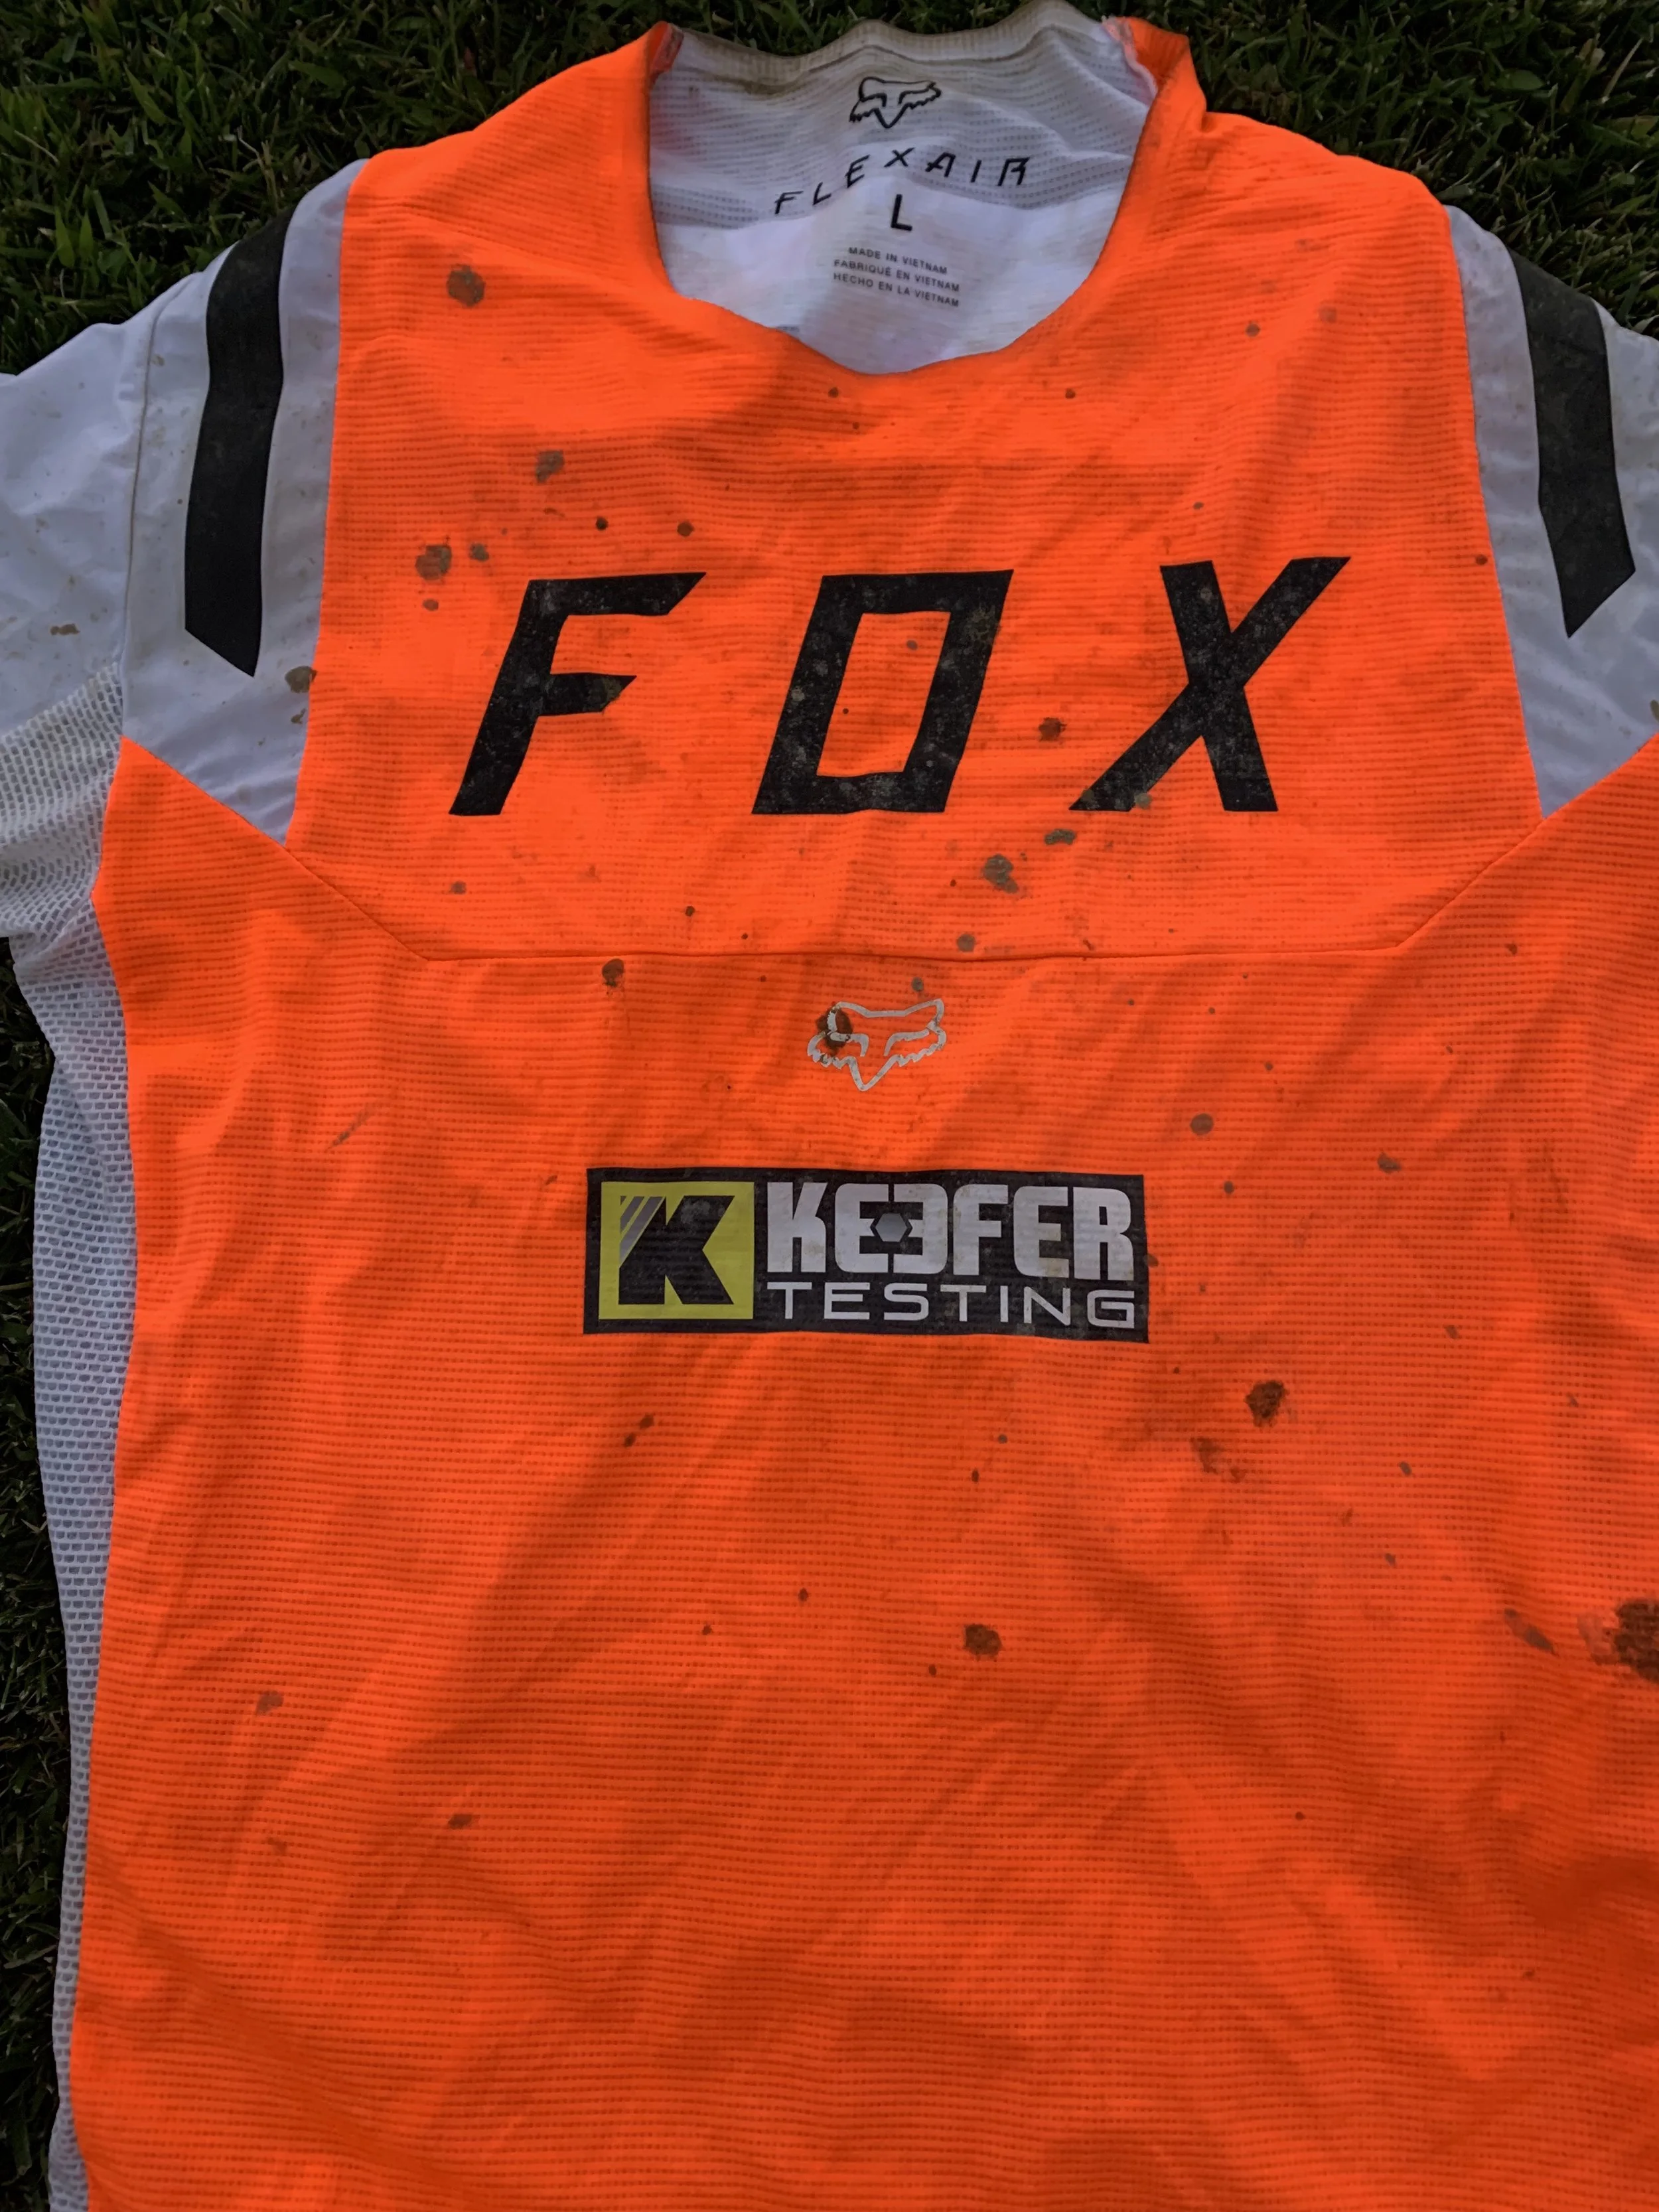
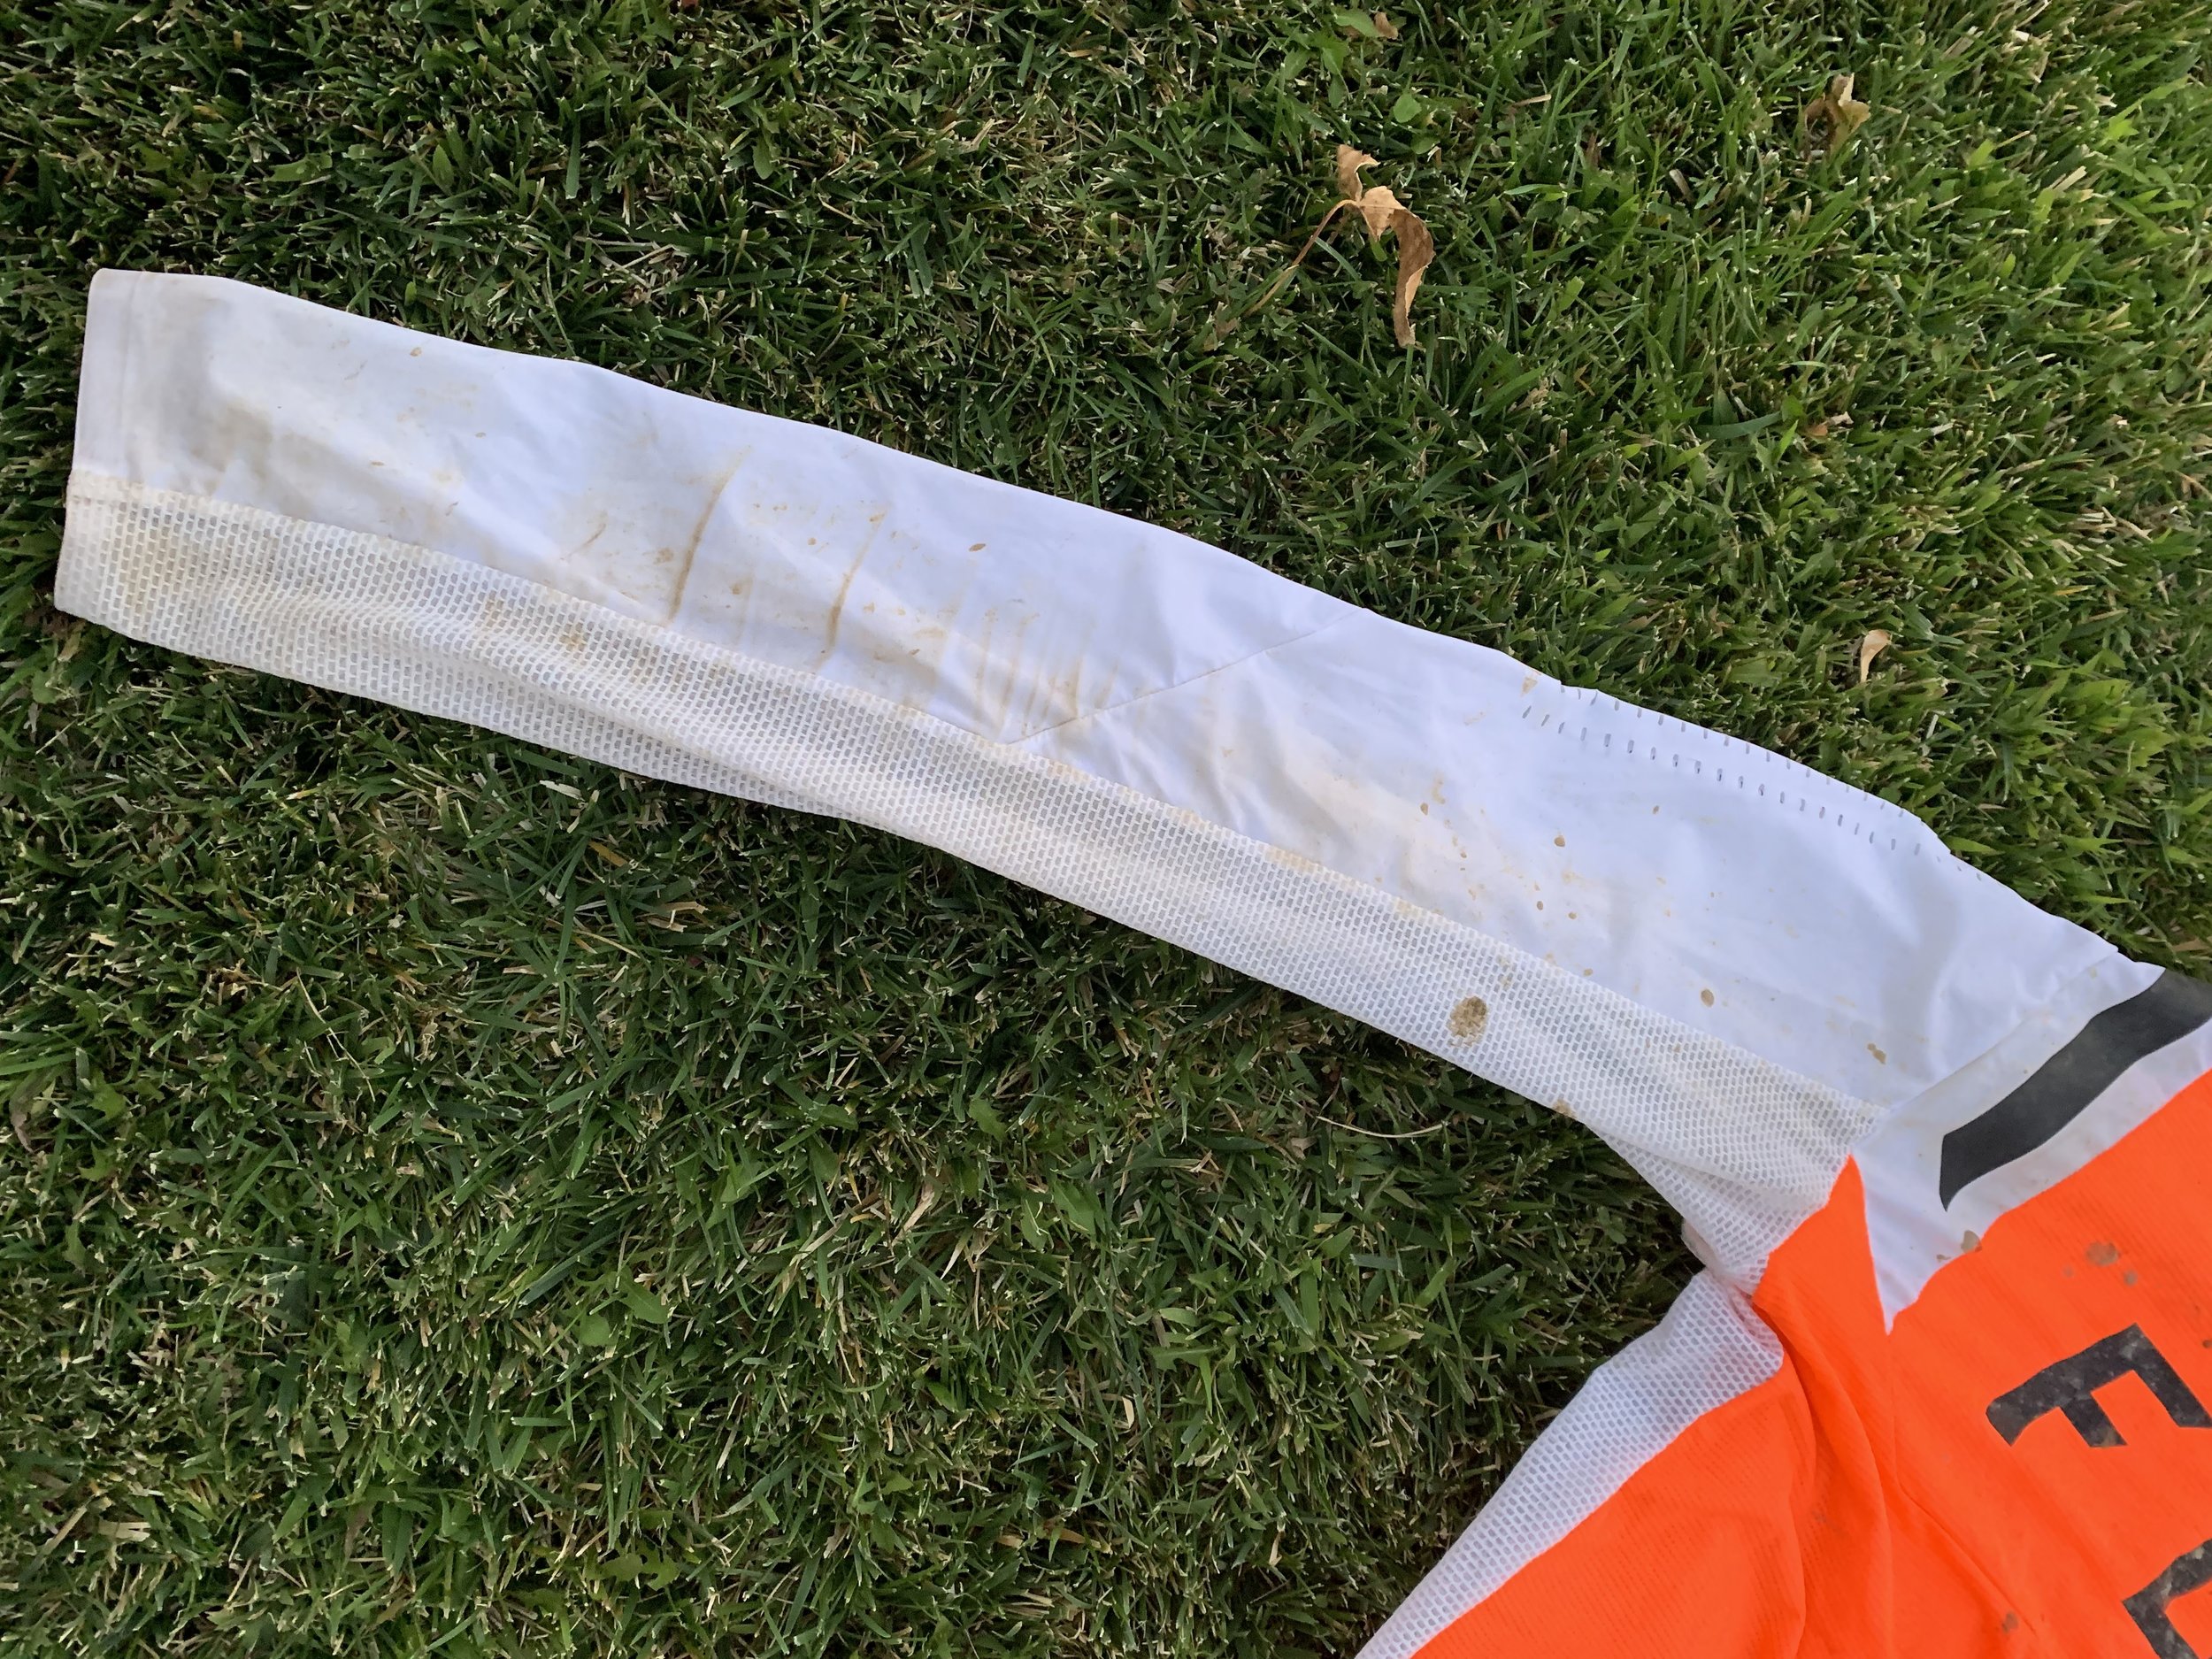
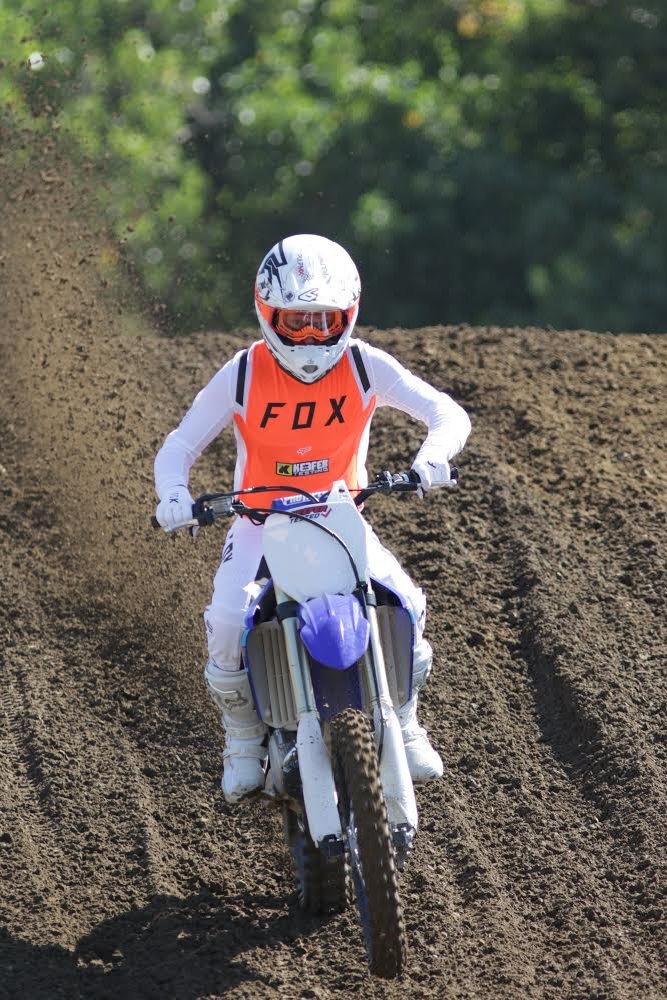
For warmer weather this FlexAir jersey is the best on the market with its Tru-Dri fabric material. The ventilation through the arms and a lightweight feel throughout my torso, there is no other jersey on the market quite like this FlexAir jersey. I don’t know if Fox changed the length of the arm for 2020, but after wearing my 2019 jersey and this new HOWK jersey back to back, it seems like the cut is slightly longer, so taller riders will like this feature more in 2020. However, I am 5’11 and the length of the sleeve/arm was adequate enough for my picky ass. The perforated sleeves ventilate insanely well, but unlike last year, when you happened to sweat, the sleeve doesn’t get crusty/hard feeling once your jersey dries. The 2020 FlexAir jersey doesn't have that harsh or course feel to the skin and remains soft throughout the day. The FlexAir jersey is athletic cut, but as snug as it is to your torso, the material of the jersey is super stretchy. All you bigger dudes out there do not stress on if this jersey will be too tight or reveal too much. It will be just fine! Trust me! You will like the way this jersey can conform to your body yet remain so comfortable throughout a long day of riding. 

IMG_5392.jpg

The cuff doesn't get stretched out like the old FlexAir jersey over time and although it’s somewhat tight when sliding over your hand, it’s very comfortable when riding (and isn't restrictive). The FlexAir jersey feels so light, it’s almost like wearing nothing, so be forewarned of roost if you’re a non-chest protector kind of guy. It’s super thin, yet surprisingly durable! Most underprotectors work well with the FlexAir jersey because it’s sso stretchy. I have worn three different types of underprotectors and all have fit well with my normal jersey size. You will not need to go up a size if you’re wearing a underprotector. Durability of the jersey is superb, but DO NOT go riding through trees with this jersey and expect it to last. Tree branches will rip the material on the FlexAir! This is a motocross only type of material. The jersey fits true to size and stays tucked in throughout the day.

IMG_5388.jpg

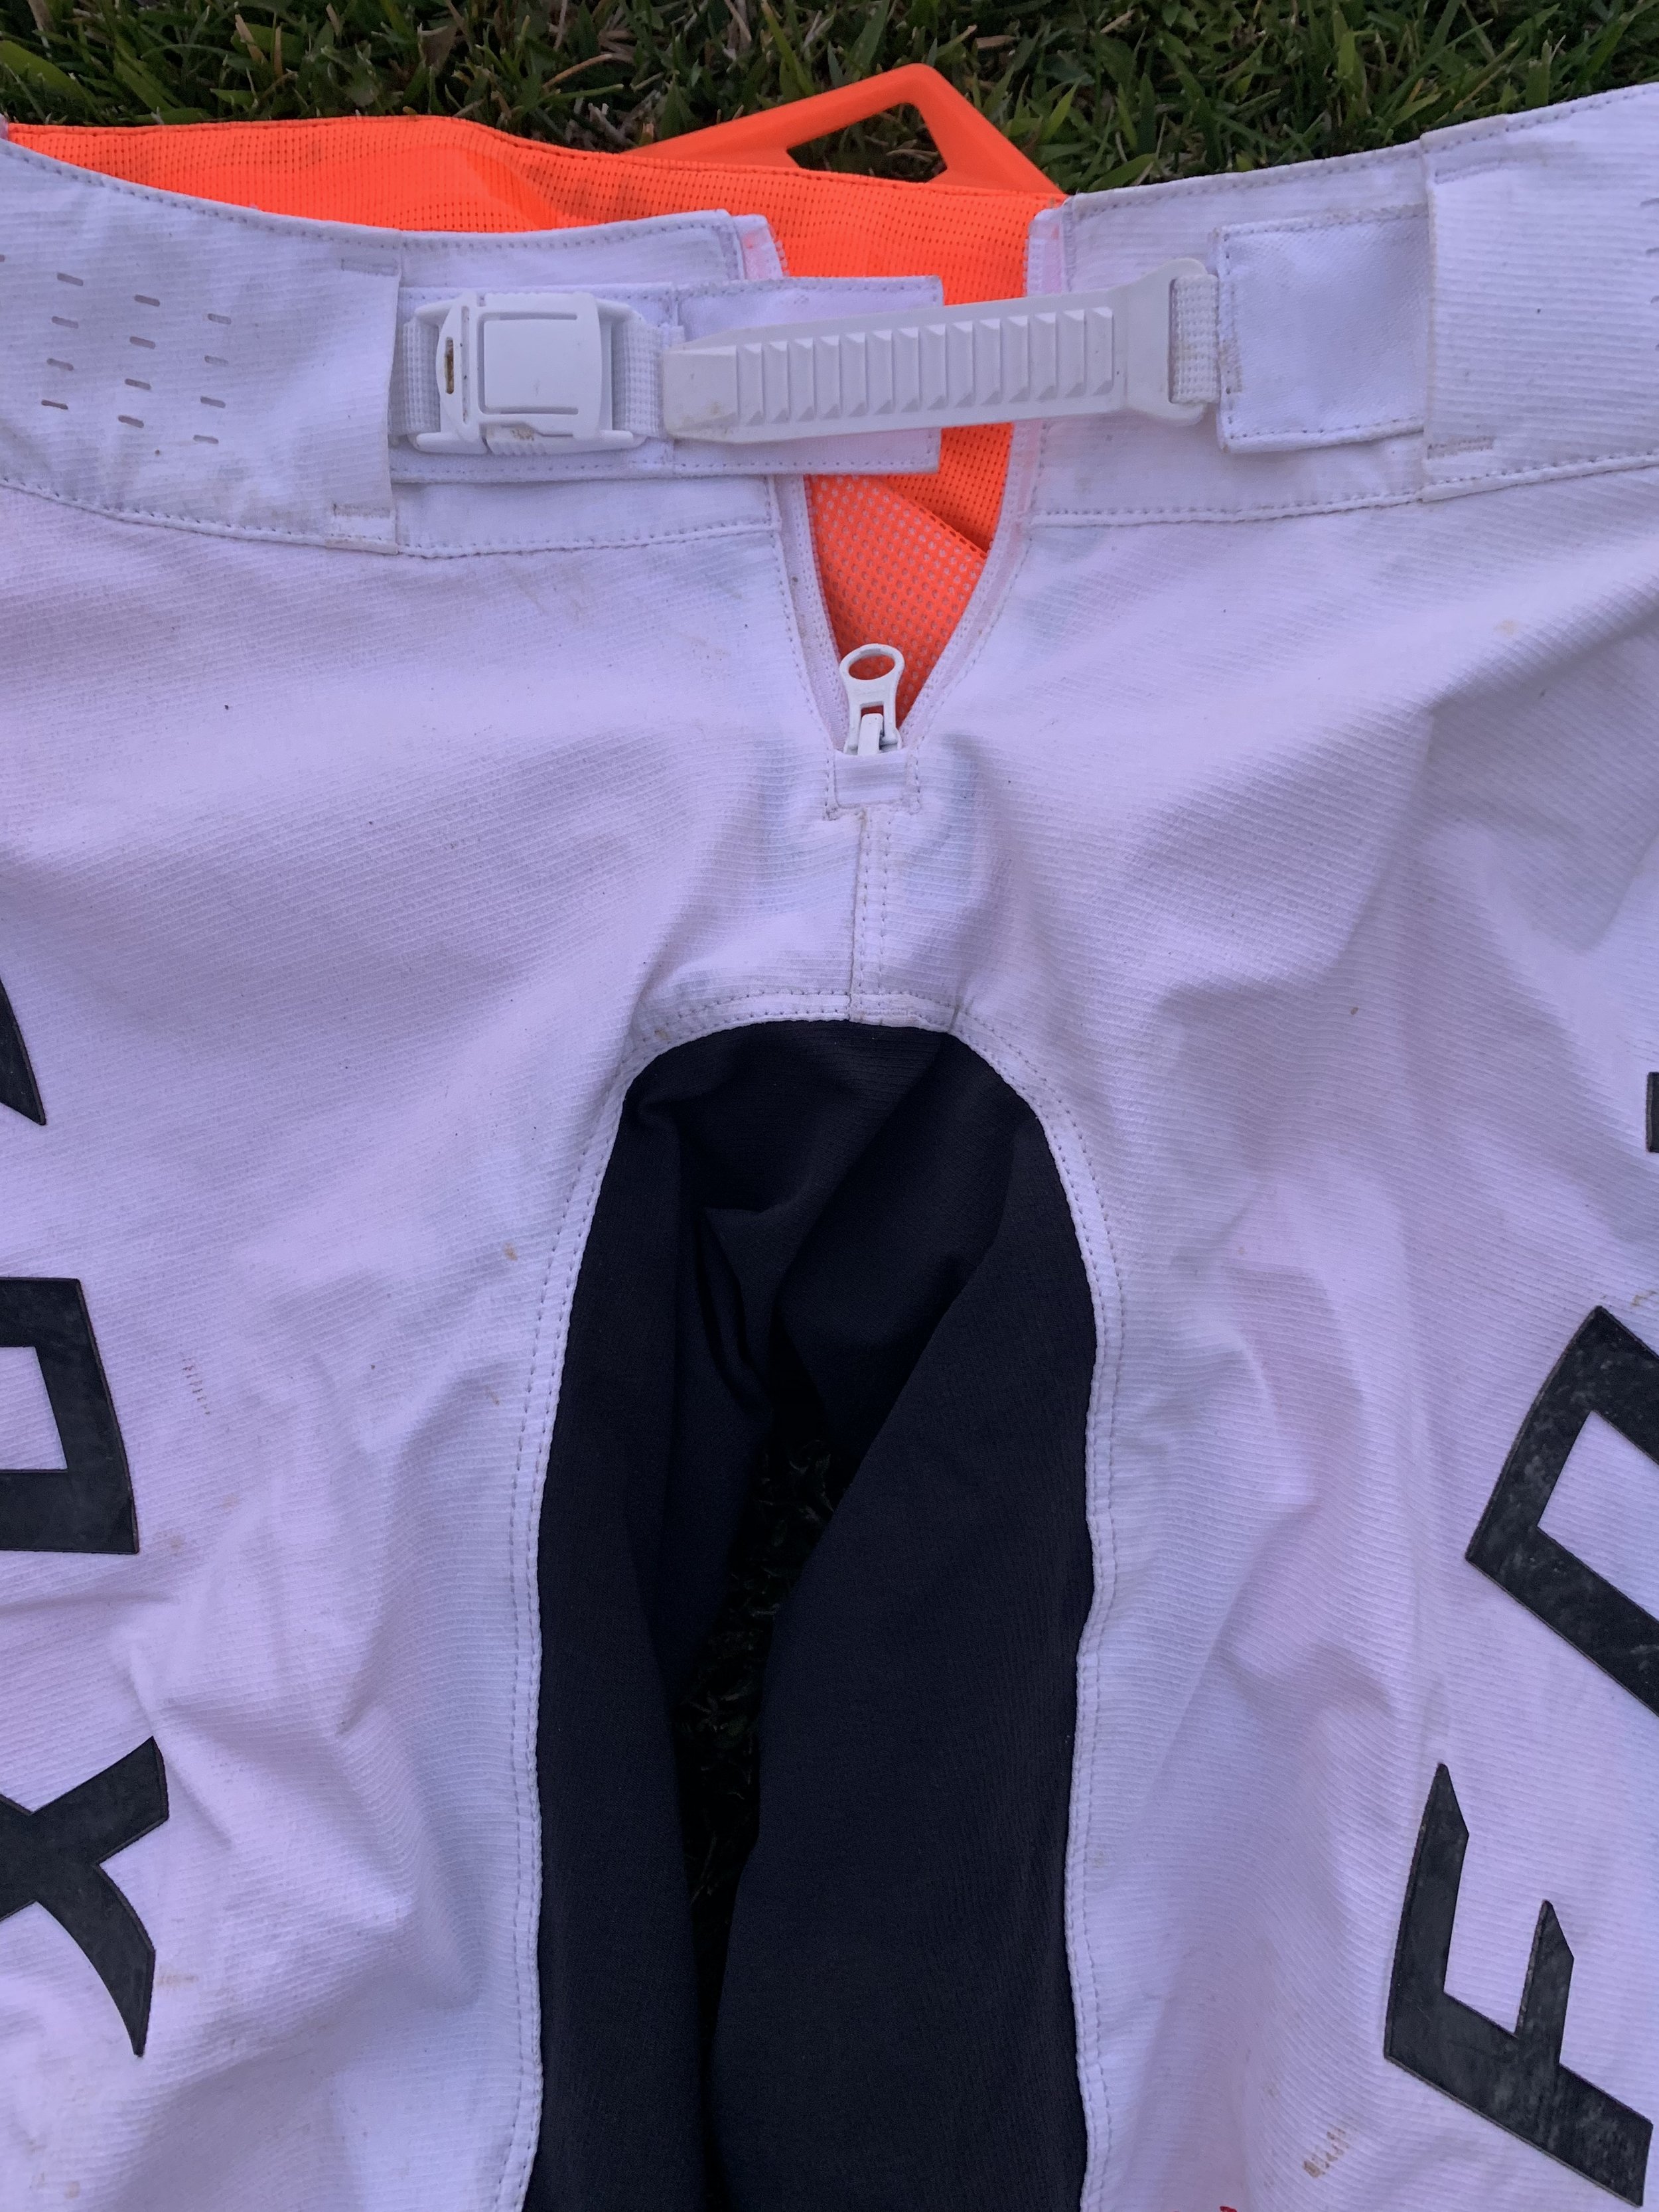
The Flex Air pant is an athletic style pant that fits tight/snug over my knee brace/knee area, but remains super stretchy through the thigh area. I am able to move around on the bike freely and feel less restricted compared to other non-athletic fit type pants. The word “snug” doesn’t have to mean “restrictive” or “uncomfortable”. Having a snug fit against your body can help make you feel streamlined while riding. This may sound like a line of bullshit to some of you, but I have gone back and forth enough with other brands of pants and jerseys that I can really feel the difference with the Fox’s FlexAir set of gear. Having a cut closer to your body that is stretchy really lets me move around the bike better without any hang ups or drag when riding (aka, seamless feel). It’s hard to explain how good the feeling is when wearing a pant and jersey that is snug enough yet can make your muscles feel more secure when riding, but also has enough stretch in it that you can move around/articulate your movements on the bike more efficiently while riding.     

IMG_5390.jpg

What’s odd to me is that no other media testing outlet ever really talks about this, but when going back and forth between athletic/non-athletic cut gear, you can feel a difference in drag (especially at speed) and weight. When going from sitting to standing with athletic cut gear there is less bunching of material therefore when going from sitting to standing I can actually feel the lack of weight of the pant. At the end of a long test day my legs are literally less fatigued because of the lightweight materials inside the FlexAir pant. The updated closure system is like having a half belt around your waist with Fox’s two-piece design. When you cinch down on the buckle it feels like the waist area is firmly secure all the way around your waist, not just the front area. I am a huge fan of the BOA reel on the Fly Racing pants, but this half belt is the next best closure system to me. The taped seams inside the pant are great and I wish every manufacturer would do this because you never get snags when pulling the pants up. Not only do taped seams help when putting the pant on, it helps when moving around on the bike and keeps the pant lightweight feeling. Fox’s “RAP” system really does work and is not just a gimmick. The redesigned internal liner will not rub your ass raw when riding longer motos unlike like last year’s FlexAir pant. I will say that I only ran into this chafing problem last year when wearing boxer brief type of under garments (Ethika’s, BVD’s, tighty whitey’s, etc.) with the FlexAir pants. If you’re a cycling short under garment type of rider then don’t worry as you may not even notice the internal liner change.

IMG_4917.PNG

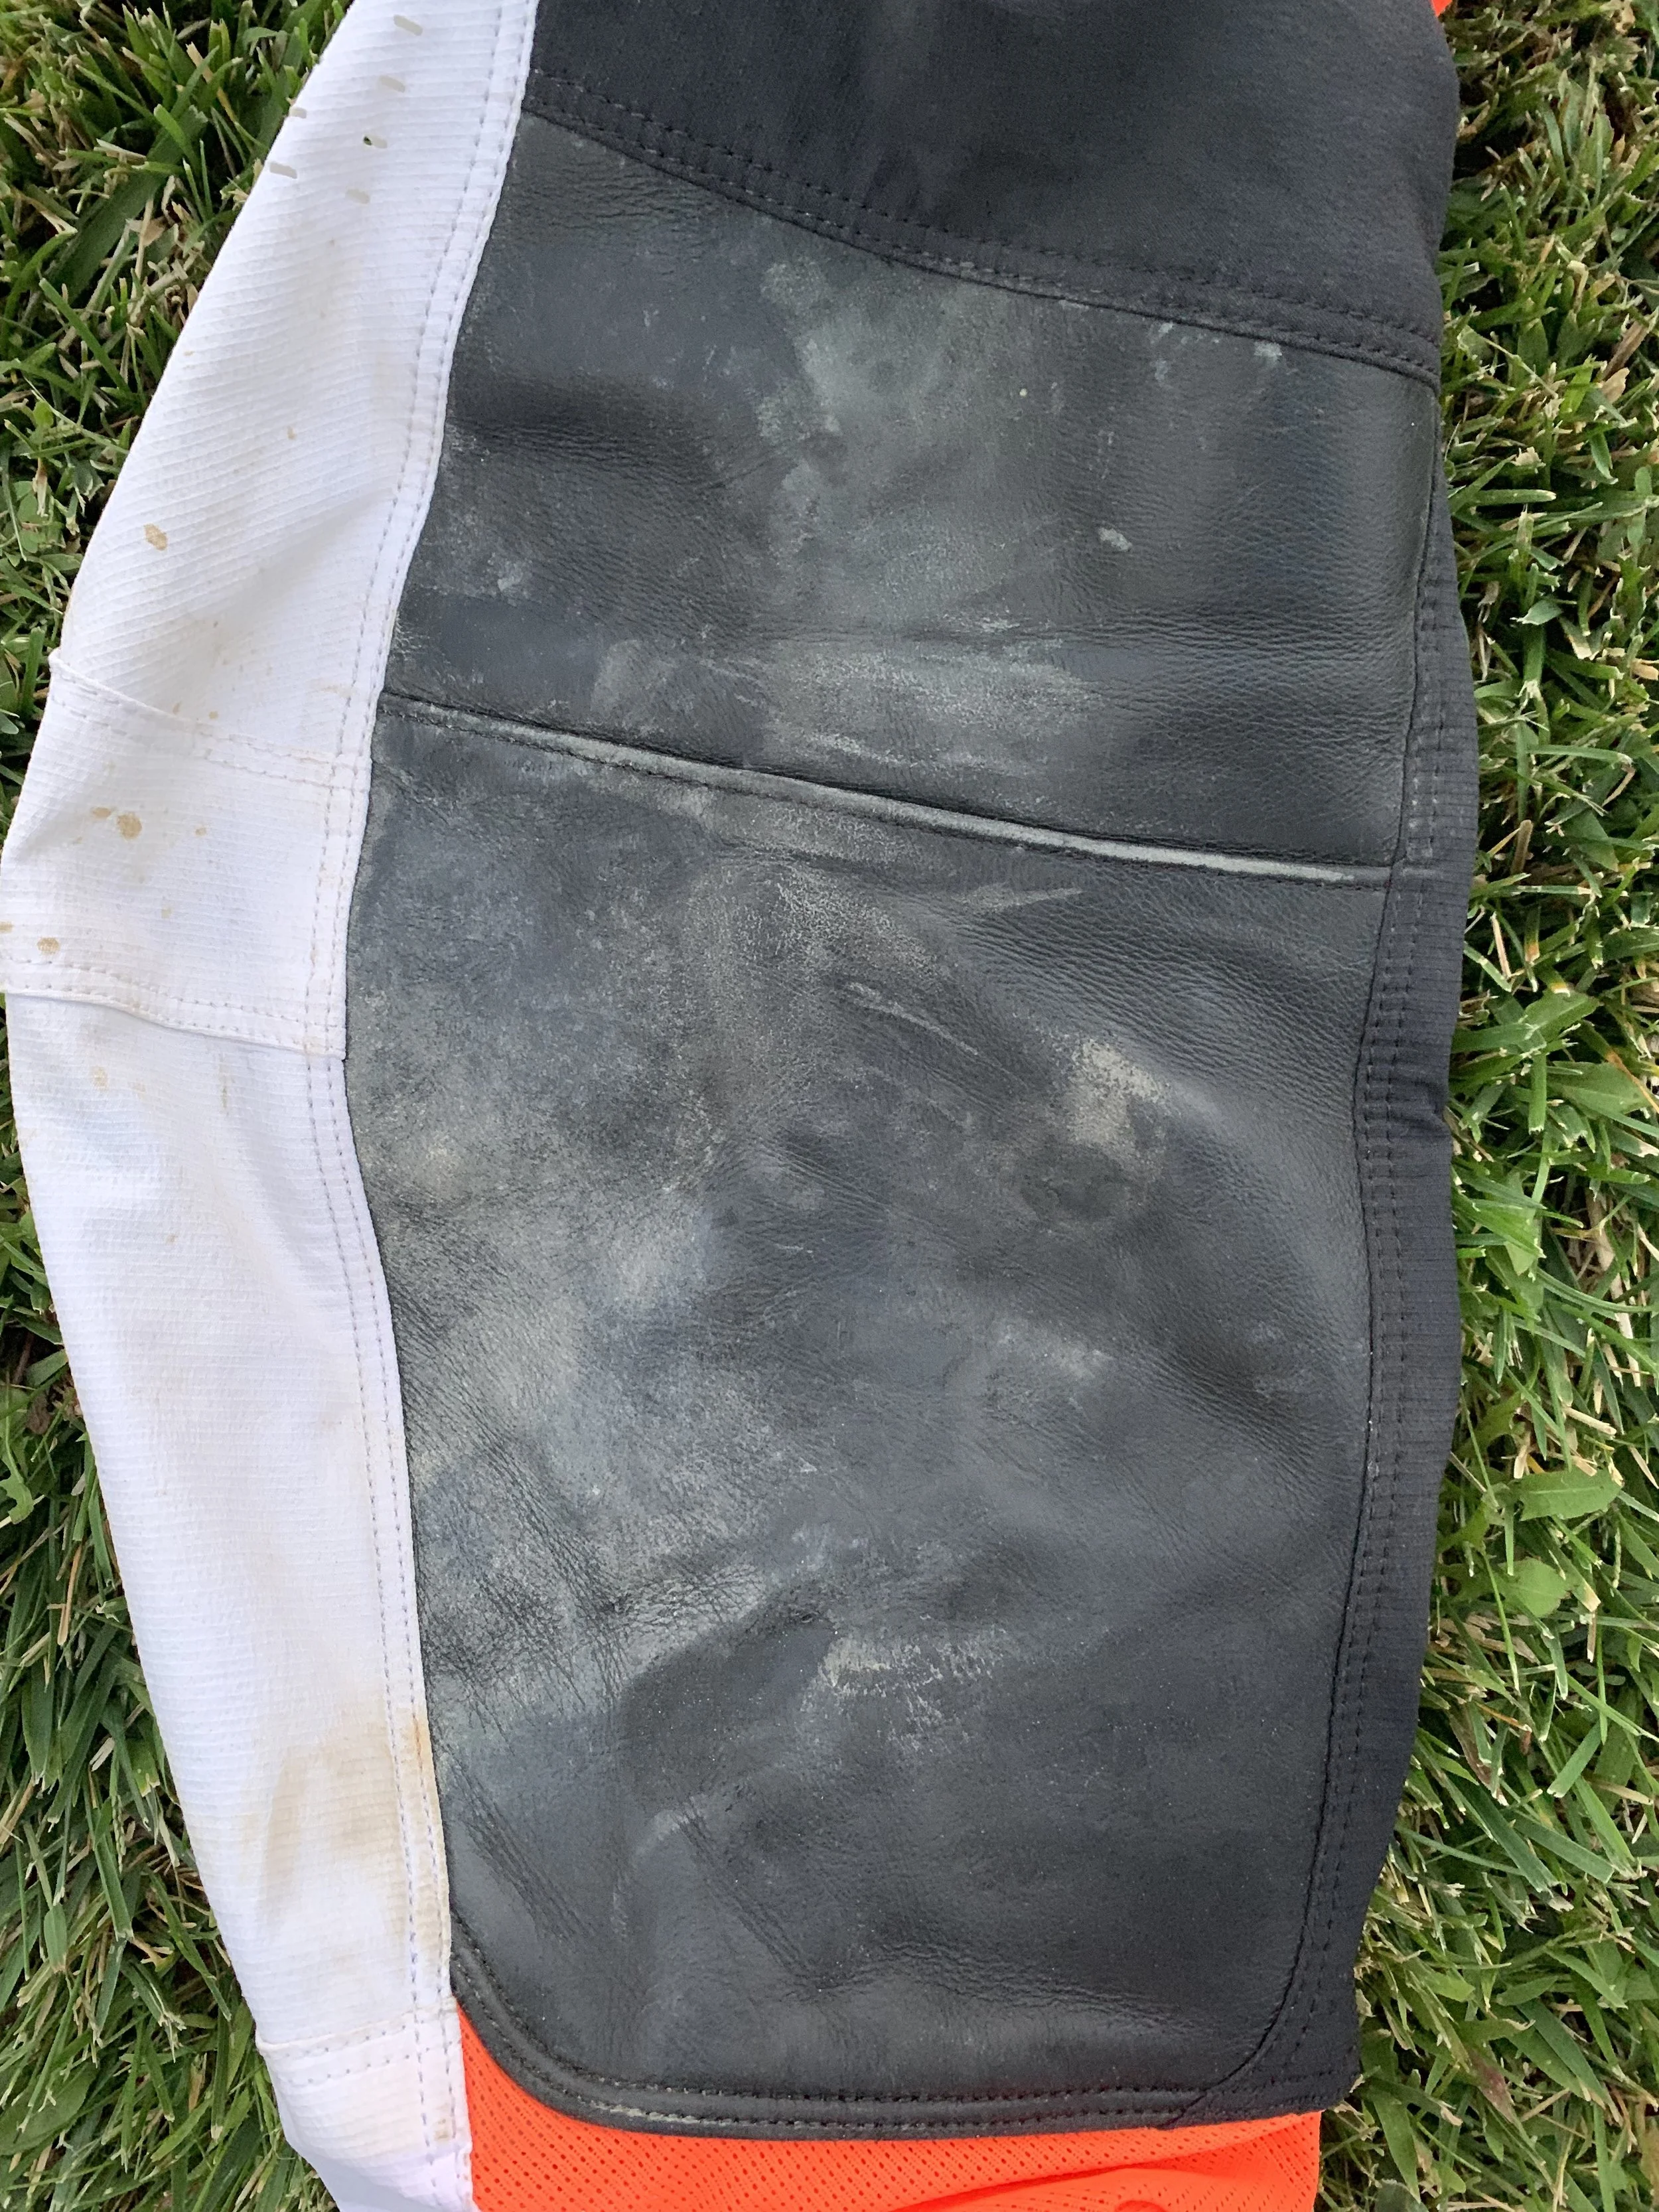
The FlexAir pant bends with my natural motion on the bike and doesn’t bunch up near the leather of the knee area when I am seated on the machine. Not to mention that the leather knee is extremely durable for a minimalistic type pant. I have endured more than a few weeks of durability testing with the FlexAir pant and it has held up well against my CTi knee braces as well as a heatshield-less Pro Circuit headpipe/mid-pipe. The FlexAir pant fit is true to size and has a little extra room with how stretchy the pant is in the waist. So if you're a size 33, a 32 will work just fine. 

The Fox FlexAir price point has also been reduced for 2020. The pant costs $199.95 and the jersey is $69.95. That is $60.00 less than last year’s price point. I am huge fan of the materials, fit, durability, and function of the Fox FlexAir gear. I do wish Fox had more colorways to choose from in the FlexAir design, but without a doubt the HOWK is my favorite of the 2020 sets.

As for you older guys reading this that might think this type of gear isn't for you, I will have to say don’t knock it until you try it. I know us older dudes are stubborn and usually DO NOT like change, but wearing athletic cut gear could really open your eyes to some next level comfort you may have not have ever felt while you're riding. Like an older/wiser test rider once told me, “you’re only as good as what you try”.

Go to foxracing.com to see all of the Fox products as well as order this HOWK FlexAir set.

If you have any questions about this gear please email me at kris@keeferinctesting.com.


Pros: 

  • Fit

  • Comfort

  • Durable for minimalistic type of gear

  • Ventilation


Cons:

  • Lack of different colorways

  • Jersey can be hard to remove after riding (sticky)

EVS F-2 Roost Deflector

When I hear the name EVS, the first thing that comes to mind are those neck donuts that most of us wore when we were kids, or really anything safety gear in general. You know that EVS takes safety seriously if none other than Travis Pastrana has trusted them to protect his banged up body year after year. I was recently contacted by EVS to try their all new for 2019 F-2 roost deflector and see what I thought of it. The older I get the more and more I find it necessary to wear a chest protector (seeing as I don’t quite bounce off the ground like I used to). Being primarily an off-road rider I have worn a plethora off brands and configurations when it comes to roost guards and have become slightly picky about the balance between comfort, protection, and ventilation so this test was right up my ally. 

IMG_6033.JPG

EVS went back to the drawing board for 2019 and re-designed the F-2, integrating some new technology into the deflector. The F-2 has a pivoting system built into the body of the unit that helps keep the guard form pinching on the rider no matter the contortion of the torso.  Also integrated into the guard are flow vents to help keep air moving across the body. This is used in conjunction with the Flyte liner which is a grid of impact dampening pads that lift the protective gear off the skin, allowing for increased air flow. The F-2 comes in either white or black as well as being offered in small, medium, large, and extra-large all while being completely adjustable to fit a large array of riders. This deflector meets CE standard 14021 for roost deflection, as well as CE standard 1621-1 for back impact protection. Leatt/Atlas neck braces are compatible with the F-2 and it comes with elastic shoulder loops that help keep the neck brace in place. 

IMG_6069.jpg

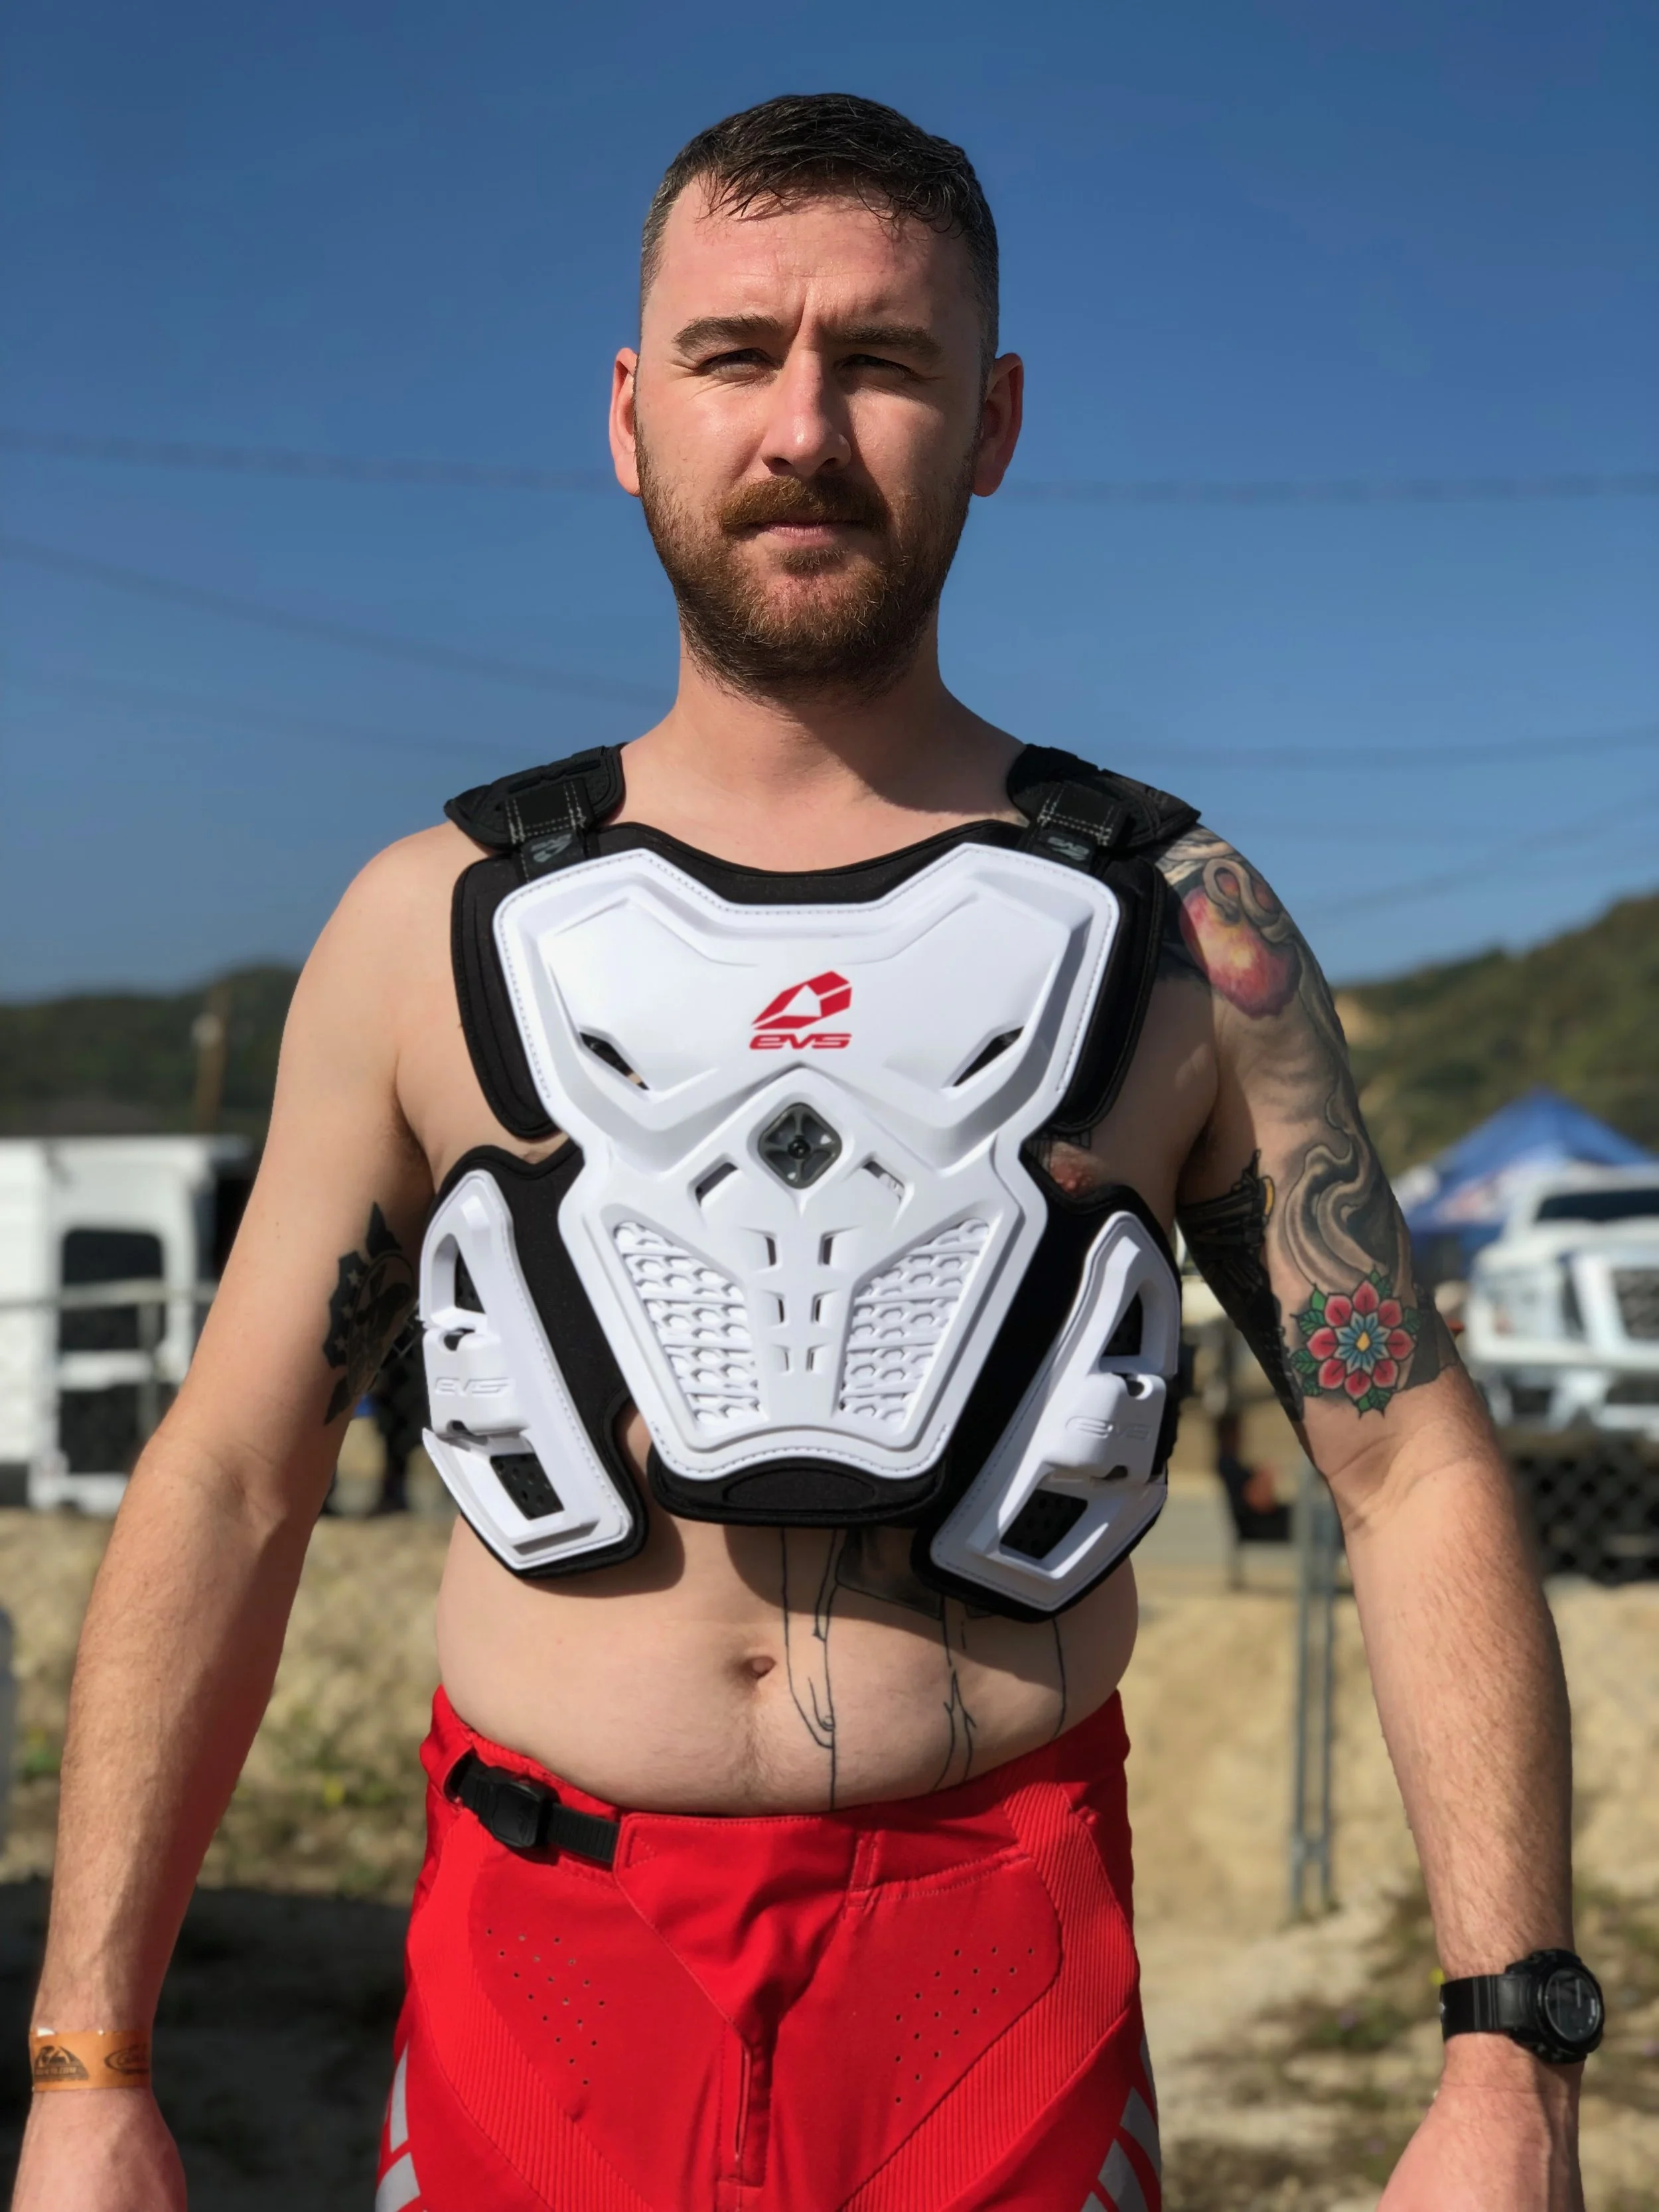
Now that you know all about the technical aspects to the F-2 let’s get down to how I liked it out on the trail and track. To start with, since this is a “roost deflector” and not a full “chest protector” it doesn’t come with bulky shoulder cups. In my book this is a plus because those are usually the first thing I take off of a guard that has them. On top of that it doesn’t come with those dumb upper arm protectors that you have to slip your hands through, which I also remove because they are almost always super uncomfortable. Although I am glad there aren’t shoulder cups, I do think the pads that are on the shoulders could be a little larger and more protective for my frame. I am 6’ 185 pounds (although the pictures look like I’m 285 pounds) and I wear a large F-2 which fits pretty good out of the box. For height adjustment there are four adjusters on the shoulder straps (two per side) but they are pretty short and only allow for minimal fine tuning. When it comes to fine tuning for the waist, the side straps allow for a considerable amount of adjustment so that you can get a snug fit. The pivot system on the front of the guard is very functional and works well when you are leaning or contorting your body on the bike, so you don’t feel as though the guard is stabbing you or giving you any pinch points. The hard plastic front and back provided substantial protection from roost and trailside hazards as well as offering padded and hard protection on some small crashes that I experienced. The hard plastic is sewn to the thick padded under protection making the guard solid feeling, but it also feels a little on the heavy side. In terms of protection/comfort it was a big plus, but in terms of wearing it in mid June for a 102 degree motocross race, the deflector was definitely on the hot side. When worn under the jersey the F-2 majorly lacked air flow (also when worn under the jersey, the F-2 looks slightly bulky).

IMG_6036.JPG

When worn over the jersey the air flow was more noticeable, but still the amount of foam under the plastic proved to be too much of an air block to be able to keep me cool. For me when it comes to roost deflectors there are three main categories; comfort, protection, and ventilation. The F-2 is very comfortable for a heavy duty style roost deflector, as it doesn’t give you any pinch spots are discomfort. The protection of the F-2 for a roost guard is very good and I feel like it gives protection for both decent sized crashes as well as plain old roost. When it comes to ventilation I feel like the F-2 does the best it can for the amount of coverage and protection it offers. Even with vent holes and the Flyte liner, which creates an air gap between the skin and guard, it’s still very hot to wear in summer. I am actually looking forward to wearing this deflector in the winter when you may want something to help keep the body heat in. The F-2 seems to bridge the gap between full chest protection and a minimalistic roost deflector. Other than being hot I feel that EVS did a great job of re-designing the F-2. When it comes to keeping riders safe and comfortable, I think the F-2 is a great option, but you may want to consider another option from EVS when it comes to those hot summer motos. Coming in at $139.00, the F-2 isn’t the cheapest option on the market, but I feel that for the amount of protection it offers, $139.00 is a ball park price point. If you have any questions about the EVS F-2 roost guard feel free to reach out to me at Michael@keeferinctesting.com

2020 Alpinestars Gear Intro/First Impression


New gear season is upon us and Alpinestars had us out to ride in a couple sets of their latest offerings for 2020. There was some heavy hitters out at Milestone MX Park riding along side all of us media dorks. Factory riders like Justin Barcia, Jason Anderson, Ricky Brabec and movie moguls like Dax Shepard as well as Channning Tatum were on hand to rip around the Riverside, California track. The good news for you consumers out there is that the Alpinestars product line will be available at a few select North American distributors for 2020, including Rocky Mountain ATV/MC and BTO Sports. I hear a lot of people saying that you can’t get Alpinestars gear here in the states, but in reality it has been available online directly at alpinestars.com for a couple years now. So there are no excuses on why you can’t order yourself up some now! Instead of boring you with the happenings of the day, I will just break down what my first impressions are of the 2020 Alpinestars gear. 


I got a chance to ride in the 2020 SuperTech pant and jersey so here are some statements from Alpinestars about the product and a quick first impression from myself.

From Alpinestars:

3720720-1413-fr_supertech-pants.jpg

Supertech is Alpinestars innovative Motocross apparel line, designed for superior dirt riding performance. Featuring an innovative performance fit design, a chassis consisting of advanced stretch material and an ultra-lightweight construction with a simple, clean design and an aggressive look, the Supertech Pant incorporates a host of race-proven technologies for comfort and performance-winning pedigree in Supercross and Motocross. 

• Meticulously designed to a new pattern keeping the pant perfectly positioned while riding aggressively and offering unrivalled levels of movement and flexibility.

• Main shell extensively constructed (80%) from advanced stretch fabric for freedom of movement. Textile fiber composition specifically developed by Alpinestars to offer high levels of mechanical properties, such as strength, elasticity and durability.

• Heavy (900 Denier) reinforcements on seat area provide seam strength, durability and critical coverage.

• 450 Denier knee panel for durability and freedom of movement.

• Strategically positioned stretch mesh inserts offer cooling comfort and freedom of movement.

• Localized perforations for enhanced airflow.

• Leather panels on inner leg provide heat resistance, grip, comfort and durability.

• Ratchet waist closure system with two flaps and a front metal fly
hook offers a precise, personalized and secure fit.

• PU reinforced knee area and on back.

• Leg cuff features stretch mesh insert for easy on and off.

• Silicon print on inner waist to keep the pants in position.

3760720-1413-fr_supertech-jersey.jpg

With a new performance design for an athletic fit, a chassis consisting entirely of advanced stretch mesh and an ultra-lightweight construction, the Supertech Jersey is Alpinestars lightest ever MX jersey, featuring a host of race-proven technologies such as the innovative floating arm construction for superior freedom of movement and an extended back panel to maintain a flawless riding fit. 

• Ultra-lightweight advanced fabric main construction for moisture-wicking and performance fit. Jersey features a more fitted, lightweight design.

• Chassis consists of stretch mesh chassis with open mesh inserts on arms and side torso for high levels of cooling airflow.

• Innovative, fully floating arm construction offers excellent freedom of movement.

• Neck and sleeves feature fully tape-welded hems for reduced weight and improved levels of comfort.

• Pre-curved sleeves for maximum comfort and performance fit.

• Extended rear design helps maintain a perfect riding fit.

• Sublimated fade-resistant graphics.

0439D843-74D0-4180-9403-2FD62780B593.JPG

So what exactly was my first impression of the new Alpinestars 2020 SuperTech gear? I was worried that the pant would be too snug, but to my surprise the size 32 pant fits well and is true to size. The pant is an athletic fit yet is stretchy enough to be comfortable to move around on the bike out on the track. The ventilation of the pant is what you’d expect from a minimalist type of pant yet the knee coverage proved to be thicker than other minimalist pant I have tried lately. I am not a huge fan of the front metal fly hook, but it is something that could come in handy in case of a zipper failure. I may have to get used to latching the hook before ratcheting the buckle closure system. I also noticed immediately that the leather in the knee is very grabby against the shroud area of the machine. While gripping with my knees in corners I could feel the leather almost feel sticky, which was odd, but also great for gripping the middle of the bike. 

The SuperTech jersey is snug! It’s stretchy, but just know that the arms are very athletic, almost compression-ish. The SuperTech jersey is right up my alley because it conforms to my body, makes me feel streamlined, and is super thin/ventilated feeling. I do know that larger riders may not like this feel, but for my size 32/Large sized frame it’s great. I will say that once you have sweated in the jersey, it can get a little sticky to the skin when trying to take it off your body, so that can be tricky. The cooling effect of the jersey when perspiring is very good because of the materials the jersey is made up with. There are only a couple jerseys out there today that do as good of job of cooling you down and the SuperTech is one of those jerseys. 

Overall, I think Alpinestars really nailed the colorways of the 2020 gear lineup. Lots of solid colors along with clean lines make for the best looking Alpinestars gear that I have seen yet. I will be doing a more thorough review of the gear that will involve more of the durability side of things to see if the price tag of $229.95 for the pant and $89.95 for the jersey is worth it. Stay tuned… 

The Wife And Dax

The Wife And Dax

Leatt Z Frame Knee Braces


When it comes to “brace” style protective gear there are many opinions as to their effectiveness.  Questions like does it hamper the rider’s ability to correctly ride the motorcycle? Or does bracing the knee make your femur susceptible for injury? Far be it from me to have the end all be all answer, but I can tell you what has worked for me. Up until 2012 I was just a knee cup/guard guy who basically thought knee braces were only for people with money, good insurance, and past knee Injuries. In 2012 a buddy of mine handed down his old pair of braces and I found them to be comfortable and in fact gave me a little more confidence in my somewhat flimsy knees (one is always slightly swollen, and the other pops out from time to time).  

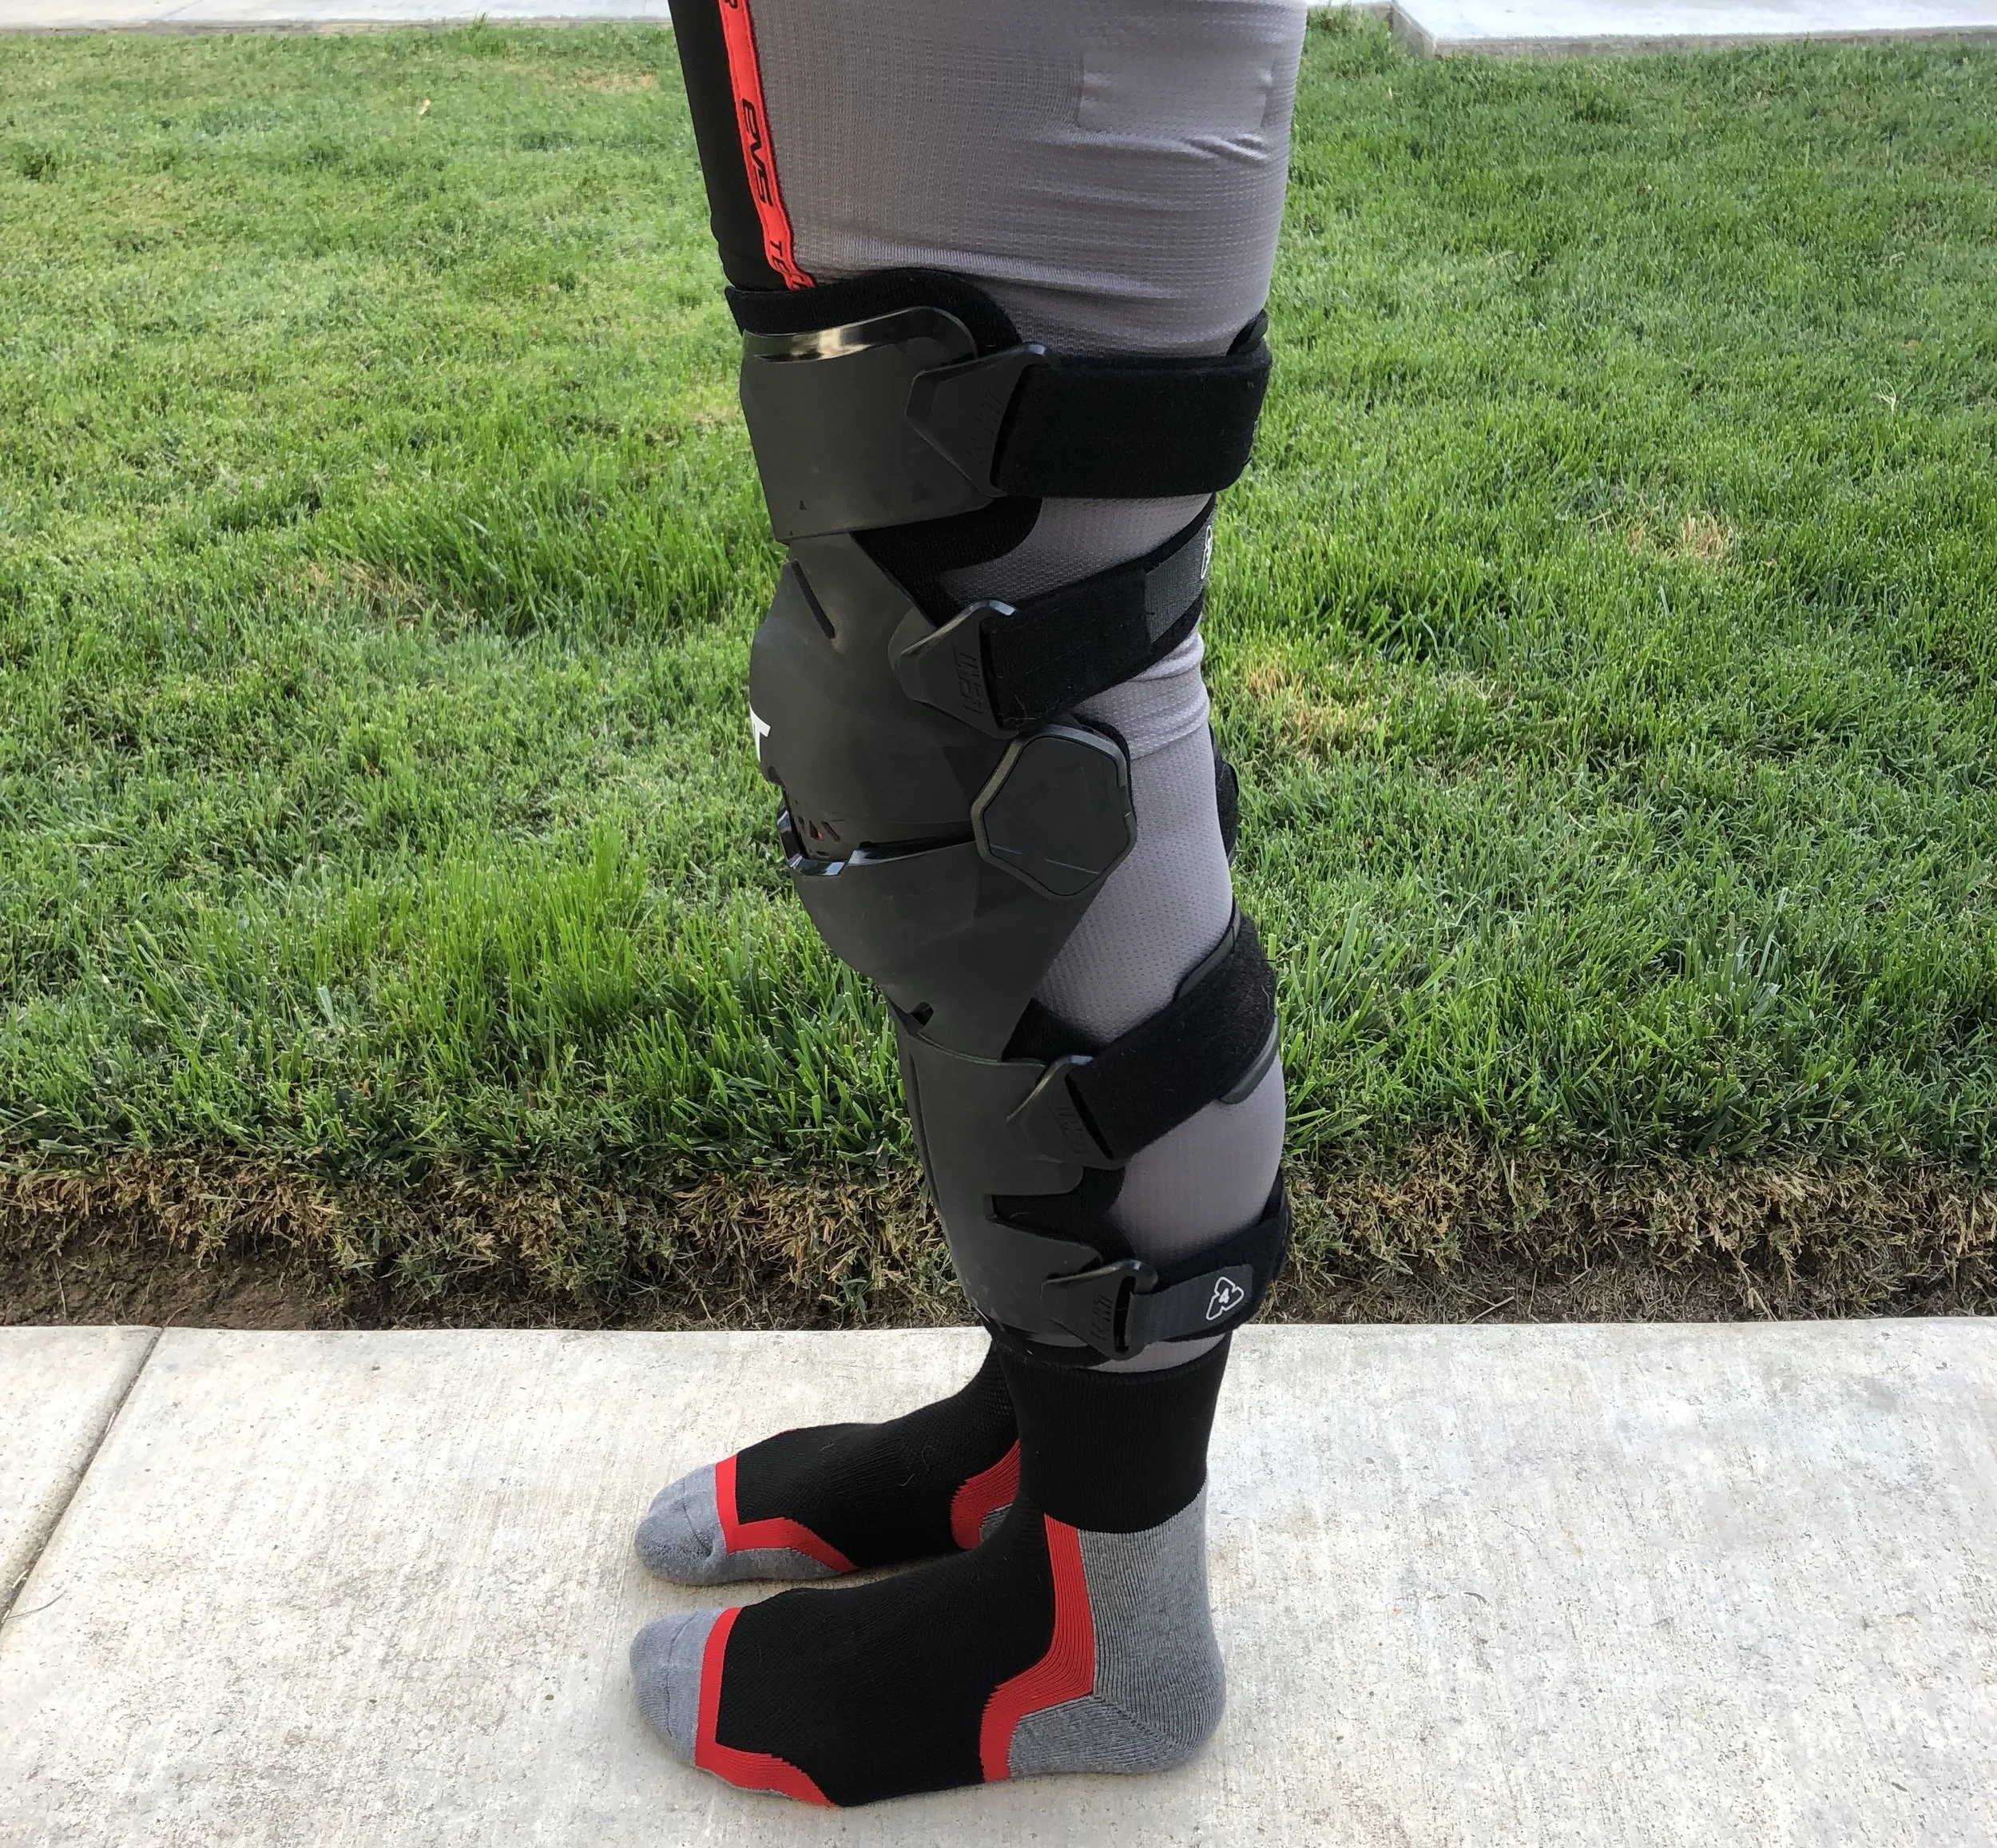
Now that you know a little about my knee protection history let me tell you about the Leatt Z Frame braces. I have been wearing and loving the Leatt X Frame braces for the past nine months and they have become my favorite non custom fit braces. I was excited to get the lower price point Z Frame’s and see if the price really dictates comfort and protection. The way the Z Frame straps to your leg is slightly different than the X Frames, as they strap in a “Z” pattern behind the leg (hence the name). Theoretically once you adjust the Velcro to your leg size you can just unclip the plastic clips on the straps to take the braces on and off, but I found myself always adjusting the Velcro to get the right fit every time I put the braces on. Why? Because sometimes I will drink a beer or three and eat a cheeseburger the night before. Can you say sodium intake? 

IMG_5080.jpg

Once on, the Z Frame braces are noticeably bulkier than the X Frames, especially in the knee cup area. To me the knee cup area was excessively large and I felt like my knee cap was floating around underneath the cup, which would occasionally rub the underside of the cup when my legs were bent. This excessive bulkiness also changed how my legs were able to grip the bike, which wasn’t necessarily bad, it just didn’t feel like the braces that I was used to. The protection of the knee, shin, and thigh area is substantial as well as provides a large coverage area to protect in the event of a crash or hitting trailside debris. The “brace” function of the Z Frame didn’t seem as strong or supportive as the X-Frame that I have been used to. What I mean by this is that my knee didn’t feel as supported and actually popped out once when I dabbed my foot wrong (this isn’t necessarily the braces fault). 

IMG_5088.jpg

After wearing these braces for a few months, I have come to the conclusion that they may fit some people better than others. I think that for my smaller (weaker) knees I need something that hugs, fits tighter, and gives me slightly more support (like the X Frame does). They are not necessarily bad braces, maybe someone with bigger knees would have a completely different opinion, but I just felt that my knees were kind of floating in the braces (yes, I had the correct size). With an MSRP of $299.99 the Z frame doesn’t break the bank as badly as other knee braces on the market, but they still aren’t exactly “cheap”. This Z Frame brace would more than likely be adequate for the weekend warrior that wants to go from a knee guard to a knee brace. The type of rider that wants some more safety, but isn't necessarily out to win a local racing series.You can check out the complete Leatt lineup over at leatt.com or if you have any questions about this test please email me at michael@keeferinctesting.com

IMG_5082.jpg


2019 Fox V3 Helmet

Fox introduced their updated 2019 V3 last month, but it has taken us a few weeks to get you an actual first impression of the helmet because we actually wanted to ride in it for a while. Call us crazy, but we really like to test products here at Keefer Inc. before opening our mouths. It also seems like a ton of gear companies are coming out with their own helmet technology and that sometimes can be overwhelming for consumers on which one to decide on. We at Keefer Inc. can’t sit here and tell you which one is the best, but what we can do is give you the information about the hemet technology and give you details on fit and performance, but it will be up to you to make the decision on which you feel the most comfortable with. Spending $500.00-$700.00 on a new helmet is a big investment on your part and we are here to help you through it. If you have any further questions about the V3 helmet please email me at kris@keeferinctesting.com as our open door policy is put in place to help you like no other media outlet can. 

IMG_3155.jpg

Technology: 

Almost every helmet manufacturer is trying to address rotational energy as riders take hits to the ground. There are a few different systems out there and Fox has come up with their own called “Fluid Inside” (or FI). There are seven pods around the inside of the helmet that are filled with a food-grade mineral oil that is supposed to mimic the same type of fluid that is inside your skull (cerebral spinal fluid). Crazy right? Fox claims that with this system, the head is decoupled from the helmet allowing the pods to squish and deform on their own, thereby absorbing rotational and linear energy. The MVRS (Magnetic Visor Release System) has been updated to be more secure than the previous V3 visor. No more of the “NO VISOR GASJER” out there on the track! Seriously, no one likes a bullethead. On the new V3, the visor slots into the top-front of the helmet with a dedicated channel rather than just floating on a round section of the helmet. This keeps the visor from popping off as easy when getting hit with roost, rocks, branches, but still allows it to separate from the helmet if you have a good sized crash. According to Fox, the benefit of the visor breaking away is in the event of a crash, the visor doesn't act as a shovel and add energy transfer to the head and neck area. 

IMG_3430.jpg

The dual-density Varizorb EPS liner is meant to provide and improve protection by spreading the forces of impact across a wider surface area. A patent-pending chin bar/eye port CAGE is intended to improve energy management in the event of an impact as well. The MCT (Multi Composite Technology) shell construction that blends Carbon and FRP resins are weaved to try and provide a light yet rigid external shell. Injected Mesh vent screens across the helmet are put in place to try and provide superior ventilation and airflow, while maintaining protection from dirt and debris. The removable, washable X-Static® comfort liner and cheek pads are antimicrobial and are put in place to manage odor while work together to wick moisture away from the head. The new V3 meets or exceeds DOT and/or ECE 22.05 standards. 


Criteria: 

I wanted to ride back to back with the older V3 and the new V3 version, so I spent a few weeks going back and forth between the two, switching helmets every moto to pinpoint what was better/worse. We are going to do a full blown helmet shootout very soon to compare a whole mess of helmets, but in the meantime here is how the new V3 feels/performs/ventilates/fits/looks compared to its older sibling

IMG_3425.JPG

On The Head/On The Track: 

The first thing I noticed with the new V3 is that it ventilates a lot better than the older model and to me is the most ventilated helmet that I have tried in quite sometime. The newer V3 helmet has 12 intake and 3 exhaust ports compared to the 14 intake and 4 exhaust ports of the older helmet, but the vents that the new V3 version does have work amazingly well.

The second thing I should mention is that the new V3 fits a little different than the older V3. The newer V3 has a snugger fit around my ears when the helmet sits on my head. Just note that if you’re a medium (like me) the new V3 will fit slightly tighter than the older version on each side of your head. With that being said, I DO NOT feel any hot spots on my head when wearing the V3 for long periods of time as comfort is not an issue. The issue I have mostly comes when taking the helmet off. I really have to spread the V3’s strap/buckles apart to spread the shell out as far as I can so it doesn't rip off my ears when my head is coming out. Getting the helmet on and off was the toughest part for me, to the “fit” of the new V3 

The plushness of the new liner of the V3 feels a little different than its older brother. The old V3 had a nice feeling inside, but over time, as you sweat, then wash, ride, the liner would get less soft (harsher) to my skin. The new V3 is the opposite as I wasn’t impressed with the plushness of the helmet when new, but when I rode in it for a week, washed the liner twice, then wore it, it felt much better than the older V3. Weird I know, but something I thought that was worth mentioning. If you think the liner of the new V3 is not as soft as what you desire, try washing your liner in the sink, let it air dry, and re-install. Thank me later! ( Note: You can wash your liner/cheek pads in the washer, but put it on gentle wash) I will concur that the new V3 liner doesn't stink up to high heaven (after a long hot day) and that it does wick away sweat pretty damn good as well. 

IMG_3305.jpg

I also wanted to mention the new MVRS is much better this time around. I had two visors blow off of me on the old V3 (once when I had a small wash out in a corner and one on a low hanging tree branch while trail riding), but the new MVRS system seems to be stronger. I had one low side crash through a corner with the new V3 and in that crash the front of the helmet took the brunt of the energy, but the visor stayed in place! Boom! Wiped myself off and continued on while hoping no one caught that lame spill. The bad news is that I don’t think the new V3 comes with an extra visor as I didn't receive one inside my box. Fox’s website also doesn't specify if they put an extra inside the box.

The eye port of the new V3 is improved for me personally. The older V3 eyeport let a ton of roost inside of the helmet and almost felt too large at times. Although I don’t know the exact measurements of each eyeport, the new V3 eyeport feels smaller to me because it doesn't allow roost in as easily, while maintaining a wide enough peripheral to insert large framed goggles. I did a wide peripheral goggle shootout with the V3 helmet and all “Big Three” goggle brands sealed nicely inside the helmet without an issue. 

IMG_3158.jpg

I get this question a lot… “Kris what about weight? How heavy is it”? The new V3 “feels lighter on my head while riding, but my scales here in the shop say they are the same in weight (3.2 pounds). Is it the lightest feeling helmet I have worn? No, it’s not, but it’s definitely not the heaviest either. I have run across this “weight discrepancy/dilemma” with dirt bikes as well. I have ridden bikes that weigh heavy on the scales, but feel light when I tested them. This is what I also feel with the new V3. So in my personal opinion don’t look so hard on the “numbers”, but pay more attention to what it actually feels like on your head. This should also go hand in hand with other aspects of life. Pay attention to what things feel like rather then be enamored by numbers, dynos, graphs, etc. I know long distance riders (off-road guys) prefer a light feeling helmet, but I think this helmet is good enough for those type of riders. 

Again, I did not have a crash in this V3 helmet, but if you want to listen to someone who did have a big one, go to Donn Maeda’s website swapmotolive.com (https://www.youtube.com/watch?v=22r2qer2NOo) and you can listen to his testimonial. I always say that helmet technology is a lot like religion in that you will have to go with the one you believe in the most. None of these helmets are going to save you from getting a concussion if you hit hard enough! PLEASE JUST KNOW THIS! All of these new technologies that are popping up will only help our sport get safer and now Fox is doing their part to see this through. 

Last, but not certainly not least my metrosexual side has to kick in here people! If you’re a manly dude and don’t give a shit about looks you can stop reading now. I prefer the new V3 shape/looks much more than the older version. Why? A couple reasons…The new V3’s visor shape is longer, not so stumpy, and even though I can’t adjust the visor, the placement in which Fox put the visor on the helmet is perfect. The front of the helmet has a much more attractive chin bar area and the overall lines of the new V3 to me are much more race inspired than the older V3. Yes, I am 42, but I love the zebra print! You older dudes shouldn’t give a crap and rock the zebra stuff too! Just because it’s loud doesn’t mean you’re too old to rock some of this stuff! I always loved wearing Fox head to toe, but never was completely in love with the older V3 looks when I viewed photos of myself riding in it. The new V3 is sexy and looks much better than the old one. Ok, metrosexual talk is finished now. Thank You.    


Alpinestars SX-1 Youth Knee Protectors

I wasn't even going to do review on this product, but I kept seeing my then 12 year old son going back for these particular set of knee guards (over his knee braces) when getting his gear bag ready for a day of riding. Now I will tell you that I have been on knee braces since I was 16 years old and I prefer the feeling of a knee brace over knee guards, but I understand that some may not feel the same way. 

For those that prefer knee guards or may be interested in some protection for their kid, enter the Alpinestars SX-1 Youth Knee Protectors… The SX-1 Youth Knee Protectors are developed specifically for younger or smaller framed riders. The lightweight SX-1 Youth Knee Protector incorporates CE certified Level 1 protection with advanced polymer hard shells backed with thermoformed foam and a dual pivot system. What exactly is that? Basically it allows the natural movement of your child’s knee. The SX-1 Youth Knee Protectors are perforated for optimized levels of breathability and airflow so he or she will not be sweating up a storm.

IMG_3388.jpg

The upper and lower frames are constructed from a high performance polymeric material blend for flexibility and strength as well as trying to keep the weight down. Polymer protector plates are perforated to try and allow more ventilation. The shell integrated dual pivot hinge gear system follows the natural movement of the knee and keeps the protector well positioned in all riding positions.

The patella cup is constructed from energy absorbing viscoelastic PU foam that is CE certified to Type A. The patella cup is also backed by soft padding for adaptive fit and breathable air mesh for ventilation and comfort. There is also a high abrasion resistant fabric on the outer central knee-cup area that can reduce the possibility of scratching. 

Now my son is not quite the test rider yet, but I did ask him why he liked these Alpinestars knee guards so much and he gave me four simple answers like only a 12 year old could. His four reasons were: 

  1. I can squeeze my bike better with my legs because these guars feel narrower than my braces. (Dad: “Ok, I can understand that”) 

  2. My legs don’t feel so heavy when I lift them up through corners. (Dad: “Ok, I can grasp that opinion”)

  3. I can wear these when I go to the skate park with my scooter. (Dad: “Ok, I like that you’re thinking on your own”)

  4. They are simple to put on and take off. (Dad: Insert face palm emoji here….”Ummmmm… Aden? That is what you call being lazy. It literally may take you 60-90 more seconds to put on your knee brace. COME ON BRO!”)

Ok, so three out of four reason are legit… Now as a parent I will have to admit that I prefer him wearing knee braces (which he is now currently in since he outgrew these SX-1 guards), but for protection at the time he was using the guards, I wasn't worried about his knees getting injured. Knee braces ARE NOT going to completely prevent a knee injury and I think that is a big misconception with a lot of consumers these days. I know a lot of top professional riders that prefer knee guards and have zero knee injuries so to say that knee braces are the end all be all of knee protection is ridiculous. 

IMG_3384.jpg

These Alpinestars SX-1 guards have seen many hours of riding and plenty of crashes over the course of almost a year. Basically almost a year of nervous novice 85cc riding time is the equivalent of like adding five years of total crashes for me. The SX-1 Youth Guards have held up great and all of the parts on these guards remained intact today. Aden wore the Small/Medium size as he has dad’s chicken legs, but Alpinestars also offer a L/XL to fit youth riders that have more size to them. My son said that they were comfortable and he only had one complaint. His complaint was that the velcro straps would sometimes get hung up on his pant liner (while putting his pants on) so he would have to re-adjust the guards to get them back into place. Once his pants and boots were on, he had no problems with the guards slipping down. I also like that these guards fit into youth sized boots well and aren't too bulky. Another aspect I thought that was interesting is that my son could wear these Alpinestars guards directly on his skin, without anything underneath them, with zero irritation to his skin. That is something I couldn’t do, but he said that the material was soft and that it didn't bother him to do this. With his knee braces he has to wear long socks underneath and that gets him hot.

The downside to these SX-1 knee guards is that they are pricey at $89.95. However, if your child is riding a dirt bike please put some kind of knee protection on them. I can’t explain how many kids I see wearing nothing under their riding pants (to protect their knees) while they are learning how to ride. This is the most important time for them to dress for the crash not the ride. The Alpinestars SX-1 Youth Knee Protectors are a great piece of protection for your child and it’s Aden endorsed. Plus they can wear them while they scooter! This particular set of guards will be handed down to my friends eight year old boy as he is just now starting to get bit by the love of two wheels. #KeepKidsOnDirtBikes 

Wide Peripheral Goggle Shootout

As Matthes and I were driving home from riding one day he suggested that I do a goggle shootout. This sounded like something right up my alley since I have spent so much time in three specific pairs of goggles as of late: The Oakley Airbrake, Scott Prospect, and 100% Armega goggles have seen their fair share of riding time the past few months, so I thought could break down the positives and negatives of each one and compare them against each other. At the time of this test EKS Brand didn’t have their new wide peripheral goggle ready, so that is why they are NOT in this shootout, so don’t yell at me Steve! 

Criteria Breakdown: I went through several helmets while executing this shootout to ensure these goggles fit in the most common North American helmets. Each goggle was worn wearing a Shoei VFX-Evo, Arai VX-Pro4, Alpinestars M10, 6D ATR-2, Fly Formula, Bell Moto 9, and Fox V3. At the bottom of each goggle’s description is a rating for some key categories of each goggle for you to digest as well as pick which one you may like best. The rating chart is a ranking from 1-10. “1” being very poor and “10” being excellent. It’s up to you to decide which one fits your budget and type of riding based on the information that is given. If you have any questions about these goggles please email me at kris@keeferinctestnig.com. As always we keep an open door testing policy. 

Scott Prospect: 

IMG_1119.jpeg

Scott USA has been in the motorsport goggle industry for just over 40 years and have had the Prospect out for a few years now. A complete redesign from their top tier goggle “The Hustle”, the Prospect was in development for nearly two years. Some of the standout features of the Prospect is a polycarbonate lens that is 1mm thick (versus 0.8mm thick like the Oakley Airbrake lens), the Scott lens locking system that consists of four locking pins that secure the lens to the frame of the goggle for safety (instead of feeding the lens into a groove and securing it with tabs), a wider frame, an updated two position outrigger system that did fit a wide range of helmet sizes, a No Sweat 3.2 foam, and a wide strap for optimal grip to the helmet. The lens of the Prospect is not injected molded like the Armega and Airbrake, but still is very tough in its own right. I have yet to have a rock pop any lens out on me over my years of racing/testing, but to say that it can’t happen would be foolish. Having an injected molded lens almost assures that this will NEVER happen.

I am kind of a pain in the ass when it comes to comfort with goggles and the Prospect goggle was the only goggle (out of all three) that took me more time to get used to. Much like a pair of new boots, the Prospect has a unique feel. The way the foam (near the nose area) is cut out doesn't quite wrap around my nose like the other two pairs of goggles.The nose area of the the Prospect is wide and sits more near the bottom of my nose rather than on the bridge. That is exactly why it took some time for me to get used to them. Speaking of the foam however, the No Sweat 3.2 foam against my face feels plush and soaks up enough of my sweat that it doesn’t drip inside the goggle on very hot days in the desert. There was no need to purchase any maxi pads products to add to the top of the goggle’s foam as it soaked up sweat adequately. The field of vision is very similar to the Oakley Airbrake and Armega as the Prospect goggle is as wide as its competitors. It is however not so wide that it didn't fit/seal in the helmets used in this shootout. Compared to the others, the Prospect will ride down almost to the edge of my nose and I have a large nose. Adjusting it to your face is key and I found the best way to get it to ride a little higher up on my nose was to get the goggle strap extra tight and to remove the nose guard that the Prospect comes with. Doing this would allow the goggle to ride a little higher on my face and give me less pressure on the wider part of my nose. It didn’t affect the way it sealed to my face after doing so, but it did take a little longer than usual to find a way to position it correctly. So if you feel like the Prospect is riding a little low on your nose, try tightening the goggle strap a little more than you normally would. 

Changing lenses out on the Prospect is fairly painless, but not better than the 100% or Oakley. You can switch lenses out by popping two locking pins out on top of the frame and two at the bottom. Once those are popped out, the lens comes out easily and I was able to stick another lens in under two minutes, not the fastest, but not horrible! I wore the Prospect on a couple long tests at open tracks days and the four-post tear off design takes a little more of a tug to rip them off. However the way the tear offs lay and fold onto themselves makes it easy NOT to pull more than one at a time. The Scott Prospect tear off design gives you enough tail that you can feel it easily with gloves and rip only one tear off. 

With the Scott Prospect goggle’s pricing (around $80.00 vs. a $160.00 Airbrake) you actually afford a couple pairs. I would also be getting the same wide peripheral vision and almost the same comfort as an Airbrake. I say “almost” because of the low nose area with the Scott’s. The Airbrake and Armega frame fit better to my face (bridge of nose area sets higher up on my nose) and has zero issues with riding low on my nose like the Prospect’s do. However, the Airbrake’s have been known to fog up on me on colder days, but the Prospect’s and Armega’s haven’t. The lens on the Prospect is resilient to getting scratched and is probably the toughest lens in the group. I could wipe the Prospect lens with my glove while riding and it wouldn’t get nearly as scratched as an Airbrake and Armega lens.

For around $80.00 I would consider this a very good goggle for the price. The field of vision, the comfort of the foam against my face, ease of finding the end of the tear off to pull efficiently, and the lack of fogging makes it a great purchase. Setting up the goggle to fit up to your face might take you a couple rides to get comfy, but once you do you will agree that this is the best goggle Scott USA has made yet.

Goggle Price: $80.00

Bonus Lens: Yes

Replacement Lens Price: $10.00

Weight: 138 Grams

Fogging Issues: No

Laminate Tear Off’s: Yes

Rating Chart:

Ease Of Replacing Lenses: 5

Lens Clarity: 7

Field Of Vision: 9

Fitment In Helmet: 8

Foam Feel/Absorption: 8

Overall Comfort/Fit On Face: 6

Ease Of Ripping Tear Offs: 9


Positives:

  • Lens toughness

  • Great price for a wide peripheral goggle

  • Sweat absorption


Negatives: 

  • Not the quickest for replacing lenses

  • Fit takes some time to get used to

  • 10 or more tear off’s clarity/vision is distorted more than Airbrake


100% Armega:

IMG_3153.jpeg

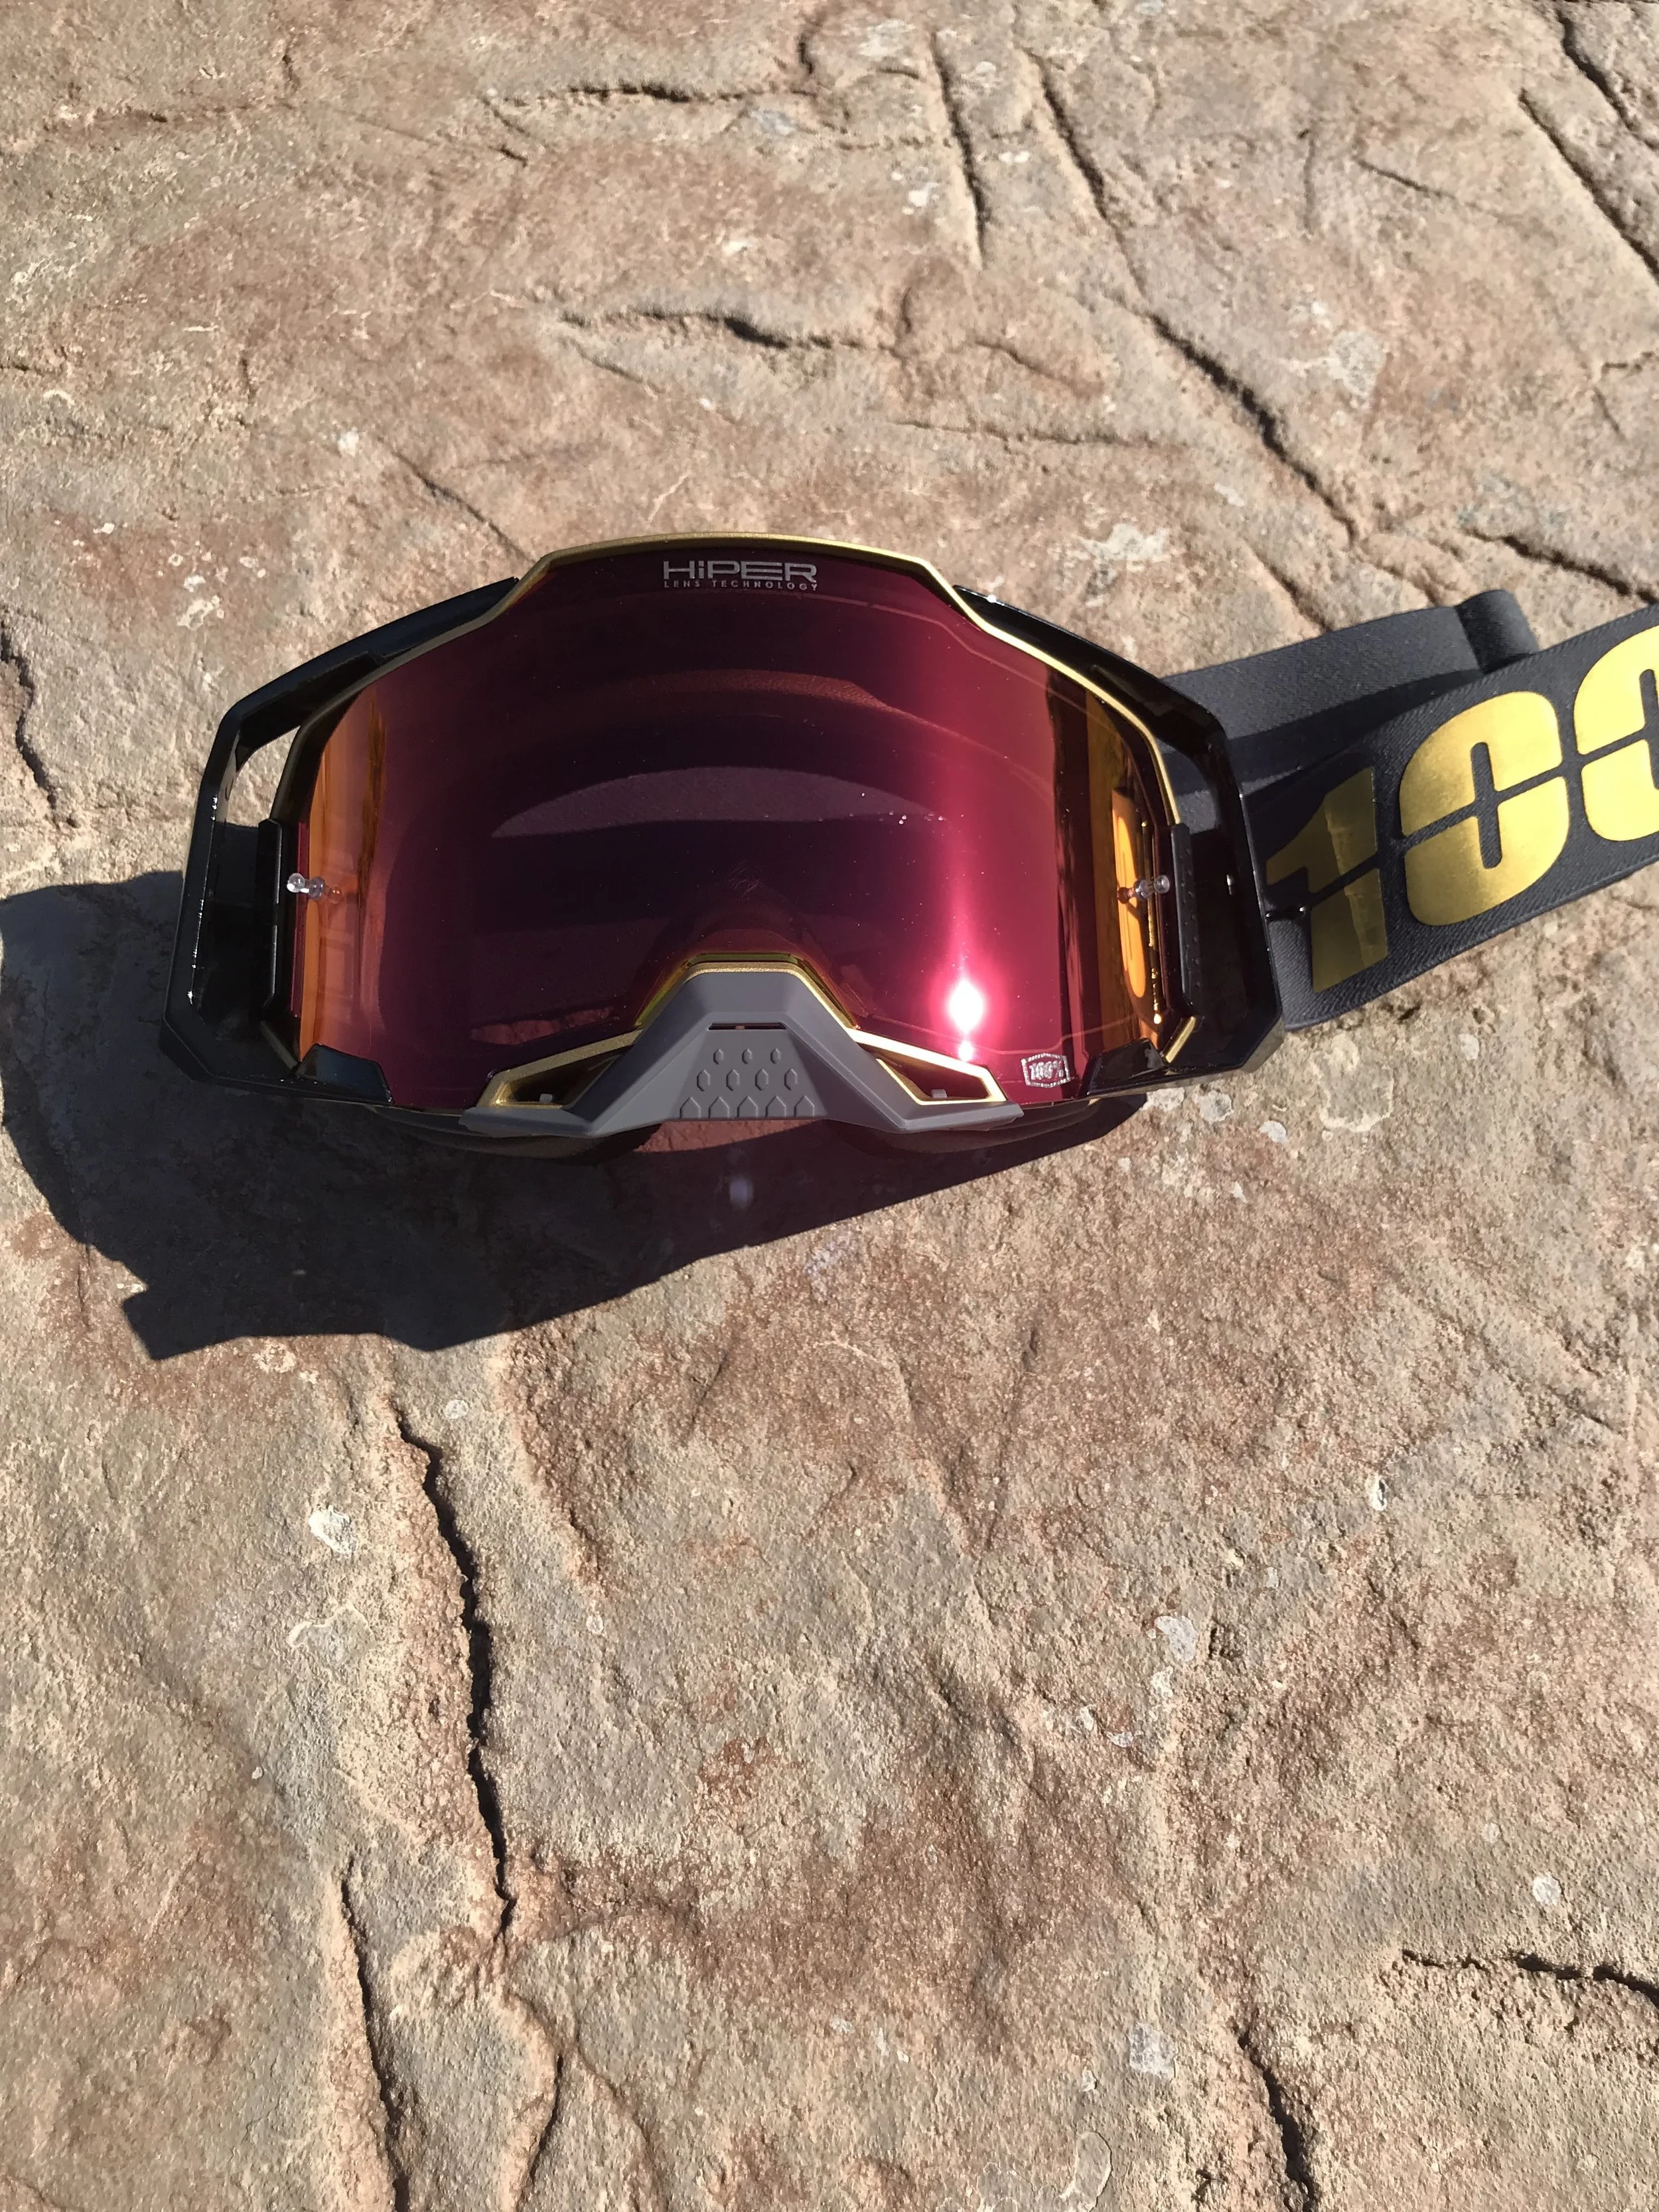
I will be the first one to admit that the older 100% goggles were not my “go to” goggles. They pinched my nose and the clarity of the lens wasn't my favorite. The new Armega goggle has changed my thought process about grabbing a pair to ride with for the week.The 3D modeled lens – this is a polycarbonate material that is specifically designed to have zero optical distortion. There are no imperfections in these lenses which means you can focus on the imperfections on the track instead. Furthermore, their premium lens offering is called HiPER technology which helps contrast red/blue/green color spectrums to really enhance what you are looking at. The best way for me to summarize this is that it almost feels like polarized sunglasses – what you are looking at just seems to pop more. Part of their marketing for the Armega goggle is “Ultra HD Vision” – now I’m not quite sure what to make of that slogan, but know that you might only really notice this HD vision when wearing an Armega goggle that has the HiPER lens in it. This lens technology is however still just behind the Oakley Airbrake Prizm lens in clarity. When wearing a stack of 14 laminate tear offs on the Armega lens, it does become clear that the Airbrake is the favorite when it comes to stacking tear offs for a long moto.

The ventilation system they designed for the Armega is also interesting. There are two induction ports on either side of the nose guard that help force air into the frame of the goggle. This air is funneled right into the foam layers (which are perforated by the way) with the intentions of eventually reaching your face. 100% had the goal of maximizing airflow for hot days and also for the cold days – because on the cold days, the more air you have flowing inside the goggle, the less likely they are to fog up. The Armega is the best no fog goggle in the group, so if you’re a cold rider weather rider these goggles would be my first choice. To tie this ventilation design together, they integrated a sweat channel into the upper part of the frame. This channel forces your sweat away from the lens and out of the goggle on either side of the frame. This is something that I got to test a little while racing the past couple weeks and I can tell you that sweat still in deed does find its way into the inside of my lens. Although it didn't distort vision while racing, you could visually see the perspiration on the lens itself. There isn't a goggle in this shootout that eliminates sweat completely from dripping inside your lens. The Armega does it very well, but DOES NOT eliminate it completely. 

The Armega goggle has the second best lens clarity of the bunch and resistance to scratching is very good (much better than that of the Airbrake). Most importantly the nose area of the Armega fits my big ass nose well and doesn’t leave a pinching sensation or blisters like their old goggle did. The foam is soft to the skin and fits in every helmet I tested, which I can appreciate because I wear so many different types of lids when performing bangers for social media. Changing the lens is also much easier than the Prospect and on par with the Airbrake so that is a welcome addition to the Armega. The pricing of the Armega is $120.00 (with the HiPER lens) so it’s slightly more expensive than the Prospect. Without the HiPER lens (clear) the cost goes down $20.00. If you’re wondering, yes, the clear lens to me is still very HD like. 

Goggle Price: $120.00

Bonus Lens: No

Replacement Lens Price: $25.00 clear $55.00 HiPER Red Mirror 

Weight: 141 Grams

Fogging Issues: No

Laminate Tear Off’s: Yes

Rating Chart:

Ease Of Replacing Lenses: 8

Lens Clarity: 8

Field Of Vision: 9

Fitment In Helmet: 8

Fitment On Face: 8

Foam Feel/Absorption: 9

Overall Comfort/Fit On Face: 8

Ease Of Ripping Tear Offs: 6


Positives:

  • Lens clarity

  • Fit/Feel

  • Sweat absorption

Negatives: 

  • Sticky tear off posts

  • Feels heavier than other goggles

  • Price of HiPER lens 

Oakley Airbrake:

IMG_3315.jpeg

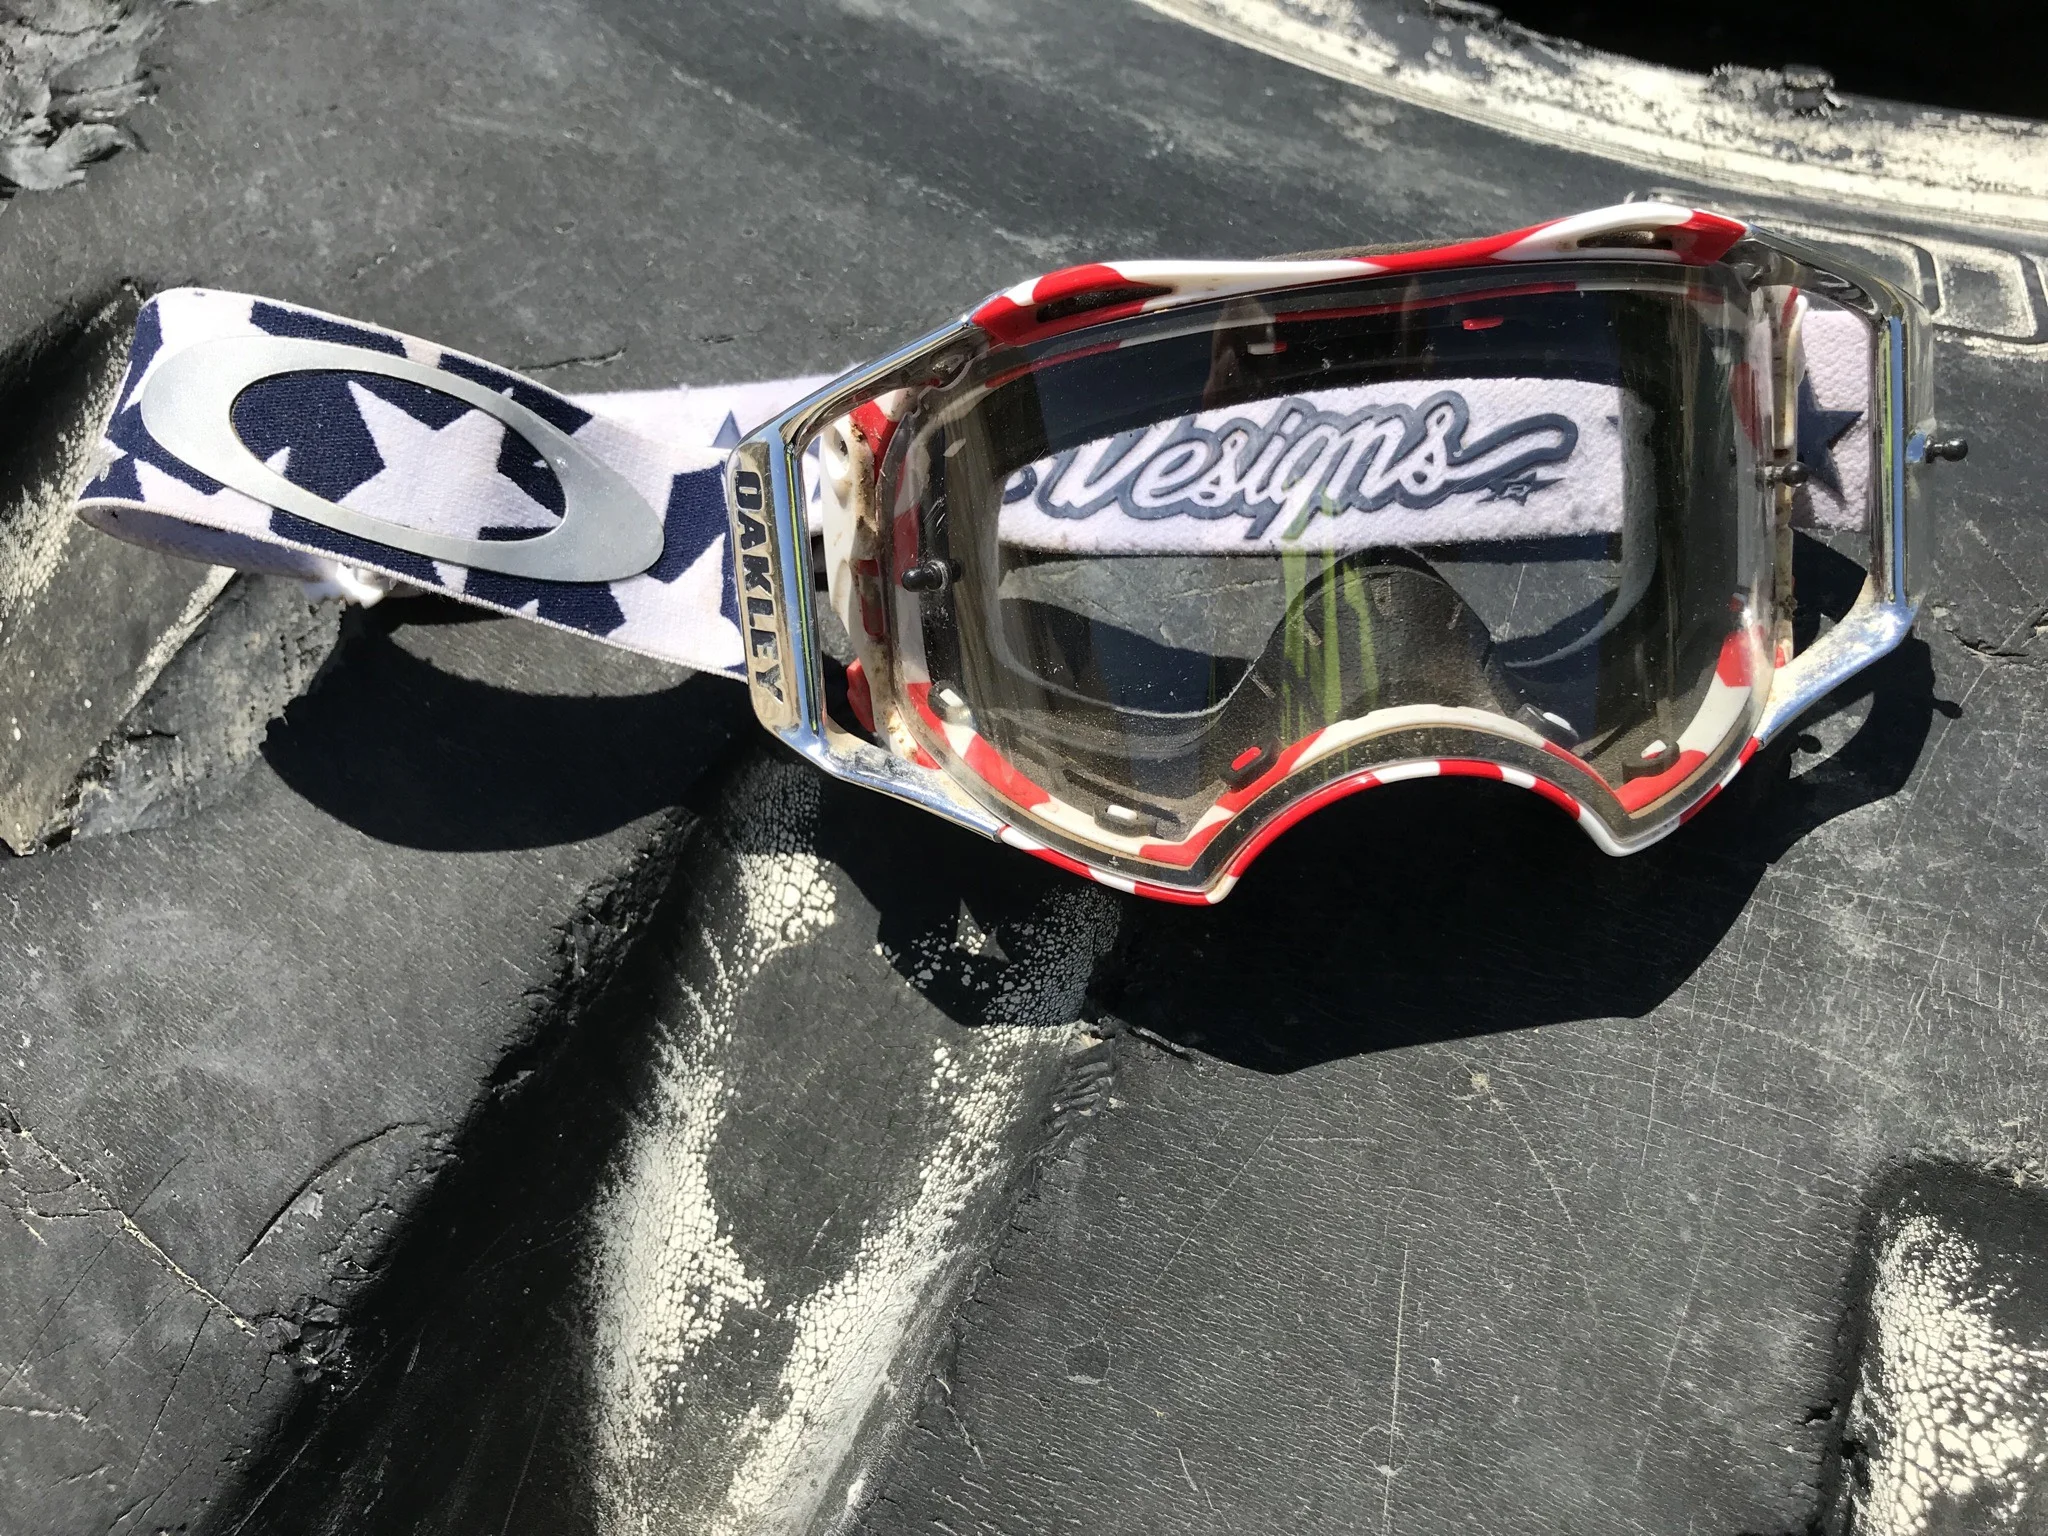
Oakley took a different approach to the goggle market when developing the Airbrake goggle back in 2013. They used different technology and put a pricepoint out there that most consumers just disregarded. In fact, I was one of those people! There was no way I could justify spending $160-200 bucks on a pair of goggles. Fast forward to today and wide peripheral, rigid frame, higher priced, HD lens goggles are the norm. Hence this shootout! The beauty of the Airbrake is the speed of changing lenses and clarity of the lens technology. The Switchlock system is the best in the shootout and really relieves any headache of several lens changes. There are two lugs that center the lens on the frame and the levers lock it in place, that’s it! The PRIZM technology is similar to 100%’s HiPER technology and are very similar looking when riding, but comparing clear lens to clear lens the Oakley Airbrake simply has more clarity. Vision and field of view are also the best in class. I get a slightly wider peripheral view when riding, but it’s only very minimal and may not be noticed by others, but since I have had so many back to back days with all of these goggles, I can nitpick this a little more. The Oakley’s frame fits into all the helmets we tested in and sealing was never an issue. The face foam is comfortable as well as thick that can soak up a good amount of sweat before dripping into the lens. Yes, they still drip into the lens! 

The ventilation on hot days is superb, but on colder days the lens has a tendency to fog up the worst of any goggle in the shootout. I also notice that my eyes get watery on faster tracks due to the amount of airflow that come through the vents. This could be where the ports are placed on the frame and flow the air into my face. This was only felt on extreme fast GP style tracks. Do yourself a favor and possibly seal the vents with a light coating of baby oil if you’re riding dusty or very fast conditions to keep your eyes from watering. On normal motocross style tracks this was a non-issue.  

The lens itself is very delicate and can’t take much abuse. I seem to scratch both  PRIZM and clear lenses easier on the Oakley Airbrake than the Armega or Prospect. You will have to make sure to leave a tear off on the lens of the Airbrakes if you want to extend the life. The overall fit and feel of the Airbrake feels lighter and more compact even though the numbers on paper don’t say much. Lastly, let’s cut to the large elephant in the room shall we… The price! At $160.00-200.00 they are the most expensive in the shootout and that is a turn off with consumers. However, if you’re looking for the best feel against your face and lens clarity that is second to none then this goggle is the ticket. If you’re an off-road guy that rides slower terrain in colder conditions this wouldn’t be my first choice, due to the fogging issues I have had (even with a no fog cloth). 

Goggle Price: $160.00-$200.00

Bonus Lens: No

Replacement Lens Price: $25.00 clear $50.00 PRIZM lens

Weight: 135 Grams

Fogging Issues: No

Laminate Tear Off’s: Yes

Rating Chart:

Ease Of Replacing Lenses: 9

Lens Clarity: 9

Field Of Vision: 9

Fitment In Helmets: 9

Fitment On Face: 9

Foam Feel/Absorption: 9

Overall Comfort/Fit On Face: 9

Ease Of Ripping Tear Offs: 8

Positives:

  • Simple to swap lens out

  • Fit/Feel

  • Clarity with several tear offs installed

Negatives: 

  • Lens scratches easily 

  • Price

  • Fogging issues


100% Armega Goggle First Impression

By: Dominic Cimino

Over here at Keefer Inc. its pretty well known how much we love wearing the Oakley Airbrake goggle. Plain and simple, we feel that this could be the best offering on the market for performance, comfort, and style. Fast forward to this past week when 100% decided to throw a wrench into that goggle train by introducing their new Armega - a completely new offering by the highest selling goggle brand in the industry. At first glance, the Armega is damn sexy and we are excited to really put it through the paces in the upcoming weeks of testing. This read is a quick shakedown after the press introduction held at a private ranch… somewhere down by Mexico. 

IMG_3127.jpg

No need to bore you with every minute detail of this goggle, because I’m sure by now you have possibly read about it since Wednesday. But I would definitely like to highlight the important traits that really stand out. First off, the 3D modeled lens - this is a polycarbonate material that is specifically designed to have zero optical distortion. In laymen terms, “I can see clearly now the rain is gone…”. Joking, but really - the field of vision is really damn clear. There are no imperfections in these lenses which means you can focus on the imperfections on the track instead. Furthermore, their premium lens offering is called HiPER technology which helps contrast red/blue/green color spectrums to really enhance what you are looking at. The best way for me to summarize this is that it almost feels like polarized sunglasses - what you are looking at just seems to pop more. Part of their marketing jargon for the Armega goggle is “Ultra HD Vision” - now I’m not quite sure what to make of that slogan, but know that you might only really notice this HD vision when wearing an Armega goggle that has the HiPER lens in it.

IMG_3133.JPG

Another key feature that stands out is the ventilation system they designed for the Armega. There are two induction ports on either side of the nose guard that help force air into the frame of the goggle. This air is funneled right into the foam layers (which are perforated by the way) with the intentions of eventually reaching your face. 100% had the goal of maximizing airflow for hot days and also for the cold days - because on the cold days, the more air you have flowing inside the goggle, the less likely they are to fog up. To tie this ventilation design together, they integrated a sweat channel into the upper part of the frame. This channel forces your sweat away from the lens and out of the goggle on either side of the frame. This is a pretty cool feature that I really want to dive into more now that summer is approaching. During the press ride day, I was able to log a pretty decent moto to where I did actually break a sweat. When returning to my truck and removing the Armega, I noticed that the face foam was still wet - just like any other goggle I’ve worn after a solid 20+ mins. Maybe I didn’t sweat enough for those channels to actually be put to work, but I will definitely try again when we start nearing 100 degrees in SoCal. 

Lastly, the overall comfort of this new goggle is really nice. The foam is super plush and it feels good when wearing it. The field of vision is plenty wide, as is the actual strap itself, and the goggle just has a solid feel to it. The lens is built well and snaps into place in the Armega frame very securely. There is very little flex which promotes safety and the security of knowing nothing will become dislodged from an impact. In regard to the lens locking system - it is definitely convenient to change lenses, but honestly the Oakley set up is still way more efficient. In addition, I feel the Oakley Airbrake frame sits wider and more flush against my face than the Armega does, but than again, I’ve only had one day riding in this new product. And if you want to continue comparing apples to apples, this new 100% Armega goggle with the premium HiPER lens lands on the shelf priced at $120 - a complete steal when comparing this to our preferred goggle of choice. 100% is onto something with the Armega and we look forward to punishing this goggle more in the upcoming weeks. Please hit me with any questions you might have (dominic@KeeferIncTesting.com). Thank you for reading!

Second Opinion: I am a big pain in the ass when it comes to goggles. I love wide peripheral vision and am used to that Oakley Airbrake lens clarity. Now I only have a couple days (four 30 minute motos) under my belt with the Armega’s, but I have some thoughts for you. The Armega goggle has the clarity of the Airbrake lens and even when using 14 laminate tear offs, the clarity is so much better than that of a standard lexan lens. Most importantly the nose area of the Armega fits my big ass nose well and doesn’t leave a pinching sensation or blisters like their old goggle did. The foam is soft to the skin and absorbs sweat well, which I can appreciate on these long hot humid days we’ve been having up here in the desert. Ventilation seems to be on par with the Airbrake and taking the lens on and off is very painless. So far I have been enjoying my time in these goggles, but will get you more of a durability report very soon. -Kris Keefer

Fly Racing Women's Lite Gear

Editors Note: Jeannine Labbe and I have emailed back and forth for sometime and she recently reached out to see if I would like a women’s opinion on a few things. As I take pride in being a well rounded testing site, I agreed to let her evaluate a set of Women’s gear for all you lady riders out there. I only gave her one condition however… She had to be brutally honest with her findings. Below is Jeannine’s honest review of the Fly Racing Women’s Lite set of gear.

By Jeannine Labbe:

Finding a high end set of women’s gear is hard to do. Finding a high end set of women’s gear with clean colorways (or even more than one) is nearly impossible. FLY Racing’s Women’s Lite racewear checks both boxes, so, when Keefer offered to let me do a review for Keefer, Inc. Testing, I jumped at the chance. 


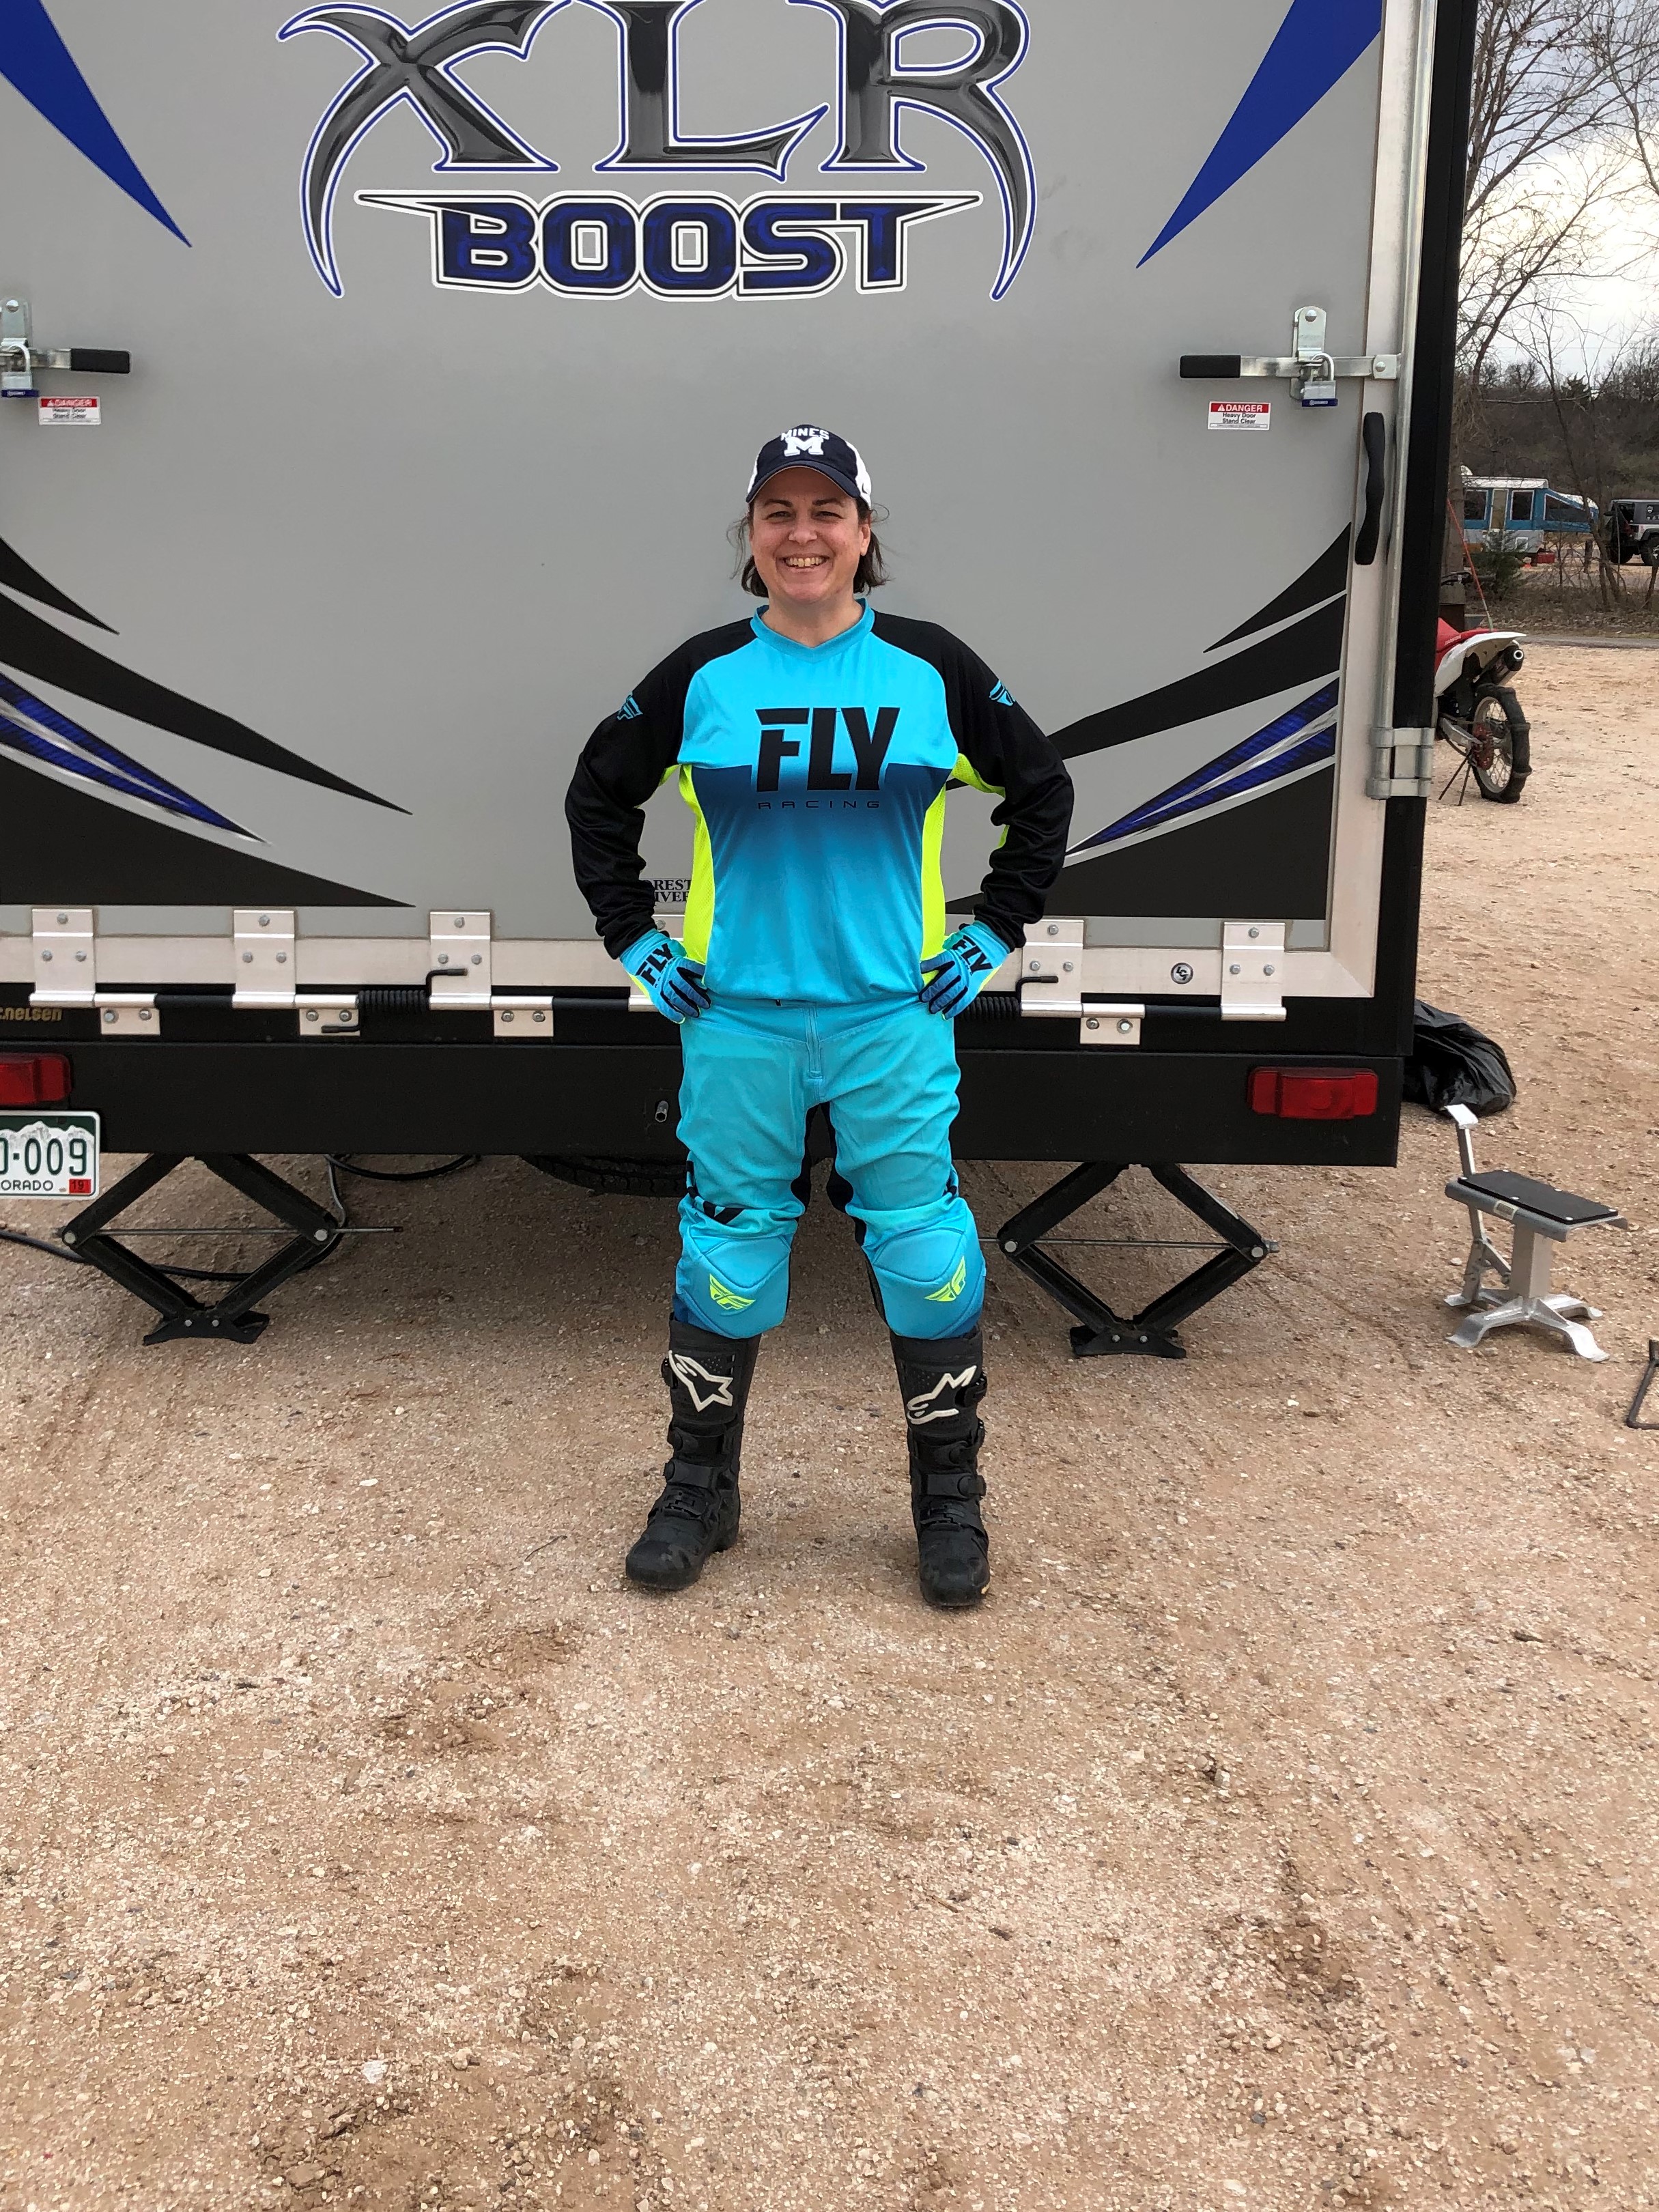
After receiving the Women’s Lite gear in Blue/Hi-Vis, we headed out to Little Sahara State Park for a few days of riding in it. Little Sahara has nice mix of dunes and sand trails, so it afforded me the chance to see how the gear worked when riding at speed, when shifting positions on the bike for steep hills, when transitioning from standing to sitting and back again through the trails, and even how well gear holds up to running through bushes and tree branches. 

Front View.jpg

The first thing that I noticed after putting on the gear is that it is really comfortable. Like wearing a favorite set of soft pajamas comfortable. The materials are soft against the skin and the overall feeling is really light. I typically change out of my riding gear between rides, but kept the FLY Women’s Lite gear on all day just for this review. I’d put in on before our first ride of the day and not take it off until after sunset, well after our last ride, when the temps dropped into hoodie territory. I must also say that I’m also a huge fan on the clean lines and colors of this gear set. The subtle addition of the darker shades of blue on the front provides nice visual contrast while also providing some camouflage if your belly is not as flat as you might want it to be. 

Sitting.jpg

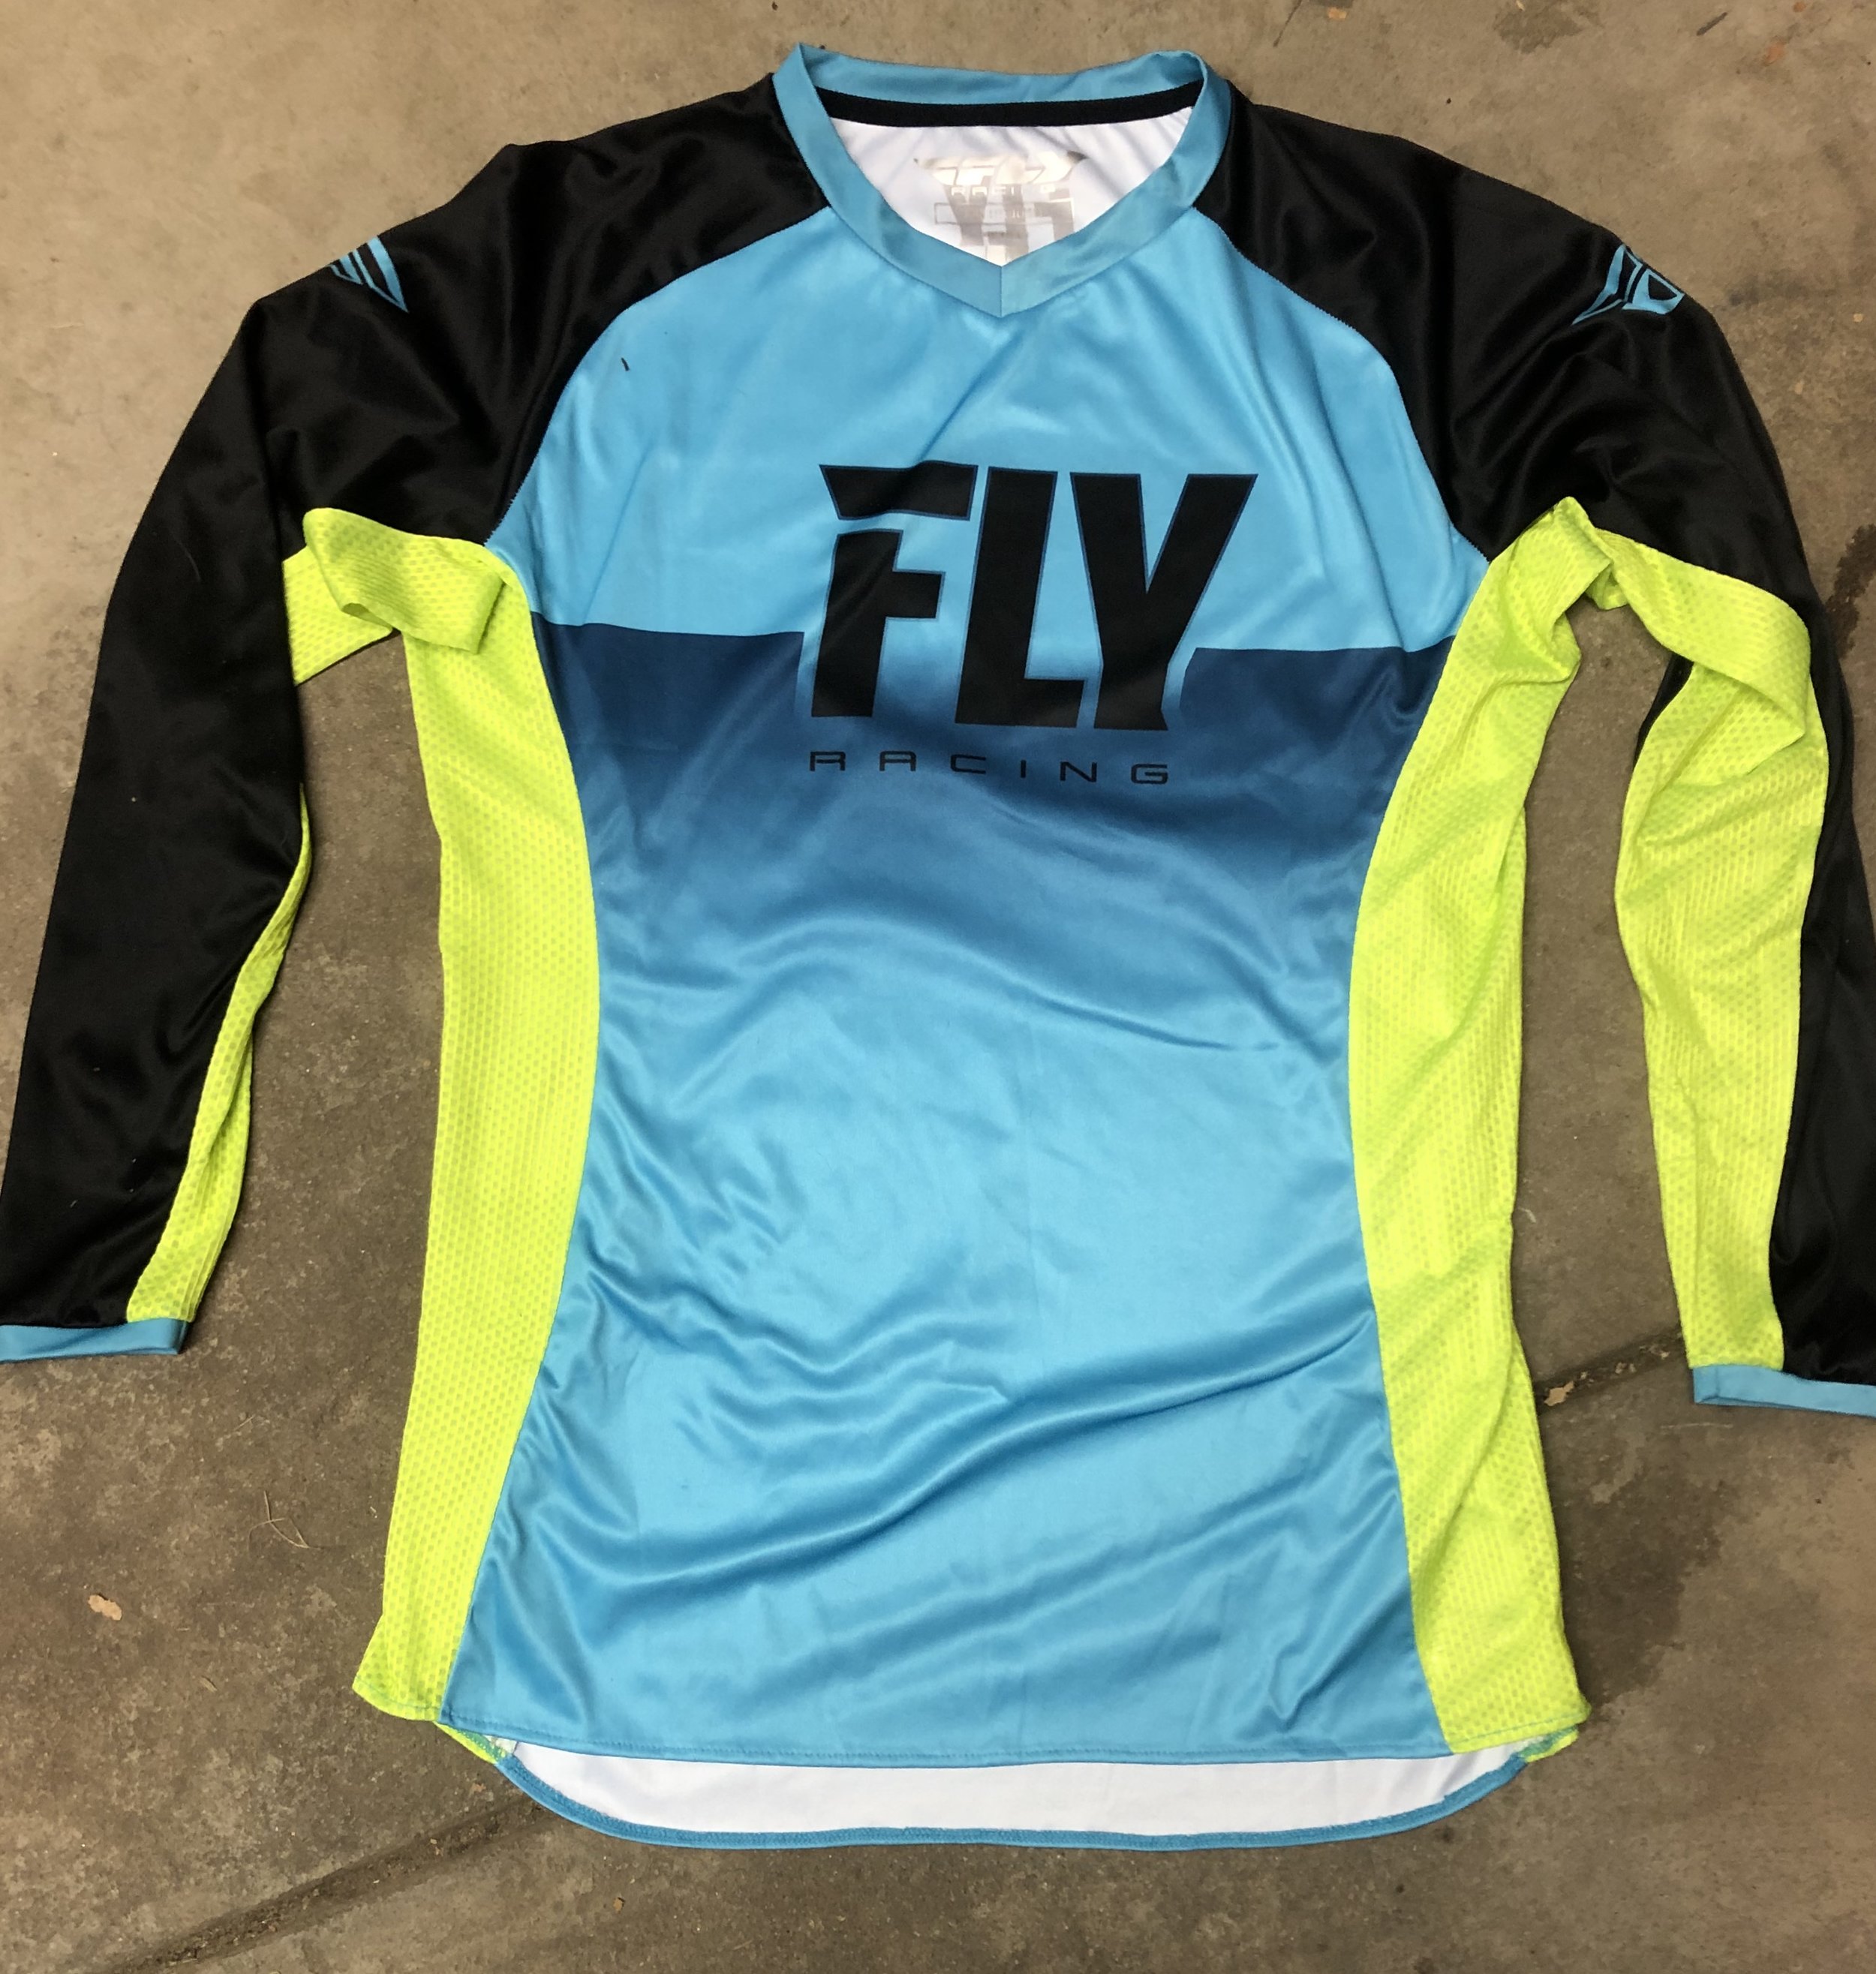
The Women’s Lite jersey features multi-panel construction with raglan sleeves, a tag-less v-neck Lycra collar, an extended tail, mesh ventilation panels down the sides and the inside of the arms, shorty cuffs, and sublimated graphics. The sublimated FLY Racing graphic is well placed to not look weird across the bust line, as can happen when graphics don’t span most of the length of a shirt or jersey. The choice of hi-vis on the blue colorway for the mesh inserts provides a pop of color, but it has the downside of being like a highlighter for belly bulges.

FLY refers to the jersey’s fit as women’s pro-fit. It has a slimmer fit with a cut that complements a woman’s curves. The sizing is close to being spot on, but might run just a bit large. I’m 5’3”, 145 lbs, and carrying about 15 extra pounds of baby weight (despite the “baby” having just turned 4). I fall between a medium and large, a problem I frequently have in street clothes, too. The medium jersey fit, but showed off my extra curves, so I opted for a large. It’s a bit loose, but not baggy. If you are considering two sizes, I’d suggest going for the smaller size if you are trim or don’t mind showing some bulges and going for the larger size if you prefer to better hide your imperfections. The v-neck is small enough to keep most of the roost out, but large enough to not feel tight. Sleeve length was nearly perfect for me, so it could be a bit short if you have longer arms, particularly if you wear a smaller jersey.

Jersey.JPG

The Women’s Lite pant features a lightweight minimalist design, a ventilated mesh liner, 90% stretch panel construction, pre-shaped knees, leather heat shields, adjustable waist belts, leg cuffs with a removable elastic band, and sublimated graphics. The knees have a low profile padding in them that should provide some abrasion resistance and resistance against knee braces rubbing through. I don’t wear knee braces, but the knees are roomy enough that you should be able to run them without them getting bound up in the pants. 


As with jersey, the pants run fairly true to size, but a tad on the large size. I wear a size 10 jean and they are typically a little loose. The 9/10 Women’s Lite pants are very loose. The 7/8 pants fit, but looked like yoga pants. Since I didn’t feel comfortable wearing bright blue yoga pants on a dirt bike, I opted for the 9/10. As with the jersey, if you are between sizes and on the thin side, you’ll probably want to opt for the smaller size. If you opt for a larger size, the side belts gives you the ability to really cinch down the waist. I love the waist belt design. The belts just pull forward and attach with Velcro. They are much faster and easier to use than the old style where you run the belt back and then pull them forward through a loop. Their soft and low profile design is much more comfortable when you lean over, too. The pants also feature my favorite motocross pant closure system of a zipper covered by a Velcro tab. It’s quick to use and low profile. The pants sit below the waist and are fairly short in the crotch. They come with removable hip pad that have large holes in them to allow maximum air flow. The pants have enough stretch that the pads do not affect the fit, but they do add odd looking bulges so I opted to not wear them. The interior of the waistband has silicone grips that grab well enough to be uncomfortable if you try to untuck your jersey between rides.

Pants.jpg

The pants feel very light. The leather heat shields feel heavy relative to the rest of the pants, but that feeling goes away when you put on boots, which support most of the weight. The mesh liner, which goes to the knees, is soft and comfortable and its hi-vis color actually shows through the pants, giving the top of the pants a slightly more yellow color than the jersey. The pant legs, with their slim fit, lightweight material at the back, and mesh at the front, fit very comfortably into my Alpinestars Tech 7 boots. With my short legs and large pants size, I did have to pull the pant legs up and hold them in place with my boots to get the knee in the correct area. This didn’t cause any comfort or performance issues, though.

Lower leg.jpg

The FLY Women’s Pro Lite glove is a minimalist glove with a perforated Clarino palm and heart-shaped silicone grips on the first two fingers. The material on the back is form-fitting, stretchy, and features the same light to dark color pattern as the jersey. Clarino material wraps around the back of the thumb and a Velcro closure allows you to tighten the fit around your wrist if needed.

Gloves.JPG

The gloves are a bit difficult to pull on. The opening is small enough on my size 6 (small) gloves that the Velcro closure is redundant. The unpadded palm is a bit thick for my taste, but only because I have small hands and run small diameter grips or half waffle grips with the waffles removed. The thickness of the Clarino on the palms made the grips feel large and ultimately made my arms pump up. After fighting it for a couple half hour rides, I finally had to switch to my thinner Thor Void gloves. I wanted to get in more a durability test on the gloves, but needed to be able ride for more than a few minutes at a time. 


The pants/jersey retained their comfortable nature on the bike and they didn’t restrict movement. The sleeves of the jersey stayed in place without being tight around the wrists. The pants didn’t catch on the shrouds and didn’t pull when moving my legs forward or up, which I appreciated. My one gripe is that, after an hour or so of riding, the pants stretched out enough that they started to pull down a bit in back in situations where I slid back on the seat. My hips kept me from worrying about them actually falling down, but it was a bit annoying. However, even with the pants pulling down a bit, the jersey stayed nicely tucked in. This could be because the tail is long enough, or it could be product of me being very short-waisted and wearing a larger jersey. The leather heat shields on the interior of pant legs did their job to protect my legs from the hot head pipes the couple times that I low-sided and ended up under the bike. 

Riding.jpg

While the neckline was high enough to keep the roost out, the mesh inserts allowed in plenty of sand. It was windy out, so most of the sand might have from crosswinds rather than roost, but, regardless, I had a decent amount of sand on my back by the end of the day, which can be common with most jerseys. 


I was impressed by the ventilation of the gear. The temperature never got extremely hot, but I remained comfortable in nearly 80 degree weather. When riding at speed in a standing position, the pants flow a surprising amount of air. I usually ride in TLD GP Air pants with mesh inserts and the air flow was almost comparable. The jersey breathes well, but it doesn’t perform as well as the pants do when compared to a full mesh model. On the flip side, when the temps dropped into the low 60’s in the evening, I didn’t need to change jerseys or add a jacket as I often need to with fully vented gear.

Sleeve.JPG

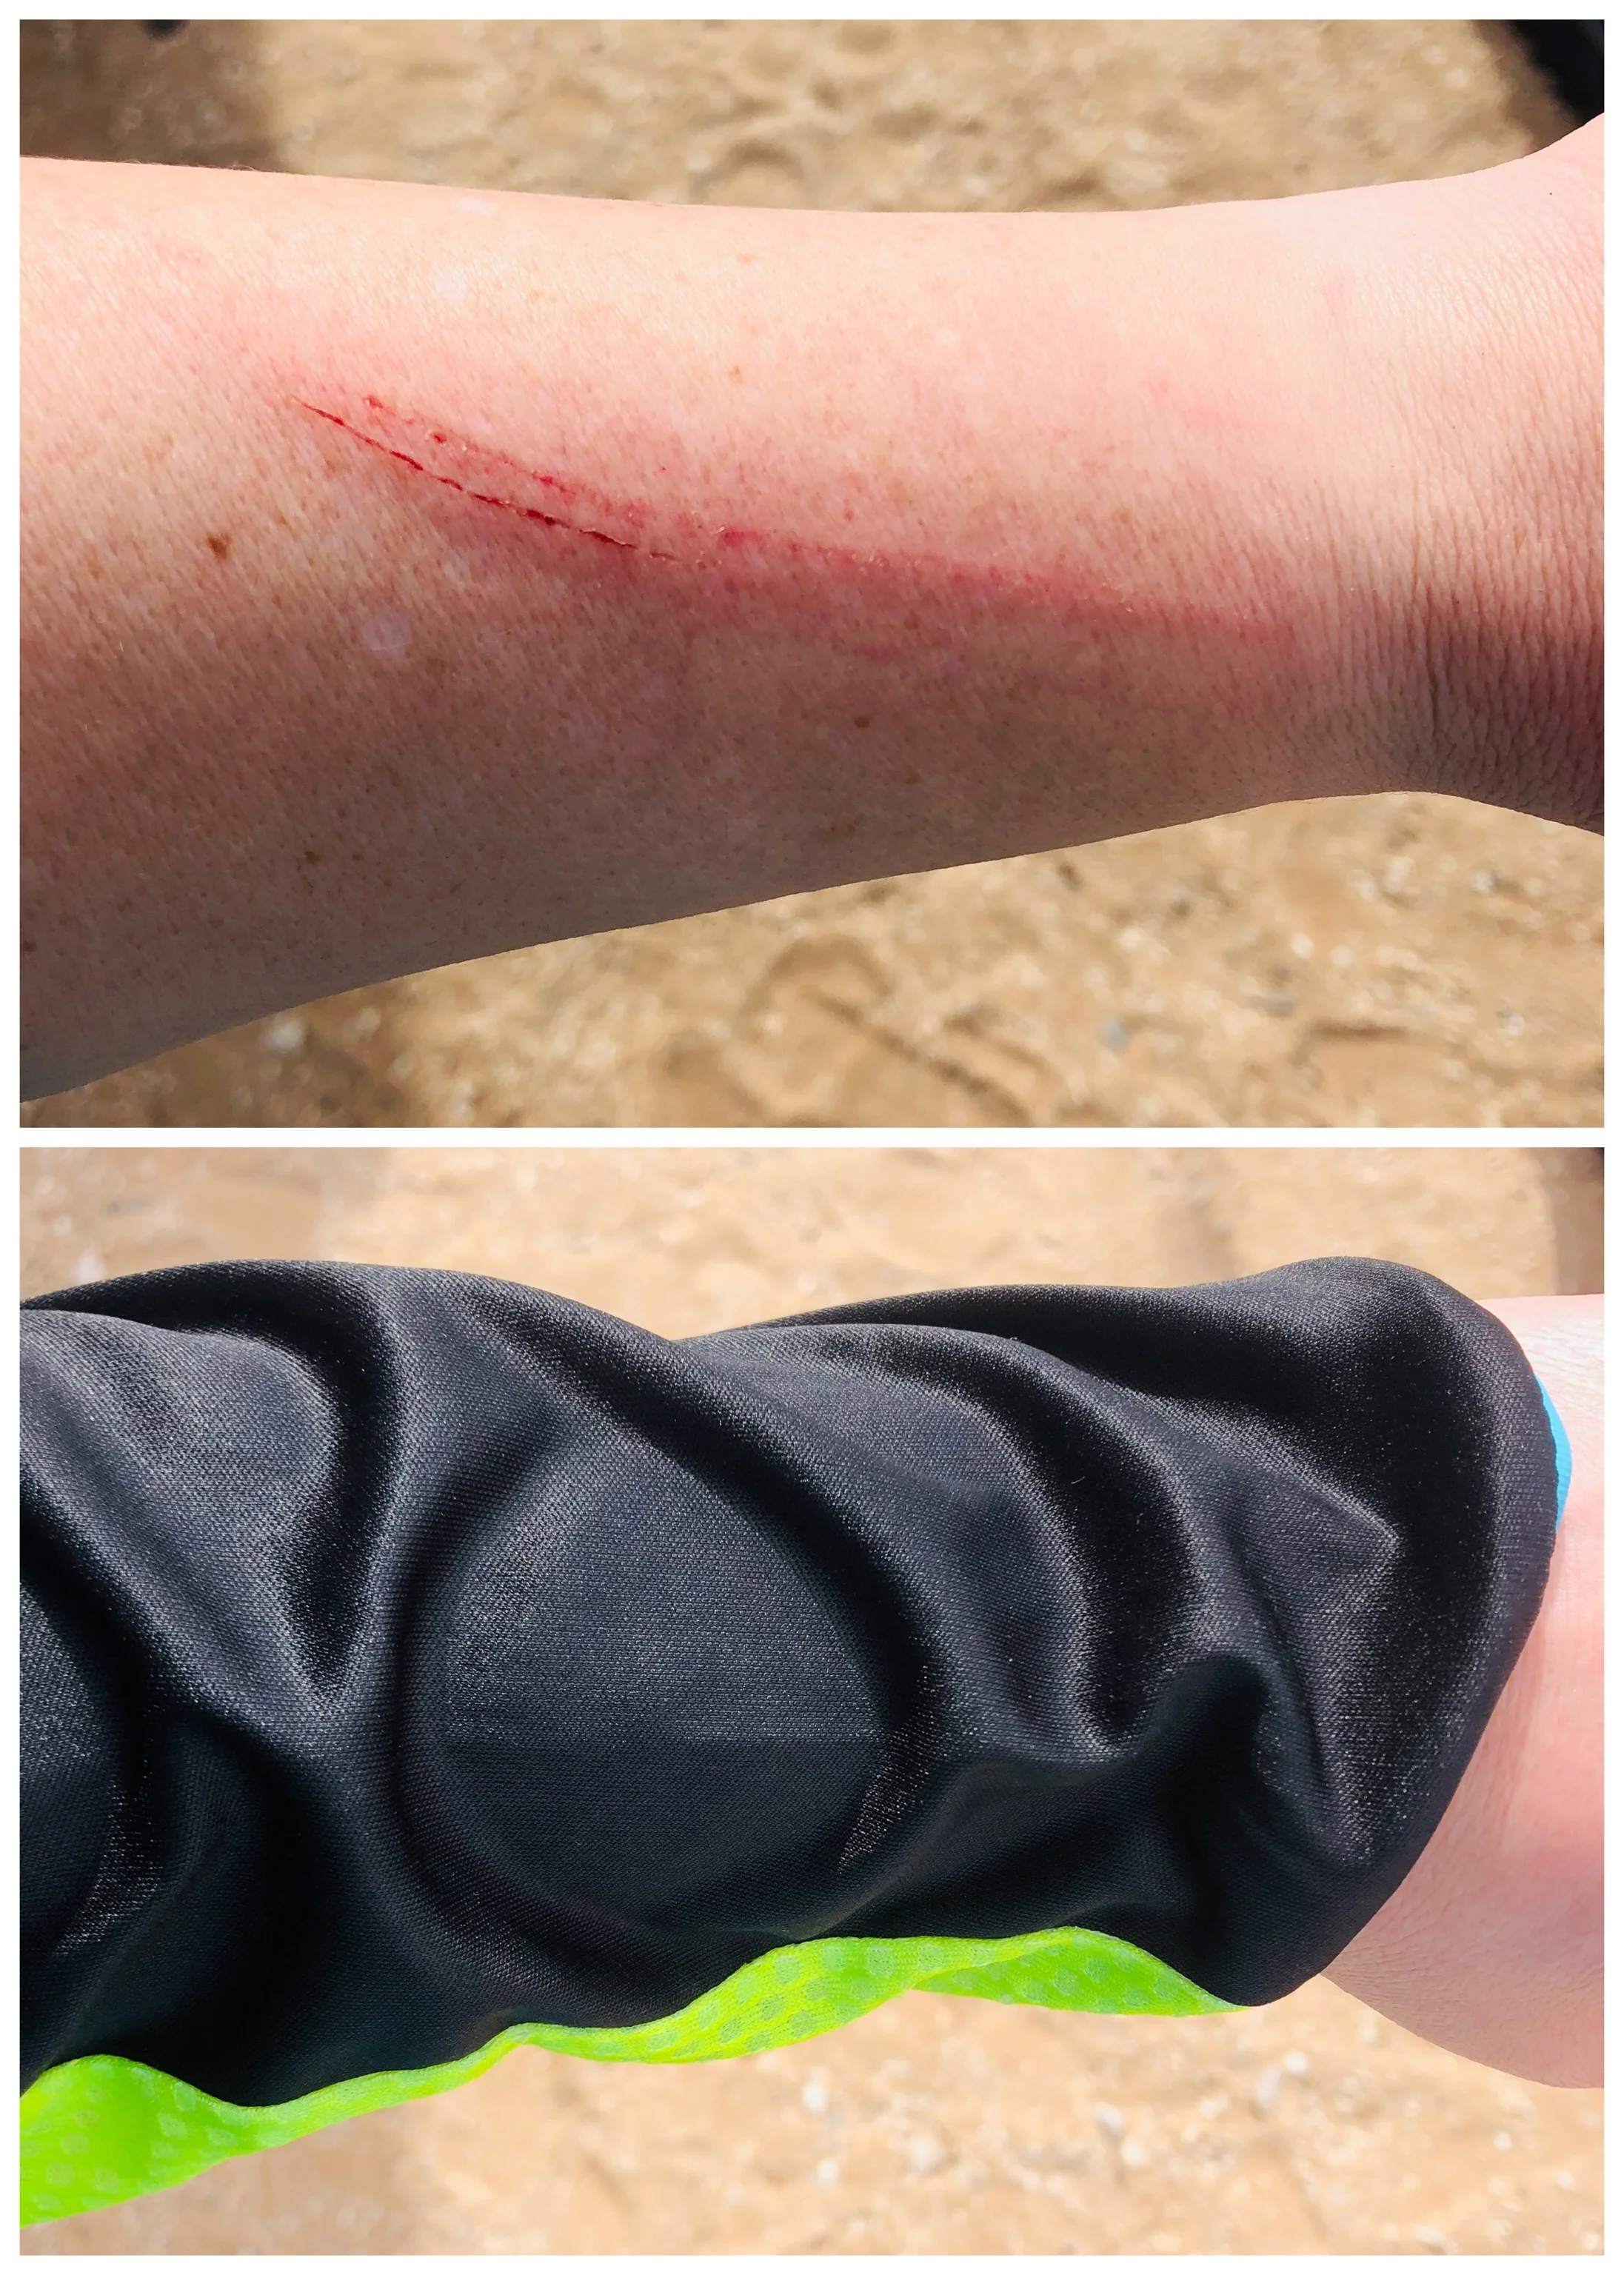
Durability is mixed bag, though mostly good. I somehow got a snag on finger of one glove before I had even started riding. The mesh inserts of the jersey also snag easily. However, the pants and the rest of the jersey held up well to repeatedly brushing up against bushes on the trails. At one point, I even broke a 1” diameter branch with my forearm although my arm was scratched and bruised you can’t even tell that the jersey took a big hit. The pants and the non-mesh sections of the jersey don’t show any sign of the repeated bush strikes neither. Another minor issue is that the stitching has started to stretch out a bit on the sides of the knees and on the shoulders where my chest protector and my Camelbak hit. I don’t know that the jersey would have this issue without the Camlbak, so if you are just riding moto, you would likely not see the issue there. Regardless, it’s minor, but you can just see the stitches; they don’t appear to be pulling out.

Overall, I love the FLY Women’s Lite Racewear. It will be my new go to gear in all but the hottest and most humid weather. I hope to do a follow-up review on its long term durability and the hot weather performance. It could prove to even be my favorite hot weather gear.

The Women’s Lite pant retails for $149.95, the Women’s Lite jersey for $38.95, and the Women’s Pro Lite glove for $29.95. In addition to Blue/Hi-Vis, the gear is available in White/Black and Neon Pink/Black. Over the boot pants are available in White/Black and Neon Pink/Black for $114.95.

If you have any questions, get them to Keefer and I’ll be happy to answer them. And a special thanks to Kris and Keefer, Inc. Testing for giving me the opportunity to review the FLY Women’s Lite racewear.

Leatt GPX 3.5 Helmet

By: Michael Allen (michael@keeferinctesting.com)

Just as neck braces have been a touchy subject for the past ten plus years, lately it seems as though helmets and concussion technology have now become a hot button topic as well. As I’m sure most readers know, a lot of helmet companies have come out with their own type of proprietary technology that helps with rotational impacts and low speed crashes in their high-end helmets. In fact, many helmet companies only offer high end expensive helmets and don’t want to be associated with “less expensive” models. While I understand that most people think that you have to spend over $500 on a helmet to protect your head, let’s be realistic, everyone needs good head protection but we don’t all have $500 to spend on one piece of riding gear. Most lower price point helmets are of the old school technology with a simple shell and eps liner but now Leatt is making a push into the lower price point market with better technology. 

IMG_4478.jpg

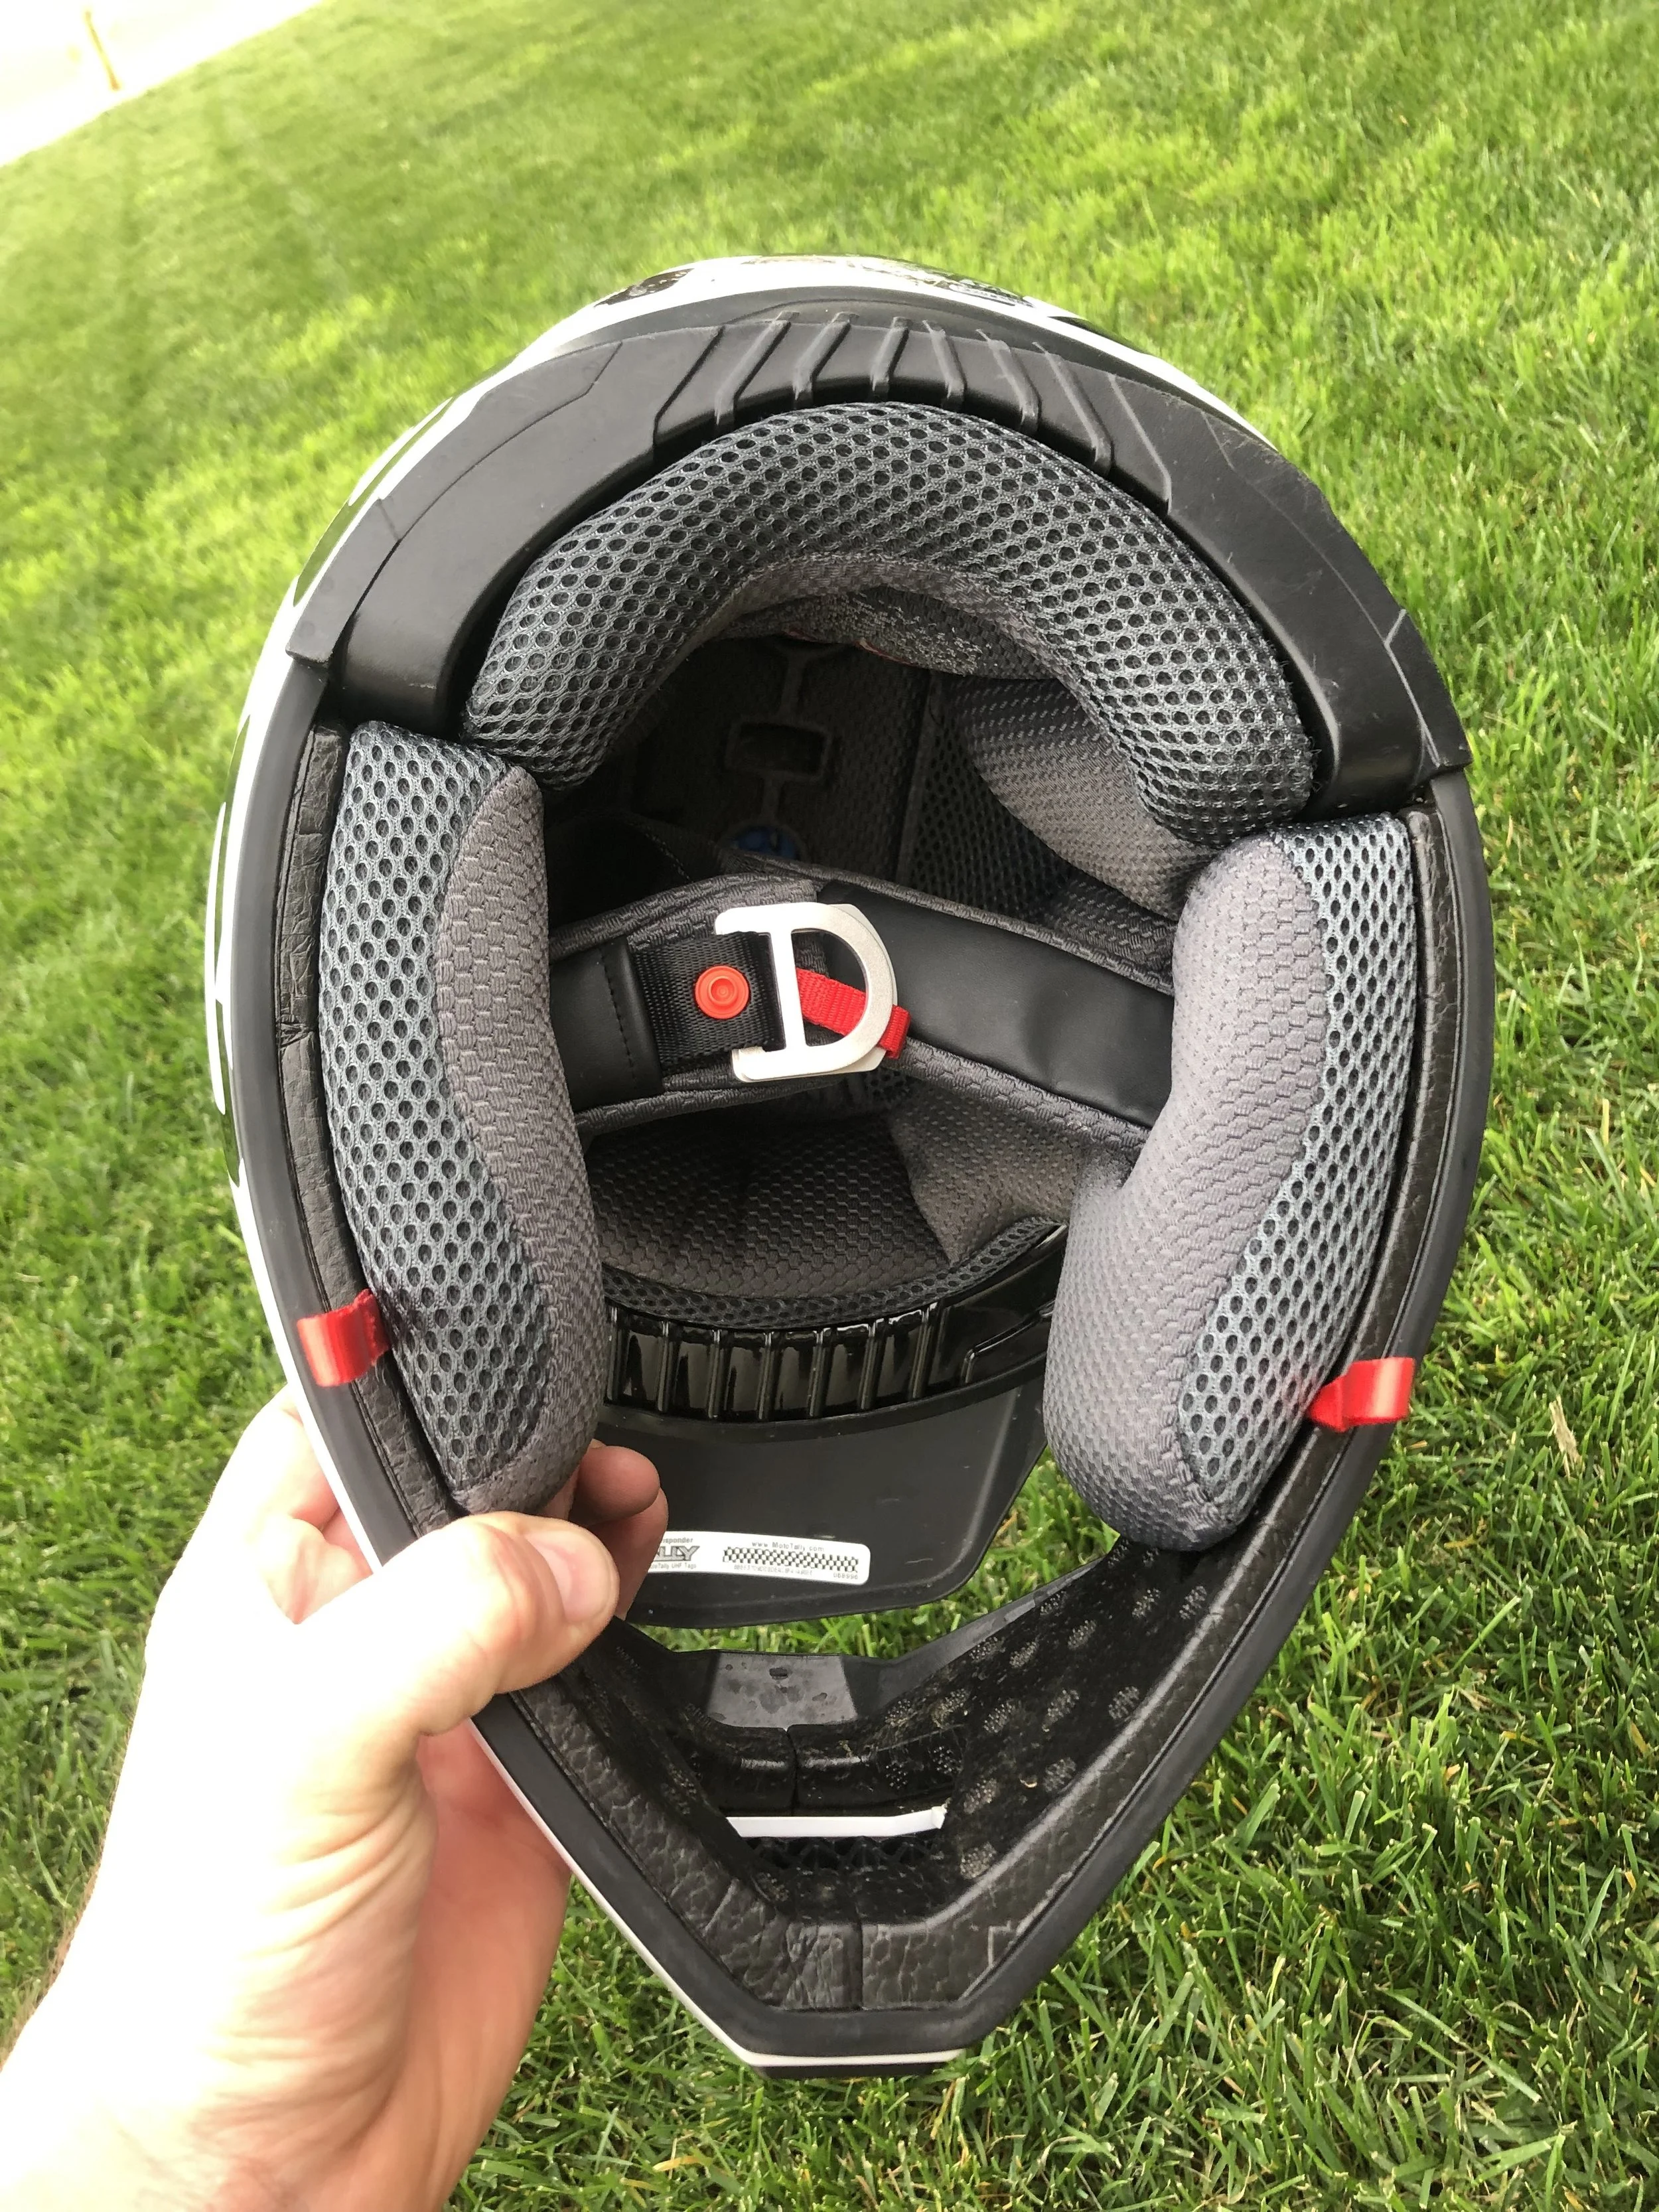
 The Leatt GPX 3.5 helmet comes in at an entry level price (at 179.99) while offering some of the technology that has went straight into their higher price point GPX 6.5 helmet. While the 3.5 helmet is less expensive than the 6.5, in my opinion the 3.5 is a better-looking helmet. The one I received was black and white with a touch of red and since it is a lower price point helmet it only came with a soft helmet pouch instead of a nice bag. Not a huge deal right? The eye port on the 3.5 is on the smaller side however and goggles with nose guards can sometimes be a pain to maneuver into place. You will have to just take your time and not get overly excited to get out on the track or trail. The visor is adjusted by the top center bolt and has minimal adjustability, which again is not a huge deal to the consumer that Leatt targets this helmet for. The only other downside to the 3.5 is the cheek pads; while I like the way all the pads clip into the helmet nice and easily, the cheek pads have one flaw. When I would take my helmet off after long sweaty motos, six out of ten times the cheek pads would un clip and come out just from my cheeks dragging along them. It was more annoying than anything, but it literally took me 10 seconds to snap them back in.  

IMG_4256.jpg

The 3.5 is DOT and ECE certified and is internally lined with small “turbines” which are 360 ̊ moving discs constructed of an energy-absorbing shape and material. These turbines are designed to reduce rotational acceleration to the head during a crash and help minimize the likelihood of a concussion. The visor is a breakaway style to help with the roll of the head along with the concussion technology, and the cheek pads (that come out too easily) have “emergency removal” pull chords in case of an accident. The 3.5 is also neck brace compatible and comes in at 2.8 pounds. When wearing the 3.5, the helmet pads are very plush to the face and don’t seem to get sopping wet with sweat after long rides. The fit is true to other brands as I was sent a large and it fit just how I prefer.  The ventilation through the helmet was on par with high end helmets (like the 6.5) and the noise in the ear pockets was muffled and not too loud. 

IMG_4477.jpg

To be totally honest I didn’t know the price of this helmet when I got it from Leatt, but when I discovered the price tag I was shocked. Usually low end helmets look just that, low end; but the 3.5 looks like a high end helmet and according to the research done by Leatt, the technology is indeed high end https://www.leatt.com/product_uploads/ce_certificates/2019/Helmet%20GPX%203.5%20-%20CE%20Certificate.pdf (https://www.leatt.com/product_uploads/white_papers/TURBINE_WHITE_PAPER.pdf). 

IMG_4480.jpg

 The bottom line is that luckily I didn’t get to test out the concussion technology of the 3.5 and for that I am grateful. That being said, before using the 3.5 I was somewhat skeptical as I assumed that “less expensive” helmets were all crap and that the only way to have good protection was to spend a lot of money. However after wearing the 3.5 and looking into the technology that went into it, I’m beginning to think I may have been wrong. Before wrapping this up I need to address the elephant in the room, there is a picture out there (I think it started on Vital) of someone in Europe crashing in this helmet and it really made the helmet look bad. In my personal opinion it’s hard to judge what a helmet looks like after a crash without seeing the crash happen and studying the actual outcome. Did the picture look bad? Yes, but the rider walked away from a pretty nasty looking crash and to that I would say that the helmet looks like it did its job in protecting the rider.

I think that it’s great that Leatt decided to put some money into a lower price point helmet to help keep the working man safe. Let’s face it, as much as we all want the brand new $500 helmet, we aren’t all making the kind of money it takes to have $500 laying around. With an MSRP of $179.99 Leatt is leading the way in keeping every rider safe, not just the top lever racers and I hope they start a trend in getting other brands to redesign their lower end helmets. This will help raise the bar in concussion protection across the price point board. If you have anymore questions about the Leatt 3.5 Helmet feel free to reach out to me at Michael@keeferinctesting.com 

Leatt Velocity 6.5 Goggle


It seems like every company in the moto industry is pushing one another to be better in every way and the consumers are reaping the benefits. As with a lot of other companies, Leatt is now offering a premium goggle and we were one of the first media outlets to get our hands on a pair. I have stated in other stories that I HATE changing goggle lenses, no matter how careful I try to be I always end up with my ugly smudged fingerprints all over the inside and outside of the lens. I was thrilled that Leatt decided to go with a pre curved hard lens that snaps out with ease. In fact, the lens is technically “bulletproof” (although our other tester Matt said it didn’t hold up to a .45cal) using a military ballistic impact standard lens material. To install or remove the lens the outriggers un-clip forward and the lens comes out and up from of the nose guard to be easily removed. Re-installing the lens is the reverse process, but can sometimes be tricky to get back over the small side posts under the outriggers. The large 50mm anti slip strap stays in place and takes minimal adjustment to get the fit correct. 

IMG_4399.jpg

I wore these goggles in a variety of conditions including moto, desert racing and trail riding so I feel like I got all of the bases covered (when it comes to riding and race testing the Velocity 6.5). The first time I tested these goggles was at the Mint 400 with a team of buddies and let me tell you, I definitely tested the bulletproof features of the tough lenses (more on that in a second). The 6.5 is breathable and at the high speeds of the mint 400, I never felt like there wasn't enough air flowing through the goggle. The field of vision is large and the foam contours my face shape well, although for some reason I feel like the lens is slightly far from my face. This isn’t a bad thing necessarily, but when wearing helmets with a close chin bar these goggles can be a hassle to get into the eye port. In fact one thing I noticed was that when wearing the 6.5 goggles with my new Leatt helmet I found it a pain in the ass to get the goggle into the eye port with the nose guard on the goggles, so I ended up taking the nose guard off the goggles to make it easier take on/off. I got to test out the strength of the impact resistant lens when I got passed racing the Mint 400 at about 85 MPH. Let me tell you, nothing hurts quite as bad as having small rocks pelt you while trying to hold onto a bike at high speed. I heard the rocks hitting everything and to my surprise the lens didn’t show any damage after the race, in fact I’m still using the original lenses.  

IMG_2437.jpg

When it comes to the downside of the new Leatt goggle all my focus is pointed at the tear-off system. When using traditional tear-offs, stacking more than two or three really hurts the clarity of vision as the lens gets somewhat distorted. After I noticed this problem I decided to try their laminated tear-offs, which has much better vision, but needs some work in the fitment and tear off capabilities. After all of the tear-offs are installed there is a noticeable gap between the tear-off and the lens (on the non-pull side) which lets dirt, water, and other debris fall between the tear-off and the lens. It seems as though the lens is nice and pre curved, but when putting a flat stack of laminated tear-offs on, the stacks want to stay flat and not perfectly contour the lens. Adding to this, the post on the lens has a plastic square underneath it, which doesn’t let the tear off sit flat on the lens. Another small critique of the tear offs is that on the pull side, the hole for the post seems too large and makes it easy to pull multiple tear-offs at one time. Leatt also offers a roll off system that I haven’t been able to try, but I am looking forward to getting my hands on. (editors note: The tear off problem also could be that this “off-road” guy needs to learn how to rip tear off’s in the air better).

IMG_4397.jpg

The foam on the 6.5 is very comfortable and while it isn’t the most absorbent foam I have ever felt, I never had a drop of sweat fall into the eye area. I am a little weird and tend to wash goggles at least every or every other time I ride, so having an easy to remove, cleanable, replaceable lens was a big plus for me. On some goggles the strap tends to start to curl after a couple washings, but I haven’t seen that yet from the 6.5. Overall, I was impressed at the new high end goggle offering from Leatt and  with a pricepoint of $79.99 it’s hard to beat. If you’re a guy that wears Leatt and ABSOLUTELY HAS to match, you just hit the jackpot, but if you’re a guy who doesn’t care about matching and just wants a good goggle, you’re stoked because in my opinion this goggle is worth a try. If you have any more questions about the new Leatt Velocity 6.5 goggle feel free to reach out to me at Michael@keeferinctesting.com


Alpinestars Tech 10 Review

Alpinestars introduced the new Tech 10 last summer, but since then, the boot has gone through a revision for a less rigid feel. You might of noticed that if you purchased a very early edition of the new Tech 10 (or “version 1.0” like I call it) it was super stiff right? They were so stiff I couldn't feel my brake pedal or shifter for a few days on the bike. I have been putting a ton of time in on the “revised” version of the Tech 10 and wanted to give you guys some thoughts/updates about both the product. As always please feel free to email me at kris@keeferinctesting.com if you have any questions about these boots.

IMG_2295.JPG

When Alpinestars introduced the new The Tech 10 last summer they were guided by three priorities as the Alpinestars technical footwear development team looked to improve overall functionality, performance and safety, decrease weight, and reduce material volume. Maximizing these priorities was the overall goal of the new Tech 10 and to be honest I have been a harsh critic of these boots when they first came out. If you listened to show #88 of the Keefer Tested Podcast you would know what I’m talking about. 

The older Tech 10’s comfort were legendary and it was a pleasure to wear the boots in all conditions. A key objective for the updated Tech 10 was maintaining the boot’s feel while enhancing its performance, functionality and safety.

The most significant upgrades to the Tech 10 (from older pre 2018 Tech 10’s) performance are unique technologies: The Frontal Flexion Control Frame, the Asymmetrical Dual-pivot Arms, the patented Dynamic Heel Compression Protection Shock Absorber which is integrated into a redesigned foot shell and the slimmer, more streamlined, outsole.

milestone -1-26.jpg

Fact! The new Tech 10 is lighter than the older version, the result of Alpinestars studying all the boot components and their connections (basically how the boot comes together). A re-design of every single one of those components has been undertaken to reduce volume and weight.


New material composites have been created that are lighter in weight and aim to be more durable to ensure they try and hold up to the rigors of off-road riding. The new, cold-forged, aluminum buckles are a result with an easier to operate, more durable and self-aligning closure that offer a positive hold across the upper surfaces of the boot. The result has yielded over 400 grams (almost 1lb.) in weight reduction from the older Tech 10.

The new design also reduces the Tech 10’s profile and physical size. It is more streamlined with newer, lighter, more durable composite materials and a more integrated approach to the construction of the components, which dynamically enhances the chassis of the boot and utilize more advanced bonding processes.

Even though Alpinestars hasn't came out and told me exactly what the revisions were on the new Tech 10’s, I can tell you that the front three bars of the ankle area have been “revised” to soften the feel.

Even though Alpinestars hasn't came out and told me exactly what the revisions were on the new Tech 10’s, I can tell you that the front three bars of the ankle area have been “revised” to soften the feel.

Built into the Tech 10’s unique and lightweight single-piece co-injected foot chassis is the patented Dynamic Heel Compression Protector (DHCP), an innovative safety feature, which includes a fully integrated collapsible heel area with expanded poly-foam to absorb high impact energies during a crash.

DCHP features a directional impact protection system which significantly reduces the effect of excessive, potentially injury-causing energy being transferred to the ankle and lower leg.

milestone -1-93.jpg

Once my foot slipped into the updated Tech 10 it felt snug enough in all the right places, but the area that I felt the new Tech 10’s needed help in was “break in” and flex in the ankle. Last summer when I tested the first version of the new Tech 10’s I couldn't even move my feet or feel the shifter/brake pedal. It was like wearing a cast and I was feverishly looking for the older Tech 10’s like a child looking for candy. The new Tech 10 is not as tall as the old boot, but that never really came into play (good or bad) when I rode with them.


It still takes a little long to break in the “2.0 version” of the new Tech 10’s (one full riding day or 4-5 engine hours), but once broken in I felt like I could bend my ankles freely, feel the shifter and brake pedal so much better than the first version. The new Tech 10 is still on the stiffer side compared to Gaerne’s/Sidi’s/Instinct’s, but I have grown to appreciate the support that I am getting when I send it off jumps to flat. There is more plastic to the new Tech 10 than the older one and that results in a lighter weight boot, but also makes it slightly less grippy on the inner side of the boot. When pinching with my legs I get more locked in with the older Tech 10’s than I did with the new ones. Could that be from not having as tall of a profile? Possibly… This is something that some of you may not notice, but to me was worth noting. 

There is more plastic on the new Tech 10’s (compared to pre 2018), which makes it much lighter, but also have slightly less grip when pinching the bike.

There is more plastic on the new Tech 10’s (compared to pre 2018), which makes it much lighter, but also have slightly less grip when pinching the bike.

A huge plus for me with the new Tech 10 is that it doesn’t get water logged and or heavy as quickly as the older version. Riding in muddy conditions and power washing boots over time have made my older Tech 10’s weigh almost two pounds heavier than when they were new (and they were already heavy when new)! The 2019 Tech 10’s have more plastic built into the boot, which saves weight, but also repels water much better than the old leather panels. So there is some give and take with getting a boot that weighs less.    


The toe box is smaller and that could take some time to get used to if you’re coming from the original Tech 10’s, yet it can make shifting a little easier by getting your foot under the shifter. The high impact, cold forged aluminum buckle system is easy to adjust and can actually close shut or open even when muddy. 


The Tech 10 boots are much more comfortable on hard landings and have an incredible soft feeling sole. The shock absorbing quality of these boots are second to none and the older I get the more I appreciate this. My ankles and feet have never been sore after a long day of riding with the new Tech 10’s. The new version of the Tech 10 boots weigh in at roughly 8.8 pounds and while they are still not the lightest boot on the market (Fox Instincts hold that honor), the protection I do feel on the track is so good I am willing to overlook the heavier feeling with the Tech 10’s. 


One other standout of the Tech 10 is that if you don’t ride on the balls of your feet—like you should—the sole will feel a little awkward because it is shaped to almost make you ride on the balls of your feet. I don’t know if Alpinestars designed the sole to help the rider in this aspect, but I like that this boot helps proper rider technique! When standing on the pegs it feels as if the front and rear of the sole is raised, and this makes you ride in that sweet spot (the balls of your feet). It took sometime to get used to this feeling when I first started riding in these boots, but now it’s second nature to me and forces me to ride like we all should. When I ride with other boots I really have to pay attention to scoot my feet back on the pegs, but with the Tech 10’s my feet get in the correct position much easier.

IMG_1648.PNG

The Tech 10 boots offers a seamless feel on the bike and will not catch or snag on any part of the machine. After several months of use I did find that the soles of the new Tech 10’s are better than the older style. I am told Alpinestars offers a resole and if you feel that the DHCP has been crushed from a crash you can send it to Alpinestars and they can evaluate and replace if needed. 


Overall, the updated “2.0 version” Tech 10 boots are still one of my favorites to slide into and give me the protection and comfort I am looking for in a boot. You can check all of the Alpinestars boots out over at alpinestars.com or rockymountainatvmc.com


In order to save my incoming email inbox I have already asked a couple questions for you right here….


Popular Question: “How do I know if I am getting the “2.0 version” or not Keefer?


Answer: “Although I can’t give a clear cut and dry answer I do believe that all the colorways besides the Battle Born Tech 10 are version 2.0”.


Popular Question: “Keefer if I can save a couple hundred bucks and buy the pre 2018 older Tech 10 boots should I do it”? 


Answer: “Yes, you should! I still love the older pre-2018 version boot and still have some that I wear”! 


Oakley Prizm Lens


Oakley introduced the PRIZM lens technology to us a couple years ago. PRIZM is an effort to build contrast through maximizing your natural color vision. What Oakley is trying to do with a PRIZM lens is identify what colors you're naturally prone to seeing effectively then look at the environment and match up those colors, so you have a lot of contrast, which is supposed to give you better depth perception, and ultimately gives you performance value to your riding.

IMG_2376.jpg

When it comes to motocross riding the PRIZM lens translates to the identification of bumps, square edge, and transitions between textures in dirt, thus allowing you to see better in shallow ruts. There are three PRIZM lenses to choose from: MX Black Iridium (designed for full sun exposure), MX Jade Iridium (designed to enhance the green colors when riding in and out of trees), and MX Bronze (enhances vision in lower light and is dark enough to notice subtle transitions in full sun). 

I tested the black iridium PRIZM lens in the morning/afternoon then the bronze lens in the evening riding sessions. I also had another pair of goggles with a clear and tinted lenses for comparison. The first thing I immediately noticed when putting on the PRIZM-equipped Oakley goggles was the clarity the lens provided. If you haven't tried an Oakley lens then it’s tough to describe over text how good they can be. Compared to a standard clear lens the crispness that came through the PRIZM lens is almost like you're wearing a corrective lens inside your goggle. I tested the black iridium PRIZM lens in the late afternoon test sessions, on a track with several corners heading into the sunlight, plus sections that were through trees and completely covered with shade, and the transitions between sunlight and darker colors were easier to see. It impressed me that the black iridium lens cut down glare from the sun so much as well.

I started off the late evening sessions using the PRIZM Bronze lens, but once I switched over to another goggle company (with a clear lens) to compare is when I could really tell the difference. The glare from the sun was extremely harsh and it was more difficult to see the lines I was aiming for when entering corners. Even with the standard tinted lens the clarity just wasn’t there like when I had (when riding with the PRIZM lens). Of course, it’s never going to be perfect riding directly into the sun, but the PRIZM lens helped me considerably in those conditions. 

IMG_2378.jpg

While the standard tinted lens helped with some glare and direct sunlight, I struggled with shade though corners and through shaded tree sections. The transition wasn't as good and I lost the ability to focus on my line where the shadows began. This is where the PRIZM lens excelled because its capability to perform in both direct and low sunlight is something I have never experienced with a goggle lens. 

When stacking laminate tear offs (pack of seven) on the PRIZM lens it doesn't lose its clarity and the benefits stay intact. There isn't another goggle out there that I have tried that can say that. The lens itself DOES scratch easier than other standard lenses, so my suggestion is to leave at least one tear off on until you can change out to another pack. This will help prevent scratches to the expensive lens! 

So the downside to the PRIZM lens is that it is costly. At $45.00-$75.00 a lens, there aren't many of you that want to spend that much coin on a goggle lens right? I get it! This is for the serious racer that wants the most performance out of their lens. Orrrrrrr the guy who rides all freaking day and well into the evening. I am happy with a standard clear Airbrake lens and the clarity it comes with, but I do have a couple of PRIZM lenses on hand (in my gear bag) for those special hard to see places I ride. You can check out the PRIZM lens over at oakley.com

Alpinestars Sequence Chest Protector


Alpinestars recently came out with the Sequence chest protector and a couple of us here at Keefer Inc. Testing have been passing it around to give it a go. One beefy guy, one skinny dude (with no butt), and one meat and potatoes eating rider all have ridden with this chest protector at some point. The Sequence shell is constructed from a high performance lightweight thermoformed material blend that is very soft to the skin and flexible, yet is supposed to offer the same level of protection as a hard-shell protector. The shell feature perforation zones and air channeling for breathability and ventilation, thermoformed textiles are used for the construction, and it’s highly abrasion resistant as I found out the hard way. Lastly, the Sequence is constructed with a soft 3D mesh on the body side of the protector that offers ample comfort and breathability.

IMG_1773.jpg

Immediately what I noticed when I put on the Sequence is how it formed to my body and actually felt like it was wrapping around me and not just sitting on top of my shoulders. The M/L sizing fit a wide range of riders, including my 170 pound body and the other two testers (200 and 190 pounds). The mesh that wraps over your shoulder area stays glued to the tops of your shoulders and doesn't have that raised “boob” look when you wear it under a jersey. Speaking of wearing it under your jersey, yes, to me this is meant to go under your jersey and not over, but we tried both. The CE certification gives this a slightly heavier feel than that of the Alpinestars A-1, but that also isn't a “chest protector” as it is a “roost deflector”. 

IMG_1776.jpg

Even though I had some qualms about the velcro only closure system, I never had an issue with the Sequence not being snug enough around my body nor did I have it ever come loose on me while moving around on the bike. I like that the flaps protect the velcro from moisture and even though I have washed the Sequence several times with a power washer, it still adhered itself nicely. For the sake of trying, I did manage to test the Sequence with three different neck braces (Leatt, Atlas, Alpinestars) and all of them fit just fine with zero issues while riding. 

IMG_2283.jpg

The thick CE certified back plate is a little warm on hotter days, but nothing out of the ordinary. I also appreciated the lack of weight the Sequence has for a CE certified chest protector. This is one of the lightest CE certified pieces that I have worn yet. The comfort that the Sequence has on my skin (yes, I raw dog this sucker under my jersey) makes me happy because it doesn't irritate me or leave me with chaffed nips. Boom! Winning! 


I have crashed and took the handlebars to the chest and the Sequence did its job without me having to spit up blood or get checked out at the ER. As flexible as this chest protector is, I found out it’s pretty damn strong. The downside it’s a little pricey at $154.95, so be ready to fork over some dough for the protection. I don't mind spending money on something if it works and is comfortable and this Sequence is both. I also don't have to go up a size in a jersey to wear it and some people don't even think I am wearing a chest protector at all. I approve!    

Leatt GPX 1.5 Gloves

To continue with our favorite minimalistic gloves, I enlisted my off-road guy Michael Allen to chime in. Here are his thoughts about one of his favorite’s. -KK

When it comes to gloves there is always a trade off between protection and comfort. Although most companies provide a midrange glove that has decent protection and comfort, they never seem to be as comfortable as a thin minimalist glove. Maybe that’s one of the reasons that I’m a handguard guy, because I don’t want to rely on the protection of a bulky glove. Either way, when I come across a good minimalist glove, I usually wear it until it has holes and is completely worn out. I love a good glove so much that although I agree with Kris (don’t mix match gear) I’ll wear a good glove with any gear regardless of if it matches my current gear. 

IMG_3994.jpg

Recently I came across one of my all-time favorite gloves when I received a new set of Leatt gear that came with a pair of Leatt GPX 1.5 Gripr gloves. Although these are not Leatt’s top of the line glove they have become my favorite “go to” gloves (especially since they’re black and white, which matches other sets of gear). They consist of a thick elastic cuff that stays in place on your wrist, while not cutting off the circulation. The material on the palm is called MicroGrip and it also wraps around the thumb area where you grip the handlebars. The palm is also seamless which makes the grip comfortable without any hot spots from stitching. The back of the hand, as well as the sides of the fingers are made of a very breathable material that helps keep hand sweat to a minimum. 

IMG_3996.jpg

Although these gloves are minimalist on the outside, they help protect the palm very well against chaffing and blisters. In terms of going bush bashing, you may want to look into more protective gloves or get a set of handguards. The only issue I’ve had with these gloves is the elastic wrist stitching can come separated from the palm of the glove. This happened when I would pull the glove on carelessly from one area of the elastic repeatedly. To show how much I liked these gloves, I had my wife re-sew them, so I could continue wearing them on a big trail ride I had the following day. If you like really comfortable gloves and aren’t too concerned about outer protection or warmth, look into the Leatt GPX 1.5 Gripr glove line.  -Michael Allen 

Thor Draft Gloves

Continuing on with our minimalistic motocross glove reviews this week, we are going to break down the Thor Draft gloves. Made with a maximum flex four-way stretch mesh, expansion panels that try to allow a full range of motion of your hands, optimal air flow venting mesh throughout the backhand, perforated palms, notched wrist openings, silicone treated finger tips, a hook and loop wrist closure system, a single-layer palm, rubber details for added structure, and made out of  100% nylon, this glove has quickly become one of my favorites to ride with. 

IMG_2206.jpg

The Thor Draft gloves not only form to each finger, but they are stretchy enough to allow for proper movement when using the clutch and front brake. When putting on the Draft gloves each finger port feels tight, but once inside, each one of my fingers feel like they are wrapped into little tiny soft hugs of happiness. The way the material of the gloves wrap around each finger has alwasy given me a positive connection to my grips. The Draft gloves DO NOT bunch up in your palms and the sizing is spot on. I did try Thor’s “Agile” glove, but I had to go down to a medium in that style of glove, that’s not the case with the “Draft” gloves. 

I like that the material on top of my hand is soft, yet has more padding than your average minimalistic design, which helps deflect roost a little more than other thin designed gloves in the marketplace. The wrist opening of the Draft is not so tight that it takes you ten minutes to put them on and the seams have held up extremely well to my abusive “hurry up and get these things off of me” nature. Most minimalistic gloves have weak seams and always tear near the thumb area, but the Draft’s have been great in this department. 

IMG_2209.jpg

The silicone that is also on the top part of the hand makes the glove feel secure and the palm has enough padding to make my calluses not turn into blisters on long test days. The palm is not as sticky as a Fox Flexair glove, but they do have a soft natured feel on the grips. The hook and loop wrist closure is little overkill with the type of rubber they use however. It’s a very stiff material, is not super flexible, is thick, and is hard to bend over to actually close. It sometimes can pop off while you're riding; if you're not attentive and really make sure the velcro is fully attached when putting the gloves on. If Thor can make that rubber closure thinner and more flexible it would cure this problem. 

IMG_1827.JPG

At the end of the day I really enjoy wearing the Thor Draft gloves because of the comfort that I get when I’m on the bike for 7-8 hours. They are durable, they can be thrown in the washer, are soft on my hands, and are true to size, which makes them one of my favorites. The Draft gloves cost $24.95 and come in four different colorways. Check them out at thormx.com. #KeeferApproved

Fox Flexair Gloves

If you asked me what piece of riding gear that I am most picky about, my answer would be, “gloves”. If you have the wrong fitting glove your whole day of riding seems to get ruined. Your hands are connected to the handlebars, which controls 90% of the motorcycle that you're trying to control right? So…. If your hands aren’t comfortable then it can throw your riding off axis real quick. Having a tight fitting glove causes arm pump and having a loose fitting glove can possibly give you whiskey throttle, so yes gloves are important! In the coming weeks I am going to be writing about some of my favorite sets of gloves that are out there on the market right here at keeferinctesting.com. The first set I would like to talk about are the Fox Flexair gloves: 

IMG_2150.jpg

The Flexair Glove is a minimalist motocross glove with a almost tailored fit and a lightweight feel. Constructed from Stretch Cordura, it provides a high level of dexterity. The stretch mesh finger gussets (the fabric between your fingers) increases flexibility as well as helps channel air through the glove for increased ventilation. The Flexair glove also features a conductive thread on the thumb and index finger so you can use your cell phone without removing your gloves (AKA, getting bangers at the track).

IMG_2148.jpg

Why are the Fox Flexair gloves one of my favorite sets of gloves to wear? Let me walk you through this a little…. I like Fox’s minimalistic glove because this type of glove forms to my hand well enough that I can feel my grips exceptionally well while riding. The Fox Flexair minimalistic gloves don’t bunch up or feel fat to where I can’t feel my handlebars. The cuff design is brilliant as there are no seams to the glove near the cuff. The cuff and thumb area of the glove are a one piece design, which allows for a snug fit, yet not so tight where it cuts off the movement of your fingers/palms on the bars. The material that Fox uses is unmatched for a minimalistic style glove as the stretch Cordura material feels like a second layer of skin once the glove is slipped on to your hands. It doesn’t even feel like you're wearing gloves, it just feels like an extension of your hand. The palm area of the Flexair is super sticky and might take some time to get used to if you're not familiar with that feel. Once your hands are on the handlebars, the palms of the Flexair gloves feel planted to the compound of your grips and adheres itself so well that you do not have to worry about slippage, even when your grips seem to get worn out (which mine do often on these set bikes). The ventilation I experience is second to none as these gloves pass air so well that if you're wearing these suckers on a cool day, you might notice that your fingers will get cold fairly quick. They are super lightweight and it basically feels like a soft pillow for each finger. 

IMG_2147.jpg

Now don't expect to deflect roost, rocks, and or trees with these gloves, but if you're looking for one of the most comfortable, form fitting, stretchy set of gloves these gloves take the cake with ease. Much like new boots some new gloves take some time to break in, but the Flexair gloves need “ZERO” break in time and are ready out of the package. Durability of these gloves are decent, just don’t expect to go four hard months of riding with these as the seams can come apart from taking them on and off several times. The cost of the Flexair glove is reasonable at $39.95 and they come in three colorways (black, orange, red). The fit of the gloves are true to size, so if you're a large in other sets of gloves you will be a large in the Flexair. 


If you're looking for a glove that has the most comfort, give these Fox Flexair’s a try. While you're at it, let me know how you like yours and email me at kris@keeferinctesting.com and drop some knowledge on me! I like to hear what you guys think as well..   

Fly Racing Formula Helmet First Impression


I had the chance to head to Carlsbad last Thursday to check out the new Fly Formula helmet to get a tutorial by Dr. Dan Plant and the Fly Racing staff on the technology that is behind Fly’s new premium helmet lineup. I have had the chance to spend a couple days riding in the helmet (since Thursday) to give you an initial first impression on how it feels while riding. Here are “Ten Things” you must know about the Fly Formula helmet with AIS (Adaptive impact System). Stay tuned for a full long term review very soon over here on Pulpmx.com and Keeferinctesting.com.

IMG_1879.jpg


  1. Adaptive Impact System: The Adaptive Impact System (AIS) is a high-performance ecosystem of structural design and energy mitigating materials. Each layer of the AIS from RHEON enhanced Energy Cells, to the dual-density EPS liner, and the 12k carbon fiber shell, was carefully fine-tuned to achieve the goal of creating FLY’s highest performing helmet possible.

Formula_3D_4_With_Impact_Energy_Cells_2.jpg

2. Energy Cells By Rheon: Impact Energy Cells were engineered by the FLY Racing design team specifically for the Formula. The seven strategically-placed cells in the EPS liner are designed to feel natural inside the helmet, resulting in a seamless fit for the rider. Their unique shape and maze-like structure allow the Impact Energy Cells to compress and shear. Each cell can either compress during a linear impact or shear during a rotational impact. This slight movement maximizes absorption of low speed linear and rotational impacts reducing overall brain stress. These energy cells are made of RHEON, an “active” strain-rate sensitive material that efficiently absorbs and dissipates energy as it deforms. Invented by Dr. Dan Plant, a mechanical and industrial design engineering expert based at the Imperial College of London, RHEON’s adaptive chemistry reacts instinctively to control energy and change its behavior depending on the severity or direction of an impact. Essentially, the RHEON Impact Energy Cells maximize absorption of low speed linear and rotational impacts.

Conehead_Technology.jpg

3. Conehead Technology: Like a crumple zone, Conehead technology absorbs and dissipates impact forces more effectively than traditional EPS helmet liners. Created by physicist Don Morgan, Conehead technology uses cone shapes to pair a firm density EPS with a much lower density EPS. The result is more progressive energy absorption through a broader range of impact scenarios.

The Formula has six critical zones of Conehead EPS. Each zone has a uniquely fine-tuned combination of EPS densities to manage impacts specific to that region of the helmet. These specific multi-density EPS zones produce a much more progressive response to low speed and high-speed impacts. 

Exploded_3D_Formula_2.jpg

4.Expanded EPS Studies have shown that the majority of impacts occur on the forehead or side of the head. To help combat these impacts, the Formula development team incorporated lower density expanded volume EPS (thicker EPS) in these critical zones. This expanded volume EPS provides improved suspension for impacts.

Visor_Carbon_Fiber_12K_Shell.jpg

5. 12K Carbon Fiber Shell And Control Release System Visor: The Formula’s first line of defense is an extremely strong and lightweight 12K carbon fiber shell. 12K carbon fiber refers to 12,000 carbon filaments per band. Carbon fiber is strongest when it is flat. Wider carbon fiber bands woven together produce a flatter result with less dips and rises inherent in a woven material. The reduction of these dips and rises creates less areas for resin to pool. Less resin equals less weight. The result is an extremely lightweight shell with superior penetration resistance to common 3K carbon fiber. Mounted on the front of the helmet is a durable yet flexible fracture resistant nylon visor. FLY’s own proprietary Control Release System secures the visor to the helmet but will allow it to release under certain types of impacts.


6.True Functional Ventilation (TFV): When in motion cool air is forced through multiple air intake vents. It then passes through vent channels in the EPS to collect the heat inside the helmet. Finally, the heat is literally sucked out through multiple exhaust vents. This suction is the result of a venturi effect created by the unique geometry of the helmet. The increased draw of air out of the rear of the helmet significantly boosts overall air movement and cooling.

IMG_1859.jpg

7. Fitment/Comfort First Impression: After riding with the new Formula for a couple days I have come to feel that the fitment is a little snugger (near cheek area) than the F2, but the inside liner is much plusher inside. The pockets that surround the ears have a more dampened sound and the helmet isn't quite as loud as the F2. This is something you may or may not notice right away, as I didn't really notice it until I wore the F2 and Formula back to back. There are absolutely no hot spots on your head while wearing the Formula helmet through a long day of riding and I never felt like I needed to take it off. The Rheon energy cells sit on your head in a way that allows the helmet to almost wrap around the shape of your head better and not just get that “sit on top of it feel”.  

IMG_1886.JPG

8: Ventilation First Impression: The ventilation of the Formula helmet is on par with the Alpinestars Supertech M10 as the ports are the most wide/open I have ever seen from an intake/exhaust port standpoint. When you look through the Formula helmet you can see daylight going through the helmet itself. Wearing it during my motos you can actually feel the airflow going through your head and keeping the Ari circulated. I didn't really notice this until my second moto when my head was damp with sweat, but as soon as this happened, I could feel the cooling sensation starting to work even better. 

9: Visor First Impression: I will have two say I am not a fan of the Formula helmet’s visor length and placement. The F2 also had this problem of where the visor sets itself  too high on the shell and the Formula has that same look. When pushing the visor down it leaves a gap and just doesn't look right. The short/high nature of the visor also makes it harder to see when the sun starts dipping down (I would know because I have been burning fuel until dark lately). FLY’s control release system on the visor is very cool and will not just come flying off if you take a spill because it actually has some tension on it. You will have to take the screw off and snap the recessed portion of the visor back in place, if it ever does come out. 


10: Weight Feeling First Impression: Coming in at 1290 grams the Formula feels light on your head when riding. I have grown to appreciate a lighter feeling helmet when riding as you don't really know how tired your neck muscles can get until you ride with a heavier helmet. I also like that it doesn't feel too light where i am wondering if this thing is even going to protect me when I fall. It’s light enough for me to appreciate the lack of weight, but I’m not scared of wearing a paper weight while pushing the limits on my bike. 


Alpinestars Supertech M8 Helmet


I have been wearing the Alpinestars Supertech M10 helmet for a few months, but I also wanted to try the M8 because it’s set at a lower price point ($499.95 versus the M10 at $649.95). I recently received the M8 and wanted to compare the two out on the track, so here is some information you can digest easily after I rode in both. What’s the difference between the M8 and M10? The M8 is a multi shell construction utilizing a highly advanced molding technology with a multi-composite combination (not a full carbon shell like the M10), the M8 is 40 grams heavier than the M10 (at 1300 grams versus 1260 grams), the M8 doesn't come with an extra visor or a racing helmet bag, and that sums it up. Not much different on paper, but what about on the track?

IMG_1822.jpg

First let me fill you in on all the features of the M8: 


  • The M8 A uni-directional carbon composite with aramid layer that gives significant radial strength around the shell, preventing compression but allowing controlled deflection for reducing transmitted impact energy, and providing critical penetration protection.


  • S-M8 in four anatomical shell sizes. The Supertech M8 shell construction is optimized to offer best fit across the range of four size options. Shell sizes are manufactured in small, medium, large and extra-large to ensure that riders have the correct fit which not only improves comfort but, most importantly, the effectiveness of the helmet in an impact.


  • The Supertech M8 incorporates a patented system to allow the helmet to be tuned exactly to the riders preference for the height and angle at which the helmet sits on the head. This unique technology allows for an ultra-specific set-up that can be adapted for the type of riding and the rider’s preference.


  • With a micro-adjustable pad that is connected to the helmet inner shell, it is possible to raise or lower the helmet fit and also, to tilt the helmet forward, or backwards.


  • Alpinestars has developed a unique visor release system which, while ensuring the mounting is held securely in place for riding over the most extreme terrain and any track conditions, provides exactly the right level of resistance to ensure the visor detaches from the helmet shell if it is subjected to a significant impact – no matter what the angle.


The visor design of the S-M8 is also an integral part of the ventilation system as it is profiled to direct airflow, acting as a channel to concentrate and smooth the flow into the shell. The Supertech M8 liner design is formed to optimize airflow channeling around the rider’s head before being extracted from the S-M8 through rear exhaust vents to ensure positive pressure is maintained with constant airflow while riding.  


  • The Supertech M8 helmet lining design includes canals which allow a tube to be incorporated on either side of the shell. This is a feature extensively tested by Alpinestars rally raid and enduro riders enabling convenient fitting and connection to a hydration system.


  • Removable liner cover is washable and features a cool-max fabric interior and anti-bacterial talent yarn for long-lasting freshness and quick-dry performance between riding sessions


  • The base of the S-M8 has been sculpted to give a relief section, where the bottom profile is raised to clear the collarbone (Clavicle). Also, incorporated into the area of the base pad, where it sits over the rider’s collarbone, is an energy absorption pad; a more flexible compound rubber section which allows deflection when it contacts the Clavicle.


  • MIPS is incorporated into the Supertech M8 to reduce rotational motion energies that impact the helmet causing damaging gyration force to be transmitted to the brain. A low friction ‘slip’ layer is incorporated into the Supertech M8 helmet, between the comfort padding layer and the multi-density polymer energy absorption shell. When energy is impacted upon the helmet, causing a rotation force, the MIPS layer allows for movement of the inner absorbtion layer to damp and re-direct the energy before causing significant acceleration stress to the brain. This mitigates the causes of brain injuries, such as concussion


  • The side cheek padding of the S-M8 can be extracted efficiently and safely, while the helmet is still on the rider’s head, to allow ease of removal by trackside support and medical staff.

The Supertech M8 is also designed to allow a helmet ‘Eject’ inflation system to be fitted into the inside crown of the shell.


  • Along with the ERS padding removal, ‘Eject’ allows for emergency removal of the helmet, without putting load on the rider’s spine.


  • The Supertech M8 helmet versions conform to both DOT certification and ECE homologation for use worldwide.


IMG_1846.jpg

The first thing you immediately notice about the M8 is its lightweight feel (just like the M10). The added 40 grams is barely noticeable when riding and to me still feels like one of the lightest (if not the lightest) helmet on the market. It’s surprisingly light when you pick it up and you just about forget you’re wearing it once out on the track, which translated into less neck fatigue. Weight isn’t usually a big factor for me, but after riding with the Alpinestars M10 for a while now I surely can appreciate the feeling on longer motos and the M8 is no exception. The cool-max interior liner is really nice too, especially in the desert when doing longer motos. Sometimes helmet liners can become slightly abrasive/course feeling once all the moisture dries up, but the M8 still leaves you with a soft feel inside and will not feel like a Brillo pad when putting it on or taking it off your head.


Ventilation was an important focal point in Alpinestars R&D process of the M10 and M8. Immediately when I went out on the track I noticed this helmet flows a lot of air, noticeably more than other off-road helmets I have tested lately. Alpinestars heat mapping tests have resulted in specifically designed ducting which produces a positive flow into the helmet over and around the rider’s head, leading to improved comfort while riding and reduced onset of heat stress in extreme conditions.The visor design of the M8 is also a very innovative part of the ventilation system, as it’s profiled to direct airflow and acts as a channel to concentrate and smooth the flow into the shell. The Supertech M8 interior liner design is formed to optimize airflow channeling around the rider’s head before exiting through rear exhaust vents. The visor design also features a patented mounting/release system that sits flush with the helmet’s shell. There are no screws keeping it in place. This makes the helmet look even more custom and seamless. The visor snaps in and stays put until the right level of resistance causes it to release and detach from the helmet to mitigate any rotational forces that would otherwise be transmitted to the rider’s head, brain or neck in the event of a crash. You will not lose this M8 visor from a simple tip over/face plant like a Fox V3 helmet can do at times. I have tested this on a couple of occasions on my local sand tracks near the house.  

IMG_1845.jpg

As far as the safety aspects of the M8, the carbon composite shell took a couple sizable hits over the few weeks that I tested it. Usually I am not much of a crasher, but I have been trying to push my limits riding with faster guys and have found myself on the ground a few times. The M8 left the track with scratches, but my head was no worse for the wear. MIPS and similar technologies are becoming more common these days in helmet construction. MIPS is a system that uses a low-friction slip layer between the comfort padding liner and the EPS layer, which allows one to move slightly independently of the other to dampen, redirect and reduce forces to the brain and neck, helping to reduce the chances of a concussion. Now is this the best technology there is out there for us moto guys and gals? I DON’T KNOW! I can’t sit here and tell you that this technology is the best and this is the helmet to buy over all the rest, but I can tell you the technology seems to work. 


This MIPS system will not prevent a concussion. There are many types of “helmet technologies” in the our world, so study up and decide on which one you believe in the most. Again, just like neck brace technology, it’s up to you to take in the scientific information and decide for yourself which one you trust in the most. 


I do like the A-Head fitting height and adjustment system as well as hydration system compatibility. The A-Head system allows the helmet to be tuned exactly to my preference for the height and angle at which the helmet sits on my head. With a micro-adjustable pad that is connected to the helmet’s inner shell, it is possible to raise or lower the helmet fit and also, to tilt the helmet forward, or backwards. It’s easy to use and adjust, but I did find that I needed to use thicker cheek pads to fill in the area inside the helmet. I am a size medium and the standard cheek pads are a little too thin for my skinny cheek bones (just like the M10). Going to 40-45mm cheek pads gave me a snugger fit and helped with the feeling of too much side to side slop. 


For you off-roaders out there, the hydration pack compatibility is also a very cool feature and my off-road tester Michael Allen found it beneficial on his longer trail rides. There’s a channel on either side of the chinbar behind the cheek pads to run a tube for a Camelbak or similar type of hydration system. It’s cool that Alpinestars includes some “off-road” into their lids!

IMG_1847.jpg

Each Alpinestars Supertech M8 helmet size comes with its own dedicated proprietary carbon shell size and EPS liner construction. This not only ensures that riders have a correct fit, but most importantly improves protection and the effectiveness of the helmet in case of an impact while optimizing weight reduction across the size range. The Alpinestars Supertech M8 is both DOT and ECE certified, comes in six different sizes from XS to XXL and will set you back $499.95. That is slightly less than most premium helmets that are floating around in the market today.


The looks of the helmet is something that has grown on me the past couple months. I wasn’t completely sold on the front piece of the helmet where the A-Stars logo is placed, but after riding with it and seeing photos of myself with the M8 on, it looks attractive enough for me not to complain. And you all know that I am a picky SOB when i comes to gear/helmets. If someone made me choose between the M8 and M10. Think I would go with the M8 because it is slightly less money and comes in some colors that I prefer more. Check the SuperTech M8 and M10 helmets out over at alpinestars.com