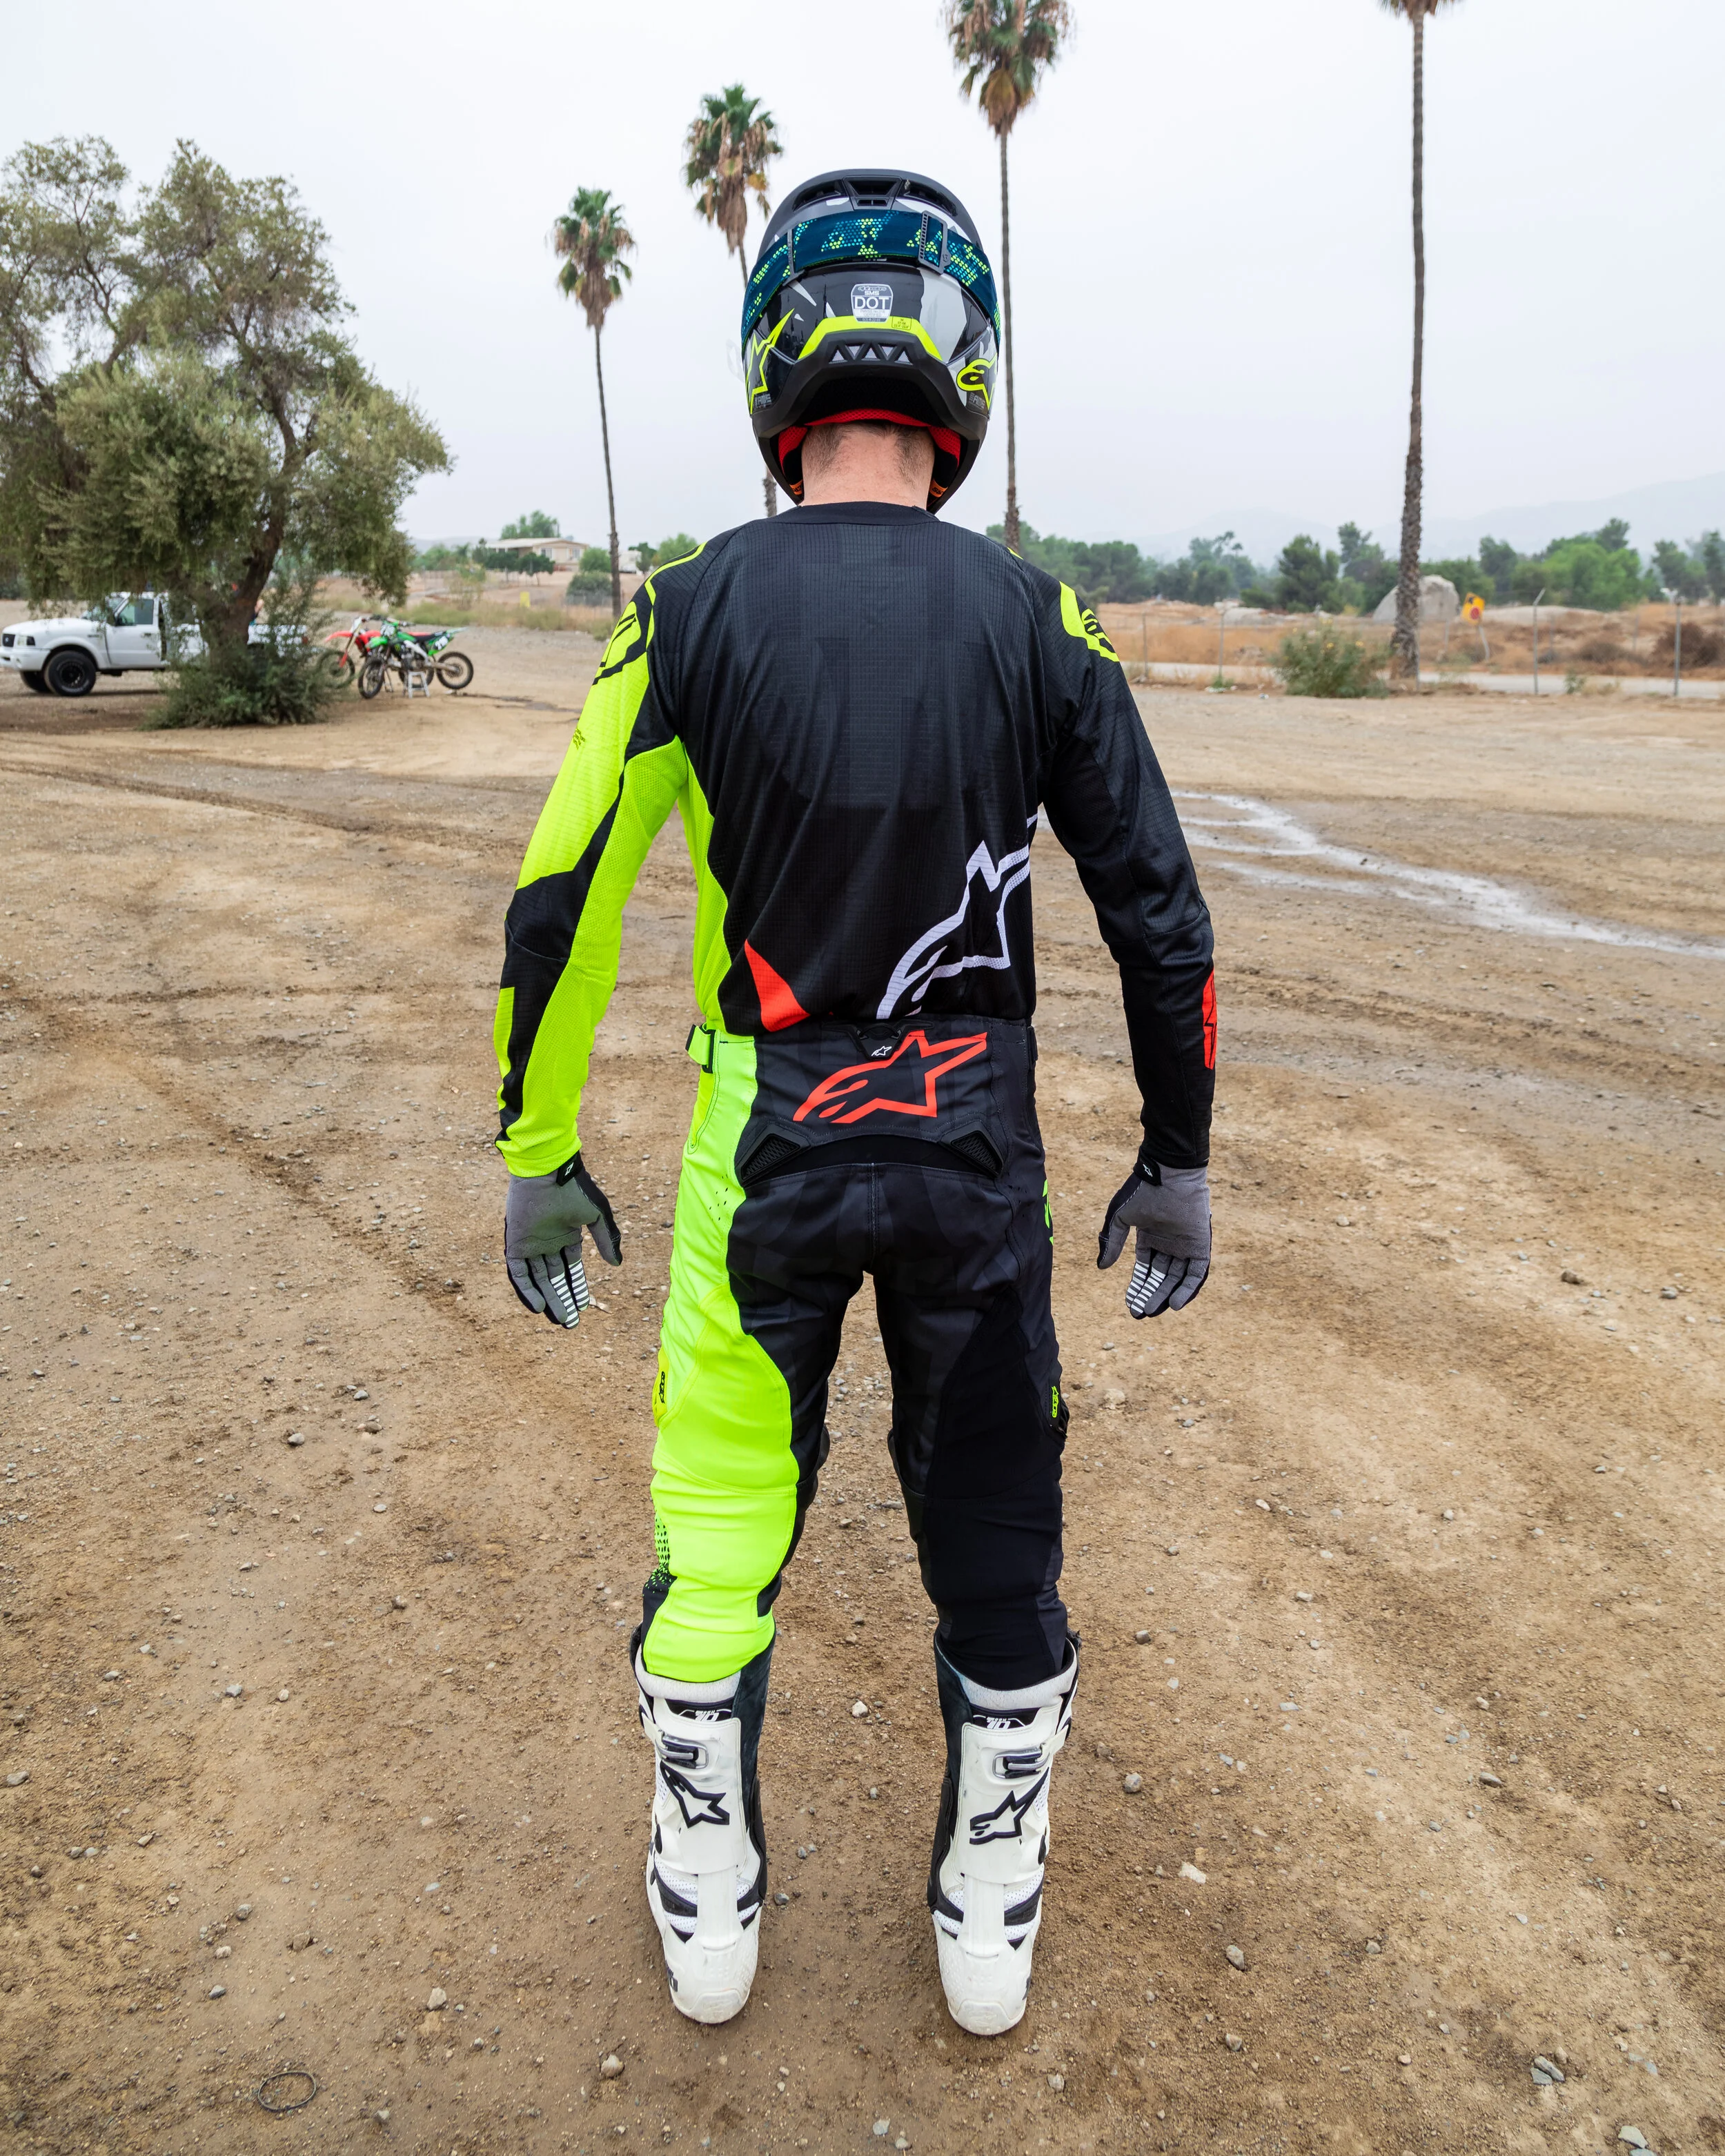
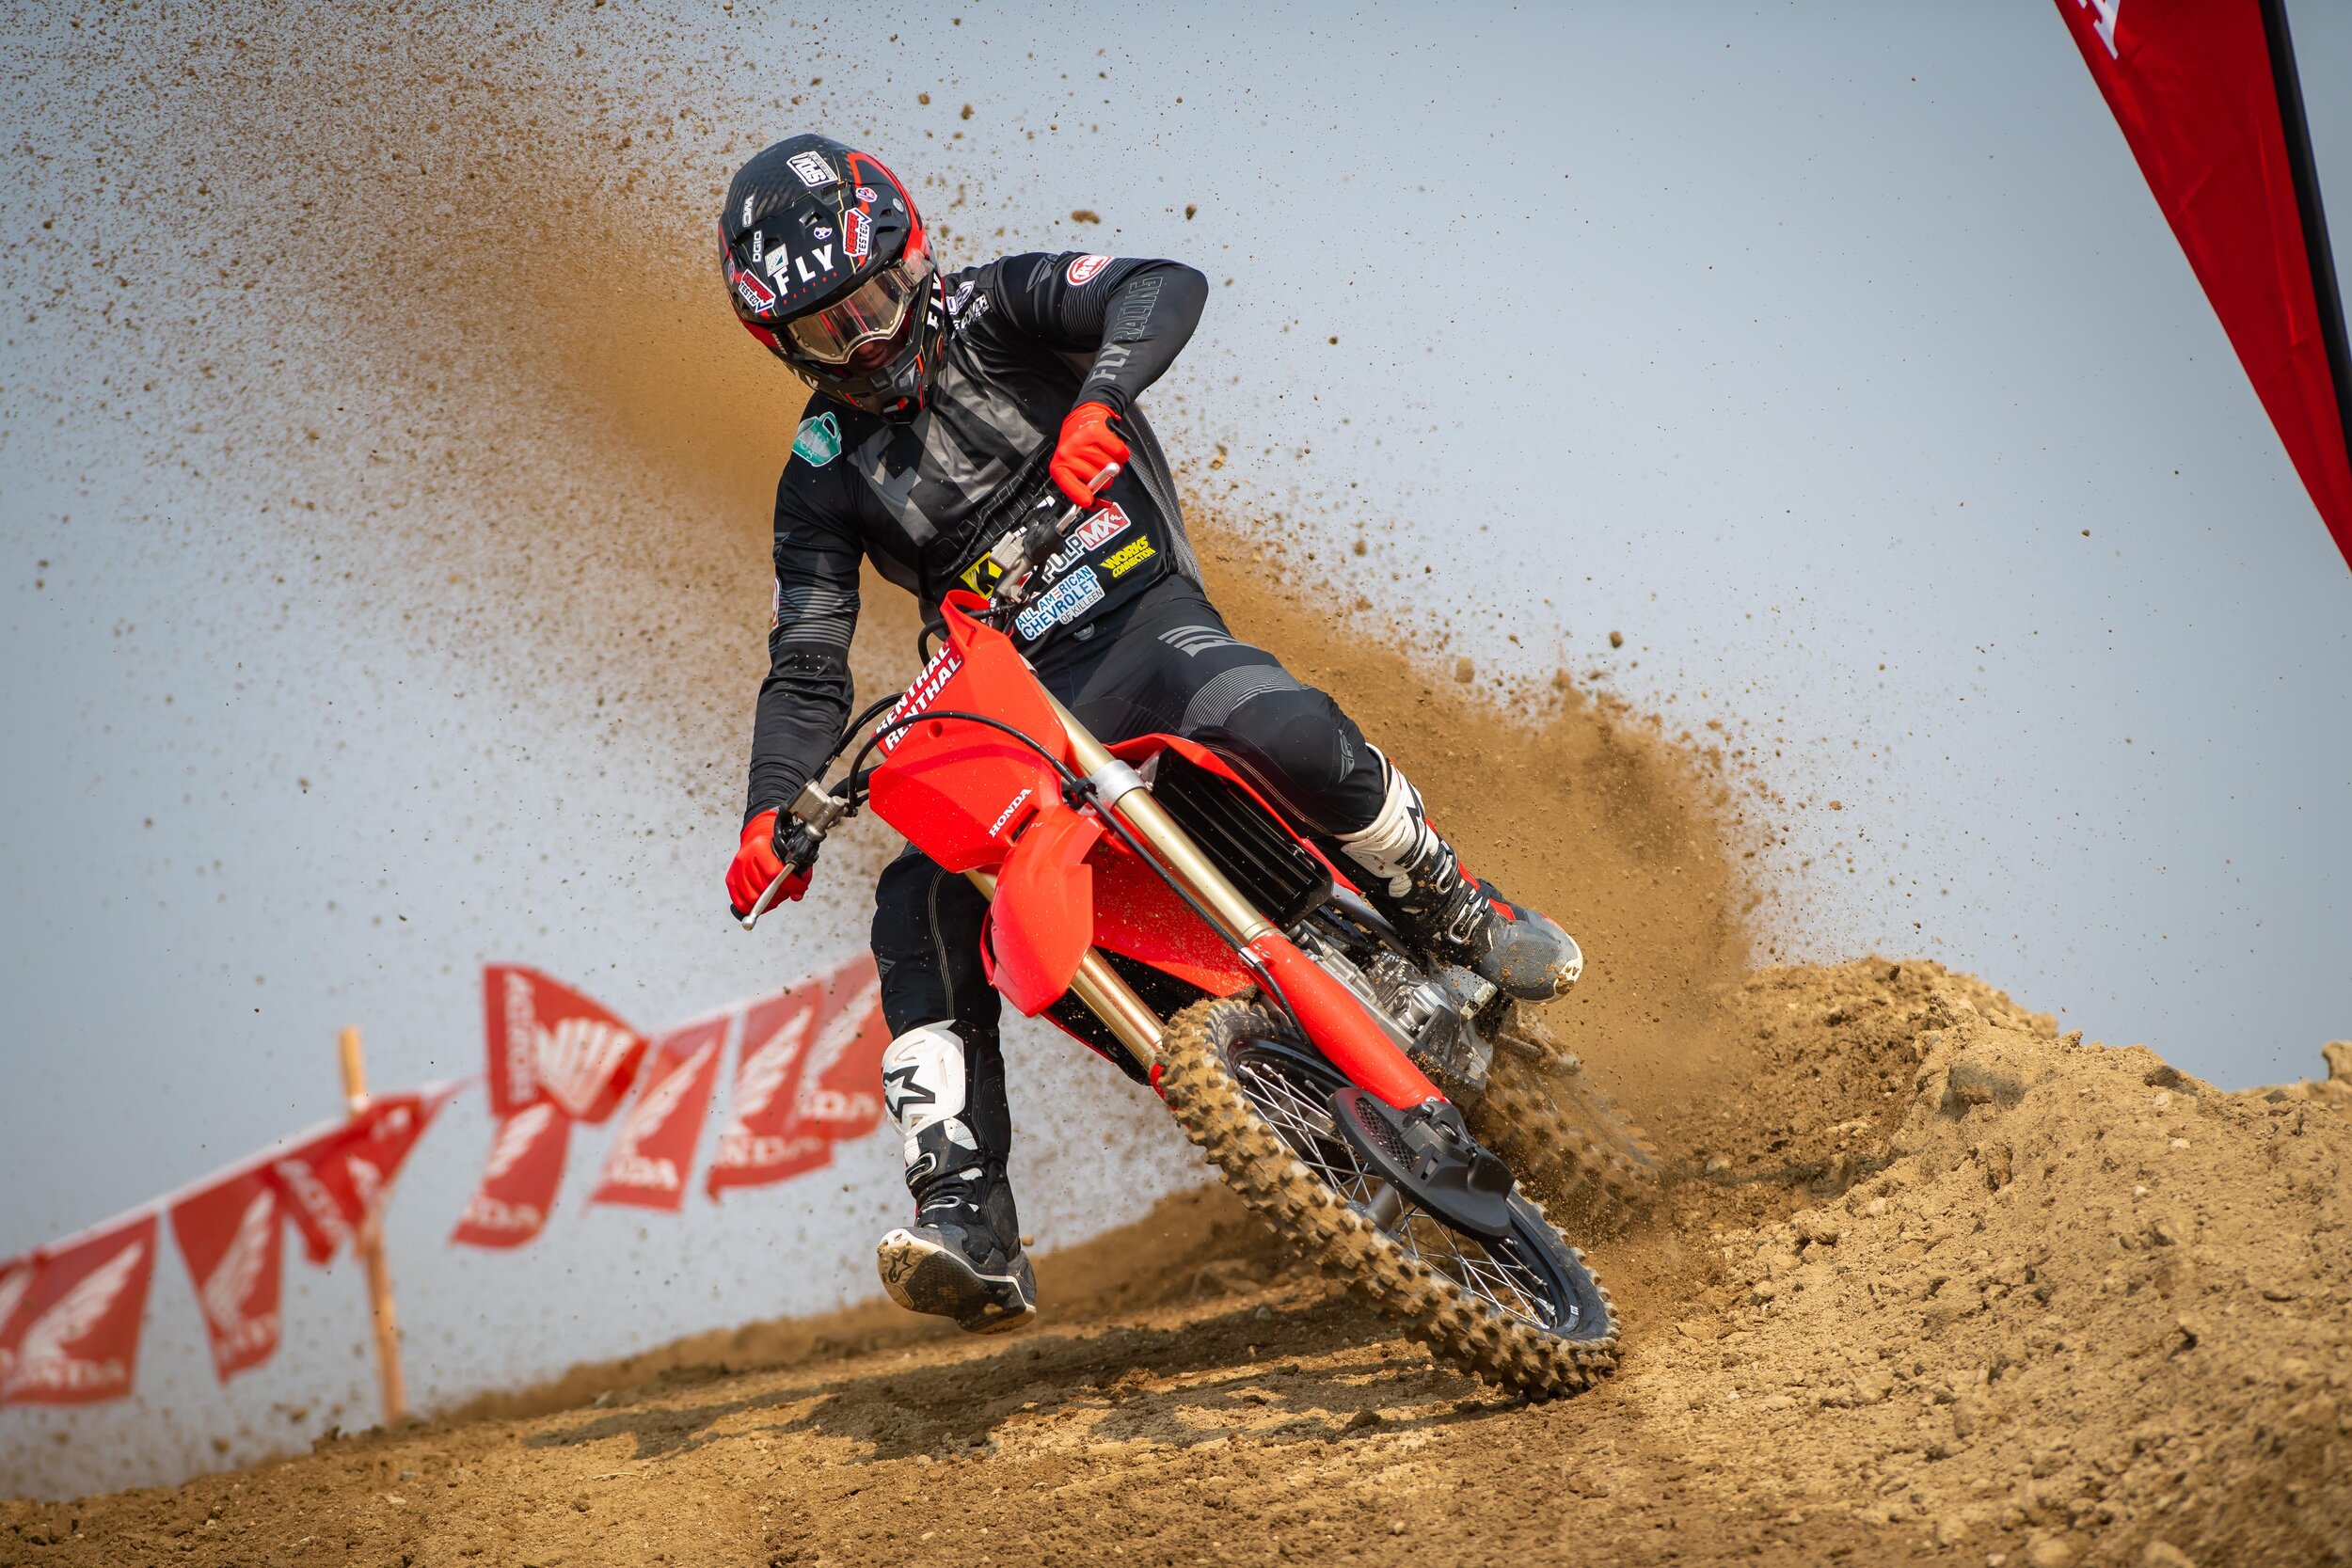
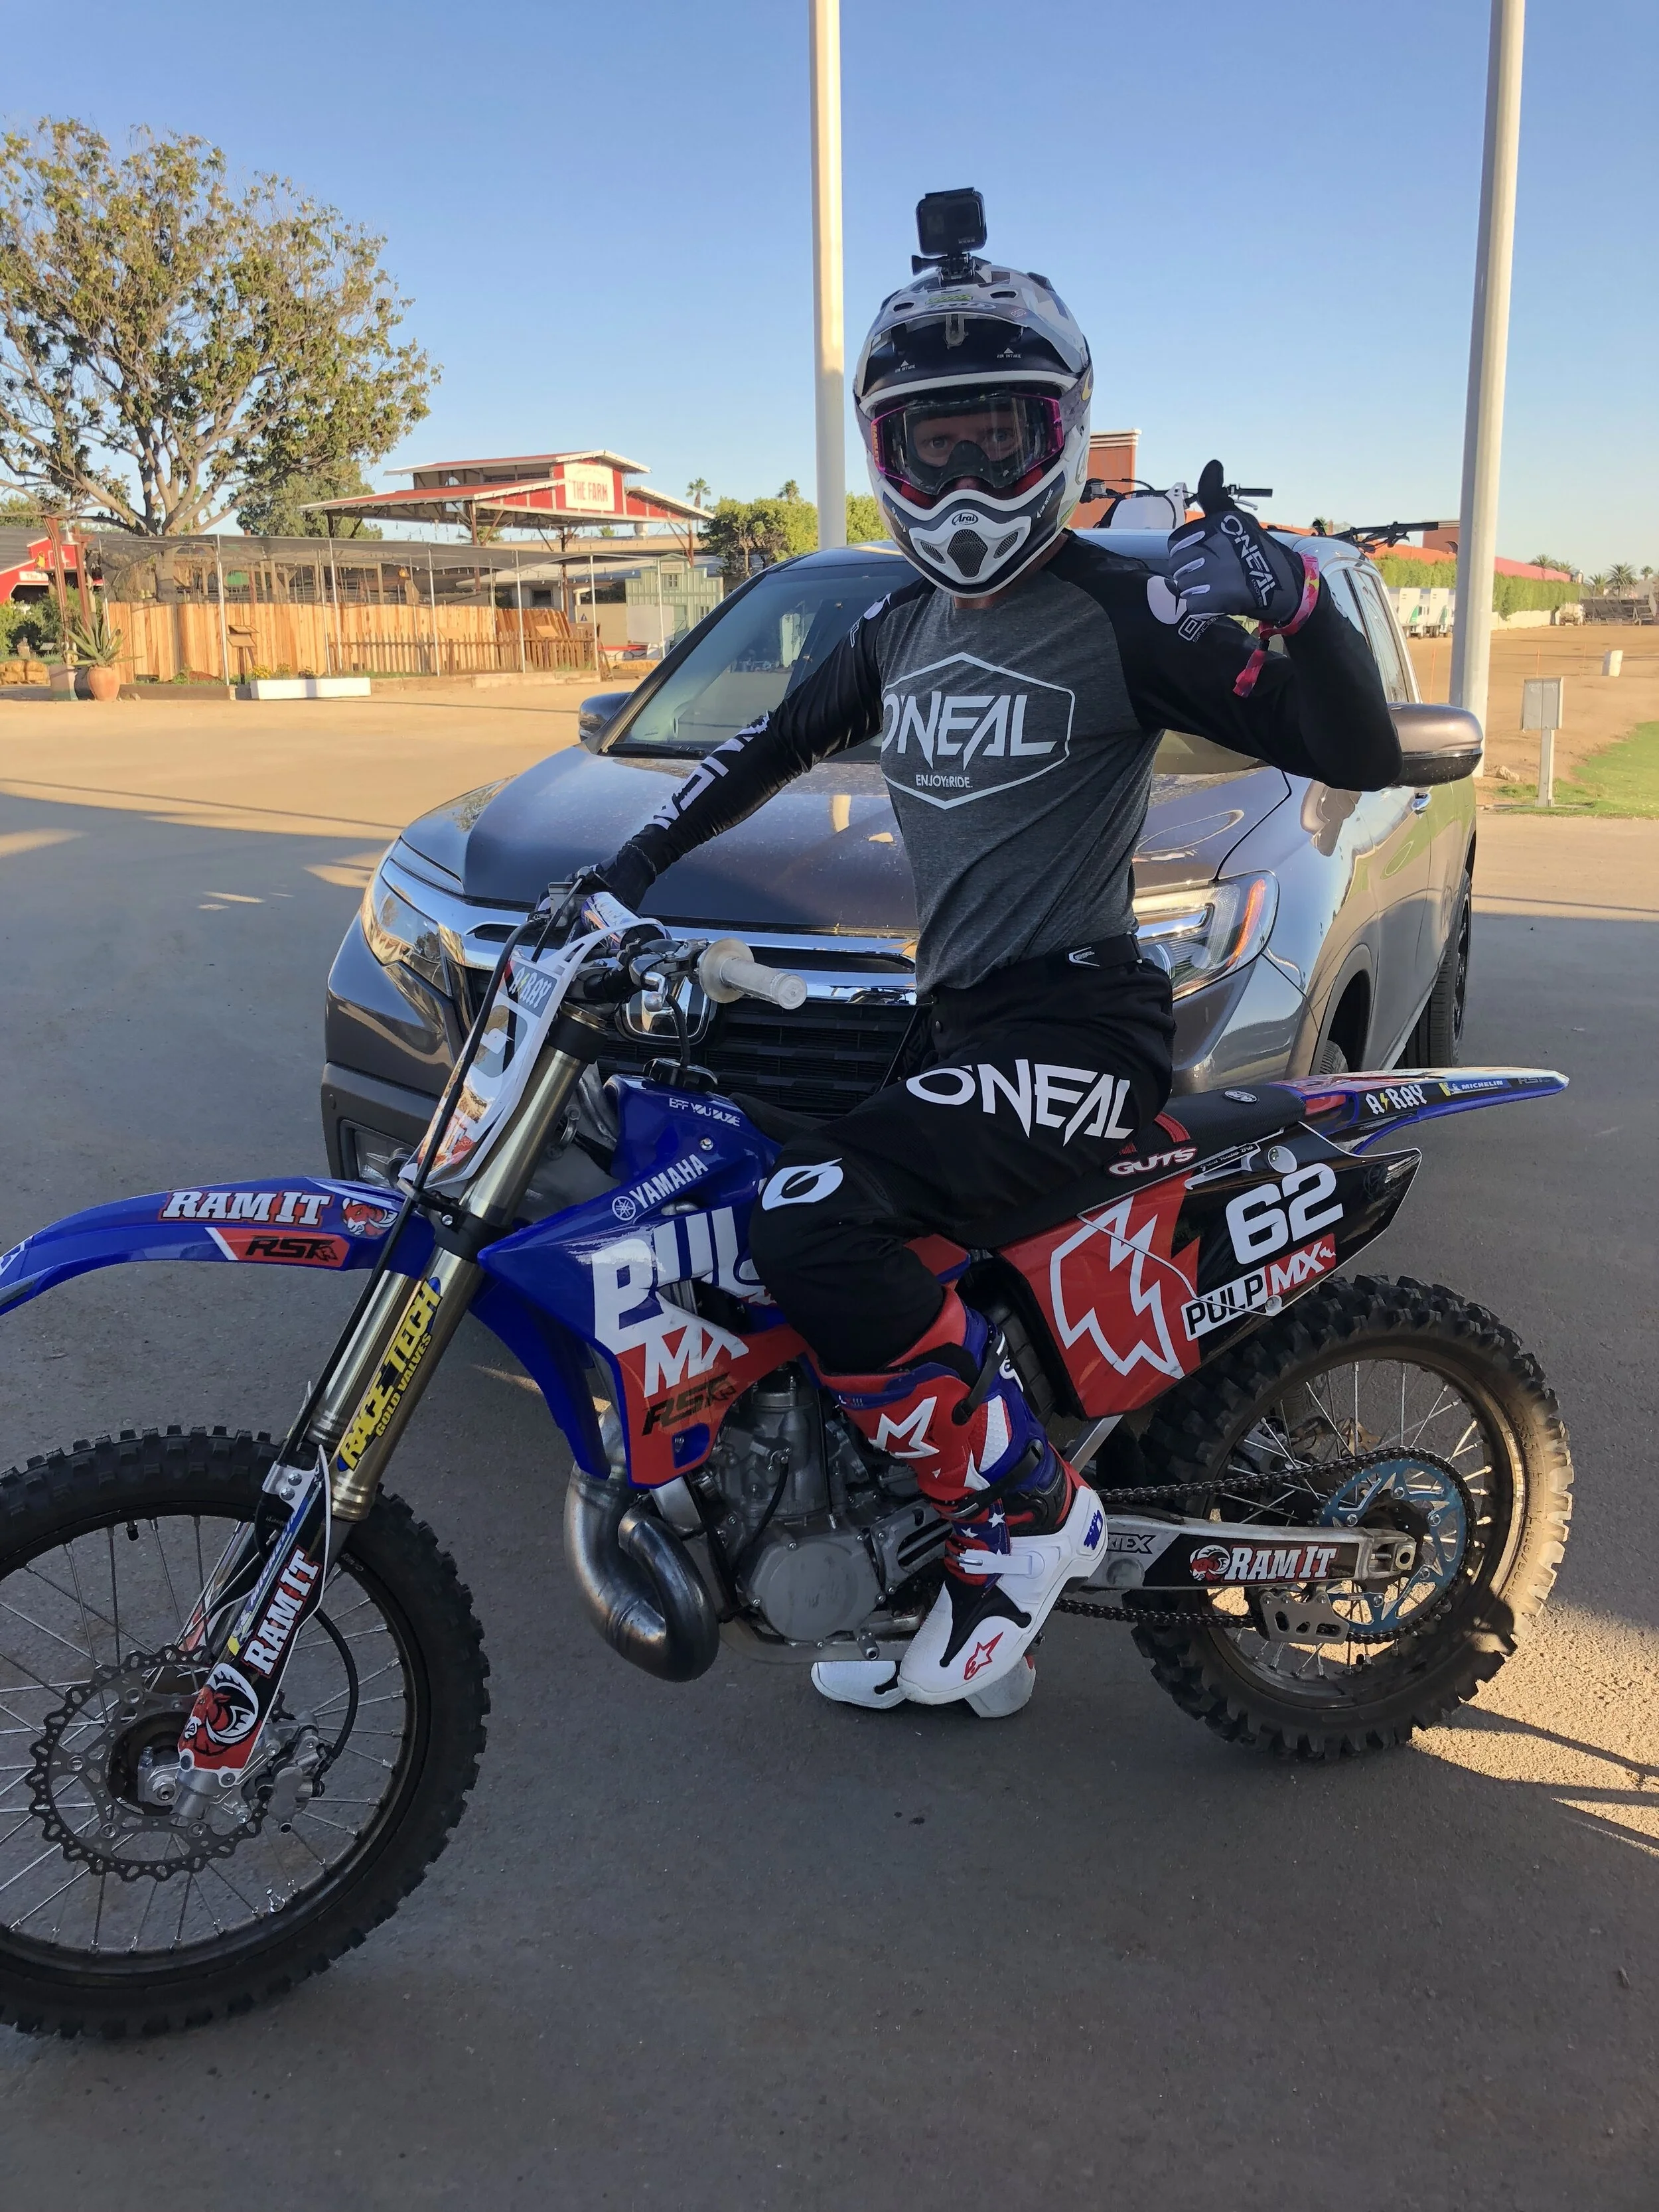
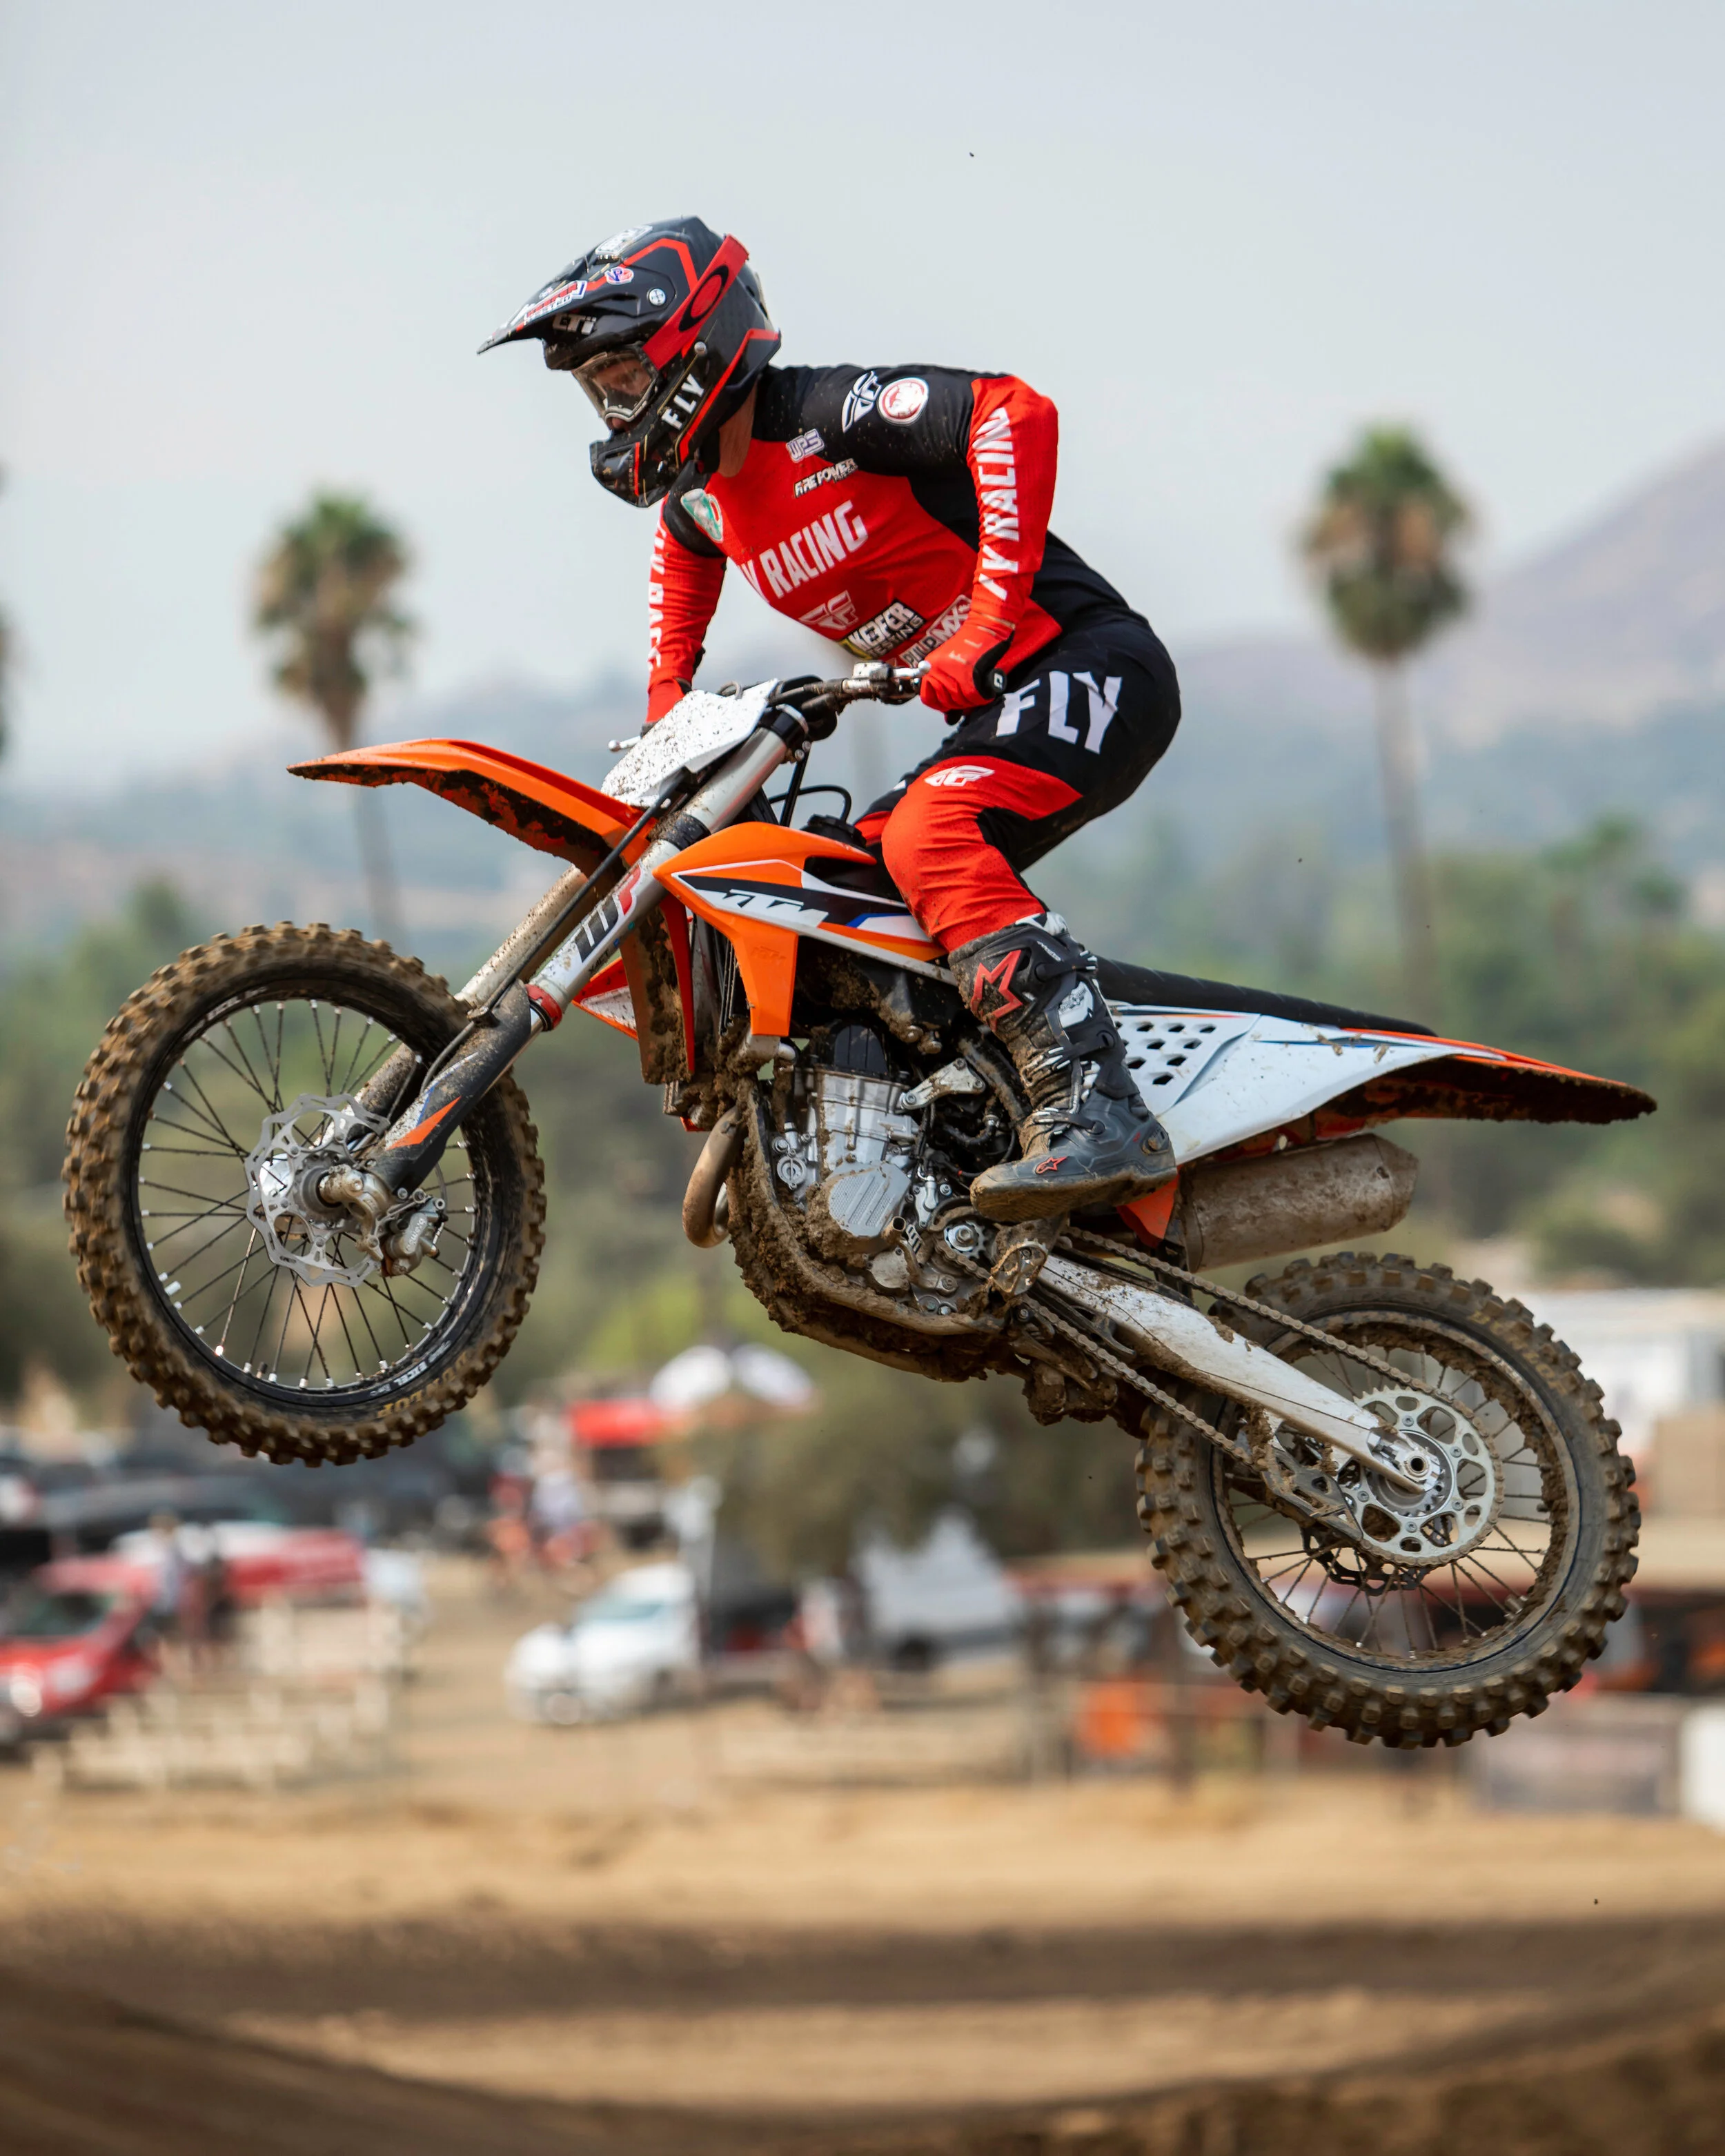
Atlas Vision (Anti Compression Collar)

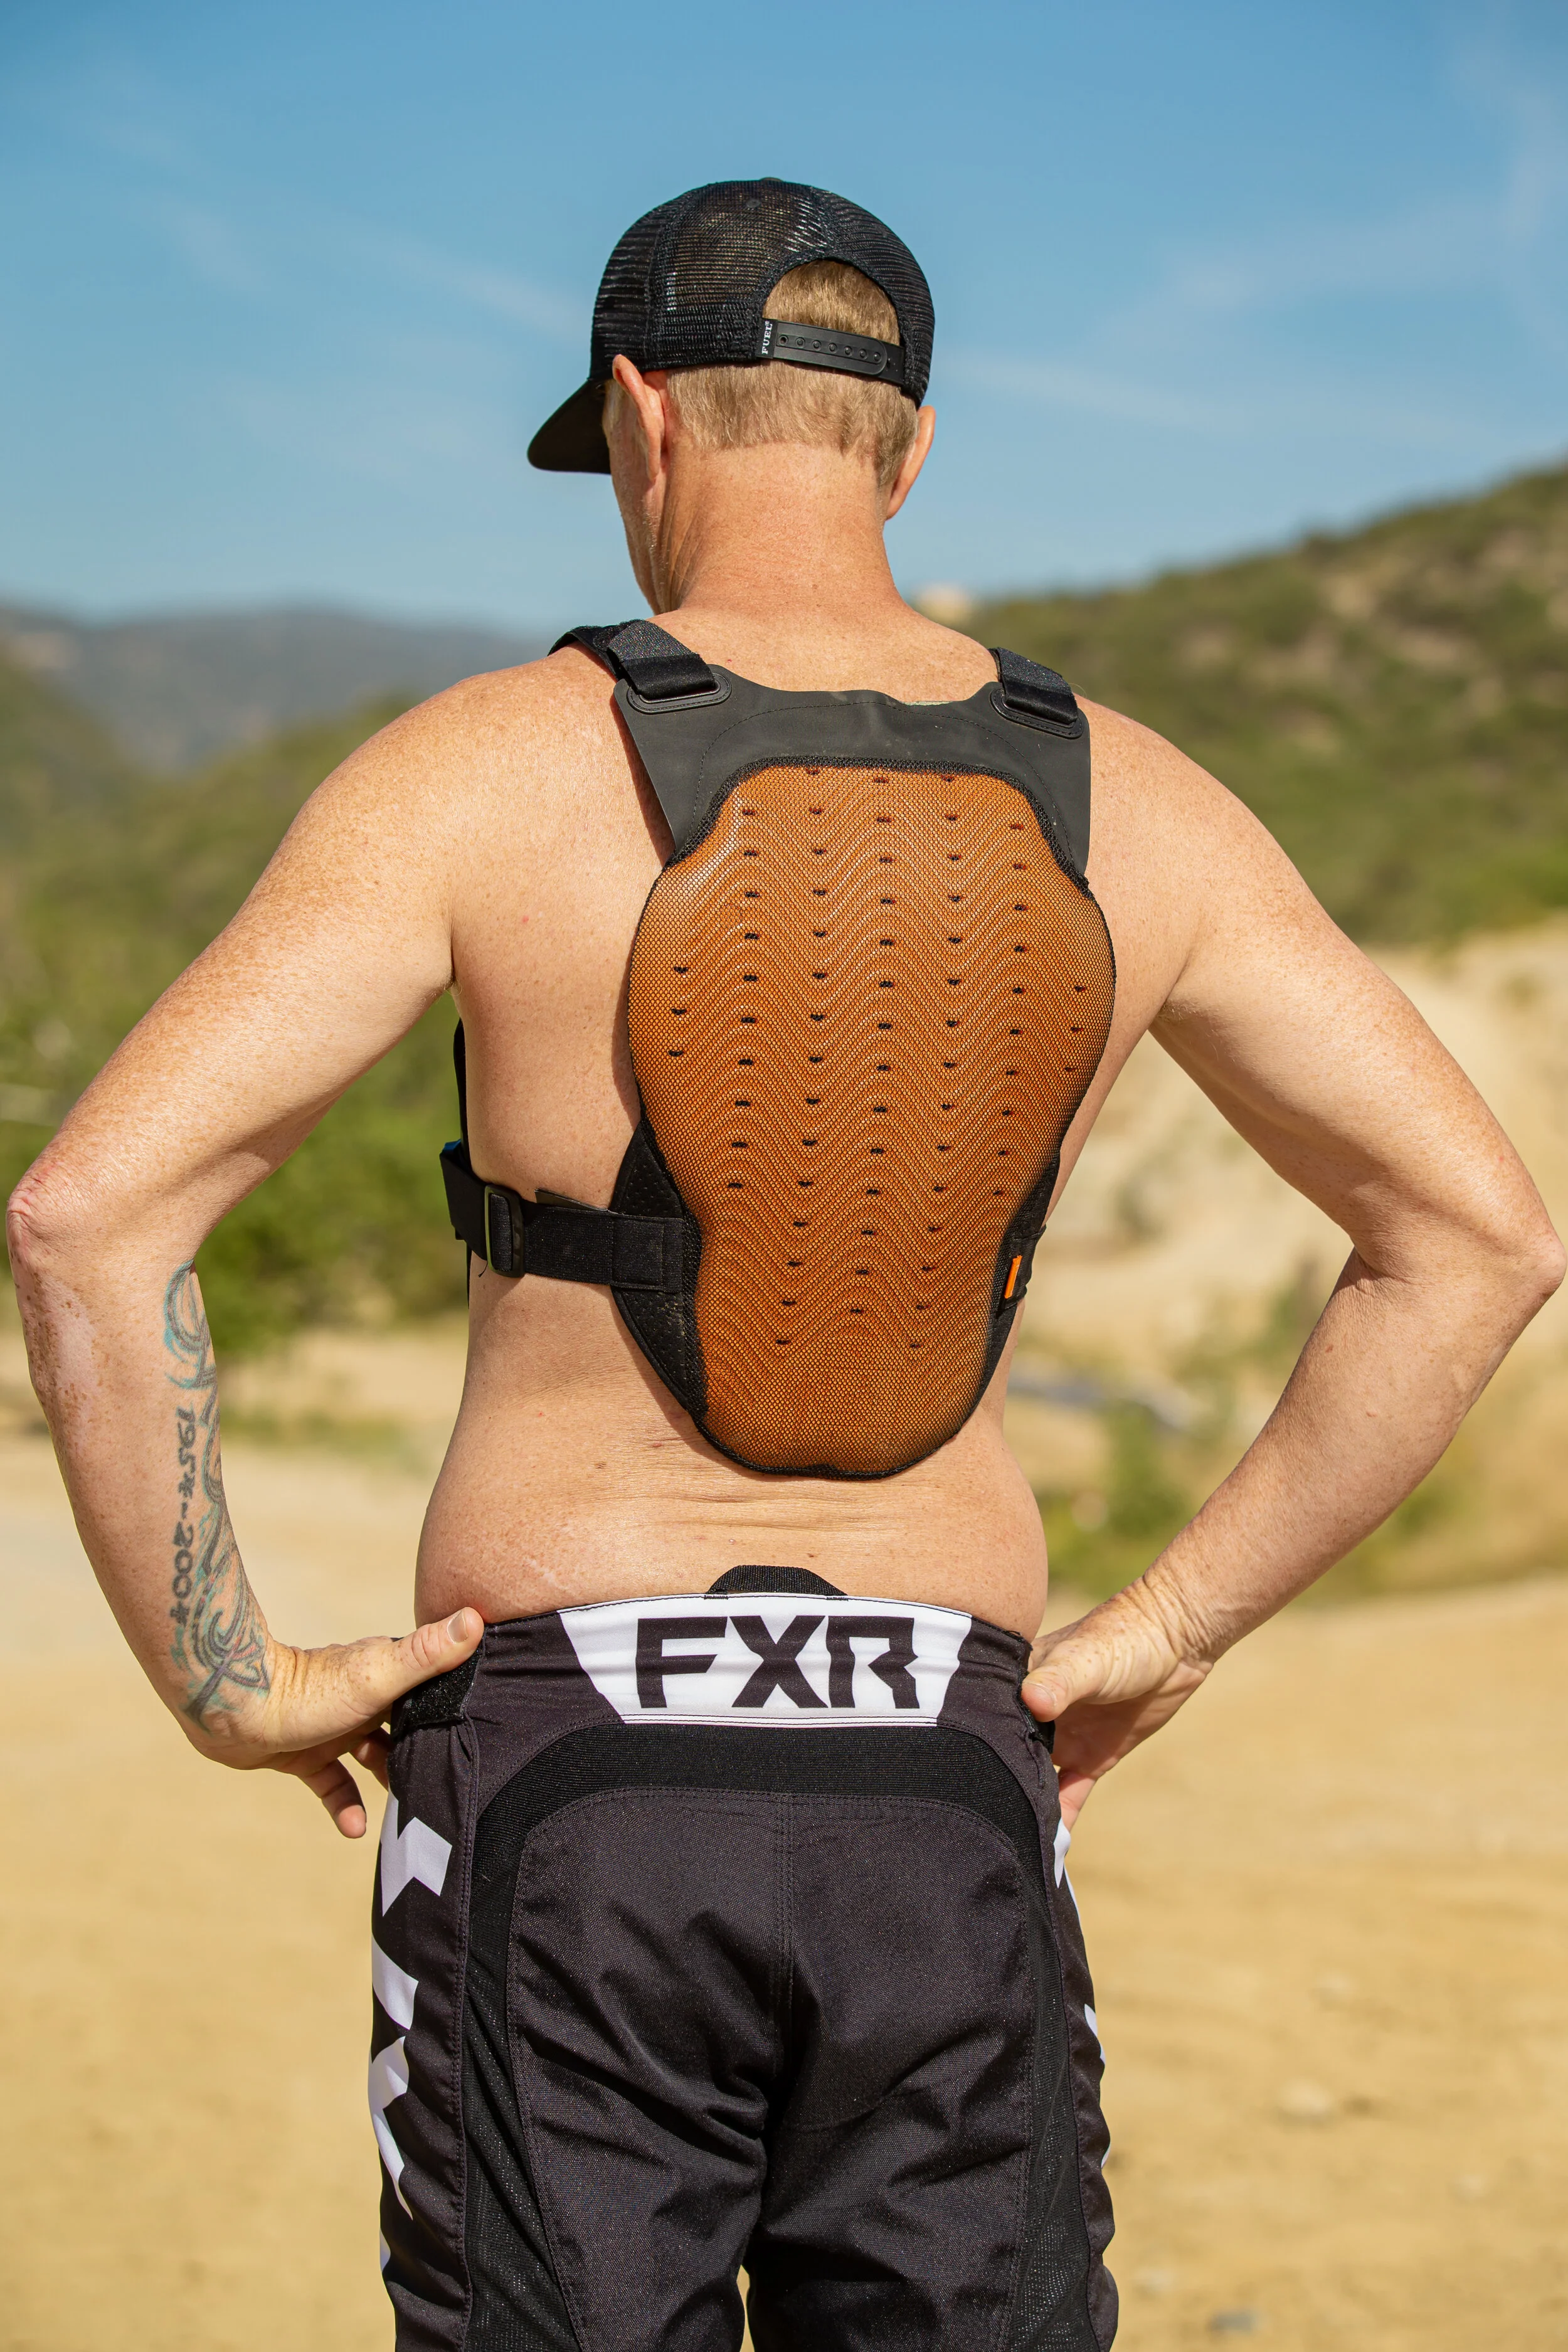
Neck braces part two… Ehhhhhhh Boy, here we go again.. This has been a tough topic in the world of motocross right? Like I have mentioned before, neck braces are almost like a form of religion. You have a bunch of people preaching to you on how they believe in what “they” (neck braces) can provide for you, but it’s something that is up to you to fully believe in. Or maybe it’s something that you choose not to believe in at all? I can tell you that I am somewhere in the middle between those two. It’s not that I don’t “believe” in the technology as much as it was more of a comfort thing for me when I rode with one. Plus, I am old and stuck in my ways right? I like what I like. I know what I know. But being a test rider forces me to be more open minded and this is how I went in when asked to test the Atlas Vison Anti Compression Collar. Yes, that’s right, Atlas prefers that name rather than call it a neck brace. Ok, so for the rest of this article we will call it the “Atlas Vison ACC”. 

Back in the day a neck brace felt too restricted when riding and it hindered my technique on the bike. I felt like a robot, that was so stiff on the bike, so because of that feel, I immediately was an anti neck brace guy! Fast forward five years and I got pressured to try an Atlas Air neck brace by my good friend Steve and it was much better than the first gen braces that I tried. Two years later I am back here talking about the Atlas Vision brace. Just like dirt bikes, products can evolve and get better over time. Well to my surprise the Atlas Vison ACC did just that, it evolved and got better from the previous version.  

Before I get into the meat and potatoes of why the Atlas Vison ACC is a better neck brace, what exactly is the technology behind this product? Like I mentioned above the Vision is what Atlas likes to call an "Anti-Compression Collar" - a brand new category of neck protection developed by Atlas that they say can ONLY assist with compression and lateral hyper flexion (head sideways) forces on the neck. Traditional full-frame braces, like the Atlas Air, help manage these forces along with Hyper-Flexion (head forward) and Hyper-Extension (head back) using their built up front and rear “shelves”. Atlas wanted to build a product that is for everyone who wants neck protection, but has found it impossible to wear a full frame brace. Bring on the short necks, large helmets, and bulky body armor - Atlas says it doesn’t matter, this Vision can fit your stature. Atlas says that its Vision has 50% greater reduction of impact forces (Compression only - vs Atlas Air) that is made possible by D3O - An advanced impact absorbing material used in a wide range of applications from extreme sports to military. The Vision Padding has been custom engineered to fit the function and design of the Vision Collar, and is said to withstand multiple impacts with no reduction in performance unlike traditional padding materials used on other neck braces. Atlas says that the Vision has 66% more range of motion (vs Atlas Air) because of their Pro-Motion design, there is a drastically increased range of motion that allows you to freely see up and down hills, at your feet, to the sky, or tuck and roll during a crash, which I can concur on personally (more on that later). The Vision has a 45% lower weight (vs Atlas Air) because of its simplified design that removes everything you don't need, leaving behind only the smallest, most effective components. The feeling of freedom is there when you ride. The compression only design removes the front and rear shelves of a traditional full-frame neck brace in order to enhance the mobility, while focusing on reducing compression. Just like the Atlas Air, taller pads are included in the box and can make fit easier for longer necks, smaller helmets, and/or other needs. Slit-Flex Frame Split frame design promotes flex to mimic natural body movements for maximum comfort and mobility. This was developed over a decade ago with the Atlas original brace.

Now let me start off by saying that it’s up to you whether you believe in neck brace technology or not. I am not here to change your mind on that. You guys can make your own decision on which way you want to go. I am not a preacher and can’t force you to believe in a certain technology, but I can give you facts on what it’s like to ride with the Atlas Vision for several, long test days. After studying/reading all about the old technology versus the new technology, I can say that I “believe” that there are some safety advantages to wearing this ACC. One important piece of technology (that I really like) that has evolved from the older Atlas Air neck brace is the material consistency and how flexible the Vision is. The older neck braces weren't nearly as flexible and that was a big red flag for me, especially in a crash. You can bend each end of the Atlas Vision and it snaps back to the original shape much easier than older models I have ridden with. Another complaint I had with older neck braces is that I couldn't look far enough ahead of me without feeling restricted. The Atlas Vision is only felt on my shoulders and not felt at all with my neck/helmet area. This gives me enough freedom that I didn’t really notice it was on. I mean I knew it was on because I could feel the straps (that hold the Vision in place) across my chest. I think the straps are the hardest thing to get used to honestly. The straps can rub you a little under the jersey, but after the second day it wasn’t something that I cared about. The Atlas Vison is also very lightweight feeling at 325 grams and that feels like nothing when motoing down. I had zero complaints with my neck mobility while riding, but you will notice the chin bar of your helmet will hit the front of the Vision if you’re hanging out while your BS’ing with your buddies in the pits, but this takes some work to get the chin bar area of your helmet to hit the collar of the Vision. Each contact point of the Atlas Vision is soft against your body and not at one moment did I feel an uncomfortable feeling. 

If you are a chest protector wearing rider don’t fret because the Atlas Vision does comply with a number of different chest protectors. At my disposal was a Fly Revel, Alpinestars A1, A4, Thor Sentinel, Fox Titan, Pro-Frame, and even an old HRP Flak Jak! Yes, I still have one of those and it was here for the Atlas Air test as well! I did prefer wearing the Atlas Vision with a lightweight roost deflector versus a full chest pro because I felt less bulky and could move around on the bike better. However, this is more of a chest protector feeling than a neck collar issue. 

So if you haven't worn a neck brace or collar for that matter in a while and are “on the fence” about wearing one, like I was, give it a try because you’ll be shocked on how comfortable the Atlas Vision actually is. I know you’re reading this article and saying to yourself, “well Kris are you going to wear one now”? The truth is, NO, no I am not. I am a no BS kind of dude and wouldn’t want to start BS’ing all of you now. I have been wired one way for so long (on safety equipment) that I am going to keep on doing what I have been doing (which is not wear a neck collar or brace), but I can tell you, if you believe in more safety, this Vision ACC piece of equipment could really be something you need to look in. It really WILL NOT bother you when you ride and I am going to try and keep doing these neck brace/collar tests more to ensure that I am evolving on safety equipment myself. At the end of the day, all I have to offer is my educated opinion and to me this technology is NOT A BAD PIECE OF SAFETY EQUIPMENT! If you crash, this Vision collar will not increase your risk of injury. This is what I believe. Could I have said that 10 years ago with the first gen neck braces? No! AII can do is tell you that if you do believe in neck brace technology, the Atlas Vision neck collar (or ACC) is the most comfortable anti compression collar I have tried. The cost of the Atlas Vision Collar is $199.99, comes in two sizes, and two different colorways. You can check the complete line of Atlas neck braces over at atlasbrace.com.

Scott Prospect Amplifier Vs. 100% Armega

Written By: Aden Keefer

Scott and 100% are a couple big name goggle brands that sell like hot cakes. Scott has just released their brand new amplifier goggle/goggle lens, as the name states, it has new Amplifier technology in the lens. The new Amplifier lens is injection molded to provide improved definition and optical clarity, allowing you to see contours and transitions in the dirt like never before. They have also provided us sweaty boys and girls with a no-sweat face foam, they have also provided us with the Scott lens lock system, with articulating outriggers.

I have been wearing 100% for over two years now and I have come accustomed to the fit as well as the HiPER lens system they use. I have had issues with sweat falling off from the top layer of the foam and going into the lens in longer/hot motos. However, I do love how wide the Armega goggles are so I can see what's next to me and in front of me very easily. The past few weeks, my dad has tasked me with the job of comparing the Armega/HiPER and Prospect Amplifier goggles a little to help me with my testing/writing. I have done motos in both, crashed in both, sweated in both, you name it, I’ve probably done it all. The two main features that I love about the Prospect Amplifier goggle lens is how bright shadows and deep ruts can be for me. I wore the goggles on a cloudy day and oh my lord did it make a huge difference, it really brightened the dark State Fair MX dirt up and made it seem like it was sunny and 75 in Perris, CA. I also like Scott’s no sweat face foam that they have provided as it helped with my teenage pores as they rained down upon me. Although the Prospect foam was wet after a long moto, it didn’t leak down into the inside of the goggle.  Every time I am in the middle of the moto I sometimes can have a problem with sweat falling into my goggles with the Armega’s, but with the new Scott Prospect Amplifier goggle I haven’t had that problem yet. One downfall of the Prospect goggle is that it feels like the goggle doesn't fit snug up against/secure around my face. The 100% Armega goggles feel like it's nice and secured around my face and allow me to feel like there will be no dirt coming into my goggle for a visit. Although I didn’t get any dirt inside the Prospect frame, I just felt like it didn’t fit my nose area as good as the Armega. Maybe I am cursed with my dad’s nose? Who knows! The Armega HiPER lens although clear just doesn’t pop those shadows as much as the Scott lens did for me. I do notice that both lenses scratch easy if you don’t take care of them as well. Make sure to only wipe the lens with the goggle cloth bag each comes with.

 So after a few weeks of wearing the Scott Prospect goggle, I got to say I'm impressed with them. The new Amplifier lens helps brighten up some of the imperfections of our Southern California dirt. They works so good that when I went back to a regular clear lens, I wanted to switch back to the Amplifier lens because of how much brighter they made the track seem. The Armega goggles with HiPER lens does gie me a ton of clarity, but to me the Prospect just has a little more brightness to them on darker dirt. I will say that the injected molded HiPER lens of the Armega does give me the same amount of clarity, just not the pop that I get with the Amplifier. 

 If I had to choose what goggle to go with it would be hard not to pick either of the two as both the 100% Armega goggle or the Scott Prospect Amplifier goggle have its strong points. I guess this is what you call waffling in the Pulp MX Show world, but to me it would depend on the fit. I do think I am going to stick with the Armega goggles for the simple fact that they fit my face a little better at this time. If Scott made the nose area a little less wide and also provided a fit that was slightly up more on my nose rather than down on it, I would pick the Prospect in a second. I do feel like you can see more (side to side) with the Armega goggle, compared to the Scott prospect goggle, but the Sweat absorption and clarity have to go to the Prospect. 

However, being that I am not sponsored by any one of these companies yet, I might just wear them both to prove to my dad how much I like each of these companies’ products. My dad always said that you don’t have to wear just one company until you sign a contract. Well… I don’t have one of those so I might just wear both.

 As a side project, my dad let me try his Oakley Airbrake’s that he chooses to wear and I just didn’t feel like those provided as good of fit or as good of sweat absorption as the Prospect.

 If you’re a young rider like me and want a good product but also would love some racing support, 100% and Scott are probably the two best ones in my opinion to try and strove for. They seem to have the best goggle guys in the business as well as the most support for amateur motocross. For example, Scott sponsors amateur riders such as Chance Hymas, Evan Ferry and also the Pro Circuit Kawasaki team as well as the factory Husqvarna team. 100% sponsors the Lawrence brothers, what used to be the Geico Honda team and Star Racing Yamaha. So, if you're looking for a solid goggle and maybe a company that will give you support, these two companies would be the move. 

Breaking Down The Important Aspects, Who Wins:

 Fit: 100%

Clarity: Scott

Peripheral Vision: 100%

Sweat Absorption: Scott

Ventilation: Tie

Less Fogging Problems: Scott

Foam Feel Comfort: 100%

Ease Of Lens Change: 100%

Price: Scott Prospect/Amplifier $124.00

Price: 100% Armega/HiPER $100.00

Hidden Gems: Fuel Clothing Socks

It’s just flipping socks right? Well, yes, but actually no. I am very picky on socks because that is the one part of my body that I sweat the most. My feet are fairly sensitive so when I get a pair of socks that are hard or rough to the touch, I am out! I actually was referred to Fuel Clothing by my good buddy Travis Preston and he suggested I try them out. Now I am normally a “up to the knee” sock guy and my normal program with Stance socks and my Asterisk Zero G pants were fine, but I have been noticing that the Stance socks were getting hard and crusty feeling after more than a few washes. I was looking for anything that remained soft for more than a month of riding so I decided to try some Fuel knee/crew socks. 

IMG_3991.jpg

Fuel socks have moisture wicking fabric, odor blocking fibers, are ultra breathable, has a double padded heel, reinforced elastic with quick dry acrylic, is machine washable and even though say to hang dry them, I throw them in the dryer. After a couple months of use I have quickly become a fan of the Fuel socks for a few reasons. The sock itself feels good against my skin and doesn’t irritate it. The Fuel socks DO NOT get hard or crusty feeling after over 20 rides. The socks are thick enough for a little cushion yet are ventilated enough where I am not getting all slushy inside my Tech 10s. They are not a nightmare to put on like some other socks I have tried because the elastic is so damn tight around the opening of the sock, that I end up stretching them out in three rides. They are durable and last me more than a few rides! Again, socks aren’t rocket science but when it comes to finding little hidden gems like these Fuel socks, it’s tough for me not to share them with you all. You can use the code “Keefer20” to save some dough if you order. I even pay for my own socks because if a product works I have zero problem paying for my own shit. I am not your typical media guy. I like to support good companies and Fuel Clothing has been around our sport for quite sometime, but somehow I missed the memo on their socks. So when I go riding, I am sliding on some Fuel socks before strapping on the BRACES! YES! KNEE BRACES! Check all the socks out at fuelclothing.com

Arai VX-Pro 4 Product Review

The VX-Pro4 has been in my helmet test rotation for a while now and that time has given me some hard opinions on the crash lid. The overall look and function of the Pro4 is similar to the older model, but with a few new features that further refine Arai’s helmet fitment, which more of a round shape. There are several cool new colorways that pop up from time to time and I personally like bright helmets, so this particular “Machine” color is my favorite that is available now. 

IMG_3747.jpg

Starting with the basics of the Arai lid, the visor is long and wide enough to provide better protection from other riders roost. The visor comes with a black sticker on the underside to reduce glare and has large air vents for an ample amount of ventilation. Rather than Arai drilling more or larger holes in the shell, the venting pieces on the top and back of the helmet have been designed to be more efficient at moving air through the helmet. On the older Arai’s I had a problem with the front of the helmet being too close to my big nose, but Arai has since moved the grill and mouth vents to the front of the bar, creating more space in front of my face. The cheek pad design hinges out of the way when taking on or off the helmet, yet is supportive and secure while riding. As with all Arai helmets, the Pro4 features a multi-density foam that Arai claims, in conjunction with the helmet’s stiff shell, provides better protection in a wide variety of crashes. 

When I first slipped on the medium sized helmet, I noticed how much material was making contact with my face/head. The cheek pads are long and tall and extend well past the bottom edge of the shell which I really like. Combined with the padding around the rear of the helmet, the VX-Pro4 has a very “round head”’ feel, unlike other helmets that can feel more on top of the head. I have a round shaped head so this type of shell makes it one of the most comfortable lids to wear on longer test days. The pillow like feel of the liner is by far my favorite and if there is a standard for comfort the Arai VX-Pro4 helmets are close to the top for me. The ERS (Emergency Release System) cheek pads have a snug feel to it and wraps around my cheeks with a snugger fit, but if you do have a fat face then Arai offers optional cheek pads to snap in. This is a great option for you guys that don’t like cheek pads touching your cheeks as much. At $749.95 this is one of the higher priced helmets, but the comfort you get from the Arai is well worth the price marker. 

 Ventilation is not the VX-Pro4’s strong point compared to some other models like the 6D, Fly Formula or even a Bell Moto 10. Like I mentioned earlier, it’s “ok” but in the hot summer months of California I was sweating more with the Arai than others. Arai’s primary goal of having the strongest shell makes for very few vent holes. The lack of ventilation is pronounced by the amount of very comfortable foam lining. The relief zones for your ears are pretty small and I felt more material in that area than with other helmets (hence the comfort). This makes the Arai a very quiet helmet inside while riding compared to a louder 6D, but the 6D breathes better for me. The goggle port is on the small side and to accommodate larger goggles like my favorite pair of Oakley Airbrake’s or goggles with nose guards, it’s tough to get them situated inside the port creating a good seal. I removed the rubber nose protector immediately on the VX-Pro4 to get extra room for goggles. 

IMG_3749.jpg

Don’t be scared to throw the liner in the washing machine as the liner can withstand the abuse of the washer just don’t throw it in the dryer. Let the liner air dry and you will be just fine. With the VX-Pro4, there is a balancing act with safety and comfort. After watching a bigger man  stand on the empty shell of a Pro4 without it flexing much at all, I got a good taste of how strong and hard this shell is (similar to a SHOEI VFX-W). Maybe this is some of the older tech that is being used by Arai, compared to the newer tech that 6D, Fly or Bell have been putting out. Plus, with Arai’s triple density foam and breakaway visor and vent pieces, I have little doubt that the helmet would perform very well in a high speed crash. However, since it isn’t the lightest or most ventilated helmet on the market, you have to decide for yourself where you fall in the wide spectrum of helmet comfort and performance. I personally love the comfort so it’s one of my top three helmets to ride with, but with further advancements in helmet tech as of late, Arai may need to latch onto some newer safety features soon.

You can check them out at araiamericas.com and see all the designs they have available. If you have any questions feel free to email me at kris@keeferinctesting.com.

2022 FXR Helium Keefer Inc LE Gear Set

It has always been a dream of mine to design my own gear. I have been a gear snob for as long as I can remember. Every Christmas since I was five years old I would ask for gear even when I didn’t have a dirt bike. I just loved the look of being a motocross rider. I would dress up as a dirt bike rider for Halloween and I would subscribe to every single motocross magazine just so I could see what the top pros and test riders were wearing. Something about having a bad ass set of gear on when you’re riding just makes you feel so good. No matter what age or skill level!

BzuqcaHQ.jpeg

When Milt, Andy, and Carson from FXR asked me if I would like to design my own gear for the 2022 gear season, I jumped at the chance and was honored. I wanted to design a set of gear that appeased to the younger and vet riders out there. As most of you know I love a clean all white set of gear so I designed mine around that. The fit, quality and the performance of this gear is some of the best I have worn. It’s a set of gear that will make you excited to ride every time you get suited up for a moto.

I would love to see photos of all of you wearing it, so please tag me on Instagram at @keeferinctesting or @keefer120. Use the code KKMX35 to save 30% off as well! Visit www.fxrracing.com to view all of the new 2022 FXR Helium lineup.

On My Own Dime: Bell Sanction Kids Helmet

Written/Tested By: Michael Allen (AKA Janky Mike)

Becoming a dad has been the best thing that has happened in my life (besides marring my beautiful wife). On the third day home from the hospital, Oliver (my son) started his two wheeled journey through life, when I strapped him onto my chest and pedaled him around the neighborhood on my old BMX bike. Since that day, bikes/motorcycles have been literally an everyday part of his life and with that obviously comes the necessity for helmets. Alyse (my wife) is a trauma nurse at a level 1 unit and the Keefers refer to her as “a savage” (in a loving way). What is meant by savage is when it comes to having sympathy for cuts, bumps and bruises (or as Keefer says my sensitive emotions) she doesn’t bat an eye. She sees the worst of the worst, day in and day out at work and has no problem describing the gore, dismemberment, disgusting scents that can come from the human body and just overall debauchery of her type of work; all while delicately sipping on a cup of coffee. However, if she hears “mommy I have a boo boo” (which seems to act as a maternal dog whistle), she’s rushing full speed to rescue her delicate baby boy, full of sympathy, hugs, kisses, and is ready to mend anything from a splinter to a broken heart. In my wife’s line of work, she’s seen a fair amount of head injuries and hates seeing people having to suffer long lasting side effects of possibly preventable head injuries. We started drilling it into Oliver’s little head that if he’s on anything with wheels he must have a helmet on. Starting so young has really made it easy and now that he’s talking, he has become the “helmet police” making sure everyone in the vicinity has a well-protected cranium.  

IMG_1083.jpg

We started with just a generic Walmart infant helmet for when he would go on e-bike rides with Alyse and I. As kids do, he quickly grew out of his first helmet (both in size and protection) when he started showing interest in riding his three wheeled pre-strider bike. We got rid of the Walmart helmet and purchased an adjustable skateboard style helmet that had MIPS. This became his balance bike helmet as well as what I would use when I would ride him around on pit bikes or my dirt bike. Not to be “that bragging dad” but he started balancing himself and riding his balance bike with his feet up at 18 months after seeing an older kid riding one at Glen Helen. Roughly two weeks after mastering the balance part of riding, Oliver started wanting to go faster and faster as well as riding up and down curbs which of course evolved into skate park sessions when I’d get home from work. The incident that made us decide it was time for a full face helmet didn’t even involve anything with wheels. We were at the park and Oliver said he wanted to go down the slide by himself. About three seconds later I watched him come out of the slide tunnel head first, then scorpion into the bark and come up with a face full of bark, blood, and blubbery tears. We talked that night and could only imagine how bad his face would have looked if he fell off his bike, so after putting him to bed we started researching full face helmets.

IMG_1104.jpg

Finding the right helmet proved to be more challenging than I thought because the selection is somewhat limited, there are different factors that needed to be taken into consideration, and pricing for kids helmets is all over the map. After about a week of doing research we decided on the Bell Sanction in an XS. There were other helmets out there that rated slightly higher on the safety scale, but we weren’t willing to pay $300-$500 on a helmet that he’s going to outgrow in six months. There were also helmets available that were in the $20-$60 range but they lacked the features and safety we desired. The Sanction isn’t directly marketed for toddlers, but the XS size 49-50cm is one of the smallest on the market, it weighs in at 850 grams (1.5 lbs.) and the fact that it can be purchased for anywhere between $90-110 made it a perfect candidate. It’s marketed for BMX dirt jumping, so its shell is small and it also has a pinch buckle for the chin strap like a bike helmet. The buckle was a huge help because anyone with a toddler knows how hard it is trying to get them to stand still long enough to buckle a traditional dirt bike helmet strap. The XS is a little on the tight side so when I put it on I pull the sides of the helmet out slightly to help them get over his dumbo ears. Once it’s past his ears, it fits nice and snug slightly pushing his cheeks together, but I’d rather have it snug than loose. The visor is adjustable and replaceable, which has come in handy on early morning or evening rides. Although I wish the Sanction had MIPS, I am confident that the US CPSC safety standard will be more than enough for his balance bike and low speed Stacyc adventures. The only other negative is that the pads/liner aren’t removable which would come in handy after a day in the saddle. While I am nitpicking, it would also be nice if the pads could be swapped out for larger ones as he grows, so that one shell would last a couple helmet sizes.  After four months of use he now asks for the full face helmet because he says “I want big helmet so I look like daddy”. 

IMG_1092.jpg

If your little one is starting to push the limits or just get a little sketchy on their bike I’d recommend taking a look at the Bell Sanction because it offers a good amount of protection without breaking the bank. Because let’s face it, you’ll be buying the next size up in the blink of an eye. It’s never too early to get your little one on two wheels, we have gone places and done things on our bikes that have made memories we (or I) will cherish forever. So get out there, dust off your old BMX bike and go make some memories with that little mini me who needs to burn off some energy and while you’re at it, give their head the protection it deserves. If you have any questions about the Bell Sanction, feel free to reach out to me at Michael@keeferinctesting.com.

Troy Lee Designs Rock Fight CE Chest Protector

I haven’t tested much Troy Lee Designs protection and was looking for  another chest protector to test and came across the Rock Fight CE chest protector and was wearing it every time I went out on the track before I injured my knee. I managed to get a a solid month in the Rock Fight and came away with these thoughts. 

IMG_3178.jpg

 The Rock Fight has a CE EN14021 Stone Shield certification front plate that helps protect from roost and other lofted debris. What is more impressive is that it has helmet technology inside which is some advanced integrated EPP in key impact zones like on the chest and spine. The Rock Fight has form fit side flex plates, fully adjustable fore/ aft shoulder straps and removable shoulder pads that allow a wide variety of neck braces to fit comfortably. Even though I am not a neck brace guy I did have an Atlas Air and Leatt 5.5 to strap on and see if it restricted any of my movements, which it didn’t. Flexible D30 back insert exceeds C.E. EN1621 Level 1 for impact absorption. Another feature of the Rock Fight is the ventilated protective plates coupled w/engineered channeled bio-foam that can allow increased airflow. 

After wearing the Rock Fight CE through some of California’s warmer spring days I can tell you that it’s a full coverage chest protector that encompasses more area than that of an Alpinestars A-1 as well as the Fox Raceframe. The Rock Fight CE is built to withstand some impacts and that means that it’s going to be bulkier and warmer than those that don’t have the D30 built into it. However, even though the RockFight CE is warm, it doesn’t feel that bulky when riding. I will say that the key thing to making it feel less bulky is to get the straps as snug as you can around the torso. Once I figured that I needed to run the straps tighter around my waist, the RockFight CE was more comfortable for me. I tried wearing it under my jersey but quickly found out that it was too bulky for my taste to be an under-the-jersey protector. This was going to be strictly over the jersey protection which I am fine with, but just know going in that you might have to get some matching TLD gear to humor the motocross fashion gods. The buckles on the side straps are durable and for my 5’11 170 pound frame, the M/L sizing was adequate. Even though I like having the peace of mind of having CE protection, it does get me warm during a longer moto on hotter days. I had my son try it for a couple motos and he complained of being too hot with it on. 

IMG_3180.jpg

Overall this is not a roost protector and is a chest protector so understand that it covers and protects better than your average roost protection. With that added safety of the D30 in the back of the RockFight it makes for a more comfortable feel than just having hard plastic resting on your back, but just know with D30 comes heat. My guess is that this TLD RockFIght protector would be best for a rider in cooler climates or a rider that is more of a man than I am in hotter temps. 

Moose Racing Agroid Gear (Pant, Jersey, Gloves)


Editors Note: Ben wrote to us via email about trying out some gear and even though we normally DO NOT use readers tests we thought it could be a cool way to give you an outside perspective on a set of gear that is not tested by myself. Ben is just your average guy that loves to ride and race on weekends. -KK

Written By: Ben Ingold

The podiums of Monster Energy AMA Supercross and FIM World Championship, Lucas Oil Pro Motocross Championship and the MX Sports Amateur National Motocross Championship at Loretta Lynn’s are typically filled with large gear brands such as Fox, Thor, Fly Racing, Troy Lee Designs and Alpinestars. However, the podiums of off-road racing series such as Grand National Cross Country, World Off Road Championship Series and Kenda AMA National Enduro series are often filled by riders wearing gear a little different than riders who stick to motocross tracks.

The Moose Racing Agroid line is marketed as a lightweight, flexible and high-quality line of gear and the jersey, pant and glove msrp for $49.95, $139.95 and $24.95 dollars, respectively. Agroid is Moose’s entry into the lightweight gear market currently filled with lines like the Fox’s Flexair, Fly Racing’s Lite, Thor’s Prime Pro. I recently purchased a set of Moose Racing’s 2021 Agroid gear from Rocky Mountain ATV/MC and have ridden and raced in it multiple times. I race the 25+ C class in the Mideast Hare Scramble series located in the Carolinas and am 6 foot 2 inches and 205 pounds. I wear a size large jersey and glove with size 34 pants.

Moose 2.jpg

 The Agroid jersey is exceptionally light as advertised. It is made of a softer material than my pervious jersey, the Fly Racing Lite, and has a drop tail in the back to stay tucked into the pants. The sleeves on the jersey are noticeably longer than other modern jerseys in the market and taller riders may appreciate the full coverage the Agroid provides. The jersey does not have ventilated side panels like competitors, but air does flow nicely through the material.

unnamed-59.jpg

 The Agroid pant is also lightweight and flows air well. The fit is looser than the Fly Racing Lite pant, but is still very much an athletic cut. The pant has a buckle closure in the front and two Velcro straps on the sides. The pants do their job of staying in place while allowing good mobility on the motorcycle. The fitment of the pant was true to size with plenty of room in the knee for my braces. The leather on the inside of the leg of the pant is larger than I am used to and is wearing out quicker than I had hoped. Lastly, the length of the pants is on the long side, like the jersey. 

unnamed-57.jpg

 The Agroid glove has a Velcro closure system and the first thing I noticed was the thicker palm than competitor’s gloves. The gloves provide good grip on the handlebars and do not bunch during riding. Air flows well through the gloves and picky riders should be happy with the Agroid gloves.

 Moose Agroid is a solid set of gear and comes in at a price point below the mainstream motocross gear companies for a similar product. The jersey and pant flow air very well and do not feel like a cheap set of gear. This gear is for the blue-collar rider that does not want to break the bank but still wants the latest technology in fabrics and fit. This gear also is for the taller rider who is tired of jersey sleeves and pants coming up while riding and not fitting their larger body how they would like. Additionally, the Agriod line has a “retro” theme for two of the sets of gear and it is quite eye-catching. 

 I think Moose getting into the lightweight gear game is a good sign for the company. Moose is expanding their racing effort and their gear has also been seen recently on the Pheonix Racing Honda team in supercross and Kicker AMA Arenacross. Kyle Peters took Moose to a podium at the Arlington 2 250 West round. I look forward to the next big thing from Moose racing. 

Learn more about Moose Racing’s line of products at: https://www.mooseracing.com

Pro Tip: Keeping Your Gloves From Slipping on Your Hands

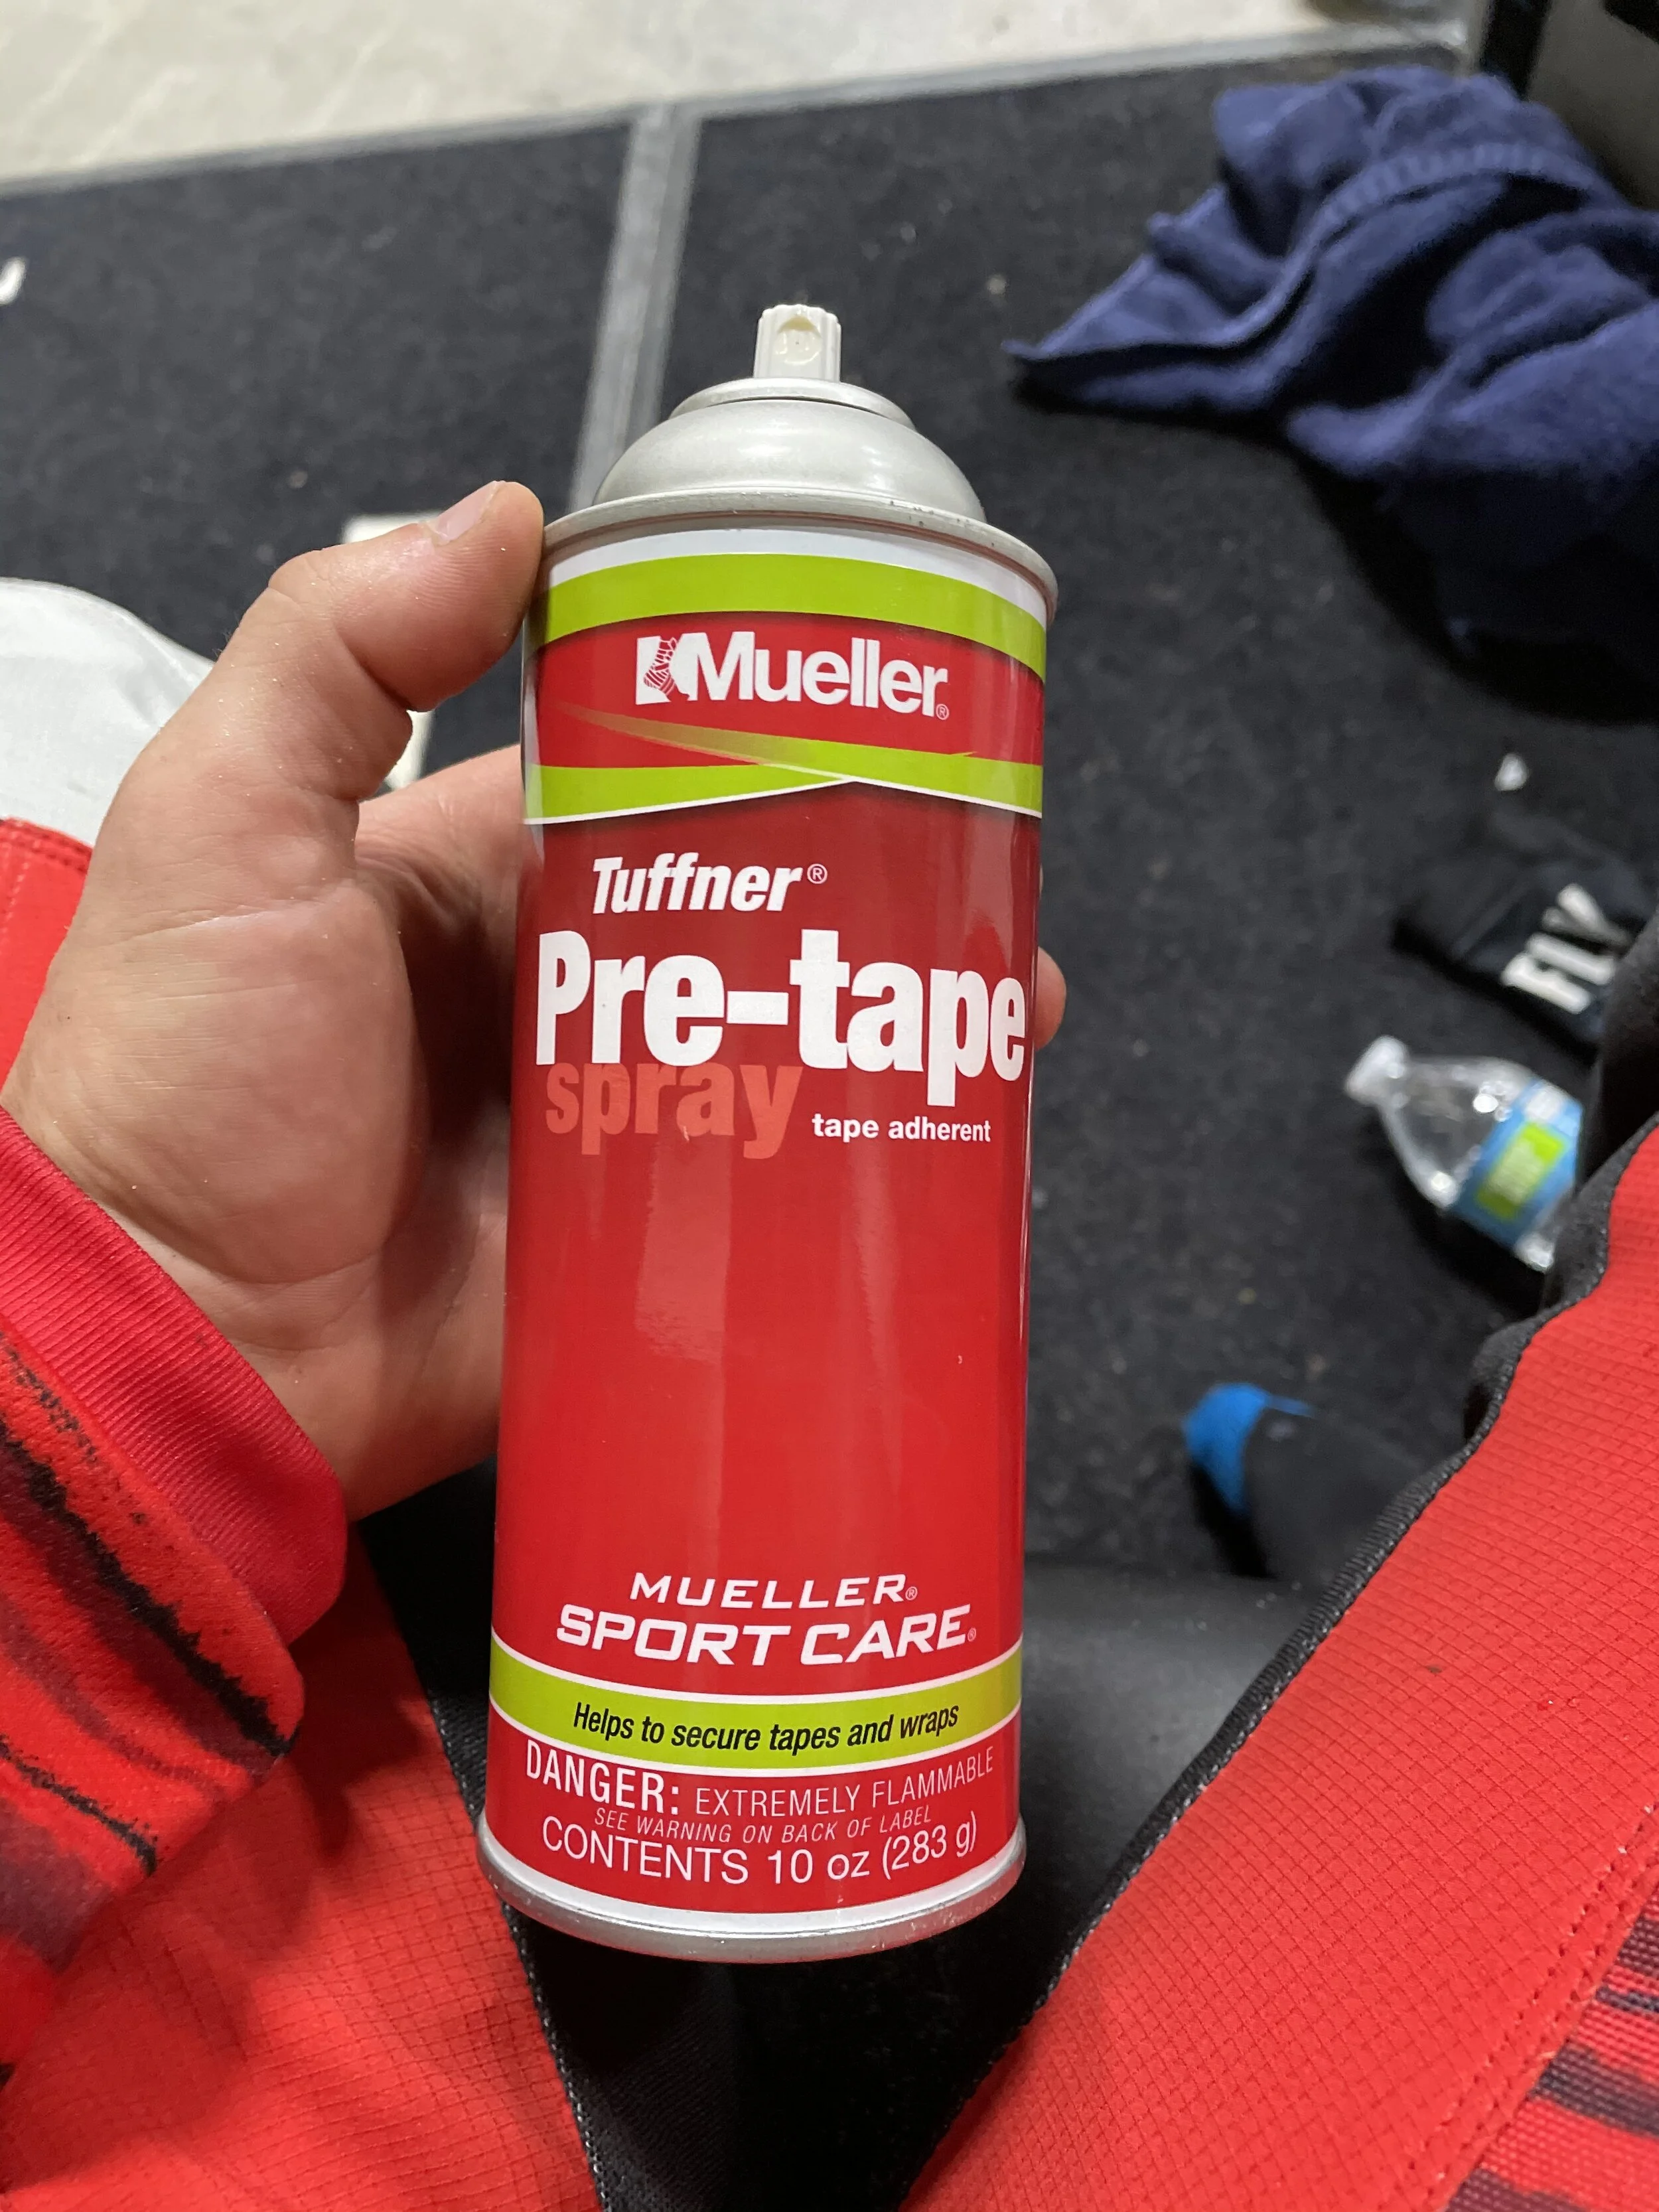
I ended up getting this tip from Justin Starling recently and he got it from Zach Osborne. Zach was wanting more grip from his gloves and a way to improve his arm pump (that he sometimes suffers from) so he looked to some sports tape adhesive spray. The idea behind this pro tip is to prevent your motorcycle gloves from sliding around on your palms while you ride. At times, no matter how good the fit of your gloves are, they will slide a little on the palms of your hands when sweaty, which means your gloves will shift a little while on the grips. When you’re riding a dirt bike, you want to be as locked in as you can without feeling tight.

IMG_2785.jpg

You can go to your local sporting goods store and grab some “Mueller Stickum Grip Enhance Spray” or “Pre-Tape” and get some extra feeling/grip next time you ride. Before you start riding, you will want to spray a decent amount of the spray on your palms as well as the back of your hand then slide on your gloves. Yes, it will be a little harder to put your glove on, but that’s the point. What this spray does is create a layer of grip between the material of your gloves and your skin, which in turn makes your glove feel like a second layer of skin. I was skeptical when I first heard about this, but I quickly found out that the adhesive spray allows for better feel on the grips when late in motos. My hands sweat when I ride and that makes my gloves slide around while riding. I then have to grip harder in order to compensate for the slip I get on the palms of my gloves. With the Stickum spray on my skin, my gloves are planted against my skin and allow me to feel more contact to my grips, which allows me to loosen my grip late in motos. It has saved some arm fatigue and has helped my grip “strength” late in motos. You will have to get some dishsoap or something with some grit to get all of the sticky residue off once you’re done riding, but to me the extra clean up time is worth it.

64236097368__1EDDB6F7-539A-45AC-AA4F-4708C47BC422.jpeg

If you’re having trouble with some arm pump, with glove slippage or maybe just want some extra contact/feeling from your gloves to your grips, try this secret that some professional racers have been doing for quite sometime. If you have any questions about this pro tip email me at kris@keeferinctesting.com

Bell Moto 10 Product Review (First Impression)

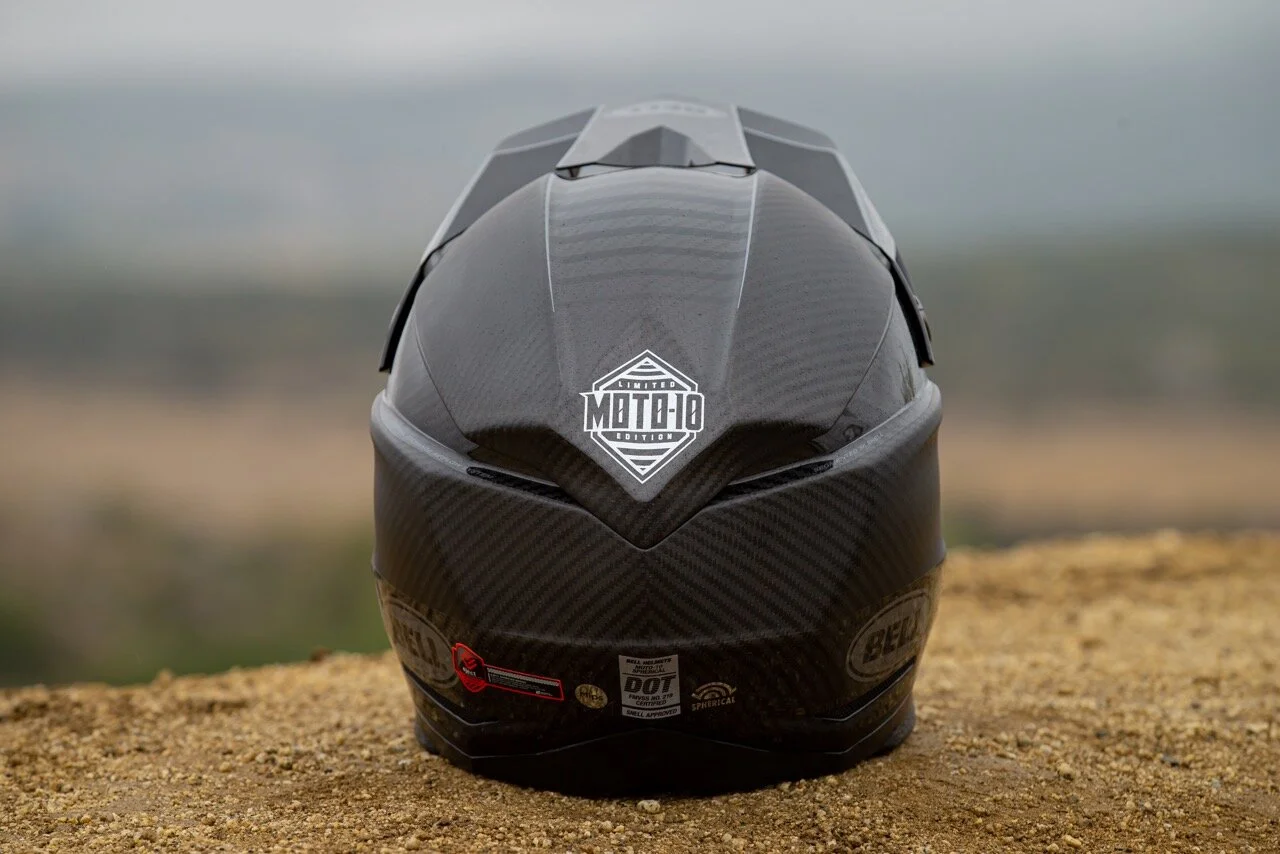
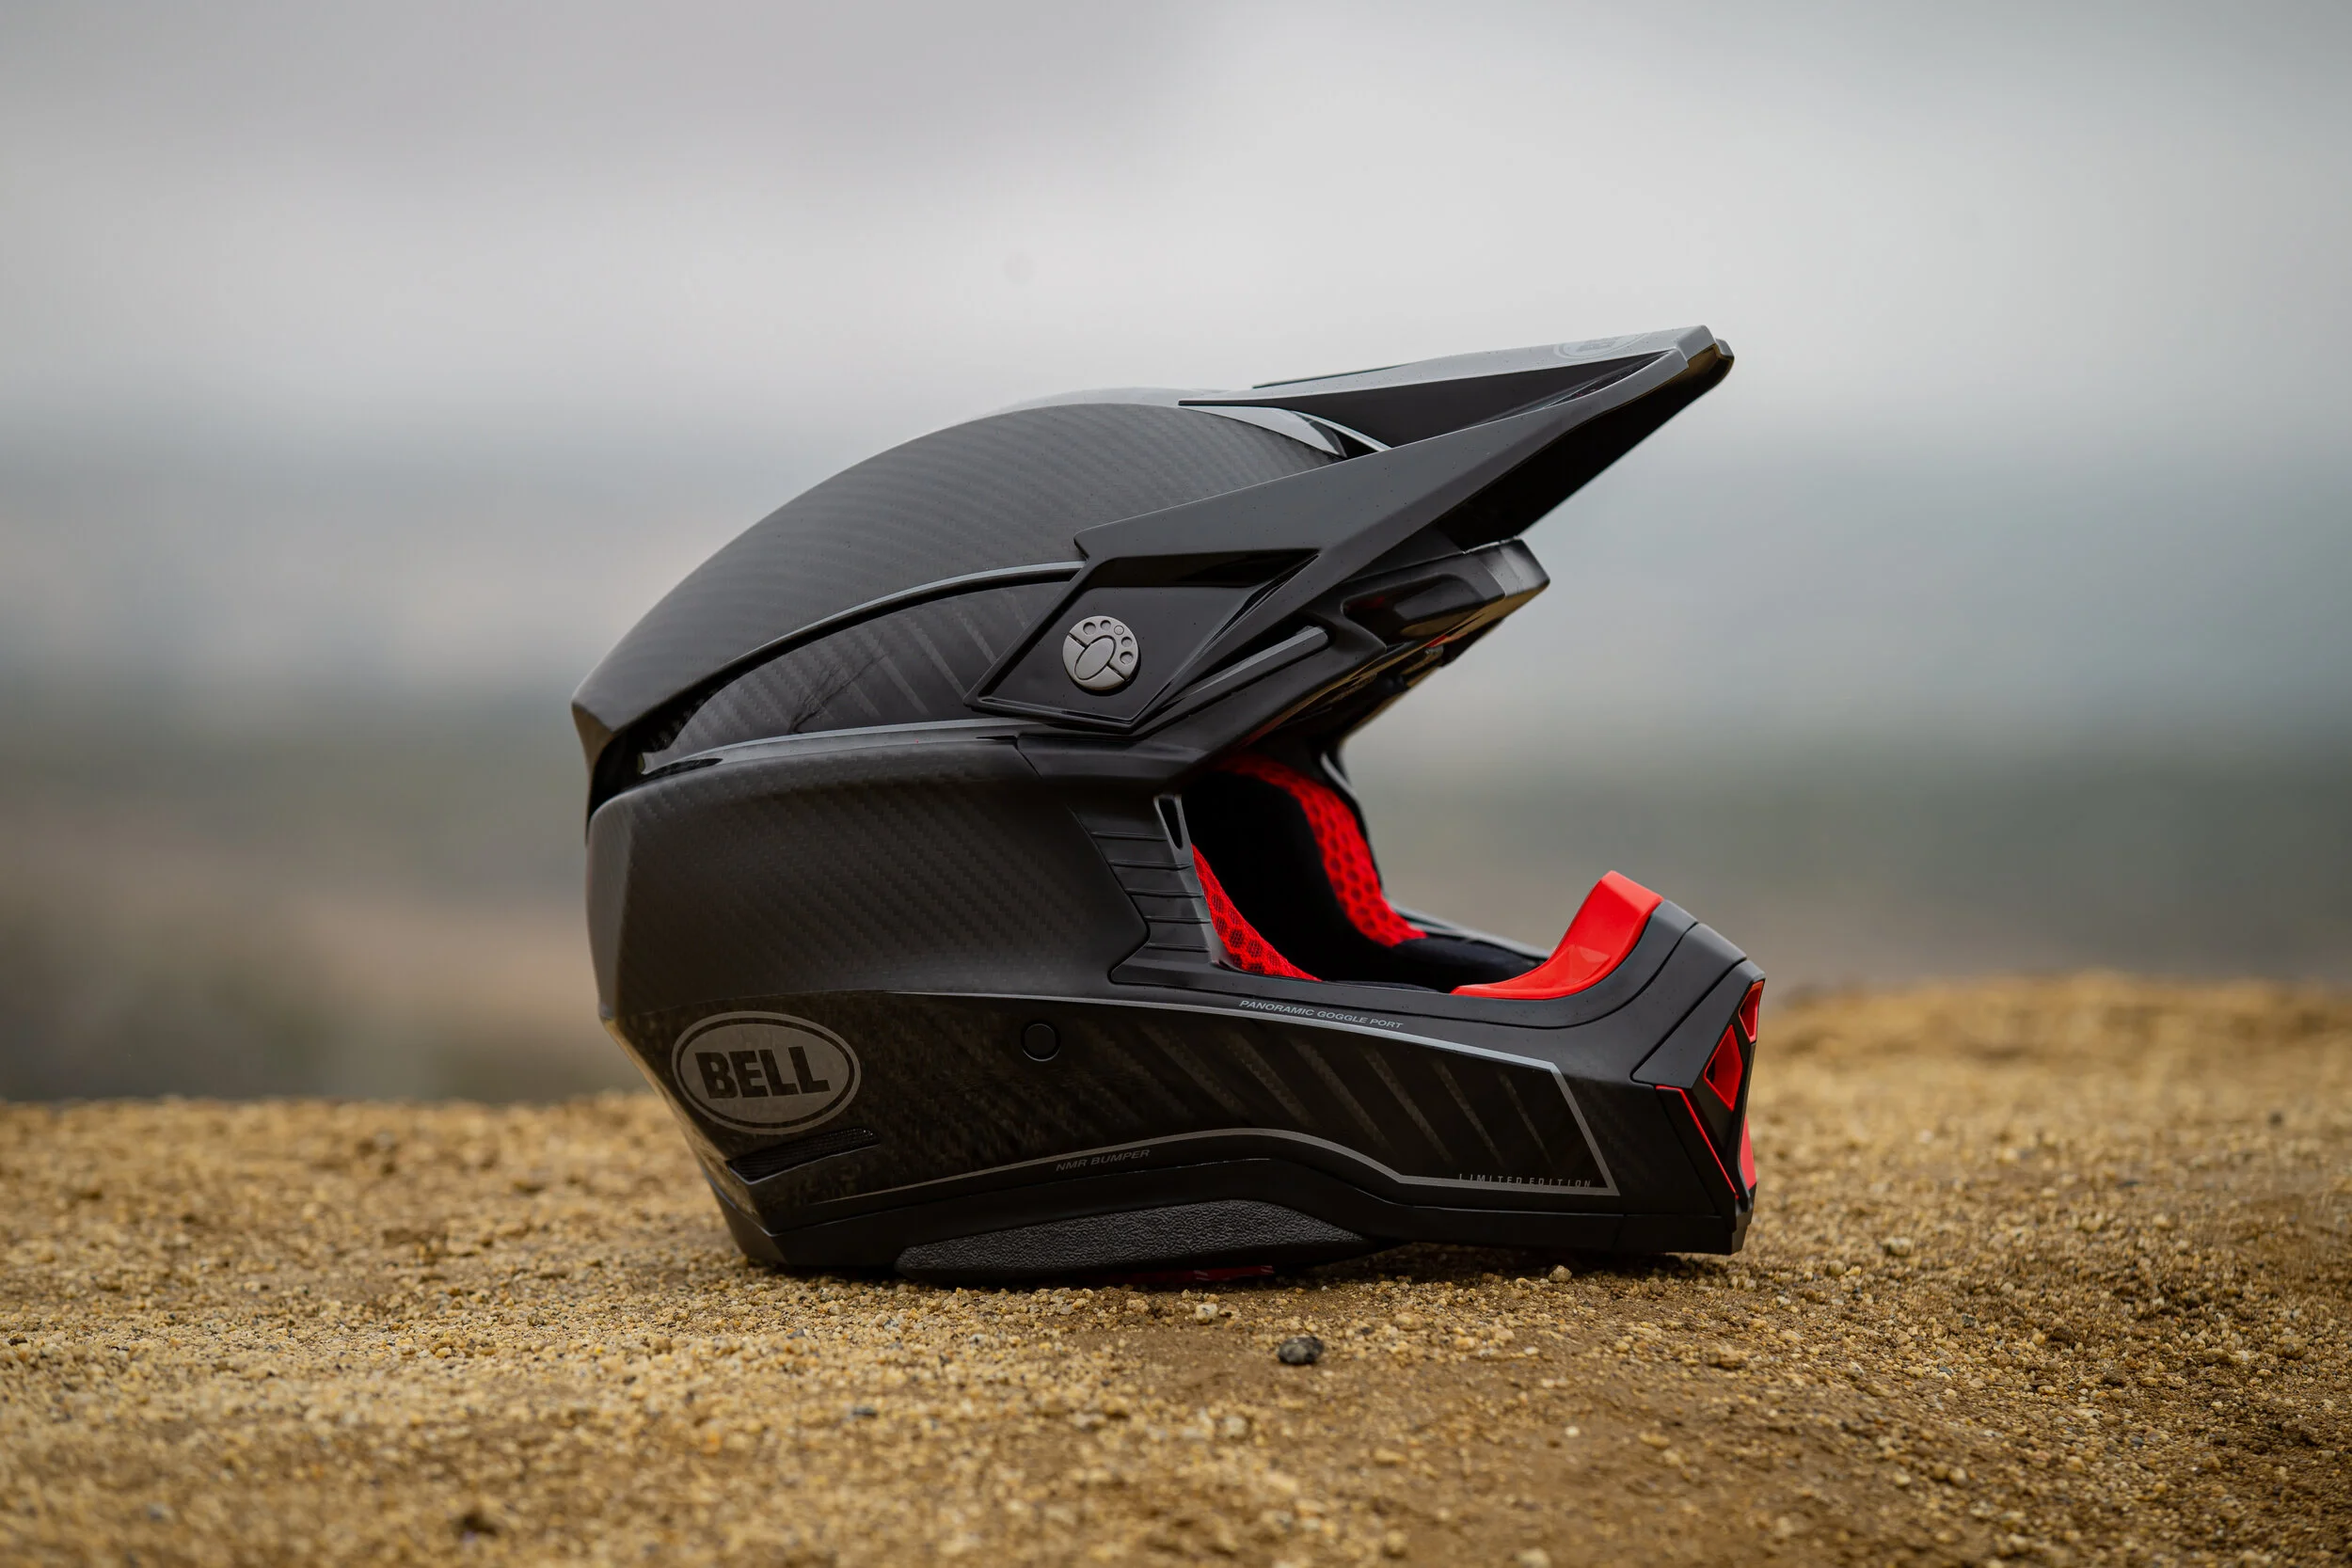
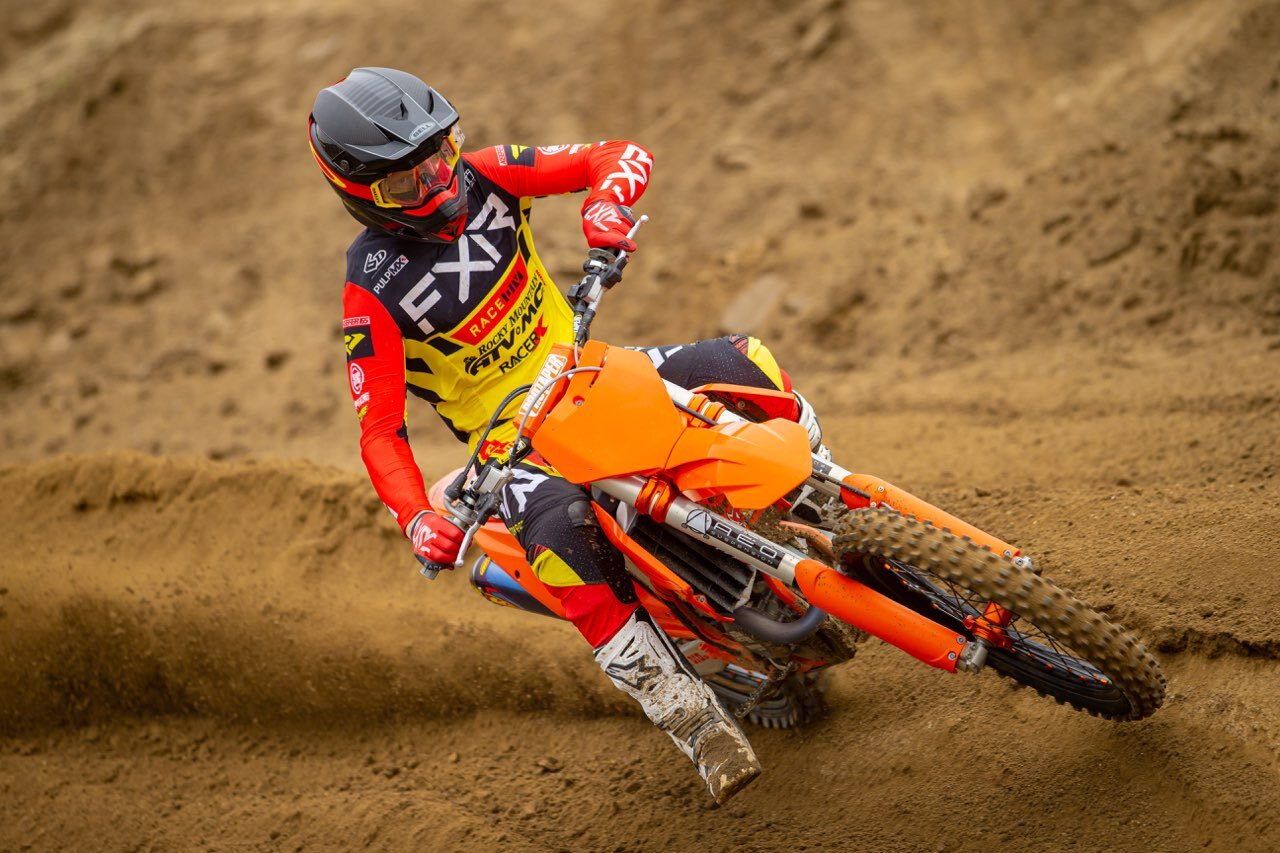
I have been able to put enough time in the Bell Moto 10 helmet to give you a proper first impression, but before I do that, let me give you some background on my history of wearing Bell Helmets. Growing up in the high desert one of the perks is that I got to ride everyday after school from the house. Usually that meant getting off the bus, walking home, doing my chores/homework, and then immediately going to my favorite dez track to ride. After years of doing this, my mom had to witness me coming home with broken bones, a bloodied face, and the occasional missing skin, but what she didn’t see was a kid with a concussion. My dad was always adamant about putting me in Bell helmets when I was younger to keep me safe. I was raised in a Moto 3, 4, and 5 kid growing up because that is what my father believed in. Soon thereafter, when I had to spend my own money on helmets, I ventured out and tried other brands with some success, but I always remember my younger days in those Bell helmets. 

BELL_INTRO_OWENSCE8U4346.jpeg
BELL_INTRO_OWENSCE8U4367.jpeg

Spherical Technology

Spherical Technology, powered by MIPS®, helps redirect impact forces, bringing market-leading design, performance and brain protection together without compromising comfort, ventilation, weight or style.

Ball-and-Socket Design

Spherical Technology’s ball-and-socket design helps redirect impact forces away from the brain by allowing the outer liner to rotate around the inner liner during a crash.

MIPS®-Equipped

MIPS stands for Multi-directional Impact Protection System, which is a leading slip-plane technology inside the helmet designed to reduce rotational forces that can result from certain impacts.

Segmented 3K Shell Technology

Special shell design that provides a large exhaust vent that expels hot air out of the helmet, ensuring the rider stays comfortable and cool.

No Missed Races Bumpers

Using a softer EPP material, two bumpers on either side of the helmet compress under load but bounce back to its original form, reducing the likelihood of further injury caused from the helmet contacting your body.

Panoramic Goggle Port Technology

A wider port provides better fitment, optimal sealing, and a massive field of view, increasing the rider’s visibility and safety when needed most.

Magnefusion Cheek Pad Emergency Release System

Allows for easy removal of the pads for washing and enables emergency responders to easily remove the cheekpads first before removing the helmet following an impact.

Sweat Management

With the combination of the T.E.A. System, Spherical venting channels, and Segmented shell, we created the ability to force perspiration across the rider’s brow—away from their goggles—preserving vision late in a race.

Virus CoolJade™ Comfort Liner

This removable, washable liner is made of recycled jade fabric to create a natural cooling effect. The ultra-wicking construction combined with CoolJade-infused yarn decreases your skin surface temperature up to 10˚ F, keeping you cool, comfortable, and focused on the race at hand.

Flying Bridge Visor

This visor design allows more flexibility and improves airflow across the helmet. By not using a traditional center post and screw concept, we’re able to increase the amount of energy-management material in a high-impact zone.

Thoughts:

So after spending a couple weeks riding in the new Moto 10, I am pleasantly surprised on how much more comfortable this helmet is for my head shape (I have more of a round head). Even though the weight of the helmets remains close to the same, the weight distribution of the Moto 10 feels evenly dispersed. The Moto 9 felt heavy directly on top of my head, but the Moto 10 feels much lighter when riding longer Motos. The Moto 10 fits snugger initially when riding with it brand new, but slowly breaks in and wraps around my face much more than the Moto 9 did. The way the helmet encompasses my head feels more secure and tighter in a good way (similar to an Arai VX-Pro 4). The liner/cheek pads have more comfort to them, are softer to the skin and overall just has more of a hug like feel that wraps around your cheeks (similar to a road racing helmet). The Moto 10 eye port now allows the rider to choose wide peripheral goggles as my Oakely Airbrake’s and 100% Armega’s seal much better to my face than they did with the Moto 9.

Ventilation is improved as the Moto 10 can cool your head down better than the Moto 9 on hotter days. Even though I assumed what Bell was explaining to the media about their ventilation system was just marketing BS, the Moto 10 actually can push sweat away from your goggles. I let one of my well known testers (that sweat profusely when riding) try the Moto 10 on a hot day at Glen Helen and he was blown away that his less than stellar goggle foam didn’t get soaked with sweat. (Editors Note: I am not much of a sweater, so that had to get put to the test by one of my guy’s). One of the other aspects that some other media outlets do not talk about is outside noise. Some helmets are louder than others, but the Bell is surprisingly quiet for how much ventilation it provides. Usually when I get a helmet that ventilates well, it is loud to the outside world, but the Moto 10 is in the top three helmets I have worn lately that muffles out bike noise.  

BELL_INTRO_OWENSCE8U4315.jpeg

If there is one negative that rolled over from the Moto 9 is that the chin bar area of the helmet is still close to my face/nose and when you wear certain goggles, the frames of those goggles damn near stick out passed the chin bar area of the helmet. It doesn’t hinder anything, but can look strange if you’re not used to it. Overall, my initial impression is that this Moto 10 is a much better Bell than the Moto 9. This is a helmet that I could actually live/want to ride with and with the updated tech along with the MIPS technology, I could actually believe/trust in its protection. 

Positives:

• Quality – You’d expect an excellent quality of finish on a $800 helmet, and this thing delivers. With a carbon compose shell, it’s both lightweight (around 1300g) and strong. As an added nice touch, it comes in a cool padded carry bag.

• Style – Aside from the cool carbon finish, it’s a good-looking lid with a contoured shell shape.

  • Comfort/Fit – The sophisticated impact liner and soft padding produces an exceptionally good fit. In fact, you can feel the liner actually mold to your head shape once you put it. In other words, it gives you a more personalized, form fitting helmet

• The Padded Liner – With its uncomplicated design (no tabs, just four plastic clip-studs), the liner is simple and easy to remove/replace. And in addition to being convenient, the magnetic cheek pads are a real advantage in the case of an emergency.

• Ventilation – This helmet flows Ari extremely well. The way it forces out sweat is something we have never felt before in a motocross helmet. 

• Attention to Detail – The stainless steel mesh that’s used in the chin-piece and ventilation exhaust ports is stylish. I absolutely love the magnetic tip in the fastening strap. This makes it extremely easy to secure with gloves on. The built-in Eject Helmet Removal System cavity in the liner means there’s no need for any modifications to fit this system (which is now mandatory for racing in many countries).

Negatives:

• Visor Screws – They have an inventive design (they’re recessed, designed with breakaway tabs, flick out to use and then back to flush), but with only two lateral screws, you have to run them super-tight to keep the visor fixed in place. The visor will not move when riding, but getting the visor to a correct position (before riding) without looking like you have dune goon syndrome is tough to do.  

• The Chin-Bar – The shell’s compact design puts the chin-piece close to your mouth, this can accelerate goggle fogging in wet/cold conditions if you start to breathe heavily. Removing the nose guard helps this however. I would prefer a slightly longer chin bar area however. 

BELL_INTRO_OWENSCE8U4635.jpeg

Fox Raceframe Impact D30 Soft Back Chest Protector

I am usually 90% in on wearing some sort of chest protection when I ride/test/race, but have only found a very select few chest guards that get me excited enough to put on. The all-new Raceframe Impact D30 Soft Back Guard is Fox Racing's top-level chest guard. The key feature on the Raceframe version is the addition of an D30 impact-absorbing insert on the back. The D30 material is body heat activated to provide a custom fit, which is said to conform to your back while riding. The articulated design is supposed to wrap around the body to ensure that you get maximum protection, flexibility, and comfort. That is basically what I have been looking for without feeling too bulky on the bike (or hot). The straps are adjustable to fit a wide arrange of body types, and the low-profile design can be worn over or under the jersey. There is also a removable chest plate on the inside front portion of the Raceframe just in case you knuckle heads think you don’t need all that protection up front. All us married guys with kids reading this know all about protection and choices now don't we!

GH_4-8-21_OWENSCE8U9728.jpeg

It has been well over the 90 degree mark for a few days here in Southern California so testing this Fox Raceframe Impact Guard in these conditions was going to be a real tell all on if this sucker could ventilate well. Once I put on the Raceframe Impact I immediately noticed how well this guard wraps or maybe I should say hugs my body in a good way. The front plastic piece moves/bends around my torso and makes it feel like the Raceframe is an extension of my body. To me this is a great feeling while I am riding as I don't have this bulky loose feeling when moving around on the bike. Another great feature that sometimes can get overlooked with chest guards is how well the straps (that secure the guard to your body) actually hold up. In some cases I have had the waistbands of other guards completely come undone, or stretch out so quick, that the guard just flops around mid moto, and I end up throwing it in the trash after only a couple rides. Goodbye money! The Fox Raceframe has been under my jersey’s, for the past several tests, 90% of the time, and it still feels secure to my body. 

Two huge features that stand out to me are the soft Level 1 certified D30 armor back protection and the overall comfort of the Raceframe. I am usually not a back wearing chest protector type of rider, as I normally remove the plastic from most chest guards and just run the straps on the back because I get so damn hot. With the D30’s body heat activated material, I was pleasantly surprised on how “not hot” it was to ride in. Yes, it’s a little warmer with it on, but I wasn't praying for my moto to end, so I could rip the sucker off. I was expecting it to stick to my skin and just be a hot mess back there, but it stayed cooler than I thought and didn't stick to my back when riding or removing the guard after a moto. The soft feel as well as the protection I am getting while keeping the back portion attached keeps my mind at ease when riding. If you have a wife like I do, you know that they want to put as much armor on you as possible (when you go ride) and this soft supple D30 insert is a great way to keep her happy as well as my picky ass. I also didn’t have to go up a size on my jerseys when wearing this Raceframe even when I was wearing athletic cut jerseys. The overall roost protection is superb and chaffing wasn't a huge issue without taping my nipples.  

GH_4-8-21_OWENSCE8U9734.jpeg

The front of the Raceframe is not quite as cool as the back with the level 1 chest plate intact. It’s not quite as cool as an  Alpinestars A-1 roost guard in the ventilation department (when removed) and that A-Stars guard has been my mainstay for quite sometime. If I wanted to simply get some added ventilation I am able to remove the chest plate out of the front portion of the guard. With three simple velcro straps I can remove the chest plate and be back on the track with an added breeze. I chose to run the plate most of the time per Mrs. Keefer’s request (I apologize fellas, that I am so PW right now), but to me there is an acceptable amount of ventilation that I must have with an under protector and this Fox Raceframe passes with an acceptable level. You will have to know going in that you will be slightly warmer with the chest plate, but it doesn't boil you off of the track neither.

GH_4-8-21_OWENSCE8U9832.jpeg

I am 6’0 and 170 pounds and a S/M sized Raceframe just fine. I had another larger sized rider try the guard (5’10 200 pounds) as well and he also thought that the sizing was fine for him once they adjusted the shoulder straps a little. The Raceframe Soft Back comes in two sizes S/M and L/XL, but if you’re in the 150-190 pound, 5’7-6’0 ft. range the S/M should be just fine. The pricing is a little steep at a $159.95, so be ready to break off some coin for the unique design and materials Fox uses with the Raceframe. However, that being said, this is one of only two chest guards that stays in my gear bag at all times. I have about eight or nine in the garage, but this one goes with me wherever I go, so that should tell you something. 


Thor Terrain Off-Road Pant And Jersey

Although I ride year around, winter in Southern California is my favorite time of year because it means wet dirt, awesome traction, and prime trails. To me there’s nothing better than taking off from the truck on a cold morning into the unknown of a good trail ride. This time of year also gives me the chance to try some new off-road riding gear form various companies. Thor’s original roots may be in motocross, but they also have a long history in off-road racing and trail riding. I was pleased to see that they hadn’t thumbed their nose at us off-road riders and had a new line of off-road specific gear called “Terrain”.  I received the gear just before a good rain, and when the sun came out the next day, I was on my way to Kris’s house to put it to the test.

IMG_1602.jpg

The Terrain jersey is made from a four-way stretch material and has abrasion resistant sleeves to minimize fraying when riding through thick brush. The paneling is vented to promote airflow, and raglan style sleeves have only one seam underneath the arm to try and minimize snagging. The pants are made with rip stop paneling in the high wear areas, use double and triple stitch seams and have full grain leather inside the knees for grip/durability. There are two external pockets with waterproof zippers and one internal hip pocket. There are waterproof zippered vents for better airflow when needed, and the waist uses a dual clinch to keep everything snug. 

IMG_1608.jpg

The Terrain jersey has a great cut when it comes to fitment (I’m 6’ 175lb and wear a large). Unlike a lot of off-road gear that can be baggy, the Thor jersey is form fitting without making me look pregnant after having that trailside beer. The stretch material on the neck is also a comfortable fit, not being too loose or too snug.  The venting works well, almost too well when its cold out, but that’s where the Thor Jacket /Vest comes in handy (keep an eye out for a review) the material on the sleeves feels a little stiff to the touch, but when on the trail it’s nice to not worry about snagging a bush and fraying your new jersey. Foliage tends to brush off the jersey instead of snagging and caching a seam. 

IMG_1604.jpg

When putting the Terrain pants on I noticed that the legs from the mid-thigh down were on the snug side and I really had to push to get my leg and braces (Asterisk) far enough down so that the waist would be far enough up on my hips. I gave them the benefit of the doubt and chalked it up to them being brand new and stiff since it was so cold outside. Unfortunately that wasn’t the case because I had to repeatedly fiddle with the mid leg sections of the pants due to them feeling tight enough to hinder my ability to move around on the bike. Since the pants felt sucked down in the knees, it made the waist slightly low and of course the crotch area didn’t stay high enough, so I found myself at every stop stretching out the crotchin order to situate the pants. That being said, the front button and double latch were comfortable and never came undone. Speaking of the crotch area, where there is traditionally a zipper, the Terrain pants have a panel that is always connected and just folds open or closed when buttoning or unbuttoning the front of the pants. When it comes to having a bathroom break on the side of the trail I found it hard to open the pants enough to get my junk (or stream for that matter) to clear the flap. The protective paneling worked well to fend off traditional off-road obstacles, but was no match for the new DR.D head pipe that doesn’t have a heat shield.  While the paneling may have melted, the leather inner knee area hardly showed any wear from the hot head pipe even after many close encounters. The zippered vents worked well and it was nice to have the option of opening or closing them dependent upon the temperature. Pockets are very important when it comes to off-road pants, whether it be for carrying your phone, some gel packs, or some spare tools. The placement of the pockets on the pants was less than ideal for a couple of reasons. One is that they are very hard to unzip in the sitting position, especially when wearing gloves. Secondly, that no matter what I stored in them, whenever I bent my hip, whatever was in the pockets, either limited my mobility, or jabbed into my hip/thigh.  

IMG_1610.jpg

I didn’t get a chance to try the Terrain gloves as Thor sent me some Draft gloves that were minimal for off-road protection, but very comfortable and although minimalist, they seem to be holding up well. One thing that is always a downside to off-road gear lines, no matter the company, is that there are limited colorways, but that’s simply due to the fact that the volume of off-road gear sold doesn’t justify the cost of investing into multiple colorways.  With the Jersey coming in at $59.95 and the pants retailing for $139.95 the Terrain off-road line of gear is on the pricey side for what you’re getting. With that said, just a few refinements would greatly improve functionality and mobility of the Terrain gear. 

 -Michael Allen (michael@keeferinctesting.com)

6D ATR-2 Helmet Review

It’s hard to write about something, that in some cases, can’t be fully tested until shit goes wrong. In the world of helmet safety, we as buyers have to be very trustworthy customers. I mean…We have no choice but to be right? We have to trust in what the helmet company is telling us (about their latest safety technology offerings) is in fact the truth and works in real world conditions, just like the test results say back at the testing facility. 

On the flip side of that us media outlets have to be able to portray the truth to you consumers as well! As always we here at Keefer Inc. will always be transparent to you and that includes why I prefer certain helmets. As most of you know I was an advocate of the Fly Formula helmet for quite sometime and I still stand behind that helmet today. Most recently, I switched back to 6D ATR-2 helmets on my own time because I also believe in this technology as well. When my son first started learning how to ride, I put him in 6D technology because I believed it to be the best there is. We recently had the chance to get back in 6D’s (as a family) and I am happy that we made that decision. If there are two helmets I trust the most in today’s helmet market it would be the Fly Formula and 6D technologies. This is not to say the other helmets on the market are bad per se, but I just know from crashing that these two have saved me more times than not. It’s called “from experience” and that is the only way I know how to “test” helmets and give you all real world advice on them. I can tell you how it feels/fit, but that is just a small portion of what sells future customers these helmets. 

IMG_1292.JPG

The only way to truly know if the helmet “works” or not is to crash and that is something that riders usually aren't looking to do. However, when it does come time to test the safety aspect of the helmet, it better damn well work and be what we paid for. I have worn and trusted in the 6D technology for quite sometime now and just like I mentioned above, have even spent my own money on a few helmets for my kid and I. Here are some thoughts on the 6D and why Aden and I choose this lid for safety. 

The 6D ATR-2 off-road helmet uses Advanced ODS technology. The ATR-2 is an evolved version of the company’s signature Omni-Directional Suspension system (ODS). The ATR-2’s Advanced ODS is highlighted by an Expanded Polypropylene (EPP) multi-impact outer liner and a Expanded Polystyrene (EPS) replaceable inner liner. Just like on the ATR-1, the two liners are connected via a series of elastomeric isolation dampers, assisting in progressive loading of the ODS system during impacts. Now, however, many of those ATR-1 dampers have been replaced by damping towers that are incorporated into only the outer liner; these towers are capped by newly updated, low-friction disks that slide freely against the inner liner, thus reducing friction under loading and increasing the displacement travel between the two liners. Make sense? Ok, good!

Keefer -2-2.jpg

With this Advanced ODS system in place, the ATR-2 is said to offer improved performance in both linear and angular acceleration mitigation, and at the same time can be made easily rebuildable for a longer service life. In addition to Advanced ODS, the ATR-2 features a number of other updates aimed at improving safety: A structural Brow Rib strengthens the upper eyeport area, while a special designed Cervical Protection Zone works to protect the rider in the event that the helmet is pushed down and back into the neck and spine during an accident. Safety features that have carried over from the ATR-1 include a clavicle cutaway, sternum pad, shear-away visor screws, and emergency removable cheekpads. This is not an ATR-1 with a new name. The ATR-2 is truly unique.

I usually wear a size medium in almost every helmet, but with standard cheek pads installed inside the ATR-2, it does feel a little loose against the cheeks (side to side, but this is my preference). For most other medium wearing helmet riders that I let try on the ATR-2 helmet, they thought it was fine, but I go with a thicker 55mm cheek pad and the fit is great for my round shaped head. If you feel like you need to tighten the space in your ATR-2 try going one size up in cheek pads. The Genuine Dri-Lex liner of the ATR-2 feels slightly softer than the old ATR-1 and is not as harsh against my sensitive face. For guys that grow the beard out and love to moto, this is especially nice as it doesn't irritate your skin. When riding back to back with the ATR-1 and ATR-2 there were a few things that I felt were a noticeable improvement immediately on the ATR-2.

50625596086_a48025d2d1_o.JPG

1 The shorter visor. Yes, this is an aesthetic thing, but also safer in case of crash. I feel like it makes the helmet look more attractive as well. Yes, I also care about looks! Sue me! 

2 I can feel a significant lighter feel with the ATR-2. The ATR-2 is only a 100 grams lighter on paper, but feels much lighter than that when riding. 

3 The chin bar/nose area of the ATR-2 is closer to your face, but not so close that you big nose riders out there will start to feel cramped. If you are familiar with the Arai VX Pro-4 you know that it sits close to your nose, but the 6D ATR-2’s nose area sits slightly further away than its competitor. This allows more room for multiple brands of goggle frames, doesn't allow for a ton of roost in side your helmet and also gives you the sensation that your helmet isn't sticking out like a duck bill. 

The ATR-2 sits down on my head correctly and conforms comfortably. Some helmets come too far down on the forehead and that prevents my goggles from sitting in the eye port correctly, but the 6D does not do this. The eye port is huge on the ATR-2, which I love for peripheral vision and awareness when I race. The 6D ATR-2 is still a “loud” helmet when comparing it to the Fly Formula, but this is something I have grown accustomed to when wearing it more. The Genuine Dri-Lex liner wicks away sweat well and dries fairly quickly. The nine intake ports and six exhaust ports ventilate my head extremely well (even better than the old ATR-1, that incorporated eight intake ports and four exhaust ports). I have worn and tested a lot of helmets and the 6D ATR-2 feels like it vents better than any other helmet I have used. Taking the liner out, washing it and putting it back in is not a nightmare and snaps in easily. The ATR-2 is neck brace friendly and is just fine when using in conjunction with an Atlas or Leatt brace. 

If you’re still  a fan of the ATR-1, don’t worry, it is still available and has a lower cost than the ATR-2. The 6D ATR-2 will set you back around $695.00 and to me is worth that pricepoint. After I have had a couple concussions, I am big on safety features of off-road helmets and to me you will be hard pressed to find anyone else in the off-road world as passionate as 6D is. Like I have said in my previous podcasts, “we all should dress for the crash and not the ride”. 

The ATR-2 is available in three shell sizes covering a size range from XS to XXL and comes with a three-year limited warranty. The ATR-2 exceeds DOT, ECE, AC and ASTM standards.There are several color combos to match up with whatever gear you're wearing and most are available now. You can view the ATR-2 and ATR-1 at 6dhelmets.com. If you want to save some dough, use the code KEEFER21 to save some money on your purchase over on their website. 


On My Own Dime: Scott Prospect Roll Off System

Written By: Michael Allen

Although I am an off-road guy through and through, living on the west coast doesn’t exactly give my inner Scott Summers many opportunities to splash around in the mud.  It almost never fails that we get some showers throughout winter, but it’s pretty rare that we get a full on storm that coincides with a motocross race. Adding to the odd times of 2020, my phone informed me that the chance of rain was 100% for the 2020 Dubya Vet World Championships at Glen Helen. I have always been a person who likes preparing for things, but since becoming a father, dad prep has become a real thing. Come race day morning, I’m always ready to take on the world (and wipe its ass with my extra baby wipes). The night before the race I was prepping goggles and I remembered that I have one pair of roll offs that stay in my goggle bag just in case. I switched to wearing Scott Prospect goggles 99% of the time a few years ago when I tested a pair and loved them. I bought a pair and they have always been tucked away in my bag. To me they are more like a “if all else fails” option that I never want to use because they came pre-assembled and to be honest, I didn’t know how to rebuild them if I ever got them muddy. That’s when it hit me, I had worn them last year at the Tecate sprint enduro (mind you I only pulled the string three times because I wasn’t used to wearing roll offs) and never rebuilt them. I knew if I rolled the dice and didn’t rebuild them before the race, I was for sure going to need them and if I used them without rebuilding them, I would surely runout of pulls because that’s how life works. So I cleaned off the bench, got out all the rebuild parts, laid out a towel and went to work.

IMG_5883.jpg

To my surprise, building the Works Film System was far more user friendly then I had anticipated. With the help of the how-to video on Scott’s website (https://www.youtube.com/watch?v=JZr_4zkb12Y)  it only took me about 10 minutes until they were ready to have muck thrown at them. The canisters are very easy to clip on and secure to the lens, the anti-stick grid pops right on and the pre rolled film comes with a little sticker to use on the opposite side so you don’t need additional tape.  There are only two challenging steps of rebuilding the WFS; the first is getting the roll started straight on the dirty side because if you don’t start it straight the film can start rolling off center and cause issues. The other is getting the top of the film under the “mud flap” all the way across the goggle. I’m sure those steps will become second nature after a few more mud races although that may take a few years living in southern California. 

IMG_5950-3.jpg

Just as the weather man said, as soon as morning practice came to an end and the national anthem was being sang, the skies opened up. As I headed to the line for my first moto I kept the goggles in their bag, tucked inside my riding raincoat (yes I’m an off-road guy who came prepared with many jackets, vests and raincoats). It’s funny how as racers we will take our nice clean bike to a mud race where we know the grit and grime is going to be mashed into every crevasse without batting an eye, yet as we go to the line, keeping our goggles and gloves clean and dry becomes more important than our first born child. As the gate dropped I quickly found that racing a 250f against 450s may have its advantages on some parts of the track, but the start straight at Glen Helen wasn’t one of them. Simultaneously I learned that once I was brave enough to take my hand off the bars and pull the string, the 50mm wide film on the WFS provides a larger view than most roll off systems. Luckily I pulled the string just in time to see more muck being thrown my way as the field of 450s seemed to be shrinking in size roaring into Talladega. The anti-stick grid that is between the lens and the film creates a small air gap so that if there is any moisture between the two surfaces, it doesn’t create any viewing distortion. In addition to the anti-stick function, the mud flap across the top creates an overlap so no moisture can come from above the film and create distortion. Throughout both moto’s that day, the WFS worked just as advertised and never left me in need of more clean film. The system can be bought separately for $40.00 or pre-installed on a set of goggles for $109.95. After spending my hard-earned money on the WFS, I am completely satisfied with the product and would recommend it to anyone who needs a straight forward roll off system with a wide peripheral field of vision. If you have any questions about the Scott WFS system feel free to reach out to me at Michael@keeferinctesting.com


Scott Prospect Goggle

Scott USA has the Prospect and it has been in circulation for over four years. Some of the standout features of the Prospect is a polycarbonate lens that is 1mm thick (versus 0.8mm thick like most other competitors lenses), the Scott lens locking system that consists of four locking pins that secure the lens to the frame of the goggle for safety (instead of feeding the lens into a groove and securing it with tabs), a wide peripheral frame, an updated two position outrigger system that can rotate to fit a wide range of helmet sizes, a No Sweat 3.2 foam, and a wider strap for better grip to the helmet.

I am kind of a pain in the ass when it comes to comfort with goggles and the Prospect goggle is one of only a few that I like. The No Sweat 3.2 foam against my face feels plush and soaks up enough of my sweat that it doesn’t drip inside the goggle on very hot days in the desert. There was no need to purchase any maxi pads products to add to the top of the goggle’s foam as it soaked up sweat adequately. The field of vision is very similar to the Oakley Airbrake as the Prospect goggle is as wide as its competitor. I have come to get accustomed to the peripheral vision I get with Oakley Airbrakes and the Prospect gives me a wide field of vision similar to that. It is however not so wide that it doesn’t fit in a wide variety of helmets. I went through several helmets while wearing the goggles (Shoei, Arai, 6D, Fly, Bell, Fox, Airoh) and the Prospect sealed to my face well in all of them. I did notice that the goggle does drop low on the nose, which took me some time to get used to. Compared to the other larger/wider framed goggles the Prospect will ride down almost to the edge of my nose and I have a large nose. Adjusting it to your face is key and I found the best way to get it to ride a little higher up on my nose was to get the goggle strap tighter and to remove the nose guard that the Prospect comes with. Doing this would allow the goggle to ride a little higher on my face and give me less pressure on the wider part of my nose. It didn’t affect the way it sealed to my face after doing so, but it did take a little longer than usual to find a way to position it correctly. So if you feel like the Prospect is riding a little low on your nose, try tightening the goggle strap a little more than usual. 

IMG_1033-2.jpg

Changing lenses out on the Prospect is fairly painless. You can switch lenses out by popping two locking pins out on top of the frame and two at the bottom. Once those are popped out, the lens comes out easily and I was able to stick another lens in under two minutes! I wore the Prospect at a couple races where I didn’t get the greatest of starts and the four-post tear off design takes a little more of a tug to rip them off. However, the way the tear offs lay and fold onto themselves makes it easy NOT to pull more than one at a time. With some other tear off designs there is not enough excess tear off (at the end) to find and pull (while riding), so you end up pulling two or three at a time. With the Scott Prospect tear off design, it gives you enough tail that you can feel it easily with gloves and rip only one tear off.

When it comes to wearing what I want on certain days I seem to gravitate towards Oakley Airbrakes. Yes, I know Airbrakes are expensive and I don’t think I could afford having four sets (if I had to purchase them myself) of those just laying around for me to wear. With the Scott Prospect goggle pricing (around $99.00 vs. a $160.00 Airbrake) I could actually afford a few pairs. I would also be getting the same wide peripheral vision, almost the same clarity through the lens and almost the same comfort. I say “almost” because of the low nose area with the Scott’s. However, the Airbrake’s have been known to fog up on me on colder days and the Prospect goggles are much better with not fogging. The lens on the Prospect is more resilient to getting scratched, as the Airbrake goggle lens scratches easier if you don’t keep tear offs on the lens at all times. I could wipe the Prospect lens with my glove while riding and it wouldn’t get nearly as scratched as the Airbrake lens. The winner of lens changes still goes to the Airbrake, but the Prospect is less painless and quicker than most of the other goggles that are out on the market. Replacement lenses are not cheap at around $18.00-$23.00, but they are less expensive than Oakley Airbrakes.  

IMG_1034-2.jpg

For around $99.95. I would consider this a very good wide peripheral goggle for the price. The field of vision, the comfort of the foam against my face, ease of finding the end of the tear off to pull efficiently and the convenience of replacing lenses make it a great buy. Setting up the goggle to fit up to your face might take you a couple rides to get comfy, but once you do you will agree that this is the best goggle Scott USA has made yet.


Tear-Off Gaskets

Tear-off Gaskets is a new patent pending product (Europe / US / Canada ) that will be available on the market by the end of 2020. The product was designed by a professional racer, for the everyday motorcycle enthusiast that rides in diverse weather conditions. The product itself starts with a biodegradable material that is compressible. The gasket is designed to sit 5mm in from the border of the laminated tear-offs. This helps the rider with clearer vision in the most extreme conditions. Tear-off gaskets are thick enough to create a compressible seal, yet thin enough to allow for a total of three laminated seven stacks with a gasket between each laminated stack. This allows riders to install twenty-one tear-offs, while ensuring that no foreign material will enter their field of vision. 

62637742463__EF865E71-D499-4B77-8FCD-D089E7699598.jpg

I ended up trying the Tear-Off Gaskets at the Dubya USA World Vet Nationals with my Oakley Airbrake’s and came away very impressed. Normally I am not a huge roll off kind of guy when it rains, so I thought the World Vet Championships would be a great way to try the product, since Mother Nature decided to bring the rain over the course of the day. Installing the gasket on the lens is not a huge process as well as stacking the laminates on literally took me only 10 minutes. I only used two gaskets and two stacks of laminates for a total of 14 tear offs. 

IMG_8019-3.jpg

During my first Moto the rain came and I was surprised that by the end of the 20 minute moto, I still had two tear offs left and clear vision! No water or debris made its way between my tear offs and with almost everyone else pitching their goggles, I was stoked to have my eyes free from mud. I will say that you can see the outline of the gasket though the lens, but it doesn’t really hamper your vision when riding that much. When I first put my Oakley Airbrake’s on, I thought I would have a problem with the gasket being so visible, but during the muddy moto, I barely noticed it. Being a California guy, I never thought I needed this, but now that I had the chance to test the Tear-Off Gaskets, I am re-considering having some on hand in the gear bag.  

Tear-off Gaskets are manufactured in Canada. The product will be sold "direct to consumer" and through Online Retailers/Dealerships. Tear-Off Gaskets will be available for 9 different motocross goggles to and will be available for purchase in a 5pk ($19.99 CAD) or a 20 pk ($39.99 CAD). To me this is an item every off-road and motocross racer should at least have in their gear bag, just in case!

Please stay tuned for the product launch at www.tearoffgaskets.com

If you have any questions, or wish to place a booking order, please contact them at tearoffgaskets@gmail.com

Alpinestars SM5 Helmet Review

Written/Tested By: Michael Allen

We’ve all done it, watched Supercross on a Saturday night while thinking “man that helmet that Tickle was wearing is bad ass, maybe I’ll go online and pick one up.” Then after adding it all to the on line cart, your wife walks by and notices the total, while simultaneously giving you the “you can stay out here on the couch tonight” look. Let’s face it, no matter what you tell your buddies, we all want to look good when we go riding. Unless you’re a soul rider then you really don’t give two shits, which we still respect. However, some of us are explaining to our wives why the Gucci bag she wants is a rip off, then in the next breath, you’re explaining to her that the $1,500 you’re spending on a custom painted helmet is purely about safety. It used to be that when you bought the “cheaper” gear it was obvious to everyone that you were too cheap to buy what you really wanted. As with most things in life times have changed for the budget minded rider. The “second tier price, second tier looks” scenario seems to be a thing of that past since companies like Alpinestars are now offering  product lines with top tier looks without breaking the bank.

image0-3.jpeg

When it comes to helmets, I think it’s safe to say that for years the general consensus has been the more you spend the more protection your head has. While I believe that’s true in the $0-$150 range, there comes a point at which the extra money isn’t necessarily giving you more safety, but maybe “different” safety, maybe more comfort, and other amenities. The Alpinestars SM5 Helmet Is a good example of not having to break the bank to keep your head looking good while staying protected. The new SM5 was designed and built using five years of research and implements new technology and procedures to make a safe and affordable helmet. The shell is thermo-injected with a special polymer that is different thicknesses throughout the helmet to maximize the protection for different impact forces and locations while keeping the helmet lightweight. The EPS liner uses five densities to ensure the correct impact absorption in the correct areas. There is a raised area to reduce the impact transmitted to the collarbone as well as a patented Visor Release System that allows the visor to break away at a pre-determined force no matter the angle of the impact. Other notable features include large ventilation ports front and back, elastic loops for hydration pack hoses, and and ERS system to safely remove the cheek pads by medical workers in case of emergency. 

keefer Astars gear-6297.jpg

Having spent a lot of time in the SM10, I was looking forward to trying the SM5. I always have the everyday rider in mind and I know that although safety comes first, price is still important when you have mouths to feed, yet still want to be safe when riding. After reading the press release I knew my head was going to be well protected although with any luck I wouldn’t have to test the safety of my new lid. When I opened the box I was pleasantly surprised with the quality and look of the helmet. Whenever I get a new helmet I always check to see how the pads come out since I wash them every time I ride. I am a stickler for ease of removal and unless it’s a really good system, I hate when companies try to reinvent the wheel with fancy fasteners, that make you feel like you’re going to rip the liner out because you can’t figure out how to unclip them. Luckily the SM 5 uses good old fashioned snaps which are simple in theory, but for some reason the snaps take A LOT of force to come undone and made me a little nervous that something else was going to give before the snaps came undone. The liner and cheek pad material aren’t made from anything fancy, but it feels adequate to the face without being uncomfortable. Although I hope I never have to use it, the Emergency Release System is a nice feature that allows for the cheek pads to be removed without un-snapping them. The 26mm chin strap is comfortable and the snap is easy to fasten and remove. 

When putting the SM5 on it seems that for the shape of my head the inside feels like its contacting my head in multiple places (like pressure points but not painful) instead of cradling it in one constant contact throughout my whole head. The best way to explain this is to imagine a net (the liner) with medium sized holes cradling a bowling ball (your head) compared to a pillow case cradling the same bowling ball. They both support the ball, but the pillowcase is making more contact than the net. I really only noticed this when putting the helmet on, but for some reason I didn’t notice it when riding (probably because I’m focusing on not crashing). The integration of the small elastic loops under the cheek pads (for a hydration system hose) is a great feature and I hope it catches on so we stop seeing people drill holes in their helmets to secure the hose with zip ties. When testing the SM5 I wore the Scott Prospect goggles as well as a set of Airbrakes, which both fit inside the eye port without any issues. Southern California’s climate has been scorching as of late and although I don’t feel like the ventilation was excessively great, I did notice that the air in the shell was moving and keeping my head semi-cool. The only real issue I have with this helmet (other than the lack of a plush feeling for my head) is the Visor Release System. This isn’t necessarily an issue with the SM5 specifically since Alpinestars uses the VRS system on multiple models; the issue I have is not being able to adjust the position of the visor. Being an off-road guy there are times when I need to look like a goon and push the visor, down at the end of a trail ride, when the sun is setting and with the SM5 I have no ability to do that. 

image1-12.jpeg

After riding with the SM5 for some time now, it’s shown itself to be a good offering from a great company. It’s awesome that there is a good looking helmet design mixed with eight different colorways that won’t break the bank coming in at $259.95. A medium SM5 also weighs in at 1260 grams so it’s not that heavy on the head when wearing it on longer motos. The bottom line is that the SM5 is a helmet that is not un-like one of its potential buyers; the blue collar worker. It doesn’t have all the frills of a top dollar helmet, but it looks good and is there with the right amount of protection when you need it; if you need it. If you have any questions about the Alpinestars SM5 feel free to reach out to me at Michael@keeferinctesting.com


On My Own Dime (Oakley Airbrake Goggles)

If someone was to pull the rug out from underneath me today and I was left with nothing in my garage, what would I replenish to start my moto life once again. I mean let’s face it, some of you may still think because I get free products/bikes/etc. that I will tell you everything is great. Well in case this is your first time here at Keefer Inc. we don’t exactly do that kind of thing. What if I was just like you and had to buy all my own shit, just so I could go riding with my buddies on the weekend. Once a week for the rest of 2020, I will talk about a product(s) that I would go purchase with my own money because it’s that good. Here is my second installment of O.M.O.D. 

If you are on the fence about what wide peripheral goggle to purchase you might want to check out this: https://www.keeferinctesting.com/gear-2/2019/6/3/goggle-shootout. I get a couple pairs of free Oakley Airbrake goggles from time to time, but I am far from a sponsored athlete or media guy. I purchase most of my Oakley products through RMATVMC and I do this because the Airbrake is by far my favorite goggle to wear with any helmet. I know what you might be thinking… Holy shit, I am not spending a $160.00 on a goggle. I totally understand this and I was that guy when the goggle was introduced. I thought it was obscured to spend that much money on a goggle. However, once I tried them and noticed how crisp/clear their injected molded lens was, how much ventilation I got, how good the foam was, as well as how much of the track I could view, I was hooked! 

CUD-2376.jpeg

Oakley took a different approach to the goggle market when developing the Airbrake goggle back in 2013. They used different technology and put a pricepoint out there that most consumers just disregarded. In fact, I was one of those people! There was no way I could justify spending $160-200 bucks on a pair of goggles. Fast forward to today and wide peripheral, rigid frame, higher priced, HD lens goggles are the norm. The beauty of the Airbrake is the speed of changing lenses and clarity of the lens technology. The Switchlock system is the best in the business and it really relieves any headache of several lens changes. There are two lugs that center the lens on the frame and the levers lock it in place, that’s it! The PRIZM technology is similar to 100%’s HiPER technology and are very similar looking when riding, but comparing clear lens to clear lens, the Oakley Airbrake simply has more clarity than others. Vision and field of view are also the best in class. I get a slightly wider peripheral view when riding, but it’s only very minimal and may not be noticed by others, but since I have had so many back to back days with all of types goggles, I can nitpick this a little more. The Oakley’s frame fits into all the helmets I have tested in and sealing was never an issue. The face foam is comfortable as well as thick and that can soak up a good amount of sweat before dripping into the lens. Yes, they can still drip into the lens! 

The ventilation on hot days is superb, but on colder days the lens has a tendency to fog up more than I would like so a no fog cloth is key on colder days. I also notice that my eyes get watery on faster tracks due to the amount of airflow that come through the vents. This could be where the ports are placed on the frame and flow the air into my face. This was only felt on extreme fast GP style tracks. Do yourself a favor and possibly seal the vents with a light coating of baby oil if you’re riding dusty or very fast conditions to keep your eyes from watering. On normal motocross style tracks this was a non-issue.  

IMG_9852-2.jpg

The lens itself is very delicate and can’t take much abuse. I seem to scratch both  PRIZM and clear lenses easier on the Oakley Airbrake than the Armega or Prospect. You will have to make sure to leave a tear off on the lens of the Airbrakes if you want to extend the life. The overall fit and feel of the Airbrake feels lighter and more compact even though the numbers on paper may not suggest that.

Goggle Price: $140.00-$200.00

Bonus Lens: No

Replacement Lens Price: $25.00 clear $50.00 PRIZM lens

Weight: 135 Grams

Fogging Issues: At Times, Yes When Cold

Laminate Tear Offs: Yes

IMG_3659.JPEG

Positives:

• Simple to swap lens out

• Fit/Feel

• Clarity with several tear offs installed

Negatives: 

• Lens scratches easily 

• Price

• Fogging issues


On My Own Dime (Leatt Knee Brace Pant)


By Michael Allen:

Seeing as I’ve been helping Keefer Inc. since 2017 it should be no surprise that most of the things I use for my hobby are either test items that in lieu of paying money for, I get to write reviews on. I am super grateful that I have this opportunity (as is my wife) but there are certain items that if I’m not able to test, I will either stop by the local bike shop, or go online to spend my hard earned money to get my hands on. When it comes to informing readers/listeners about products either good or bad I take what I do very seriously. The reason for that is my full time job as a welder/fabricator in the R&D department at Total Chaos Fabrication isn’t cushy, I don’t necessarily sit in an A/C office all day. Especially on days in the mid-summer when its 106° and I’m sweating my balls off welding, I feel as though I earn every penny. So when I come across a product that I’m willing to spend my money on, it damn well better be worth every penny. 

IMG_3894.jpg

When it comes to knee braces, I’ve seen riders try everything; under shorts, long socks, long pants or hell just going commando. It took me many years to finally catch on that with my bad knees I should be wearing braces, but when I did, I had the dilemma of what the hell to wear underneath. After trying all of the previously listed solutions (ok, ok, I never tried going commando) I was left unsatisfied and at the end of every moto I found myself always pulling up my knee braces. I dealt with that until Leatt sent me some gear to test and just so happened to throw in a pair of their Knee Brace Pants. (https://www.leatt.com/shop/catalog/product/view/id/2922/s/knee-brace-pants/category/738/) I figured I had nothing to lose right?. After the first moto it was clear that the solution to my problem had been found. The material breathes nicely and has built in panels to protect the pants from the abuse of squeezing the bike with your knees. The Velcro never lacked the ability to stay attached (although the stitching holding the Velcro down did start to unravel towards the end of their life) and the elastic never got stretched out over time. They worked with multiple brands of braces and even if you are a brand loyal/ a non-mix and match rider, you’ll never see them under the riding gear of your choice.

I mean, I can’t believe he doesn’t wear socks? -KK

I mean, I can’t believe he doesn’t wear socks? -KK

  I wore that same pair of under pants literally every time I rode for over a year until they started showing signs of fatigue and needed to be replaced. In the end they had a small rip at the seam of the butt. When those wore out, there was no question in my mind that I needed another pair, the only problem was I forgot to reach out to Leatt. I didn’t remember until the Friday before Saturdays race and I really didn’t feel like wearing my back ups and ending up with a raw rectum. Seeing as it was too late to place an online order with RMATVMC.com, I stopped by my local dealer (Malcolm Smith Motorsports) and picked up a new pair. To me there is nothing worse than feeling like you paid too much for a product, or are just unsure you made the right choice having spent your hard earned money. The antithesis of that was not batting an eye when I handed the cashier my money because I knew this was money well spent. I am on my second pair and they are still going strong, that being said, I still kept my old, ass torn pair in the bottom of my gear bag just in case I ever forget my new set (I have twice now). If you have any other questions about these pants, or if you too need a solution to your raw rectum, feel free to reach out to me at Michael@keeferinctesting.com

Leatt Knee Brace Pants 

MSRP $79.00

  • Retains knee braces in correct position and helps prevent any knee brace from slipping down

  • Strategically placed knee brace reinforcement panels

  • Flatlock stitching for extra comfort

  • New anti-odor MoistureCool and AirMesh wicking fabrics

  • Super soft knitted waistband with silicone grip

  • Knee alignment design

  • Velcro adjustable brace cover sock

  • Designed for all knee brace brands

  • Size

    • #XS/S US28-31/EU44-46

    • #M/L US32-35/EU48-50

    • #XL/XXL US36-39/EU52-56


On My Own Dime/Time (Fly EVO DST Gear)

If someone was to pull the rug out from underneath me today and I was left with nothing in my garage, what would I replenish to start my moto life once again. I mean let’s face it, some of you may still think because I get free products/bikes/etc. that I will tell you everything is great. Well in case this is your first time here at Keefer Inc. we don’t exactly do that kind of thing. What if I was just like you and had to buy all my own shit, just so I could go riding with my buddies on the weekend. Once a week for the rest of 2020, I will talk about a product(s) that I would go purchase with my own money because it’s that good. Here is our first installment of the 2020 O.M.O.D. 

It’s no secret that I am a huge believer in Fly Racing products. This is not to say that other gear manufacturers will not make the O.M.O.D list in 2020, but I thought it was fitting to start here. I am a gear snob and love a nice feeling set of gear so without further adieu, the first set of gear I am buying is a set of Fly Racing EVO DST. 

JA2_9111.JPG

Although I love me some Fly Lite gear, my new love has come in the way of the EVO DST line. The EVO pant still has that slimming type of fit, but is still stretchy enough that my size 38 tester doesn’t feel bunched up when his fat roll jiggles a little bit when riding out of the pits. The EVO pant delivers a lightweight feel has an enough room in the waist area just in case your in between a size and is durable as hell! I previously only had a couple weeks in last year’s (2019) DST line and although the cut hasn’t changed in 2020/2021, to me it feels like there is less bunching in the knee area than in 2019. I like that the BOA is on the back of the pant still, as I can still easily get my pants on/off just in case I am super hydrated at a race. I mean when you’re at a race, with nerves flowing and your super hydrated, you will be visiting your favorite relief spot a few times. The EVO pant also stays secured to my waist via the BOA and for me it prevents the yolk of the pant from moving too much when accelerating out of corners hard on the seat. I know it’s not very common to get a lot of ventilation through a pant, but to me the Fly Racing EVO pant does a good job of giving enough air flow to surrounding regions that require some air conditioning. The leather on the knee area is tough enough to withstand my CTi knee brace hinges without eating a hole through them and they also DO NOT mark up my shrouds when squeezing the bike. To sum it up, I feel like I get a lot of comfort out of this pant when I am on the bike with a blend of durability.  

Keefer inc Testing-2972.jpg

The EVO jersey is a key part to this equation here. I can’t have a great pant with a jersey that is rough against my skin, baggy or has an arm length that bunches up against my glove. The EVO DST jersey lays nicely over my shoulders and has a neck that doesn't ride up too high. Some jerseys ride too high up on my neck and end up chafing the back of my neck area, but the EVO doesn’t. The stretch and mobility that I get with the DST allows me to move around on the bike freely with enough air flow to make me happy in the summer months here in Southern California. Although it does have a Pro Fit, it’s still roomy enough for that XXL crowd as well. 

The Fly Racing EVO DST pant and jersey have great durability and has come a long way in the past few years. If you’re looking for durability with comfort, this line of gear could become your favorite rather quickly. If I had to replenish my gear bag with my own money a set or two of this gear would last me a season or two of riding without an issue. 

IMG_0122.JPG

I am happy to put my money where my mouth is so the first three people to send me a copy of their receipt of their EVO DST pant/jersey order on RMATVMC.com through my banner right here on keeferinctesting.com will get fully refunded on their order! 

EVO DST PANT PRODUCT DETAILS: $199.95

DST (Durable Stretch Technology) constructed of four-way HEX-Stretch fabric provides excellent mobility with heavy-duty durability

Laser-cut perforations in key areas for advanced airflow

Strategically placed stretch-mesh ventilation areas

Relaxed leg cuffs

Exclusive four-way HEX-Stretch fabric construction is flexible and tough

Leather heat shield panels with DuPont™ Kevlar® stitching

Seat panel sewn to breathable light mesh reduces pulling

Advanced Lycra® liner adds increased comfort and performance

The Boa® System offers fast, on-the-fly micro adjustability

Ratcheting fly closure allows for adjustability

Ergonomically pre-shaped knee accommodates most knee braces and guards

Full-Floating durable 900D seat surrounded by HEX-Stretch material moves naturally with your body

Exclusive zipper lock system keeps pants closed and secure

JERSEY PRODUCT DETAILS: $59.95

Laser-cut perforations for advanced ventilation

Full mesh back and integrated mesh in key areas

Zero-cuff arm openings provide unrestrictive mobility, and a comfortable fit

Multi-directional Lycra® neck and shoulder panels

Low profile multi-panel construction for maximum performance and a comfortable fit

Seamless armpit construction, with a single-continuous stretch mesh panel from the sides to cuffs which helps prevents underarm rubbing and irritation

Silicone-printed tail keeps jersey tucked in

Pro fit: ergonomic arms created for riding position, with a slim cut