Protection

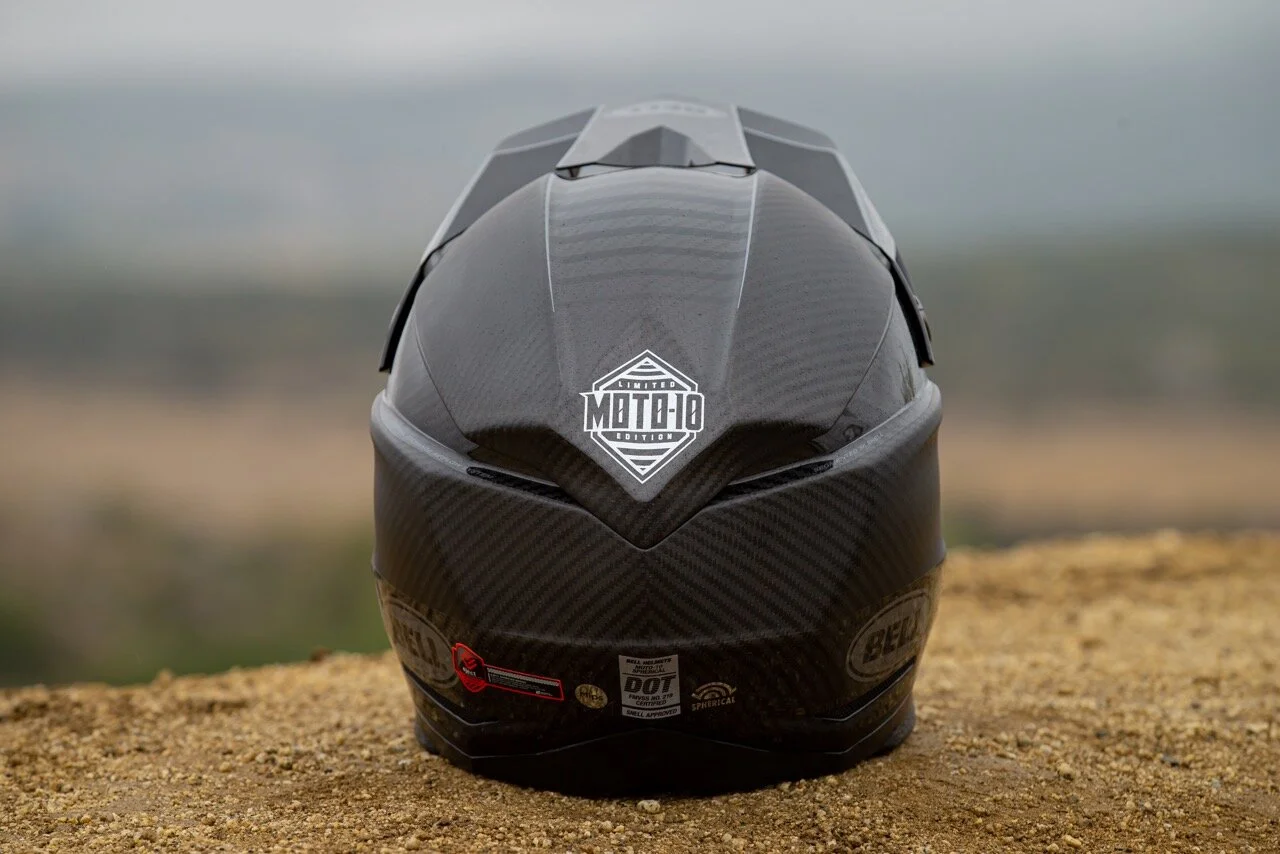
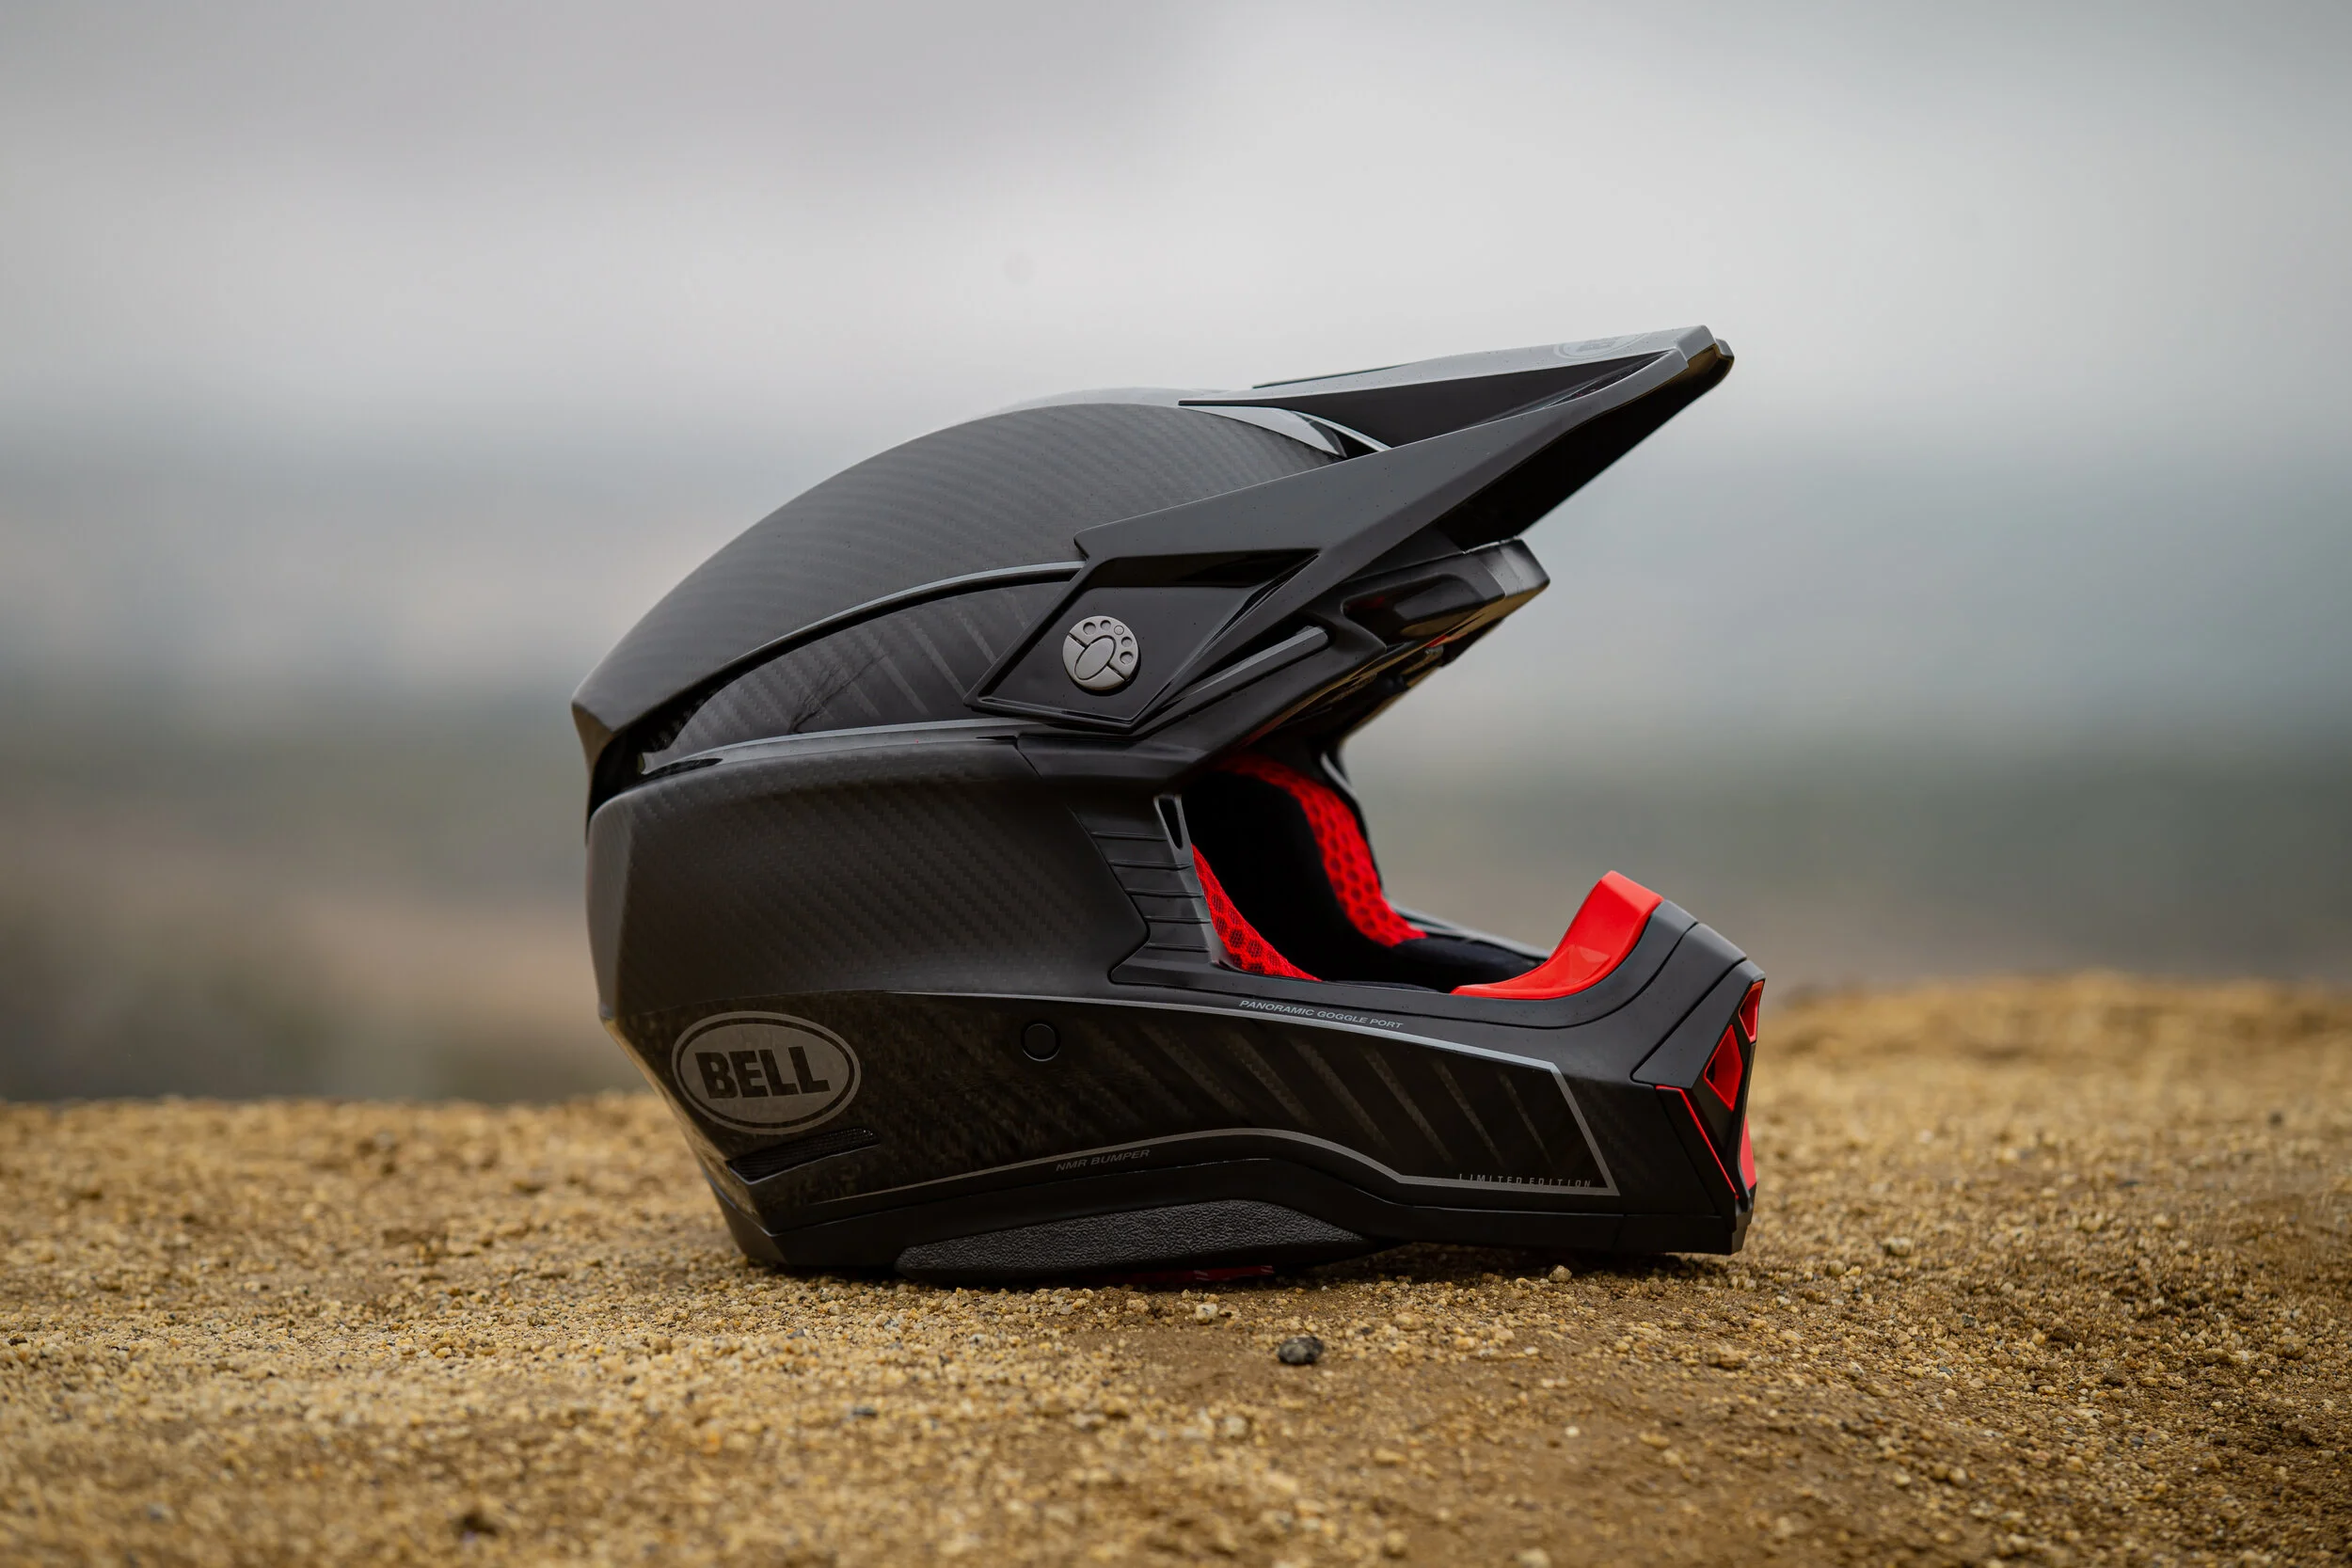
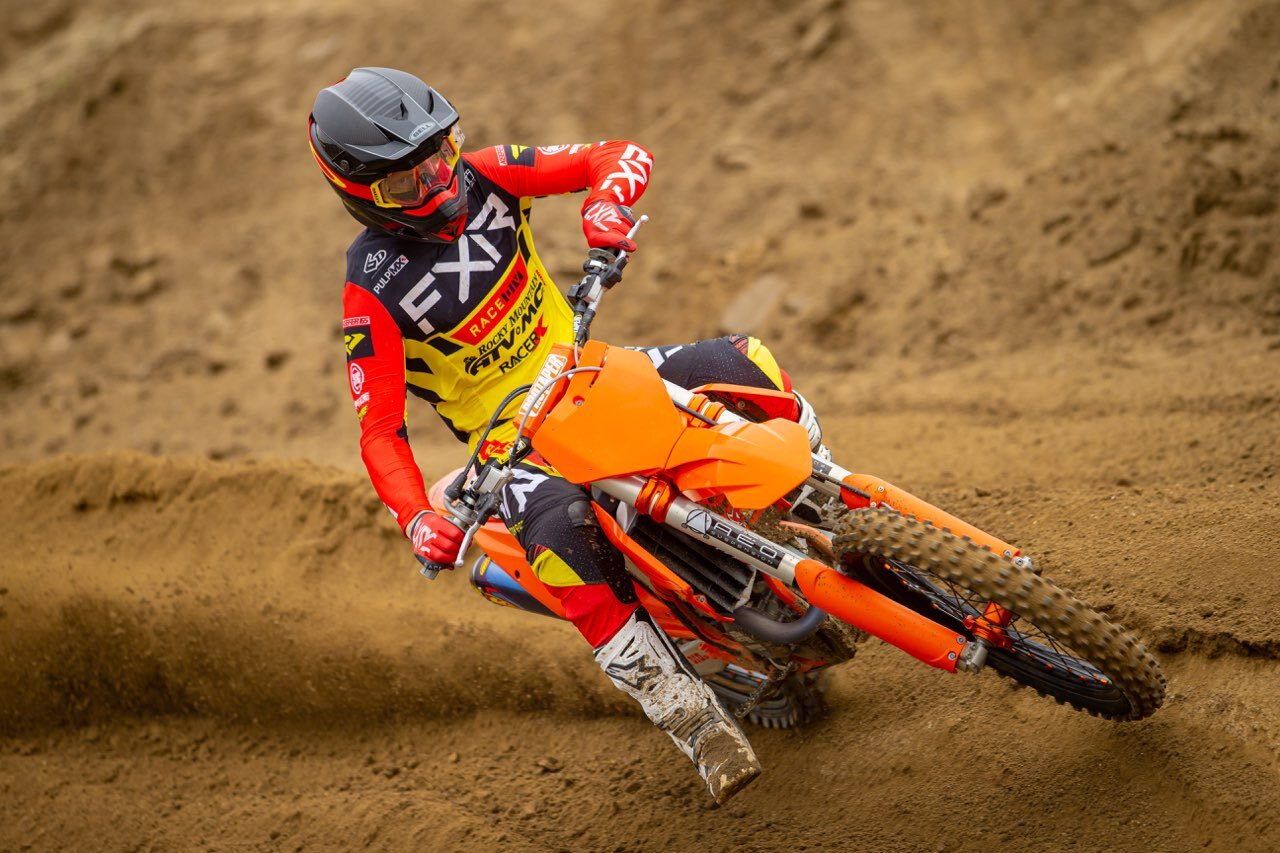
Bell Moto 10 Product Review (First Impression)

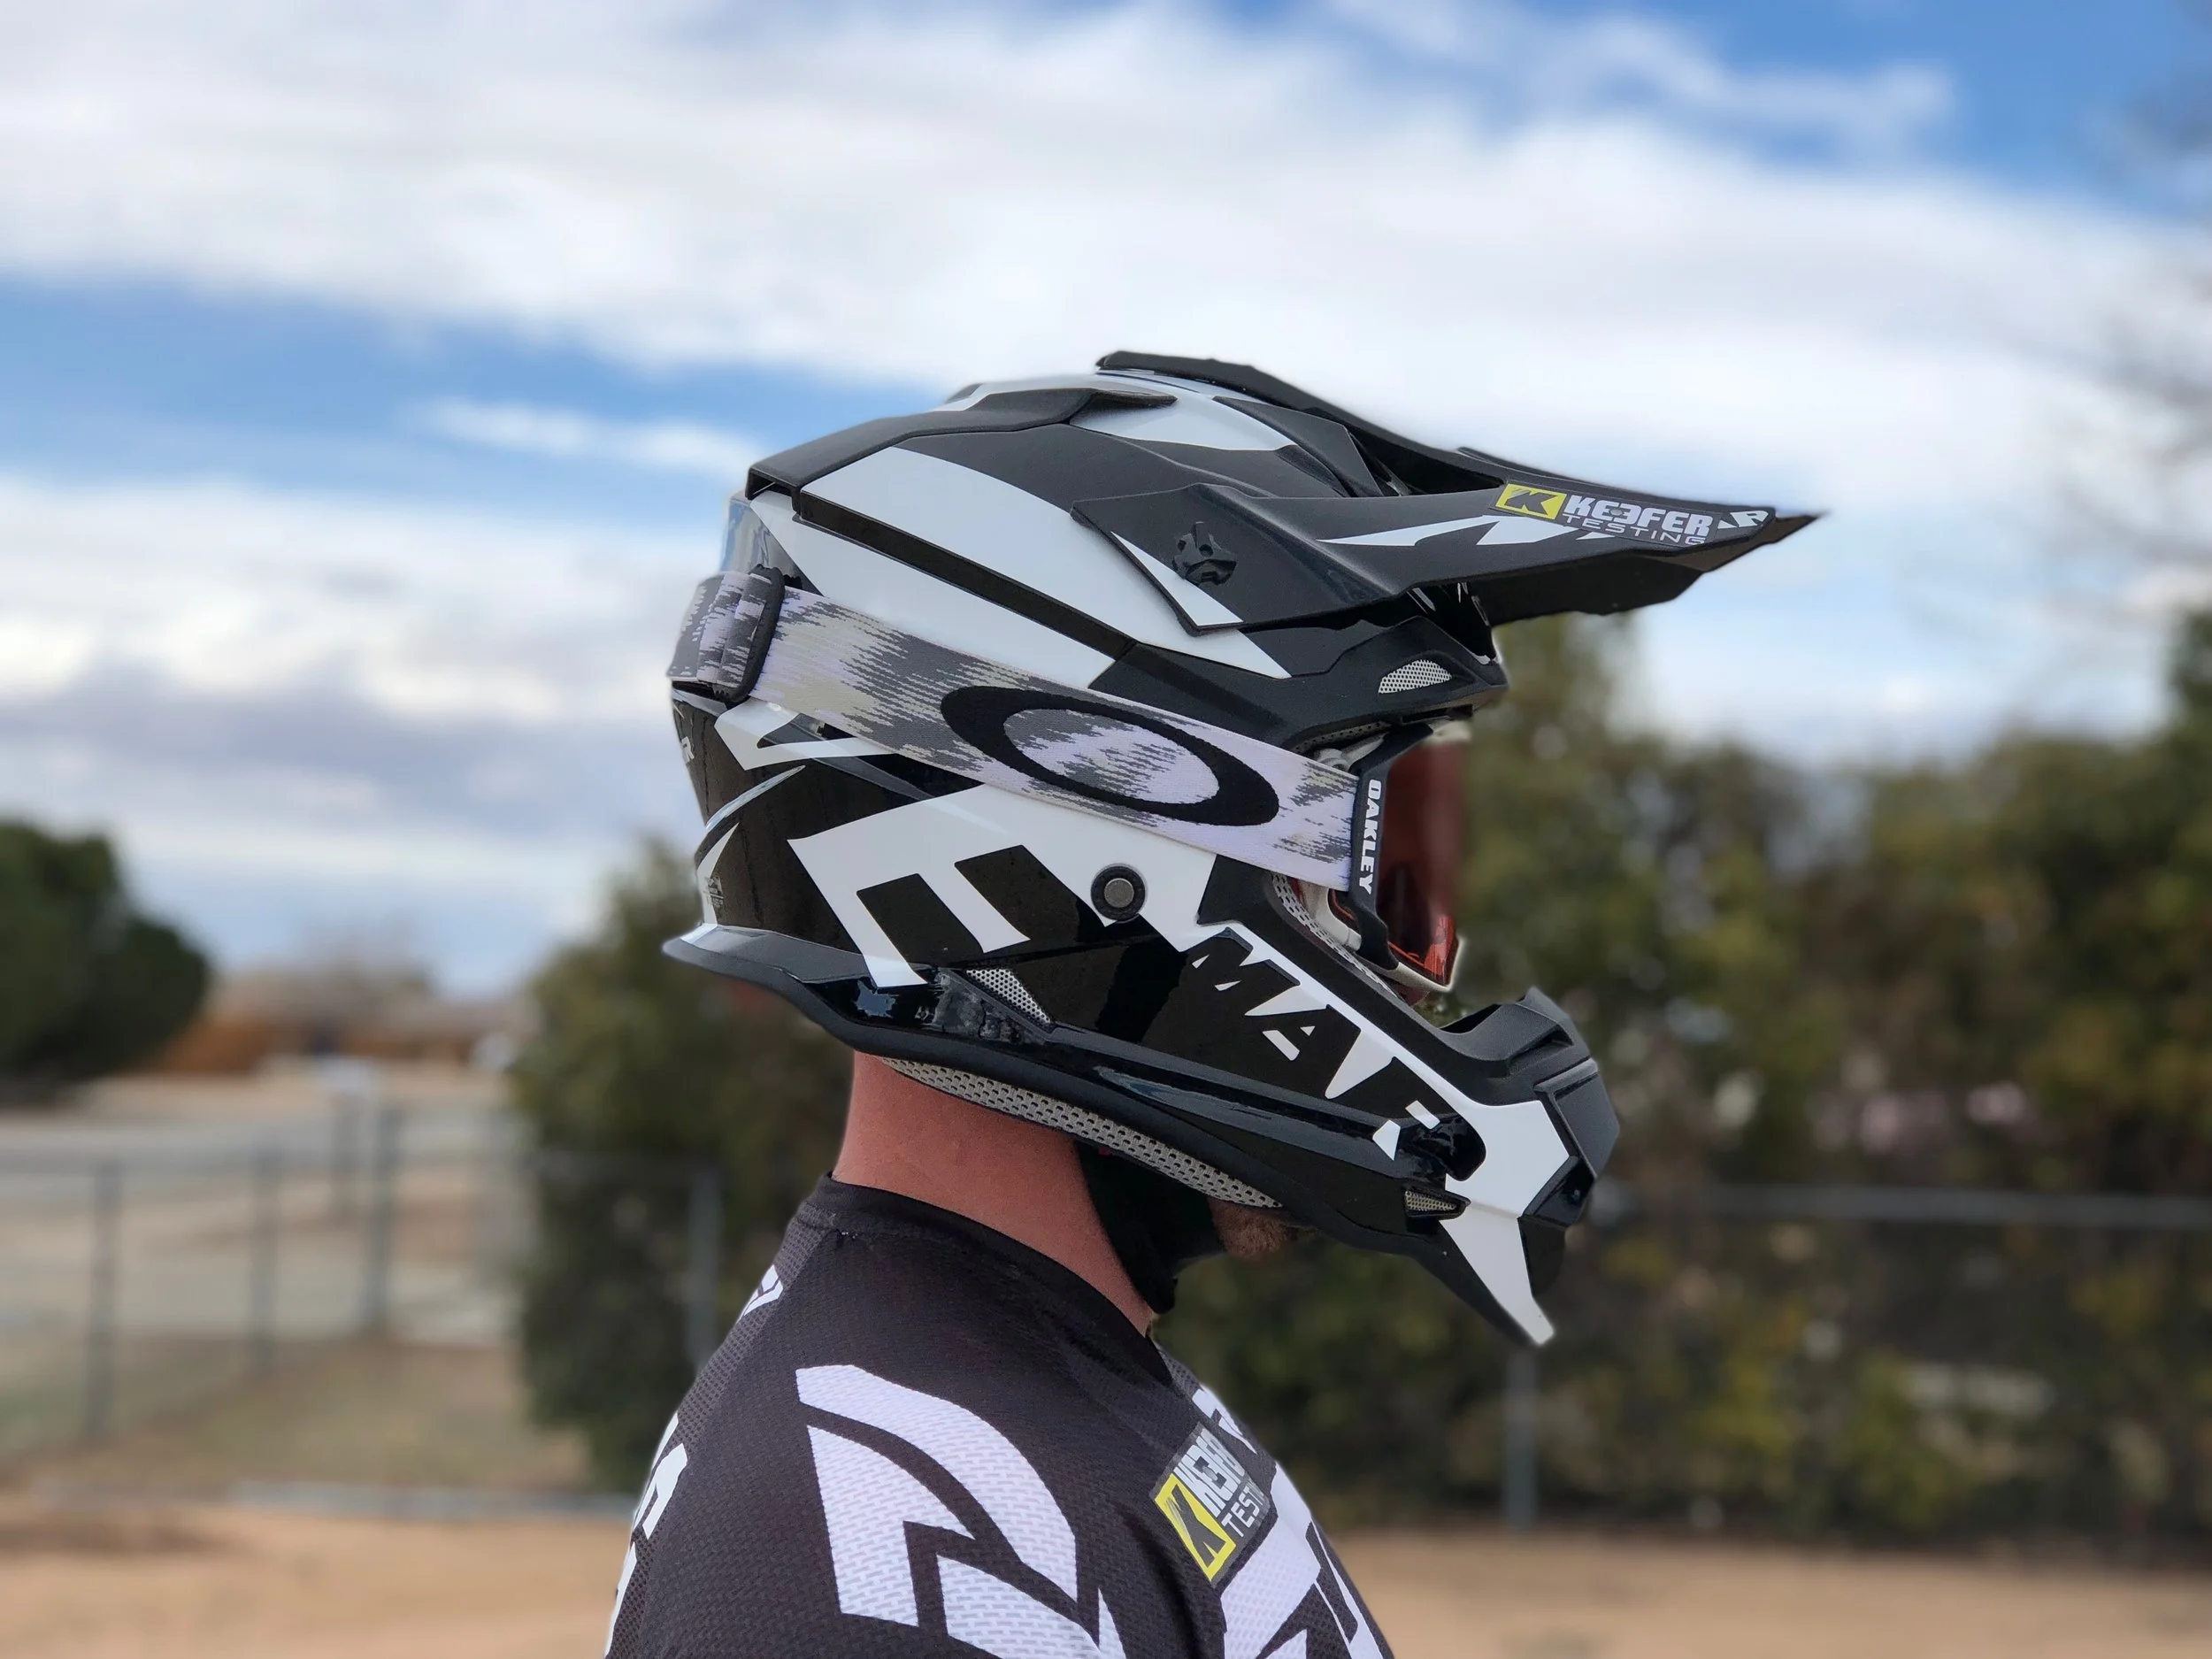
I have been able to put enough time in the Bell Moto 10 helmet to give you a proper first impression, but before I do that, let me give you some background on my history of wearing Bell Helmets. Growing up in the high desert one of the perks is that I got to ride everyday after school from the house. Usually that meant getting off the bus, walking home, doing my chores/homework, and then immediately going to my favorite dez track to ride. After years of doing this, my mom had to witness me coming home with broken bones, a bloodied face, and the occasional missing skin, but what she didn’t see was a kid with a concussion. My dad was always adamant about putting me in Bell helmets when I was younger to keep me safe. I was raised in a Moto 3, 4, and 5 kid growing up because that is what my father believed in. Soon thereafter, when I had to spend my own money on helmets, I ventured out and tried other brands with some success, but I always remember my younger days in those Bell helmets. 

BELL_INTRO_OWENSCE8U4346.jpeg
BELL_INTRO_OWENSCE8U4367.jpeg

Spherical Technology

Spherical Technology, powered by MIPS®, helps redirect impact forces, bringing market-leading design, performance and brain protection together without compromising comfort, ventilation, weight or style.

Ball-and-Socket Design

Spherical Technology’s ball-and-socket design helps redirect impact forces away from the brain by allowing the outer liner to rotate around the inner liner during a crash.

MIPS®-Equipped

MIPS stands for Multi-directional Impact Protection System, which is a leading slip-plane technology inside the helmet designed to reduce rotational forces that can result from certain impacts.

Segmented 3K Shell Technology

Special shell design that provides a large exhaust vent that expels hot air out of the helmet, ensuring the rider stays comfortable and cool.

No Missed Races Bumpers

Using a softer EPP material, two bumpers on either side of the helmet compress under load but bounce back to its original form, reducing the likelihood of further injury caused from the helmet contacting your body.

Panoramic Goggle Port Technology

A wider port provides better fitment, optimal sealing, and a massive field of view, increasing the rider’s visibility and safety when needed most.

Magnefusion Cheek Pad Emergency Release System

Allows for easy removal of the pads for washing and enables emergency responders to easily remove the cheekpads first before removing the helmet following an impact.

Sweat Management

With the combination of the T.E.A. System, Spherical venting channels, and Segmented shell, we created the ability to force perspiration across the rider’s brow—away from their goggles—preserving vision late in a race.

Virus CoolJade™ Comfort Liner

This removable, washable liner is made of recycled jade fabric to create a natural cooling effect. The ultra-wicking construction combined with CoolJade-infused yarn decreases your skin surface temperature up to 10˚ F, keeping you cool, comfortable, and focused on the race at hand.

Flying Bridge Visor

This visor design allows more flexibility and improves airflow across the helmet. By not using a traditional center post and screw concept, we’re able to increase the amount of energy-management material in a high-impact zone.

Thoughts:

So after spending a couple weeks riding in the new Moto 10, I am pleasantly surprised on how much more comfortable this helmet is for my head shape (I have more of a round head). Even though the weight of the helmets remains close to the same, the weight distribution of the Moto 10 feels evenly dispersed. The Moto 9 felt heavy directly on top of my head, but the Moto 10 feels much lighter when riding longer Motos. The Moto 10 fits snugger initially when riding with it brand new, but slowly breaks in and wraps around my face much more than the Moto 9 did. The way the helmet encompasses my head feels more secure and tighter in a good way (similar to an Arai VX-Pro 4). The liner/cheek pads have more comfort to them, are softer to the skin and overall just has more of a hug like feel that wraps around your cheeks (similar to a road racing helmet). The Moto 10 eye port now allows the rider to choose wide peripheral goggles as my Oakely Airbrake’s and 100% Armega’s seal much better to my face than they did with the Moto 9.

Ventilation is improved as the Moto 10 can cool your head down better than the Moto 9 on hotter days. Even though I assumed what Bell was explaining to the media about their ventilation system was just marketing BS, the Moto 10 actually can push sweat away from your goggles. I let one of my well known testers (that sweat profusely when riding) try the Moto 10 on a hot day at Glen Helen and he was blown away that his less than stellar goggle foam didn’t get soaked with sweat. (Editors Note: I am not much of a sweater, so that had to get put to the test by one of my guy’s). One of the other aspects that some other media outlets do not talk about is outside noise. Some helmets are louder than others, but the Bell is surprisingly quiet for how much ventilation it provides. Usually when I get a helmet that ventilates well, it is loud to the outside world, but the Moto 10 is in the top three helmets I have worn lately that muffles out bike noise.  

BELL_INTRO_OWENSCE8U4315.jpeg

If there is one negative that rolled over from the Moto 9 is that the chin bar area of the helmet is still close to my face/nose and when you wear certain goggles, the frames of those goggles damn near stick out passed the chin bar area of the helmet. It doesn’t hinder anything, but can look strange if you’re not used to it. Overall, my initial impression is that this Moto 10 is a much better Bell than the Moto 9. This is a helmet that I could actually live/want to ride with and with the updated tech along with the MIPS technology, I could actually believe/trust in its protection. 

Positives:

• Quality – You’d expect an excellent quality of finish on a $800 helmet, and this thing delivers. With a carbon compose shell, it’s both lightweight (around 1300g) and strong. As an added nice touch, it comes in a cool padded carry bag.

• Style – Aside from the cool carbon finish, it’s a good-looking lid with a contoured shell shape.

  • Comfort/Fit – The sophisticated impact liner and soft padding produces an exceptionally good fit. In fact, you can feel the liner actually mold to your head shape once you put it. In other words, it gives you a more personalized, form fitting helmet

• The Padded Liner – With its uncomplicated design (no tabs, just four plastic clip-studs), the liner is simple and easy to remove/replace. And in addition to being convenient, the magnetic cheek pads are a real advantage in the case of an emergency.

• Ventilation – This helmet flows Ari extremely well. The way it forces out sweat is something we have never felt before in a motocross helmet. 

• Attention to Detail – The stainless steel mesh that’s used in the chin-piece and ventilation exhaust ports is stylish. I absolutely love the magnetic tip in the fastening strap. This makes it extremely easy to secure with gloves on. The built-in Eject Helmet Removal System cavity in the liner means there’s no need for any modifications to fit this system (which is now mandatory for racing in many countries).

Negatives:

• Visor Screws – They have an inventive design (they’re recessed, designed with breakaway tabs, flick out to use and then back to flush), but with only two lateral screws, you have to run them super-tight to keep the visor fixed in place. The visor will not move when riding, but getting the visor to a correct position (before riding) without looking like you have dune goon syndrome is tough to do.  

• The Chin-Bar – The shell’s compact design puts the chin-piece close to your mouth, this can accelerate goggle fogging in wet/cold conditions if you start to breathe heavily. Removing the nose guard helps this however. I would prefer a slightly longer chin bar area however. 

BELL_INTRO_OWENSCE8U4635.jpeg

Alpinestars SM5 Helmet Review

Written/Tested By: Michael Allen

We’ve all done it, watched Supercross on a Saturday night while thinking “man that helmet that Tickle was wearing is bad ass, maybe I’ll go online and pick one up.” Then after adding it all to the on line cart, your wife walks by and notices the total, while simultaneously giving you the “you can stay out here on the couch tonight” look. Let’s face it, no matter what you tell your buddies, we all want to look good when we go riding. Unless you’re a soul rider then you really don’t give two shits, which we still respect. However, some of us are explaining to our wives why the Gucci bag she wants is a rip off, then in the next breath, you’re explaining to her that the $1,500 you’re spending on a custom painted helmet is purely about safety. It used to be that when you bought the “cheaper” gear it was obvious to everyone that you were too cheap to buy what you really wanted. As with most things in life times have changed for the budget minded rider. The “second tier price, second tier looks” scenario seems to be a thing of that past since companies like Alpinestars are now offering  product lines with top tier looks without breaking the bank.

image0-3.jpeg

When it comes to helmets, I think it’s safe to say that for years the general consensus has been the more you spend the more protection your head has. While I believe that’s true in the $0-$150 range, there comes a point at which the extra money isn’t necessarily giving you more safety, but maybe “different” safety, maybe more comfort, and other amenities. The Alpinestars SM5 Helmet Is a good example of not having to break the bank to keep your head looking good while staying protected. The new SM5 was designed and built using five years of research and implements new technology and procedures to make a safe and affordable helmet. The shell is thermo-injected with a special polymer that is different thicknesses throughout the helmet to maximize the protection for different impact forces and locations while keeping the helmet lightweight. The EPS liner uses five densities to ensure the correct impact absorption in the correct areas. There is a raised area to reduce the impact transmitted to the collarbone as well as a patented Visor Release System that allows the visor to break away at a pre-determined force no matter the angle of the impact. Other notable features include large ventilation ports front and back, elastic loops for hydration pack hoses, and and ERS system to safely remove the cheek pads by medical workers in case of emergency. 

keefer Astars gear-6297.jpg

Having spent a lot of time in the SM10, I was looking forward to trying the SM5. I always have the everyday rider in mind and I know that although safety comes first, price is still important when you have mouths to feed, yet still want to be safe when riding. After reading the press release I knew my head was going to be well protected although with any luck I wouldn’t have to test the safety of my new lid. When I opened the box I was pleasantly surprised with the quality and look of the helmet. Whenever I get a new helmet I always check to see how the pads come out since I wash them every time I ride. I am a stickler for ease of removal and unless it’s a really good system, I hate when companies try to reinvent the wheel with fancy fasteners, that make you feel like you’re going to rip the liner out because you can’t figure out how to unclip them. Luckily the SM 5 uses good old fashioned snaps which are simple in theory, but for some reason the snaps take A LOT of force to come undone and made me a little nervous that something else was going to give before the snaps came undone. The liner and cheek pad material aren’t made from anything fancy, but it feels adequate to the face without being uncomfortable. Although I hope I never have to use it, the Emergency Release System is a nice feature that allows for the cheek pads to be removed without un-snapping them. The 26mm chin strap is comfortable and the snap is easy to fasten and remove. 

When putting the SM5 on it seems that for the shape of my head the inside feels like its contacting my head in multiple places (like pressure points but not painful) instead of cradling it in one constant contact throughout my whole head. The best way to explain this is to imagine a net (the liner) with medium sized holes cradling a bowling ball (your head) compared to a pillow case cradling the same bowling ball. They both support the ball, but the pillowcase is making more contact than the net. I really only noticed this when putting the helmet on, but for some reason I didn’t notice it when riding (probably because I’m focusing on not crashing). The integration of the small elastic loops under the cheek pads (for a hydration system hose) is a great feature and I hope it catches on so we stop seeing people drill holes in their helmets to secure the hose with zip ties. When testing the SM5 I wore the Scott Prospect goggles as well as a set of Airbrakes, which both fit inside the eye port without any issues. Southern California’s climate has been scorching as of late and although I don’t feel like the ventilation was excessively great, I did notice that the air in the shell was moving and keeping my head semi-cool. The only real issue I have with this helmet (other than the lack of a plush feeling for my head) is the Visor Release System. This isn’t necessarily an issue with the SM5 specifically since Alpinestars uses the VRS system on multiple models; the issue I have is not being able to adjust the position of the visor. Being an off-road guy there are times when I need to look like a goon and push the visor, down at the end of a trail ride, when the sun is setting and with the SM5 I have no ability to do that. 
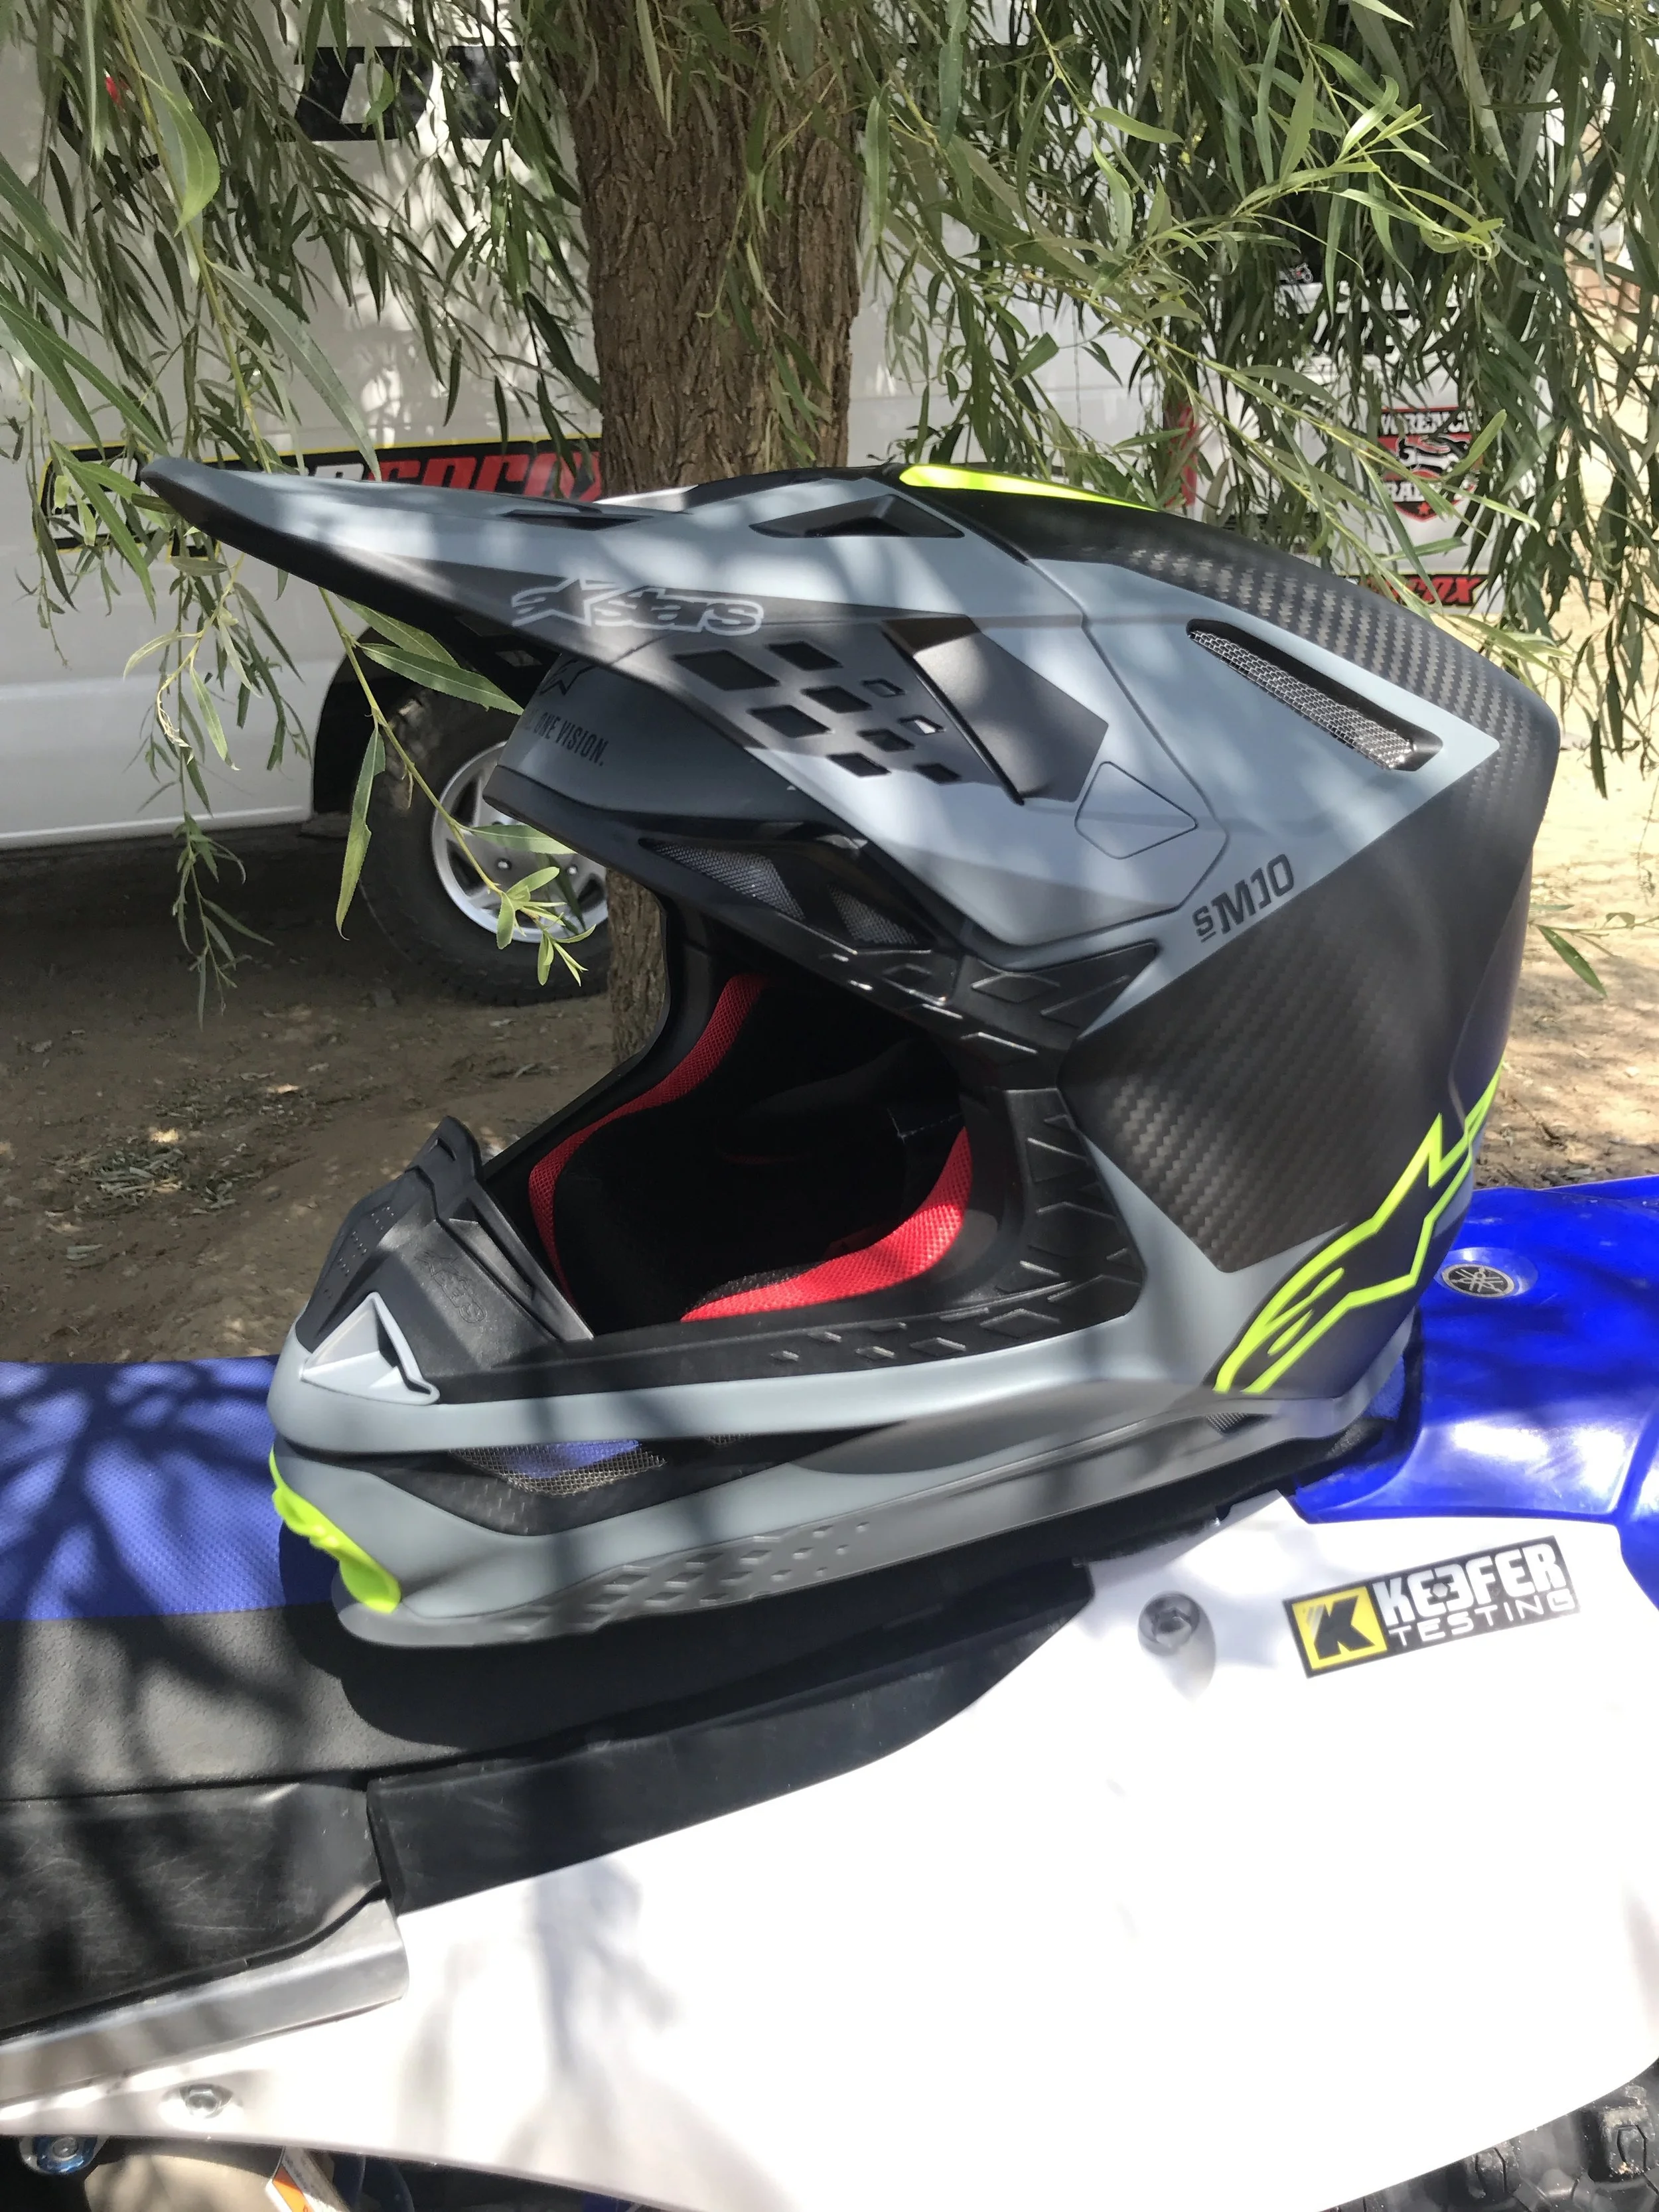
image1-12.jpeg

After riding with the SM5 for some time now, it’s shown itself to be a good offering from a great company. It’s awesome that there is a good looking helmet design mixed with eight different colorways that won’t break the bank coming in at $259.95. A medium SM5 also weighs in at 1260 grams so it’s not that heavy on the head when wearing it on longer motos. The bottom line is that the SM5 is a helmet that is not un-like one of its potential buyers; the blue collar worker. It doesn’t have all the frills of a top dollar helmet, but it looks good and is there with the right amount of protection when you need it; if you need it. If you have any questions about the Alpinestars SM5 feel free to reach out to me at Michael@keeferinctesting.com


Asterisk Zero G Pant Re-Visit


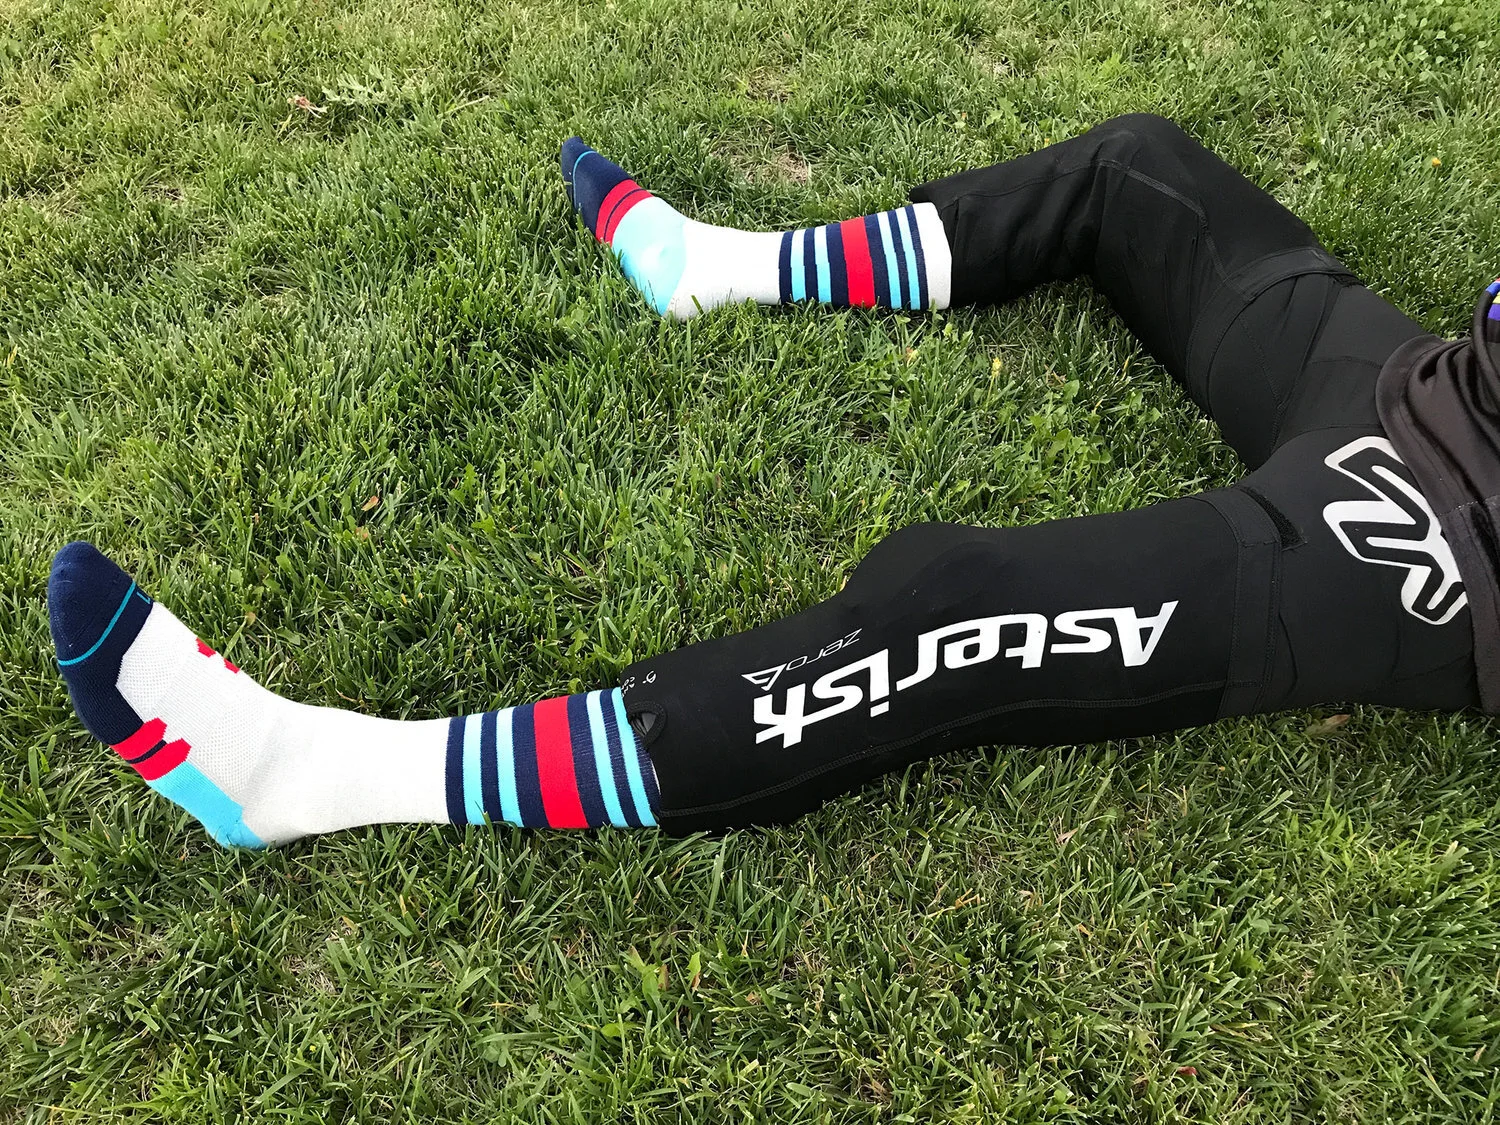
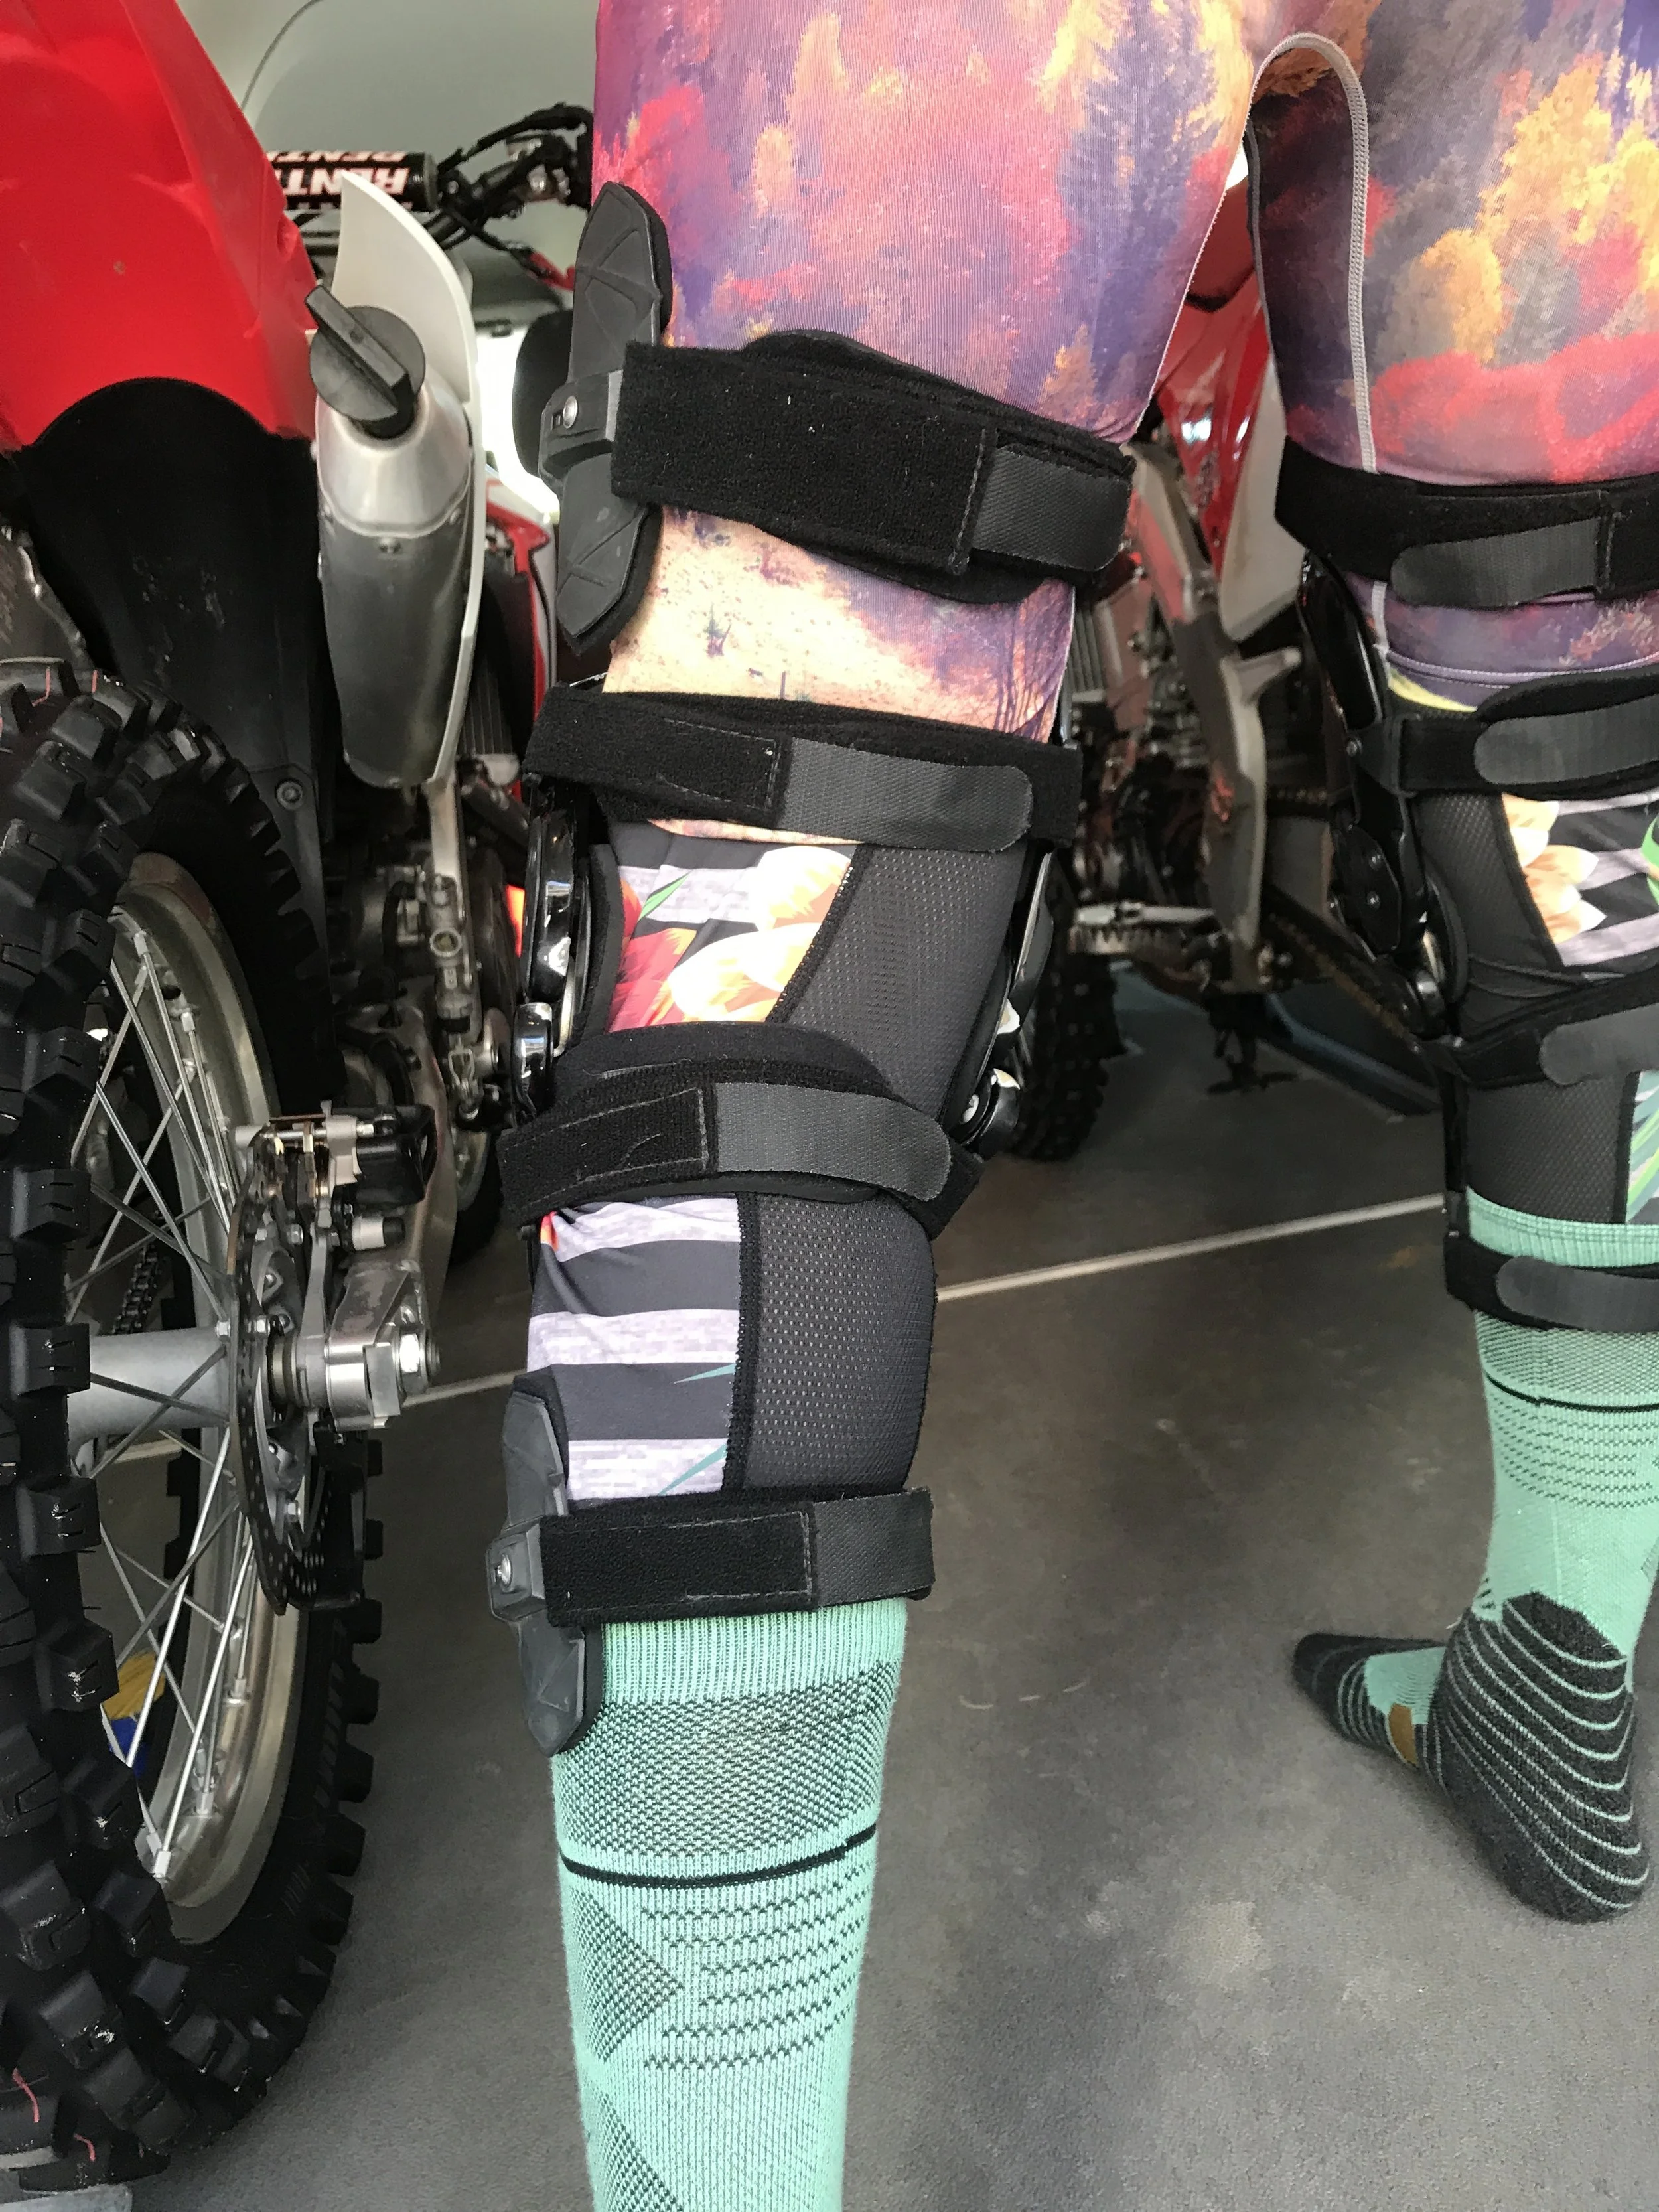
Sometimes when you ride as much as me, some things like getting geared up to ride gets monotonous. I am usually pulling different bits and pieces of protective gear out weekly, but then I will pull my head out of my ass and realize there are a few things that have been a staple in my gear bag. One of those things has been my Asterisk Zero G knee brace pant. There is nothing more annoying then having a pair of knee braces slide down during a moto. With the new wave of Velcro secured knee braces, slipping is almost unavoidable, unless you give it the death grip and then your legs lose movement as well as circulation. I am simply not about that life! I want my braces to stay in place all day without having to touch them, so the Asterisk Zero G Pant is one of the pieces of gear that I can’t ride without. Here is a re-fresh on what the Zero G is all about in case you missed it when I posted this a couple years ago. -KK

Before the Asterisk Zero G came along I was always pulling my knee braces up during a long test day and I was tired of it. Not only did my knee brace slip, but more often than not they would dig into my knee and gouge the crap out of them. No matter what knee brace I had (and I have tried a lot), they slipped during the course of the day. The Asterisk Zero G pant is a base layer compression pant that encompasses the knee brace to help keep the brace in place against your leg. The extra long length of the pant can fold back up and over the brace, traps the brace and a Velcro enclosure (located at thigh area) holds it all together. So simple! Why didn't I think of this?! Not only does it keep your braces in place, but you also can tuck any excess laces you have inside the pant (if you are old school and use lace up knee braces). If you're up to date and have Velcro straps on your braces, those will not get caught on the liner of your pant and make life much easier. The Zero G pant is designed to make it simpler for all of us to slide the pant over the knee brace, as well as allowing the brace to move with your legs without restraint on the bike. For durability the Zero G pant features a Cordura Built-in Gear Guard (to protect the riding pant from the knee brace hinges) and it also has Anti-Rotation Tether Slots for riders that tether their knee brace to the boot. If you are not running Asterisk knee braces, it doesn't matter, because the Zero G pant will work with any knee brace that you are currently using.

image-asset-3.jpeg

Is it hot where you live right now? Of course it is, it’s Summer! The last thing I want is to get swamp ass on a long hot testing day wearing extra layers, but the pant actually doesn't make my lower extremities any hotter. When I put these suckers on for the first time I thought I would be too hot to wear the Asterisk Zero G in the summer time, but it didn't make my body any warmer when I rode. In fact when I started to perspire, I noticed my legs felt slightly cooler. If I wear just regular old long socks/knee socks my legs are full of sweat when I remove them, but not with the Zero G’s. Riding on the track felt normal with the pant on and doesn't constrict any of my long leg movements. My knee braces do not slip AT ALL during the day and the braces I am wearing do not dig into my knee because they don't slide down. Hallelujah! Most knee braces come with some type of Velcro closure system and you can find yourself taking the pants off and having to readjust them in the middle of the day, but if you have these Zero G pants, that doesn't happen. Boom! I do wear short Moto socks however with the Zero G pant, so I’m not tripling up on the layers below your knee. On the older style Zero G’s, I had some of the Cordura pieces and their stitching (inside the pant) tear away. However, on the new updated Zero G pants, the Cordura/Velcro parts have stayed in place and haven’t torn away. Asterisk beefed up those parts and created a more durable pant. I have a coupleyears on the updated versions and they have been great so far. 

image-asset.jpeg

If you’re tired of your knee brace sliding down, getting hung up on your riding pants and having to adjust them several times a day, do yourself a favor and pay the $89.00 for the Asterisk Zero G pant. It’s one of my top 5 things that I must have when I ride and I am pretty picky. You can order your Zero G pant directly at asterisk.com. Or call Morgan at Asterisk at (951) 268-6790 and tell her Keefer sent you.

Leatt GPX 5.5 Boots

My Leatt GPX 5.5 Boot Background: 

I get to test a lot of things behind the scenes and this Leatt GPX 5.5 boot was one of them. When I got asked to do some initial testing on this boot from Leatt a couple years ago, I was happy to help, but I warned them that I was a picky SOB when it comes to boots. I don’t necessarily have bad ankles, but I do like my ankles to feel secure/protected when I come up short on jumps. I also want a boot that doesn’t weigh a ton because my old ass doesn’t need any extra weight to haul around when I am doing a long Moto. I put in almost 100 sneaky testing hours in the GPX 5.5 boots and although we had some revisions along the way, these boots surprised me on how comfortable they were. With a price point of $389.99 you might expect not to get all the bells and whistles of a top tier off-road boot, but to me a lot of those boxes are checked with the GPX 5.5’s. The engineers over in South Africa, where the Leatt main offices are located, listened to any short comings I may have experienced with the boot during initial testing and fixed those problems along the way. After riding with these boots in silence for a while, here are some of my findings with the final production version that could be of use when maybe looking to purchase a pair of new boots in the future.  

IMG_6628.jpg

I do know that Leatt is committed to protection, but getting a boot to look good is tough to do. I feel Leatt did a good job of getting a boot to look unique without it being ugly looking. The Leatt 5.5 boot comes in three different colorways and should please even the pickiest of gear snobs. The GPX 5.5 boot uses a FlexLock system that makes for adjustable boot flex, lockout of ankle movement, force reduction to ankle (up to 37 percent) and knee-force reduction (up to 35 percent). It has a SlideLock Velcro top closure, 3D-shaped impact foam over the ankles, a heel-grip ankle design and the toe box is low-profile and shifter-friendly. The Leatt boots’ sole has a DualZone hardness and has an extended footpeg zone to accommodate varying riding styles with a steel shank for additional support. It uses a grip material inside of each boot for rider feel, the buckles are forged with an over-locking function, and the inner liner is breathable mesh with anti-slip reinforcement for zero heel lift. 

For reference, I feel like the Fox Instinct boot is one of the only boots that I am able to ride with right out of the box without any break in period. The Leatt 5.5 boot doesn’t quite have that instantaneous take out of the box and ride feel, but does break in quicker than a set of Tech 10’s. It’s unique with its FlexLock design that actually DOES absorb energy, yet offers a good amount of feel on the brake/shifter. This is one area where a non-hinge boot usually lacks in feel and requires a longer break-in before you get totally comfortable with mobility, shifting and finding the brake pedal. The FlexLock is a multi-directional system that allows the boot to hinge forward and backward. Additionally, it has an inward and outward flexing ability that is designed to mirror your ankle movement. The amount that the boot flexes in this direction is limited by the FlexLock system.

IMG_9474.jpg

The Leatt GPX 5.5 has far better foot mobility than a normal non-hinged boot, yet gives you the ability to lock out as much ankle movement as you want. The GPX 5.5 size 10 weighs just under nine pounds, which is around the same weight as most mid to top tier off-road boots. For most riders, especially us older guys, the lighter the boot, the better it can be for our legs, as it’s easier on your knees and mobility. It’s funny because when I weighed the boots I was expecting the GPX 5.5 to weigh less than it did because when riding with them, it didn't feel like nine pounds of boot on each leg. They feel lighter than a Tech 10 and DO NOT cause my legs to get as tired when the track is deep. 

I love the GPX top SlideLock closure (you can secure the Velcro, then buckle the top strap, which slides against itself in one direction), it’s simply genius! I appreciated the grip of the sole and how long the sole lasted, especially during my durability test of the boot. You can do yourself a favor and make sure to keep an eye on the small screws that hold some of the plastic pieces on the boot together as they can back out over time. If you are concerned about the fit for wide feet, don’t be alarmed as I feel the GPX 5.5 boot accommodates a wider foot. I don’t have a wide foot, but a couple of my test riders do and they didn’t complain about pinching. I however did get a pinch initially near the top of my foot during break in, but once the boot seated to my foot, the pinch went away. 

With the minimal break-in time, the fit as well as the feel through the ankle, along with the ease of the buckling system, I feel this is a lower cost option for the off-road consumer. I felt that the protection and comfort levels rated high, the durability of the boot was adequate and the price is very friendly, considering the high-end appeal of some other boots.  As of right now, I have around 28 hours on the production Leatt GPX 5.5 boots and plan to at least get to the 50 hour mark. 

IMG_9475.jpg

If you have any questions about the Leatt GPX 5.5 boots or anything that relates to dirt bikes, Keefer Inc. Testing is here to assist in anyway we can. Email me at kris@keeferinctesting.com for any philosophical thoughts or questions. 

EVS F-2 Roost Deflector

When I hear the name EVS, the first thing that comes to mind are those neck donuts that most of us wore when we were kids, or really anything safety gear in general. You know that EVS takes safety seriously if none other than Travis Pastrana has trusted them to protect his banged up body year after year. I was recently contacted by EVS to try their all new for 2019 F-2 roost deflector and see what I thought of it. The older I get the more and more I find it necessary to wear a chest protector (seeing as I don’t quite bounce off the ground like I used to). Being primarily an off-road rider I have worn a plethora off brands and configurations when it comes to roost guards and have become slightly picky about the balance between comfort, protection, and ventilation so this test was right up my ally. 

IMG_6033.JPG

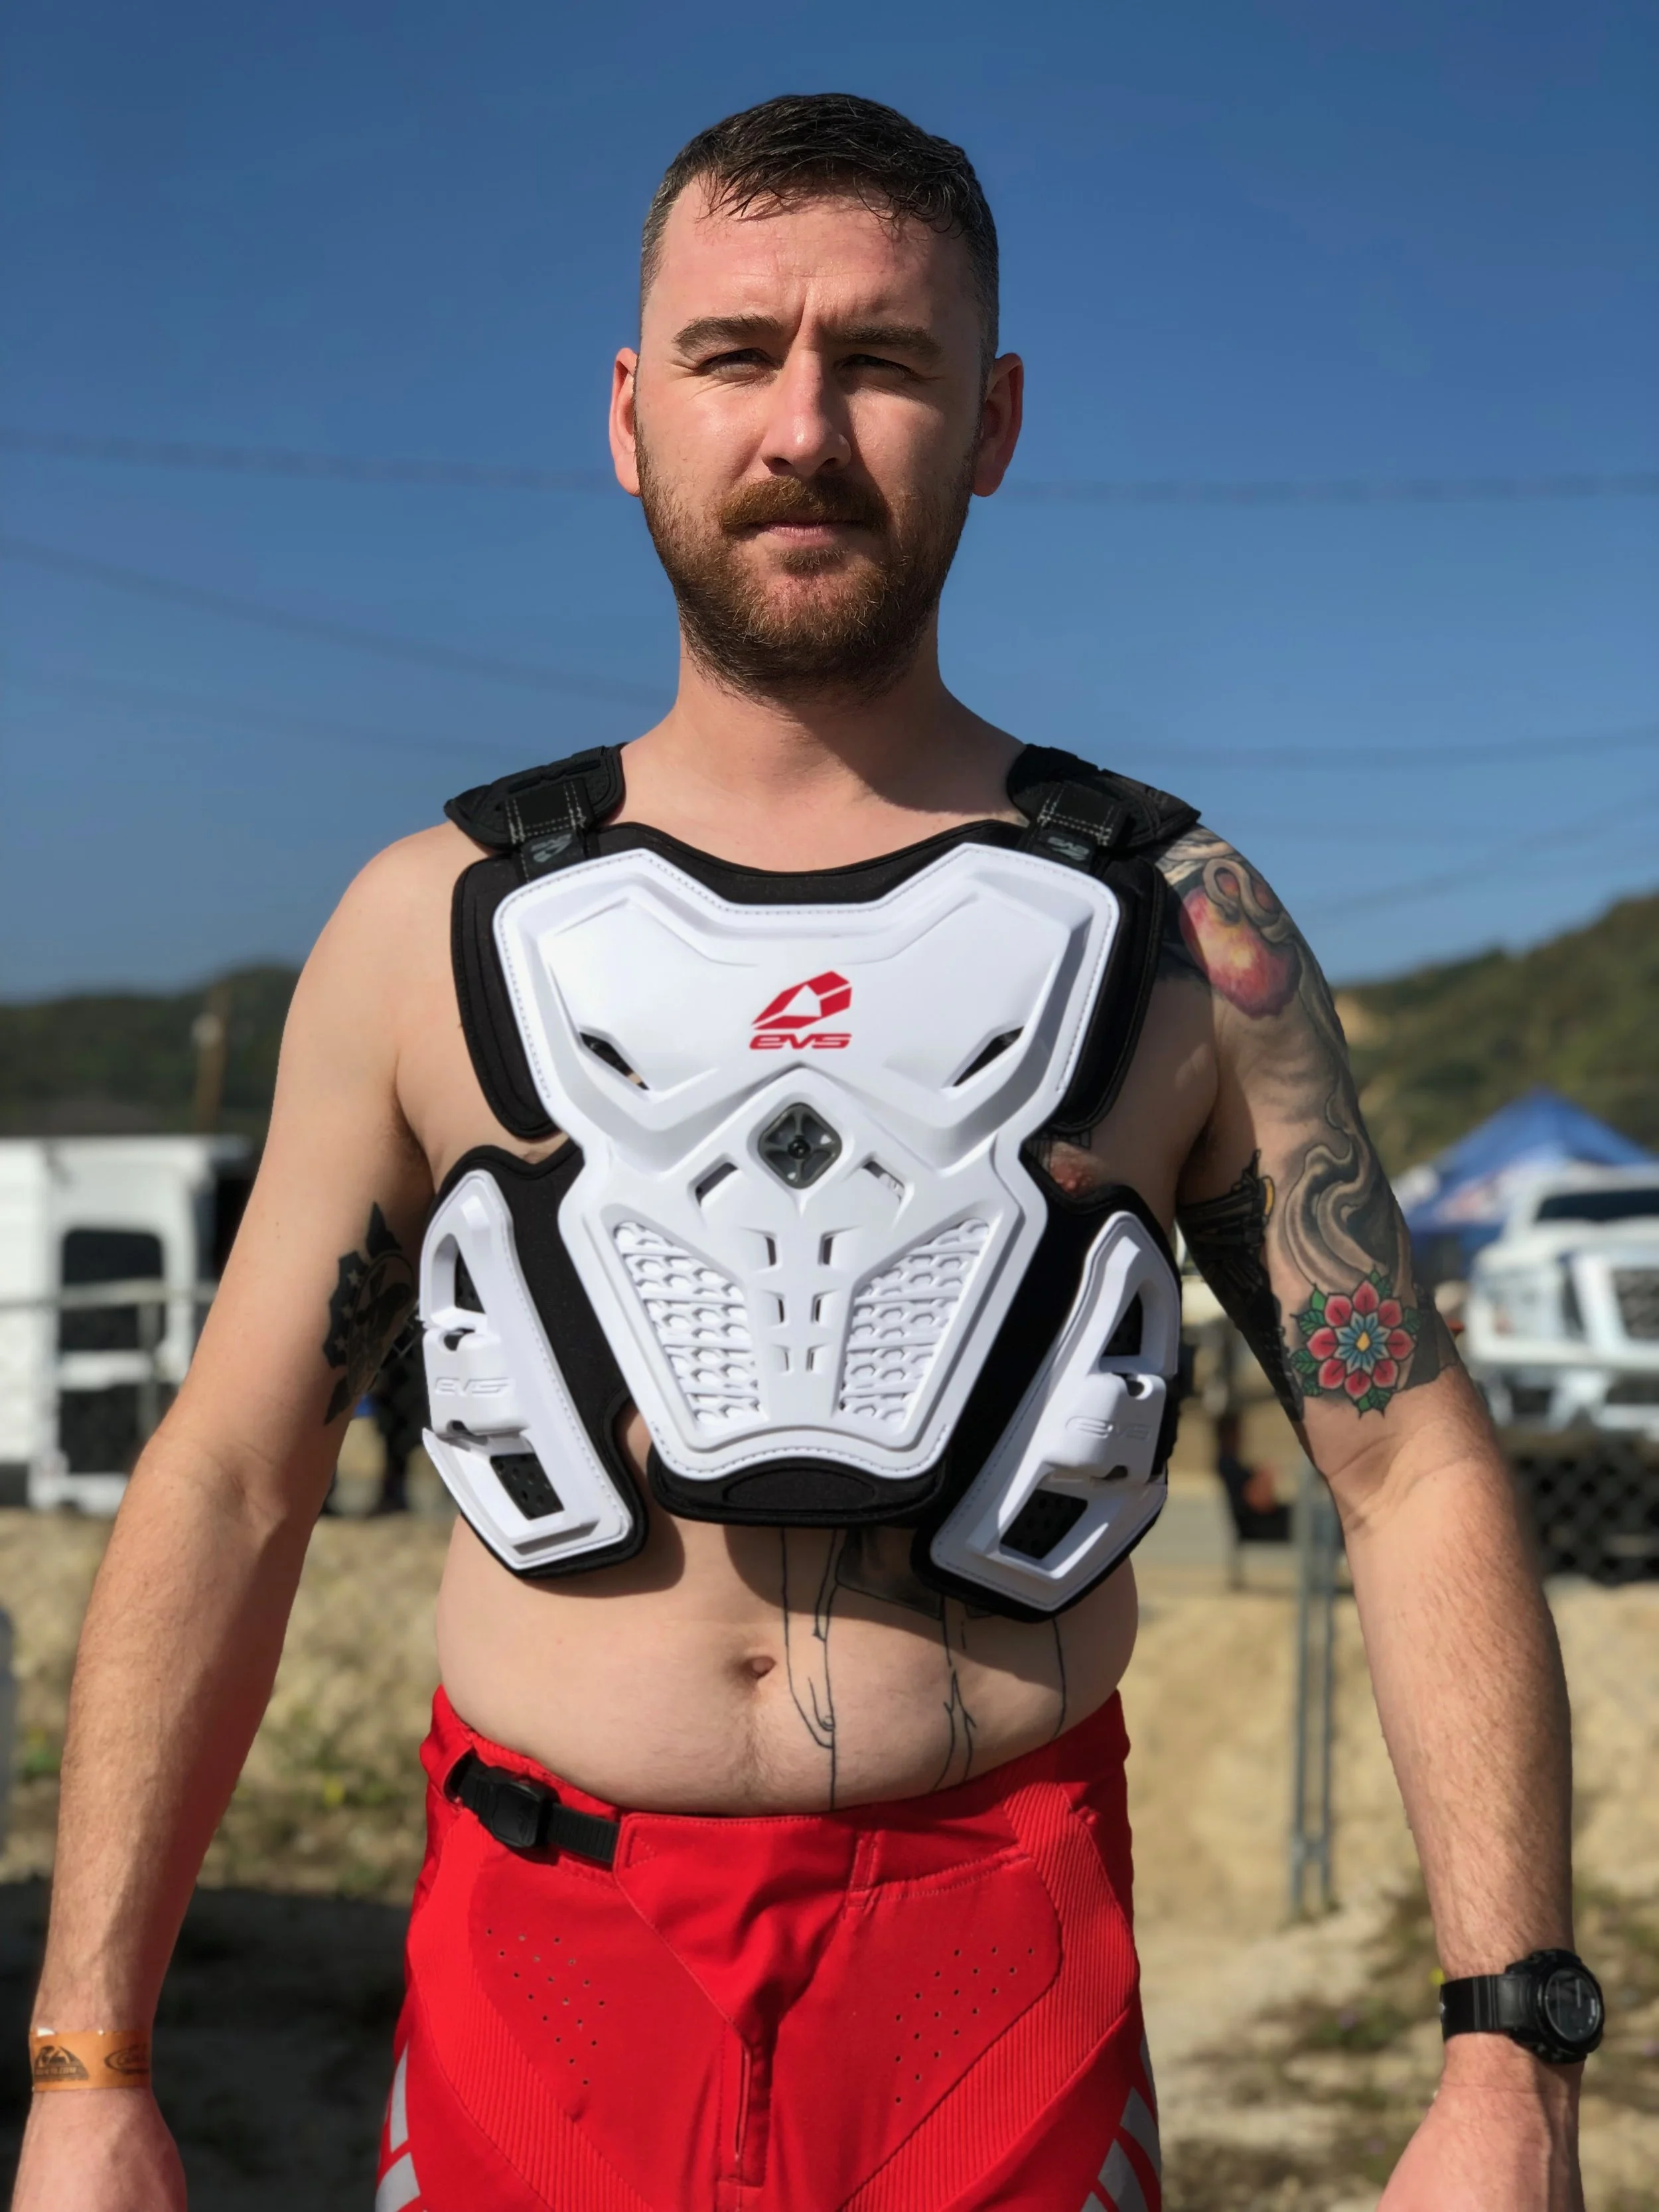
EVS went back to the drawing board for 2019 and re-designed the F-2, integrating some new technology into the deflector. The F-2 has a pivoting system built into the body of the unit that helps keep the guard form pinching on the rider no matter the contortion of the torso.  Also integrated into the guard are flow vents to help keep air moving across the body. This is used in conjunction with the Flyte liner which is a grid of impact dampening pads that lift the protective gear off the skin, allowing for increased air flow. The F-2 comes in either white or black as well as being offered in small, medium, large, and extra-large all while being completely adjustable to fit a large array of riders. This deflector meets CE standard 14021 for roost deflection, as well as CE standard 1621-1 for back impact protection. Leatt/Atlas neck braces are compatible with the F-2 and it comes with elastic shoulder loops that help keep the neck brace in place. 

IMG_6069.jpg

Now that you know all about the technical aspects to the F-2 let’s get down to how I liked it out on the trail and track. To start with, since this is a “roost deflector” and not a full “chest protector” it doesn’t come with bulky shoulder cups. In my book this is a plus because those are usually the first thing I take off of a guard that has them. On top of that it doesn’t come with those dumb upper arm protectors that you have to slip your hands through, which I also remove because they are almost always super uncomfortable. Although I am glad there aren’t shoulder cups, I do think the pads that are on the shoulders could be a little larger and more protective for my frame. I am 6’ 185 pounds (although the pictures look like I’m 285 pounds) and I wear a large F-2 which fits pretty good out of the box. For height adjustment there are four adjusters on the shoulder straps (two per side) but they are pretty short and only allow for minimal fine tuning. When it comes to fine tuning for the waist, the side straps allow for a considerable amount of adjustment so that you can get a snug fit. The pivot system on the front of the guard is very functional and works well when you are leaning or contorting your body on the bike, so you don’t feel as though the guard is stabbing you or giving you any pinch points. The hard plastic front and back provided substantial protection from roost and trailside hazards as well as offering padded and hard protection on some small crashes that I experienced. The hard plastic is sewn to the thick padded under protection making the guard solid feeling, but it also feels a little on the heavy side. In terms of protection/comfort it was a big plus, but in terms of wearing it in mid June for a 102 degree motocross race, the deflector was definitely on the hot side. When worn under the jersey the F-2 majorly lacked air flow (also when worn under the jersey, the F-2 looks slightly bulky).

IMG_6036.JPG

When worn over the jersey the air flow was more noticeable, but still the amount of foam under the plastic proved to be too much of an air block to be able to keep me cool. For me when it comes to roost deflectors there are three main categories; comfort, protection, and ventilation. The F-2 is very comfortable for a heavy duty style roost deflector, as it doesn’t give you any pinch spots are discomfort. The protection of the F-2 for a roost guard is very good and I feel like it gives protection for both decent sized crashes as well as plain old roost. When it comes to ventilation I feel like the F-2 does the best it can for the amount of coverage and protection it offers. Even with vent holes and the Flyte liner, which creates an air gap between the skin and guard, it’s still very hot to wear in summer. I am actually looking forward to wearing this deflector in the winter when you may want something to help keep the body heat in. The F-2 seems to bridge the gap between full chest protection and a minimalistic roost deflector. Other than being hot I feel that EVS did a great job of re-designing the F-2. When it comes to keeping riders safe and comfortable, I think the F-2 is a great option, but you may want to consider another option from EVS when it comes to those hot summer motos. Coming in at $139.00, the F-2 isn’t the cheapest option on the market, but I feel that for the amount of protection it offers, $139.00 is a ball park price point. If you have any questions about the EVS F-2 roost guard feel free to reach out to me at Michael@keeferinctesting.com

Fly Racing Women's Lite Gear

Editors Note: Jeannine Labbe and I have emailed back and forth for sometime and she recently reached out to see if I would like a women’s opinion on a few things. As I take pride in being a well rounded testing site, I agreed to let her evaluate a set of Women’s gear for all you lady riders out there. I only gave her one condition however… She had to be brutally honest with her findings. Below is Jeannine’s honest review of the Fly Racing Women’s Lite set of gear.

By Jeannine Labbe:

Finding a high end set of women’s gear is hard to do. Finding a high end set of women’s gear with clean colorways (or even more than one) is nearly impossible. FLY Racing’s Women’s Lite racewear checks both boxes, so, when Keefer offered to let me do a review for Keefer, Inc. Testing, I jumped at the chance. 


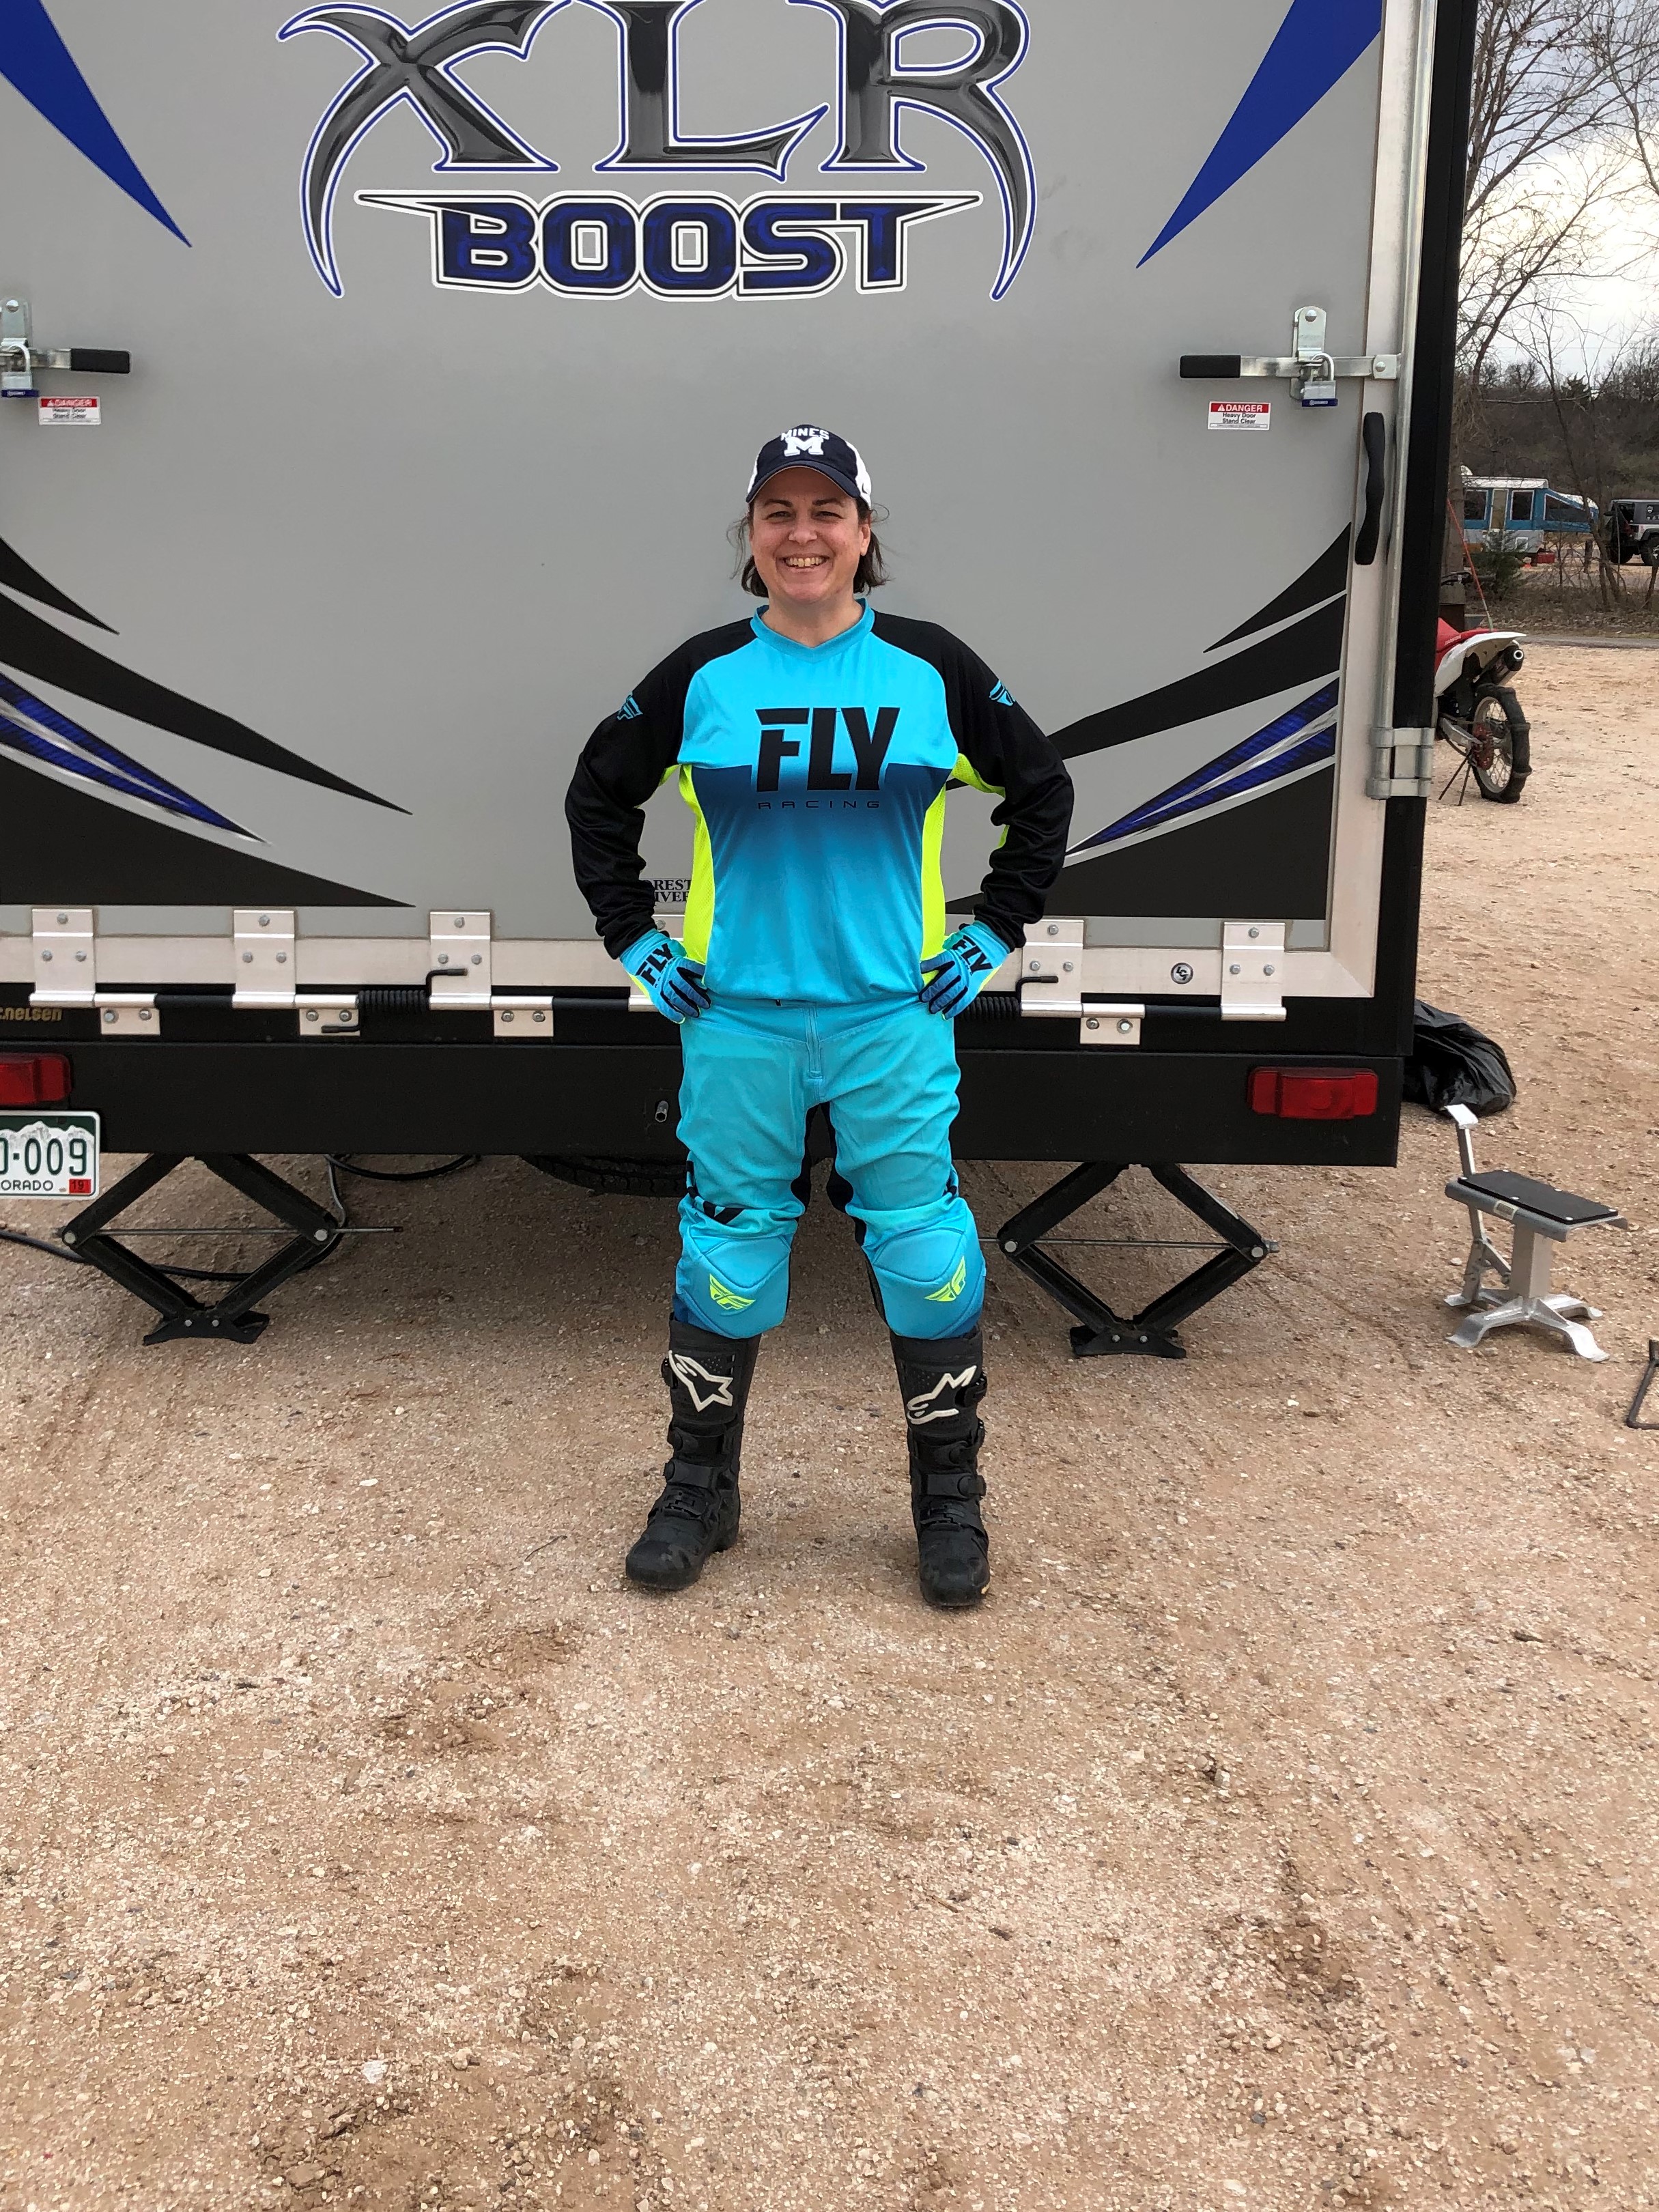
After receiving the Women’s Lite gear in Blue/Hi-Vis, we headed out to Little Sahara State Park for a few days of riding in it. Little Sahara has nice mix of dunes and sand trails, so it afforded me the chance to see how the gear worked when riding at speed, when shifting positions on the bike for steep hills, when transitioning from standing to sitting and back again through the trails, and even how well gear holds up to running through bushes and tree branches. 

Front View.jpg

The first thing that I noticed after putting on the gear is that it is really comfortable. Like wearing a favorite set of soft pajamas comfortable. The materials are soft against the skin and the overall feeling is really light. I typically change out of my riding gear between rides, but kept the FLY Women’s Lite gear on all day just for this review. I’d put in on before our first ride of the day and not take it off until after sunset, well after our last ride, when the temps dropped into hoodie territory. I must also say that I’m also a huge fan on the clean lines and colors of this gear set. The subtle addition of the darker shades of blue on the front provides nice visual contrast while also providing some camouflage if your belly is not as flat as you might want it to be. 

Sitting.jpg

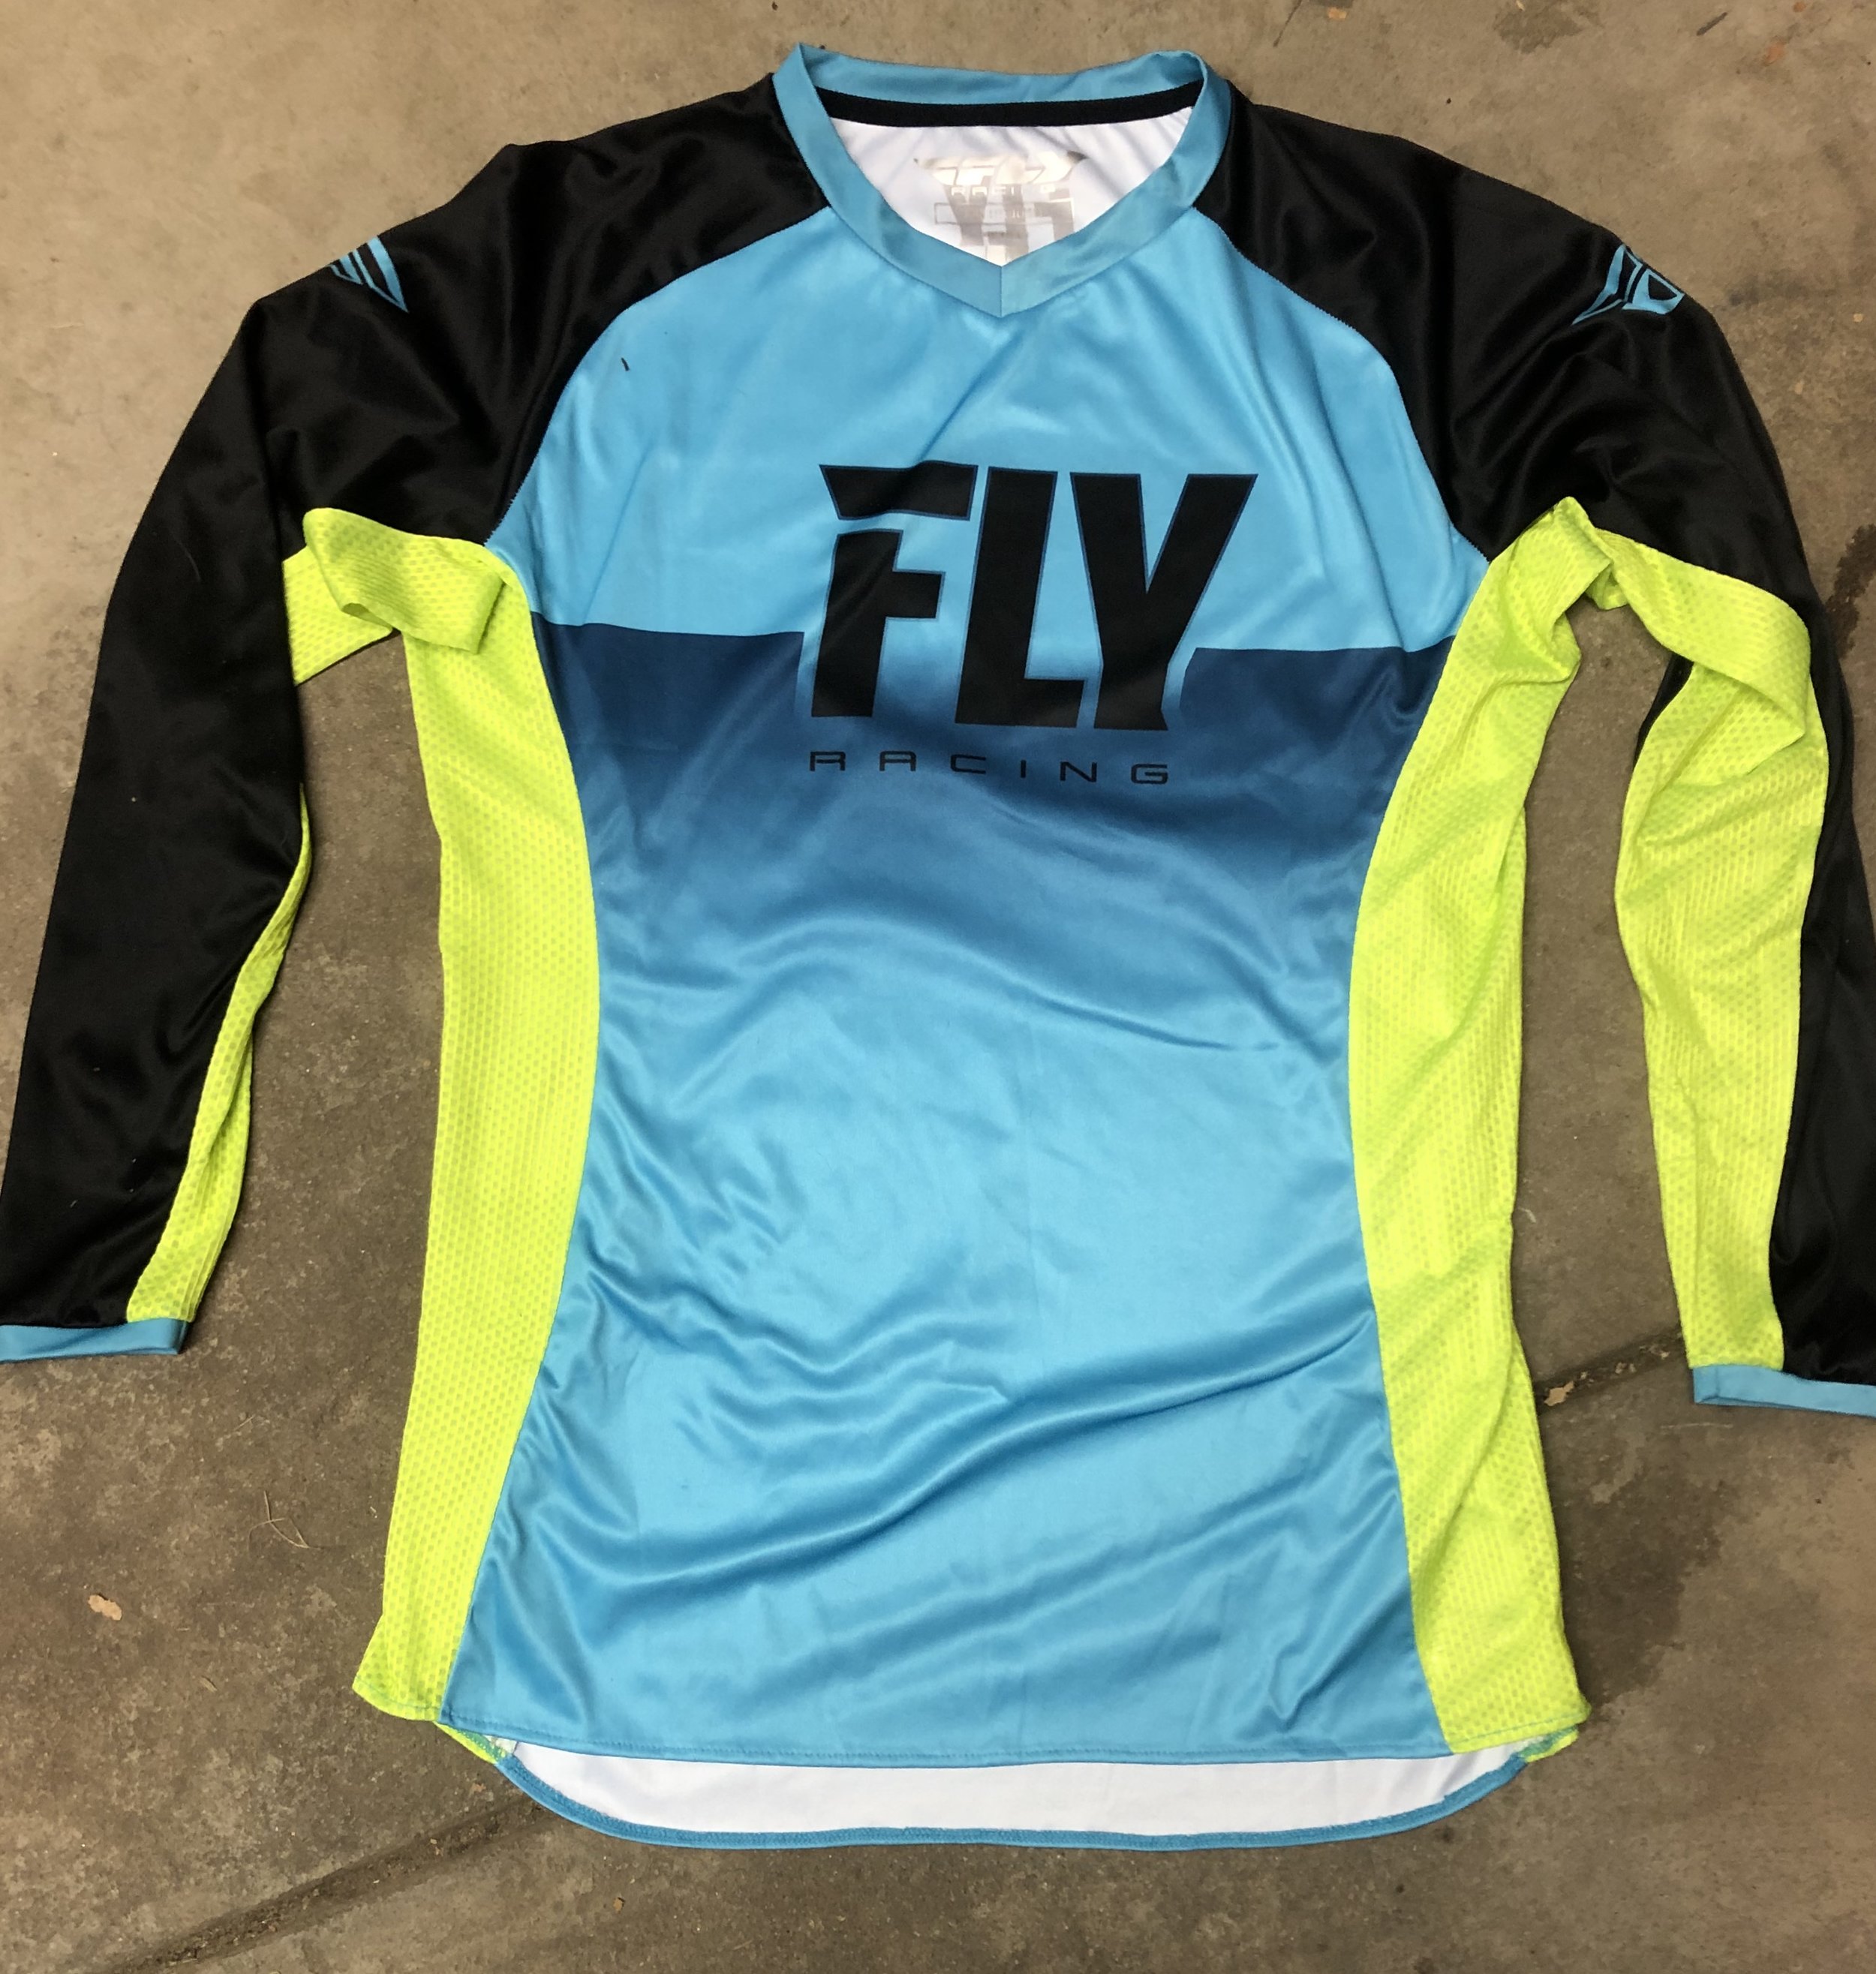
The Women’s Lite jersey features multi-panel construction with raglan sleeves, a tag-less v-neck Lycra collar, an extended tail, mesh ventilation panels down the sides and the inside of the arms, shorty cuffs, and sublimated graphics. The sublimated FLY Racing graphic is well placed to not look weird across the bust line, as can happen when graphics don’t span most of the length of a shirt or jersey. The choice of hi-vis on the blue colorway for the mesh inserts provides a pop of color, but it has the downside of being like a highlighter for belly bulges.

FLY refers to the jersey’s fit as women’s pro-fit. It has a slimmer fit with a cut that complements a woman’s curves. The sizing is close to being spot on, but might run just a bit large. I’m 5’3”, 145 lbs, and carrying about 15 extra pounds of baby weight (despite the “baby” having just turned 4). I fall between a medium and large, a problem I frequently have in street clothes, too. The medium jersey fit, but showed off my extra curves, so I opted for a large. It’s a bit loose, but not baggy. If you are considering two sizes, I’d suggest going for the smaller size if you are trim or don’t mind showing some bulges and going for the larger size if you prefer to better hide your imperfections. The v-neck is small enough to keep most of the roost out, but large enough to not feel tight. Sleeve length was nearly perfect for me, so it could be a bit short if you have longer arms, particularly if you wear a smaller jersey.

Jersey.JPG

The Women’s Lite pant features a lightweight minimalist design, a ventilated mesh liner, 90% stretch panel construction, pre-shaped knees, leather heat shields, adjustable waist belts, leg cuffs with a removable elastic band, and sublimated graphics. The knees have a low profile padding in them that should provide some abrasion resistance and resistance against knee braces rubbing through. I don’t wear knee braces, but the knees are roomy enough that you should be able to run them without them getting bound up in the pants. 


As with jersey, the pants run fairly true to size, but a tad on the large size. I wear a size 10 jean and they are typically a little loose. The 9/10 Women’s Lite pants are very loose. The 7/8 pants fit, but looked like yoga pants. Since I didn’t feel comfortable wearing bright blue yoga pants on a dirt bike, I opted for the 9/10. As with the jersey, if you are between sizes and on the thin side, you’ll probably want to opt for the smaller size. If you opt for a larger size, the side belts gives you the ability to really cinch down the waist. I love the waist belt design. The belts just pull forward and attach with Velcro. They are much faster and easier to use than the old style where you run the belt back and then pull them forward through a loop. Their soft and low profile design is much more comfortable when you lean over, too. The pants also feature my favorite motocross pant closure system of a zipper covered by a Velcro tab. It’s quick to use and low profile. The pants sit below the waist and are fairly short in the crotch. They come with removable hip pad that have large holes in them to allow maximum air flow. The pants have enough stretch that the pads do not affect the fit, but they do add odd looking bulges so I opted to not wear them. The interior of the waistband has silicone grips that grab well enough to be uncomfortable if you try to untuck your jersey between rides.

Pants.jpg

The pants feel very light. The leather heat shields feel heavy relative to the rest of the pants, but that feeling goes away when you put on boots, which support most of the weight. The mesh liner, which goes to the knees, is soft and comfortable and its hi-vis color actually shows through the pants, giving the top of the pants a slightly more yellow color than the jersey. The pant legs, with their slim fit, lightweight material at the back, and mesh at the front, fit very comfortably into my Alpinestars Tech 7 boots. With my short legs and large pants size, I did have to pull the pant legs up and hold them in place with my boots to get the knee in the correct area. This didn’t cause any comfort or performance issues, though.

Lower leg.jpg

The FLY Women’s Pro Lite glove is a minimalist glove with a perforated Clarino palm and heart-shaped silicone grips on the first two fingers. The material on the back is form-fitting, stretchy, and features the same light to dark color pattern as the jersey. Clarino material wraps around the back of the thumb and a Velcro closure allows you to tighten the fit around your wrist if needed.

Gloves.JPG

The gloves are a bit difficult to pull on. The opening is small enough on my size 6 (small) gloves that the Velcro closure is redundant. The unpadded palm is a bit thick for my taste, but only because I have small hands and run small diameter grips or half waffle grips with the waffles removed. The thickness of the Clarino on the palms made the grips feel large and ultimately made my arms pump up. After fighting it for a couple half hour rides, I finally had to switch to my thinner Thor Void gloves. I wanted to get in more a durability test on the gloves, but needed to be able ride for more than a few minutes at a time. 


The pants/jersey retained their comfortable nature on the bike and they didn’t restrict movement. The sleeves of the jersey stayed in place without being tight around the wrists. The pants didn’t catch on the shrouds and didn’t pull when moving my legs forward or up, which I appreciated. My one gripe is that, after an hour or so of riding, the pants stretched out enough that they started to pull down a bit in back in situations where I slid back on the seat. My hips kept me from worrying about them actually falling down, but it was a bit annoying. However, even with the pants pulling down a bit, the jersey stayed nicely tucked in. This could be because the tail is long enough, or it could be product of me being very short-waisted and wearing a larger jersey. The leather heat shields on the interior of pant legs did their job to protect my legs from the hot head pipes the couple times that I low-sided and ended up under the bike. 

Riding.jpg

While the neckline was high enough to keep the roost out, the mesh inserts allowed in plenty of sand. It was windy out, so most of the sand might have from crosswinds rather than roost, but, regardless, I had a decent amount of sand on my back by the end of the day, which can be common with most jerseys. 


I was impressed by the ventilation of the gear. The temperature never got extremely hot, but I remained comfortable in nearly 80 degree weather. When riding at speed in a standing position, the pants flow a surprising amount of air. I usually ride in TLD GP Air pants with mesh inserts and the air flow was almost comparable. The jersey breathes well, but it doesn’t perform as well as the pants do when compared to a full mesh model. On the flip side, when the temps dropped into the low 60’s in the evening, I didn’t need to change jerseys or add a jacket as I often need to with fully vented gear.

Sleeve.JPG

Durability is mixed bag, though mostly good. I somehow got a snag on finger of one glove before I had even started riding. The mesh inserts of the jersey also snag easily. However, the pants and the rest of the jersey held up well to repeatedly brushing up against bushes on the trails. At one point, I even broke a 1” diameter branch with my forearm although my arm was scratched and bruised you can’t even tell that the jersey took a big hit. The pants and the non-mesh sections of the jersey don’t show any sign of the repeated bush strikes neither. Another minor issue is that the stitching has started to stretch out a bit on the sides of the knees and on the shoulders where my chest protector and my Camelbak hit. I don’t know that the jersey would have this issue without the Camlbak, so if you are just riding moto, you would likely not see the issue there. Regardless, it’s minor, but you can just see the stitches; they don’t appear to be pulling out.

Overall, I love the FLY Women’s Lite Racewear. It will be my new go to gear in all but the hottest and most humid weather. I hope to do a follow-up review on its long term durability and the hot weather performance. It could prove to even be my favorite hot weather gear.

The Women’s Lite pant retails for $149.95, the Women’s Lite jersey for $38.95, and the Women’s Pro Lite glove for $29.95. In addition to Blue/Hi-Vis, the gear is available in White/Black and Neon Pink/Black. Over the boot pants are available in White/Black and Neon Pink/Black for $114.95.

If you have any questions, get them to Keefer and I’ll be happy to answer them. And a special thanks to Kris and Keefer, Inc. Testing for giving me the opportunity to review the FLY Women’s Lite racewear.

EVS Revo 4 & Revo 5 Roost Guards


Written/Tested By: Dominic Cimino


I am a huge advocate for wearing protective gear in motocross. I firmly believe that the better someone is equipped with safety gear, the lesser the chance is for them to experience an injury that could have been prevented. This product review is centered around something that I continue to wear every time I swing my leg over a bike; an under-the-jersey chest protector/roost guard. We have both the Revo 4 and Revo 5 roost guards by EVS on the table, and this quick review will break down a little bit about each of them in case you might be on the market for this specific piece of equipment. 

First off, EVS has been in the protective gear game for a longer than a hot minute. They stand by the company motto of “we are protection” and it shows. They make anything and everything related to keeping one’s body safe in this sport we love the most. Not to mention, one of their biggest ambassadors is the human crash test dummy himself, Travis Pastrana. The fact that the guy is still walking should be a true testament to the EVS protection line. The Revo 4 and Revo 5 roost guards are a one size fits all, under the jersey garment, designed to keep that painful roost off of your upper body. We all know the feeling; of trying to pass your buddy or some stubborn animal on a 450 that is completely hazing you. It is not fun! If you experience this scenario from time to time and are not wearing a roost guard or chest protector, god bless you. 

IMG_1447-2.jpg

Both of the Revo guards share the exact same chest piece - from the color, to sizing and design. Where they differ is the Revo 5 incorporates a back protector and removable shoulder pads to round out the comprehensive upper body zone. Upon first fitment, both guards felt large on me (I’m 5’7”, 145lbs - skinny guy). I quickly found out there are plenty of adjustable straps to tailor the Revos’ to my body, so the “one size fits all” statement seems pretty accurate. Once I got everything adjusted accordingly, the roost guards felt very comfortable. They both wrapped around my chest and ribs really well, giving the “hug effect”. They allowed me to put my jersey on easily with no hang-ups, and once fully geared up, did not feel or look overly bulky in plain sight. 

IMG_1445.jpg

For the purpose of this test, I removed the minimal shoulder pads on the Revo 5 so I could compare apples to apples to apples (Revo 4 vs Revo 5 vs Alpinestars A1 - the go-to in my gear bag). On the track, the Revo guards where very comfortable in use. They stayed in place and did not hinder any movement that I needed when on the bike. I really enjoyed the “hug effect” that they provide… I guess there is just something natural about that feeling that is hard to replicate. The Revo 4 feels just slightly more naked, due to the fact that it is missing the back piece. You will still feel the adjustable back straps against you, because they are not the most minimalistic in design. On the other hand, the Revo 5 just felt slightly better overall, due to the package being a little more complete when incorporating the backplate. To be honest, these guards are pretty much the exact same, so why would you not wear the backplate if it has no negative side effects? That is how I see it at least, the more protection the better so long as comfort and performance are not hindered. The one thing I could see posing a problem during the warmer months of the riding season is ventilation. The Revo guards do not seem to have much of it, when compared to my Alpinestars A1. After riding multiple motos in them, I did not have that big of an issue due to cooler weather at the moment, but I could definitely see that changing when we are back in triple digits. 

IMG_1448.jpg
IMG_1446.jpg

I plan to keep one of these in my gear bag at all times moving forward. Whether I end up using it, or I try to spread the gospel of safety to anyone near me that might need to hear it. These under-the-jersey protective pieces are a no brainer for me, as the sleek designs and comfort they provide give no room for excuses to anyone looking to stay safe. EVS continues to develop great safety products and you can view them all over at www.evs-sports.com. Thank you for reading! If you have any questions, feel free to holler at me - dominic@keeferinctesting.com

Fly Lite Hydrogen Gear Set

Having been a contributor for many years at a publication (that is now worthless) as well as testing with Kris over the last two years; it’s safe to say I’ve worn many different gear brands and styles. That being said, for some reason I had never worn anything from Fly Racing until last year when I got their Patrol jacket which quickly became my favorite off-road jackets/vests of all time. After telling Kris how much I liked the jacket he said I should try a set of their gear so I ordered up a pant, jersey, and set of gloves from their Lite Hydrogen line and patiently waited for it to arrive at my door step. 

IMG_3636.JPG

Let me preface this review with the fact that although I ride a lot of moto with Kris, I also do a lot of trail riding as well as off-road racing, so I tend to really put sets of gear through the both sides of the fence. I got my set of red Lite Hydrogen gear and one of the first things I noticed when getting dressed was the fit. I’m a little picky when it comes to how gear fits as I don’t want the LBZ look, but at the same time I don’t necessarily have the figure of a super model, so skin tight gear is almost as bad as wearing baggies. The large jersey and 32” pants contoured my 6” 180 pound frame perfectly without making me suck in my beer belly (yes, I like beer, sorry Keefer). The jersey is slightly looser than the pant, which is fine with me because I like some air between my body and the jersey. This also allows me to wear my chest protector under the jersey without looking like a football player. The jersey has mesh ventilation panels, is laser cut, and has a slightly longer tail, so you don’t look like Jason Anderson when on the track. 

IMG_3637.JPG

Having a slightly slimmer fitting pant is also fine with me because the fabric stays contoured without being too tight and uncomfortable. Being more form fitting also doesn’t leave any baggy material to get caught on shrouds or other parts of the bike which can impede your ability to feel comfortable on the bike. The pant material although having a contour fit seems to still be able to breathe and also has a very durable knee area, which hasn’t shown any signs of breaking down yet. One of the coolest features on the Lite Hydrogen pant is the BOA system, which gives you another way to keep the pants snug. It also kind of gives you that custom fit as everyone is made different right?  On the back of the pants, along the waist line, there is a BOA reel which can be clicked out and turned clockwise to tighten the waist of the pants. One off-road reason that I like this system is that when I wear my fanny pack (yes, I’m that guy) the extra adjustment lets me keep the pants tight so they don’t slowly fall down on a long trail ride. Boom! 

IMG_2669.jpg

The Lite glove is a minimalist glove, which for me makes it very comfortable; although it’s no secret that minimalist gloves don’t provide the most protection off-road, it works out ok for me because I am a hand guard type of guy. The palm of the glove is made from perforated Clarino material and has a reinforced thumb area which have both lasted with no signs of tearing. On the top of the hands is a spandex material, which is very comfortable, but doesn’t protect from bush and shrub slaps when off-roading. 

IMG_1709.jpg

I’ve been wearing this gear for a few months now and to be 100% honest it has been really good for both aspects of my riding! I only thought this gar would be good when I rode moto, but it has been great when I am hitting the trails as well. The only real downfall that I’ve found is the lack of protection of the back of the glove. That being said, the gloves were never meant to be off-road gloves (Fly makes a whole line of glove options for any discipline you may ride).  With the price breaking down as follows: Jersey-$49.95, Pant- $169.95, Gloves- $21.95, I think the Lite Hydrogen gear set is a great value for the hard earned dollar that you’re going to spend. If you have any more questions about the Fly Light Hydrogen gear, feel free to reach out to me at Michael@keeferinctesting.com. 

Leatt GPX 5.5 I.K.S. Steel Pant And GPX 5.5 Ultraweld Steel Jersey


For a few years Leatt has been getting deeper into the high end gear market and I’ve been lucky enough to test a few different lines. A while ago Kris (Keefer) gave me a set of 2019 GPX 5.5 gear and told me to put it through the testing ringer. Since then I’ve been wearing this set exclusively whether it be moto or off-road and have been loving the looks of the new colorway as well. I wanted to give you all quick first impression of the gear, but look for a more in depth test in a couple months, when I get more miles on the 5.5 pant and jersey.   

IMG_0473.jpg

The fit of the Leatt 5.5 gear is top notch, not being too tight or too baggy. Sizing is correct and there are no surprises when putting on any of the Leatt pieces. The jersey is made out of a lightweight, vented and stretchy material. In the armpits of the jersey there are multiple vent holes to help keep hot spots to a minimum. The torso and arm area are athletic fitting without squeezing the body and has just enough material so there is a thin layer of ventilation between your body and the jersey. One thing I didn’t care for on the jersey were the cuffs. The taped seams that are used on the welded cuffs are a rubbery plastic material that came un-bonded from the jersey material itself and just hung off. When riding off-road the jersey got some small snags from branches, but they never grew larger than just a small snag. The jersey is very comfortable, soft to the skin, and breathes well when you start to sweat.

IMG_0491.jpg


The I.K.S. steel pant, like the jersey, has a great fit. It is an athletic fit from your waist all the way down your legs without being too tight. I have zero issues with the pant stretching comfortably around my knee braces, nor does it hinder my movement on the bike. The pant is made mostly of a four-way stretch/Rip Stop material so while it looks tight, it’s really just comfortable and form fitting. Leatt uses its Internal Knee Brace System (I.K.S.) on the inside of the knee area to prevent excessive knee brace wear or tearing, which it did because the knee area have held up great. On the original set of pants I received I did have an issue with the zipper. The first ride out, the zipper came off the bottom and both sides of the zipper were disconnected. I was able to get it re-zipped, but then when zipped back up, the zipper below the top came undone and could not unzip. I contacted Leatt and they sent me out a new set of pants and I never had this issue again after several uses. Looking back, I don’t think this is a flaw in the pant, I just think it was a fluke malfunction that happened. However to keep up with the transparency here at Keefer Inc. Testing, I still wanted to let the reader know everything that has happened with the Leatt set of gear. If this happens to you please contact them and they can remedy the issue for you. One aspect about the pant that really stood out to me was that in some situations they had a hard time staying up. I’d like to say it’s because I’m so skinny, but unfortunately that isn’t the case. When accelerating out of ruts that have acceleration bumps, the stretch material on the butt of the pants (or yolk) gets pulled down. Coming out of corners with acceleration chop can make the pant pull down slightly throughout the duration of a moto. This obviously didn’t happen if the track forced me to stand a lot, but when there was a lot of sitting and chop it was noticeable. The best way I found to combat this was to tighten the buckle a little tighter than I normally would. The adjustable ratchet latch always worked well as well as the zipper (aside from the first set of pants I previously mentioned).  

IMG_0478.jpg
IMG_0481.jpg

Overall, I think Leatt is a real contender in the high-end gear market and will only improve over time. I will keep putting more time on the 5.5 set of gear over the next few months and report back with all of my findings. Feel free to reach out to me at Michael@Keeferinctesting.com if you have any questions regarding the Leatt 5.5 gear set. 

-Michael Allen

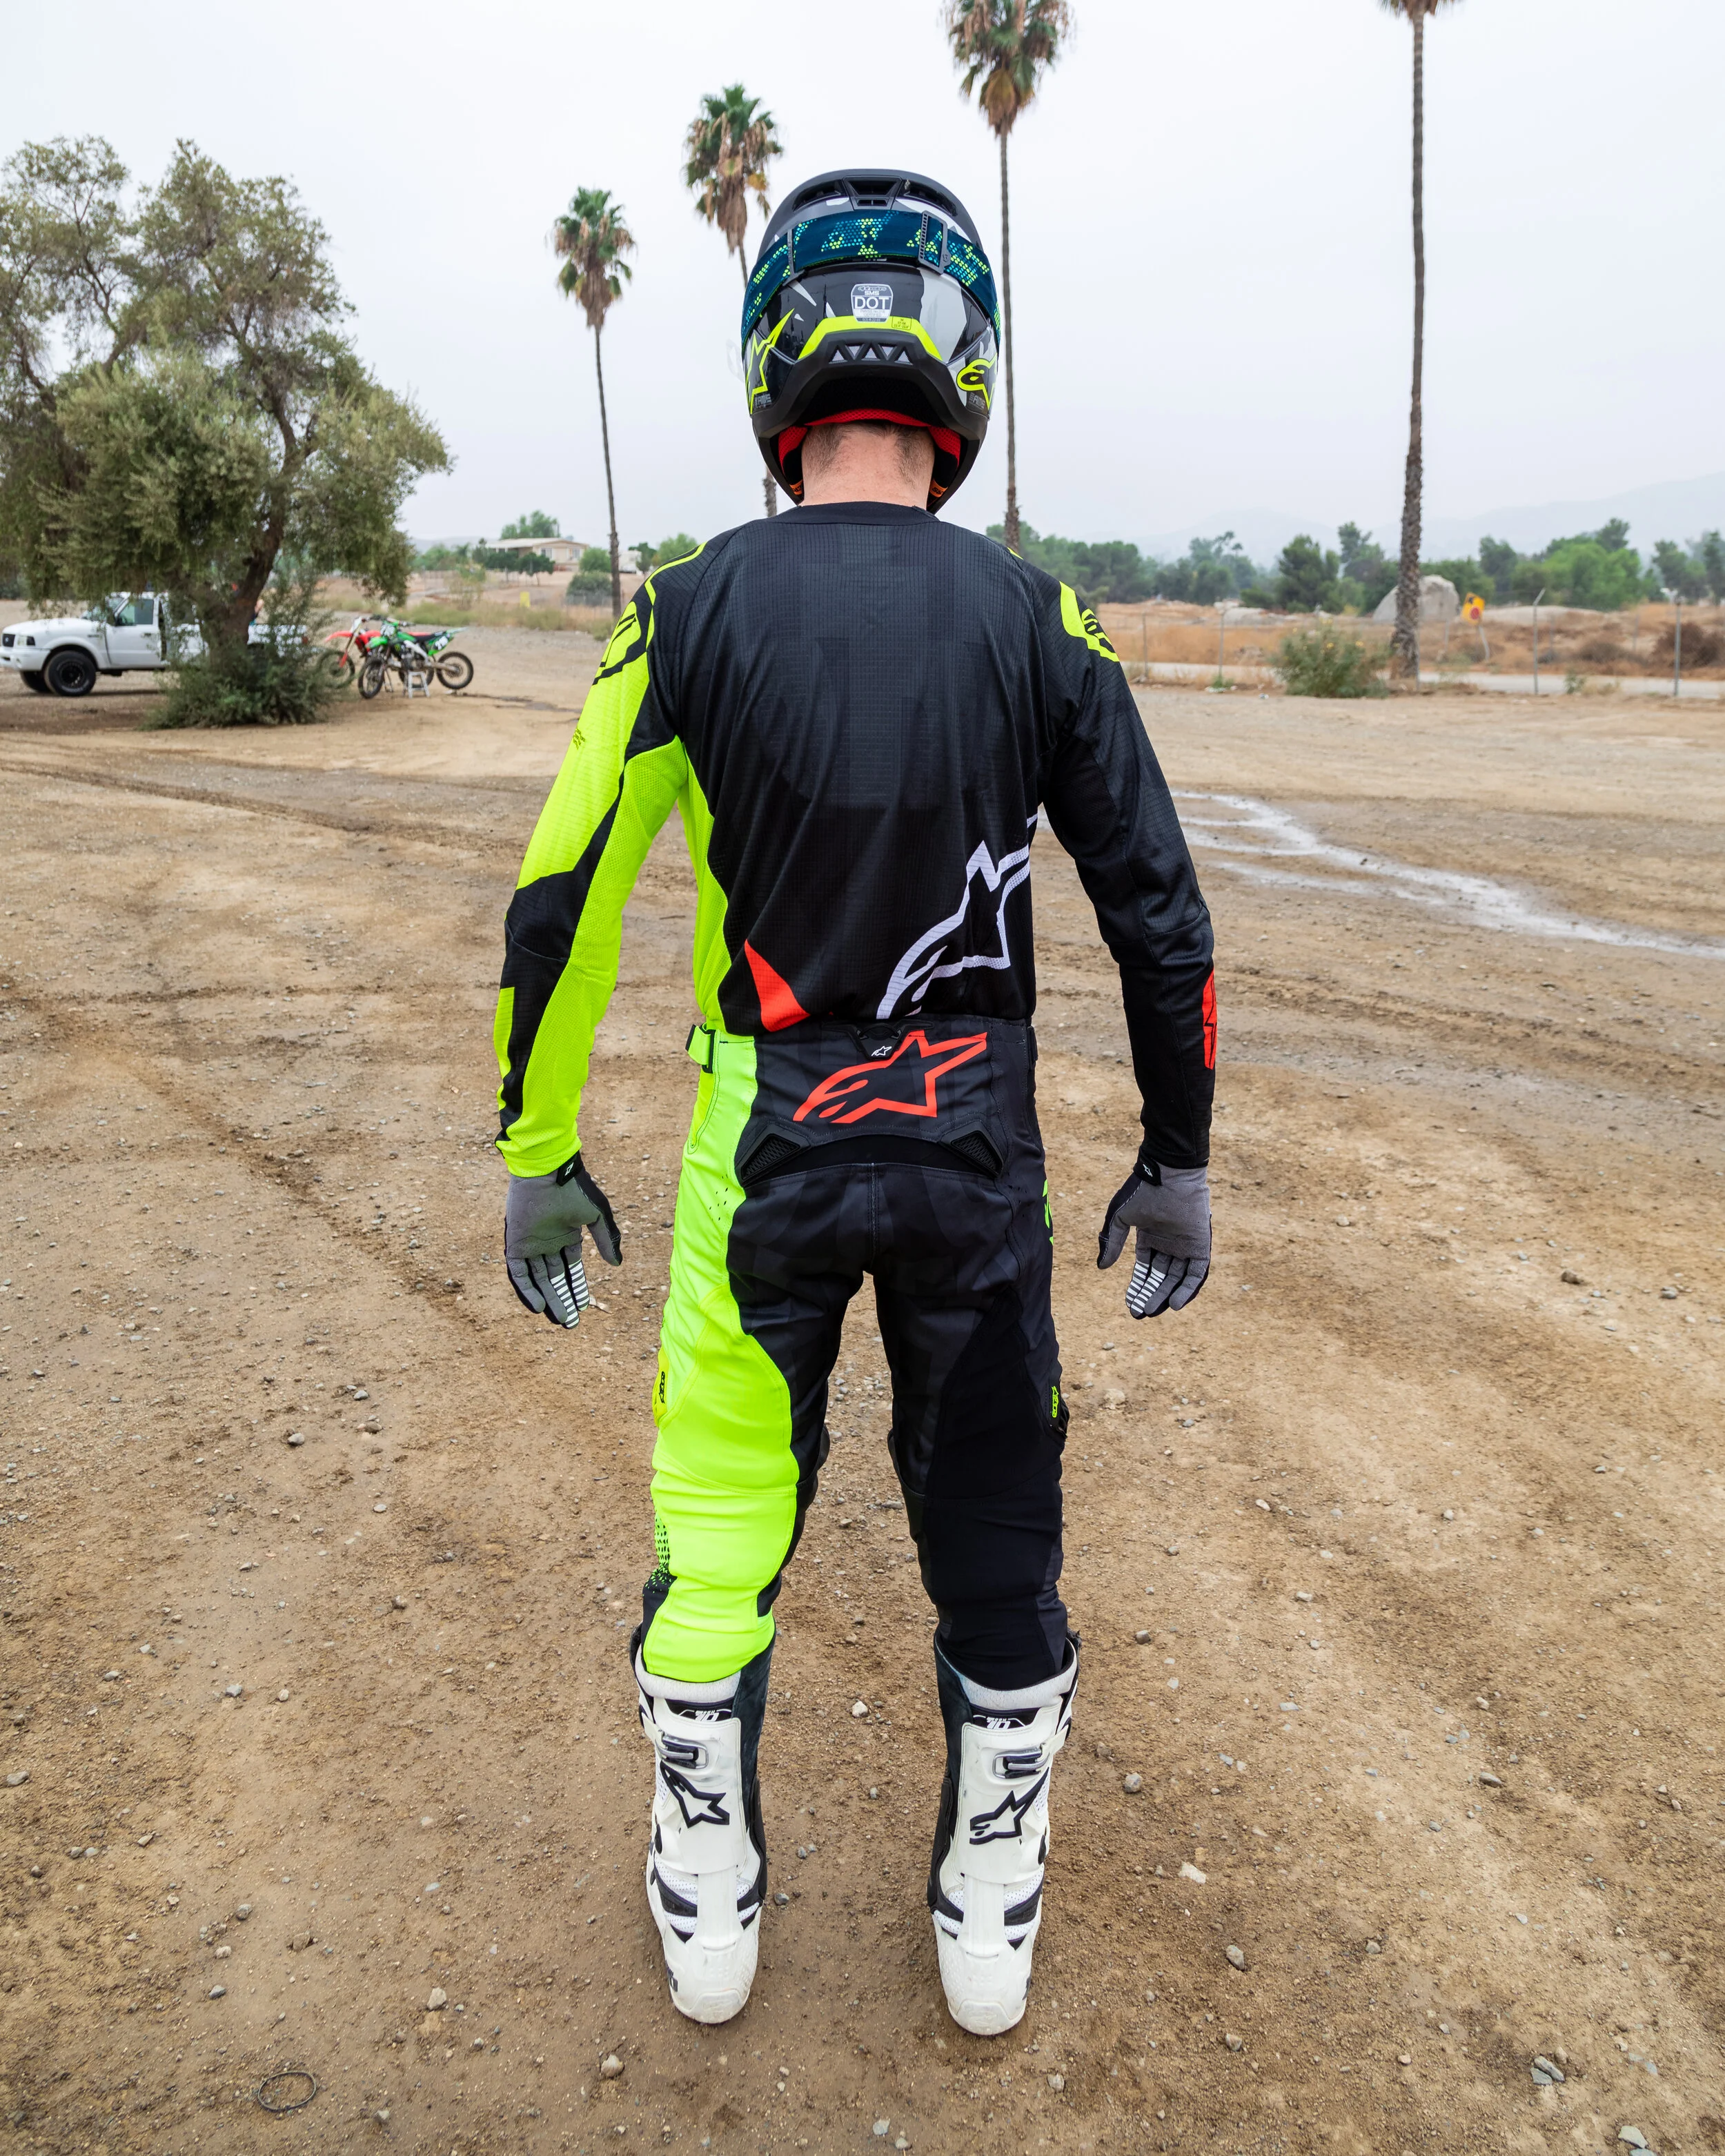
Alpinestars Supertech M10 Helmet

In the past when you decided on wearing Alpinestars gear you were stuck wearing another brand of helmet. That is until now… With the release of the all-new Supertech M10 helmet, Alpinestars is now in the premium helmet market world. The Supertech M10 helmet is the result of years of intensive study, development/testing, and after riding in it for almost two months I have learned a lot about its character. 


IMG_9872.jpg


The first thing you immediately notice about the M10 is its lightweight feel. Constructed from a carbon fiber shell, a medium M10 weighs only 1260 grams – that’s 2.78 lbs. – and is lighter than most helmets I have been wearing lately. It’s surprisingly light when you pick it up and you just about forget you’re wearing it once out on the track, which translated into less neck fatigue. Weight isn't usually a big factor for me, but after riding with the Alpinestars M10 for a while now I surely can appreciate the feeling on longer motos. The cool-max interior liner is really nice too, especially in the dez. California is atrociously hot in the summer months, but that hasn’t stopped me from continuing to pound out motos in 100 degree weather. When you’re sweating your nuts off, the helmet’s interior is wicking it away and soaking it up. Sometimes helmet liners can become slightly abrasive/course feeling once all the moisture dries up, but the M10 still leaves you with a soft feel to it and will not feel like a Brillo pad when putting it on your head. 


IMG_9391.JPG


Ventilation was an important focal point in Alpinestars R&D process of the M10. Immediately when I went out on the track I noticed this helmet flows a lot of air, noticeably more than other off-road helmets I have tested lately. Alpinestars heat mapping tests have resulted in specifically designed ducting which produces a positive flow into the helmet over and around the rider’s head, leading to improved comfort while riding and reduced onset of heat stress in extreme conditions.


The visor design of the M10 is also a very innovative part of the ventilation system, as it’s profiled to direct airflow and acts as a channel to concentrate and smooth the flow into the shell. The Supertech M10 interior liner design is formed to optimize airflow channeling around the rider’s head before exiting through rear exhaust vents. The visor design also features a patented mounting/release system that sits flush with the helmet’s shell. There are no screws keeping it in place. This makes the helmet look even more custom and seamless. The visor snaps in and stays put until the right level of resistance causes it to release and detach from the helmet to mitigate any rotational forces that would otherwise be transmitted to the rider’s head, brain or neck in the event of a crash.


Cudby Photo. 

Cudby Photo. 


As far as the safety aspects of the M10, the carbon shell features a multi-composite combination of 3K high-density carbon on the outer layer, a unidirectional carbon composite layer (which gives greater radial strength around the shell, preventing compression but allowing controlled deflection for reducing transmitted impact energy), and an aramid fiber layer that provides critical penetration protection. This multi-compound shell gets surrounded by an inner four-part multi-density EPS liner, which soaks up impact forces dissipated over the outer shell, and it all works in conjunction with its Multi-Directional Impact System, or MIPS. 


MIPS and similar technology is becoming more common these days in helmet construction. MIPS is a system that uses a low-friction slip layer between the comfort padding liner and the EPS layer, which allows one to move slightly independently of the other to dampen, redirect and reduce forces to the brain and neck, helping to reduce the chances of a concussion. Key word here is “helping”!! This system will not prevent a concussion. There are many types of “helmet technology" in the our world, so study up and decide on which one you believe in the most. Again, just like neck brace technology, it’s up to you to take in the scientific information and decide for yourself which one you trust in the most. 


Other benefits found in the M10’s shell and EPS liner are a patented A-Head fitting height and adjustment system as well as hydration system compatibility. The A-Head system allows the helmet to be tuned exactly to the riders preference for the height and angle at which the helmet sits on the head. With a micro-adjustable pad that is connected to the helmet’s inner shell, it is possible to raise or lower the helmet fit and also, to tilt the helmet forward, or backwards. It’s easy to use and adjust, but I did find that I needed to use thicker cheek pads to fill in the area inside the helmet. I am a size medium and the standard cheek pads are way too thin for my skinny cheek bones. Going to 40mm cheek pads gave me a snugger fit and helped with feeling too much side to side slop on my head. For you off-roaders out there, the hydration pack compatibility is also a very cool feature, but I am going to let my tester Michael Allen handle those duties. There’s a channel on either side of the chinbar behind the cheek pads to run a tube from a Camelbak or similar system. It’s cool that Alpinestars includes some “off-road” into their lids! 


IMG_0138.jpg


Each Alpinestars Supertech M10 helmet size comes with its own dedicated proprietary carbon shell size and EPS liner construction. This not only ensures that riders have a correct fit, but most importantly improves protection and the effectiveness of the helmet in case of an impact while optimizing weight reduction across the size range. The Alpinestars Supertech M10 is both DOT and ECE certified, comes in six different sizes from XS to XXL and will set you back $649.95. That is in the range of most premium helmets out there in the market today.


The looks of the helmet is something that has grown on me honestly. I wasn't on board with the looks initially, but after riding with it and seeing photos of myself with the M10 on, it looks attractive enough for some “Best Dressed” awards come 2019. I will continue to wear the Supertech M10 and get back to you all on a long term “Living With” test soon.     


Atlas Air Neck Brace Product Review 


Neck braces…This is a tough topic in the world of motocross right? Neck braces are almost like a form of religion. You have a bunch of people preaching to you on how they believe in what “they” (neck braces) can provide for you, but it’s something that is up to you to fully believe in. Or maybe it’s something that you choose not to believe in at all? I can tell you that I was somewhere in the middle between those two. It wasn't that I didn't “believe” in the technology as much as it was more of a comfort thing for me when I rode with one. I felt too restricted with a neck brace on and it hindered my technique on the bike. I felt like a robot, that was so stiff on the bike, that I immediately was an anti neck brace guy! Fast forward five years and I got pressured to try an Atlas Air neck brace again by my good friend Steve. I warned him beforehand that having me test a product that I didn't care for several years ago could be dangerous as I am a no bullshit kind of guy when it comes to evaluating products. Steve agreed and now here we are typing out this evaluation. However, sometimes getting pressured can be a good thing and in this case it was good, because as a test rider I needed to have an open mind to products that may or may not have been “acceptable” several years ago. Why? Because just like dirt bikes, products can evolve and get better over time. Well to my surprise the Atlas Air neck brace did just that, it evolved and got better. 


FullSizeRender-2.jpeg


Before I get into the meat and potatoes of why the Atlas Air is a better neck brace, what exactly is the technology behind this product? The Atlas Air is made up of a flexible polymer construction that is tough and impact resistant that is ideal for multiple impacts. The flexible nature of the material is designed to slow down violent impacts in an effort to spread out and reduce impact forces, rather than coming to an abrupt stop.The Split-Flex Frame design allows the rear of the brace to mimic the natural movements of your shoulders to provide maximum comfort and mobility (in dirt bike riding terms, that means while riding you're almost able to not feel like you're wearing anything). Each Atlas Neck Brace sits around your spine and sternum, transferring impact forces to the bigger muscle groups rather than directly on the spine and sternum, while increasing surface area contact with the body to dissipate forces more efficiently. Chest suspension keeps the head in motion during a longer period of the impact, while promoting tuck-and-roll ability during an accident (If you know Ryan Hughes rants, this is something he thought neck braces lacked). Unique leaf spring style design provides 30mm of chest suspension to help slow down and reduce impact forces. Each chest support can operate independently, allowing impact forces to be absorbed strategically and effectively. Each Atlas Brace is the smallest overall size compared to the competition, but is claimed to contact your body 27% more than the competition, making it smaller, and bigger if that makes sense? The increased surface area contacts the body to help spread out impact forces, with the intent of making their effects less noticeable and/or helping to potentially prevent secondary injuries. Previously Atlas used rear tethers that used an internal braided steel cable for strength. Now, after three years of development Atlas has now gone wireless! The new tethers use a specifically formulated rubber compound co-molded to custom machined aluminum axle nuts. This unique rubber compound provides more strength and longevity, that withstand a ton of cycle testing. Each Atlas Air neck brace features two height adjustments. Tall pads are included in the box and make fit easier for longer necks, smaller helmets, and/or other needs. I tried on several helmets (6D, Arai, Shoei, Fox, Fly, Bell) and all gave me the same amount of head movement/mobility. Aluminum Smart Mounts on the back of each Atlas Brace provides the rider six possible settings to find tune the fit around your chest and back. The reversible design can move the back supports forward or back, and an internal spline system provides a -10, neutral, or +10 degree micro adjustment to fit various body shapes as well. 


IMG_0851.jpeg


Now let me start off by saying that it’s up to you whether you believe in neck brace technology or not. I am not a preacher and can’t force you to believe in a certain technology, but I can give you facts on what it’s like to ride with the Atlas on for several, long test days. After studying/reading all about the old technology versus the new technology, I can say that I “believe” that there are some safety advantages to wearing a neck brace. I had the Atlas Air fitted up with the help of Canadian legends Brady Sheren and Ryan “The Newf” Lockhart and they gave me a brief tutorial on the Atlas Air. After the tutorial I was off to ride my first moto with the neck brace on. One important piece of technology (that I really like) that has evolved on the new Atlas Air neck brace is the material consistency and how flexible it is. The older neck braces weren't nearly as flexible and that was a big red flag for me, especially in a crash. You can bend each end of the Atlas Air neck brace and it snaps back to the original shape much easier than older models I have ridden with. Another complaint I had with older neck braces is that I couldn't look far enough ahead of me without feeling restricted. The Atlas Air gives me enough freedom that I didn’t really notice it was on. Impressive! The only part that made me think that I had a neck brace on was that the straps (that hold the neck brace down) rubbed me a little under my jersey. I tried not wearing the straps, but the Atlas neck brace moved around on me too much when I rode. I tried the “X” strap that they also offer, but that was too much strap against my skin. Another option is to wear the strap over your jersey, which I refuse to do because of looks. The Atlas Air is also very lightweight feeling at 580 grams and that feels like nothing when motoing down. I had zero complaints with my neck mobility while riding, but you will notice the chin bar of your helmet will hit the front of the neck brace while your BS’ing with your buddies in the pits. This isn't really noticeable while riding, but it’s something that I felt when at a standstill. Each contact point of the Atlas Air is soft against your body and not at one moment did I feel an uncomfortable feeling. 


IMG_0848.jpeg


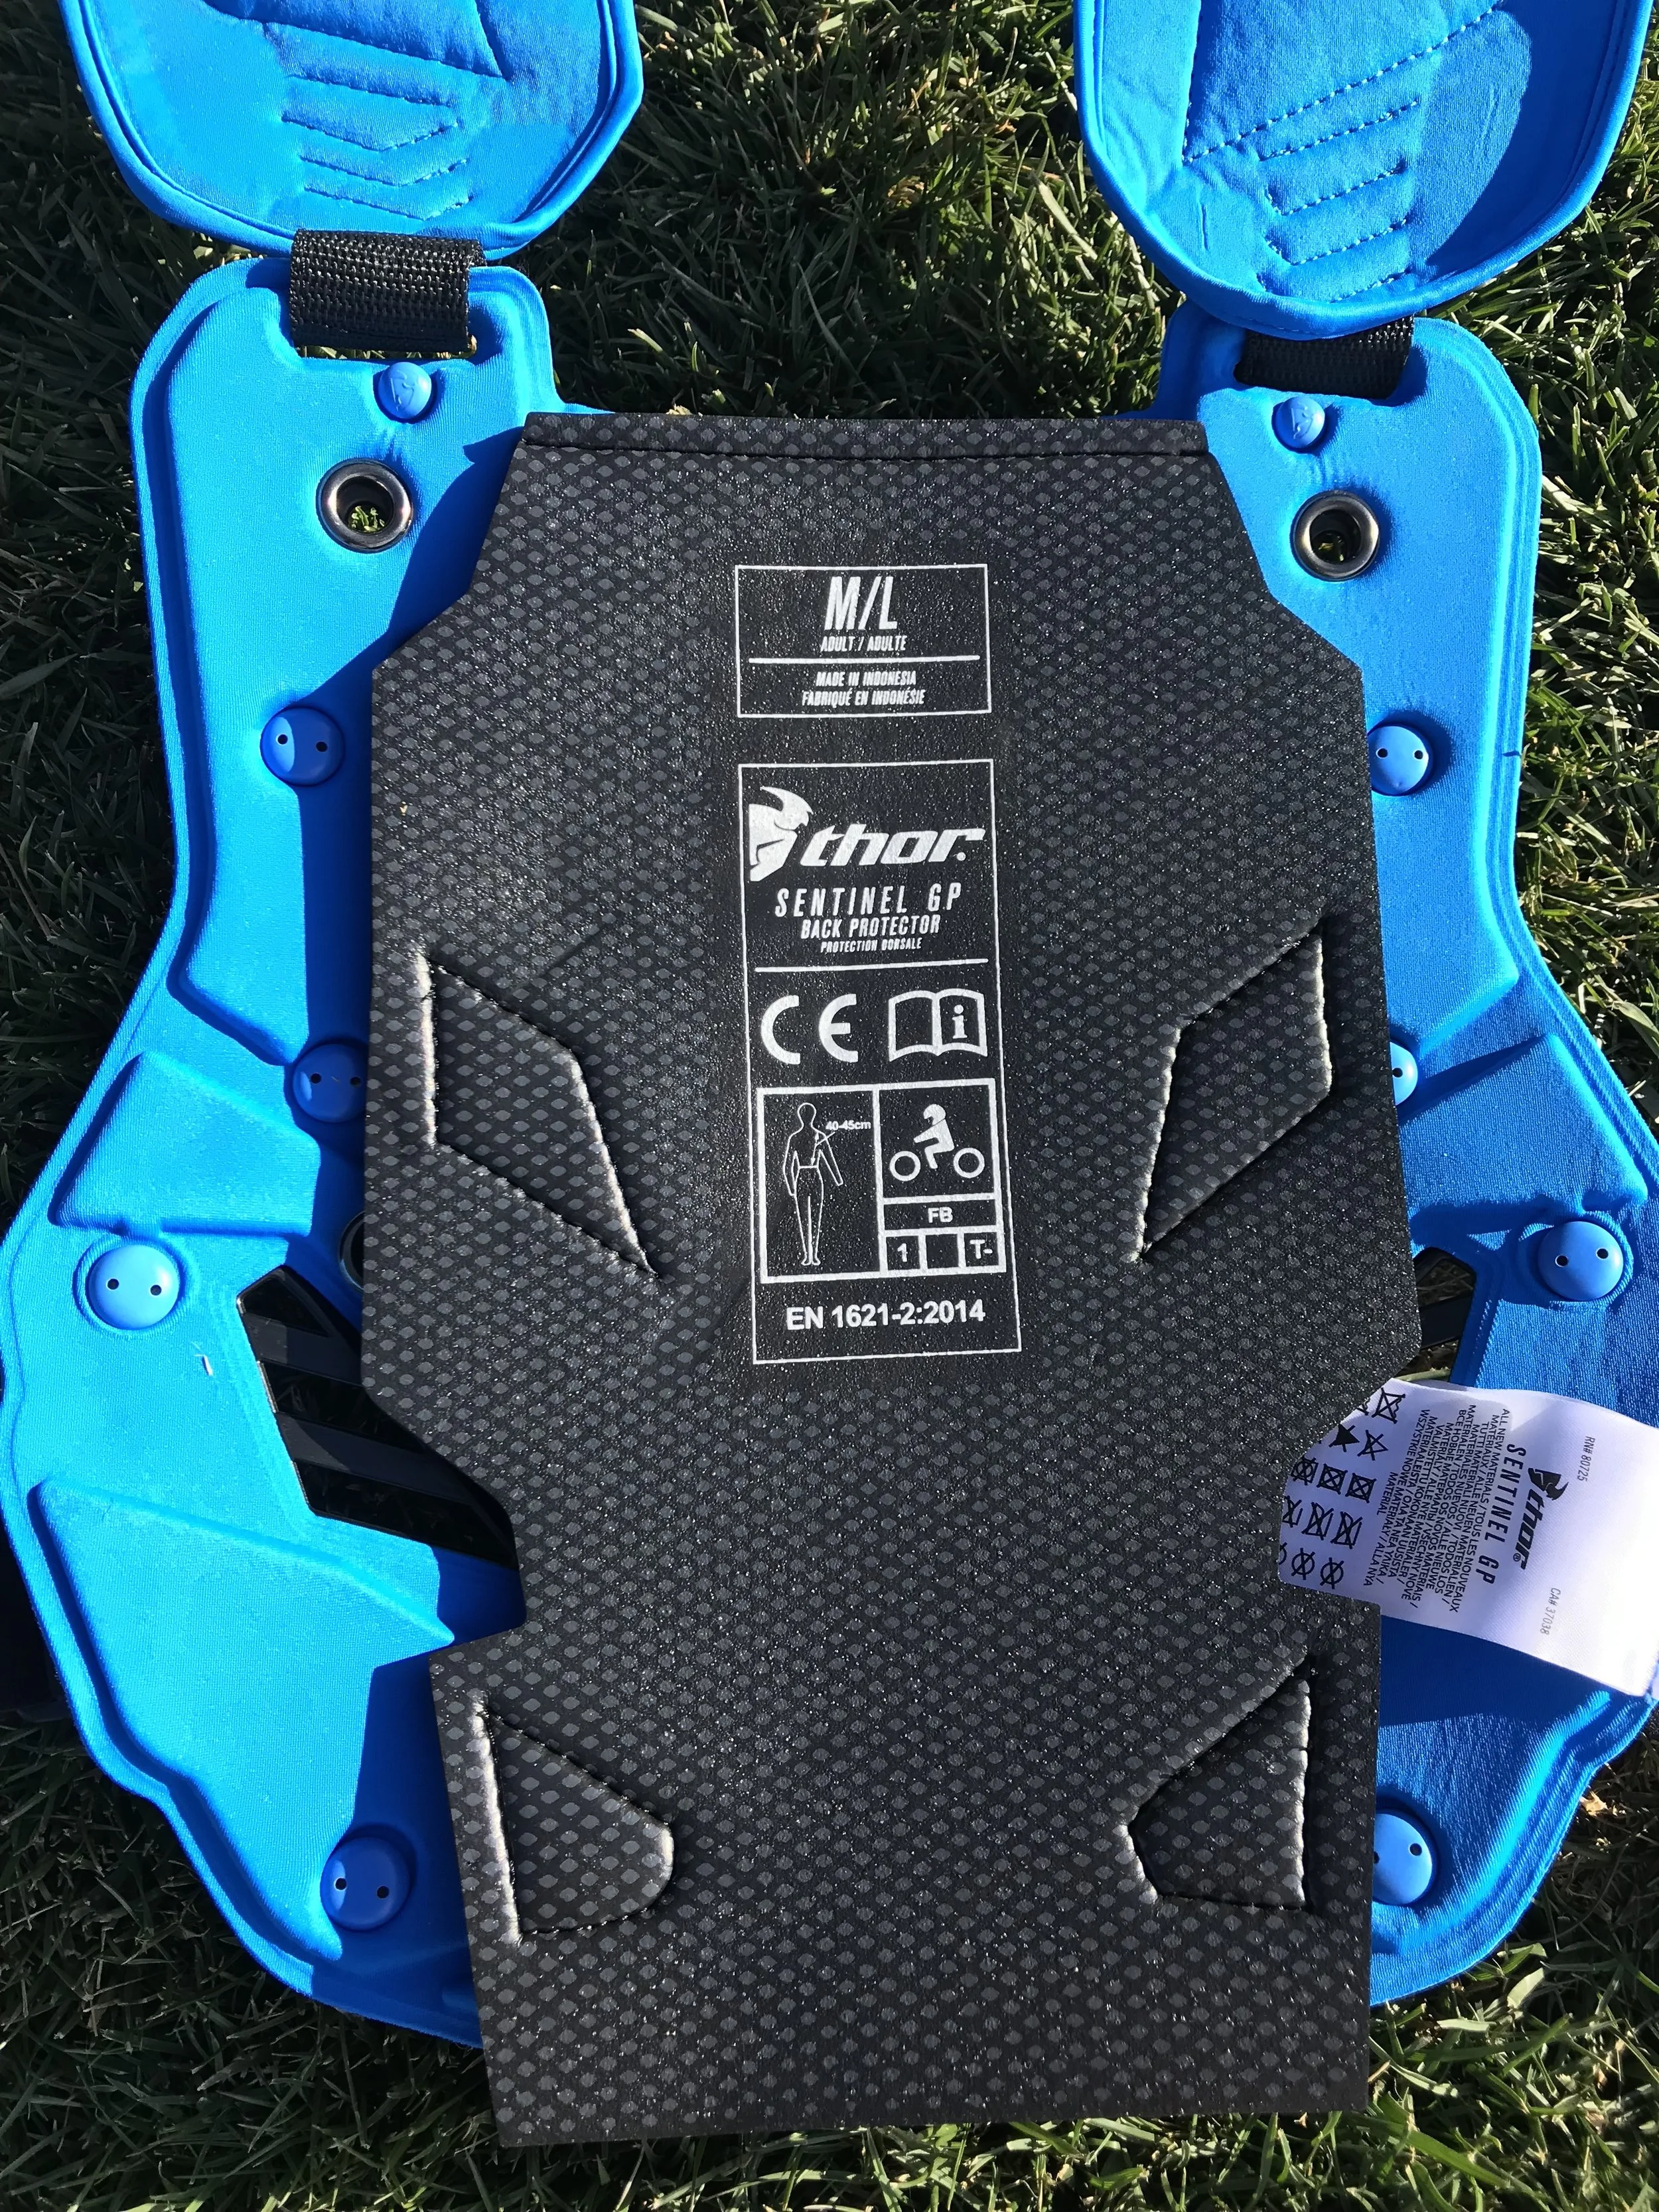
If you are a chest protector wearing rider don’t fret because the Atlas Air does comply with a number of different chest protectors. At my disposal was a Fly Revel, Alpinestars A1, A4, Thor Sentinel, Fox Titan, Pro-Frame, and even an old HRP Flak Jak! Yes, I still have one of those! I did prefer wearing the Atlas Air with a lightweight roost deflector versus a full chest pro because I felt less bulky and could move around on the bike better. However, this is more of a chest protector feeling than a neck brace issue. 


So if you haven't worn a neck brace in a while and are “on the fence” about wearing one, like I was, give it a try because you’ll be shocked on how comfortable the Atlas Air actually is. I was so impressed by how comfortable it was that I have decided to do a full neck brace shootout, come this winter, to see if the others are as good as this Atlas Air. 


IMG_0041.jpg


Since I am no BS kind of dude and I can almost guarantee you're reading this asking yourself “yeah, but will he wear a neck brace now that he can actually stand to wear one”? My honest answer to you is that I am going to “try”. I have been wired one way for so long (on safety equipment) that I am going to really give it a conscious effort to start wearing the Atlas Air neck brace more when I ride. It doesn't bother me when I ride and I am going to educate myself more on neck brace technology for future tests, so why not wear one? The lack of comfort is not stopping me anymore, so I am going to give it a go. Will I wear it 100% of the time? Probably not, but if I start to wear it more and the technology becomes something that I “believe” in fully you will see me at the track with it on. Until then all I can do is tell you that if you do believe in neck brace technology, the Atlas Air neck brace is the best neck brace I have tried to date. The cost of the Atlas Air is $329.99, comes in three sizes, and six different colorways. You can check the complete line of Atlas neck braces over at atlasbrace.com.

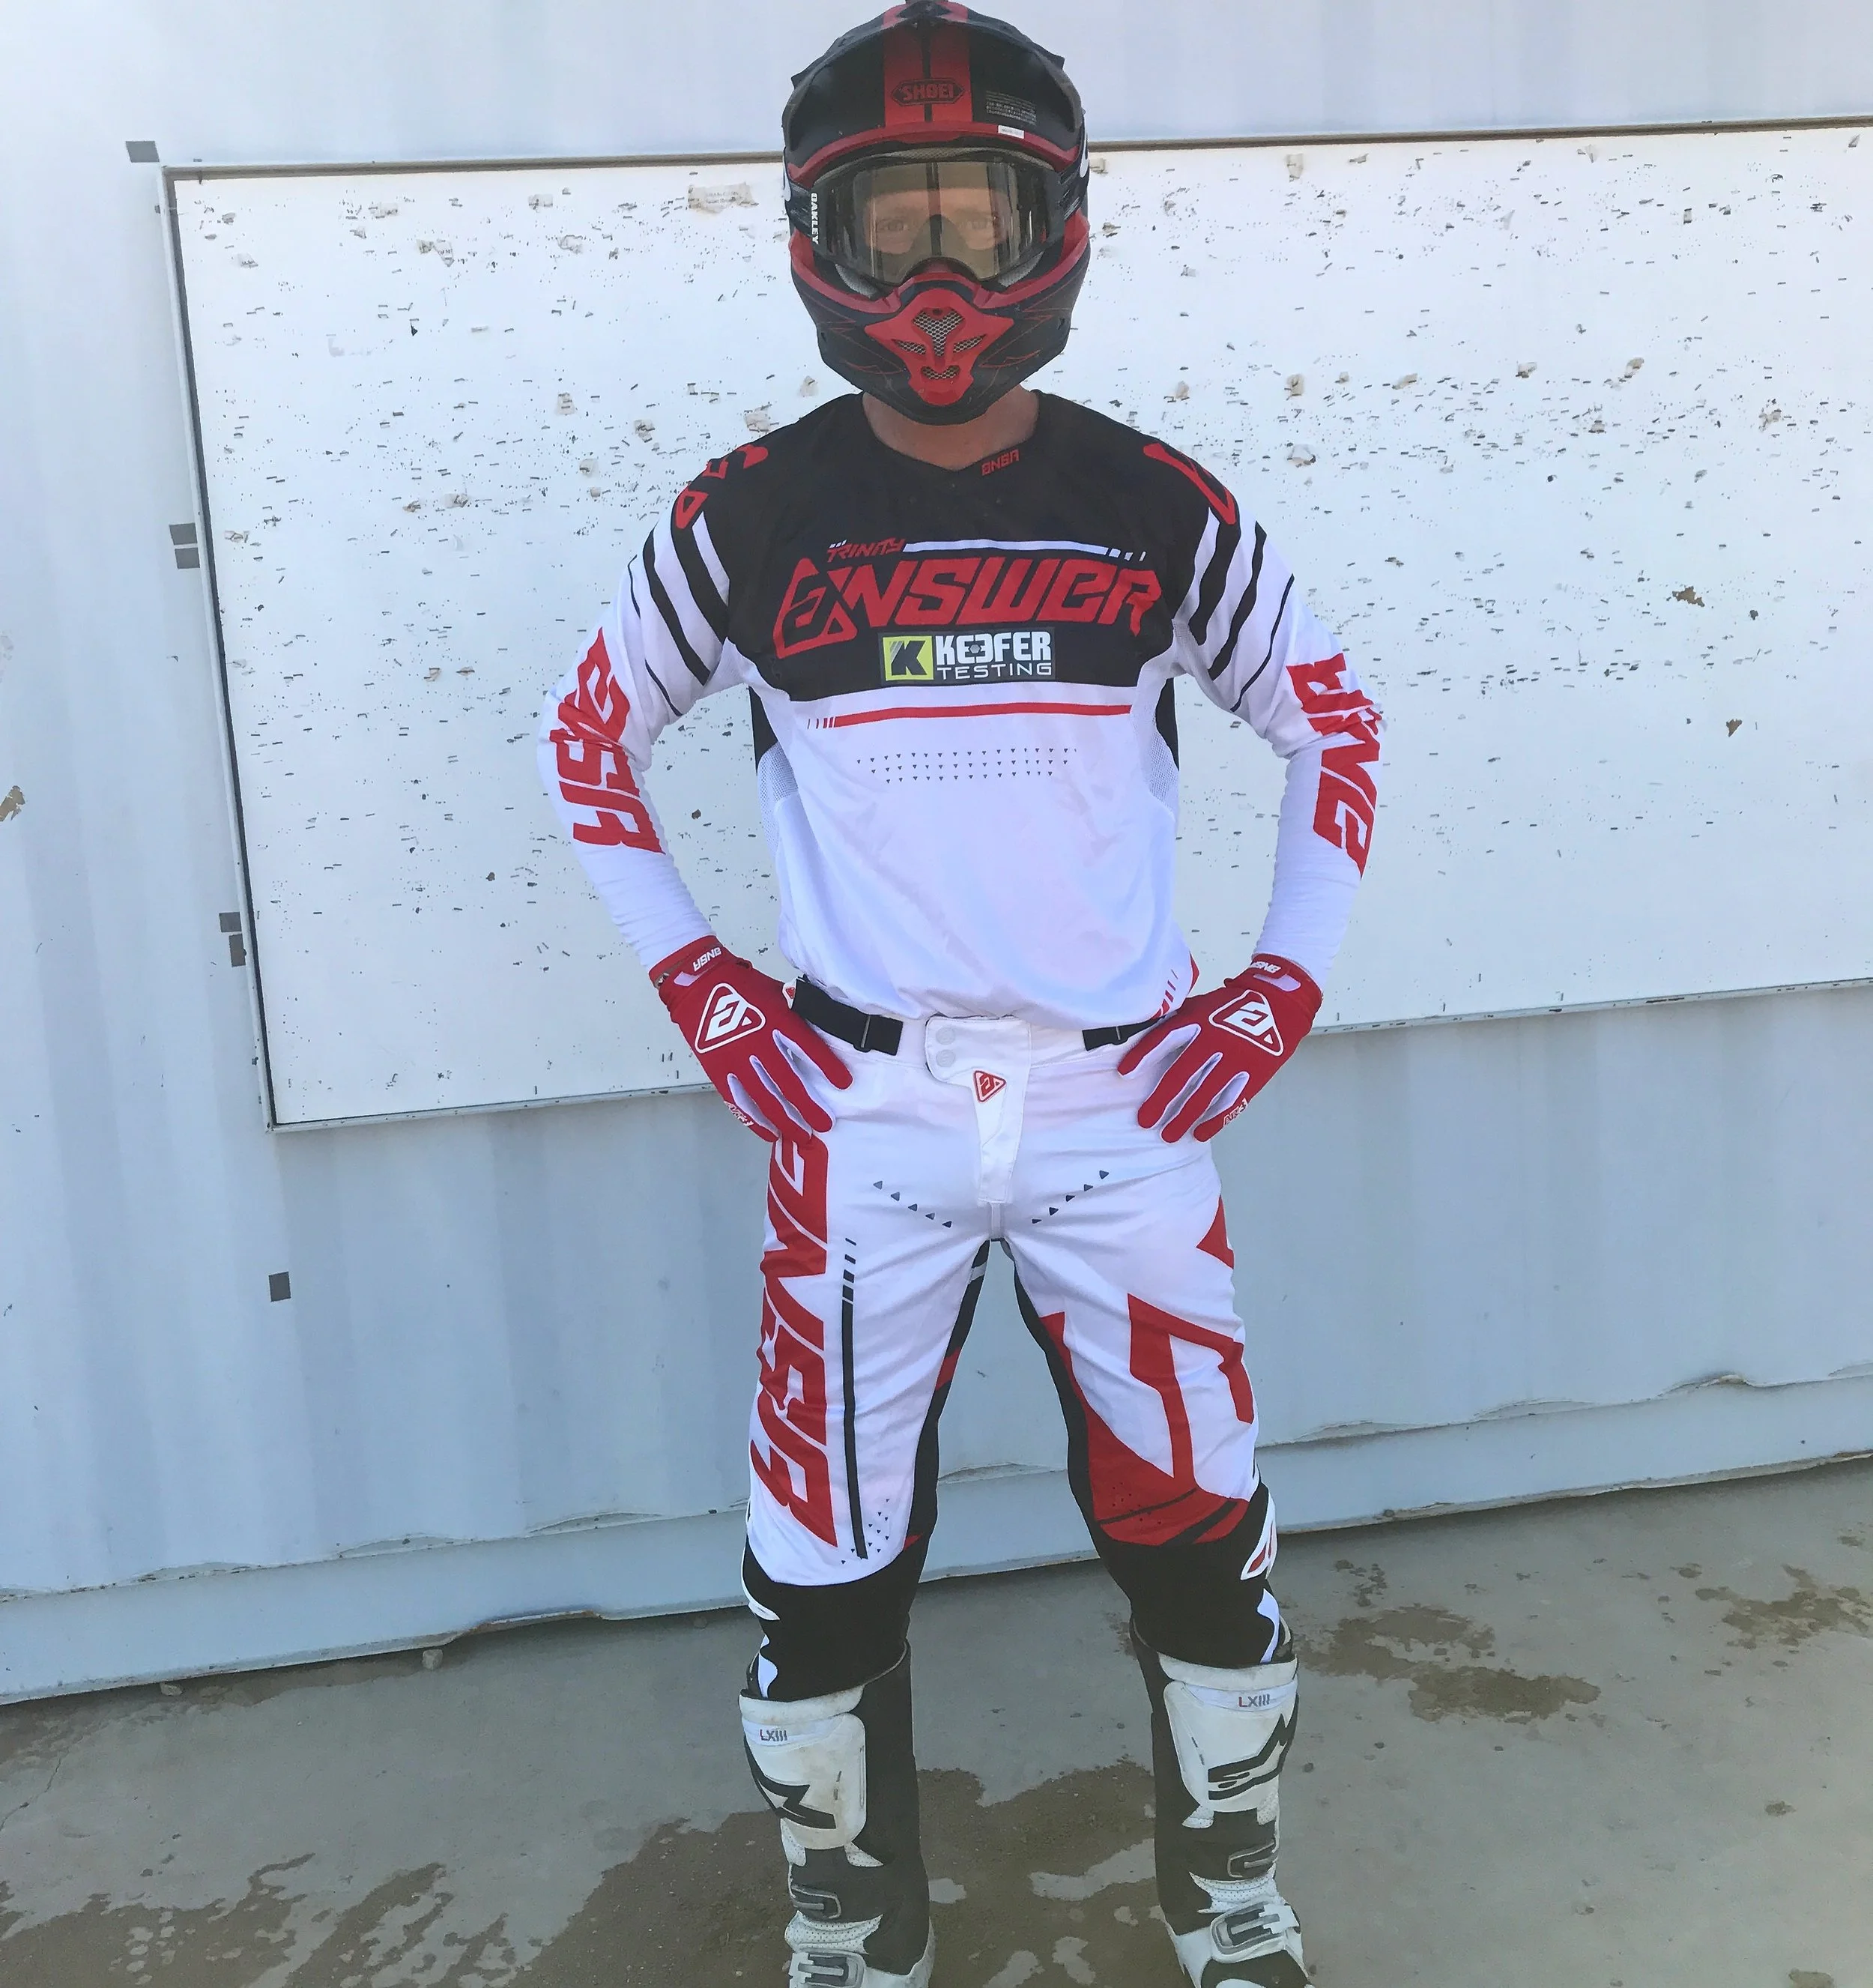
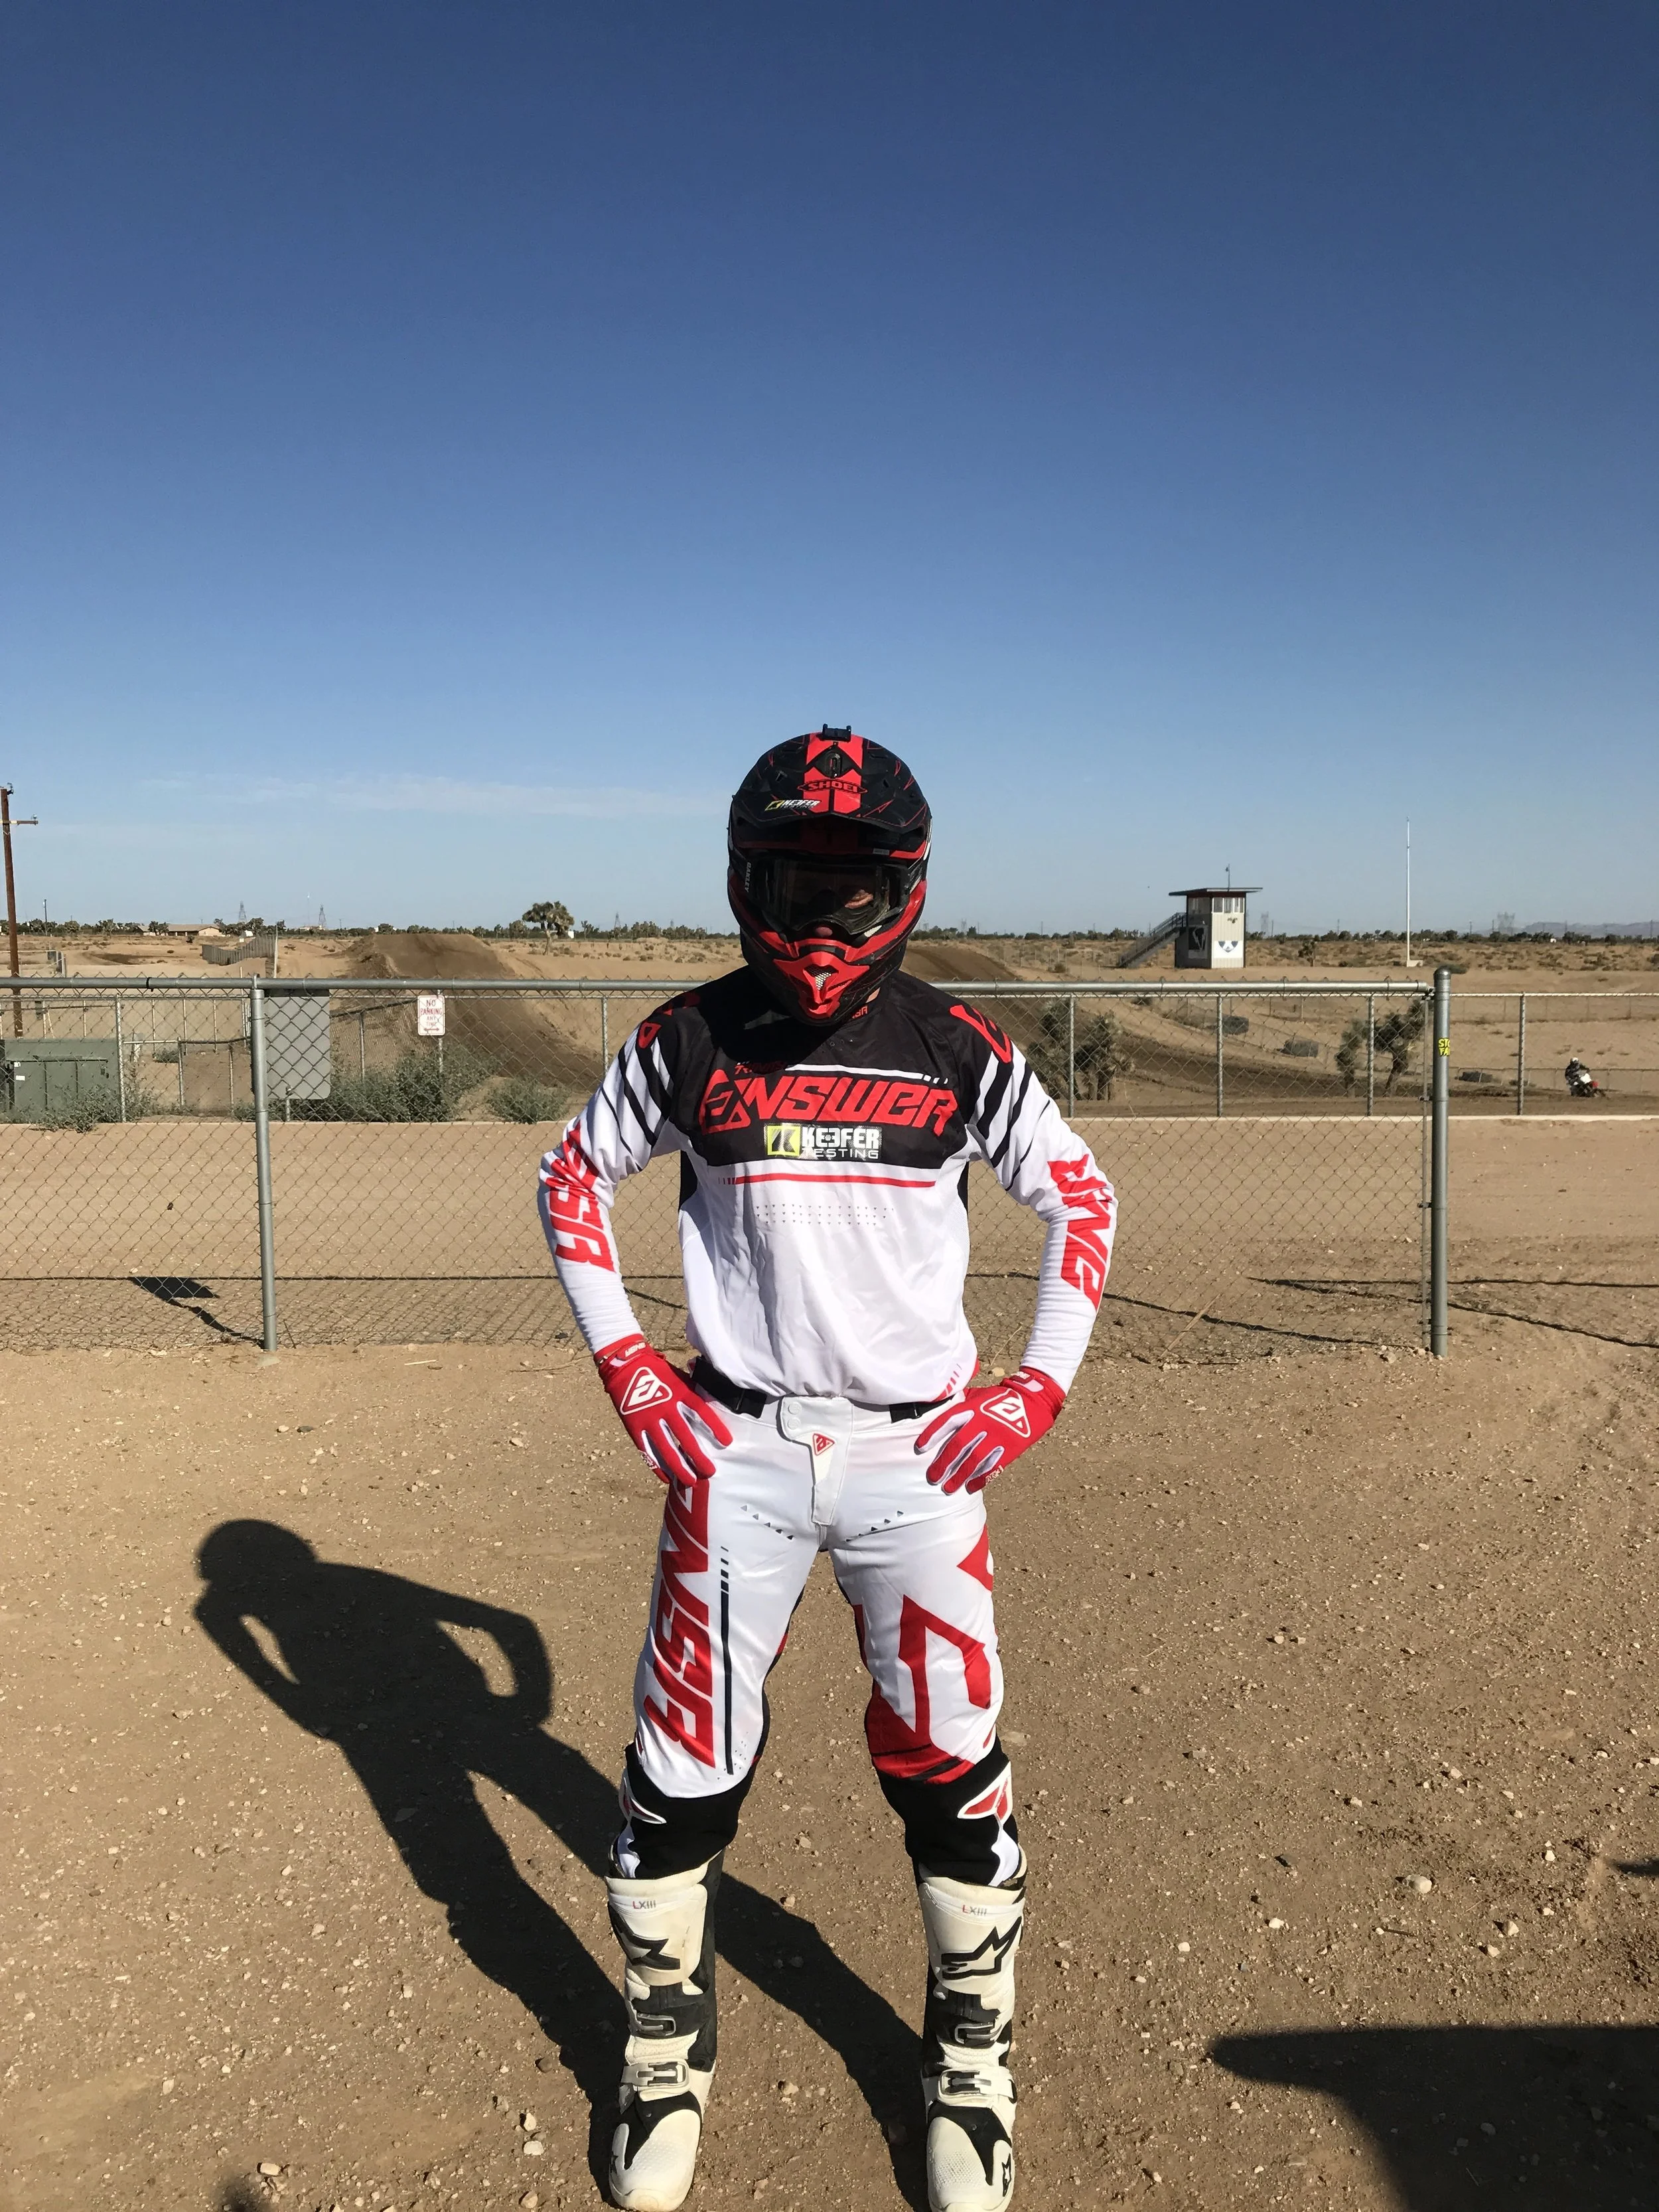
Answer Racing Trinity Pant And Jersey Product Review


Yes, I know that we are in 2019 gear season, but sometimes there is a set of 2018 gear that goes underneath the radar. The Trinity line of gear from Answer Racing to me is one of the most underrated sets of gear there was in 2018. I like an athletic fit that is stretchy, ventilates well, is lightweight and that is exactly what the Trinity pant and jersey is. I wanted to get you all some on the bike details on a set of gear that may have gone underneath your 2018 gear radar as well. 


IMG_5922.JPG


Some of the key features of the Trinity pant are:


– 320 denier multi-weave 4-way stretch nylon knee panels.

– Durable, 900 denier poly seat panel.

– Drum-dyed and de-bossed leather inner knee panels.

– Interwoven aramid inner leg heat barriers.

– Mesh lower leg panel allows for unobstructed air flow.

– Adjustable internal waist fitting system.

– Integrated knee and thigh TPR system with mesh-air flow panels.

– Laser cut ventilation panels.

– Strategically engineered stretch channels add support without limiting flexibility.

– Double and triple stitching throughout. 


When you put the Answer Trinity pants on you will notice the snug yet stretchy nature of the panels and that it contours to your legs nicely. The Trinity pant fits snugly over my knee brace/knee area, but still remains super stretchy for me to move around freely on the machine. The Trinity snap/button closure system is a nice touch and has been easy to get in an out of, but never has failed on me while riding. When I move around on the bike the Trinity pant’s rear yolk panel wasn't so stretchy that it pulled my pants down and let my jersey escape. The rear of the pant stayed in place and kept everything that I wanted, tucked in. I also really like how light weight this pant is when I ride, especially when it is baking-balls-hot here in the desert. The pant ventilates well enough where I can feel a slight breeze in key areas when I am putting in my long motos on the track. The best feature of this pant is how durable it is for a minimalistic design and how thin the material feels on your body. I have hit creosote trees, had violent roost hit me, took some diggers in this stuff and it has held up very well without tearing. The seams stay in tact and that leather inner knee panels are very resilient.   


IMG_5918.JPG


It also should be noted that the Trinity fit is true to size and has a little extra room with how stretchy the pant is in the waist. So if you're a size 33, a 32 will work just fine. It is a little tight in the crotchial region however and will show your man goods off a little more than you would like. No you will not have to worry about your fat roll busting out of the pants so you're safe there! 


Some key features of the Trinity jersey are:


– Strategically located laser cut ventilation holes.

– Minimalistic, spandex stretch neck panel.

– Articulated panels in targeted flex zones.

– Lightweight, athletic fitting body form.

– Ergonomic shaped front panel minimizes bulk while in the riding position.

– Spandex stretch dart on sleeve opening provides a comfortable, tailored fit.

– Lightweight, welded cuff openings with Spandex darts to help maintain shape.

– Fade-resistant, sublimated panels and graphics.


If there is one thing that I am picky about in a jersey it is the arm length. I DO NOT like a long, baggy sleeve where it bunches up at the end, near my glove. That annoys the crap out of me and it creates for less airflow which gets you hot quicker when riding. I love the taped seams on the cuff because the taped seams keep their integrity and do not stretch out. The Trinity jersey also ventilates fairly well and is also more of an athletic cut fit, but not so tight where you see every little imperfection in your mid drift. The collar rides up a little high on your neck, but the material is soft enough that it doesn't annoy or chafe my skin. The Trinity jersey has a simple clean look and has the correct sizing. You will not ned to work about getting a larger sized jersey because it’s an athletic fit. It’s snug enough, but its stretch enough where you're comfortable on the machine! 


For $199.95 for the pant and $74.95 for the jersey it is right in that premium gear price range, but I like the fact that it’s durable and will not fall apart after a few rides. If you’re in the market for some athletic/performance fitting gear, the Answer Trinity pant and jersey is a viable option.

Asterisk Ultra Cell Knee Braces

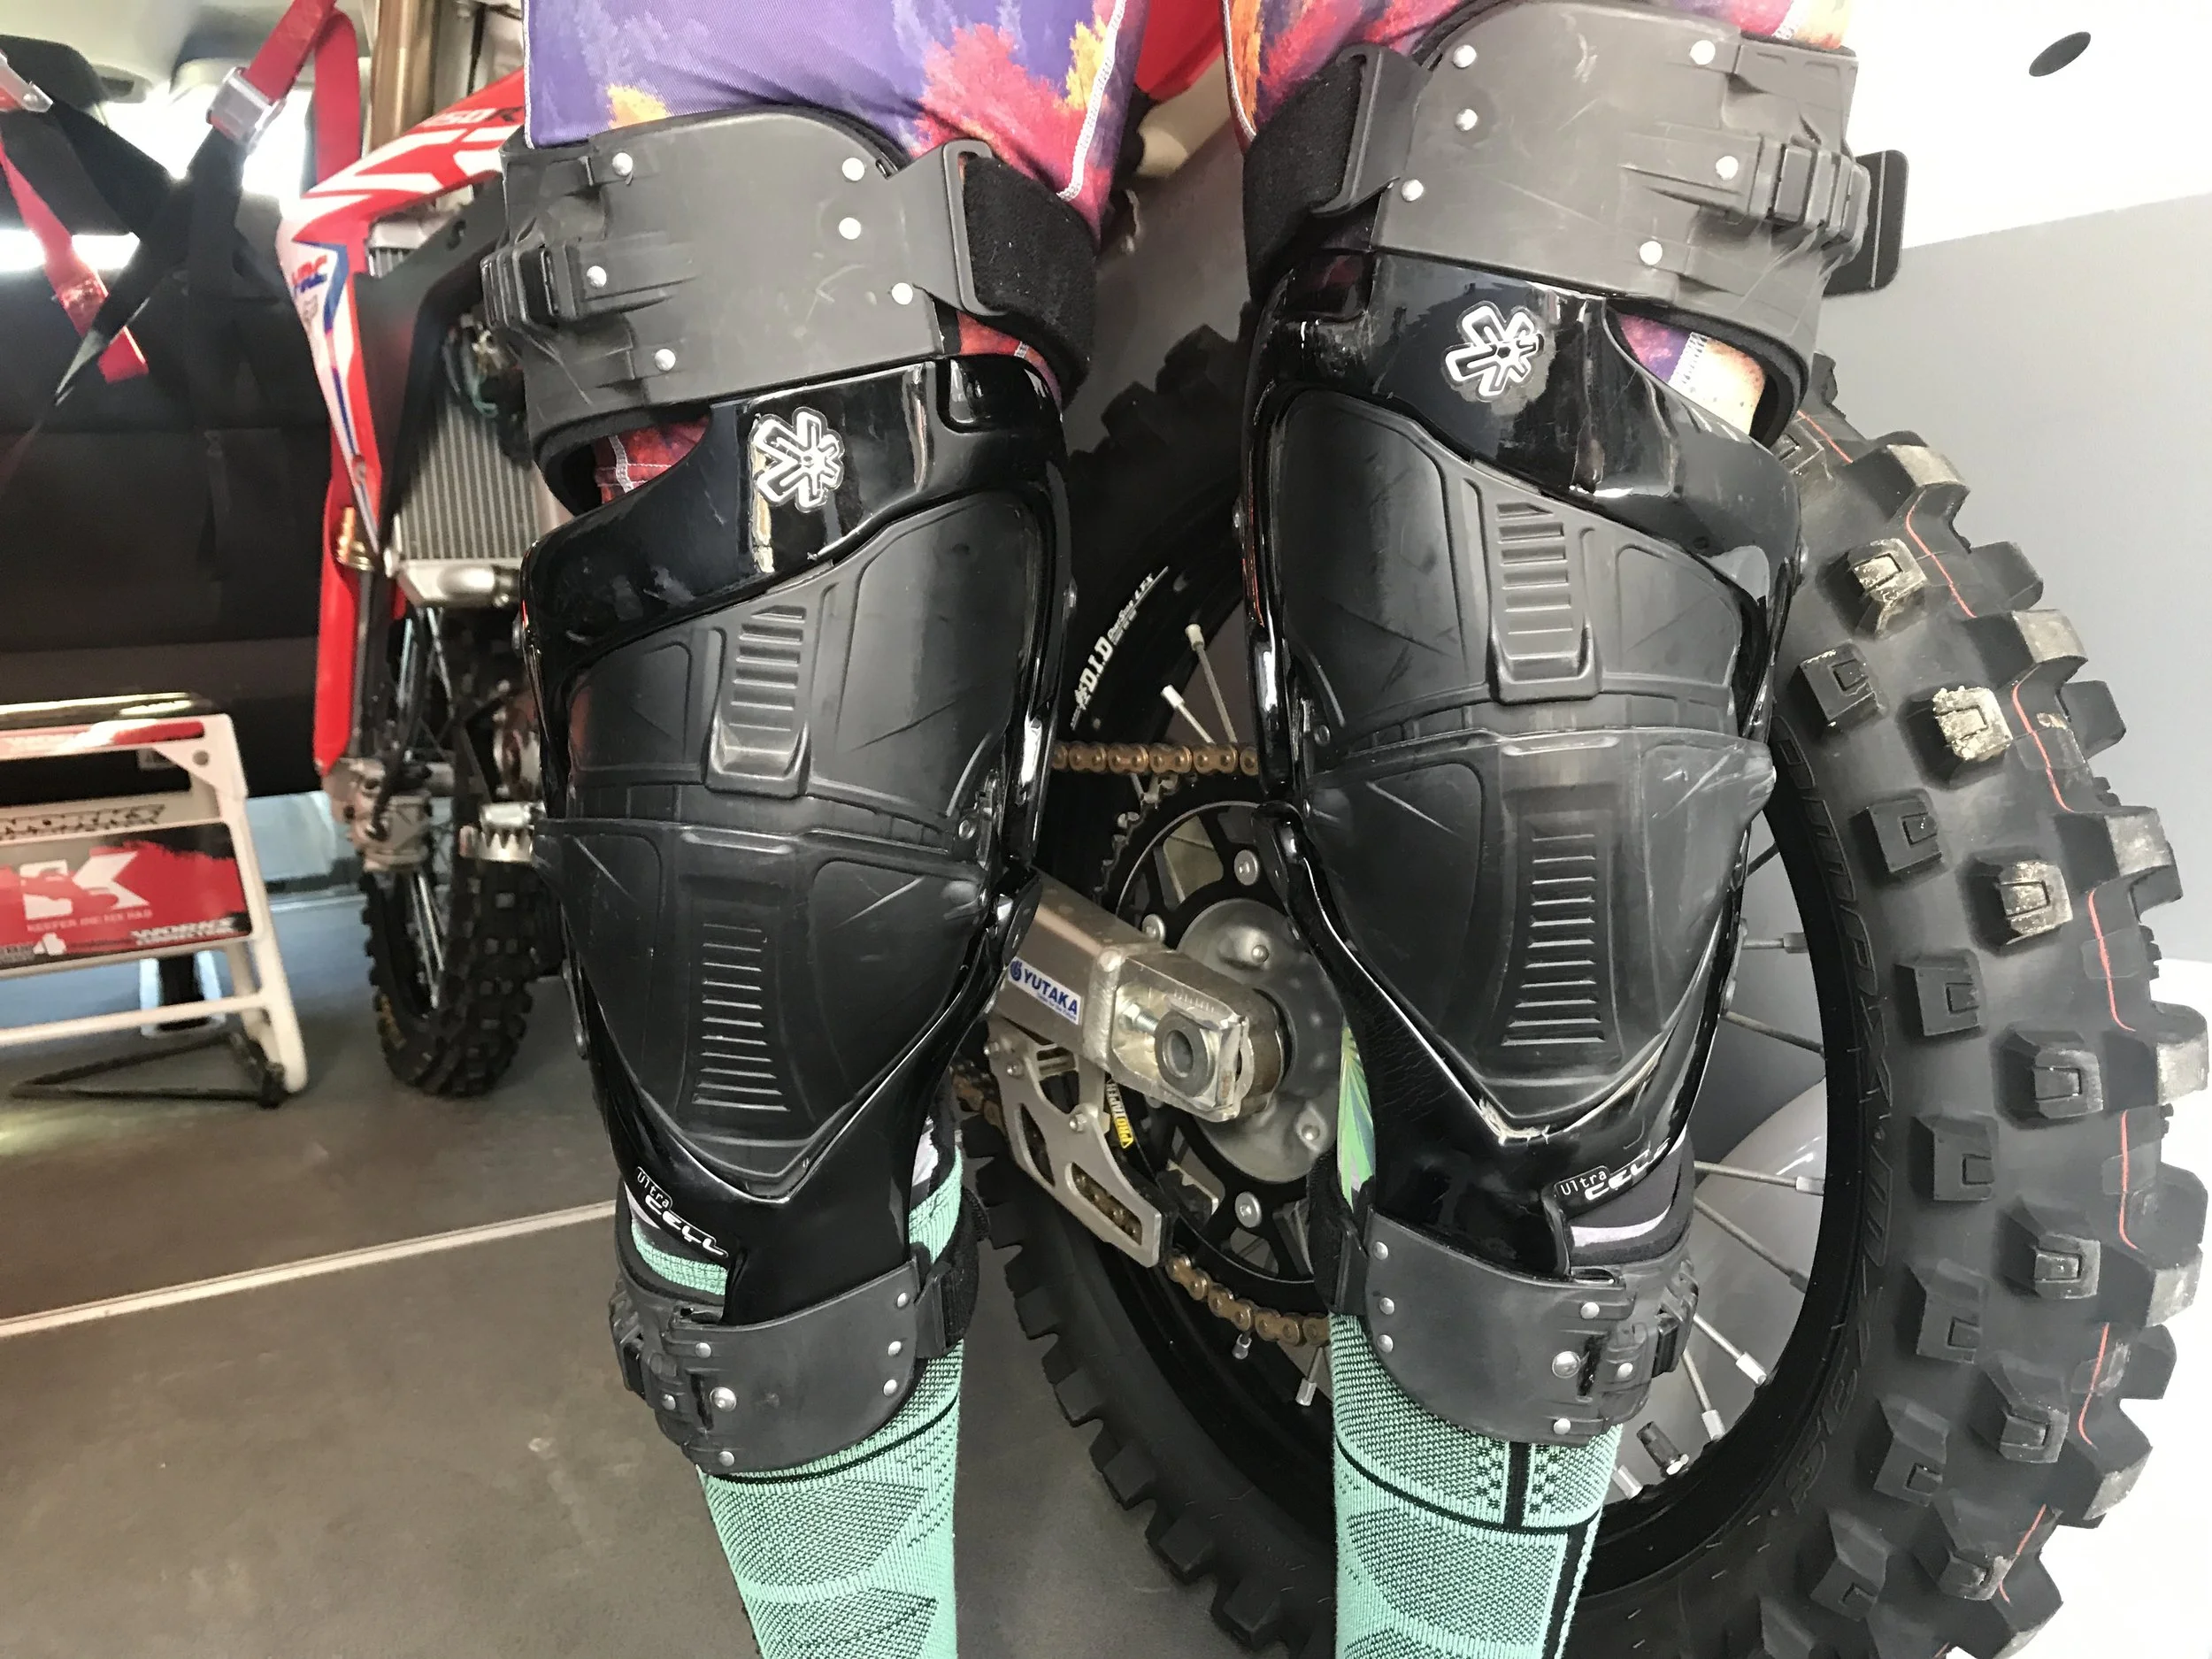
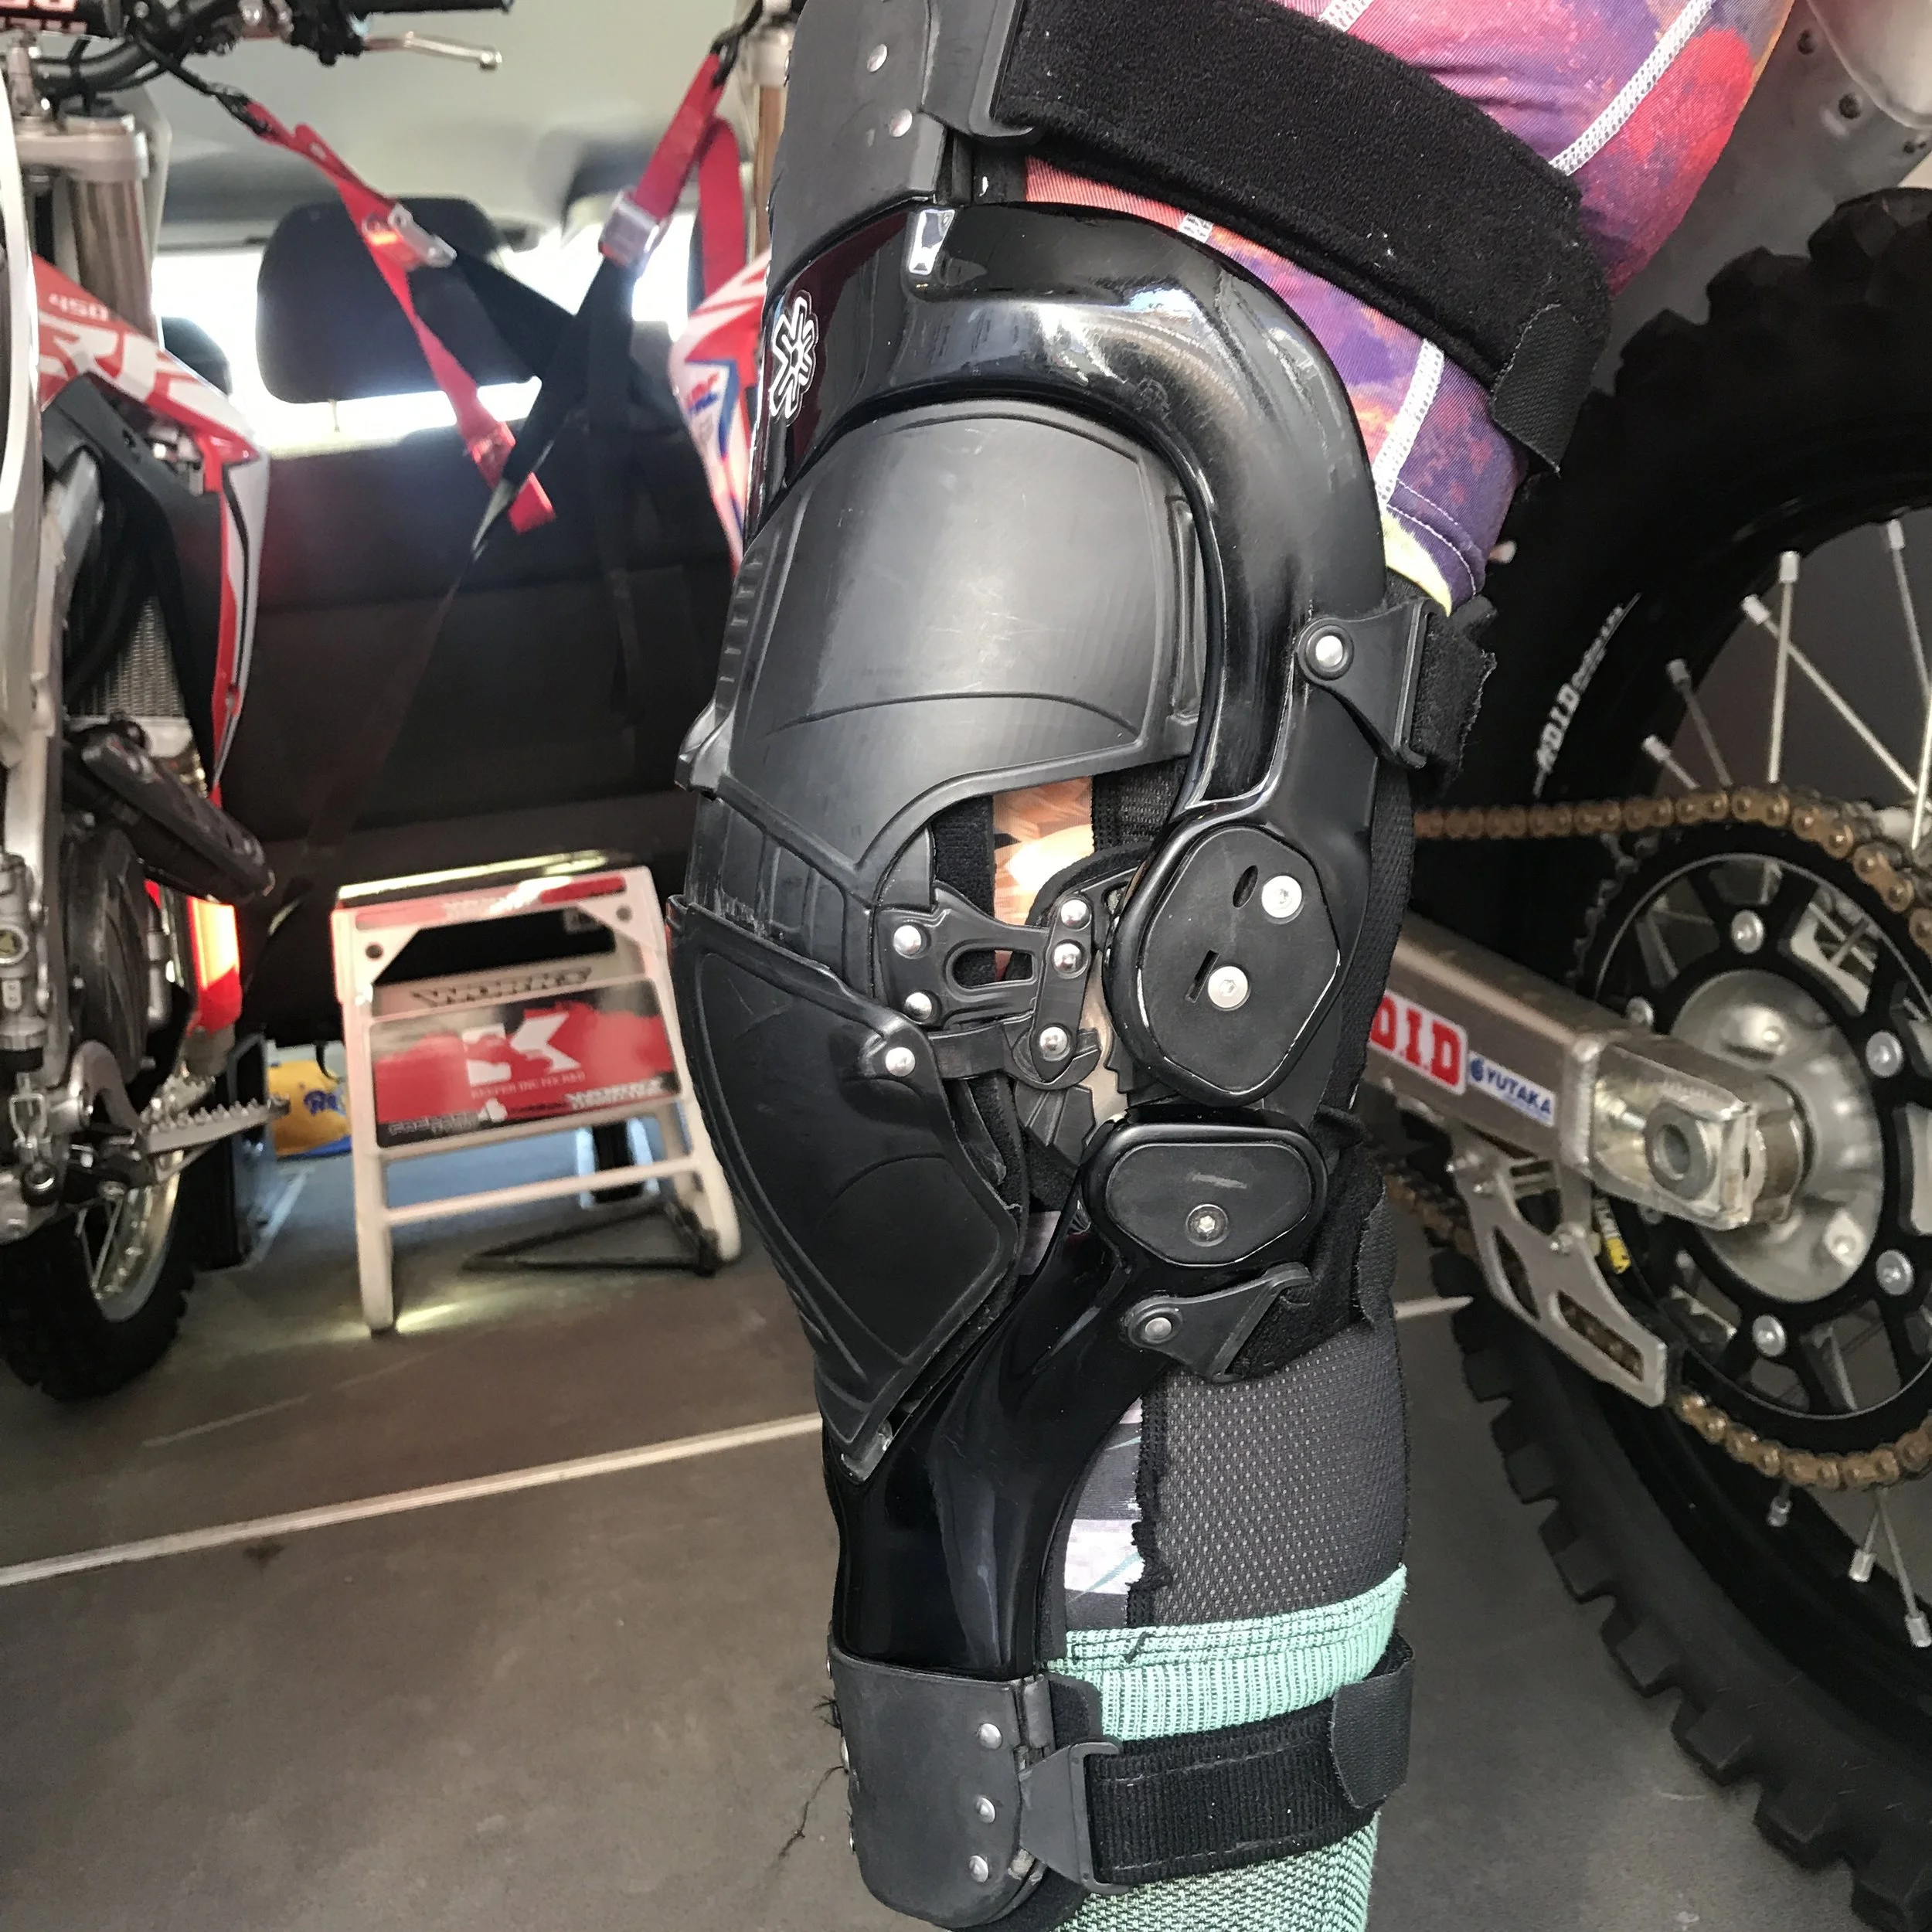
Asterisk has been in the knee brace game for quite sometime and are one of the OG's when it comes to saving your knees (without a prescription). They are under new ownership and have been moving full steam ahead for a couple years now. Most of you know that I love the Asterisk’s ZeroG knee brace pant, but what about their knee braces? Well, I have put the Asterisk Ultra Cell’s through many motos and they have been basically an extension of my legs throughout several months of riding. The newest Ultra Cell version features four adjustable Velcro straps that are less bulky and way more comfortable than the older Cell’s. The knee cup system is almost seamless and leaves no gaps at all so you don’t have to worry about stabbing your knee with your handlebars (when you go deep into a corner). As you bend your knee, the upper and lower shields are revealed from beneath the patella cup, and as your leg is straightened, they move back into place behind the patella cup. The Asterisk Ultra Cell braces have a fully adjustable calf and thigh cuffs for a customized fit.

IMG_5812.JPG


The floating knee hinge automatically aligns itself with your knee joint thus allowing it to fit on a wide range of leg and knee shapes. The Ultra Cell brace is one of the most low profile non prescription braces I have tried and it will not get snagged or caught on your riding pant liner (if you have a liner in your pants) if you're careful. If you want to be more careless when putting the braces on please go buy yourself a pair of Zero G pants. Trust me!  The knee joint hinges are rounded enough that they don’t tear my pants up after months of use. Before you ask, yes I do wear pants long enough to see if it wears holes in them so pump the brakes. I like that I can adjust the extension and flexion of the brace so that I can determine how much I want my leg to bend. 

The Ultra Cell comes with a patented boot tether system that securely attaches at the bottom of the brace to your riding boot, effectively making the boot and brace as one piece of equipment. To do this you must drill a small hole and install the other half of the strap-attached clip to your boot, plus cut a small hole in your pant leg. Yes, it’s kind of a pain, but worth it when considering how much more protection you get. When you do tether the brace up, the force will now be transferred from your boot, into the brace. Did I do this with every pair of pants I own? No, I didn’t, but I did notice a more secure feel when I got caught dragging my feet in sizable ruts. The comfort of the Ultra Cell’s are second to none and although I am not a huge fan of the Velcro strapping system on any brace, I am glad that Asterisk has the ZeroG pant to prevent the brace from moving around on my leg.

IMG_5810.JPG


Call me crazy, but I thought the older lace up design held to my leg better than the Velcro strap system does. Sizing is important so make sure to measure your leg correctly by using a soft measuring tape and measure directly in the middle of your knee cap. I did encounter (with my large size brace) that I needed smaller (length) Velcro straps. If you do order direct (which you can) you might want to ask for a smaller sized Velcro strap set (just in case). 


IMG_5814.JPG

The Ultra Cell knee braces have been on my legs for many days of riding and have performed well, but more importantly left me feeling safe. Does that mean it has prevented a knee injury from happening to me? Possibly, it’s tough to say. I don’t wear or trust knee guards to find that out so I stick to braces. Some riders swear by knee guards and usually it’s a matter of feel (bulkiness) on the bike for them. I however do not notice a very bulky feel, when squeezing the bike, with my legs, with the Asterisk Cell braces. At $699.00 the Asterisk Ultra Cell braces are a good preventative piece of protection that I will not go without. You can go to asterisk.com to purchase a set or you can call them directly at (951) 268-6790

Leatt X-Frame Knee Brace Review


For years I only wore knee pads because I didn't particularly like knee braces and their bulky feel. In fact there are still a few top pros out there racing that swear by only using pads and refuse to wear knee braces. About five years ago I had a friend give me a pair of his used braces that I had refurbished and rode with for a few days. After I gave those knee braces more than a day's worth of riding, I have been wearing braces ever since. In the past I’ve tested many different braces with that other magazine, but never had the chance to try out Leatt’s latest offering, the X-Frame. Leatt offers the braces in sizes small through extra-large as well as offering right and left sides sold individually. They are made from an injected carbon composite and are CE certified as both a medical device as well as impact protection. One cool feature the X-Frame has are the hyper extension limiters (5,10,15, and 20 degrees) that come with the braces just in case you have limitations from previous knee injuries. In addition to the hyper extension limitations, Leatt also has integrated hyper flexion stoppers to limit meniscus injury.  

IMG_1873.jpg

When it comes to protective gear with a lot of different configurations I’m a simple man, unless somethings bothering me I just leave it be. I am sure many of you out there can relate. So since I don’t have any knee injuries from the past, I never touched the different limiters that come with the braces, although for someone who has knee problems, I can see how it would be a huge advantage. Leatt did their best to keep the brace thin on the sides, so the braces don’t dig into your leg when squeezing the bike and I feel like they did a good job with keeping them comfortable. There were only a couple times that I had some slight irritation on the inside of my knee. That happened when I wore the Leatt knee brace pants incorrectly and had the braces riding on a sewn seem (of the pant) and it slightly dug into my leg. In addition to that, when my knees are in the slightly bent position I feel slight pressure on my knee cap from the knee cup. This isn’t anything painful, but can be slightly annoying after a long ride. In terms of impact protection these braces held up great, I had a few get offs while testing them as well as hitting plenty of trees/shrubbery while riding off-road. I never felt like my knees were vulnerable while wearing these braces and could wear them for a long period of time without too much fuss. When it comes to taking the braces on and off, it seems as though there are a few options. Both sides of the hook and loop straps come apart and can be adjusted. Not to mention the clips on the straps “clip” on and off of the brace. Every time I removed the braces I just left the clips in the braces and un-did the straps, so I got a nice snug fit every time I put them back on. I know this is a first world problem, but the hook and loop straps were VERY grabby when left undone. They would hook onto the other straps and get twisted up as well as attach to everything in my gear bag. This is not really an issue, just more of a tip for you all out there when using the X-Frame's. 

IMG_1875.jpg

Only a few years ago there were just a few players in the knee brace game, but now thankfully for us consumers, there are multiple high end options on the market like the Leatt X Frame Braces. I would say these braces are at the higher end of the market in terms of quality for being an off the shelf, non “custom fit” brace. Coming in at $449.99 for the pair, they aren’t going to completely break the bank either when compared to some of their competitors. If you’re looking for a quality knee brace that keeps your knees protected from impacts as well as internal injury, go to your local bike shop and try a set on and give them a shot. 


IMG_1877.jpg

Keefer’s Note: Please be aware that ALL knee braces take some time to get used to. You are not going to strap on your new knee braces, jump on your bike and everything will feel magical. If you have never worn knee braces before it can take up to a few rides to get used to the bulkier feeling (compared to knee guards). -KK


If you have any other questions regarding these braces feel free to shoot me an e-mail at michael@keeferinctesting. 


Fox Vue Goggle Review


Fox has been building and selling goggles for over ten years, but nothing they have brought to production has been this advanced until now. The Vue goggle is the latest model in Fox’s goggle program and is available now. It’s the product of an extensive R&D collaboration with Fox’s Moto-X Lab athlete Ken Roczen and takes over as Fox’s new top-of-the-line goggle. The Vue’s design focuses primarily on maximizing the rider’s field of vision, but it has two other interesting and practical design elements – the dual-material frame construction and a strap-outrigger system that doubles as a locking mechanism for lens removal/replacement. Genius! Fox offers three different colorways of the Vue goggle, the white and black colorway retails for $119.95 and the red for $129.95 (with spark lens). I am huge fan of the Oakley Airbrake goggle and its wide peripheral and easy to change lens system, so when Fox introduced the Vue, I was excited to see how it worked on my face while at the track. 

IMG_7933.jpg


The dual-density frame construction (with an ABS/nylon outer frame and softer TPU faceplate) allows the goggle to seal to your face shape really well. They do feel rigid when holding them in your hand, but are flexible enough to give the rider comfort and refrains from letting dirt inside the goggle. The triple-layer face foam is soft and wicks away sweat effectively on hotter days, even my heavy sweater tester commented that the Vue’s foam was more effective than his 100% goggles he currently has. No Maxi Pads needed people! The Peripheral Vision is on par with the Oakley Aribrake and Scott Prospect as the Fox Vue’s field of vision is excellent. The Vue goggle fits inside a wide variety of helmets like the Bell Moto 9, Shoei VFX-EVO, 6D ATR-2, Arai VX-Pro4 and of course Fox’s own V-3. The pre-curved injection-molded polycarbonate lens (which is similar to what appears on the Oakley Air Brake goggle) offers two huge benefits: optical clarity and much better protection against roost than conventional Lexan lenses. I have had more than a few Lexan lenses pop out on me when a sizable rock has hit my goggles (while racing in the past).

IMG_7993.jpg


 With the polycarbonate lens I have had several roost/rock moments and the lens has stayed in tact. The combination of 360-degree ventilation foam and the lens’ anti-fog treatment means the Vue goggle resists fogging much better than most other goggles I have tried with a single-layer lens. As much as I love the Oakley Airbrake goggle they do have a problem with fogging on colder days. I have tested the Vue goggle in lower 30 degree Fahrenheit temps and the lens will not fog. Boom! I have heard that Fox will be coming out with a dual-layer lens soon for you die hard, east coast, cold weather riders. Changing out the lens is easy to do by popping the outriggers off of the frame then popping the lens off its four posts. However, if I am nitpicking, which is what I do best, I would say that the Oakley Airbrake is easier to change lenses out by a hair. The Vue lenses, to me, are easier to change out than the Prospect by the same margin. Another benefit of a pre-curved polycarbonate lens is when you stack a pack of seven tear offs on the Vue goggle, the clarity stays in tact once installed. The Vue goggle clear replacement lenses are slightly less expensive than the Oakley Aribrake at $19.99 and are the same price as a Prospect replacement lens. 


IMG_7989.jpg

If you're looking for a great wide peripheral goggle, I think the Fox Vue is a great goggle at getting comfort, vision, clarity and sweat absorption. You can check the goggle out over at foxracing.com and purchase a set over at rockymountianatvmc.com

IMG_8008.jpg


Now, I already know what you guys are about to email me! “Kris, what if I wear Fly or Thor gear? Can I wear these goggles with other branded gear companies”? Ehhhhh boy…I created a monster! Yes, go ahead and wear the Fox Vue goggle with your Fly gear! The Vue goggle is good enough to mix and match, but just make sure your pant, jersey and gloves match though ok? -KK

Leatt GPX 6.5 V-16 Carbon Helmet


After testing and really coming to enjoy the Leatt GPX 4.5 gear I was excited to try their GPX 6.5 carbon helmet. For starters, who doesn’t like getting a new helmet and on top of that, it’s a helmet that matched my gear. Leatt has integrated their 360 degree Turbine Technology into this ECE and DOT certified helmet to try and limit injury from rotational forces.

IMG_7916.jpg

The first thing I noticed when viewing the Leatt was its small shell size. It almost reminds me of a full face mountain bike helmet. The reasoning for the smaller shell is simple; the less mass the helmet has, the less force is transferred to your head. Obviously there is a fine line between cushion and mass, but Leatt feels that their smaller shell is safer. One of the reasons that the shell can be so small is because the V-shaped impact foam is molded directly to the shell. The small turbine structures used in the helmet are designed to deform or collapse when forces reach a certain point, to help cushion the blow to the riders head. 

IMG_7917.jpg

Fortunately I never got the chance to really test out ALL the safety technology Leatt put into this helmet since I didn’t have a bad crash while wearing it, but here’s what I can tell you. The helmet is small and very light, which is nice because it doesn’t make you feel like a bobble head. I noticed the smaller shell instantly because I had to adjust my goggle strap tighter than I do with most other helmets I have in my rotation. Speaking of goggles, this is where I had my biggest complaint. The eye port/nose guard of the Leatt helmet was barely large enough to fit the array of goggles I use. The Blur magnetic goggles were tight in the eye port and had to be somewhat pushed into place in order to seal to my face. Any wide peripheral goggle like the Scott Prospect and Oakley Airbrake never really sealed well enough to keep dirt/roost out. For riders wearing smaller framed goggles like EKS Brand, 100 percent Accuri and Scott Recoil this wasn’t an issue. The helmet liner/cheek pads were comfortable, snapped in nicely, and after multiple washings didn’t show any signs of wear. One cool (pun intended) feature of the Leatt is the ventilation. This is the best ventilated helmet I’ve worn in quite some time.  Another feature I absolutely love on the V-16 is the hydration hose clip which is built in the chin bar. Instead of having to use a hook and loop strap, or drill holes and zip tie your hydration hose, you can just snap it into the chin bar. 

IMG_7920.jpg

After riding with the V-16 for quite sometime, I can say I am pleased with the light weight feeling it gives when being worn. On top of that, since I’m an off-road guy I have to say I love the hose clip as well as the excellent venting the helmet offers. On the negative side I don’t think the V-16 is very aesthetically pleasing in my personal opinion. I feel like the small shell gives the helmet a very awkward, small and un-natural look (this could be partially due to my giraffe like neck). The smaller goggle port also makes it tough to find the appropriate goggle to fit inside the Leatt lid. In terms of functionality and safety I have no problem saying that the Leatt is a high quality helmet that has a lot of thought and technology put into it. With a retail price of $599.99 it is in the range of most premium high end helmets, but can you really put a price on keeping your head safe?  -Michael Allen

If you have any questions about this test please feel free to email me at michael@keeferinctesting.com. 


6D ATR-2 Helmet Review

It’s hard to write about something, that in some cases, can’t be fully tested until shit goes wrong. In the world of helmet safety, we as buyers have to be very trustworthy customers. I mean…We have no choice but to be right? We have to trust in what the helmet company is telling us (about their latest safety technology offerings) is in fact the truth and works in real world conditions, just like the test results say back at the testing facility. The only way to truly know if the helmet “works” or not is to crash and that is something that riders usually aren't looking to do. However, when it does come time to test the safety aspect of the helmet, it better damn well work and be what we paid for. I have worn and trusted in the 6D technology for quite sometime now and even spent my own money on a few helmets for my kid and I. 6D introduced their latest off-road helmet, the ATR-2 and I have had some time on it now to fill you in on what it’s like to ride with.  


IMG_7925.jpg

 The 6D ATR-2 off-road helmet uses Advanced ODS technology. The ATR-2 is an evolved version of the company’s signature Omni-Directional Suspension system (ODS). The updates have been heavily influenced by the work 6D has done inside the NFL’s Head Health Challenge III Contest, in which 6D and testing partner Dynamic Research Inc. were selected as the Grand Prize Winner. What’s that mean to us off-roaders? It doesn't mean 6D is going to be switching gears and producing helmets for the NFL, but it means that they will have some extra funding now to further progress helmet safety for us dirt bike goers out there. All great news! 


The ATR-2’s Advanced ODS is highlighted by a new Expanded Polypropylene (EPP) multi-impact outer liner and a new Expanded Polystyrene (EPS) replaceable inner liner. Just like on the ATR-1, the two liners are connected via a series of elastomeric isolation dampers, assisting in progressive loading of the ODS system during impacts. Now, however, many of those ATR-1 dampers have been replaced by damping towers that are incorporated into only the outer liner; these towers are capped by newly updated, low-friction disks that slide freely against the inner liner, thus reducing friction under loading and increasing the displacement travel between the two liners. Make sense? Ok, good! 


IMG_7926.jpg

With this new Advanced ODS system in place, the ATR-2 is said to offer improved performance in both linear and angular acceleration mitigation, and at the same time can be made easily rebuildable for a longer service life. In addition to Advanced ODS, the ATR-2 features a number of other updates aimed at improving safety: A structural Brow Rib strengthens the upper eyeport area, while a special designed Cervical Protection Zone works to protect the rider in the event that the helmet is pushed down and back into the neck and spine during an accident. Safety features that have carried over from the ATR-1 include a clavicle cutaway, sternum pad, shear-away visor screws, and emergency removable cheekpads. This is not an ATR-1 with a new name. The ATR-2 is truly unique. 


1D3_5518.jpg

I usually wear a size medium in almost every helmet, but with standard cheek pads installed inside the ATR-2, it does feel a little loose against the cheeks (side to side). For most other medium wearing helmet riders that I let try on the ATR-2 helmet, they thought it was fine, but I go with a thicker 55mm cheek pad and the fit is great for my round shaped head. If you feel like you need to tighten the space in your ATR-2 try going one size up in cheek pads. The Genuine Dri-Lex liner of the ATR-2 feels slightly softer than the old ATR-1 and is not as harsh against my sensitive face. For guys that grow the beard out and love to moto, this is especially nice as it doesn't irritate your skin. When riding back to back with the ATR-1 and ATR-2 there were a few things that I felt were a noticeable improvement immediately on the ATR-2.


  1. The shorter visor. Yes, this is an aesthetic thing, but also safer in case of crash. I feel like it makes the helmet look more attractive as well. Yes, I also care about looks! Sue me! 
  2. I can feel a significant lighter feel with the ATR-2. The ATR-2 is only a 100 grams lighter on paper, but feels much lighter than that when riding. 
  3. The chin bar/nose area of the ATR-2 is closer to your face, but not so close that you big nose riders out there will start to feel cramped. If you are familiar with the Arai VX Pro-4 you know that it sits close to your nose, but the 6D ATR-2’s nose area sits slightly further away than its competitor. This allows more room for multiple brands of goggle frames, doesn't allow for a ton of roost in side your helmet and also gives you the sensation that your helmet isn't sticking out like a duck bill. 


The ATR-2 sits down on my head correctly and conforms comfortably. Some helmets come too far down on the forehead and that prevents my goggles from sitting in the eye port correctly, but the 6D does not do this. The eye port is huge on the ATR-2, which I love for peripheral vision and awareness when I race. The 6D ATR-2 is still a “loud” helmet when comparing it to others, but this is something I have grown accustomed to when wearing it more. The Genuine Dri-Lex liner wicks away sweat well and dries fairly quickly. The nine intake ports and six exhaust ports ventilate my head extremely well (even better than the old ATR-1, that incorporated eight intake ports and four exhaust ports). I have worn and tested a lot of helmets and the 6D ATR-2 feels like it vents better than any other helmet I have used. Taking the liner out, washing it and putting it back in is not a nightmare and snaps in easily. The ATR-2 is neck brace friendly and is just fine when using in conjunction with an Atlas or Leatt brace. 


IMG_7696.jpg

If you’re still  a fan of the ATR-1, don’t worry, it is still available and has a lower cost of $525.00. The new 6D ATR-2 will set you back $695.00 and to me is worth the extra cost. After I got my concussion (a couple years ago) I am big on safety features of off-road helmets and to me you will be hard pressed to find anyone else in the off-road world as passionate as 6D is. Like I have said in my previous podcasts, “we all should dress for the crash and not the ride”. 


The ATR-2 is available in three shell sizes covering a size range from XS to XXL and comes with a three-year limited warranty. The ATR-2 exceeds DOT, ECE, AC and ASTM standards.There are several color combos to match up with whatever gear you're wearing and most are available now. You can view the ATR-2 and ATR-1 at 6dhelmets.com.

Vemar Taku Helmet

When asked by Kris to try the new Vemar Taku helmet, I was happy to give it some of that honest Keefer Inc. Testing feedback. While I do not “write” a ton, I do “ride” a lot and have purchased many helmets over my 15 plus years that I have been riding dirt bikes. Vemar has been in the helmet market since 1987, but I have never worn one myself until now. I have been a Bell, Shoei, Arai and 6D owner, but never a Vemar. I did learn through this time testing the Vemar Taku that the company was was one of the first helmet manufacturers to use Kevlar carbon and multi-composite materials in off-road helmet construction. Although Vemar isn't new to the helmet market, they are not as well known here in the states as they are in Europe. Known mainly for their premium VR-X9, Vemar brought in the Taku, which is a new, lower price point helmet to their lineup.


IMG-7003.JPG

Upon arrival of the Vemar Taku helmet I didn’t really know what to expect, as Vemar is not as well known in the states as let’s say Bell or Shoei. We do know Vemar already has a premium helmet to their name and I was anxious to see what Vemar had to offer in the lower price point realm. To my surprise when I pulled the Taku out of the box I noticed its distinct euro style. As soon as you look at this helmet you can tell it is an Italian born lid, as most European helmets have very sharp lines and more of a squared off look compared to the traditional round look of many helmets. After picking up the Taku you notice how light it feels once you pick up and put it on your head. Vemar claims 3.1 pounds for the medium shell size I received and that weight was true on the scale. The Taku helmet is DOT approved, meets the ECE standard (which is the European version of the USA DOT standard), but is not Snell approved. The Taku is constructed with a R-3P shell with reinforced thermo-polymers offered in six sizes ranging from XS through XXL. Vemar also offers a five year manufacturer warranty on their helmets, but this warranty is from the manufacturer date not date of purchase. The Taku does offer a great ventilation with their VKS (Vemar Klima System) with intake ports above the goggle frame, along with two upper vents and one chin intake vent to help pull the cool air into the helmet. To aid in extracting the air, Vemar uses what they call their hot air exhaust system, which works in conjunction with their VKS vents to help pull hot air from the helmet. Vemar offers the Taku in six different designs and color ways, so you have plenty of options to help you look your best at the track. The Taku has removable cheek pads and an inner liner that are completely replaceable/washable.


When you first slide the Taku helmet on your head you do notice that the inner liner is very plush and feels good on your face. The Taku is more of a mid-oval shape and gives you more room front to back than ear to ear. Like I mentioned earlier, the Taku does feel as light as the scale says (when riding with it) and that is a very good trait to have especially during a longer off-road race. Some helmets feel great right away with little to no break in, but the Taku is not one of those helmets. The first 15-20 minutes of ride time the Taku felt as if it didn’t conform to my head as quickly as others, but the more time I spent with it, the better it started to feel. With intake vents above the goggle frame and two upper intake vents on top of the helmet it definitely keeps the fresh air circulating through the helmet. I am normally a heavy sweater, so ventilation is important to me when racing longer GP style events. I had no issues with ventilation with the Taku, but this can be a catch 22, since the Taku has no way of blocking off the vents. Even though I would never block off the vents living here in California, I can see this being a drag for you east coast riders, on very cold days where your head will get a little chilly. I do notice that more sound (similar to a 6D ATR-1) does gets through the Taku compared to a Bell or Shoei, so you may want to consider ear plugs if it is too bothersome. I had some issues with the eye port while wearing larger framed goggles like an Oakley AirBrake and Scott Prospect. You really had to take your time and work the goggle in to find that sweet spot for proper sealing. The Taku is neck brace friendly and works well with the Leatt GPX-5.5 and Atlas neck braces. When used with these neck braces I had no movement issues while riding, had normal range of motion and the Taku never obscured my line of sight while looking far enough forward down the trail. The Taku has a long visor, which did take a couple laps to get used to, but offers great protection from roost and helps with the sun on evening motos.

IMG-7002.JPG

 No, I haven’t taken a spill in the Taku yet (knock on wood), but I do feel safe enough when riding with it. Yes, I do have some gripes with this helmet, mostly having a smaller eye port area and a longer than normal break in time, but to me Vemar did a very good job building a lower price point helmet that is fairly comfortable. The ventilation is a strong point; flowing more air than some premium helmets I have worn in the past, it's light, is compatible with neck braces and has a 5 year manufacturer warranty. In my opinion you are getting a great value for an entry level helmet. For the rider on a budget or if you're new to the sport, this could be a good option, if cost is an issue. Head over to vermarhelmets.net to view all the models. -Matt Sirevaag (Pay For My Own Stuff, Blue Collar Electrician, 9-5'er)


Thor Sentinel GP Roost Deflector Product Review 

I haven't been on the chest/roost protector bandwagon since I was 18 years old. My dad used to make me wear one when I was young, but once I turned 18 and I started paying my own way to race, I thought I would try not wearing one at the track. Well.... That turned into not ever wearing a chest protector because I got used to all the freedom I had on the bike by not wearing one. Throughout my professional career I didn't wear any chest protection and luckily for me the difference of not having one on never came into play. I would occasionally wear something under my jersey to protect my chest from roost when I raced, but if the dirt was soft enough, I would just raw dog it for the most part. Fast forward to 2018 where my own son now sits and asks me, “Dad, how come you don’t wear a chest protector and I always have to when I ride”? Crap, that little sucker got me! I really had no answer for him. So in order set an example for my kid and try to promote better safety, I went searching to get back on the chest protector bandwagon and now I find myself here. 

IMG_7757.jpg


 I can tell you that I have tested a lot of chest/roost protectors over the course of 15 years with Dirt Rider, but I recently only came across a couple that I could actually live/ride with. The Thor Sentinel GP Roost Deflector comes in six different colors, three size options and will cost you $129.95. The Thor Sentinel is a lightweight certified stone shield that is constructed with energy dispersing molded panels and is a level 1 back protector constructed to reduce impact energy transmission. The Sentinel has an adjustable elastic torso strap with a ratcheting buckle closure that comes with strategically placed ventilation ports for maximum cooling. Its chassis has a soft liner molded for maximum comfort and also supports a back strap kit (just in case you want to remove the back panel) and ID panel that is sold separately. The Sentinel stone shield is tested and certified according to European Standard and the back protector is also tested and certified according to the European Standard. 

IMG_7763.jpg


Note: Stand by for the AMA to step in at some point and require all AMA sanctioned events to have some sort of standardized chest/back protection rule in place soon.  


IMG_7759.jpg

Sizing is true to form as I wear a size medium/large in the Sentinel, which is normal for my 170 pound 6’0 frame. I wasn't all that excited (on the inside) about setting a good safety example for my kid, but once I slipped the Sentinel on over my jersey, I started to re-think my fatherly decision. The Sentinel hugs your body and wraps around just enough to where it feels like it’s a part of your body. I was also impressed by the lightweight feel of the Sentinel and that it had enough ventilation for me not to bake out in the desert heat. I love that it has a ratchet style closure system and not a clip on style system as well. With the ratchet style system I can really feel the closure system start to hug around my torso and the Sentinel doesn't flop around on my body while riding. The soft shoulder pads don't do much for protection, but in this case for me, I do not mind the lack of plastic protection up on the tops of my shoulders. The downside to the soft shoulder foam padding is that it can rub the skin around your neck a little raw. If the collar of your jersey doesn't go up far enough around the neck area it can be bothersome. Although I didn’t have this problem on my Sentinel, my chest protection, pot-stirring son Aden did get a little chafing around the neck (from the foam padding moving across his skin). The Thor protector also is neck brace friendly as it accepts the Leatt and Atlas braces that I had on hand to test with the Sentinel. 


IMG_7751.JPG

There are only two things that can get me to wear a chest protector. One is my son telling me he wants me to be safer and the other is the chest protector has to be very, very comfortable. It can’t hinder my movement on the bike and must be cool enough to where I am not hot as hell when riding. The Sentinel checked all those boxes for me, but it took me a while to find a chest protector that fit my way of moving around on the bike. I figured I would pass on the information to all of you about how comfortable the Thor Sentinel GP Roost Protector is and how I have come to really enjoy wearing this when I ride. Yes, even when I wear other sets of gear besides Thor, you will now know that there could be a Thor Sentinel GP Roost Deflector under my jersey. Yes, it can be worn under the jersey as well so you don't have to worry about mix matching while riding. You’re safe! You can buy some Thor gear (Prime Fit is my favorite out of what Thor offers) and wear the Sentinel over the jersey like me or if you’re wearing another brand of gear you can wear it under. 

IMG_7761.jpg


Thanks Aden for bugging me enough to wear some protection. Your dad is getting up there in years and I guess I need to start dressing for the crash and not the ride. Thanks Thor for making a nice chest protector that isn't bulky and protects me well. You can check the Sentinel out at www.thormx.com


If you have any questions about this test feel free to email me at kris@keeferinctesting.com 


Leatt GPX 4.5 Pant, GPX 4.5 Lite Jersey And GPX 2.5 X-Flow Gloves

Leatt may be known mostly for their groundbreaking neck brace invention that changed the way most people think about rider/neck safety, but in the past couple years their off-road riding gear has been making a name of its own. We recently received a box full of Leatt protection pieces, including knee brace pants, knee braces, a helmet and some gear. Stay tuned for reviews on the other Leatt products, but for now let’s talk gear. Leatt sent us a 4.5 pant, 4.5 lite jersey and the 2.5 X-Flow glove to test, so we obliged and put it through some wear and tear. Being that California hasn't experienced winter yet this year I was just fine with testing a more lightweight, vented gear set in mid-January. Don't be jealous Minnesota peeps! 

IMG_7475.JPG

When it comes to jerseys, I feel as though they can be over priced at times, but the GPX 4.5 Lite jersey comes in at only $39.99, which doesn’t hit the wallet too hard. Don’t let the fact that the 4.5 gear is Leatt’s price point (AKA less money) gear scare you away, the jersey is nicer than some other companies high end jerseys that we have tried in the past. The Leatt 4.5 jersey is made from Moisturecool 3D stretch material and isn’t just a baggy one size fits no one fit. In fact the fit is what I normally like in a jersey. It has a precise athletic fit, but not so tight that it looks like I’m in a skin suit skiing down a mountain. The cuffs have a slightly stretchy material, so they don't ride up too high on your arm, but at the same time won’t cut off your circulation. Being that it’s a “Lite” jersey, it has excellent ventilation. That being said, it has such great airflow, that on chillier mornings, I found myself wearing a vest (yes I’m an off-road guy) until the temperature came up, so be forewarned. The overall stitching has held up well, but the material of the jersey tends to fray after being snagged on a few bushes (think creosote bushes). Other than the little fray points, I feel like the 4.5 Lite jersey is high quality for a fair price. 

IMG_1340.JPG

The GPX 4.5 pant, like the jersey, is Leatt’s price point pant at $119.99, but again don’t let the term “price point” fool you. The knee area of the 4.5 pant, which tends to be most riders weak point on pants, uses an Amara material. This material is soft and semi-stretchy, but still durable and so far has held up excellent to my knee braces, especially with how much I squeeze the bike with my knees. The 4.5 pant is somewhat like the jersey in that it’s a fairly lightweight construction and has quite a bit of venting, which results in a very breathable pant. The pant has held up to bushes and the occasional tree branch, with no rips. The zipper is smooth, hasn’t gotten stuck and also comes with a hook and loop strap, which keeps the pants closed at the top of the zipper (this comes in handy after lunch time). The main closure on the pants is the ratchet style system Leatt incorporates, which has worked flawlessly. There is also elastic inside the waistband that helps keep the pants snug along with silicone (like on the backs of goggle straps) on the inside of the waist band.  The fit of the pant is true to size, is very comfortable to wear and for the price is a great product.

When it comes to gloves a lot of riders are like Goldilocks “these are too soft, these are too hard, these are too bulky, these are too thin", but in my opinion the $29.99 Leatt GPX 2.5 X-Flow glove is like wearing heaven on your hand (if you can imagine what heaven would feel like). Although some people would complain about it being too minimal, I LOVE the 2.5! Yes it’s thin and its intended purpose is not to protect you from branches or roost (I use handguards so I don’t care). It contours to my hand perfectly in all the right places, doesn’t bunch and oh man is the palm material great. The material in the palm is called MicronGrip and it feels like a very soft, smooth, slightly stretchy leather. My ONLY complaint about the glove is that the stitching can be weak when putting the glove on that is typical of minimalistic gloves. Almost every minimalistic glove does the same thing. These gloves are meant for performance and comfort, not durability. You can choose between Leatt's other model gloves if you want a little more durability, but if you want comfort look no further. If you have a bad habit (like I do) of pulling hard on the glove where the wrist elastic meets the palm material you might go through these faster than the riders that do not do that. After more than several riding days the stitching gave out and the elastic separated from the palm, but just to show you how much I like the gloves, I kept wearing them even with the tear because it didn’t really bother me when I was riding. If Leatt can beef up their stitching in this area a little and maybe put a little pull tab on the end of the palm, it would be a flawless minimalistic glove.  

IMG_1338.JPG

After many days on the track and trail, I have to say I’m very pleased with the quality of the Leatt “price point” gear. Other than some bushwhacking that I have done and the glove separation, I feel like this is a set of gear I would love to purchase for myself to ride on long warmer days. Although I will say that for riders who strictly ride off-road, this gear my not be for you because the more you go through shrubbery the more frays and snags you might begin to see. For the guy that motos 70 percent of the time, rides off-road 30 percent of the time, the Leatt 4.5 pant/jersey and 2.5 X-Flow gloves are something seriously to consider. -Michael Allen 


If you have any questions about the Leatt 4.5 pant, 4.5 Lite jersey or the 2.5 X-Flow gloves, please feel free to email me at michael@keeferinctesting.com