Garage

Mythbusters: Test Rider Edition

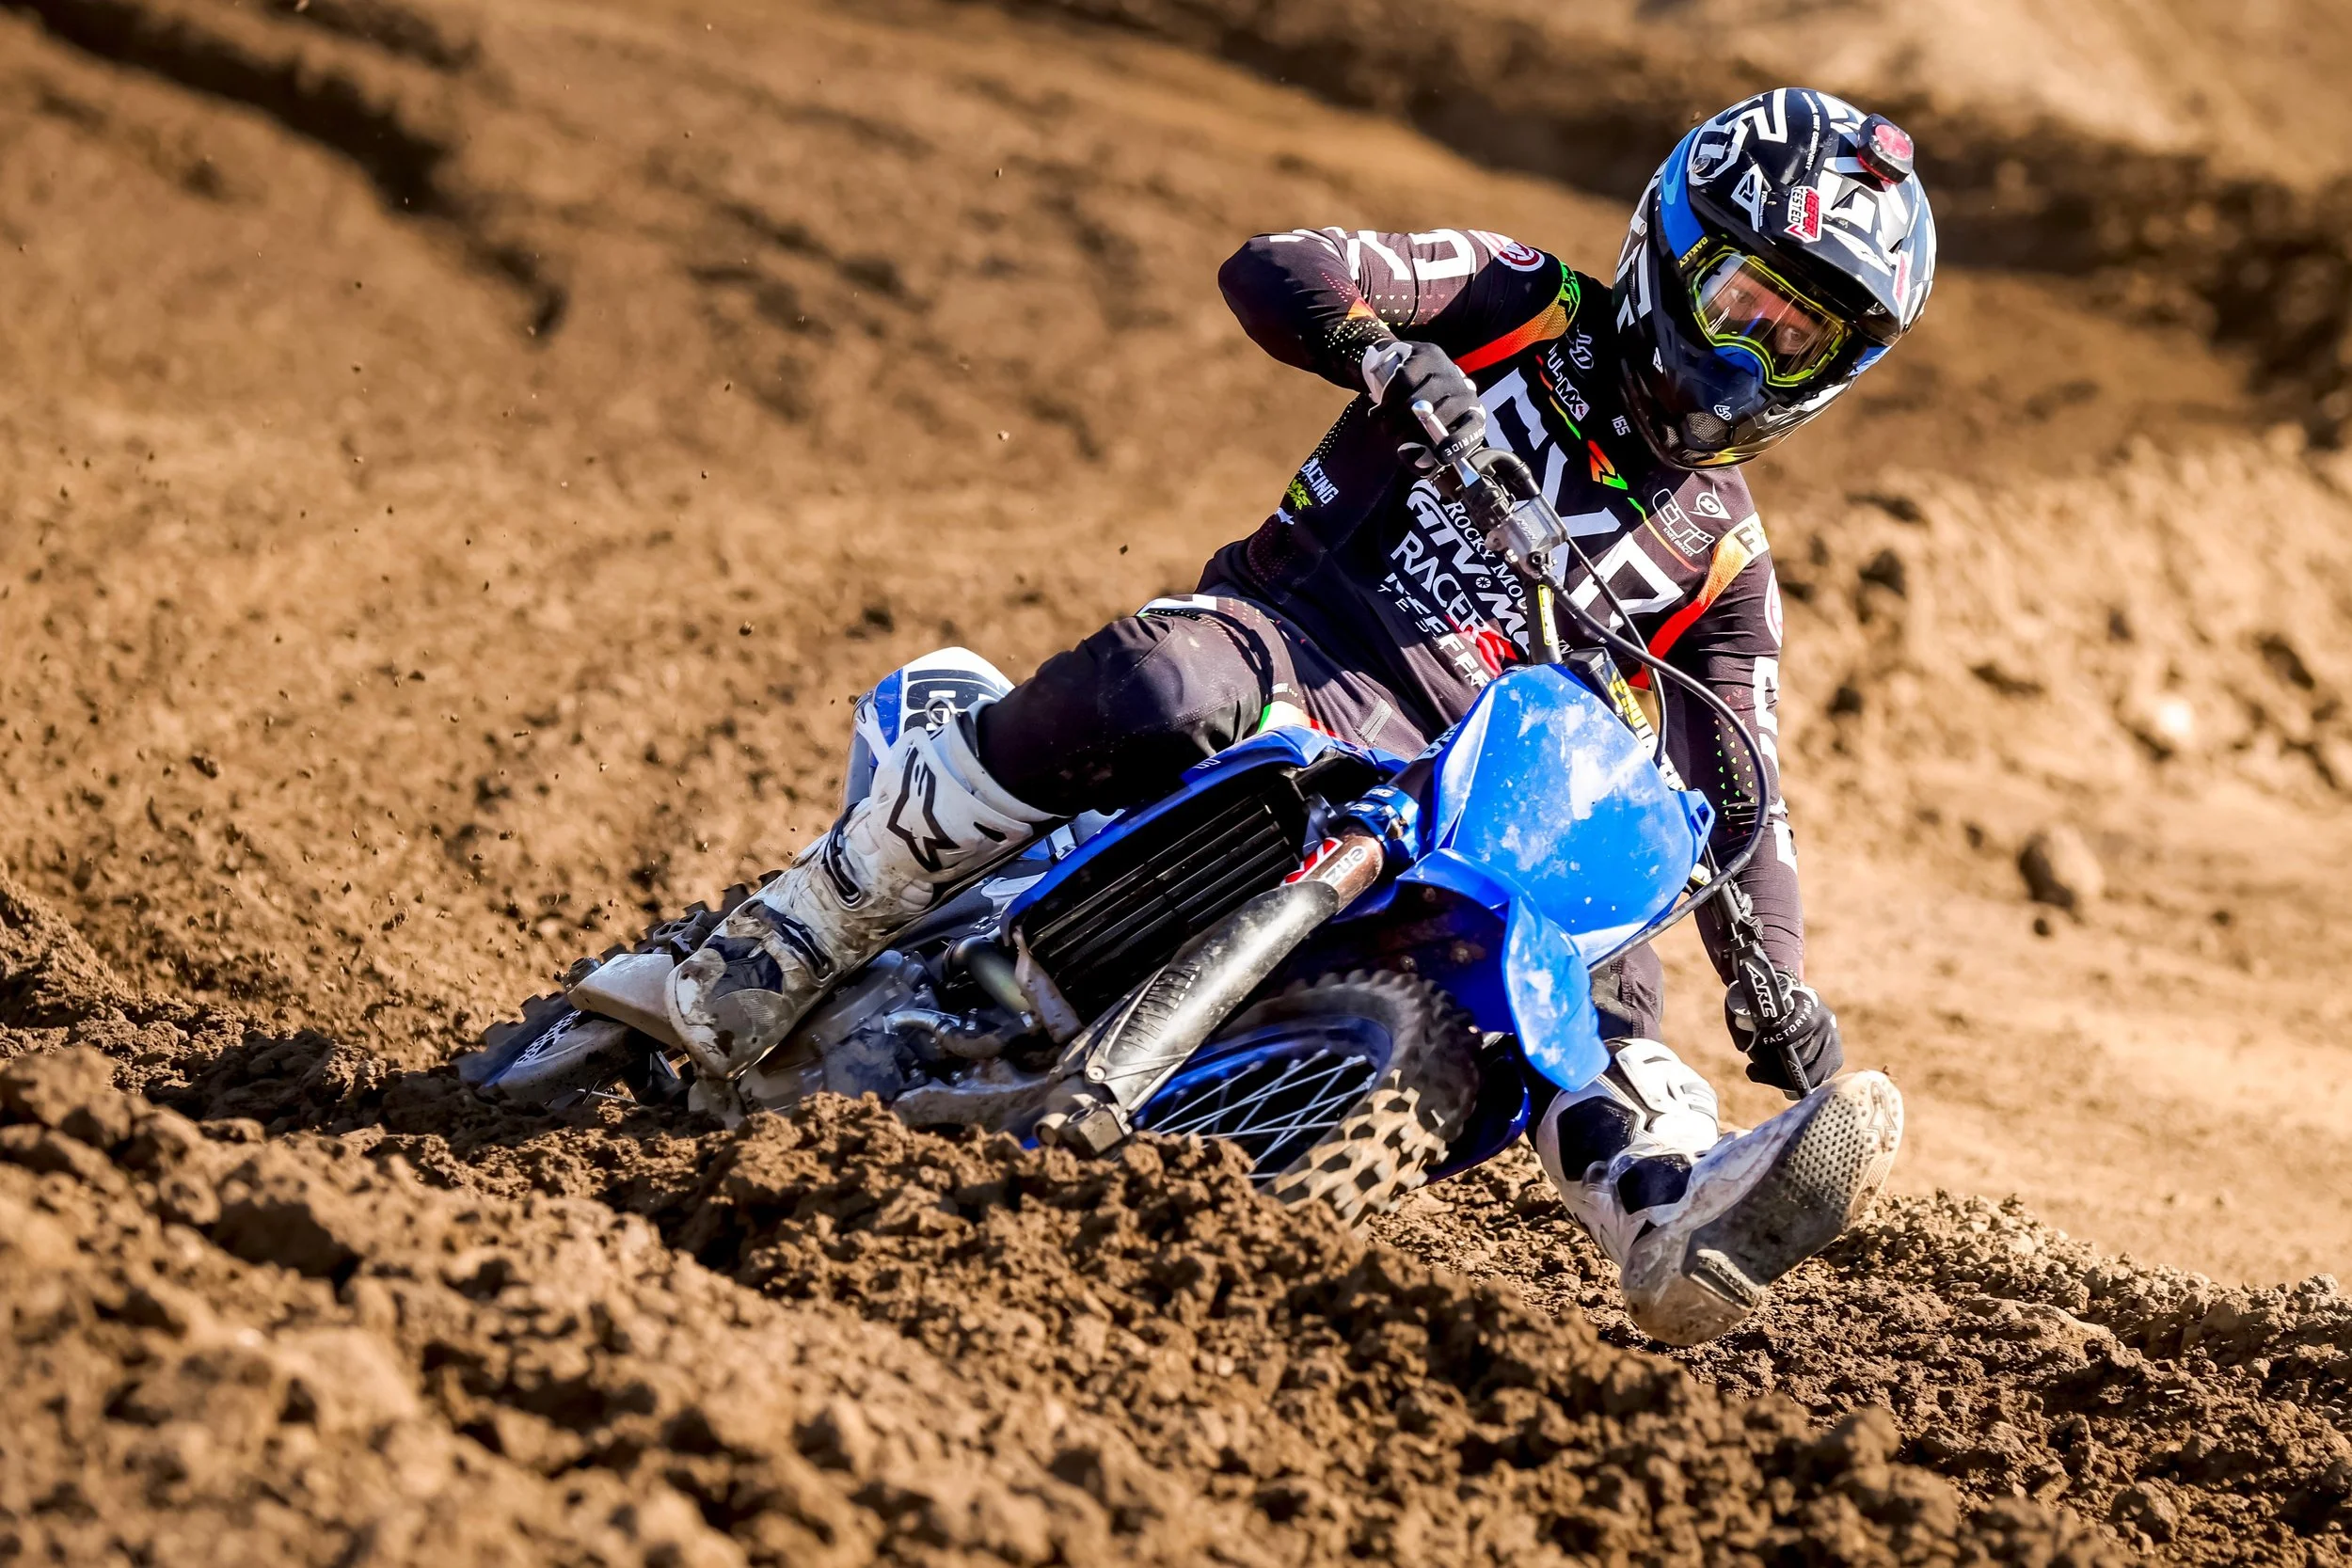
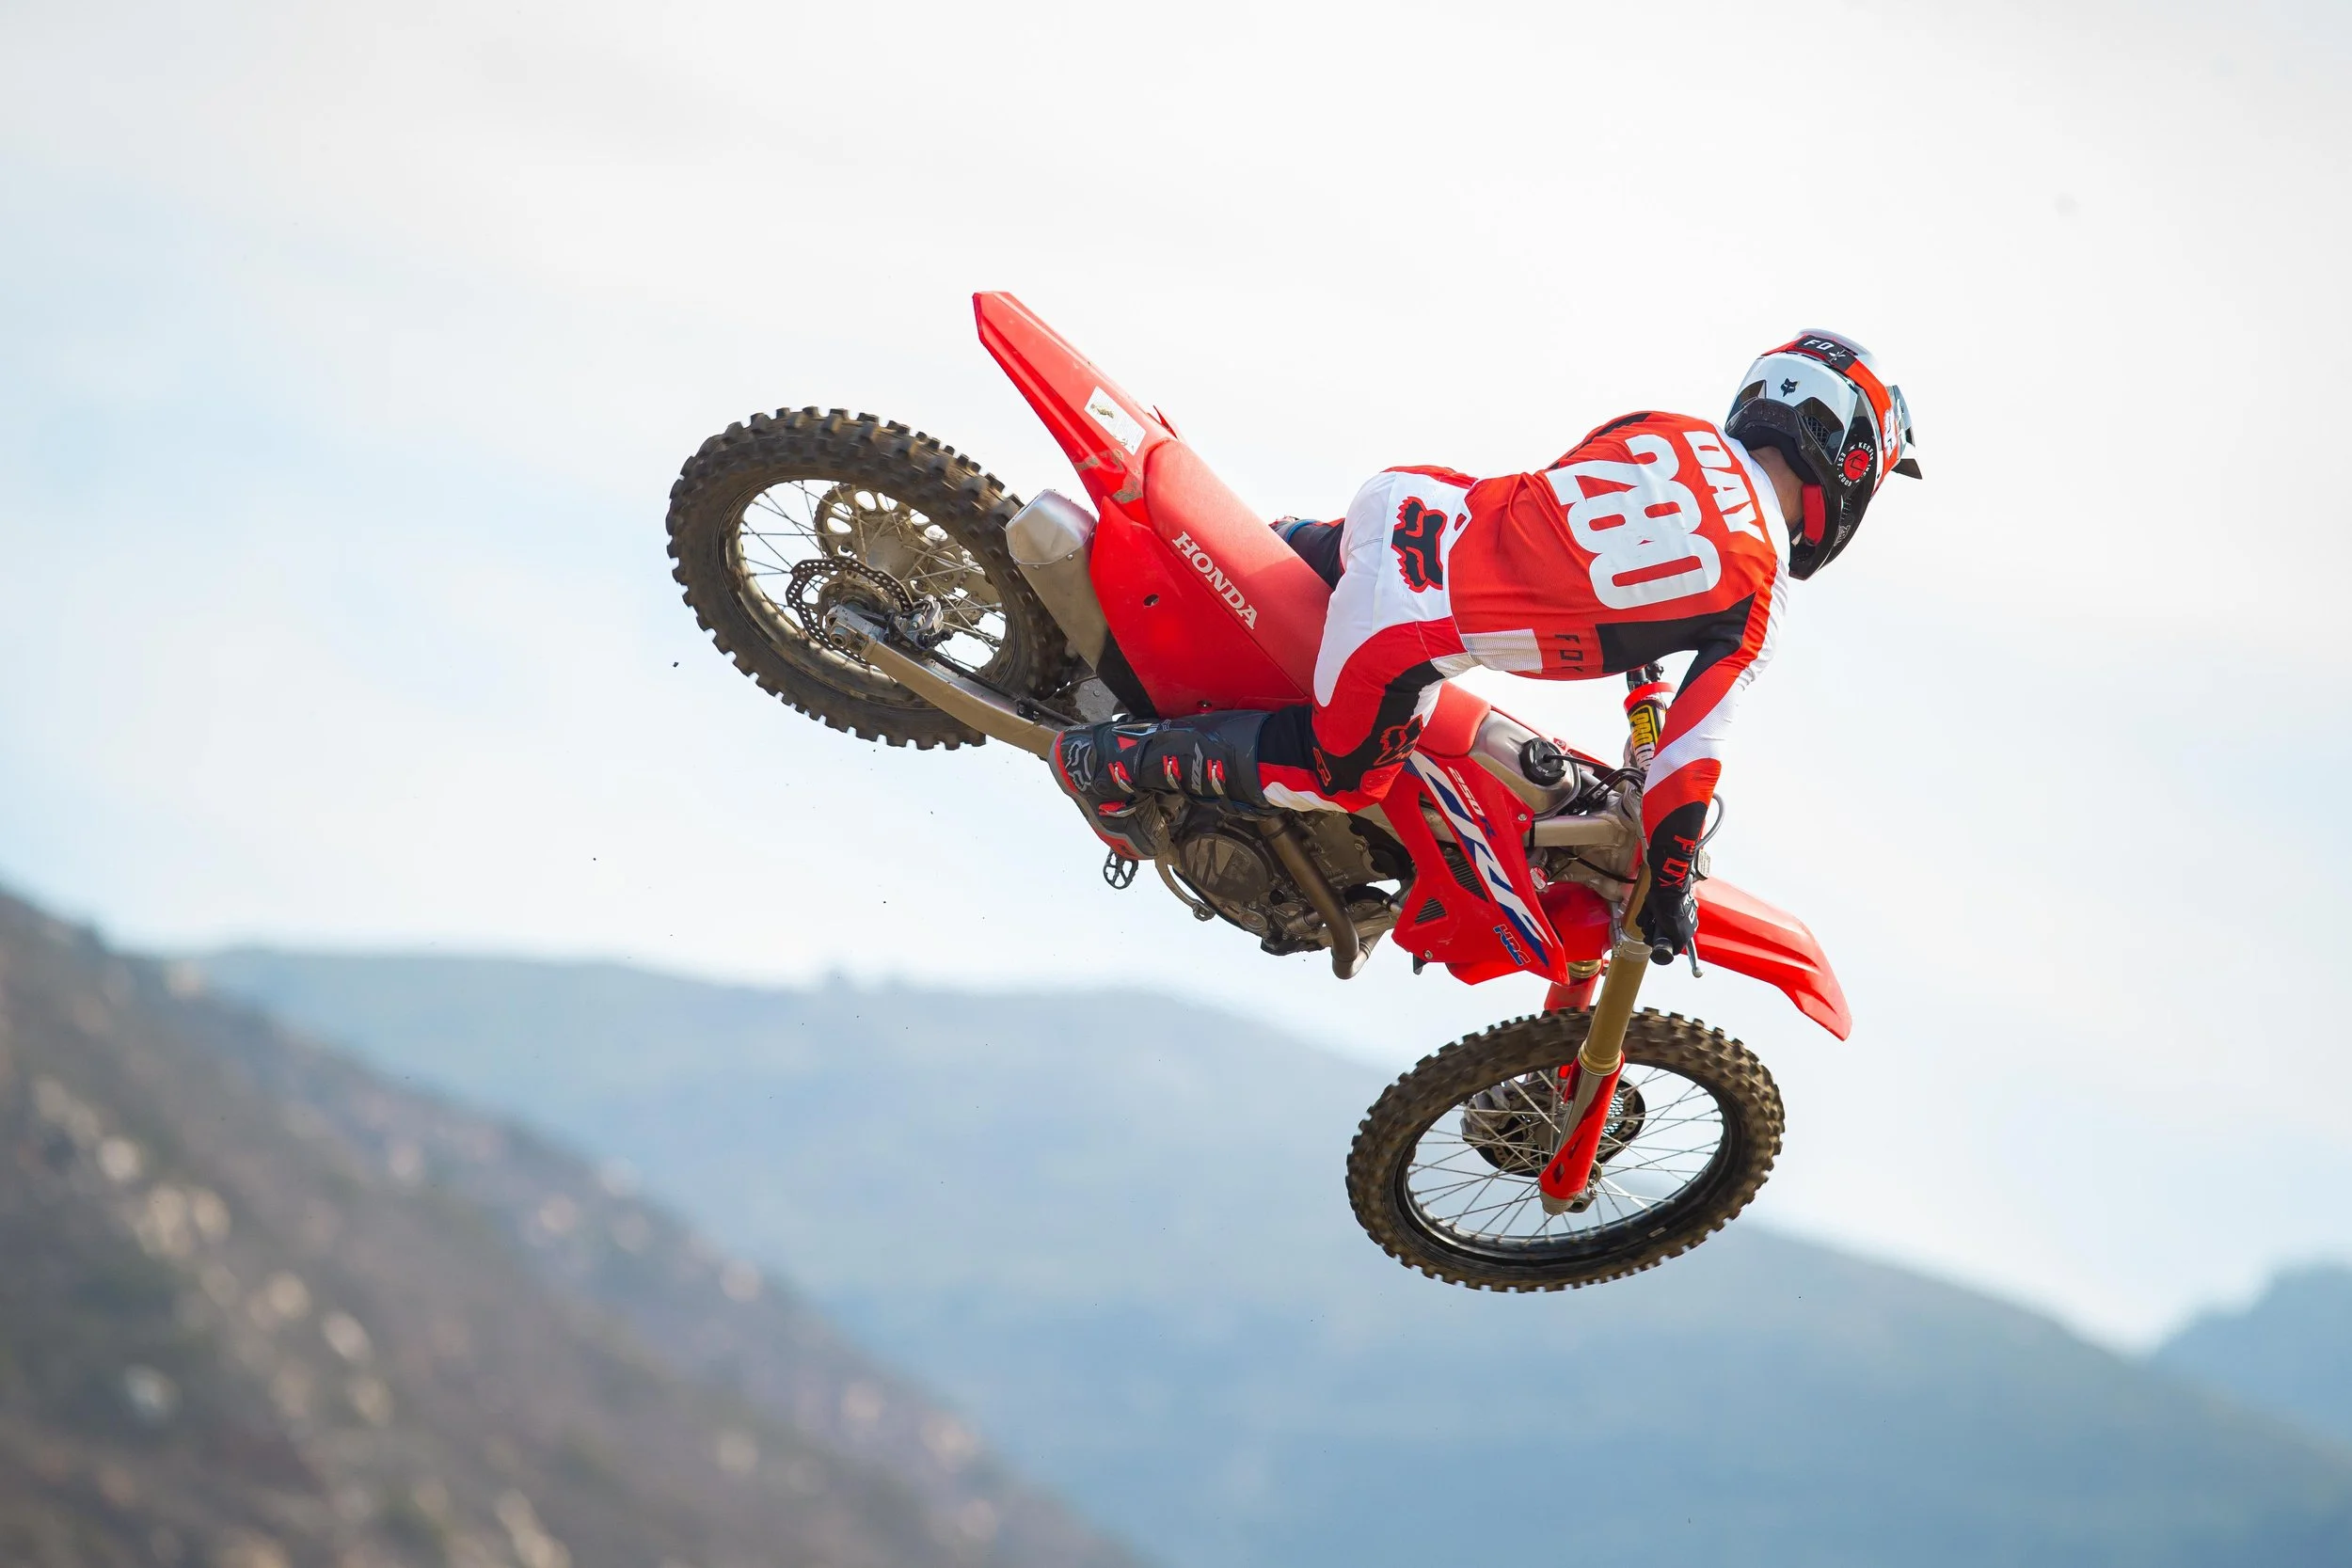
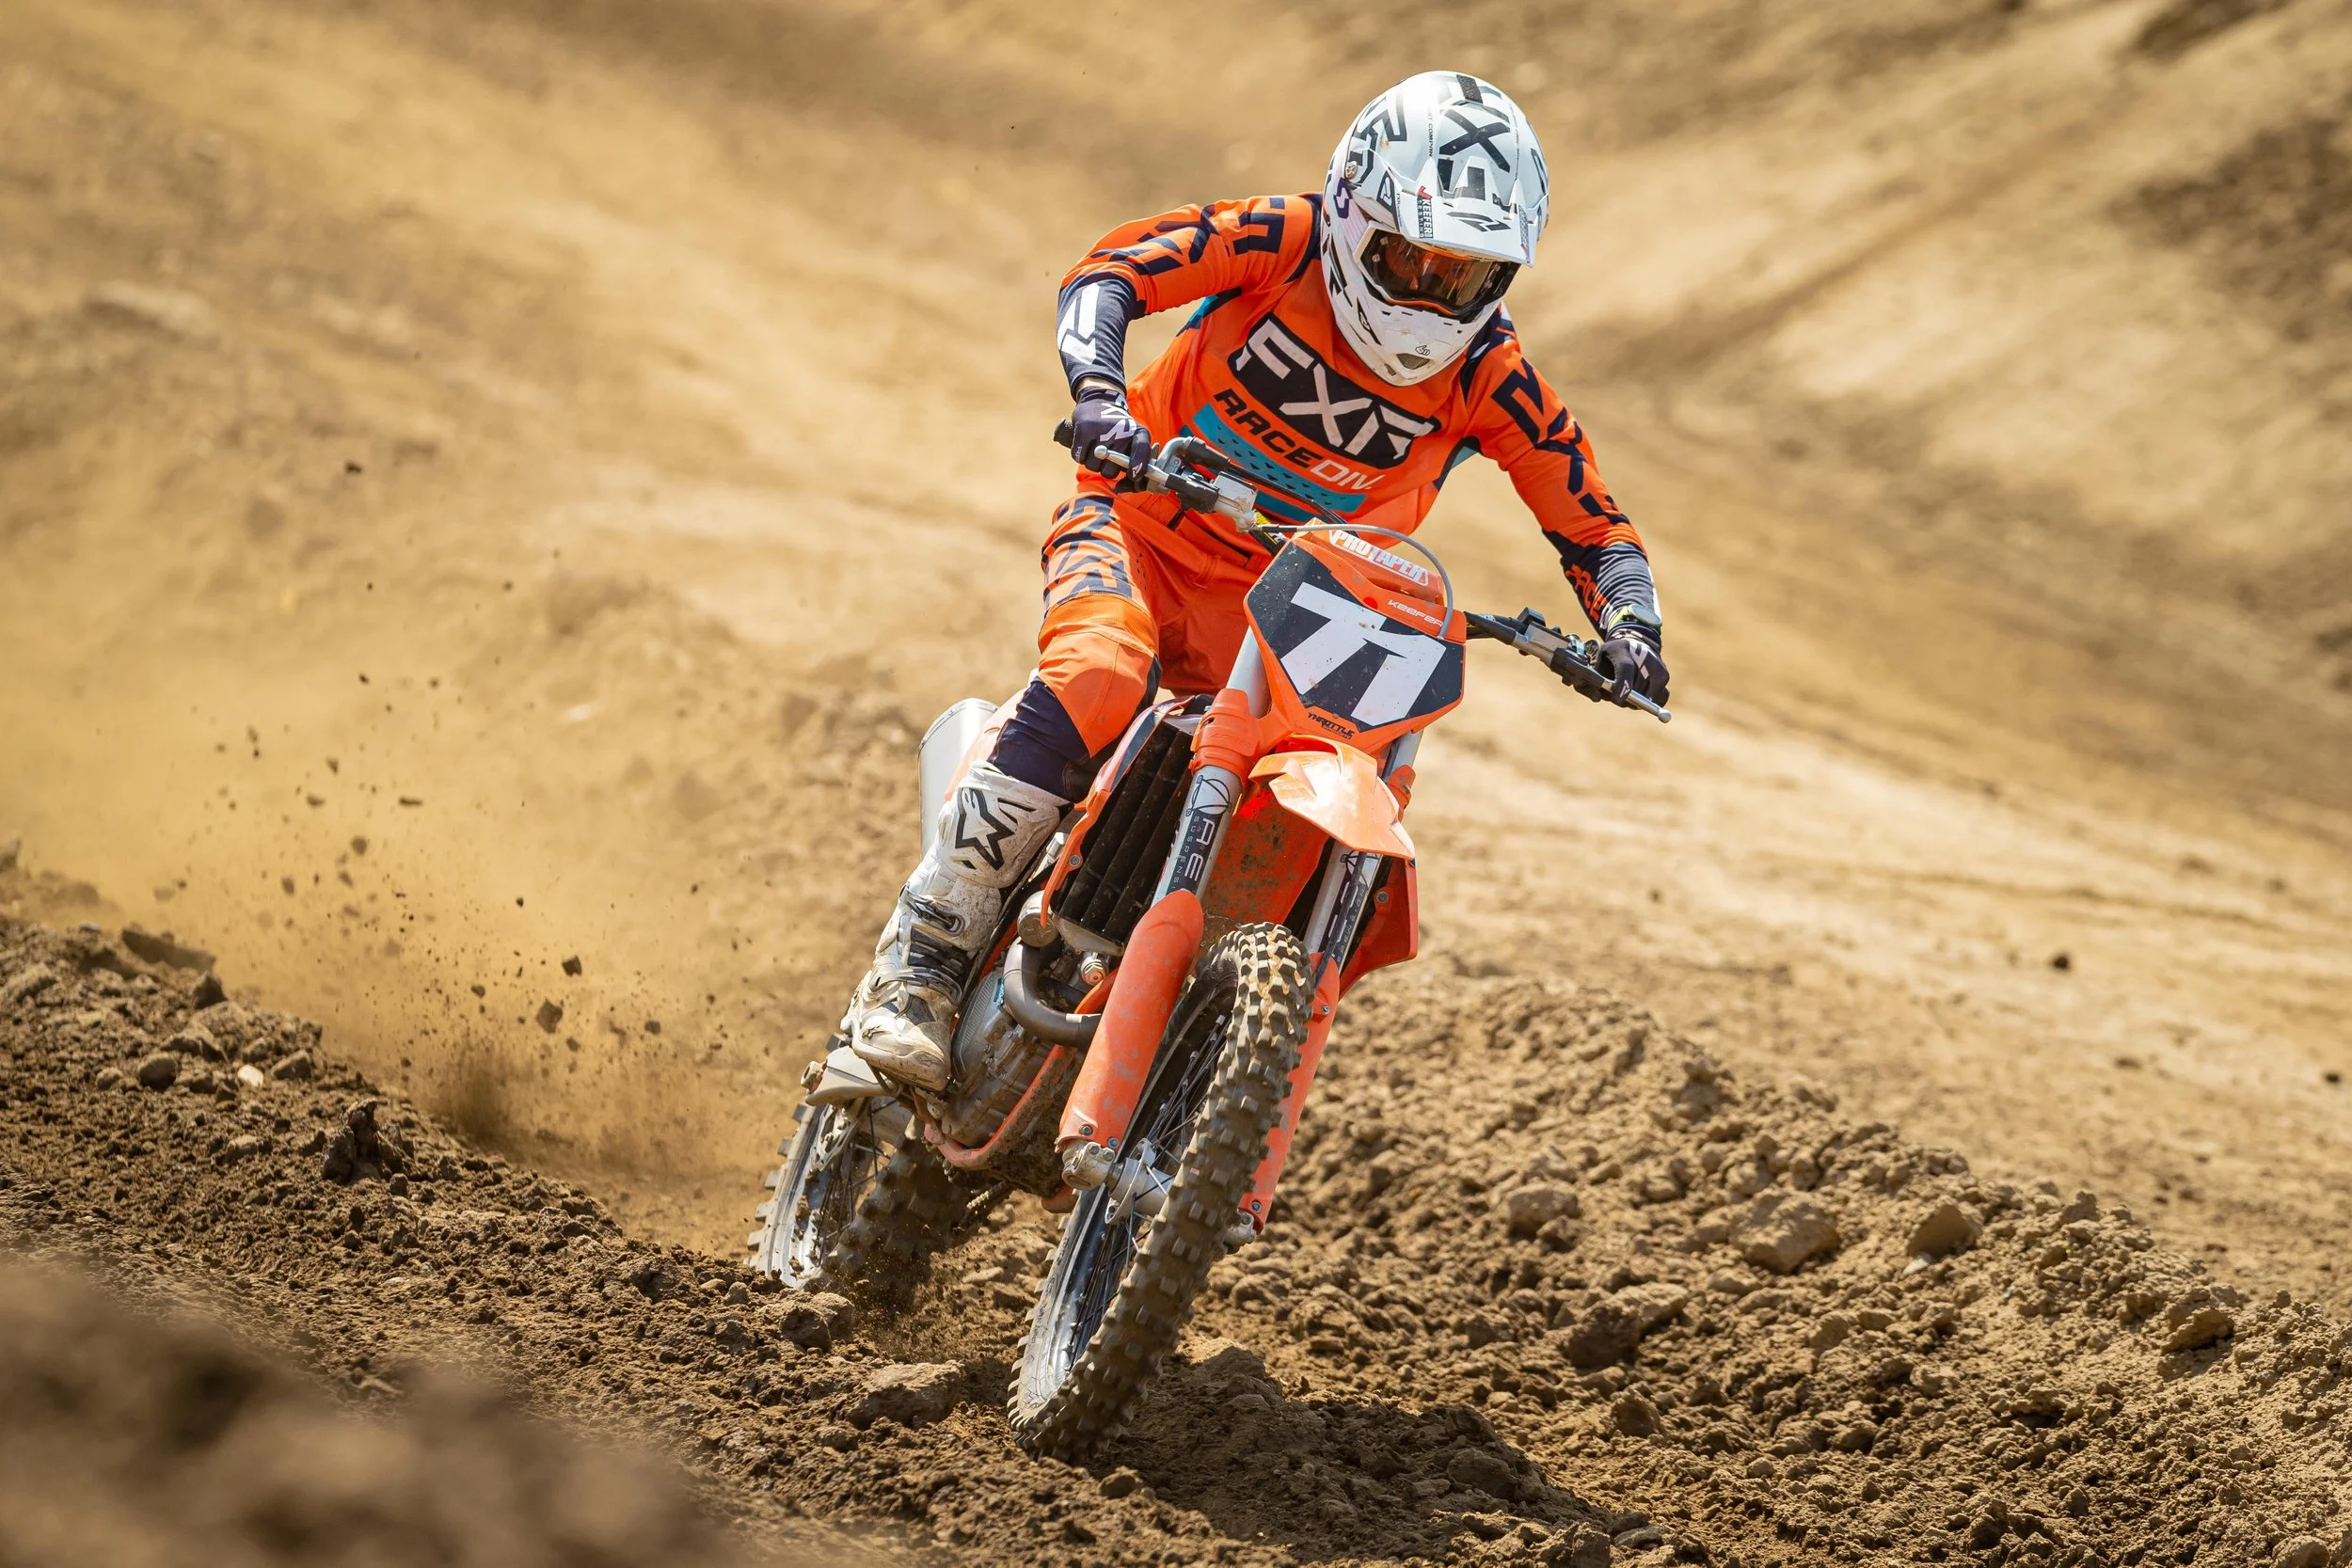
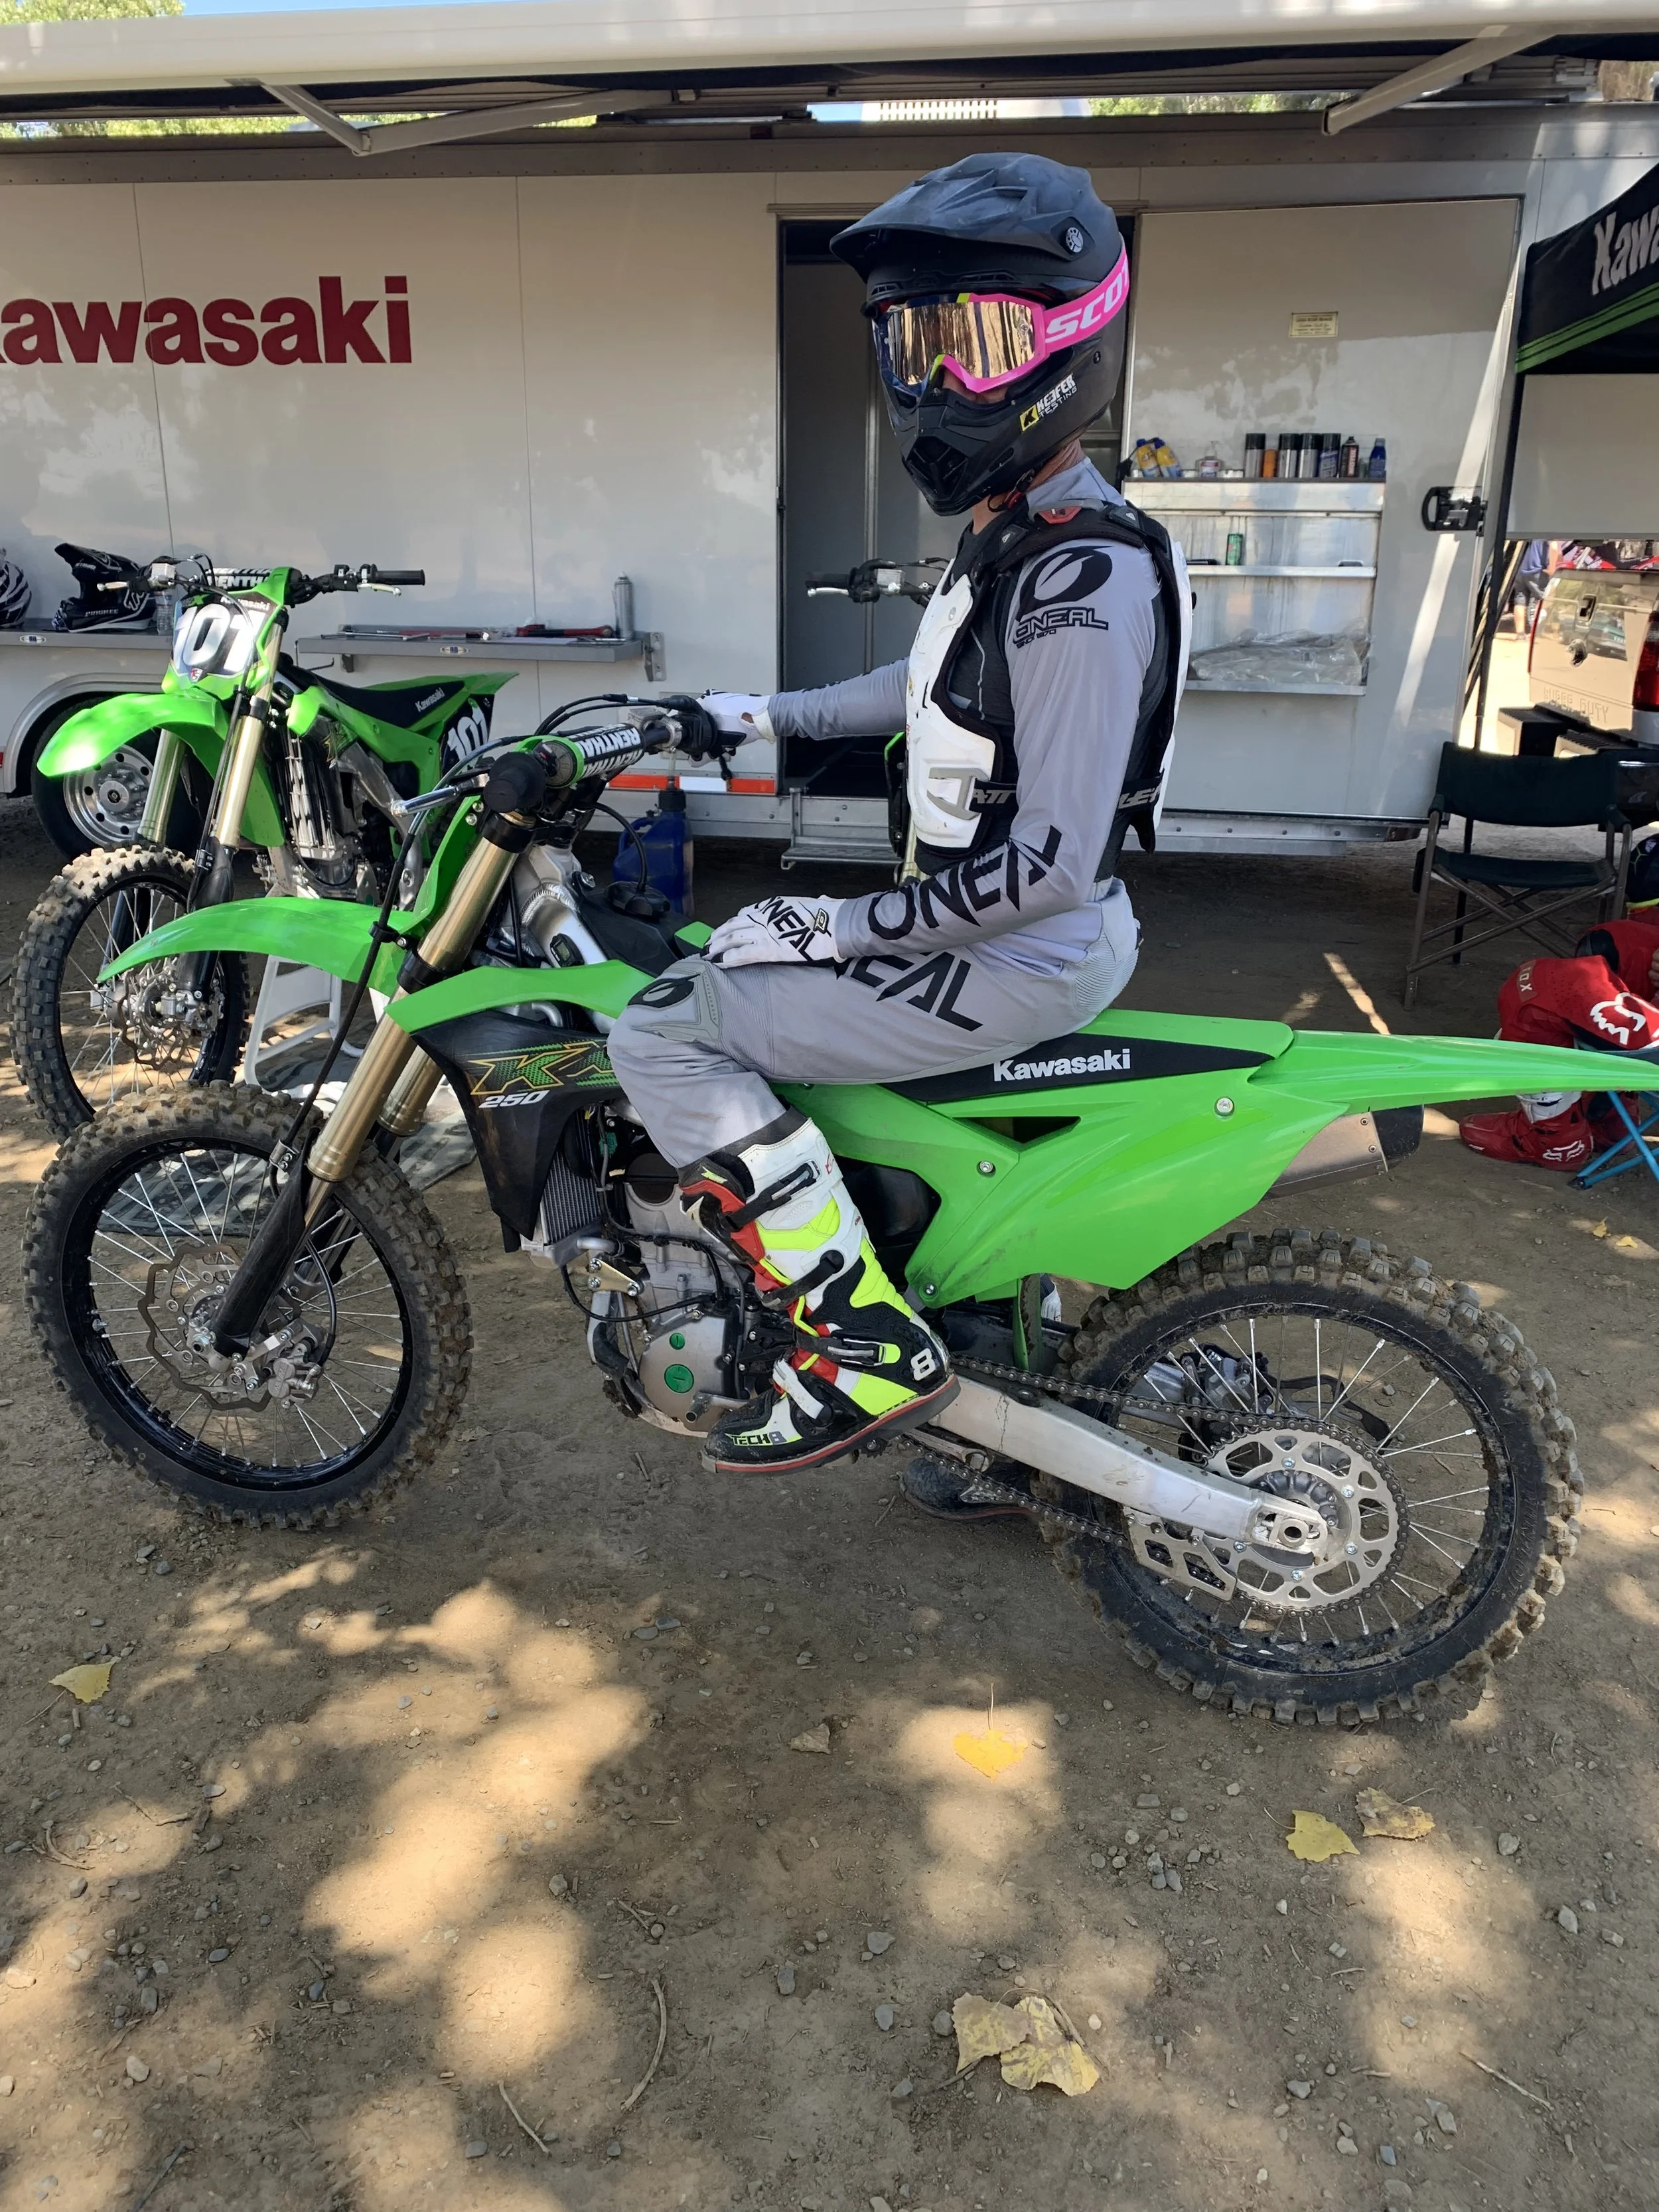
“Keefer, I want to be a test rider”. Of course you do, but do you know what you have to do once off the bike? Do you know what the correct way to do things when you’re on the bike testing? I hear this statement all the time, but I end up asking these questions above every single time I get asked. To me I don’t think a lot of people understand the ins and outs of testing. From the outside, a gig testing for Keefer Inc. or any other motocross media outlet appears to be one of the best jobs in the industry and it is! Where else do you get to ride the latest bikes, sometimes on private tracks while wearing new, free riding gear? Yet, despite all the apparent perks, being a test rider is actually a tough job that requires dedication, being a good person, persistence, honest and more than a little luck. The purpose of this article is to fill you in on some of the false notions surrounding the gig of being a test rider and to tell you how to become one, if that is, what you are looking to do.

Falsehoods That Surround Being A Test Rider:

There are several components of being a test rider that aren’t exactly understood by those trying to get this type of job. Here are some things that I put together that you all may think happens in the testing world, but are simply just falsehoods.

Fiction: Testing is easy work. While you may think that bike tests involves simply cruising out to the track, hitting kickers and getting free shit, you couldn’t be more delusional. Testing is hard work and those that do it right, do a lot of it! Most of my test days begin early in the morning to take advantage of the quiet time I have at home to type and typically don’t finish a testing day until the evening. Don’t get me wrong, it is fun, but becomes more like a real job the more you do it. The toughest thing about being a test rider would have to be the long days I put in at the track and only to return home to start typing an article. I am mentally fried by the time I am ready to hit the sack. Sorry Mrs. Keefer, you’re not getting any tonight! To evaluate a motorcycle in a comparison situation you have to make sure you give equal time for each bike, and that could be up to six motorcycles at times! So, it is definitely a full day. Your body is tired at the end of the day right up to that last bike you get on, but you have to make sure you’re in the right frame of mind (and in shape) when you are testing at 5:30 in the evening. You have to make sure you are fair and not in a rush to leave the track just because you’re tired. Being in shape is sometimes over looked with other test riders. I take pride that I try to stay in as good as physical shape as I can be for a 40 sotting year old. You’re only going to ride as much as your body allows so having this base of all these years riding has helped.

Fiction: Test riders get paid a lot of money. Believe it or not, I don’t pay my test riders (I only have a couple) a whole hell of a lot for their services. While this may seem unfair, consider the flip side: My test guy gets to ride the latest bikes, gets parts and gear to test and keep. Your hobby is work, but at least you don’t have to pay for your hobby. Not only that, but they end up getting a lot of time on each bike, which makes it a great gig for aspiring pros or those who desire a lot of training. When I started at Dirt Rider years ago, I got paid nothing for years until a check showed up for a couple hundred bucks after a shootout. I had to put in my time and pay my dues in order just to get a couple hundred dollars. When you test for a manufacturer (think durability testing) you will get a set amount per day, but it is usually only a couple hundred bucks per day for a 12-14 hour day.

Fiction: You have to be fast or a pro to be a test rider. Being a high-level racer type certainly makes someone a good test rider on paper, but this isn’t always the case when it comes to track time. Many pros are very adept at gauging what is going on with their equipment; conversely, some pros can’t even tell if they have a flat rear tire. Trust me, I have seen it! Speed is not directly related to having a good sense of what a bike is doing and as such I try to use riders of every skill level. When I test for manufacturers I have to be conscientious of the fact that these bikes need to perform for a wide variety of riders, not just what I like. When doing stuff for Keefer Inc. shootouts I have multiple opinions in which helps broaden the evaluations I bring to readers, since not everyone out there is a Supercross Pro. This is also why you’ll see mid forty year old, blue collar guys testing in my 450cc shootout alongside 240 pound weekend warriors, not just 170 pound fast guys; diversity only enhances the value of testing.

Fiction: Test riders get to roach out bikes. While I can’t say the same for other testing sites, there is no denying that I ride a lot and spend almost as much time in my garage as I do on the track. Why? Because I adhere to one simple rule that my dad preached to me when I was young: treat anything you ride as if it was your own. One look around my garage and you will find clean bikes, lubed chains, fresh filters and fresh engine oil in the machines. I take great care to not only keep the test bikes in solid shape, but also to know what makes them tick and this transfers into getting the correct feedback to you all. On the track or on the trails, I encourage my test guys to ride a bike to its full potential, but this in no way includes thrashing it. All of the manufacturers are great dudes and if I trash a bike and give it back to them like that, I would feel like shit.

So now that I brought up some common myths about test riding, how the hell do you become a test rider?

Be Persistent And Available:

If you really want to test rider, the first thing you need to do is to make yourself available. Like “I don’t have a life” accessible and on short notice. I usually like to get the information out to the people ASAP, so I often have to plan test sessions without much warning. As a result the guys I have used earned their test riding moments by simply being in the right place at the right time. I have literally talked to riders at the track and I could tell by just the way they treat their bike, how they ride and what type of attitude they have, offered them to try out test bikes. I am a huge people person and can tell a lot about someone by just talking to them. Some of those guys came off articulate when it comes to explaining how a certain bike performs on the track. Sometimes being lucky and in the right place at the right time helps. This isn’t a slam dunk and doesn’t mean that you’re going to be a test rider, but it helps to have a good presence at the track. Say hi to people at the track and look like you’re enjoying yourself instead of hiding out in your van all day, like I am guilty of at time. Ehhhhhh…

Knowledge Of Dirt Bikes:

Please for the love of all that is holy know which way to turn a clicker to speed up the rebound? What does a bike do if the mapping is off? How does the bike react if the sag is set wrong? Do you know what sag is? Or shit, did you even check your sag?These questions-and more like them-all need to be answered by a test rider before getting the job. No one is looking for super freaks when it comes to bike knowledge, but a test rider needs more than an elementary idea of how a motorcycle works and how certain changes affect its performance on the track. A test rider needs to be picky enough to know how he or she likes their setup, yet open-minded enough to be able to try something different (I to can struggle with that last part at times). He (or she) cannot be afraid to try new settings, setups and has to be vocal enough when something isn’t working. If you don’t know or can’t feel a difference between bikes or settings, then it is OK to say “I can’t feel a differnce”. Most importantly, a tester needs to distinguish between what effect the track is having, what the bike is doing and what the rider or his technique is causing. This comes with either a natural ability to know a dirt bike, or lots and lots of seat time.

Confidentiality:

A lot of my work is confidential and if I screw that up, I wouldn’t have a job. If you can’t keep a secret, don’t even think about trying to become a test rider. If you give up a secret before it comes to production, you risk getting blackballed from any type of testing! The word “embargo” is gold with the manufacturers. Some people think it’s no big deal and I am being too intense, but I take my testing extremely serious and that includes not talking about things until they are in production or the embargo has lifted. The best test riders are not only great at breaking down each machine, but they would have to be pistol whipped before giving up the goods of a new bike or part. Being part of Pulp MX means that Matthes will try to get the goods out of you, but you have to be resilient and tell him to “suck it” from time to time. Mums the word Steven.

Be A Good Person And Professional:

As most of you know I like to have fun just as much as the next guy, but when it comes time to start busting ass and working, I am all in. Playtime is over and work mode kicks in. There is such a thing as “Work Kris”, just ask some of my friends! As a test rider I am representing myself and am expected to be professional at those times. This includes not riding like a jackhole at intros, treating people with respect, not looking like I just woke up on the beach the night before, not showing up to the track late or in old, thrashed riding gear and not typing up a second grade opinion of something on an iPhone. Being able to formulate a solid opinion is not only helpful, it’s essential; what good is a rider who can feel what a bike is doing, but can’t put it into words. Or if a rider just starts making up shit to sound like he or she knows what the hell they are talking about. Being punctual is also key when turning in reports on time. I get so many kids that just want to ride the bikes and then go home to throw up an Instabanger to pull chics. Go home, get the report/opinion done and send it in. That is how I got more work. It’s surprising how much of a big deal that is to companies. So many people want to do the fun shit, but not the hard stuff afterwards. Lastly, if you don’t know how to spell at least 90 percent of the words on your report, go take a college course, so you can have the complete package or “The Quan” as Jerry McGuire would say.

Be Consistent:

As with many things, consistency in testing your own stuff is key. Know what you like and stick to it, but again, don’t be afraid to be flexible and try new things. Don’t ever use the word “perfect” in the testing world. There is nothing perfect because everything can get better through testing. An old saying goes “you’re only as good as what you try”. I try to live by that motto when it comes to testing. When I work with manufacturers, consistency is also important because it provides a common goal to work toward. We always have a baseline setting that we are looking to get better than and sometimes we will re-visit that baseline setting along our testing path. Consistency on the track plays a big roll to making bikes better as well. When on the track make sure to hit the same line every lap when you’re testing, so your feeling on the bike never sways one way or the other. If you pick a smoother line one lap and miss the bump you were hitting, you’re not getting an apples to apples comparison.

Be Transparent:

Yes, I get paid by advertisers, but those advertisers are companies that I would personally spend my money with! I have refused money from several companies just because I personally don’t believe in their product. I would rather make less money than take money from a product that is half assed or simply doesn’t work. I built my business on being honest and I plan on staying that way. You should as well! Being honest is a rare thing these days and when you’re honest, you’re going to piss some people off, but in the long run, you will be a great tester.

Boxo 103 Piece Moto Toolbox

The Boxo MotoBox toolbox has been in the ol Sprinter van and going to the tracks with the family and I for a few months now. It is basically the first complete toolbox specifically made for us Moto guys. The 103-piece Boxo set comes complete with many of the tools you might need for just about any dirt bike brand. Plus, the tools and the box itself comes with a limited lifetime warranty.

IMG_4071.jpg

I am not a top mechanic by any means and I am not ripping apart engines at the shop here in the high dez, but growing up, my dad was always either a Craftsman or Snap On guy, so I was a little leary about the Boxo tools up front. Pops always told me “don’t buy shit tools son”! With that being said, I haven’t seen any one tool brand market a toolbox to the moto community, so giving this box a fair shake wasn’t that difficult. Each tool is encased in an EVA foam tool storage solution tray making tools fit securely in drawers to keep organized and no shifting during motion. I was impressed by the laser-cut foam tool cutouts and etched size markings as I didn’t feel embarrassed opening up my toolbox at the track now! Pops would be proud! What matters most is if the tools last and if the complete set was worth the $750.00 price tag. 

IMG_4067.jpg

The things I look to use the most when it comes to working on bikes are T-handles, Torx bits, wrenches/sockets (especially odd sizes like 11mm and 13mm), 30/32mm open end wrenches, screwdrivers, air fork pumps, tire psi gauge, and hammer/punch. The Boxo 97 piece set doesn’t come with a fork pump, t-handles or a punch, but does have almost everything else I need for a day at the track. 

The three-drawer toolbox is made from heavy-duty 20-gauge steel. It features ball-bearing drawer sliders and a smooth latch locker drawer system that retails for $160 if you want to buy it without the tools. The Boxo set comes with 1/4-inch and 3/8-inch ratchets and a 1/2-inch breaker bar. There are 24 1/4-inch, 3/8-inch and 1/2-inch metric drive sockets (with nine extensions and adapters) from size 4 to 32. For KTM/Husqvarna/Gas Gas dudes, Torx sockets from T15 to T55 are included with a set of hex sockets as well. Boxo desn’t quite have the “normal” T-handles that you usually use, they are build your own slide T-handles that you put together with the included extensions and sockets. There are 17 open-end metric wrenches from sizes 6 to 27. With those come a 7-piece foldable hex key wrench, three sets of pliers and six flat/Phillips screwdrivers.

There are also other tools that you may need from time to time like a hammer, scissors, digital tire gauge (which I tested with three other gauges and it’s accurate), safety-wire pliers, spoke wrench, axle step-down tool and two tire irons (that have box-end 32mm and 10mm wrenches on their ends and include 17mm and 27mm inserts. 

IMG_4068.jpg

A couple things that I would have loved to have within the Boxo set is a air fork pump, pipe spring puller, valve stem remover, and yes maybe some standard mini t-handles. The build your own socket T-handles are fine but do take some time to put together instead of just grabbing an 8 T maybe at the bottom of a fourth pull out drawer? What do you say Boxo? The spoke wrench worked on the KX, CRF and RM-Z spokes but wasn’t quite right for the rest of the test fleet. So what did I do with the tools that weren’t inside the Box 103 piece set? I simply just took my FASST Co. Torque spoke wrench set with me, some shorty t-handles, slapped a fork pump inside as well as a punch and valve stem remover. There is some extra room to put some loose tools in without having them slide all over hell so that was a plus!   

I mean we are only a few months in so I can’t really talk about how durable this box is, but so far so good! I chose a white box because it looks the cleanest, but Boxo does offer black as well. Boxo offers many different toolsets in all shapes and sizes with prices ranging from as high $9000 for roll-aways if you want to get serious! Boxo also even lets the customer completely customize your toolbox. Boxo will even laser-cut the foam to your custom order. To me, this 750.00 track box has been one of the best investments I have made. If there is one thing I use everyday, it is this box! 

Bolt It On Bike Rack

I just got a new Mercedes Sprinter van and I don’t know about you, but when I spend the kind of money I did with my new van, I want to make sure my bikes are secure and not going to fall over and ruin the sides of my new Sprinter. After I sold the ol’ trusty 2016 Sprinter, I purchased our new 2021 version and was looking for a bike rack to secure my test bikes. Some of you may be asking why not just build out the back of the van Kris? Well, it’s called money and I seemed to have spent a lot of it when I got the new van so I can’t exactly afford to build out a custom van right now. After doing some research, I wanted to try a different bike rack company than the previous one I used, so I decided on Bolt It On. Bolt It On is a family owned and USA operated business out of central California. After scouring their website and the tons of options they give you, I decided on the three dirt bike kit with 60 degree chocks with a 4 inch middle chock for my 170 sized van box. 

IMG_3318.jpg

Installation literally took me 10 minutes and required zero tools. I began by locating the long square tube known as the crossbar. This is the body/base of your rack. I began by loading the chocks onto the crossbar, then installed each support leg as well as a tie down hook on the inside or outside of each support leg. Lastly, attach one j-hook on the left and one on the right of the corssbar. Each j-hook should line up through a hole positioned directly above each D-Ring. That is it! Boom! Done. No tools required! What’s even better is that the whole system feels and looks quality. No crappy welds or burrs, the cuts on the crossbar are clean and even the paint on the kit has a nice finish to it. 

Initially I was going to install the Bolt It On rack to the D-Rings directly behind the bench seat but noticed that the crossbar stuck out over the side door step so we relegated the crossbar to the  set of D-Rings that are set back one row. After speaking with Scott (the owner of Bolt It On) he mentioned that they offer a shorter 144 box version of the crossbar that can be installed directly behind the seat, which will not affect the clearance of the step. So, if you’re in the market for a bike rack from Bolt It On, make sure you kind of know where you would like to install it before making your purchase. Loading bike into the chocks is easy and what I like most about having that 60 degree bend is that the bikes we load up will not sway back and forth when tied down. In my previous van I had another bike rack that had chocks that were straight and had some nightmare-is moments with the bars hitting the sides of my van when hitting bumps in the road (no matter how tight we got them). Adding a third bike through the middle was a breeze and even though we mounted the Bolt It On rack back a little inside the van, we still had enough room to throw in toolboxes, gear bags, gas cans, etc. 

The benefit to this Bolt It On rack is that I can disassemble and reassemble in minutes if need be. I don’t have to drill into the frame of my rear bench seat and my bikes are more secure with the Bolt It On rack, with the 60 degree angle of the chocks! Bolt It On makes these bicycle and dirt bike racks for all different makes and model trucks/vans and if you want a custom crossbar size, Bolt It On can cut the bar to your specific size. You can visit them over at boltiton.com or call Scott at 805 975 8280. Prices range from $400-$500 for a complete 2-3 dirt bike kit.  If you have any questions about this test, please feel free to email me at kris@keeferinctesting.com.

IMG_3332.jpg

Pump Replacement Fuel Comparison

We decided to try three brands of pump replacement type fuels to see how they stack up against pump fuel and one another. Below is a detailed breakdown of each fuel as well as what I am currently pouring into my test bikes.

IMG_2946.jpg

Renegade MX4:

Renegade may not be as much of a household racing fuel name with normal blue collar folk as VP Racing. With that being said, I think some of this is because it’s tougher to find Renegade fuels than VP and lets face it, VP has some pretty damn good fuel. However, Renegade offers several different kinds of fuel for the two wheeled enthusiast at a competitive price as well. I wanted to try a pump replacement fuel, similar to VP’s T4, so I asked a Renegade dealer Stan Benson Racing (located in up in Northern California) to supply me with a pale of MX4 (we also will be reviewing Renegade’s SX4+ in a future article). This high-performance four-stroke-specific fuel has many of the same technologies as Renegade’s popular SX4+ fuel and is also used by many top AMA Supercross teams. In most cases, MX4 is said to not require jetting or fuel mapping changes when transitioning from pump fuel applications. Renegade’s in house testing has shown up to 4-5% gains in power over popular comparable fuels on the market and their exclusive additive package is said to inhibit dreaded gumming and performance-robbing deposits. Much better than our crappy California blend fuel! 

The biggest advantage of MX4 over pump gas is that our current California crappy pump gas contains ethanol, an alcohol-based alternative fuel manufactured by fermenting and distilling starch crops that have been converted to simple sugars. This is not good for the lifespan of valve trains, fuel pumps, and top end gaskets on small engines like those found in dirt bikes. Ethanol in the fuel can leave a gummy substance that clogs fuel pumps (or jets on carbureted bikes) and causes early deterioration of head gaskets and o-rings, shortening the life of your engine. Another major problem is phase separation; if water gets into the fuel, this can cause the water/ethanol mixture to sink to the bottom of the tank where the fuel pickup is. Water inside your engine can cause the fuel pump to stop working and also can make your bike miss and sputter.

Is the on-track performance gain from MX4 worth the added cost from pump? For the average guy screwing around on open land, maybe not so much. For the true enthusiast who rides/races hard and wants a reliable power gain? Yes, it is, at least to me. Renegade’s MX4 comes in an easy-to-pour 5-gallon pail or a 55-gallon drum. I ran a pale of MX4 through a KTM 450 SX-F, YZ450F and CRF250R and it took me less than two laps to feel the added throttle response compared to pump fuel. When I came out of corners, while rolling the throttle on in second gear, each machine had more pull down low as well as throttle response with the MX4. In third gear, I felt a better pull and each machine ran crisper/cleaner throughout the rpm range. I didn’t feel too much gain through the top-end as most of what I felt was down low and up through the midrange. An added benefit was that the bike was easier to start (this especially is great because the YZ450F was the hardest to start out of all the machines I tested the fuel with). Riding longer motos on a sandier-type track, I also noticed that the bike kept consistent power. Usually when I test at this type of track, the power falls off a little as the bike gets hot with pump fuel—but not so with MX4. I also liked that I didn't have to change my ECU mapping in either a stock ECU’s or a previously mapped Vortex ECU.
Compared to VP’s T4 I feel like both are similar in performance on the track except for one area. Renegade’s MX4 does give a better low end rpm response and pulling power down low feels slightly better. Renegade has a slightly cleaner feel on low rpm, but I wouldn’t know that everyone would be able to feel the difference when going back to back with each fuel. 

For $94.00 for a five gallon pale of MX4, it is a little more expensive than that of T4, but there is a small performance advantage. Is it worth it? That will have to be left up to you, but it’s nice to know that the consumer has another option when it comes to pump replacement race fuel. Check out renegaderacefuel.com .

T4-racing-fuel.png

VP T4:

Designed for stock or slightly modified four-stroke motorcycles and other off-road vehicles used in competition, unleaded/oxygenated and ethanol-free T4 is a direct pour-in replacement for premium pump gas. Since pump gas has a short storage life and could cause greater need for repairs in the motorcycle industry due to its ethanol content, T4 100 octane rating (R+M/2) provides greater protection against detonation. Compared with more expensive performance parts that increase power along only a small slice of the power curve, T4 claims to add 2-3 percent more power and better throttle response across the entire rpm range. I wanted to see if that “claim” was true and have been running it in several test bikes I have here. 

The biggest advantage of VP T4 over pump gas is our current pump gas (especially California pump fuel) contains ethanol, an alcohol-based alternative fuel manufactured by fermenting and distilling starch crops that have been converted to simple sugars. This is not good on the life span of the valve train, fuel pumps, and top end gaskets on small engines like a dirt bike. Ethanol in the fuel can leave a gummy substance that clogs fuel pumps (or jets on carbureted bikes) and causes early deterioration to head gaskets and O-rings and possibly shortening the life of your engine. Another major problem is phase separation; if water gets into the fuel this can cause the water/ethanol mixture to sink to the bottom of the tank where the fuel pick up is. Here’s a tip: If you are using pump fuel and you’re at a gas station and see a fuel truck filling the gas station’s tanks, go somewhere else, because chances are they are near the bottom of the reservoir. Water inside your engine can cause the fuel pump to stop working (seize up) and also can make your bike miss and sputter. 

 Is their a on-track performance gain from T4 compared to pump fuel? For the average guy putting around on weekends, maybe not so much. Pump fuel is just fine. For the true enthusiast who rides hard and wants a reliable power gain, yes, it is. I ran five gallons of T4 in the Yamaha YZ450F and it took me less than three laps to feel the added throttle response (compared to pump fuel). Coming out of corners and rolling the throttle on in second gear I felt like the bike had more pulling power down low. Shifting in third gear I felt a better pull and the Yamaha actually ran slightly cleaner throughout the rpm range. I didn’t feel too much gain through the top end as most of what I felt was down on low rpm and up through the mid range. However, riding longer motos on a sandier-type track I noticed that the bike kept consistent power. Usually when I ride this type of track with this bike the power decreases a little as the bike gets very hot – but not so with the T4. If you’re looking for a little more bottom end snap/pulling power, VP’s T4 is the real deal. If you’re in the market for a lower cost race fuel (versus some of VP’s higher-end products) that gives you some power gains and helps your bike just run better, then for around $85.00, a 5 gallon pale of T4 is a good choice. You can go to vpracingfuels.com to check out what other options VP has.

IMG_2944.jpg

F&L “Pure 93” Racing Fuel:

F&L has been around for several years in the off-road world, but you just don’t see it a ton around the motocross tracks. That has changed because F&L has introduced several new motorcycle specific fuels and the Pure 93 is an ethanol free pump replacement unleaded racing fuel. 

Formulated as a direct pour in replacement for premium pump gas, Pure 93 uses the same high end chemicals to be refined as a racing fuel which can mean better performance and a cleaner, more complete burn in the combustion chamber. 

Pump gas has a shorter shelf life and contains ethanol, which will eventually gum up fuel system components such as carburetors, injectors, pressure regulators, etc. Pure 93 is ethanol free and has a shelf life of up to 24 months. 

Applications that Pure 93 is good for are motorcycles, marine engines, agriculture equipment, generators, lawn equipment. Basically any engine where you would want to have a better performing fuel with a longer storage life than pump gas. 

From what I noticed when running the Pure 93 F&L fuel in my KTM 450 SX-F test bike is that you will not necessarily feel more low end pulling power or rpm response like you do when using VP or Renegade, but you will feel a cleaner burn. With pump fuel, I can feel some dirtiness associated with the ethanol we have here in California and that can make your throttle hand feel disconnected with your rear wheel. Unlike the other two brands, F&L is going for a lower cost with a cleaner burn in mind. This cleaner burn is better for the life of your motorcycle as well as not has heavy on your pocketbook ($45.00 for 5 gallons) when purchasing 5 gallons. The Pure 93 is a true pump replacement fuel that you may not feel on the track, but could feel in your wallet over the lifespan of your machine. Pure 93 is not on F&L’s website yet, but it is available. Visit racefuel.com to see where your local F&L dealers are or simply email info@racefuel.com

So What Should You Use?: 

I am not the type of media outlet to push something down your throats and tell you this is what you absolutely have to use. I will say that if you’re a weekend warrior looking to spend as little as possible and get more life out of your engine, the Pure 93 is a good choice as it is almost half as expensive as the Renegade MX4 or VP T4.  Just know that raw performance advantages are not super noticeable on the track like the others.

If you’re racing on the weekends and want more power, then to me, the Renegade MX4 as well as VP T4 is hard to beat. I have ran both fuels in the same machine, with the same ECU map, with great results. I will say I do get more low end RPM response and slightly more pulling power out of corners with Renegade MX4, but it’s a very minute difference. It would be difficult for me to tell you which one is best for you as I see positives in both Renegade and VP. I will say that my son and I split fuels between our machines, as he has been running Renegade in his 250 four stroke (for slightly snappier response) and I have been running VP T4 in a couple of my 450 test bikes here (for better rear wheel connection). My suggestion is if you’re looking to run better fuel than pump gas without performance advantages, but want cleaner burning fuel, go with F&L. If you’re looking to get all of that plus power advantages felt on the track, go with VP or Renegade. Just know that with performance advantages comes a heftier price tag.

Renegade SX4+ Racing Fuel

Renegade SX4+ is a four-stroke powersports race fuel for those who are serious about racing or have engine modifications done that need to coax the absolute most performance out of their race engines. I did a review on Renegade’s MX4 pump replacement fuel and was so impressed with that fuel that I decided to try the SX4+ (for reference, it can be the equivalent of going to VP’s MR Pro 6). Now when I talk to some engine builders that use this fuel, they tell me that Renegade SX4+ burns quicker than Pro 6 and that can mean that the ECU needs to be remapped. For the sake of testing, I decided to try the Renegade fuel against VP’s MR Pro 6 in a KTM 250 SX-F and a Yamaha YZ450F to see if I could feel any difference between the two fuels.. 

IMG_2100.jpg

On a 2021 KTM 250 SX-F (with an FMF muffler system and Vortex ECU) the Renegade SX4+ gives me a little more low end RPM response than the Pro 6. I noticed better pulling power down low and an overall feel of just more low end excitement. Mid to top end pulling power felt the same between the two fuels, but once I ran through a couple tanks of SX4+, I could tell that I needed to richen up the ECU setting as well as advance the timing a little. Once we remapped the Vortex ECU for SX4+, I could feel the KTM pull more through the mid range without any de-cel pop. I also noticed that after a 20 minute moto the Renegade fuel was slightly lower (visibly) in the tank than that of the MR Pro 6 fuel. I feel like if you’re looking for maximum gains out of your 250F then the SX4+ is a great fuel to maximize horsepower. 

IMG_2101.jpg

On a 2021 Yamaha YZ450F with a FMF muffler and Vortex ECU, I preferred the VP MR Pro 6 because the Renegade fuel gave me too much throttle response which caused me to not have a much control though my corners. That same throttle response that I liked so much on the KTM 250 SX-F, I didn’t really care for on of my Yamaha. The MR Pro 6 felt like it gave my delivery more control on low RPM situations and to me that was beneficial on the 450. Now since I felt like I had too much throttle response with the SX4+, I decided to play around with the ECU mapping to see if I can tune it out, which I was able to do, but once I tuned the hit out a little, it just seemed to me the SX4+ wasn’t any better than the MR Pro 6 in my 450. To me there was not advantage between either fuel on the track, which meant it was a sideways move for me. 

The Renegade SX4+ does deliver more low end rpm response and pulling power, but to me this may only really benefit 250 four stroke riders who want the most front side power they can, or gnarly 450 guys that want more low end. I guess I am not that gnarly of a 450 guy! This fuel is for racers who understand that you will have to get a reputable engine builder to tune your ECU to SX4+, so don’t go thinking that you can just pour S4+ in and enjoy all of its benefits. Simply pouring it in and expecting it to be magical is foolish and you will be wasting your money. However, if you plan on building a race machine and want a fuel that burns clean and quick, the Renegade SX4+ is some of the most responsive racing fuel we have felt. Maybe too good for you 450 riders! If it was me and I was running Renegade Fuels on a 450, I would stick with the MX4 fuel. I typically run MR Pro 6 HT in my race engine 450s for the simple fact that it doesn’t burn as quick as the SX4+ and the “HT” doesn’t boil in hot conditions. This MR Pro 6 HT helps RPM response and mid range pulling power (over standard pump fuel), but doesn’t give you so much hit that it makes that big girl hard to ride! Speaking of boiling, the SX4+ withstands boiling fairly well and I didn’t notice any issues during warm California motos that ranged in the low 90s.

The huge downside to this SX4+ fuel is that it’s expensive and can cost anywhere between $180.00-$200.00 per 5 gallon pale! Ouch! You can check out all of Renegade’s fuel over at www.renegaderacefuels.com


Renegade MX4 Racing Fuel

Renegade MX4 may not be as much of a household racing fuel name with normal blue collar folk as VP Racing. With that being said, I think some of this is because it’s tougher to find Renegade fuels than VP and lets face it, VP has some pretty damn good fuel. However, Renegade offers several different kinds of fuel for the two wheeled enthusiast at a competitive price as well. I wanted to try a pump replacement fuel, similar to VP’s T4, so I asked a Renegade dealer Stan Benson Racing (located in up in Northern California) to supply me with a pale of MX4 (we also will be reviewing Renegade’s SX4+ in a future article). This high-performance four-stroke-specific fuel has many of the same technologies as Renegade’s popular SX4+ fuel and is also used by many top AMA Supercross teams. In most cases, MX4 is said to not require jetting or fuel mapping changes when transitioning from pump fuel applications. Renegade’s in house testing has shown up to 4-5% gains in power over popular comparable fuels on the market and their exclusive additive package is said to inhibit dreaded gumming and performance-robbing deposits. Much better than our crappy California blend fuel!

IMG_1286.jpg

The biggest advantage of MX4 over pump gas is that our current California crappy pump gas contains ethanol, an alcohol-based alternative fuel manufactured by fermenting and distilling starch crops that have been converted to simple sugars. This is not good for the lifespan of valve trains, fuel pumps, and top end gaskets on small engines like those found in dirt bikes. Ethanol in the fuel can leave a gummy substance that clogs fuel pumps (or jets on carbureted bikes) and causes early deterioration of head gaskets and o-rings, shortening the life of your engine. Another major problem is phase separation; if water gets into the fuel, this can cause the water/ethanol mixture to sink to the bottom of the tank where the fuel pickup is. Water inside your engine can cause the fuel pump to stop working and also can make your bike miss and sputter.

Is the on-track performance gain from MX4 worth the added cost from pump? For the average guy screwing around on open land, maybe not so much. For the true enthusiast who rides/races hard and wants a reliable power gain? Yes, it is, at least to me. Renegade’s MX4 comes in an easy-to-pour 5-gallon pail or a 55-gallon drum. I ran a pale of MX4 through a KTM 450 SX-F, YZ450F and CRF250R and it took me less than two laps to feel the added throttle response compared to pump fuel. When I came out of corners, while rolling the throttle on in second gear, each machine had more pull down low as well as throttle response with the MX4. In third gear, I felt a better pull and each machine ran crisper/cleaner throughout the rpm range. I didn’t feel too much gain through the top-end as most of what I felt was down low and up through the midrange. An added benefit was that the bike was easier to start (this especially is great because the YZ450F was the hardest to start out of all the machines I tested the fuel with). Riding longer motos on a sandier-type track, I also noticed that the bike kept consistent power. Usually when I test at this type of track, the power falls off a little as the bike gets hot with pump fuel—but not so with MX4. I also liked that I didn't have to change my ECU mapping in either a stock ECU’s or a previously mapped Vortex ECU.

IMG_1288-2.jpg

Compared to VP’s T4 I feel like both are similar in performance on the track except for one area. Renegade’s MX4 does give a better low end rpm response, but pulling power down low feels similar. Renegade has a slightly cleaner feel on low rpm, but I wouldn’t know that everyone would be able to feel the difference when going back to back with each fuel. 

For $94.00 for a five gallon pale of MX4, it is a little more expensive than that of T4, but there is a small performance advantage. Is it worth it? That will have to be left up to you, but it’s nice to know that the consumer has another option when it comes to pump replacement race fuel. You can order your Renegade Race Fuels right here:      

https://stanbensonracing.com/collections/renegade-race-fuel/products/mx4

Blendzall Ultra Racing Castor

By: Michael Allen

The senses of the human body are incredible, especially the sense of smell. I have always found it fascinating that you can smell a certain scent and your mind has the ability to take you back to a specific time your life. When I got my order of Blendzall I didn’t recognize the packaging, nor the scent of the raw oil itself. It wasn’t until I mixed it into my YZ 125 and started it, that the scent took me back to my first time at a motocross track in the late 1990s. You see the reason I didn’t recognize the packaging, or the raw smell is because when I was growing up we used to just get our two-stroke mix from the local chevron gas station because it was the cheapest thing around and it was on our way out of town to go ride. Keeping that in mind, I remember my brother taking me to the motocross track for my first practice (around 96’ or 97’) on a bitchen 1994 KDX 200. The first thing that stuck out to me when we got there was the smell of castor oil coming from the exhaust that seemingly everyone was using to mix in their two-stroke fuel. There is just something about that smell that brings back fond memories of a simpler time when life was less about Instagram and more about sitting on tailgates and talking smack.  

Like I said, I had never tried Blendzall or any other castor oil for that matter until this month when I got my shipment. Blendzall has been in business since 1959 when Ray Hook turned his passion for going fast into a racing oil business. The name Blendzall was used to describe how the oil will blend with all types of fuel. When doing some research on the company I found that Blendzall set the speed record for a go-kart with a top speed of 152 mph (holy shit). Over the past 60 years many factory teams have relied on Blendzall, in fact rumor has it that factory Yamaha was dumping out Yamalube, and re-filling the bottles with Blendzall when Kenny Roberts was road racing in the mid 1970’s.

IMG_0597.jpg

There are multiple reasons people prefer to use castor oil instead of traditional petroleum or even synthetic oils. Castor oil is a clean burning oil and wont foul spark plugs, nor will it puff out blue smoke from your exhaust. The viscosity of Blendzall stays consistent from -30 to 500 degrees Fahrenheit. Blendzall’s formula is designed so that the oil will flow to higher heat areas to help cool, and prevent metal galling. 

I’ve never been a big fan of flip flopping two-stroke oils because sometimes different oils won’t mix together properly causing poor lubrication. In fact when I was younger and borrowed my brothers KX 250 on my birthday and told him I couldn’t find the same oil he used so I just used what I could find he was less than thrilled. To this day I will never forget the time my brother kicked my ass on my birthday for mixing two different two-stroke oils in his bike. When I got my Blendzall shipment I made sure to drain my tank of any remaining fuel as well as the bowl of the carburetor. The first thing I noticed was that there is no color to the Ultra Racing oil, which in my opinion is a negative because I (along with many other riders) don’t just have one gas can in the garage. I had to make sure I clearly marked the gas can “mixed” since the fuel inside that can looked just the same as the other non-mixed cans in my garage. For the last 10 years I have been using Amsoil synthetic pre mix at a ratio of 40:1 and have never had an issue. I emailed Blendzall to ask what ratio I should mix to since it was a completely different oil and they said to keep the ratio at 40:1, which was great because one Blendzall bottle mixes five gallons of gas at 40:1, so you don’t even need a Ratio Rite. 

With a couple kicks my 125 was fired up and the first thing I noticed was the less smoke coming from my silencer. Every two-stroke I’ve owned puffs blue smoke when it’s first fired up as well as being slightly loaded up while it’s cold and getting to operating temperature. To my surprise that wasn’t the case with Blendzall; there was almost no smoke coming from the silencer. Instead of feeling lethargic and loaded up, the bike was crisp as soon as it came to life. The bike had the same sensation when out on the trails, it felt crisper and I felt like the throttle response was slightly better as well. No matter what the terrain or elevation, the overall sensation was that the bike ran “cleaner” and was more crisp, which made it that much more fun to ride to me.

IMG_0598.jpg

 The only thing I didn’t find on my trail ride were long hill climbs where the bike would be held wide open for prolonged periods of time. I’m sure there would be no issues, but I simply didn’t get the chance to put the bike in that scenario. After years of using traditional oils for my two-strokes, Blendzall has made me re-think what kind of mix I put in my 125. With a price tag of $8.53 per bottle, not only will I be constantly reminded of childhood memories, but I’ll be saving money as well. Blendzall makes oils for almost any application and they all smell fantastic! If you have any questions about this test, feel free to reach out to me at Michael@keeferinctesting.com, also check out Blendzall’s website at https://blendzall.com/.

Hidden Gems (Peet Boot Dryer)

By: Michael Allen

About eight years ago I started testing motorcycles and motorcycle related products, which is where I met Kris. At times there were multi day tests that had us either having to wear sweaty boots from the day before or wet boots because they needed to be washed. For a few years I just dealt with the wet feet inside the boot feel, but I knew I had to find a better way to combat this problem. That all ended when I walked through Bass Pro Shop with my wife and something caught my eye. As we walked through the footwear section I noticed a plastic contraption that had two upside down boots on the top. When I looked at the tag I realized that I had been riding in wet boots for years for no damn good reason. I don’t know why, but I never seen a boot dryer and when I saw this one, I figured it would be more money than it was worth, but to my surprise it was only $45.00. I purchased it that day and haven’t started my ride in wet boots ever since. 

IMG_0238.jpg

The dryer I have is made by Peet and can be found on Amazon (see the link at the bottom) for $44.99. There are cheaper options (and much more expensive), but I can only vouch for the one that I own and it’s been great. The concept is simple; once plugged in (there isn’t an on/off switch) the dryer radiates warm air through the tubes and into the boots. Once I finish washing my boots I set them on the dryer and leave them over night and by morning they are warm and dry. I’ve dried every brand of boot on the Peet dryer and have yet to find a pair it doesn’t mate with. When it comes to bootie style boots I don’t always remove the booties when I scrub the boots, but it doesn’t matter as the boots fit with or without the booties. Also, if the top tubes are removed you have the ability to dry gloves as well. Another plus side to a dryer is that I’ve noticed my boots don’t smell as bad since they no longer sit with moisture in them that could cause that awful wet sweat smell. If you know, you know!

IMG_0246.jpg

 After looking online I have seen that people have made their own dryer out of PVC, but in my opinion, for the price, it’s much easier to just buy a drier that’s proven. To me this is a hidden gem because I didn’t know they existed (I guess I’d been living under a rock). The design is simple and works great and it’s relatively inexpensive. 

IMG_0241.jpg

Questions About Av Gas Answered

A Bit of Information About Aviation Fuel

Aviation Fuel has been used as a low-cost substitute for high octane fuels for decades. This was more common in the hay days of 2 strokes, due to higher probability of detonation, and thus the change to 4 strokes has seen a decline in the popularity of “aviation race gas”. The reason for aviation fuel, once all the folk lore is stripped away, is simple; The most common aviation fuel (100 Low Lead) has a high-octane rating, is low cost compared to store bought race gas, and has a higher resistance to detonation than pump fuel. The relatively high (compared to pump gas) octane rating is achieved using a chemical tetraethyllead (TEL) (the lead in leaded fuel) which increased the resistance to detonation.

Detonation in an aircraft is a very bad thing. Imagine sticking a ring at 8000 ft, makes Mt. St. Helens look like an ant hill when you fall from that high. In a motorcycle, especially a two stroke, the balance of compression ratio, cylinder temp, air/fuel ratios, and the like can push a machine to the limit of detonation. A two stroke seems to love life at the edge, a 125 seems to run the best right before it stops running completely. An increased octane rated fuel resists detonation more than a lower octane rated fuel. This is the definition of the octane rating, notice the lack of power in that definition. A father of an aspiring 125 champion could make a high compression, lean running, crisp feeling engine, and run practice with Aviation fuel to lower the fuel bill. The fuel by no means produced the same power, throttle response, or any of the key characteristics of a good running machine, but it would allow the bike to run with a longer service life for less money.

IMG_8381.JPG

Octane Rating

I used the phrase “octane rating” earlier. This was chosen instead of phrases like: “the octane in the fuel”, “has more octane”. Octane is a physical molecule, has physical properties, even has a very easy chemical formula:

Octane = C8H18

However, in modern applications, octane is not what makes a fuel more or less powerful, more or less resistant to detonation, or better or worse race fuel. The “octane” in a fuel is a simplification of “octane rating”, which is a test of the amount of compression alone that will cause fuel to combust. I will briefly describe the test, to hopefully clarify what the number means, and make clear that “octane rating” does not correspond to increased/decreased engine power.

Octane Test:

If you take pure octane (C8H18), vaporize it in air, and compress it rapidly, eventually it will combust on its own. This is equivalent to detonation in a real engine, in that there is no spark required to start combustion. You can do the exact same test with heptane (C7H16) which is similar in chemical composition, physical properties, but it will self-combust at a lower pressure than pure octane.

If you blend octane and heptane with a ratio of 50 parts octane and 50 parts heptane, the mixture would have an octane rating of 50. This is the definition of the octane rating. The mixture would self-combust at some pressure given the test described above. Any fuel mixture (diesel fuel and pump gas, 50:50 race gas and pump gas, vegetable oil and nail polish) that self-combusts at the same pressure in this test would have an octane rating of 50. You can imagine these mixtures would make different powers, but the fuel would have identical octane ratings. 

Octane ratings are independent of power output.

Most pump gas has an octane rating of 87 to 95 depending on where you live. This means that the fuel coming out of the “87” hose at the gas station will self-combust at the same pressure as a 87:13 mixture of octane to heptane. The pump does not, however, pump out pure octane and pure heptane in that ratio. The fuel we buy is a mixture of near countless chemicals designed to meet environmental, storage, transportation, and performance requirements for the lowest possible costs. I will skip the rating methods and different octane numbers based off the test, but just know that the number on the pump in Europe vs the US does not tell the whole picture. Crossing international borders makes comparing fuel octane ratings difficult due to laws that govern what goes into that number on the pump.

 This may then beg the question: “What is 110 octane rated fuel, you can’t have 110% of something in a fuel”? This is true, and the simple answer is the rating is just plotting self-combustion pressure past 100% octane test fuel. The chart below illustrates this.

IMG_7699.jpg

Back to Octane Rating:

The octane rating is crucial, as it allows a consumer to know the fuel they are purchasing will not cause damage to the engine by detonation. One of the more practical ways to think about octane rating is the amount of energy needed to start the combustion process. This energy comes from 3 main sources, each adding on top of one another to eventually reach the threshold to start combustion. The main sources are:

  1. Engine Temperature

The hotter the fuel is when entering the combustion chamber, the less energy needed to get the fuel to combust. Likewise, the higher the temperature of the components that make up the combustion chamber, the less energy required to start combustion. This is due to the thermal energy in the hot engine parts transfers to the fuel while the fuel is in the engine, waiting for the spark. These no doubt play a role in meeting the minimum combustion energy level, but if you pour gas on a piece of metal at 1.5 times the temperature of the cylinder walls, it will not self-combust. The temperature of the incoming air and temperature of engine parts can push an engine near detonation over the limit, but typically cannot combust fuel just by touching it.

Compression:

This is the main perpetrator in detonation, and the main reason why people think race bikes “need” high octane race gas. When you compress any gas, the temperature goes up. Do this fast enough, and the increase in temperature can be substantial. If you have a can of compressed air, you can run this process in reverse. Spray the can against a piece of material and the air leaving the nozzle is ice cold (never point this at someone as it can cause frost bite even through clothes). Compressing air is the exact same process in reverse, so heat is generated rather than lost (exothermic vs endothermic for the nerds out there). The more you compress air, the more energy that is generated. Compress it enough, and enough energy is generated to combust the fuel without spark. This is the main source of energy when detonation occurs.

One additional note: compression is not uniform in the combustion chamber. The shape of the combustion chamber has a drastic effect on detonation risk. This comes from some areas of the head getting very close to the cylinder head, and the air struggles to move away fast enough when at high RPM. This causes local high pressure areas, which causes local higher temperature, which can push a small amount of fuel over the combustion limit. A small area detonating can spread the flame to the whole air fuel mixture, causing complete detonation. 

This is part of the reason why a two stroke on the limit will have some small damage at the edge of the piston when running correctly, the pressure is highest, and some small detonation happens, pitting the surface. This is also why you typically only get detonation at high RPM. At low RPM, there is enough time for the air to have a more uniform pressure (and the heat generated by compression can bleed out through the cylinder). Without local high pressure spots, detonation is less likely.

Spark Plug:

In a perfect engine, the spark is the last little bit of energy needed to start the combustion process, which is where you get the power from an engine. I won’t delve too deep into this, but just know that the spark is designed to start combustion in the center of the combustion chamber to allow for an even, non-damaging, pressure wave. When detonation occurs, it is typically not at the center, very uneven, and causes much higher cylinder pressures than what the engine was designed for. Lastly, a cooler or hotter spark plug is used to give a little extra energy for quick, even burning. A hotter plug means the porcelain piece is physically at higher temperature due to some design differences. The increased temperature, like cylinder or air temp, can be enough to push the engine into detonation.

There are many, many sources that engine designers consider when developing an engine for power character, running temperatures, RPM ranges, etc. that all factor into how the combustion process occurs. A paper on these items would be a great PhD thesis, and more than any sane person would be willing to read. These 3 are the simplest, and are the largest contributors to detonation risk.

In simple terms, a higher number octane rating means a higher energy level needed for combustion. When doing any engine modifications, you need to consider these factors and consider higher octane fuel if some change (typically compression ratio) will push the machine into detontation risk. You do not, however, get more power from higher octane fuel. In a stock machine, switching to a high octane fuel can sometimes decrease engine power output.

A Brief Word on Combustion

Combustion is very complicated when trying to design parts to optimize power. The concept governing it is simple. The commandments in the bible of power are rather simple:

“Get as much air and fuel, in the right ratio, into the cylinder as possible.”

“Thou shall not detonate”

“Achieve the maximum possible cylinder pressure as soon after Top Dead Center as possible”

The first comandment is for another conversation. The second we have already talked in detail. The third is what seperates the men from the boys, the cats from the dogs, and the good fuel from the bad. The power in race gas is the way that it builds pressure in the cylinder, increasing the power. Again, I want to make it clear that this is not because of the octane of the fuel. The simplified principle is that race gas burns quicker than standard pump gas. The faster a fuel burns, typically, the lower the octane. Defying this trend is what you pay for in race gas. 

When fuel is too high octane, combustion starts later than it should (because the energy requirement for combustion is not met until more cylinder pressure is built up) and the burn rate of the fuel is slower. The chemical properties that make a fuel resistant to detonation also make the fuel burn slower once the combustion has started. An engine in a motorcycle is just a mechanism that turns pressure (from fuel combustion) into mechanical motion. If the pressure of the cylinder is high, it gets the engine moving faster, and making more power. If the fuel takes a long time to burn, the pressure is lower, and less power is generated. 

Final Thoughts

There are a lot of extra pieces to this puzzle, but for simplicity, this is what fuel designers must balance.

  1. Fuel needs to not combust prematurely (detonate), so an octane rating is needed to achieve this. Some bikes need 110 (turbocharged drag bikes), some bikes need 100 (modified two strokes), and some bikes need 93-95 (4 strokes, modified and standard).

  2. Fuel needs to combust in a controlled, consistent manner so that cylinder pressure can be very high on the power stroke to get maximum power from each molucule of fuel. This is used for efficiency on road cars, and power in racing aplications.

  3. Fuel needs to have an appropriate cost for the application. Pump gas makes some sacrifices in area 1 and 2 to achieve a cost. Race fuels sacrifice much less, but have a price that goes with it.

I hope that this offers some clarity on the complex liquid that is fuel. When buying fuel, you need to be realistic about your application needs, your desired cost, and have realistic expectations for what to expect when you pour it into your tank. 

  1. Don’t fall into the misunderstanding that the “octane” is in the fuel, or that you can add octane out of a bottle. 

  2. You don’t always need the highest octane for every application (sometimes it can undo power gains you probably paid good money for). 

  3. Octane rating does not cause power. Filling up the 1998 E350 with 91 won’t help my quarter mile time.

  4. Race fuel cost what it does for a reason. It is high quality, engineered fuel that will actually give you power (not from the octane rating though).

Taking it Back to the Start, “What about av gas, is it good?”

Av gas, like any specialty fuel, is great for it’s application. It resists detontation, resists evaporation at low pressures (8000 ft), and is a decent price. However, av gas is designed for planes that run at 2800 RPM, not 14000, so it burns slower, and unless you have some wicked step up skills, the fuel evaporation probably won’t be a problem. If you have a two stroke that is detonating, I would ask yourself 3 things:

  1. Do you need the compression ratio you are running? 

  2. Is your jetting right? You may need to richen up a bit to get the ‘ol race YZ490 to sing all day.

  3. Don’t you work hard to play hard? Treat yourself to some high quality fuel, designed for motorcycles, with the appropriate octane rating. Don’t forget the last commandment of power (and first of lunch meat):

“Compromise Elsewhere”


CCR Sport Sprinter Pro Track Moto Kit

People always ask me “Hey Keefer, when you going to build the inside of your Mercedes Sprinter Van”? I always come back with “I am not rich and I don’t have that kind of money”. Sure I would love to get some cabinets for chemicals and a tire rack in there, but I am not to sold on installing a partition behind my rear bench seat quite yet. I have been basically putting my bikes against my bench seat for two years! Yeah, I know…That’s not very professional. I at least wanted to install a rack with wheel chocks just so my bikes can be locked in more securely. I called Chris Cooley of CCR Sport whose been in the motocross industry for a long time. I worked with Chris when he was a test rider at Dirt Rider and MX Racer Magazine. I told him I just wanted some sort of moto rack in my van so I can get my motorcycle tires off the back of my bench seat. Chris sent me their Sprinter Pro Track Moto X-3 Kit for my Mercedes and I thought why not put up a review. 

IMG_6808.jpg

DESCRIPTION

The Sprinter ProTrack Moto X-3 Kit is a cargo track that mounts to the back side of the passenger bench seat in your Sprinter Van. You can use the fully adjustable track to secure any type of cargo you may need to transport. The X-3 Moto Kit includes a couple of CCR Sport’s ProTrack wheel chocks for transporting two motorcycles, bicycles or scooters, plus the ProTrack third bike extender for adding a third bike for when three riding buddies is better than two.

HOW IT WORKS

Two uniquely designed seat base mounts easily attach to the factory seat base. The ProTrack is attached to the seat base mounts creating a very sturdy option for securing cargo to the rear of the Sprinter passenger seat. The Sprinter ProTrack assembly stays installed when you remove the seat from the van, so no extra work having to remove your rack when you need added space. Primarily used for transporting dirt bikes, the track has been used for our bicycles, scooters/groms, and just about any other cargo you need to secure for safe transport.

FEATURES

• Mounts to factory rear passenger seat bases creating a sturdy cargo rack.

• Stays attached to seat, therefore no removal needed for additional space.

• Fully adjustable and extremely durable tie down hooks.

• Great for securely transporting all kinds of cargo, including motorcycles, bicycles, scooters and much more.

IMG_7122.jpg

SPECS

• ProTrack is manufactured from 6063 extruded aluminum and clear anodized.

• Seat Base Mounts are laser cut and formed from steel alloy and powder coated for an attractive and durable finish.

• Components are manufactured from high-grade steel alloy and are Zinc plated and powder coated for an attractive, long lasting finish.

INCLUDES

• (1) ProTrack

• (2) Sprinter Seat Base Mounts.

• (3) ProTrack Tie Down Loops.

• (2) ProTrack MC Wheel Chock

• (1) ProTrack 3rd Bike Extender

• (1) Required installation hardware kit with instructions.

• Additional components can be purchased separately.

IMG_7125.jpg

THOUGHTS

The CCR Sport Protrack Moto Kit literally took me 45 minutes to install. I am not a great mechanic by any means, but this Protrack kit was basic and straightforward. I simply used a step drill and a 5/16 drill bit and then bolted it right up to the frame of my bench seat. I now can load up three bikes with ease and have them firmly in place without the front wheels moving around on me while in transport. I like that I can get a third bike in the van without having to load it backwards as the third bike extender makes it simple for easy loading and unloading. I know it doesn't seem like much, but this CCR Protrack kit makes my life a lot easier when going riding with my kid. At $399.99 this was a fairly inexpensive way for me to make my Sprinter less ghetto. 

Go check out ccrsport.com to see all the moto kits they have to offer.  

Mistakes Beginners Make And How To Fix Them (Part One)

No one comes out of the womb a professional motocross racer and knows exactly how to get around a track properly let alone fast. What about the basics of riding your dirt bike on a motocross track with other people? We all started out as lost beginners and were all squids at one point in time. There is nothing I hate more than when a good rider sees a beginner and talks trash on him/her because they aren’t as good. Or maybe they don’t have all the new gear and shit! Who cares! Instead of talking down to them or making fun of them, let’s help them! Go over and talk to them! Let’s make them feel welcome to our sport and make them want to tell their friends on how much fun it is to go to the track. We all make mistakes in our life and most of us had/have our parents there to help us through those mistakes (at least I know I did). 

However, I understand that some beginner or novice riders may not have come from the same “riding friendly” family background as me. With the un-written rules/ethics of motocross riding, it can be somewhat difficult to get solid information on what to do or maybe more importantly, what NOT to do. If we learn from our mistakes we can become wiser, safer, faster, and more efficient, but in motocross sometimes those mistakes come at the cost of an injury. I wanted to share some mistakes I have made in the past and some that I have seen over the years at tracks over my time. Riding dirt bikes is dangerous enough, so knowledge shared is usually a less painful way to learn than by making the mistakes yourself. So if you’ve been around a while in this sport and are decent rider, put your ego to the side and help those newbies out there, so our sport grows and we have less angry people in the world. If your a beginner/novice rider welcome to our sport and keeferinctesting.com! This website is fun and also a great stop to learn all things dit bikes! Read this “Part One” article and try to apply this wisdom to your riding and hopefully those mistakes that you’re making now will be less after you read this!

Note: I use the phrase “pull your head out of your ass” to my thirteen year old kid a lot! This phrase goes a long way when you ride a dirt bike as well. Staying aware and pulling your head out of your ass can save your life! Every time you get on the bike, have fun, but respect it and know your surroundings. 

5cc9.jpg

Not Holding Your Line When Faster Riders Come Up Behind You

Travis Preston and I talked about this on my podcast (Show #124 Practice Track Etiquette). On crowded tracks, slower riders tend to get nervous and worried that the faster riders won't see them and will run into them or even land on them. To avoid the chances of this, stick to your line if a faster rider is closing in on you. The faster rider will see you and pick the best line to get around you—so if you are riding down the middle of the track, stay there. If you change your line to let them by, you're actually making it more likely that they will run into you. If you hear them coming up when you are getting ready to jump (as long as your clearing the jump), make sure to jump straight from where you take off. Definitely don't change lines up the face or cross jump, and if you're going to roll the jump, approach it at a speed that announces this, don't charge up to the jump and then get on the brakes hard. If the track is crowded maybe wait until it gets less busy with faster riders. Also, if you aren't jumping a certain jump and you have a busy track, try to stick to the side of the jump/track so that the riders behind you know that you aren't jumping this double/tabletop/etc.

7F23B3F5-8C7E-4B8D-90E8-56E873DCEF1D.jpeg

Practice Breathing 

This really may sound super lame, but we actually can forget to take in enough oxygen while riding. It’s actually pretty easy to forget to breathe while riding since you're already focused, concentrating on not crashing, shifting, braking, rolling the throttle on as well as hanging on for dear life. So you need to pick "trigger points" (AKA sections of the track) where you will take a deep breath and try to relax your muscles. If you're comfortable jumping, they are the best trigger points; as soon as you launch, start taking a really deep breath and try to relax, hold it in for half a second, then let it out as you land. Do that on just two to three of the biggest jumps on the track and your heart rate will drop 10 to 15 beats a minute! If jumping is not your forte, then find two to three trigger points where you're the most comfortable and take take the deep breaths at those spots. Doing this will help you ride longer and possibly get less arm fatigue. 

9X1A3021.jpg

Listening To Your Clutch

Yes, just like a woman, you must listen to your motorcycle as it’s talking to you. Didn't know bikes could talk? Yes, they can and sometimes they talk in the form of a burnt out clutch! This could cause you to crash on a big jump—you could come up short because your bike didn't give you the power you expected. Change your oil, then give it a sniff and a look for excessive amounts of clutch fiber particles floating in the oil. Inspect your clutch components for fibers that are out of spec or blued steels (heat damaged). And it's usually a bad idea to install softer clutch springs; they will speed up clutch wear. This is the number one thing I see when I look at a beginner/novice type of rider. I have even rode people’s bikes and have almost always have to tell them that their clutch is fried. Change your plates! 


Losing Focus On The Fun

If this dirt bike thing has bitten you like it has most of us you will be trying to improve your speed or your conditioning every time you ride. This doesn’t happen overnight, you will need to put in the time, do your motos, and work on your corners, but don't forget what riding dirt bikes is all about: fun, thrills hanging out with friends/family and enjoying life. Go out and find some cool jumps in the desert, go ride in the hills, or find some epic single-track. Forget about going faster at the track or getting in better shape once in a while, or you'll get yourself into a rut and your improvement will slow down. Don’t let the negative dirt bike people bring you down, you know who they are. They are the ones that tell you that dirt bikes aren't good for your health, that their death traps, or maybe even say you’ll never be pro. Clip those people out of your life. 

9X1A5215.jpg

Gripping the Handlebars Improperly 

Many beginner and novice riders grip the clutch lever with all five fingers when shifting. The problem with this is that you lose control of your bike during the transition from grip to clutch/front brake lever, and if you're doing it while riding through braking bumps, you have a high chance of losing control of your bike. Train yourself to ride with one finger on the clutch lever so that you're always ready to use them while still keeping complete control over your bike. The index finger is popular with pro riders, but many riders prefer to use their middle finger on the clutch and brake. Unlike the clutch lever you will have to take your index finger off of the front brake lever while riding to use the throttle properly. Grabbing four fingers of front brake isn't a good thing because you will be hitting the deck mighty fast if that is the route you go. Try rolling the throttle off and using no more than two fingers to lightly pull in the front brake. The front brake contains more than 70% of your stopping power when you learn how to use correctly. 


Riding With the Controls in the Wrong Position

You need to be as comfortable as possible when riding, so make sure to set up your handlebars, front brake, and clutch lever correctly before you go out on the track/trail. Don't forget about the rear brake pedal height as well so you’re not stomping down too far or even dragging the rear brake around the track. I can't tell you how many times I’ve seen people buy brand-new dirt bikes and jump on them with no adjustments. Running the levers too low will have you riding in the wrong position and could prevent you from saving an avoidable crash. Rolling your bars too far forward will cause your cornering ability to suffer and you will not be able to dive into corners aggressively. Try and use a neutral position on your handlebar (run it at close to the same angle as the fork) so your body positioning doesn't suffer.

9X1A6284.jpg

Getting Off of the Track Carelessly

Ehhhhhhhhhhhhhhh Boy…….. This is a doozy. I have been a victim of this and it isn't fun for anyone. If you need to get off of the track, use hand signals to let the riders behind you know when you're exiting. When you arrive at a track, look for the exit and make sure when you do exit the track you leave on the correct side. We have seen numerous riders cut across the track to exit only to get center-punched by an oncoming rider. Use your head; look behind you before exiting, raise your left hand to signal that you're exiting, and never cross over a track in a blind section (right after a jump, hill, or high berm)! Pull your head out of your ass! It’s seriously a great phrase that I can’t use enough! 

Slacking on Your Technique

This is similar to riding for fun tip, but focuses back on a different way to develop proper MX technique: challenge yourself trail riding. It improves your bike skills to find tough, technical off-road sections to conquer, like super-steep uphills, gnarly downhills, ravines, logs, rocks, streams. Finding your own lines—and sometimes just a way through—forces you to think creatively, and insane trails will make those intimidating track obstacles look like child's play. When you are at the track make the most out of your time. Work on things you’re not so good at and have a plan. If you’re going to a track you already know, work on the parts that you’re slow in. Have that in the back of your mind when you pull up! 

If you have any questions about this article or anything on our site please feel free to email me at kris@keeferinctesting.com

OGIO Adrenaline VRT Gear Bag

There are a few off the bike pieces that are essential to me and my testing program. One of those things is a gear bag that fits all of my crap and isn't a huge/heavy monstrosity. I have used and gone through just about every gear bag imaginable, but only a couple have really held my excitement for more than a couple trips to the track. You may be thinking it just a freaking gear bag Keefer, but to me it’s something I use almost everyday and am in and out of. 

I have been using OGIO products since I started at Dirt Rider way back in the early 2000’s and absolutely loved the 9900 Rig Gear Bag, but that bag has been discontinued. The 9800 was decent, but I really wanted something more compact/smaller/lighter to travel with and take to the track. Enter the OGIO Adrenaline VRT Gear Bag for all us non lifted bro truck kind of dirt bike riders. AKA gentlemen truck owners. 

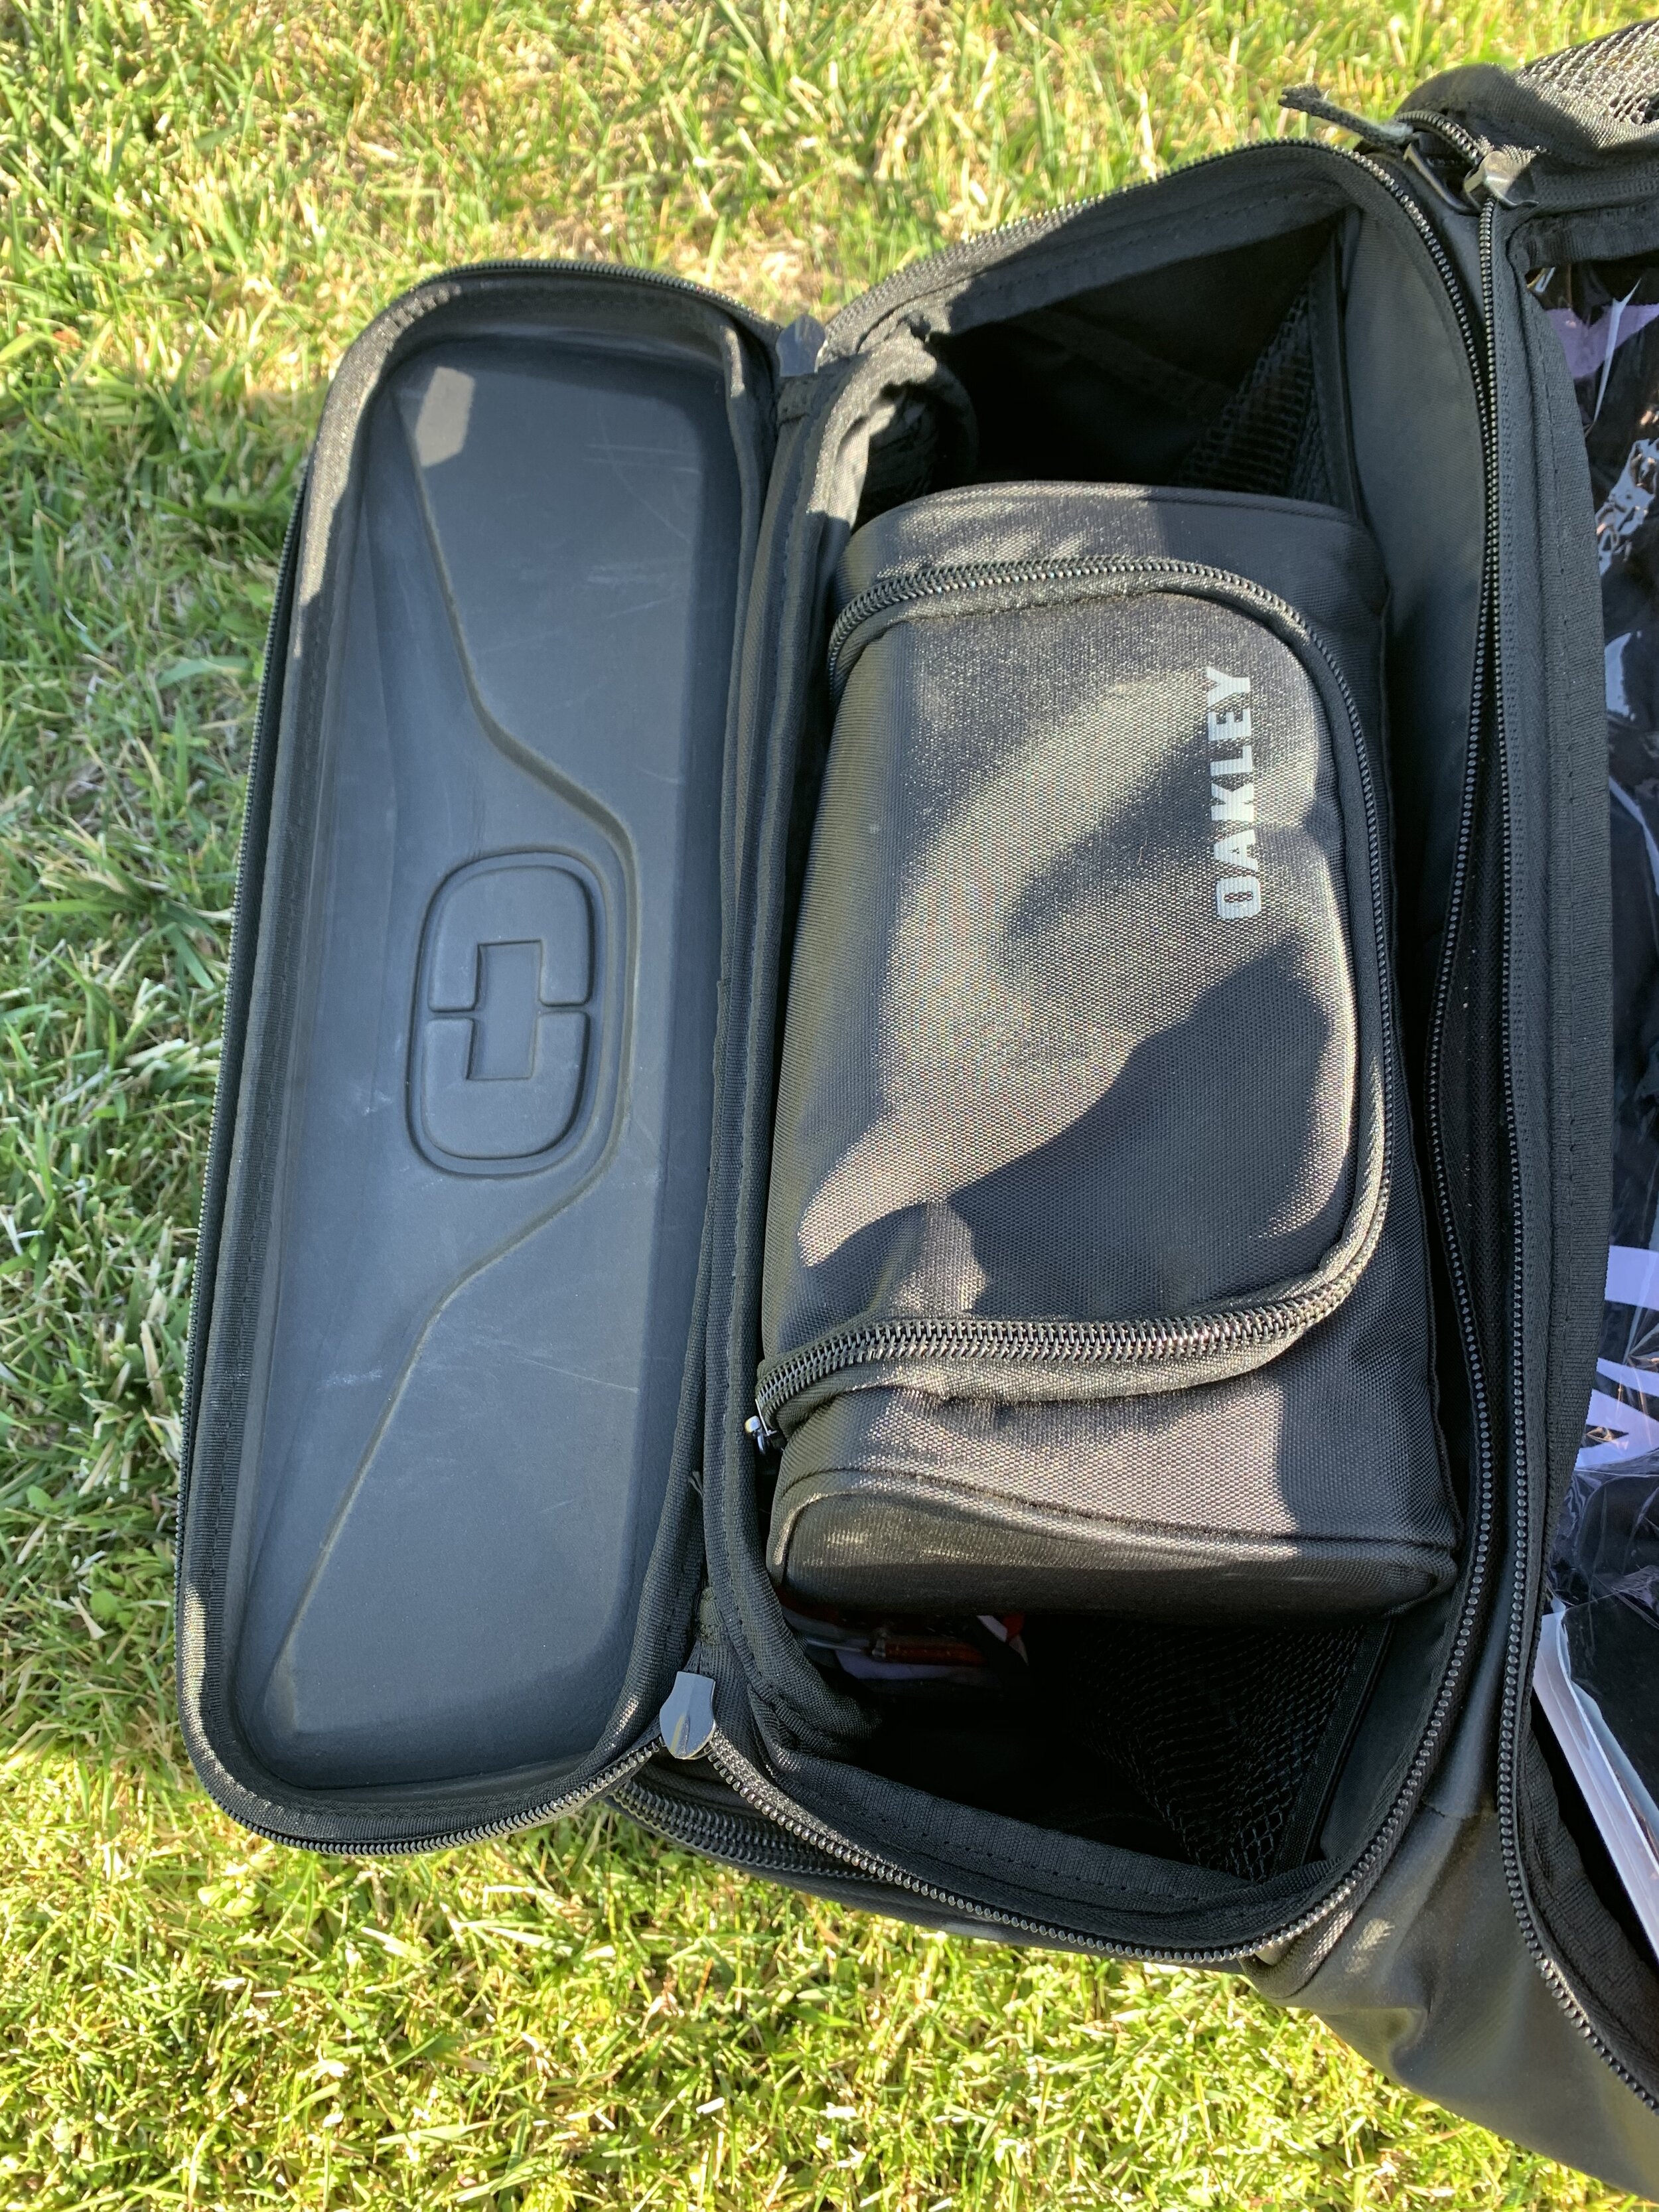
The OGIO Adrenaline VRT Gear Bag has a dimension of 30" H x17.5"W x 6.5" D has a EVA molded goggle/personal items pocket, two fabric slip pockets for gloves/tear-offs, a large main volume, two Internal mesh organization pockets, Internal top lid zippered mesh pocket, large wet/dry compartment to separate dirty or clean gear/clothes, a zip away divider allows use of entire volume or wet/dry compartment, an ABS molded tub, a reinforced replaceable wheel set, an easy to clean eco friendly PVC liner, two stage trolley handle helmet divider/changing mat, and a heavy duty 900D fabric with Eco friendly PVC backing.

IMG_5328.jpg

So the short story to this test is that I have owned this bag over a year and haven't really wanted to try another bag since. I looked at my bag today and thought why haven't I did a review on this sucker yet? Well now here we are! The Adrenaline is small enough to fit in my Ridgeline trunk (no hate comms) yet big enough to hold three sets of gear, knee braces, socks, helmet, several sets of gloves, a pair of boots, several sets of goggles, snacks, tear offs, and still have room for other crap if I need it. Before the Adrenaline bag was introduced I was a 9800/9900 gear bag guy, but it was heavy (at 14.1 pounds) so I would almost always go over the weight limit (at the airport) forcing me to pay an oversized fee. LAME! I hate spending money on stuff that I feel is not warranted and the weight on the 9800 wasn't worth the 30-50 dollar oversize fee. The adrenaline weighs in at 10.2 pounds and allows me to sneak in some extra gear and I am still under the weight limit. SCORE! 

IMG_5330.jpg

I love that I can separate my stinky gear from my fresh smelling gear with the wet/dry compartment. Mrs. Keefer likes this because she doesn't have to wash two sets of gear when opening/pulling out my dirty gear. The clean gear remains clean and doest have that stank on it! Yes, my wife washes my gear, so don’t be jealous. #HomeLife. Sometimes when gear bags come with side boot compartments it can be a pain in the ass to stick dirty/muddy boots, but with the ABS molded tube at the bottom of the bag, I can simply lay my boots down inside and zip up the bag. Boom! Easy! I also like that I can separate my knee braces from the main compartment as well as keep my goggles inside the EVA molded comportment and they don't get damaged (you Oakley Airbrake guys need this). 

Mrs Keefer’s Thoughts: Look all I know is Kris’s gear stinks up the laundry room up to high heaven and having to reach into that god forsaken bag to get his gear is not fun, but I do it. I like that this bag has the separation compartment because it doesn’t blow out his other clean stuff I put in there for him. I remember another bag he was using last year was horrible because his lazy ass would just throw his used/old gear in with his clean gear and all of it would stink. More work for me right? This OGIO bag makes my life a little easier and his bitching about all of his gear stinking before he even rides, just disappear. If your wife washes your gear, do them a favor and get this bag because it will actually be helping her. Thank you. -Heather Keefer

IMG_5332.jpg

The OGIO Adrenaline is durable and is over a hundred bucks cheaper (at $219.99) than the 9800. If you’re looking to get a compact, durable, and useful gear bag take a look at the Adrenaline over at the ogiopowersports.com. OGIO has a designated moto site specially for their powersports products. 

IMG_5335.jpg

Slick Products Off-Road Wash Kit

There are two things that I really dislike about riding… One is cleaning air filters and the other is washing bikes when I get home from the track. I usually just get the ol’ Simple Green out, spray, and power wash, but after a couple months of doing that the bike begins to look dull and damaged from the harsh chemicals that are in Simple Green. I love the grease cutting effect of SG, but it does damage plastic and some engine parts if not used carefully. After seeing Slick Products blow up on my social media timeline I thought I would give these products a review to see if washing with Slick Products would make my life easier when I come home to do my dirt bike “chores”. 

IMG_3618.jpg

 I ordered the bundle for off-road which includes the foam cannon, soap, brush, mit, micro fiber towels, cleaner/degreaser, and the detail/shine spray. I am not going to lie… It sat in my garage a long time because quite frankly I thought it was a pain in the ass to do the step by step process that Slick recommends, but when I finally got off my dead ass and used the product I found it to be quite easy/helpful.

Per the instructions, I mixed the appropriate 4 ounces of wash solution into the foam cannon, then filled the rest with water. Prior to applying the soap, I sprayed the bike down with my Karcher power washer (yes, Steve I will do a review on this soon as well, chill down) to get the bigger pieces of mud off, then sprayed the Slick degreaser on the engine. After that, I attached the foam cannon to the power washer, pulled the trigger and giggled like a 12 year old school girl. My 13 year old son and I had a pretty good time seeing how it blasts a huge pile of foam onto the bike to cover it completely with soap. I never thought washing bikes would make me smile this much! It works great to get full coverage on the rims, tires, and eery part on the engine.

IMG_4059.jpg

After completely coating it, I let it sit for 5 minutes without touching it. Rinsing was the same as normal with the power washer; just rinse off the foam and that’s it. After rinsing, I was looking to see if I noticed any differences between my normal routine against the Slick Products way of washing and to me the slight post wash shine of the Slick wash was better. I will say that Simple Green (over the Slick degreaser) has a stronger grease cutting effect with chain lube, dried fuel marks, and oil stains, but over time I could tell that there was less abrasive chemical damage to the machine using the Slick stuff. 

Foam Cannon

Foam Cannon

Is it worth spending $150.00 for the kit? That would have to be your call and how deep your pocket book is, but I can tell you a couple things though. Having the Slick Products Pressure Washer Foam Cannon has made my son WANT to wash all the bikes when I get home! To me that’s a win! Dad can chill out and the kid can do the work! Boom! We got around 17 washes out of the kit, but the good news is that after the large initial expense, the next expense will only be half of that because you will to have to purchase the “Foam Cannon” again. I also liked using the Slick Foam Cannon with my vehicles at home as it sprayed the soap evenly across the entire truck, which made washing much easier/pleasant. 

Any questions about this test please email me at kris@keeferinctesting.com


If you’re serious about having a clean bike and want to keep your washing products inside the motocross/off-road community, then Slick Products is the way to go! They support the sport and the products they do offer work well for what we as dirt bike riders are trying to accomplish. Just be ready to fork over some dough initially to get you going. 

Risk Racing ATS Adjustable Magnetic Stand

Matthes walked through my shop the other day and said “Keefer, you need more stands” with a lot of sarcasm in his voice. Yes, I have a lot of stands Steve, but I also have a lot of bikes in the shop as well. The tough part is to get a stand that works for every type of machine I have in the shop. Risk Racing emailed me and wanted to give them my honest opinion on their ATS Magnetic Adjustable Stand so I spent about three months with this sucker to see what its capabilities were. 

IMG_2931.jpg

The Risk Racing ATS Magnetic Stand features two anodized, CNC, aluminum turnbuckles with locknuts, that allow the user to set the angle of the top of the stand and then lock it in place. This enables the user to match the exact angle of their bike chassis, bringing both tires level into the air. With both tires lifted, simple tasks like cleaning and servicing can be much easier right? 

IMG_2934.jpg

When I work on my test bikes I often leave loose bolts around then Aden will come outside (into the shop) and kicks them across the shop. To eliminate this frustration, Risk Racing embedded magnets into both side panels of the A.T.S. Stand. Utilizing magnets on both side panels allows bolts from each side of the bike to be kept isolated and on the correct side of the bike.

IMG_2935.jpg

The adjustable top features a large oil drain hole and an oversized, non-slip rubber pad that is chemical resistant, thick, and hard-wearing. The bolts sit below the rubber top meaning your bike only ever sits on the rubber. The A.T.S Stand chassis is constructed of powder coated steel and built to endure the abusive life that us dirt bikers can dish out to our stands from time to time. 

The turnbuckles are anodized aluminum and equipped with locknuts, so users can lock in their desired angle. The combination is a robust moto stand that can magnetically hold nuts & bolts! The Risk Racing stand isn't the lightest of stands, but that forces me to actually get out of the van and place it on the dirt instead of throwing my stand out into the pits like a lazy person. 

What I like about this Risk Racing ATS Adjustable Stand the most is that I can actually lube my chain on the Honda CRF450R without the rear wheel hitting the dirt. Yes, other stands have rubber blocks that you can put at the top of one end and the bike will balance, but what’s cool is that you can put your kid’s 85 on the Risk Racing stand and you can get the perfect balance (with either machine within seconds). Having the magnetic side panels makes for easier at-the-track part changes/bolt placement. No more looking for that one missing bolt in the dirt. Don’t act like that hasn’t happened to you or your riding buddy. The parts on the stand have been reliable and trying the occasional nose wheelie on the stand hasn’t damaged anything. Yet…

IMG_2928.jpg

Just like in life, it’s the little things that really make me happy. Risk Racing did a great job of creating a stand that makes my life a little easier in the shop and at the track. The $139.99 price tag is steeper than other stands out on the market, but then again, this stand will accept any type of chassis. I think this stand is bad ass! Check them out at riskracing.com

If you have any questions about this test you can email me at kris@keeferinctesing.com   

Scosche PowerUp 700 Portable Jump Starter


I usually stick to dirt bike related things on this site, but since I recently used the Scosche Power 700 Portable Jump Starter on Lil D’s (Donnie Emler Jr.) brand new 2019 Husqvarna FC450, I thought I would give you guys some insight on why this is a great piece to add in the truck, car or van. The 700 Portable Jump Starter is a high-capacity 15,000mAh lithium-ion battery w/700 amp peak that can jump start vehicles up to 10 cylinders, is spark-free, and the 6-point safety protection system prevents any unwanted mishaps. It also has dual 5V (2.1A + 1.1A) USB ports for charging mobile devices, has a safety protection against any short circuits, a reverse connection/Polarity, ultra-bright LED flashlight, 1000+ charge/discharge cycle backwards that is compatible to work with smaller engines and the LED battery power level indicator works just fine on cars, trucks, boats, ATV/UTV’s and of course dirt bikes.

IMG_1267.jpg

How many times have you messed around with jumper cables, only to have the positive and negative touch? With most other portable jumpers on the market, you can cause a short circuit and permanently damage the unit when those clamps come in contact. Plus sparks can be dangerous to you and the vehicle as well. The Scosche PowerUp was designed with Spark Proof technology, allowing you, your vehicle, and the unit to stay safe should the clamps touch. My wife doesn't like to jump start anything because she is intimidated by big jumper cables, but with this Scosche 700 Jump Starter, she feels safe enough to do it on her own! Boom! Score! 

IMG_1269.jpg

What about when it’s dark outside and you need some extra light? This unit has you covered, with the built-in ultra-bright LED, you're provided with plenty of light to find your battery terminals, find your phone (in the loads of crap under your seat), in your carry bag or wherever you may need it. The LED also has a strobe and SOS flashing option just in case you’re in distress or want a portable rave unit.

IMG_1268.jpg


This Scosche 700 also includes many other great features such as the ability to use it as a backup battery for mobile devices. Low on battery life and your kids are hogging the cords? No problem the Scosche 700 provides you with one 2.1A and one 1.1A USB ports so you can charge two devices at once! 

Most importantly it saved my buddy Lil D’s butt as his new Husqvarna FC450 waste charged enough to start. I simply whipped out the Scosche 700 Portable Jump Starter and the white beast fired right up. He let it idle for a few minutes and the battery was ready to rock! It also takes up almost zero room in your cab and I rarely have to charge it.

Go check out all the products Scosche has to offer at scosche.com and use the code SCOKT25 to save yourself 25% on almost every product on their site! 

VP MR-Pro 6 Racing Fuel Review 


If you're on a budget and are happy with your pump fuel, just continue on with your day and don’t worry about this review. There is nothing wrong with pump fuel (unless you’re from California then you have ethanol problems). However if you do have some extra cash and want to see an improvement in your engine’s power delivery, continue to stick around and read all about VP’s MR-Pro 6 racing fuel. MR-Pro 6 is an unleaded fuel engineered to generate maximum horsepower in four-stroke applications while still conforming to the AMA rules for lead and oxygen content. MR-Pro 6 delivers more power (than pump fuel), thanks to its carefully formulated oxygen and octane content. It requires some jetting/mapping changes and also require some changes in ignition timing. This unleaded fuel is said to make the equivalent power of leaded MR12 on the dyno.

IMG_1229.jpg


I have been testing the 2019 KTM 450 SX-F and 2019 Yamaha YZ450F a ton lately with aftermarket ignitions. With these ignitions you are able to have increased parameters and can really tune in a bike’s power delivery. To aid in some of this delivery, race fuel becomes very important, so I have been using VP’s MR-Pro 6 in both machines. Now before I tell you how it performed with these aftermarket ECU’s let me start off by saying that you “should” map your ECU for MR-Pro 6, but for testing purposes, I tried the VP fuel with a stock ignition without a re-map. By simply pouring in the MR-Pro 6 into your stock steed, you will see some benefits like increased throttle response and more bottom end. However if you're spending anywhere between $130.00-$180.00 a pail, you will want the most out of your money. Simply pouring this stuff into your bike isn't going to blow your mind with its performance on the track. Don’t waste your money! 

If you want to really benefit from VP’s MR-Pro 6 get your stock or aftermarket ECU re-mapped for this type of fuel. Once mapped you will feel all of the benefits of some good race fuel. You will notice you will have even more RPM response, bottom-mid range pulling power, and an increase in peak horsepower (over-rev). Even with a stock ECU (that is re-mapped for MR-Pro 6) I get all of these positive affects, but with less top end/over-rev. 

Our 2019 KTM 450SX-F test bike has lived on MR-Pro 6 for the past 20 hours or so.

Our 2019 KTM 450SX-F test bike has lived on MR-Pro 6 for the past 20 hours or so.

With a GET or Vortex ECU and MR-Pro 6 the difference is huge on the track. I have spoke about the importance of ECU settings and what they can bring to modern four-stroke technology in my podcasts. It’s huge! MR-Pro 6 gives you an increase in horsepower everywhere on the track and gives your four-stoke a crisper throttle response that makes your machine feel slightly lighter feeling on the track. Yes, fuel with an aftermarket ECU CAN DO THIS


One downside to the MR-Pro 6 is that it can boil when the temperatures rise. I had better luck in the summer months with ETS Racing fuel than I did with MR-Pro 6. You will notice if the fuel starts to boil because you will feel the machine start to run dirty (or rich) feeling (and you will lose a lot of throttle response). In the winter months or on cooler days I have had no problems with MR-Pro 6 boiling. ETS was just more consistent when the temperatures were high. 


If you're looking for increased horsepower and throttle response, VP’s MR-Pro 6 is a huge advantage over many other unleaded race fuels out there. Just be sure to store it somewhere away from your living quarters because the MR-Pro 6 is pungent. The smell is quite strong and can really make your wife or neighbors mad.           

How To Obtain And Keep A Sponsorship

Dirt bikes are expensive right? I know I didn't grow up rich and my dad worked more than one job to get me to the races on the weekends. Sometimes the only time I saw my old man was when we went to the races on the weekends. I knew it was hard on my dad’s pocketbook to get me new shit all the time, so I started to look for ways to get sponsored in order to try and get discounts on parts, gear, dirt bikes, and whatever it is that we needed to go racing. Even though sponsorships have evolved, I have seen some old school trends coming back within the motocross industry. I wanted to sit down and get you all some insight on what it might take to help yourself and or your family to get you to the races every weekend. Read through this carefully and just know that it takes more than just being fast or winning races to get sponsored. There are tons of fast riders out there, but there is only one you!  

Adam and Tyler Enticknap (shown) are great riders who market themselves very well.

Adam and Tyler Enticknap (shown) are great riders who market themselves very well.

Although many people assume only elite athletes can obtain sponsorships, this is simply not true in the motocross and off-road racing world (where amateur racing is the foundation of our sport). The following helpful hints and steps can shed some light on the often-misunderstood process of sponsorships and can give you a leg up on other riders looking for the same opportunities. This just might be your time to become a sponsored athlete and save money or maybe make money on doing what you love—riding and racing your dirt bike! To me that is the definition of “making it”.

Ultimately, it’s about selling products or services. Different companies use different marketing strategies. Those that sponsor athletes use sponsorship as a form of marketing to sell its goods. The riders they choose to support usually represent its target demographic/market. In some cases, they are elite riders, but in other cases, it might just be someone who is exceptionally marketable (look at social media influencer Axel Hodges as of late). Or maybe it’s a local dealership looking for the “blue-collar privateer” racer type or a company marketing to teens looking for that “edgy” rider. Keep in mind that all these companies are looking for someone who represents its desired image and who can help the company sell more of its products. KEY PHRASE HERE IS SELL MORE PRODUCT!!! It is better to be a novice and act professionally than it is to be a professional and act like a jackass. I tell my son Aden all the time to always watch how he acts because in today’s day and age someone is always watching you. 

IMG_5309.JPG

When searching for companies to sponsor you, consider your own image. Are you an off-road rider who races enduros and cross-country-type races? Are you the local motocross rider who shows up on the weekend or are you the local pro that is looking to head to Supercross? How many times a year do you race? You have to be highly visible to the public (even if it is only locally) if you want to get sponsorship from any company (this is where social media comes into play). Look for companies that market to your racing lifestyle, and know your identity so you’re aware of what you have to offer.

This isn’t the 90’s or early 2000’s as simply showing up to a race isn’t enough, even if you finish well. This fact seems to be lost on most, even with some of today’s top riders. You're virtually useless if you don’t have an audience beyond the very few people who might see you at a race. By developing an audience, you dramatically increase the number of people who see your sponsoring company’s message. A very select few can develop this audience simply by winning (think Eli Tomac or Ken Roczen). These individuals don’t necessarily have to actively build an audience. The media coverage they receive serves that purpose.

For the rest of us normal folk, we need something else. Social media pages and a blog or vlog can be a great way to build an audience. It’s very cheap and easy to get into. It does take significant time to write, shoot and edit video, and to develop a following, but it’s one of the simplest/cheapest ways to do so. There are also websites that can help you provide all of your information and race results like HookIt.com or SponsorHouse.com. These websites let companies view your profile and any updates you would like to share throughout the year. However, I see a trend with more companies going away from sites like these and are using more of an in house approach again.

Having your own Youtube channel could be a great way for fans and future/current sponsors to get to know you better.

Having your own Youtube channel could be a great way for fans and future/current sponsors to get to know you better.

Another great avenue is a social network such as Facebook, Instagram, Snapchat, and Twitter. Having thousands of followers and/or friends is a ready-made audience. Also, there are other ways to build an audience. If you have your own business, your customers are an audience of sorts. Basically, it boils down to the fact that, in order to be valuable to a potential sponsor, you need people to pay attention to you. Companies and manufacturers take note on how many “followers” you have and how much you post. When you do have these followers don’t blow smoke up their asses and try to be as transparent as possible. No one wants to see a social media post of some kid drinking an energy drink on the back of his truck with the caption reading “quenching my thirst in between motos”. We all know that is bullshit man! Create an engaging caption and be “real”. Tell a story! People love stories! Let us get to know you, not some fake ass two minute post. When you are “real” people will engage with you more and in doing so your sponsors product has a higher chance of being seen/purchased by viewer. No one likes fake people!

9X1A9093.jpg

Once you have an audience, a sponsorship level goal, and a target company and the contact, you can begin formulating the actual proposal. Email them or write them! WHAT A CONCEPT RIGHT? COMMUNICATION! HOLY CRAP, IT’S LIKE A LOST ART FORM!! Keep it very short and to the point though. Tell them who you are, the size and demographics of your audience, and what you are seeking. Shoot between 100 and 200 words maximum. These people you’re contacting don’t want a biography; they want to know what you can do for them and how much it is going to cost them. Be courteous and humble. Arrogance is almost always a recipe for failure. “PLEASE” AND “THANK YOU” CAN GO A LONG WAY! Try to be genuine and don’t just ask for all of their shit! Ask them what you can do for them as well. It’s a two way street!

343A9448.JPG

If you're contacting a relatively large company, it's likely they receive tens if not hundreds of requests like yours per month. In most cases, the companies have identified and already reached out to the racers they want. You’re fighting for a tiny fraction of the remaining slice of the marketing budget pie.

If you are at a race and you meet someone representing a company, approach them and ask about their product. If you do not know anything about their product ask about it and how it works. Why would you ask for a sponsorship if you have zero knowledge about their product? That is lame as hell! Asking for free stuff and not knowing the background of the product/company is a red flag almost immediately to industry folk. The best way to represent a company is to fully understand their product beforehand and use it on your own machine or yourself. If you DO NOT like it, don’t ask for a sponsorship. Always believe in what you are pitching or selling. Whatever you do, DO NOT walk up to any company and just directly ask them, “Will you sponsor me?” This tells a potential sponsor that you will “take” and not “give back.” We have enough of these type of people in this world, so don’t add to the list. The off-road motorcycle industry is small, and word can get around that your dumb ass is looking for a handout and only looking out for himself. Don’t be that guy! A sponsorship has to be a 50/50 commitment between the company and the rider (similar to a marriage or any relationship). According to some industry insiders, out of all the riders who receive sponsorships from companies during the year, only half ever use the company’s discounts and order a single thing throughout the sponsorship year agreement. Does that sound like commitment to you? No it sounds like you just screwed up. 

Be approachable and learn to speak to people about certain products you’re endorsing.

Be approachable and learn to speak to people about certain products you’re endorsing.

Ok let’s say you make it this far and have signed a contract for sponsorship to said company. Now it’s time for the real work—to trying to keep it! Or, if you’re receiving a discount on products, maybe getting a heftier discount in the future. Every sponsor is different and will have its own objectives and expectations. Yet whether you’re seeking money, products, or services from a sponsor, it is seeking a few select things from you as well, so you should shape your approach like this:


  • Visibility and Exposure: Companies want to know that those who they sponsor are providing them with unique and revenue-generating exposure. If you can’t provide consistent brand visibility at events or races, you have little to offer a company in terms of long-range sponsorship.

  • Image Compatibility: You’re the image of the company; you should fit the idea of the image it is trying to promote—not the other way around.

  • Local Track Involvement: Businesses benefit when they are identified with a commitment to their local track or even yours. For example, collaborate with a sponsor to organize a ride day or maybe do a kids’ class at your local motocross track. This effort will go far.

• Personal Availability: Depending on a variety of factors, a company might want to have you endorse a product by making appearances or advertising on its behalf. Obviously that is not going to happen to everyone, but make sure when you are at an event you are available to other riders or spectators who want to know more about the products you’re endorsing.

  • Communication: This is huge! If you listen to the Pulp MX Show you know I am big on communication! Keep your sponsors in the loop on what you’re doing and what your future plans are. Don’t rely on them to find out when you are racing or when you are doing an event; they have many riders, and they can’t keep up with all of them. You can do this by communicating directly to the company, using your own personal social media outlets, weekly emails, or other websites. Whichever outlet you choose just be sure to inform them of all your events, and even though results are not always important, it is nice to let them know how you are finishing when you race.

  • Personal Touch: Saying “thank you” and “please” can go a long way these days. Not just in the real world but in the motorcycle industry as well. Yes, we all know you should thank sponsors on the podium or when you do interviews, but what about writing or typing a letter, old-school style, telling the company you appreciate all of its help? Showing personal attention to companies and writing them or even emailing them shows your appreciation and doesn’t hurt. It’s nice to get a letter or email without having the words “can I have?” involved. And just like your initial proposal, keep these updates very brief. If you see the sponsorship coordinator you work with at an event, go up to him or her and introduce yourself. Don’t expect them to know who you are through email and phone conversations. Some people think this is called “ASS KISSING”, but to me it’s being appreciative of what you’re getting. Our society almost frowns on nice people and expect people to be mean, so don’t fall into the trap of being an asshole. Be approachable and learn to speak in public. This is a very rare quality these days and can make you stand out in a industry players mind. 

  • Loyalty/Don’t Be A Company Hopper: Don’t be the guy who hops around with each passing year because another company gives you a little more. Loyalty goes a long way within our industry still, but if you’re known to be a whore within the industry, no one will have respect for you. Our industry is small! 

LLQ1.jpg


Trying to obtain and keep a sponsorship is much like trying to obtain and keep a job in the competitive world today. Each one of us is a unique individual, but it’s up to us to make sure that shines through so other people and/or companies see that. You just have to make sure you have a plan, you stick to it, and you keep your word. When you shake someone’s hand let that handshake be firm and a way of letting anyone know that your handshake and your word is your bond. That is what companies want to see when crunching sponsorship dollars come résumé time. A sponsorship is a privilege, not a right; so make sure to let each company know that you appreciate what they are doing for you. 

This all seems like a lot of work and you would be right! It is a lot of work, but just know that these companies are putting their time and money back into you so following these guidelines could give you a long lasting future on helping yourself save some money on what you love to do the most! Ride and race dirt bikes! 

If you have any questions please feel free to email me at kris@keeferinctesting.com


ETS Ultra Blaze US MX 18 K2 Racing Fuel


 Not everyone has the money to go purchase race fuel for their dirt bike. High end race fuel is something that maybe only a few die hard weekend warrior racers really want. I understand this. That shouldn't deter other media testing outlets away from testing such fuels, but it seems like you can’t find that much real world testing info about such things. This test may not be for everyone, but I feel like I wanted to really see how much of an improvement (on the track) race fuel can make in a machine when properly mapped for modern four-strokes. With most high end fuel, simply dumping it into your bike and riding is not going to benefit you in any way. So don’t waste your time and money unless you plan on mapping your existing ECU for any type of high end fuel. There are some other direct pump replacement fuels that DO NOT need re-mapping, but for this test I wanted to try and get the most out of what I am pouring in. I mean it’s $28.00 a gallon, so we have to be “ALL IN” when going this route right? More on that price later… ETS Racing fuels are based out of France and have been around for 10 years, but maybe you’re not too familiar with the company, so here is a breakdown of the ETS Ultra Blaze US MX 18 K2 racing fuel.

IMG_0451.jpg


About The Machine: I chose the 2019 KTM 450 SX-F to test the ETS Racing Fuel because it is one of the bikes that I feel that can benefit from quality race fuel. The KTM 450 SX-F has a smoother power delivery with a stock ECU setting that is slightly off from the factory. I also have been doing some modifications along they way with this model and have seen very solid improvements. Each modification that I have done to the orange brigade has made this machine better with each bit of money that I have thrown at it. That is what you expect when you put money into your bike right? Well, that is not always the case because sometimes putting your money into your bike doesn't mean it gets better. Putting the money into the right modifications is key and that is what we have done to this 2019 KTM 450 SX-F. Our 450SX-F has a Twisted Development Vortex ignition that is mapped for ETS US MX K2 18, VP MR Pro 6, and regular super unleaded pump fuel. The beauty of the Vortex ignition is that you have 10 preset maps that you can go back and forth from. The simple fact that the ignition is super consistent and hasn't gave me any problems is just one reason why I went this route. The engine is completely stock (minus the FMF 4.1 Muffler System) and I wanted to keep it this way for durability reasons. I ride the crap out of the KTM 450 SX-F and I DO NOT need to be rebuilding it every 20 hours.  

IMG_0453.jpg

What Sparked My Interest To Test The ETS Racing Fuel: Number 1….Not a lot of people know about ETS Racing Fuel and who is using it. Factory Red Bull KTM and Rockstar Husqvarna race teams use and endorse the fuel. In fact, ETS doesn’t “give” those teams fuel, because in reality both teams “purchase” the fuel. This sparked my interest because it’s not everyday that teams are “spending” money on pieces to their factory bike puzzle. Most of the time factory teams test parts and said companies provide them with that product for free (or even pay them to run their product)! Number 2…We have a ton of ethanol based super unleaded pump fuels around California and this has caused a couple fuel pump failures for me in the past. Number 3…Once Jamie at Twisted Development put on the Vortex ignition he told me there was a map preset for VP MR Pro 6 and ETS US MX 18 K2 racing fuel, so I went ahead and got some of each coming my way. Number 4…I tested with the VP MR Pro 6 for a while and noticed a nice gain in pulling power (compared to pump fuel), but it boiled on warm summer days in California. I really liked the power gains I felt, but after 18 minutes of hard riding the KTM began to run dirty and inconsistent. This really sparked my interest to see if another competing fuel could give me the same power gains, but more consistency over the course of longer motos.  

9X1A9412.jpg

So How Did the ETS US MX 18 K2 Perform On The Track: First thing’s first. If you're a die hard moto guy you will really love the smell of the ETS US MX 18 K2 racing fuel. It’s a sweet smell and if you have walked around the pits of an AMA Supercross, I am sure you have picked up the scent. However, other people may not appreciate the smell (like the wife), so you may want to store the fuel somewhere far away from the living room or kitchen area of your home (just in case your garage is close to these parts). Once the KTM fuel tank was emptied and the ETS was poured in, I headed out on the track to do a 30 minute moto. I made sure to test all three fuels (VP, ETS, Pump) on the same day (over the course of a few days) in 90 degree temps for an apples to apples comparison. The first thing that I noticed with the ETS US MX 18 K2 racing fuel is that the KTM 450 SX-F had better throttle response (than that of the VP). Throttle response was slightly more crisp and instant with a better bottom end pulling power out of corners. You can just feel a little more “meat” when rolling on the throttle. Mid range was also improved slightly, especially when I was rolling sweeping corners in third gear. The KTM just seemed to pull better and have increased mid range RPM response. The VP and ETS fuels feel very similar up on top end as I didn't notice any real difference there. To me the biggest selling point (besides increased power feeling) was the consistency the fuel had over the course of a 30 minute moto. With the VP I had a clean running engine feel up until 18 minutes and then it started to boil (on very warm days), but with the ETS fuel the KTM ran crisp and clean throughout the entire moto. This was huge for me! There were no remnants of fuel puking out the vent house and I could do a full day of motos with zero boiling issues.       

Cost And Where To Purchase: You may want to sit down for this. The cost of the ETS US MX 18 K2 racing fuel is $28.00 a gallon and comes in 15 gallon drums. Again, like I mentioned before, this is an expensive investment that is not for everyone, but if you're serious about performance and getting that little extra, this is a great alternative fuel that is CONSISTENT! The VP MR Pro 6 fuel is slightly more expensive compared to the ETS US MX 18 K2 fuel so if you're already purchasing high end fuel, this will not be a big shock to you. You DO NOT need an aftermarket ECU to run this fuel, but you will need to get your stock ECU re-mapped to reap all the benefits of this fuel. The ETS fuel usually makes your machine run a little richer than that of the VP MR Pro 6, so leaning out your bike a little is a good way to go. There are plenty of engine builders who are familiar with mapping ECU’s to this fuel so please feel free to email me and I can gt you some recommendations. If you are looking to get a drum of this fuel ASAP you can reach out to Bill Bovensiep (US Sales Director) at bbovensiep@h-c-s-group.com and he can get you sorted for delivery. You can follow ETS on their Facebook, Instagram, and Twitter social media channels at ets_racing_fuels


Any questions about this test please feel free to email them to kris@keeferinctesting.com 

ChafeZone

I ride a lot! Sometimes many consecutive days in a row. Now all of you out there going WHAAAAAAAAAAA he has to ride a dirt bike WHAAAAAAAAAAAAA, probably never had to ride more than a few days in a row. Sometimes I have to ride a couple weeks in a row and let me tell you that is hard on my ass!  


IMG_8198.jpg

 I have been using ChafeZone when I know I have long days on the bike or maybe coming back from not riding in a while. I stumbled on this stuff over a year ago and it has been one of the first things I put in my gear bag when I go to the track. ChafeZone prevents monkey butt, blisters and chafing. How you ask? I don’t know, but MedZone’s ChafeZone is made up of oleic acid, safflower seed oil, linoleum acid, palmitic acid, myristic acid and brag officinalis seed oil.


I first started using ChafeZone on my hands on long durability testing days to prevent from getting gnarly blisters. It worked so good, I then started to put it in other key areas to prevent me from getting monkey butt and rashes on my rear end. I would literally get holes in my butt from aggressive gripper seats (think Husqvarna and KTM 450 Factory Edition seats) and would have to stand up on the pegs by late afternoon on long testing days. Sitting down would just make me cringe! Once I decided to try ChafeZone, I would religiously put it on in the morning before I left for the track and would be good to go for the duration of the day. ChafeZone goes on your body as a solid but quickly turns into a liquid that leaves a slippery feeling. Sliding your gloves on your hands after applying is kind of a foreign feeling, but once out on the track I quickly forgot about it and it didn’t bother me. 

The good news is that once you apply the stick to the areas you want, it will not rub off all day. The bad news is that it is a pain to get off and takes some effort to wash away. A shower once at home will handle the residue, but if you want it off while you’re at the track, it is tough to get off. You must use soap and water and really get aggressive to get the stuff off. But hey the stuff works and its the only product I use to keep me from getting blisters and chafing. A 1.5 ounce stick ($12.99) lasted me about two months (riding four to five times per week). If you’re a die hard rider and want to log the motos or the miles this ChafeZone stuff works very well. It’s easy to stick in your gear bag, just make sure it doesn’t get to hot or it can melt. Getting it off your gear bag is even harder than getting it off your skin. 

IMG_8199.jpg


You can go to medzonecorp.com to get yours or you can go to Amazon and  order it through there. Thank me later!

Fasst Company Spoke Torque Wrench

As much as I love riding and testing products, working on bikes is not something I really want to do all day. I would say I am a middle of the pack vet intermediate mechanic and I like tools that make my life easier. The Fasst Company spoke torque wrench has made checking my spokes tension much easier and more accurate. The spoke torque wrench kit comes with 12 heads that fit all spoke nipples of all makes and models.

IMG_8072.jpg


The Fasst wrench comes preset at 48 inch-pounds, but can be adjusted from 10 to 100 inch-pounds. The wrench is easy to use as you simply tighten your spoke until you hear/feel a click. A good rule of thumb is to tighten every third spoke, which will take you three revolutions of the wheel. The guesswork of how much tension you are using on each spoke is gone and I have kept my wheels better trued longer than I have using a traditional spoke wrench. The handle is larger for an easy grip, and each head is wide and will not slip once on the spoke. You can even get custom laser etching on the wrench for an extra $19.99, which of course I did for the cool factor. I mean come on! 


IMG_8073.jpg

 The Fasst Company torque spoke wrench will cost you a pretty penny at $255.87 (for the wrench and all 12 heads), but it can be used for every bike in your garage. Everyone has that one buddy that needs to borrow a spoke wrench at the track right? Well...Once he uses this sucker he will most likely fall in love with it and will go buy his own. You can thank me through email at kris@keeferinctesting.com later. If you don’t need all 12 heads and you just want the wrench, it is $99.99; and any extra head will cost you $12.99. This is by far my favorite tool in my toolbox. You can go to fasstco.com to get yours.